|
|
|

|
|
| Search | Car Forums | Gallery | Articles | Helper | AF 350Z | IgorSushko.com | Corporate |
|
| Latest | 0 Rplys |
|
|||||||
| WIP - Motorsports Post topics for any "Work In Process" motorsports vehicles in this sub-forum. |
 |
 Show Printable Version | Show Printable Version |  Email this Page | Email this Page |  Subscribe to this Thread
|
|
|
Thread Tools |
 04-02-2007, 06:07 AM
|
#1 | |
|
AF Enthusiast
 
Join Date: Mar 2005
Location: Barnsley
Posts: 3,199
Thanks: 8
Thanked 111 Times in 107 Posts
|
"W.I.P" Tamiya Benetton B192 1/20th
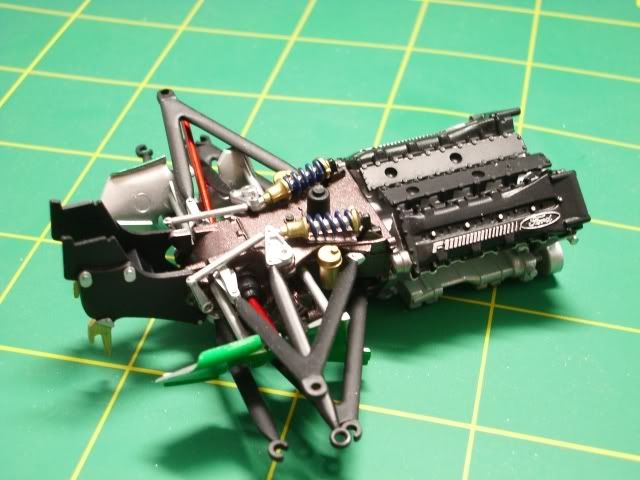
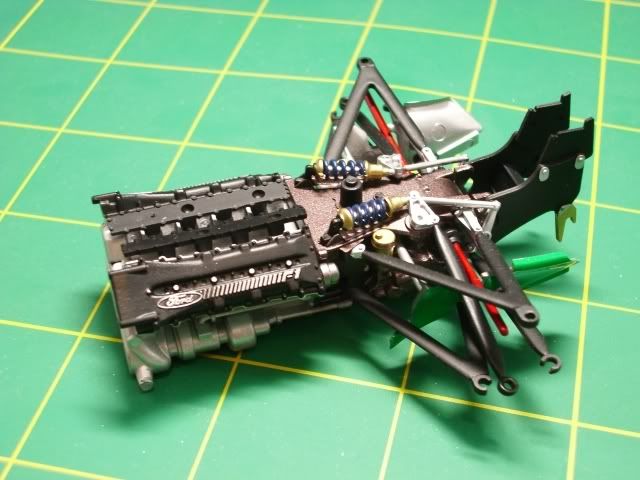
After following the excellent build recently by fellow forum member "Davesans" I decided my next project would be the Benetton B192.I've started work on the engine so far and thought I would share a few progress pictures with you all.
I'm undecided at the moment wheather I am going to do any detailing work, including wiring the engine etc.I really want to keep the build simple and make sure all the panels still fit at the end (unlike my recent McLaren build) I may just add a little wiring to keep it looking busy,though not too much.On the engine I've tried out some of the Alclad paints (aluminium) and also Tamiya enamels (gold,chrome,aluminium) the black areas are Vallejo Satin Air.The green on the side panels is Finishers Brilliant green which sprayed beautifully as always. 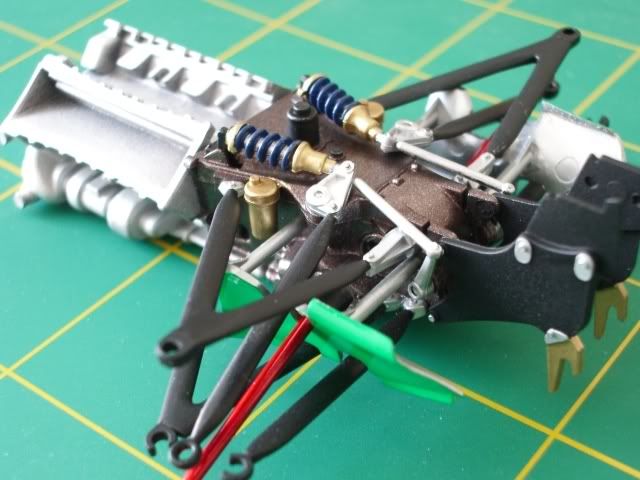 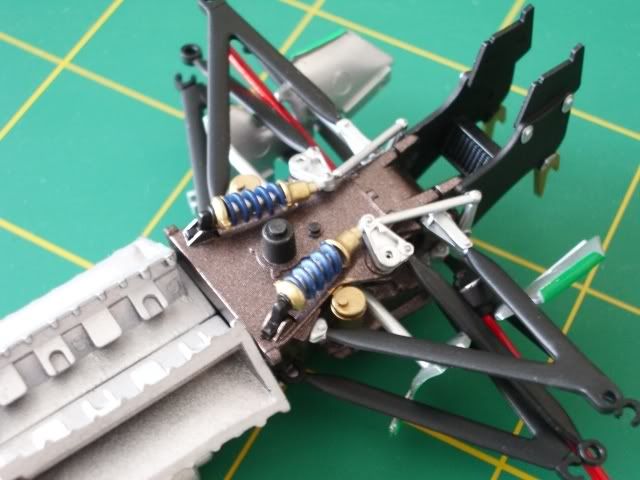 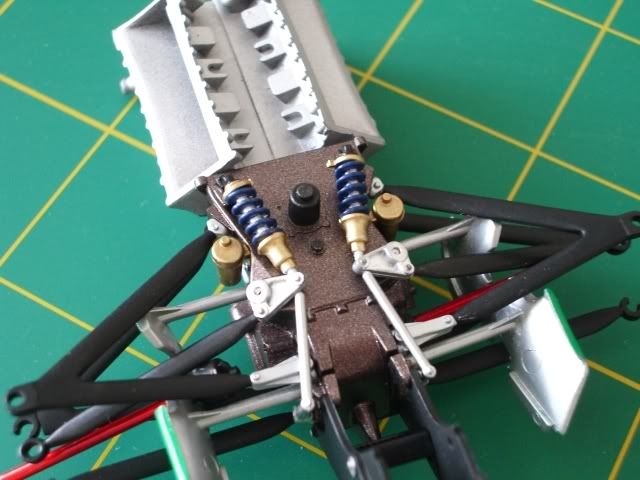  That's all for now.I'll post more as I progress further.Of note as well I should have filled the ejector pin marks on the side panels but missed it and it's too late to do them now.The red driveshaft slipped out of place during the photos fixed it now. Best regards,
__________________
Steve Noble |
|

|

|
|
04-02-2007, 08:29 AM
|
#2 | ||
|
AF Enthusiast

Join Date: Sep 2006
Location: USA, Florida
Posts: 590
Thanks: 3
Thanked 6 Times in 6 Posts
|
Re: "W.I.P" Tamiya Benetton B192 1/20th
Quote:
Nice start to the engine looks real clean your airbrush work once again is fantasist. Looking forward to really seeing what the Finishers Green paint looks like on the body are you going to use Tamiya Chrome Yellow? It also looks like you dried brush some silver on the oil cooler from what I can see in the picture. Looking forward to your progress what are you using for reference photos? 
__________________
Regards, Dave |
||
|
|
|
|
04-02-2007, 09:47 AM
|
#3 | |
|
AF Regular

Join Date: Feb 2006
Location: NorCal!, California
Posts: 475
Thanks: 0
Thanked 0 Times in 0 Posts
|
Re: "W.I.P" Tamiya Benetton B192 1/20th
i'll watch this build, and try to resist the urge to add a B192 to the pile... you're the reason i've got an MP4/5B on the pile.
 |
|
|
|
|
|
04-02-2007, 10:07 AM
|
#4 | |
|
AF Premium User

Join Date: Mar 2003
Location: Mexico City
Posts: 379
Thanks: 1
Thanked 0 Times in 0 Posts

|
Re: "W.I.P" Tamiya Benetton B192 1/20th
Nice clean start!
I'll too will be following this one.
__________________
Rodrigo Mexico    Hey!!! monkeys can't recreate things with such perfection. Hey!!! monkeys can't recreate things with such perfection.Respect the evolution!!!  (message to people making fun of our hobby) (message to people making fun of our hobby)
|
|
|
|
|
|
04-02-2007, 04:58 PM
|
#5 | ||
|
AF Enthusiast
Join Date: Mar 2005
Location: Barnsley
Posts: 3,199
Thanks: 8
Thanked 111 Times in 107 Posts
|
Re: "W.I.P" Tamiya Benetton B192 1/20th
Quote:
I've got two yellows from Finishers for the yellow.Deep yellow (Camel yellow) and Pure yellow (brighter yellow,like TS 16) I'm going to mix the two together (Probably 50:50 or 40:60) to make the yellow for the body.I'm hoping to end up somewhere near Tamiya Chrome yellow.The only reason I'm doing this is I really like the way those Finishers paints spray and they cover beautifully and leave very little to do in the way of polishing etc.I really wish there was a stockist in the UK to save me having to order them from Japan. The oil cooler was painted in two types of satin black.Tamiya X18 on the outside and Vallejo Model Air black on the grill portion.I didn't do any dry brushing on it.I've got some reference pictures from the Gurney Flap website which I've been using so far and a few general shots from the internet. When you built your's Dave did you fill the join line at the bottom of the cockpit? Did you have to mask out the cockpit area when you sprayed the yellow and green on the outside of the monocoque? Did you fit the seat before or after the main painting? These are a few of the areas that are puzzling me at the moment. Best regards,
__________________
Steve Noble |
||
|
|
|
|
04-03-2007, 10:34 AM
|
#6 | ||||
|
AF Enthusiast
Join Date: Sep 2006
Location: USA, Florida
Posts: 590
Thanks: 3
Thanked 6 Times in 6 Posts
|
Re: "W.I.P" Tamiya Benetton B192 1/20th
Quote:
Quote:
Quote:
The thing I did forget was the head rest that fits on the monocoque and is also part of the air box fill that joint I had to glue that in then do some more painting of the yellow to fill in the joint you can still see it a little this was after I had put the green on the side. Hope this helps
__________________
Regards, Dave |
||||
|
|
|
|
04-03-2007, 02:37 PM
|
#7 | |
|
AF Enthusiast

Join Date: Feb 2006
Location: Chichester
Posts: 755
Thanks: 9
Thanked 1 Time in 1 Post
|
Re: "W.I.P" Tamiya Benetton B192 1/20th
Seve,
great start, looks very neat and tidy. Are the suspension struts OOB and just painted - they look extremely neat, couldnt work out if you had cut out the centre section and replaced it with coiled tubing or not. good job
__________________
Sean _______________________________ http://www.scalereproductions.co.uk _______________________________ WIP: Ferrari F40 |
|
|
|
|
|
04-03-2007, 03:46 PM
|
#8 | |
|
AF Enthusiast
 
Join Date: Feb 2003
Location: Antwerp
Posts: 674
Thanks: 0
Thanked 0 Times in 0 Posts
|
Re: "W.I.P" Tamiya Benetton B192 1/20th
Great overall work and especially the paint finish!
May I make a suggestion though? I know you told us that it's to late to remove the ejector pin marks, but I still would ask you to reconsider; you will regret it later on if you leave them like this, so noticeable in a model that is so well built aside from them... |
|
|
|
|
|
04-03-2007, 04:59 PM
|
#9 | ||
|
AF Enthusiast
Join Date: Mar 2005
Location: Barnsley
Posts: 3,199
Thanks: 8
Thanked 111 Times in 107 Posts
|
Re: "W.I.P" Tamiya Benetton B192 1/20th
Quote:
Best regards, Steve.
__________________
Steve Noble |
||
|
|
|
|
04-03-2007, 05:04 PM
|
#10 | ||
|
AF Enthusiast
Join Date: Mar 2005
Location: Barnsley
Posts: 3,199
Thanks: 8
Thanked 111 Times in 107 Posts
|
Re: "W.I.P" Tamiya Benetton B192 1/20th
Quote:
Best regards, Steve.
__________________
Steve Noble |
||
|
|
|
|
04-03-2007, 05:06 PM
|
#11 | ||
|
AF Enthusiast
Join Date: Mar 2005
Location: Barnsley
Posts: 3,199
Thanks: 8
Thanked 111 Times in 107 Posts
|
Re: "W.I.P" Tamiya Benetton B192 1/20th
Quote:
__________________
Steve Noble |
||
|
|
|
|
04-03-2007, 05:13 PM
|
#12 | |
|
AF Enthusiast

Join Date: Mar 2007
Location: Lisle, Illinois
Posts: 809
Thanks: 0
Thanked 2 Times in 2 Posts

|
Re: "W.I.P" Tamiya Benetton B192 1/20th
so far lookin good
__________________
Steve |
|
|
|
|
|
04-14-2007, 03:04 PM
|
#13 | |
|
AF Enthusiast
Join Date: Mar 2005
Location: Barnsley
Posts: 3,199
Thanks: 8
Thanked 111 Times in 107 Posts
|
Re: "W.I.P" Tamiya Benetton B192 1/20th
It's been a while since I last updated.I've been quite busy of late on other things and didn't have much time for modelling,so it took a back seat for a while.To be honest I've not progressed a lot further on the build,but I have made a little progress.I had quite a headache trying to paint the Ford logos onto the engine covers.I tried all sorts of methods,masking,painting by hand,even applying Bare Metal foil,painting black and scraping off the black to reveal the foil.The method I settled on was to spray them black,drybrush the logo's with Citadel colours chainmail silver and then apply a wash of Tamiya X-18 enamel to neaten the area around the logo's.It's still not perfect after 4 attempts but I'm fairly happy with it this time.I'm also going to rectify the ejector pin marks on the two side pieces as well.
  I painted 2 of the tyres (fronts) and added the decals.The yellow stripes were a little tricky to fit.I used the Studio 27 ones at first and they seemed a bit too big all over.So I removed them and went with the Tamiya ones instead and they fitted a lot better.Gunze Mr Mark Softer used sparingly helped them to conform without wrinkling and I sealed all the decals with 2 coats of Finishers Auto Clear.I'm not sure yet wheather to use the stencil or decals for the Goodyear logo's on the tyres. 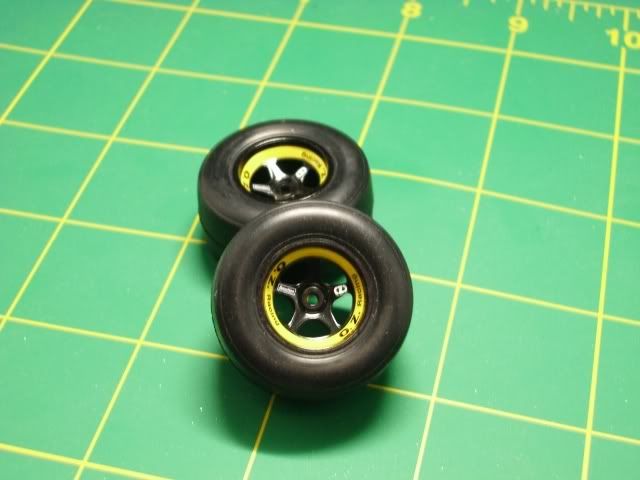 I've also singled out the air intake cover as an area I can improve.So I've removed the moulded in trumpets and am preparing the part to accept turned metal items from Meri Kits.The 2 pieces of white are some styrene rod I added to fill a couple of holes in the plastic.These will be sanded flush later. 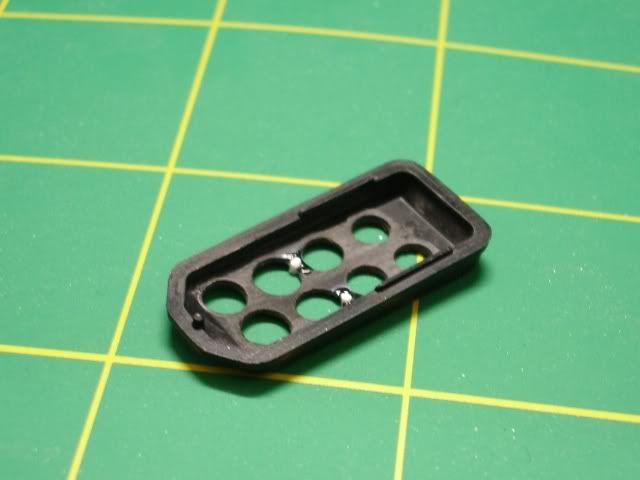 These are the Meri Kits turned trumpets.I think they are a big improvement over trying to paint the Tamiya moulded in ones. 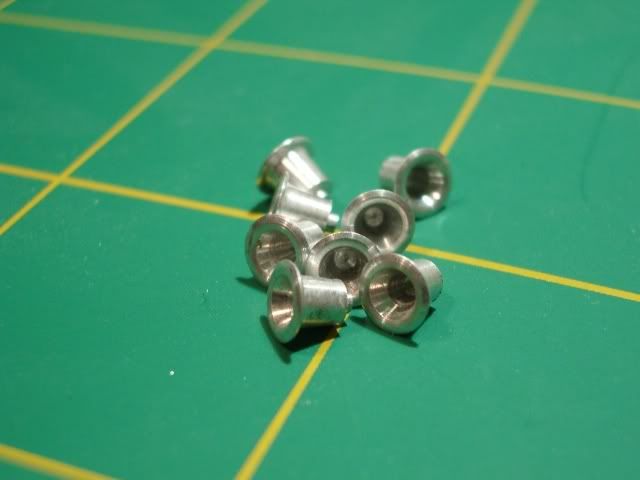 I should be able to update more often now I have a little more time on my hands,so until the next update.Best regards.
__________________
Steve Noble |
|
|
|
|
|
04-14-2007, 05:42 PM
|
#14 | |
|
AF Enthusiast
Join Date: Sep 2006
Location: USA, Florida
Posts: 590
Thanks: 3
Thanked 6 Times in 6 Posts
|
Re: "W.I.P" Tamiya Benetton B192 1/20th
Looking good Steve I know what you mean about paintint the logo on the engine covers I am trying to paint the ones on my FW13B and their smaller the the Ford logo therenot coming out that nice at all. The intake trumpets look awesome can't wait to see installed.

__________________
Regards, Dave |
|
|
|
|
|
04-15-2007, 02:44 AM
|
#15 | |
|
AF Enthusiast

Join Date: Feb 2003
Location: F1...
Posts: 1,410
Thanks: 3
Thanked 3 Times in 3 Posts
|
Re: "W.I.P" Tamiya Benetton B192 1/20th
that looks great, really clean work! The turned trumpets will look great on the engine, can't wait to see them installed
opcorn: |
|
|
|
|
|
|
POST REPLY TO THIS THREAD |
 |
|
|


