

|
| Search | Car Forums | Gallery | Articles | Helper | AF 350Z | IgorSushko.com | Corporate |
|
| Latest | 0 Rplys |
|
|||||||
| WIP - Motorsports Post topics for any "Work In Process" motorsports vehicles in this sub-forum. |
 |
 Show Printable Version | Show Printable Version |  Email this Page | Email this Page |  Subscribe to this Thread
|
|
|
Thread Tools |
|
|
#661 | |
|
AF Enthusiast
Thread starter
Join Date: Nov 2008
Location: Norwich
Posts: 649
Thanks: 21
Thanked 111 Times in 87 Posts
|
Re: 1/8 Porsche 935/78 'Moby Dick'
Sorry, Ian - no actual stitching on the steering wheel! I mean, that would be ridiculous - almost as daft as making headlight bulbs with filaments inside them. I have my limits...
I airbrushed the whole steering wheel with a couple of coats of Tamiya semi-gloss black, then toned it all down by carefully drybrushing the centre with Citadel 'Chaos Black' and some Tamiya 'Rubber Black' for the rim. Note also the column stalks fitted behind. This is all now ready for final fitting. 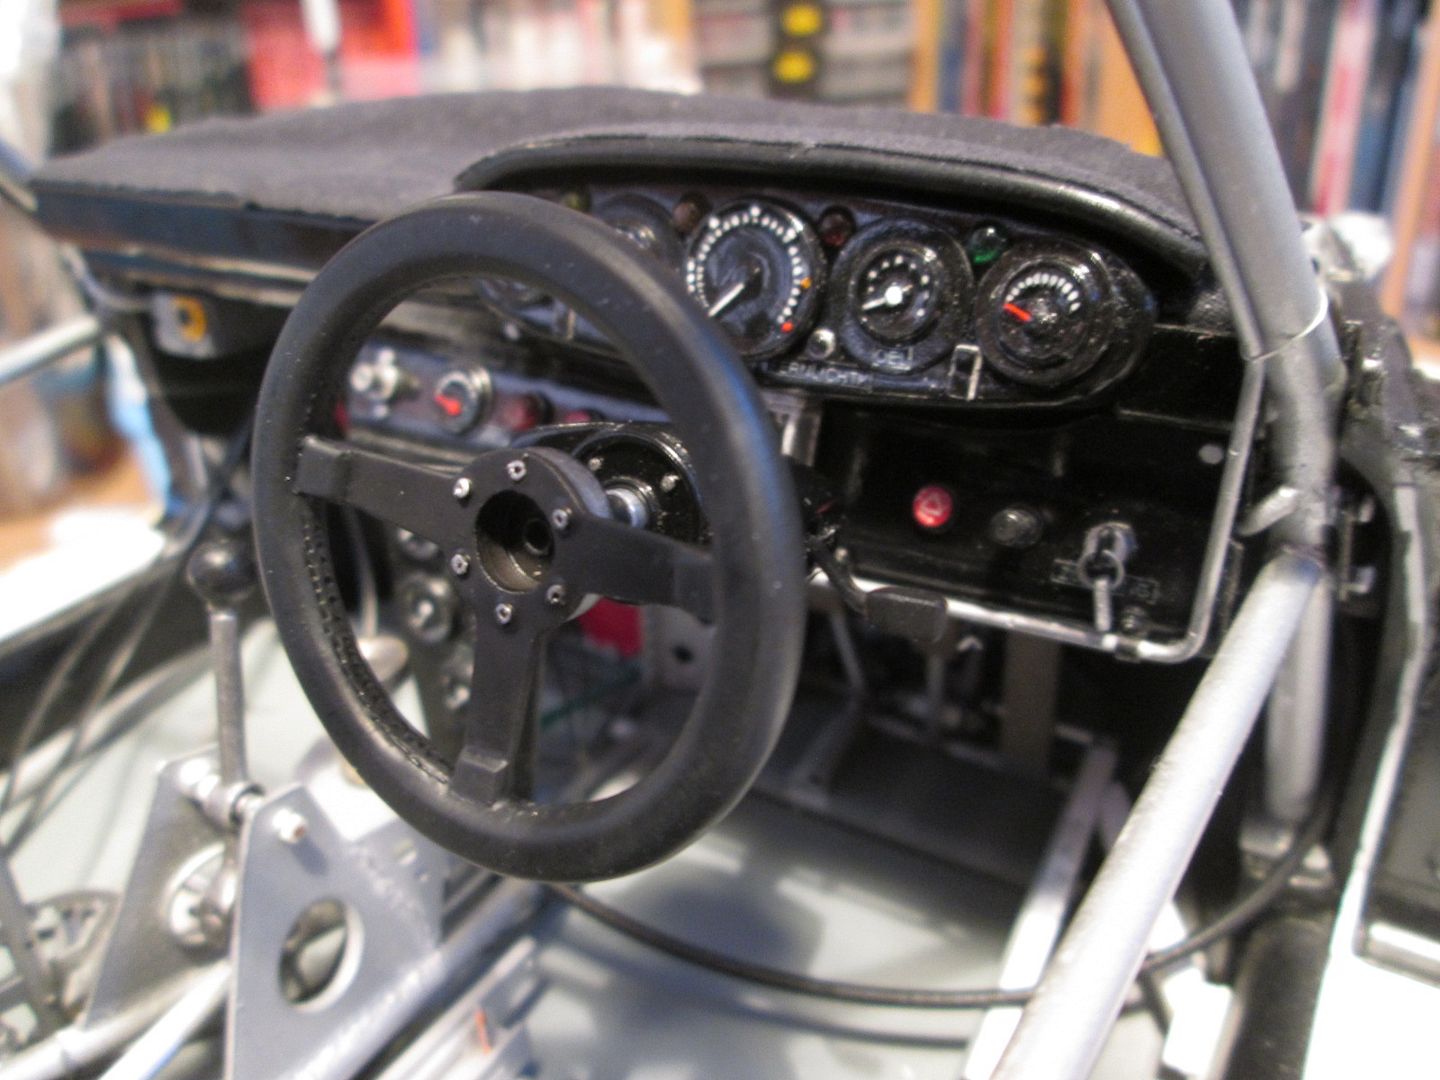 Next, a bit more on the nose section. I mentioned last time that I'd added some styrene around the inside - you can see it better here: 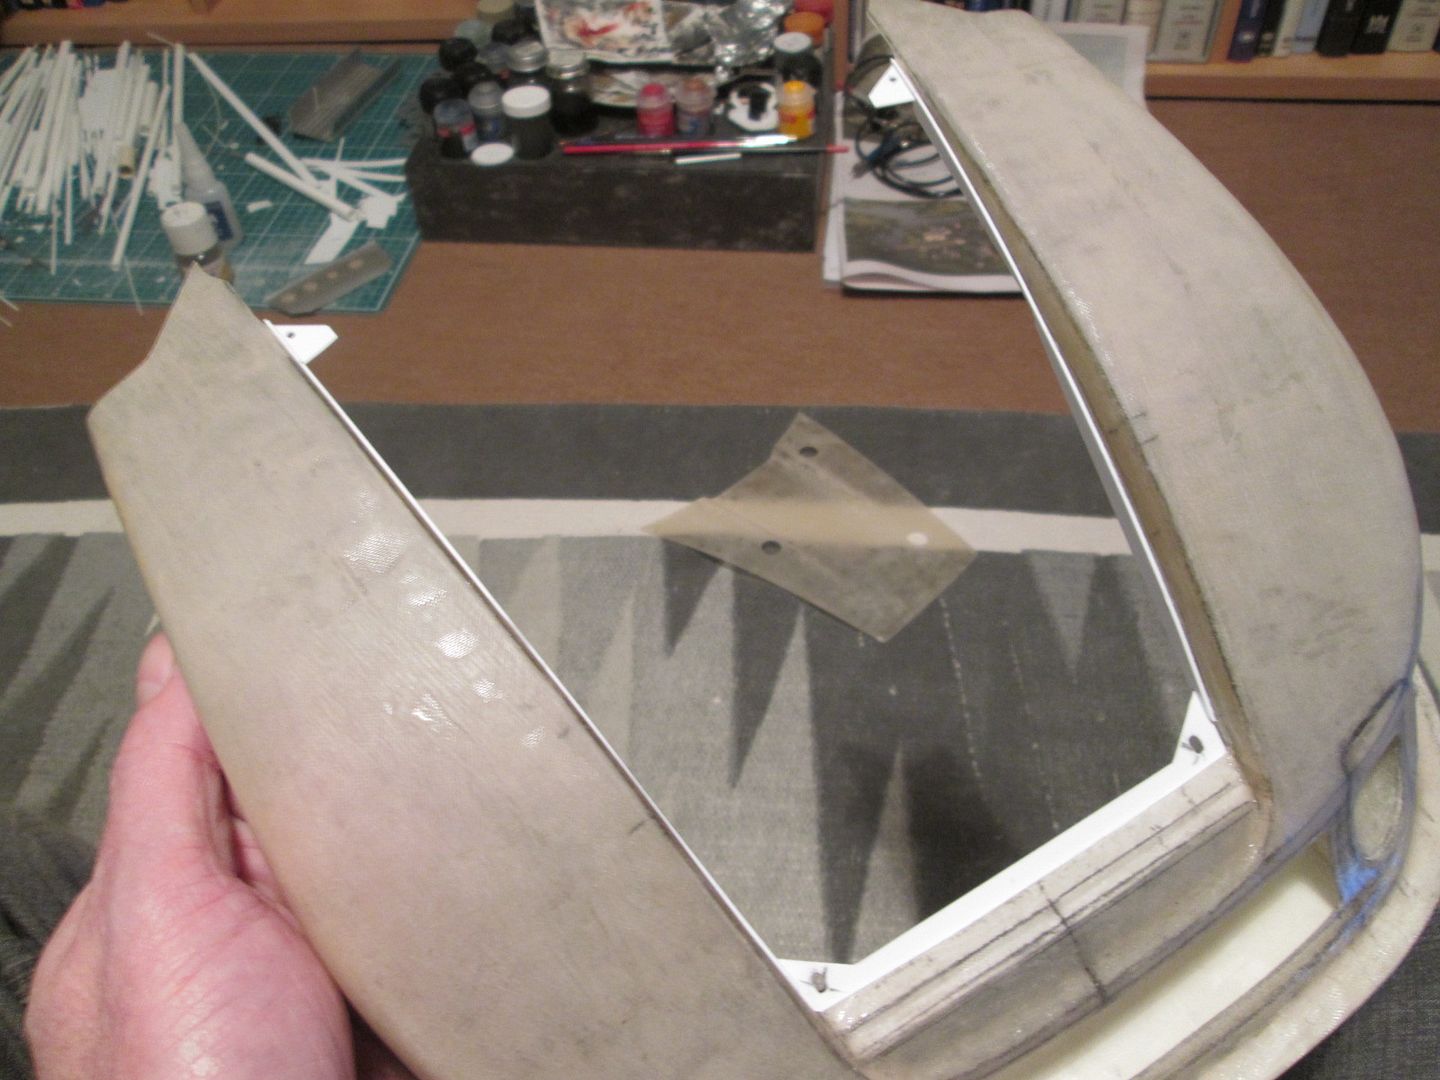 The two small triangular plates in the upper corners also have magnets underneath and will eventually fit over a couple of locating pins on the bodyshell. The seatbelts took the best part of a week to make. I had the various sizes of black ribbon from making the 908, so just had to stitch it all together with the various brackets, etc: 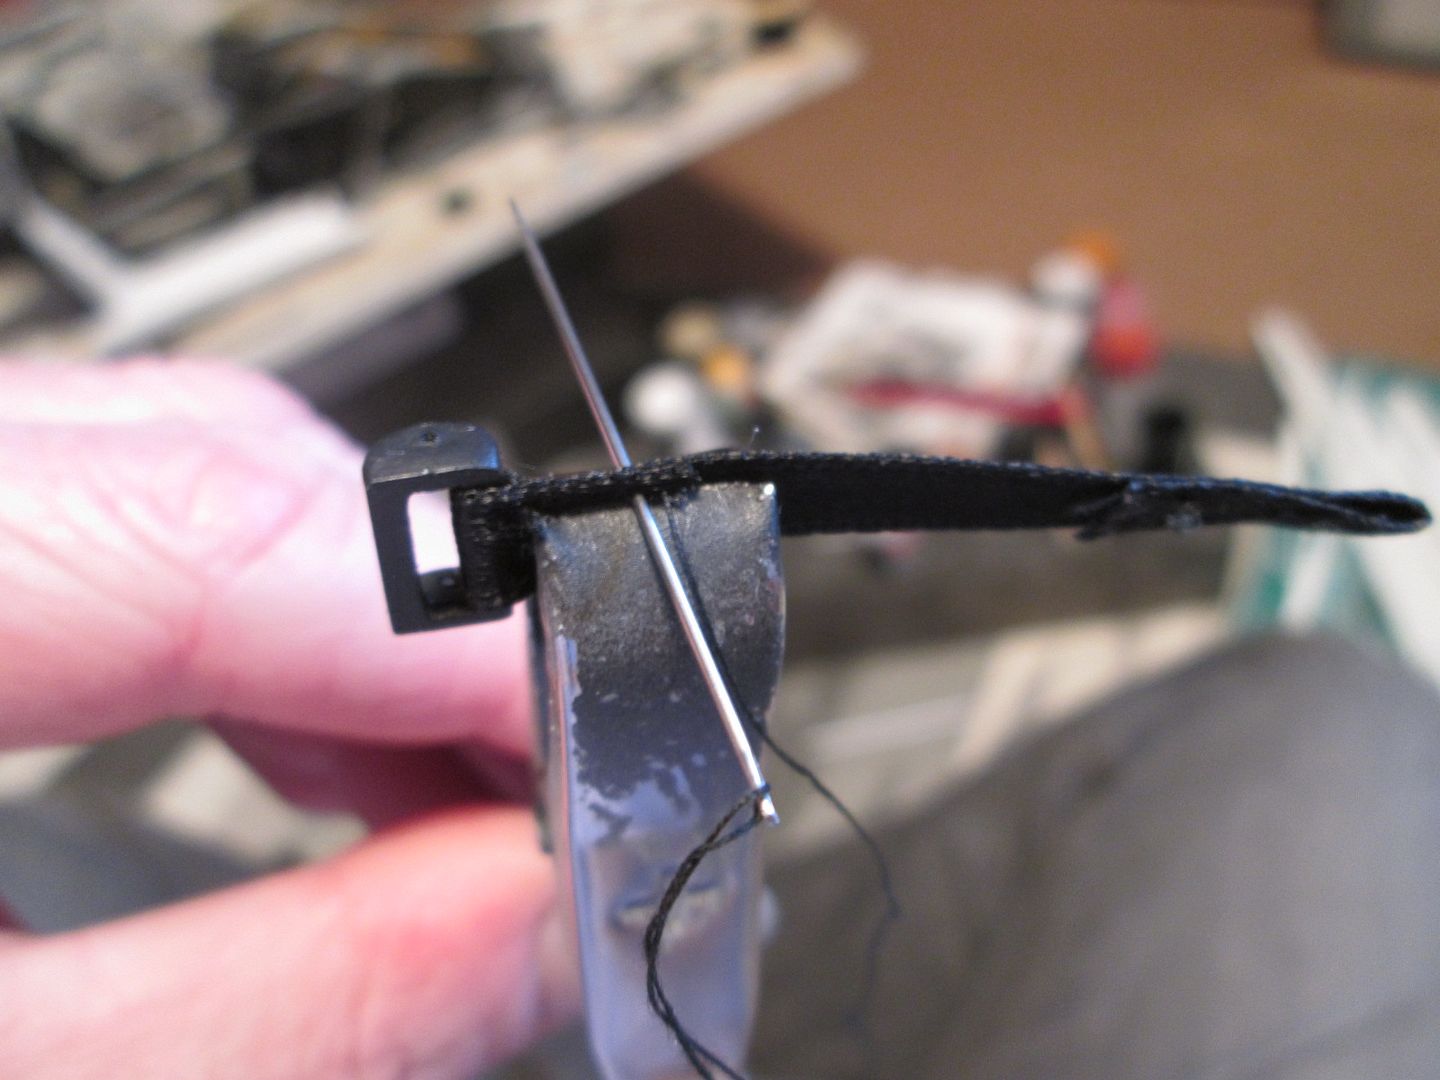  The main problem with the ribbon is that once cut, the edges tend to fray apart. In the past I've used CA glue to seal them, but this can result in them becoming stiff. So, all the ends have to be folded back and stitched together. No major wounds or physical injuries during the stitching, I'm pleased to say, although it took a bit of force to shove the needle through three layers when assembling the lap-belts: 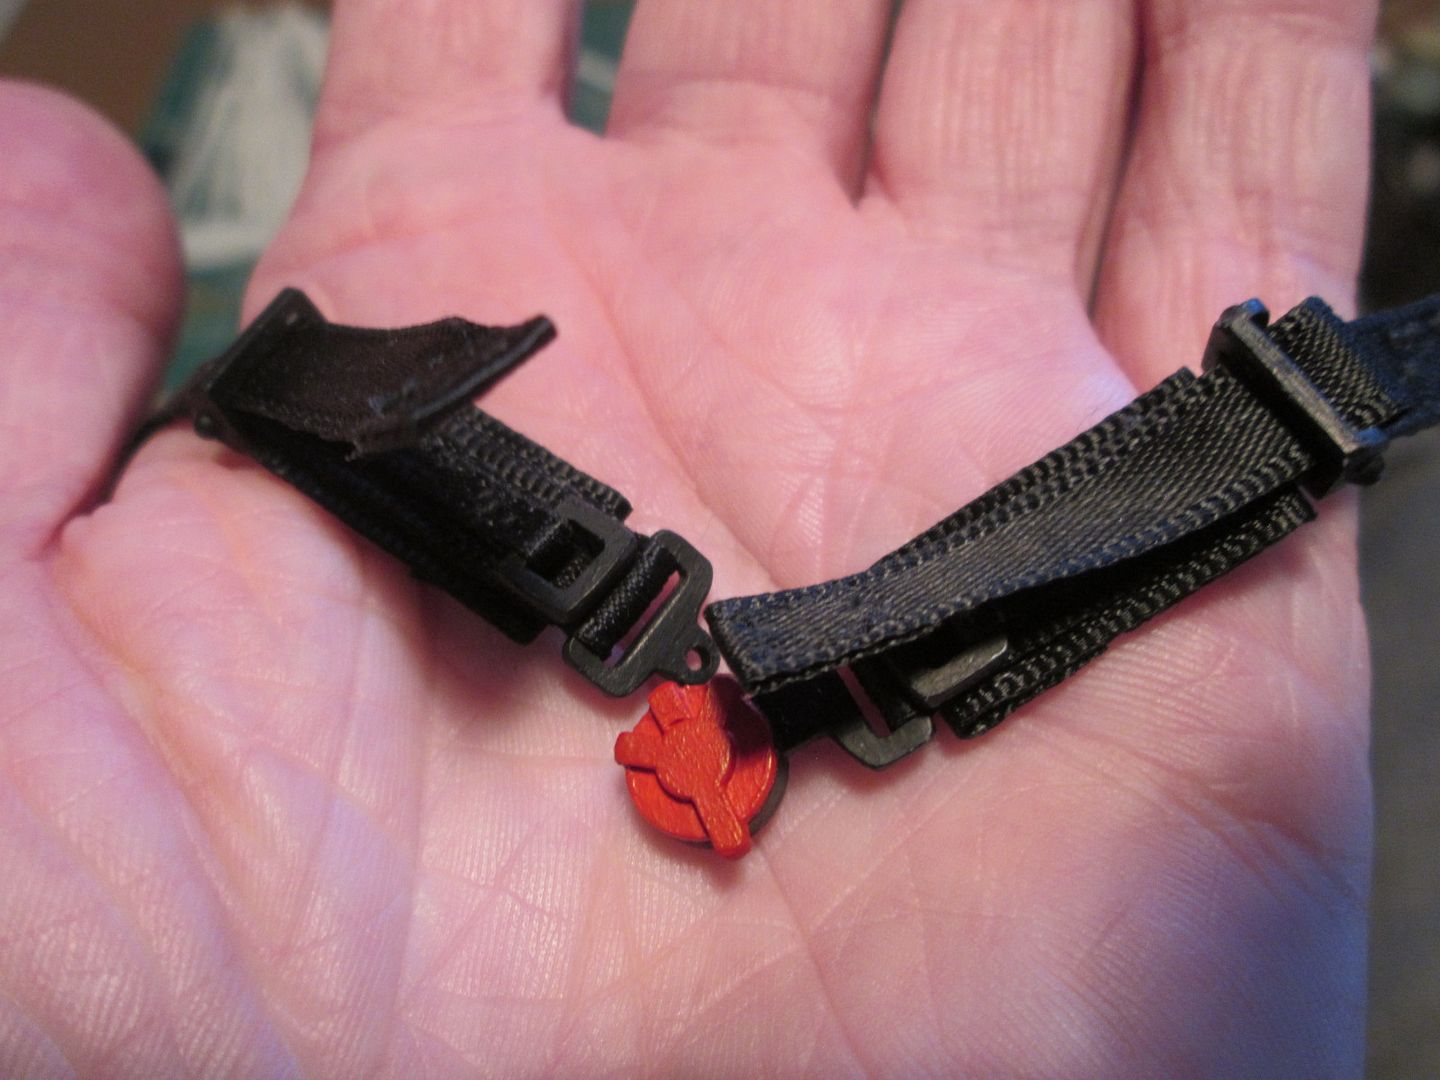 Last thing for tonight - headlights! So, the headlight bowls were laid-up in fibreglass a few weeks ago, removed from the moulds and trimmed up. Next job was to line the inside with aluminium foil to create a bit of 'shine' - I used one of the male patterns to press the foil into the bowl (without tearing) and then repeated the procedure when gluing the foil in place:  I'd already planned to use a length of 20m diameter clear acrylic rod as the starting point for the lenses, but once cut it needed a lot of work with various grades of paper to clean up - I even used a little bit of toothpaste as a polishing compound! You can see by the reflection that I've chamfered around the edges to get some shape into the lens, too. Of course, having made the bowl, and the lens, I really had to make the bulbs too. These are 4mm clear rod, a little shaping on each end, with two 0.5mm holes drilled into one end with fine copper wires inserted as filaments. A collar of styrene and aluminium tube around the base allows a 0.5mm pin to be fixed through the whole lot which in turn allows the bulb to be fixed into the bowl.  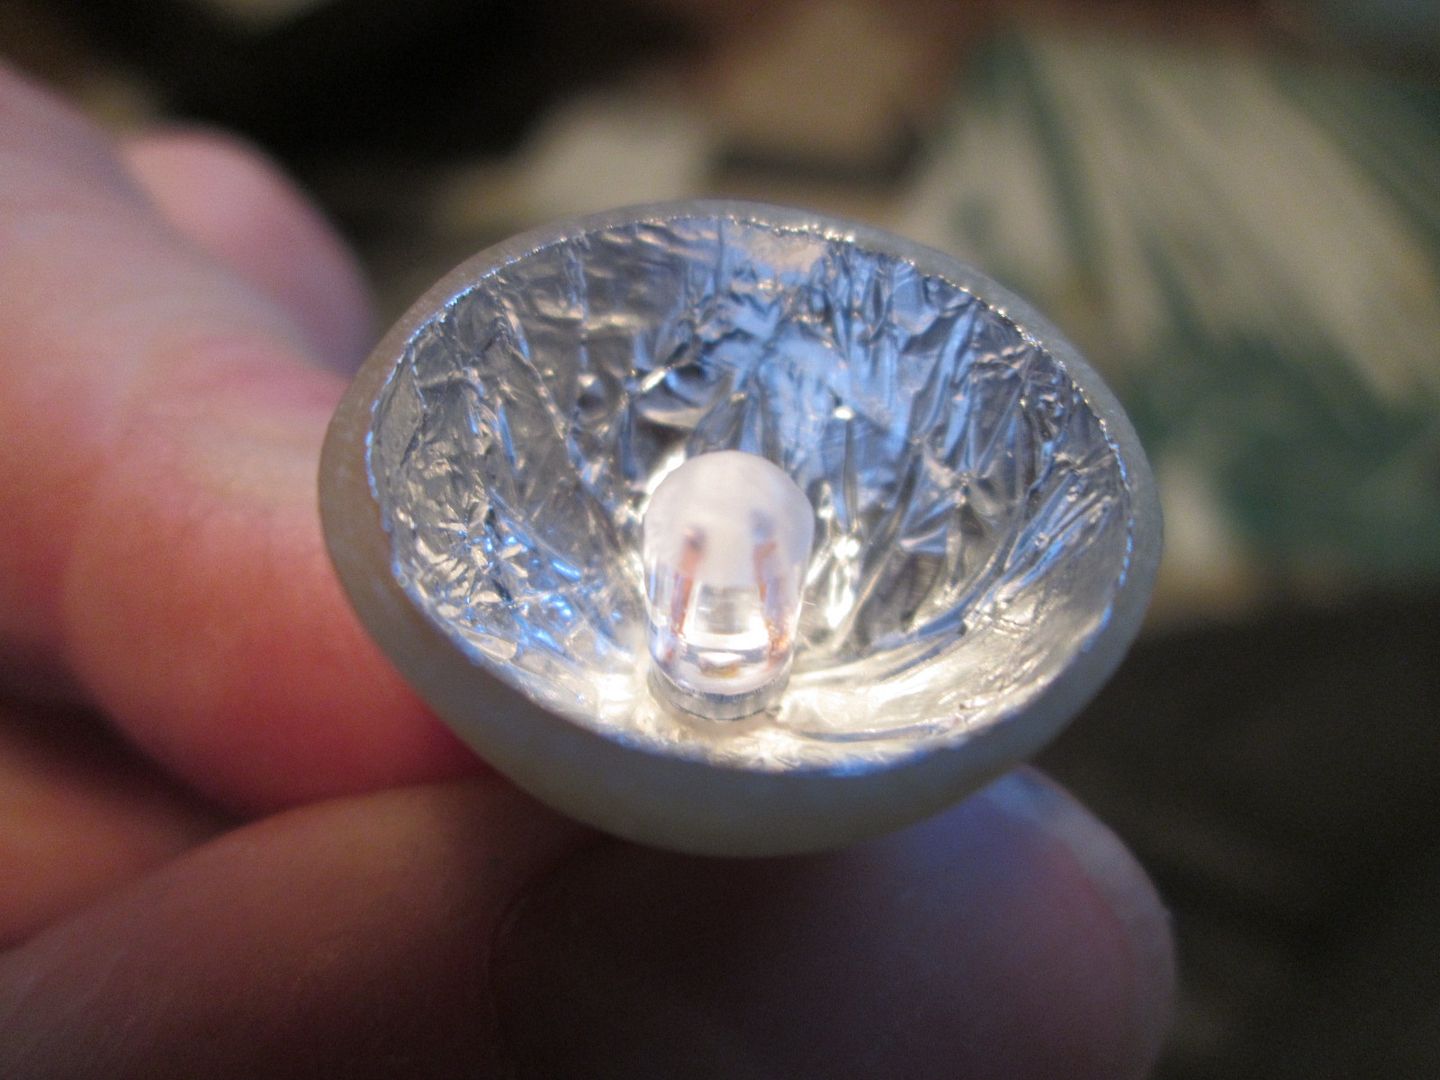 I glued the lens to the styrene ring with CA glue (having tried a test-piece first to make sure it didn't react. The styrene collar has then been filed and sanded down to a minimal diameter: 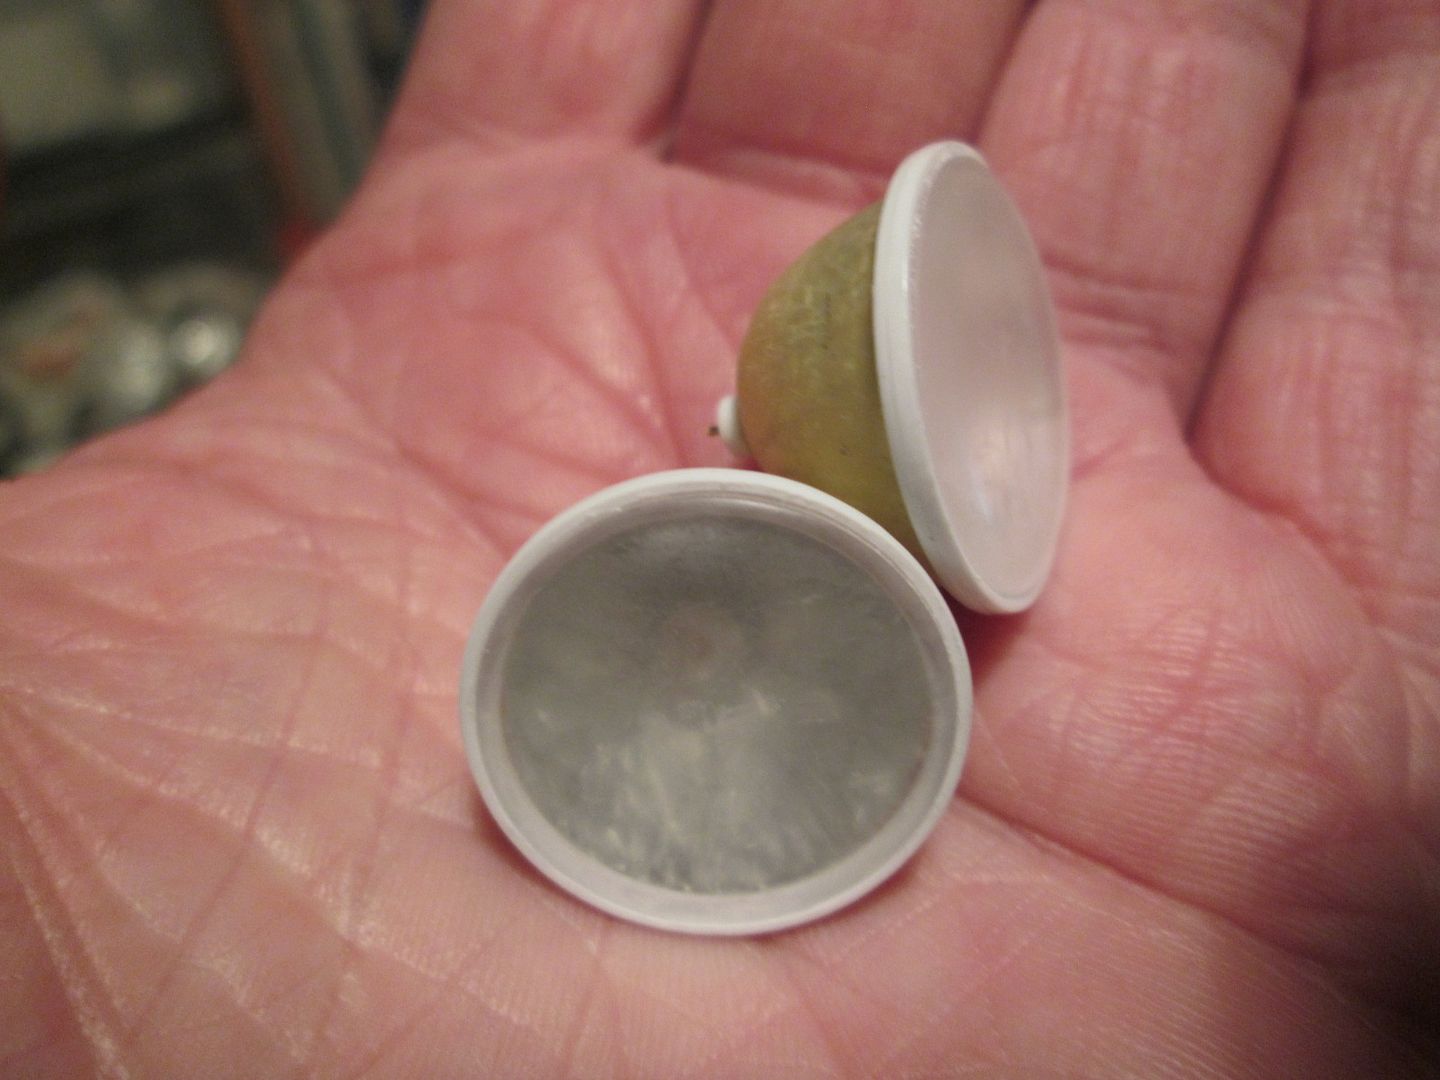 Now, two things to note here. Some of you will say that I have not put any pattern on the lenses - this is true. The factory car has this style of headlight, but the Freisinger car appears to have plain lenses. I also couldn't think of a good way to create the lens pattern accurately without risking damage to the part! Having glued these together last night, they have become somewhat cloudy. The photos aren't great, I know, but they look better in reality. I'm wondering if the CA glue fumes trapped inside the bowl have caused this - I might try drilling a small 0.5mm hole behind the lens as a breather. Overall, I'm pleased with the result. I just need to make some small adjuster pieces which will be positioned around the outside, and make sure the whole lot fits inside the pod in the bodywork. There's also a couple of small indicator lights and marker lights to do. That's it for tonight. I plan to do another update between now and Christmas, and probably another one at the end of the year - it'll depend on how much progress I can make! Still plenty to do... SB |
|
|
|

|
|
|
#662 | |
|
AF Newbie
Join Date: Feb 2017
Location: messing around at garageHEART
Posts: 36
Thanks: 0
Thanked 12 Times in 11 Posts
|
Re: 1/8 Porsche 935/78 'Moby Dick'
I have watched this thread from the start , and what im going to say has been said already. this is inspirational and I have come here to see how to create things for my 1/24 builds.
You asked how to create lens patterns? you could do it two ways (probably more) Print the pattern on clear sticker and stick it from behind ,similar (the ones in link are 3d) to the way they do it for 1/10 rc cars (sorry about posting links in your thread): http://supergdrift.com/store/product...ndora-vgp-604/ or how I use to do it on my Rc cars long before these (above) came about, took a sharpie (blade) and slowly and steadily scribed the pattern in using an image on the outside and held up to a light so it reflects back. I hope this helps. keep up the amazing work.
__________________
 garageHEART- 1/24 auto workshop The love for 1/24 scale Japanese cars... |
|
|
|

|
|
|
#663 | |
|
AF Enthusiast
Join Date: May 2012
Location: Bamberg
Posts: 1,209
Thanks: 13
Thanked 178 Times in 176 Posts
|
Re: 1/8 Porsche 935/78 'Moby Dick'
__________________

|
|
|
|

|
|
|
#664 | |
|
AF Enthusiast
Join Date: Sep 2011
Location: Redwood City, California
Posts: 651
Thanks: 0
Thanked 39 Times in 39 Posts
|
Re: 1/8 Porsche 935/78 'Moby Dick'
Ha, yeah; not sure if old SB has some secret trick up his sleeve for the stitching, or if he's just taking the piss. Looks great either way!
 ianc |
|
|
|

|
|
|
#665 | |
|
AF Newbie
Join Date: Nov 2010
Location: Portugal
Posts: 62
Thanks: 4
Thanked 2 Times in 2 Posts
|
Re: 1/8 Porsche 935/78 'Moby Dick'
First things first: I think the headlights are tremendously well done!
One question, though: is the inside of the bulbs so "textured"? If they are, you just nailed it!!! If they are slick, why didn't you try Alclad Chrome or, even better, Molotow? Just my two cents. Going to get some popcorn and wait for the next update! Creers Art |
|
|
|

|
|
|
#666 | |
|
AF Enthusiast
Thread starter
Join Date: Nov 2008
Location: Norwich
Posts: 649
Thanks: 21
Thanked 111 Times in 87 Posts
|
Re: 1/8 Porsche 935/78 'Moby Dick'
Hello folks,
My aim with the headlights has been to try to get some 'life' into them. Another time I would probably have concentrated on creating a decent-looking lens and surround, and tried to fudge the internals, but for this one it just seemed easier to actually make a complete unit. As I've said before with the wiring - it's easier to work to a proper layout, than it is to just throw lots of wire around and hope it looks right! Adding the bulbs and filaments was a bit of fun - an Easter Egg for the build that'll probably be barely noticed by anyone who sees the model in real life. To be honest, I didn't really consider painting the insides of the bowls. I knew that nothing I already had would be bright enough, and I have no experience with Alclad paints. Another time, maybe. The aluminium foil seemed a good approach, although it's obviously prone to tearing - so I wasn't pushing to get a super-smooth finish. Using the mould patterns to press the foil into shape worked well, but I was happy to trade the crinkles for no rips! The fogginess I mentioned inside the bowl seems to have improved during the week without the need to drill any vent holes, so I'll see how that develops. We've got a hand-held engraving tool at work which I'm going to try on a test piece of acrylic - I'm not promising there'll be markings on the lenses, though! Don't forget, the lights on the -78 are tucked down at the bottom of the nose, so they're not as prominent as they would be on a regular 911. Unfortunately, I don't think there's anything up my sleeve for the stitching on the wheel, Ian. I did have a think about it after your comment, but even in 1/8 scale it would be ridiculously fiddly to glue in individual threads between the stitch-marks. Maybe a fine paintbrush and a magnifying glass...hmm...there's an idea! SB |
|
|
|

|
|
|
#667 | |
|
AF Newbie
Join Date: Jun 2004
Location: Auburn, New York
Posts: 97
Thanks: 2
Thanked 5 Times in 5 Posts
|
Re: 1/8 Porsche 935/78 'Moby Dick'
I'd recommend trying a spoon with alcad paints, I think you'll find it extremely easy to use.
|
|
|
|

|
|
|
#668 | |
|
AF Newbie
Join Date: Nov 2010
Location: Portugal
Posts: 62
Thanks: 4
Thanked 2 Times in 2 Posts
|
Re: 1/8 Porsche 935/78 'Moby Dick'
Yes, you must try with a plastic spoon first, you gonna see how simple it is...
You must spray a coat of VERY bright Black first - the brighter, the better. And then, with a very low pressure in your compressor, paint with a light coat of Alclad Chrome. And... that's all! I take the liberty of posting a picture of a bowl (not a bulb, as I wrote before  ) of a 1/8 car I'm building, right now. I used Molotow (even better solution, I think). You can see how reflective and smooth it is. ) of a 1/8 car I'm building, right now. I used Molotow (even better solution, I think). You can see how reflective and smooth it is.Best Art  |
|
|
|

|
|
|
#669 | |
|
AF Newbie
Join Date: Nov 2010
Location: Portugal
Posts: 62
Thanks: 4
Thanked 2 Times in 2 Posts
|
Re: 1/8 Porsche 935/78 'Moby Dick'
... and, by the way... STITCHES 1/8!
Art  |
|
|
|

|
|
|
#670 | |
|
AF Enthusiast
Thread starter
Join Date: Nov 2008
Location: Norwich
Posts: 649
Thanks: 21
Thanked 111 Times in 87 Posts
|
Re: 1/8 Porsche 935/78 'Moby Dick'
Happy New Year!
Although I spent a fair bit of time modelling during the Christmas holidays, I wasn't able to make a big leap forwards - mainly because I'm still being careful about what gets glued in and when! Most of what I've been doing has been preparation for either fitting the fuel tank, etc, into the nose, or for getting the cockpit relatively complete before the roof goes on. First up, having added a few extra details to the headlight surrounds, I made the two small indicator lights and marker lights: 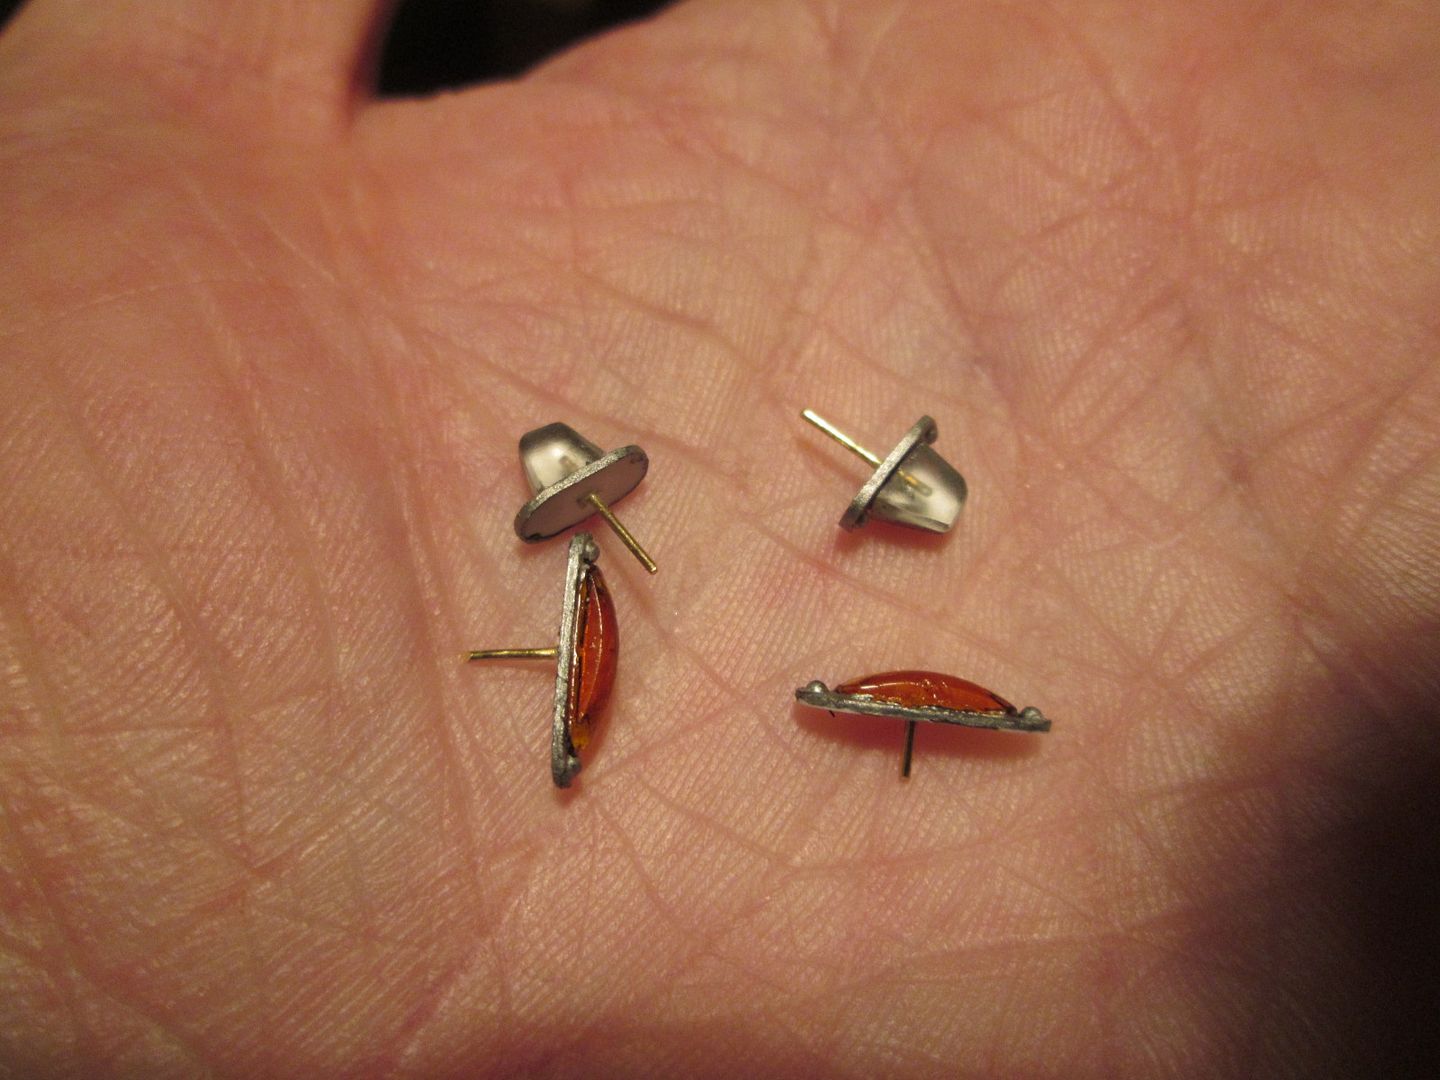 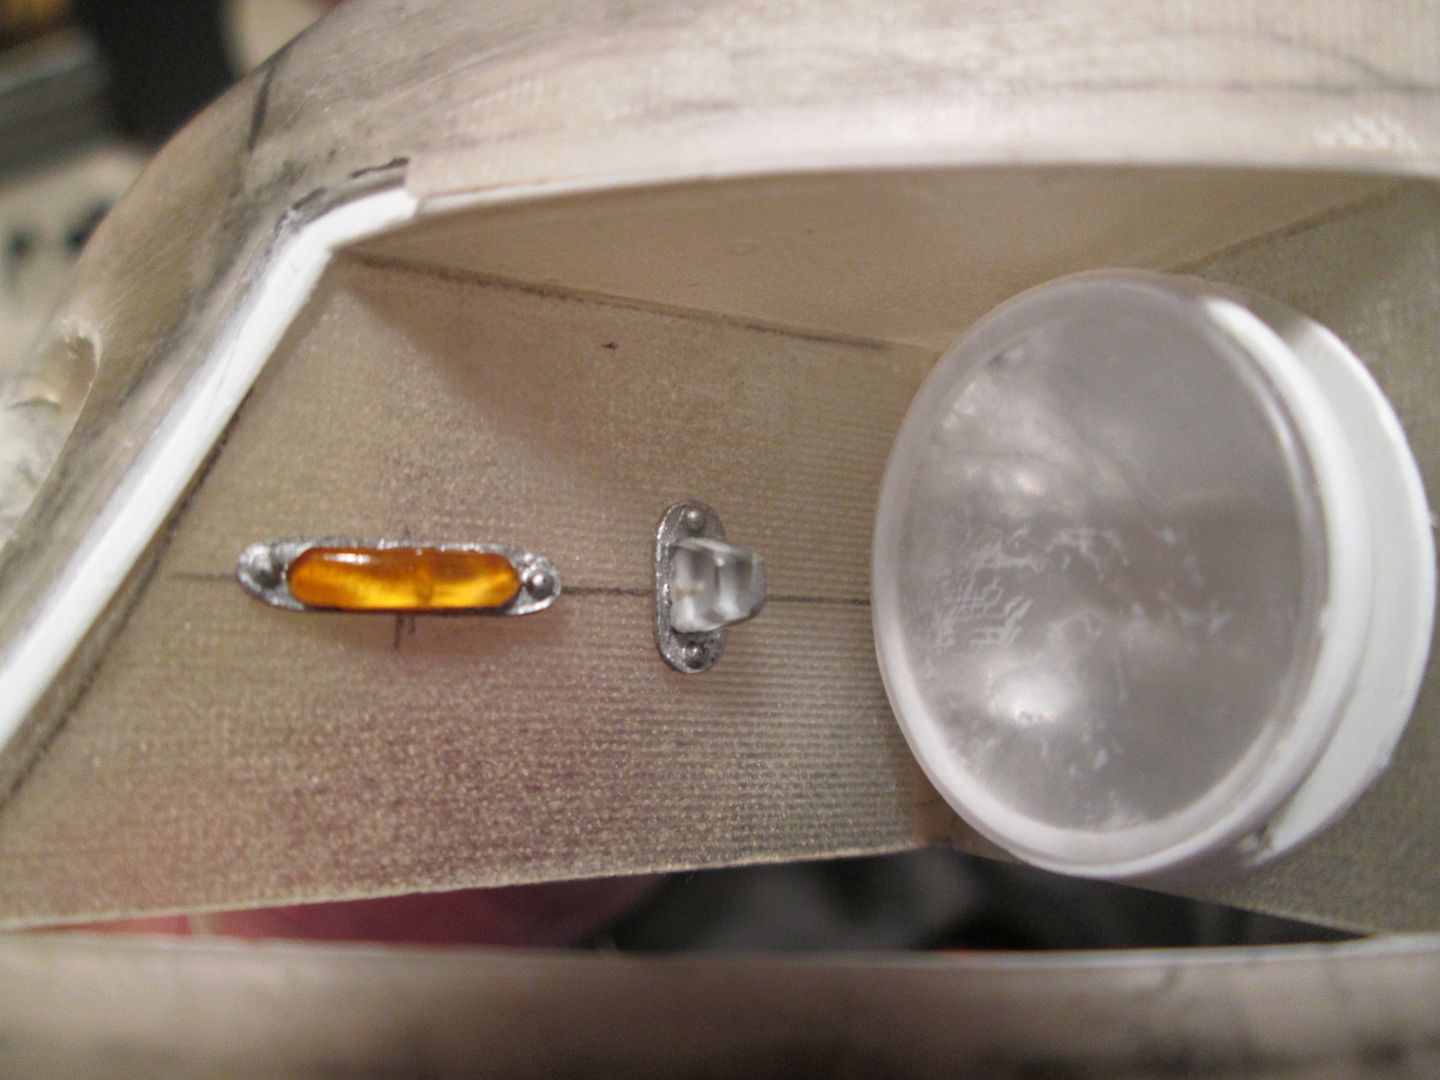 Very fiddly to make, but I think they'll look fine once the bodywork is painted. For now they're just pinned in place. For the indicators I cut each one from a thin disc of the 15mm clear acrylic rod, then rounded-off the ends with a file. A couple of coats of Tamiya clear orange, and job done. The clear marker lights were cut from the remains of the disc but needed a bit more filing to shape. The backing plates are strip styrene, with 'Wave Option' rivet detailing. One thing I definitely wanted to do during the holidays was to sort out some of the decals required for a few of the electrical parts. I spent a couple of hours trawling online for suitable logos, etc, then spent a bit of time cleaning them up and checking the sizes. The end result was half a sheet of logos, most of which will hopefully not be required... 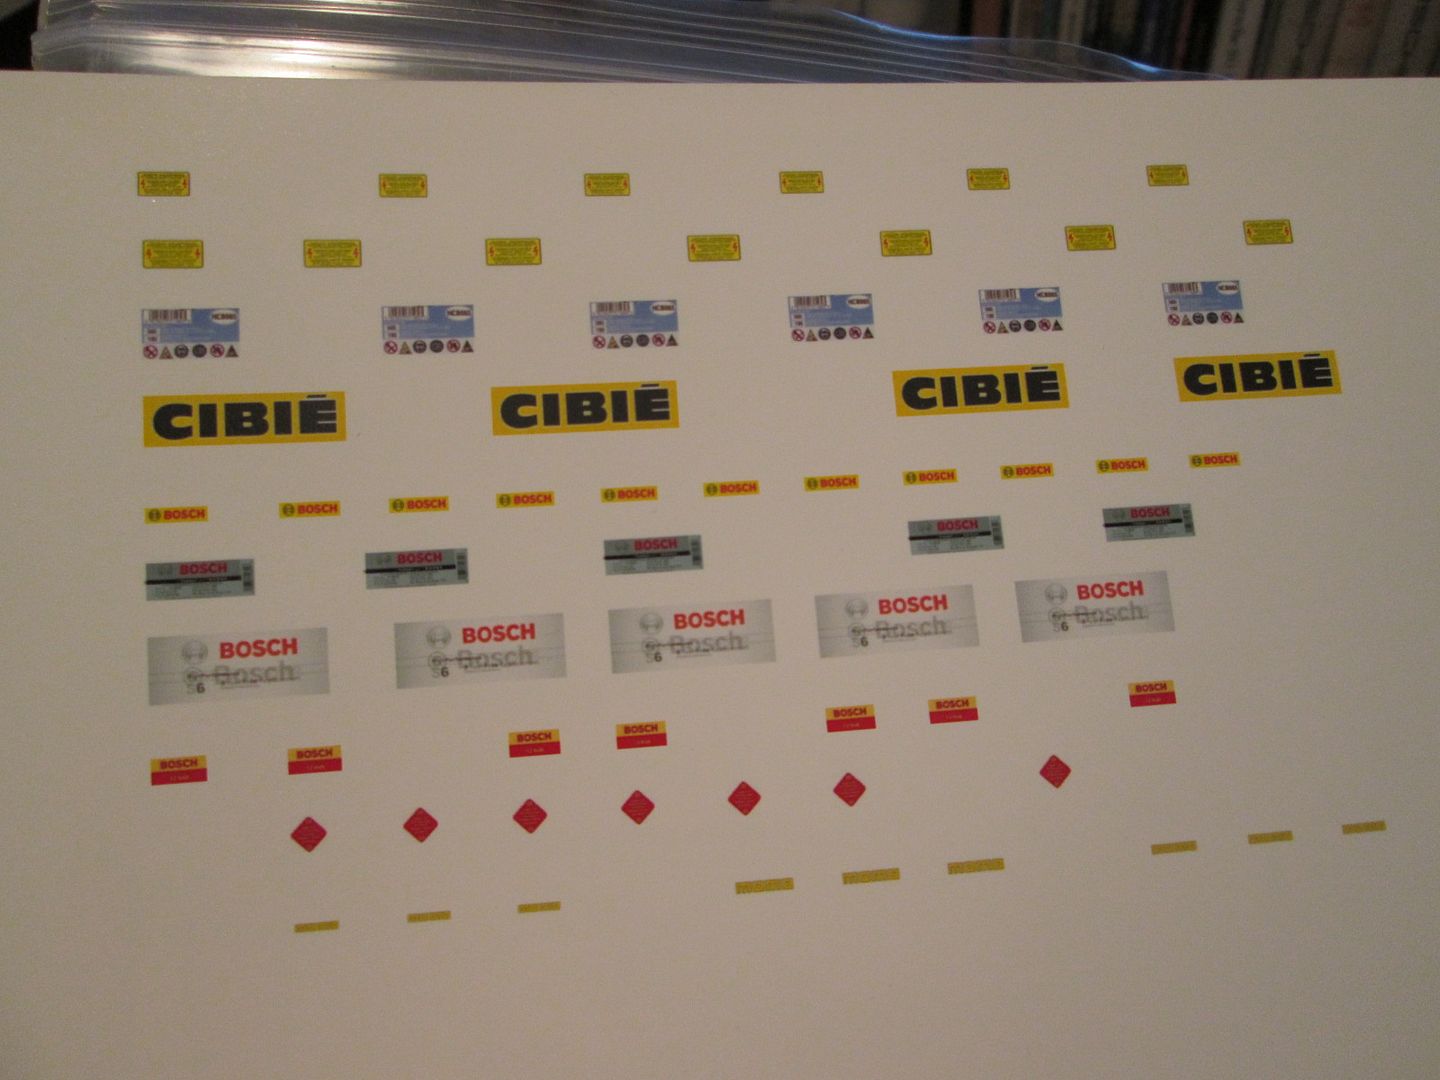 Here's the starter motor, ignition boxes and coil: 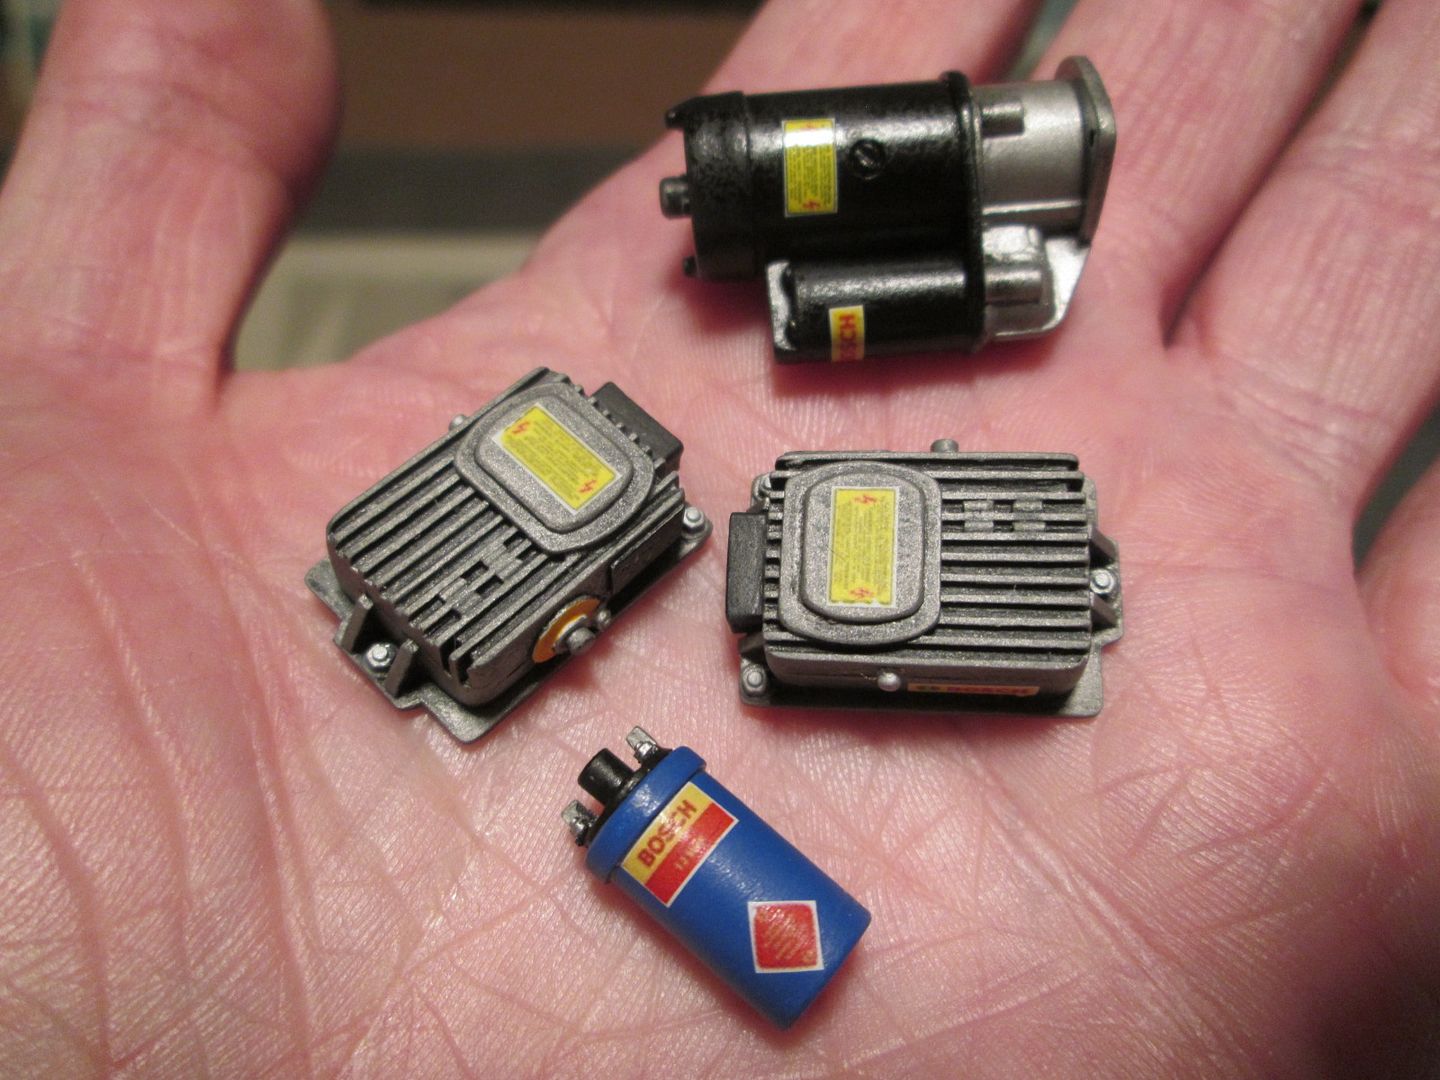 ...and the battery: 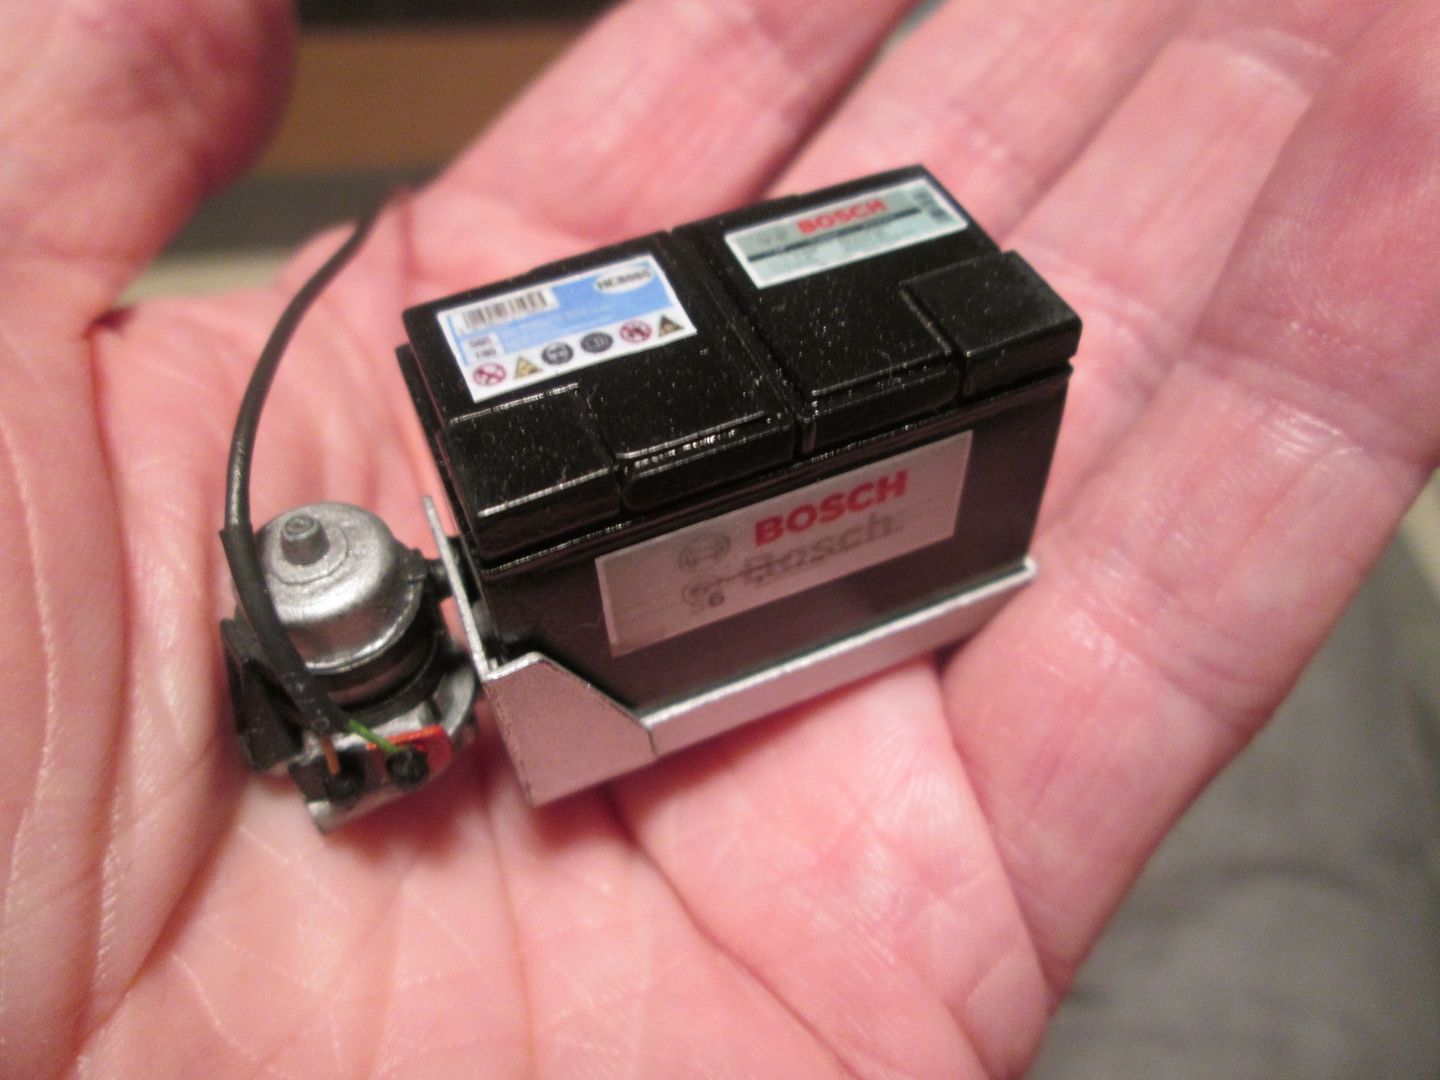 I'm particularly pleased with the battery - although it's buried down in the nose of the car, the decals stop it looking like just a black box. While I was at it, I sorted the wiring for the fuel pump, ready for installation. The coil needed a bit of work to finish the top detailing, and the ali mounting strap (not shown) has been primed and re-painted. Each part has been re-varnished afterwards to give the decals extra protection. Most of the rest of the work has been in the cockpit. The last couple of photos hopefully give a feel of what I've been doing: 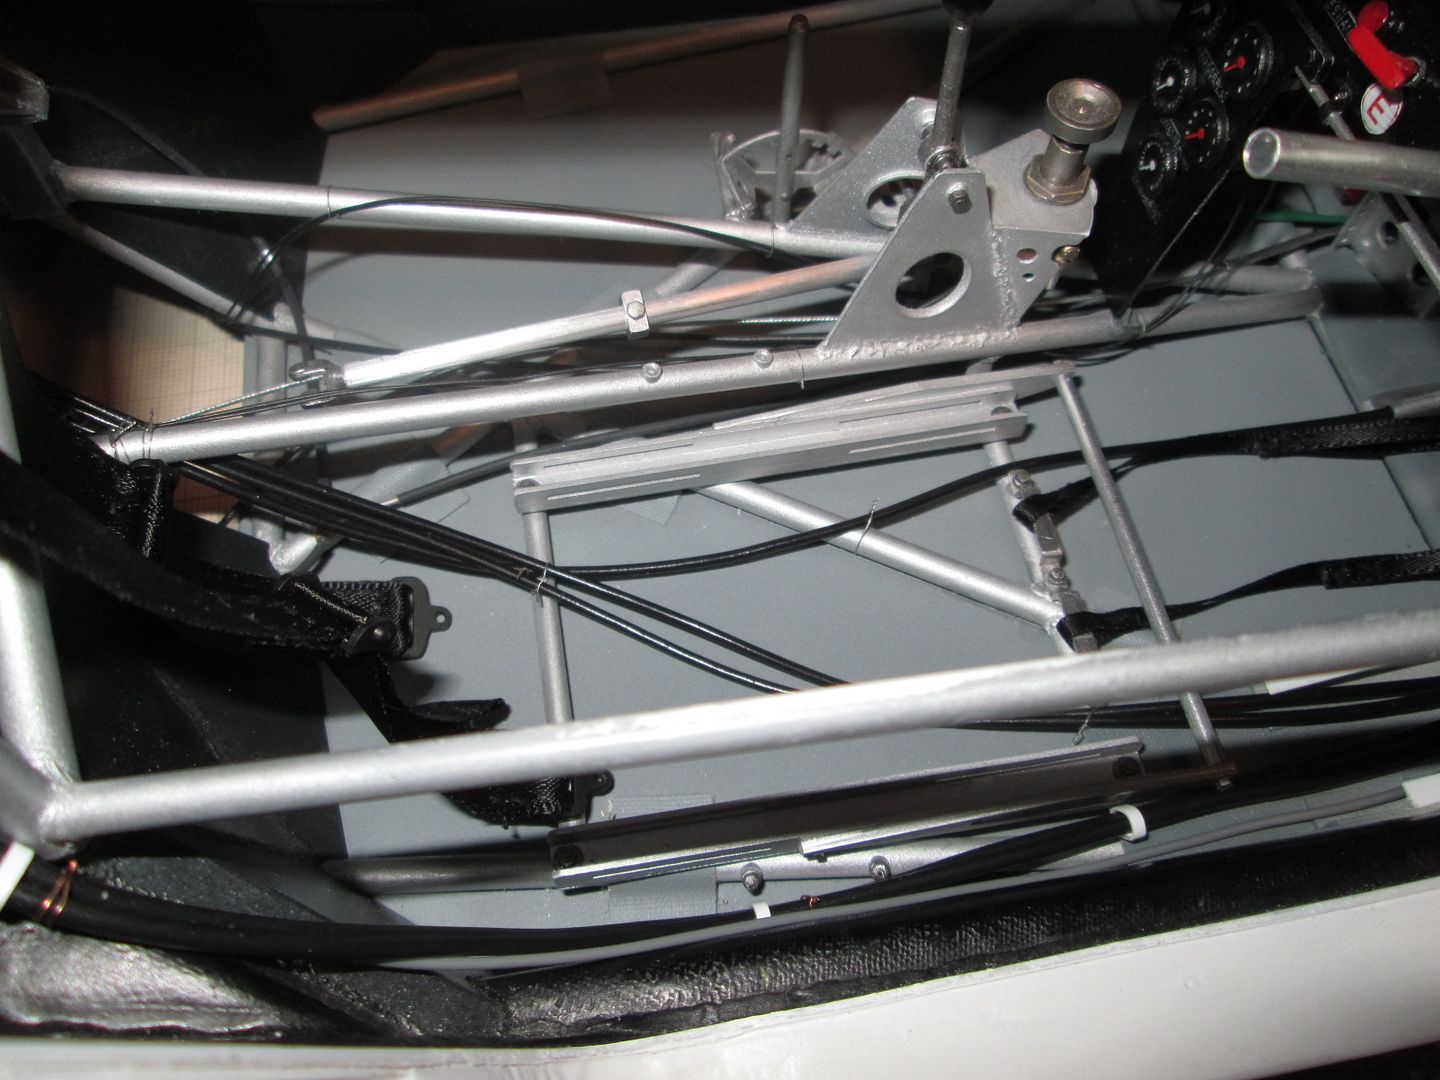 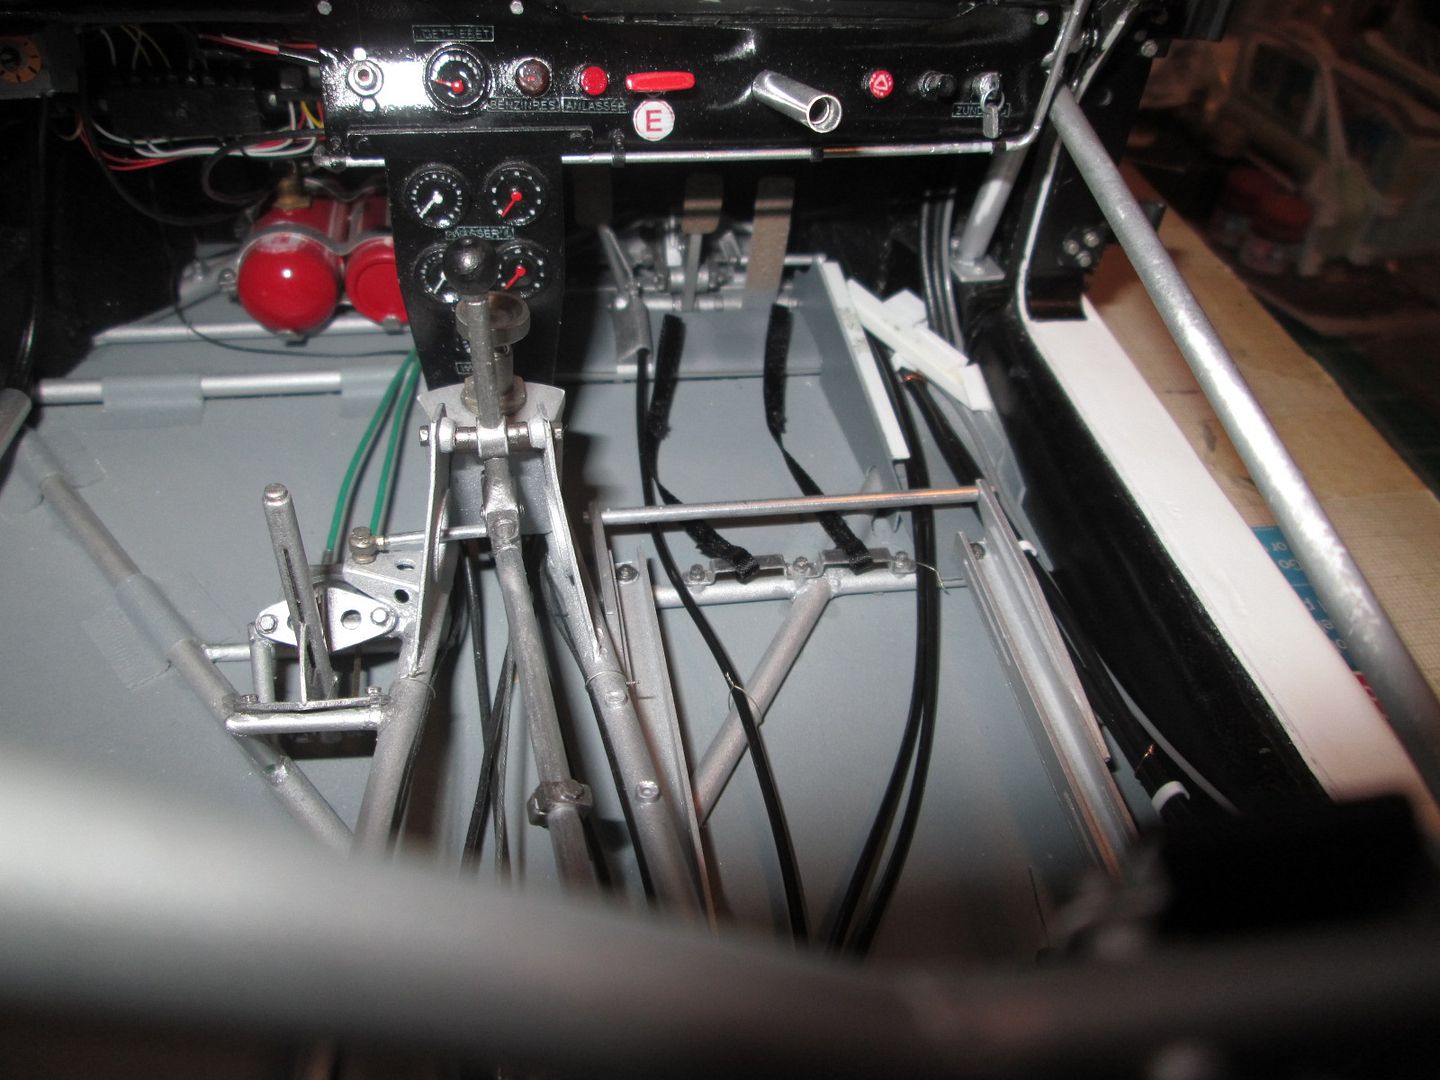 The wiring running down the left-hand side of the cockpit from the dashboard has been matched up with the appropriate pieces coming from the engine bay, with a length of ali tube used as protective conduit. This might be changed. I've drilled some extra holes through the rear firewall to pass a few of the cables through, rather than forcing everything through the holes for the water pipes. The fuel lines down the right-hand side have been strapped together and are ready to be fixed in place. There's also a thin grey wire there which will be used for the air-jack plumbing - I've also made the fittings for the top of each jack. I've made four pins which will be used to fix the seat frame to the mounting channels, and re-made the handle which connects the two adjusters each side. The clutch line and two throttle cables (one spare!) have been fitted and wired into place around the chassis tubes. Before I fit the seat to the frame, and the frame to the mounting channels, I've added the shoulder straps and crotch straps - the lap straps will be threaded through the seat before final assembly. What else? The four door hinges have been fitted, glued, pinned and detailed with hex nuts. The gear lever is now glued in, although it is still free to move so I can connect it to the gearbox. At the front, I've played around with the colouring of the oil tank a little to get away from the 'flat aluminium' finish, and added a small bit of detailing to the fuel collector tank as the level sender. I've made some extra bits of wiring for the three smaller fuel pumps, and started assembling the wash-bottle pump. As usual, it's at this point that I remember I don't have photos for a lot of this stuff, but you'll see it next time. So, I'm nearly at the stage where I can start fitting the various bits into the nose - getting the decals on the battery was the main obstacle here. But...do I fit the fuel tank, then the battery tray, or battery first then the fuel tank? Do I connect the wiring before or after? What about the pipework for the fuel system? Don't forget the trackrods need to be fitted into the steering rack while it's still accessible! As always, this is what soaks up so much of the time - trying to get the correct assembly sequence. We're nearly there, though... More next time. SB |
|
|
|

|
|
|
#671 | |
|
Registered User
Join Date: Jun 2016
Location: Melbourne
Posts: 136
Thanks: 12
Thanked 20 Times in 20 Posts
|
Re: 1/8 Porsche 935/78 'Moby Dick'
Well i have learnt so much from this so far....exceptional skills and amazing work. I will look at my builds now and think why can i not just finish you its OOB....lol
Keep up this wonderful project. |
|
|
|

|
|
|
#672 | |
|
AF Enthusiast
Thread starter
Join Date: Nov 2008
Location: Norwich
Posts: 649
Thanks: 21
Thanked 111 Times in 87 Posts
|
Re: 1/8 Porsche 935/78 'Moby Dick'
Work continues!
The seat shell was glued into the frame, and five small sections of styrene added at various points as reinforcements. The final touch before painting was to add some small pieces of fibreglass cloth, gluing them in place with CA (rather than resin / hardener): 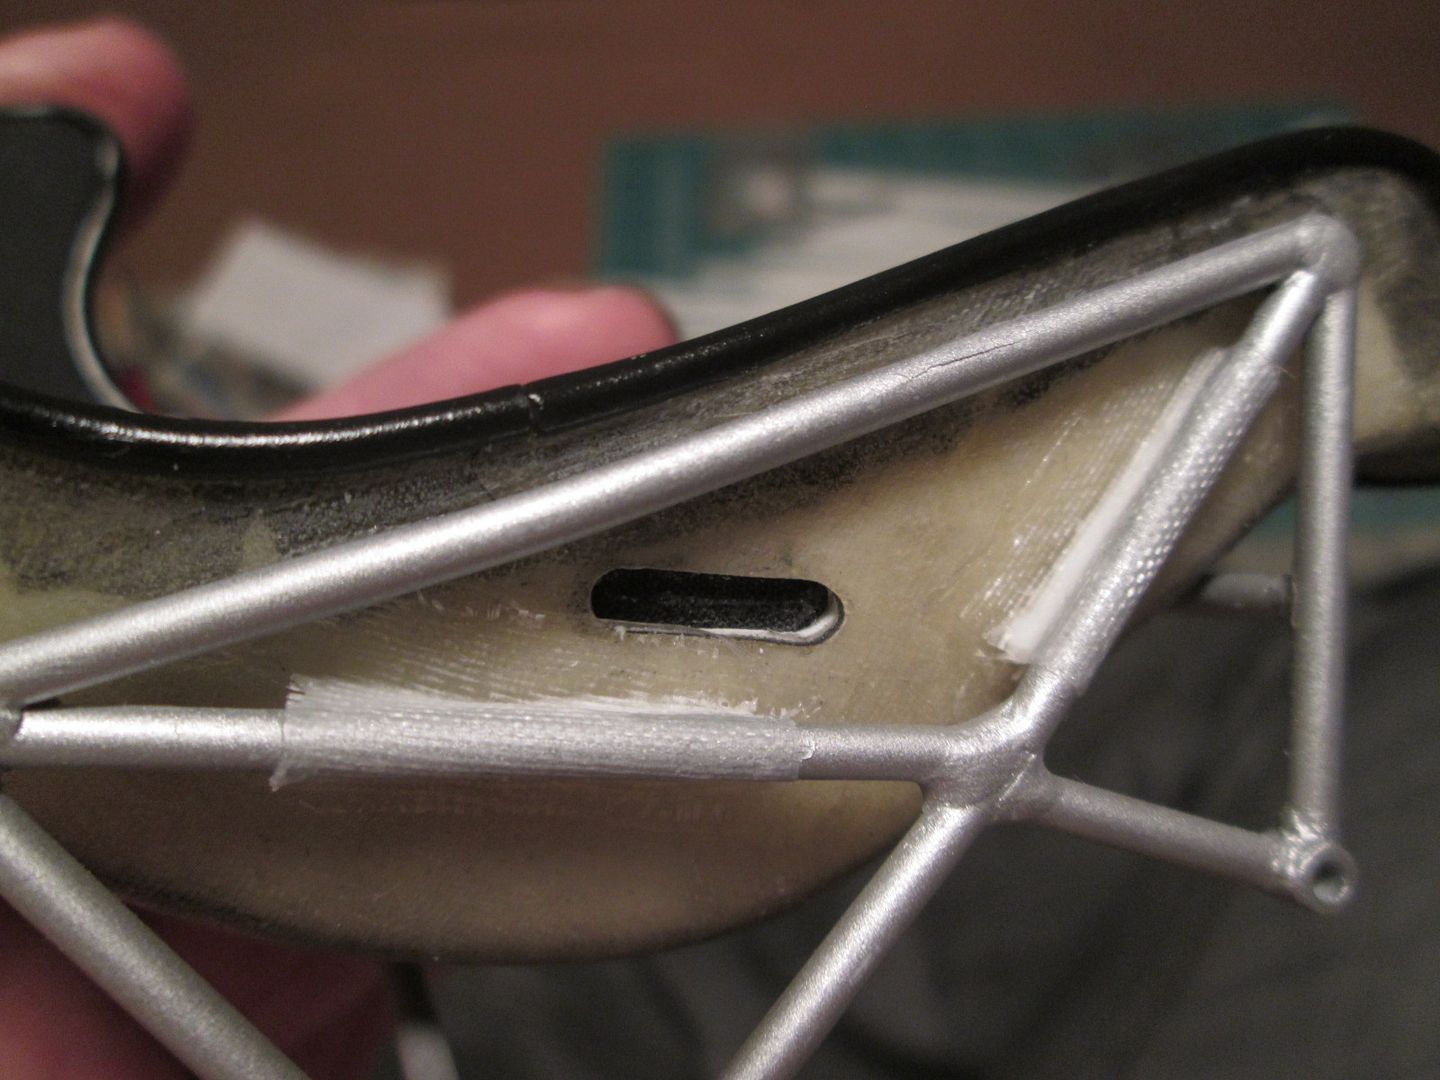 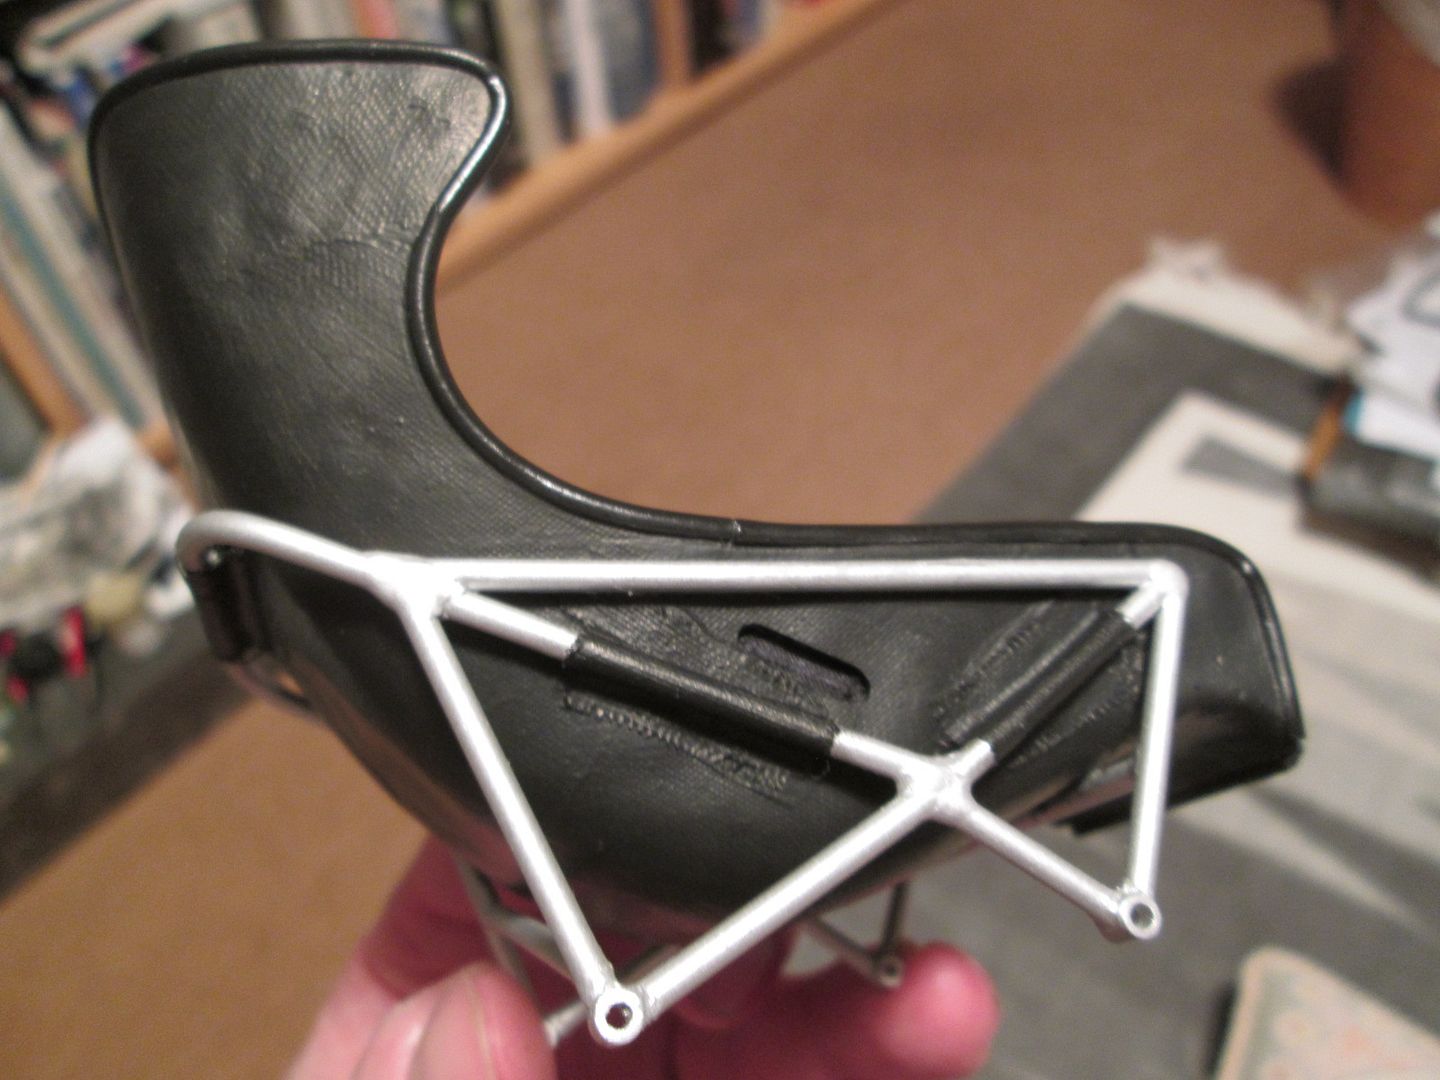 Just needs the mounting frame pinning to the bottom and it'll be ready to drop into place. More tidying of plumbing and wiring in the cockpit. The length of ali tube used as conduit on the left-hand side has been covered in a piece of black heat-shrink tubing, and fixed in place with three styrene straps: 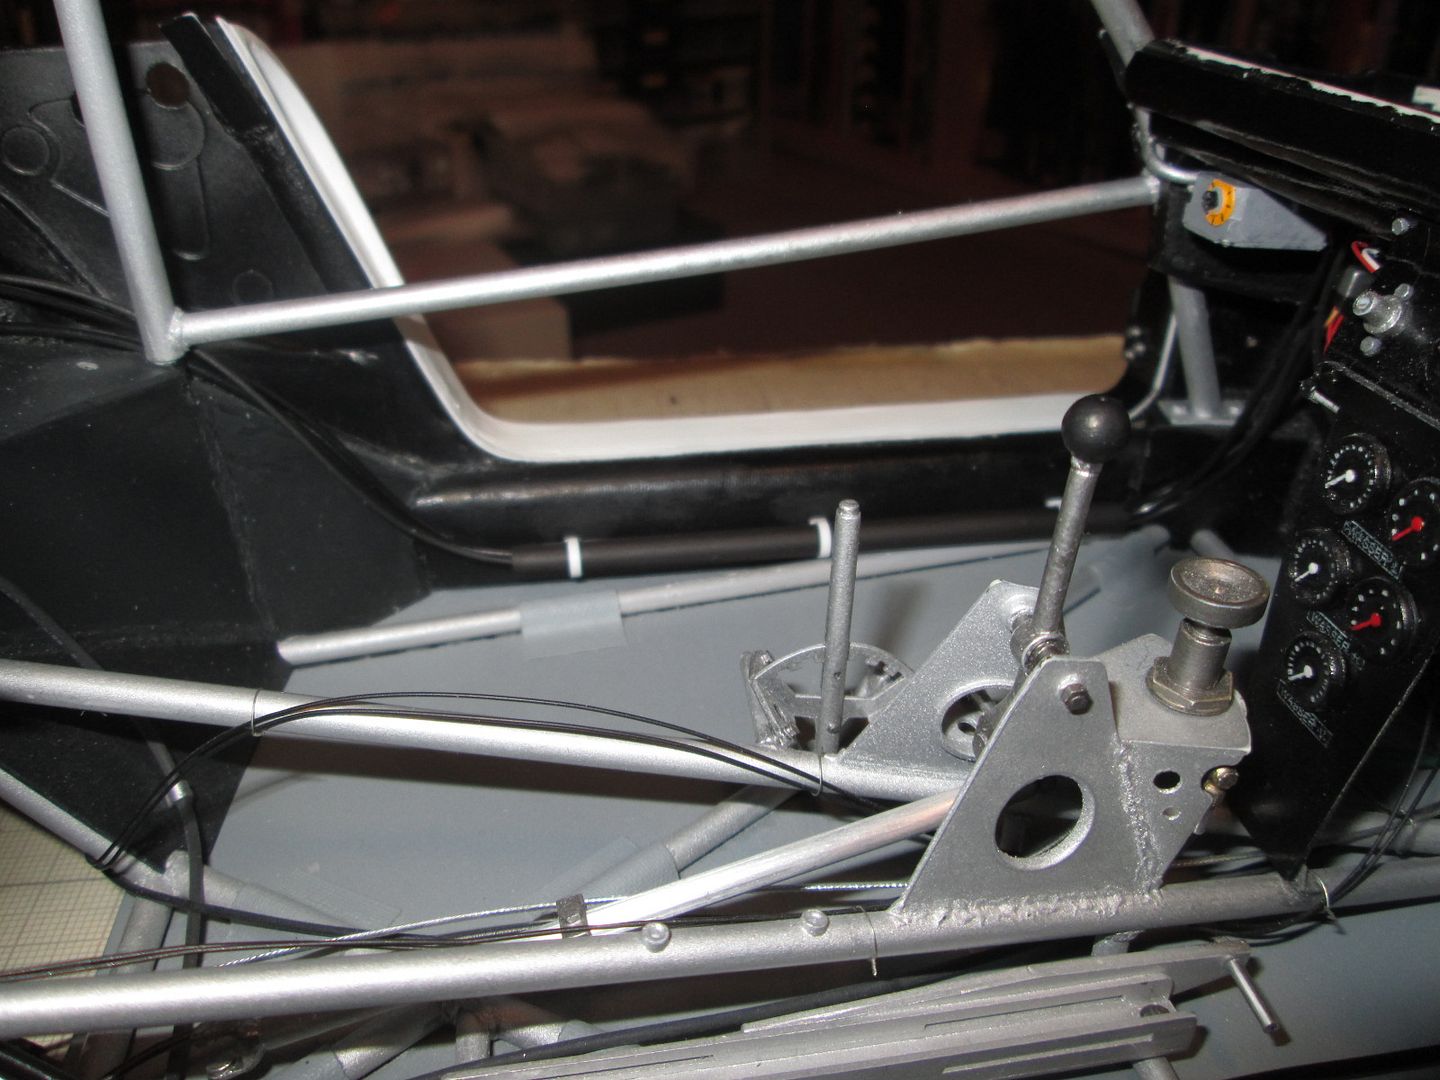 The fuel lines on the other side have also been fixed into place, and the cover panel to the right of the pedals has also been trimmed and fitted: 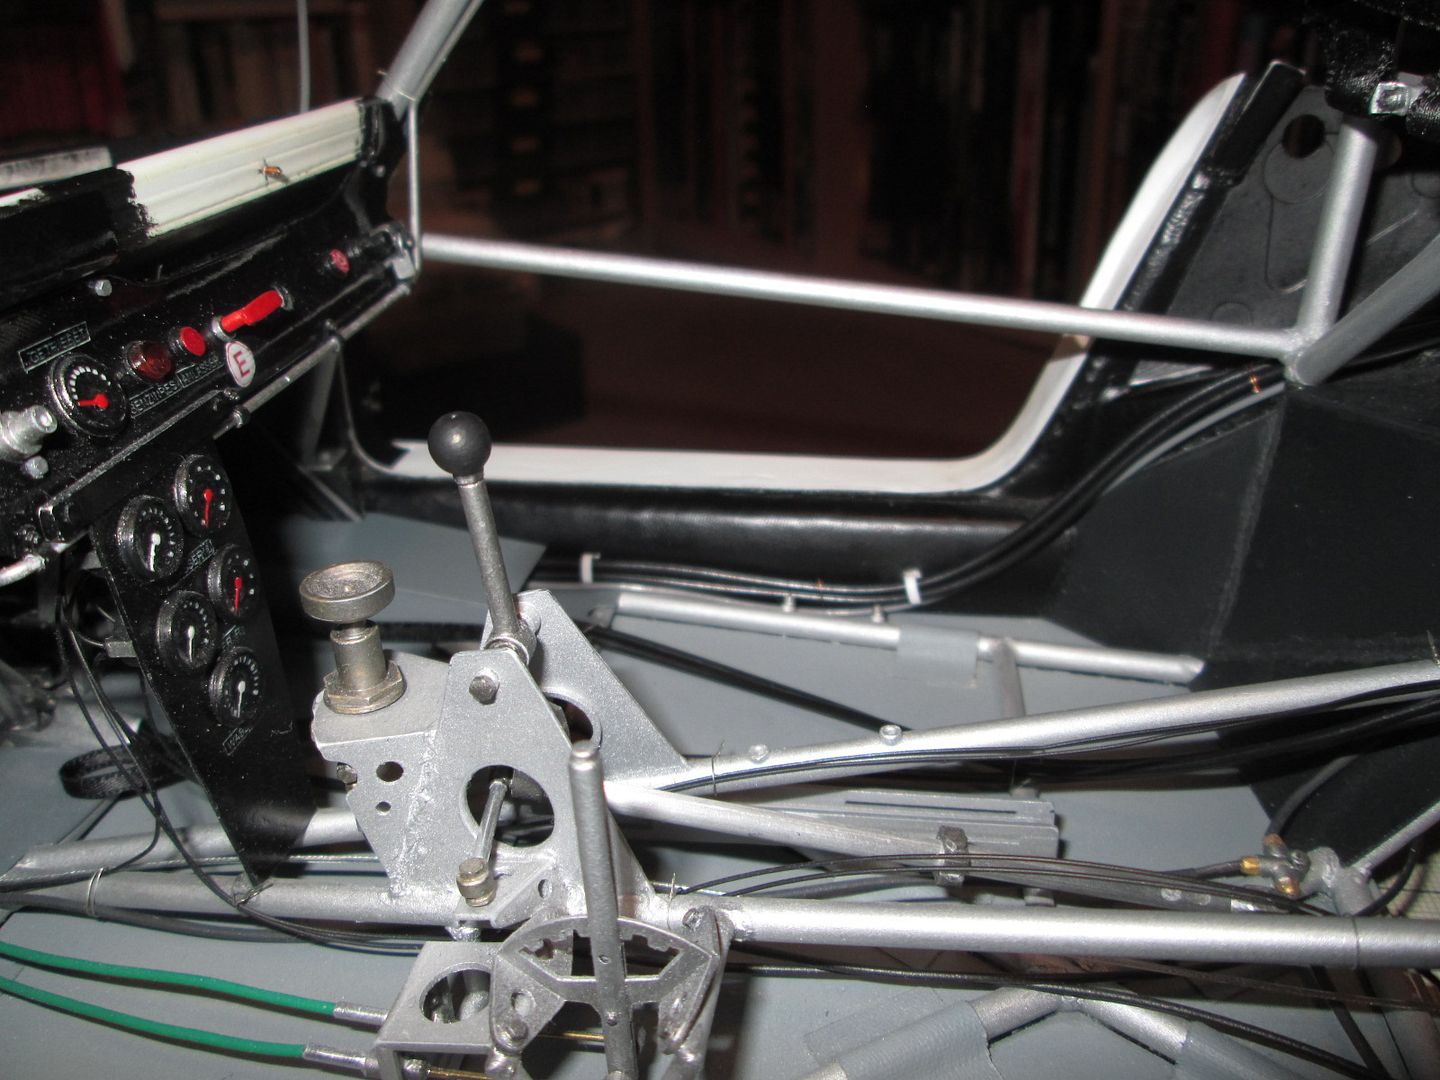 I'm sure I'll find a few more wires to add here and there, but these can be tucked in and around the main ones already fitted. On both sides the chassis tubes running across the doorways have been touched-up with paint - you could see in a couple of photos in the last update (and others) that there was a lot of wear and tear. Not surprising, given the problems of accessing the cockpit! It's pretty much ready to fit the seat now, but I'll hold off on that job for a little while in case I think of something else to do in there! Once the seat is in I'll fix the lap-straps, then add the instrument pod and column surround - all easy enough to do. As mentioned last time, here's the left-hand front air-jack fitted, plus pipework, and the door-hinges: 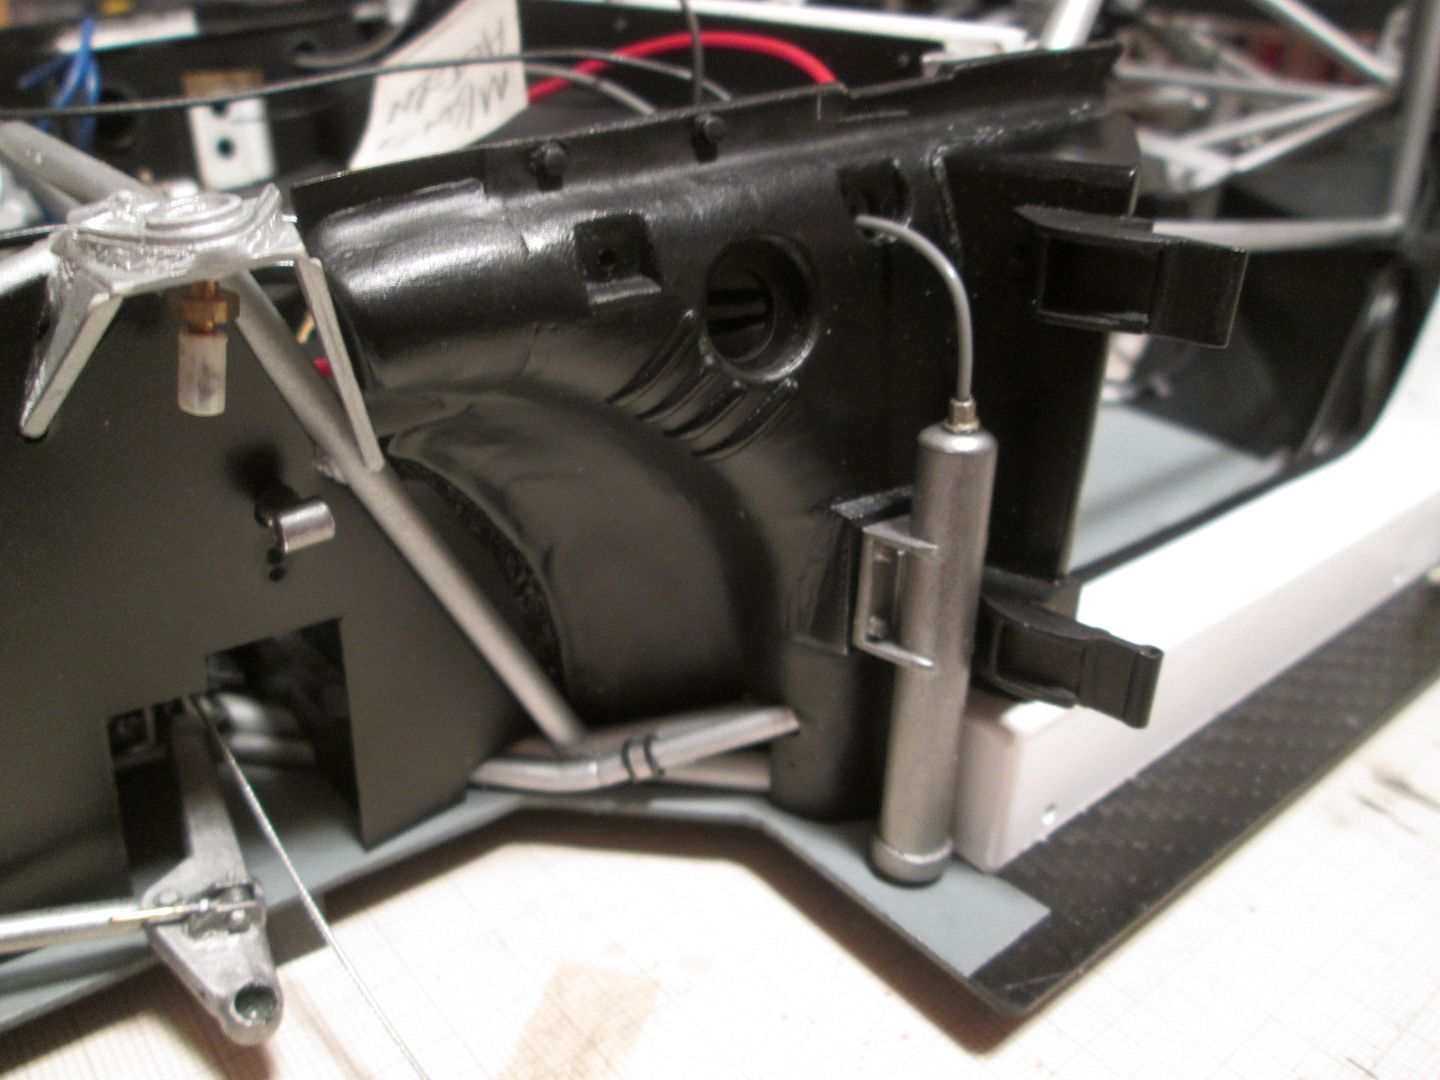 I'm now back in the nose of the car - after spending a bit of time checking the assembly sequence (yes, the steering rack bar and trackrods can be fitted later) I added the battery / fuel pump unit (with wiring), and the main part of the fuel tank: 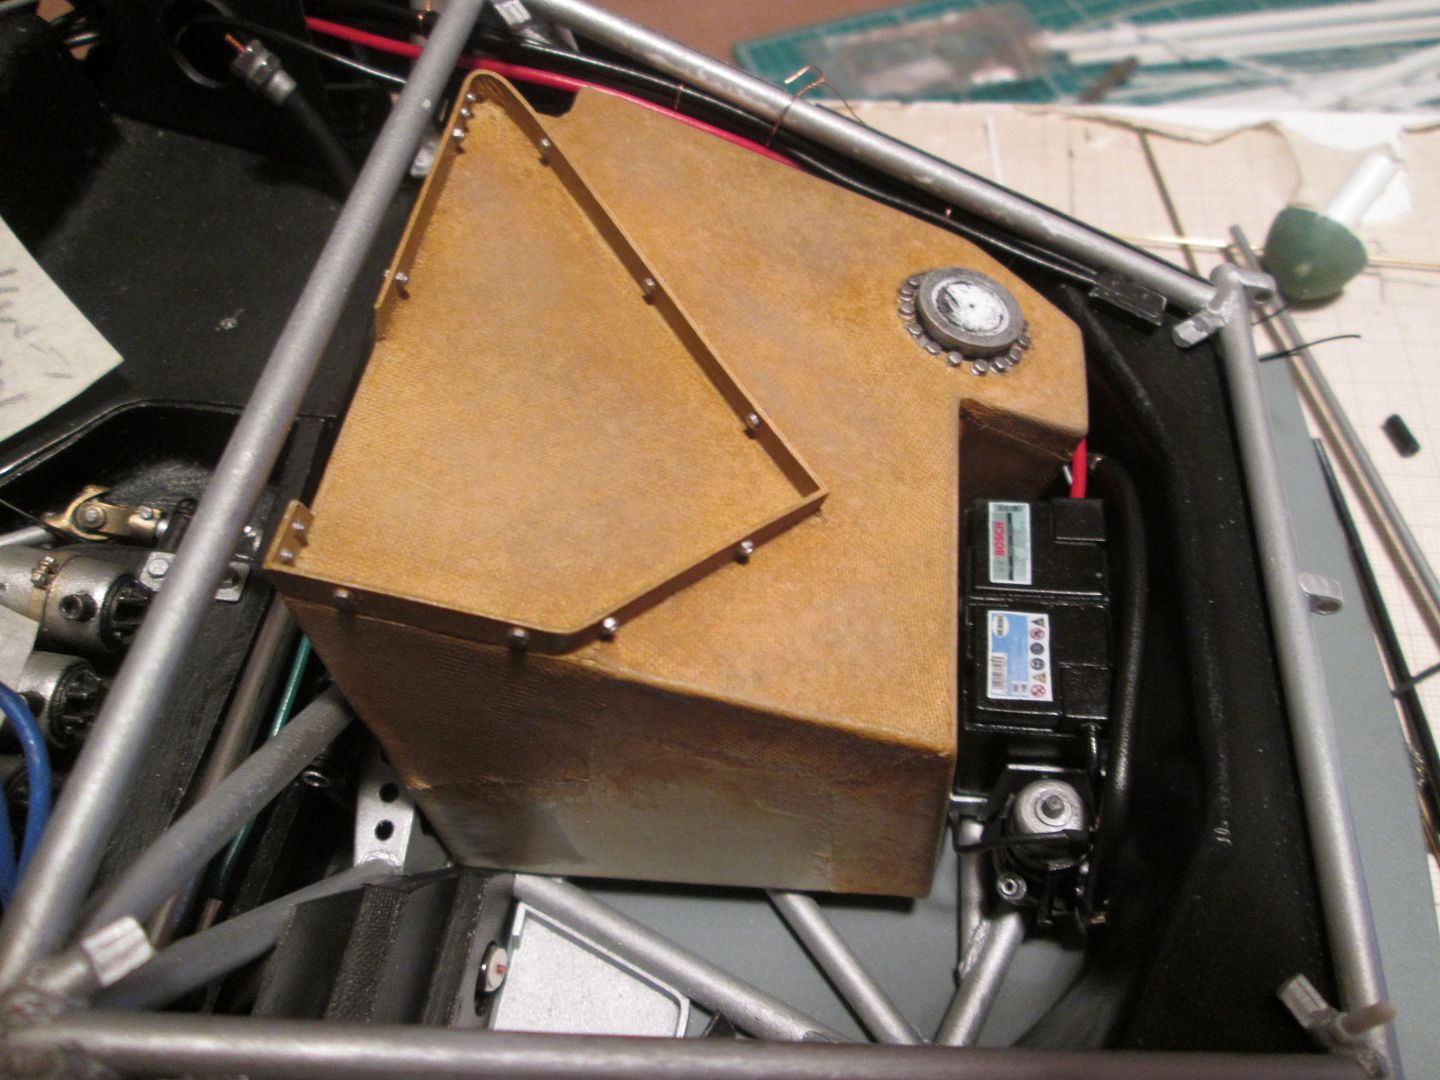 The fuel-pipe from the tank to the pump is in, and the battery has been wired-up. A bit of test-fitting proved that the upper section of the fuel tank can still be fitted, and the oil tank and fuel collector tank will squeeze into the side - some of this will happen this week. Then I can work on the upper part of the nose - wash-bottle, catch-tank, more pipework - before adding the top X-frames. It's quite possible that by the end of this month the front end will be looking fairly complete... Have a good week, SB |
|
|
|

|
|
|
#673 | |
|
AF Enthusiast
Join Date: Sep 2011
Location: Redwood City, California
Posts: 651
Thanks: 0
Thanked 39 Times in 39 Posts
|
Re: 1/8 Porsche 935/78 'Moby Dick'
Gawd, this detail work is just driving me mad!
Gorgeous! ianc |
|
|
|

|
|
|
#674 | |
|
Blarg! Wort Wort Wort!
Join Date: Mar 2006
Location: Quezon City
Posts: 2,120
Thanks: 64
Thanked 101 Times in 100 Posts
|
Re: 1/8 Porsche 935/78 'Moby Dick'
Hot dang! always gets more amazing with each update

__________________
olly olly oxen free |
|
|
|

|
|
|
#675 | |
|
AF Enthusiast
Thread starter
Join Date: Nov 2008
Location: Norwich
Posts: 649
Thanks: 21
Thanked 111 Times in 87 Posts
|
Re: 1/8 Porsche 935/78 'Moby Dick'
Well, it's not the end of the month, but the front end of the 935 is certainly looking different! Only a few photos tonight, but they are proof that I've been busy...
 Everything you can see in the front of the chassis has now been fitted and fixed in place, including the two X-frames over the top. It hasn't been a five-minute job - at every stage I've been checking and re-checking that everything will go in, test-fitting bits and pieces, and basically trying to avoid any slip-ups. Connecting all the bits of pipe-work hasn't been easy, either. Although I'd cut most of the pieces to a rough length some time ago, I still had to check and adjust everything as I fitted them. A couple of pieces had to be re-made as things were routed slightly differently, but this wasn't a problem as the end-fittings weren't glued-in until the last minute. 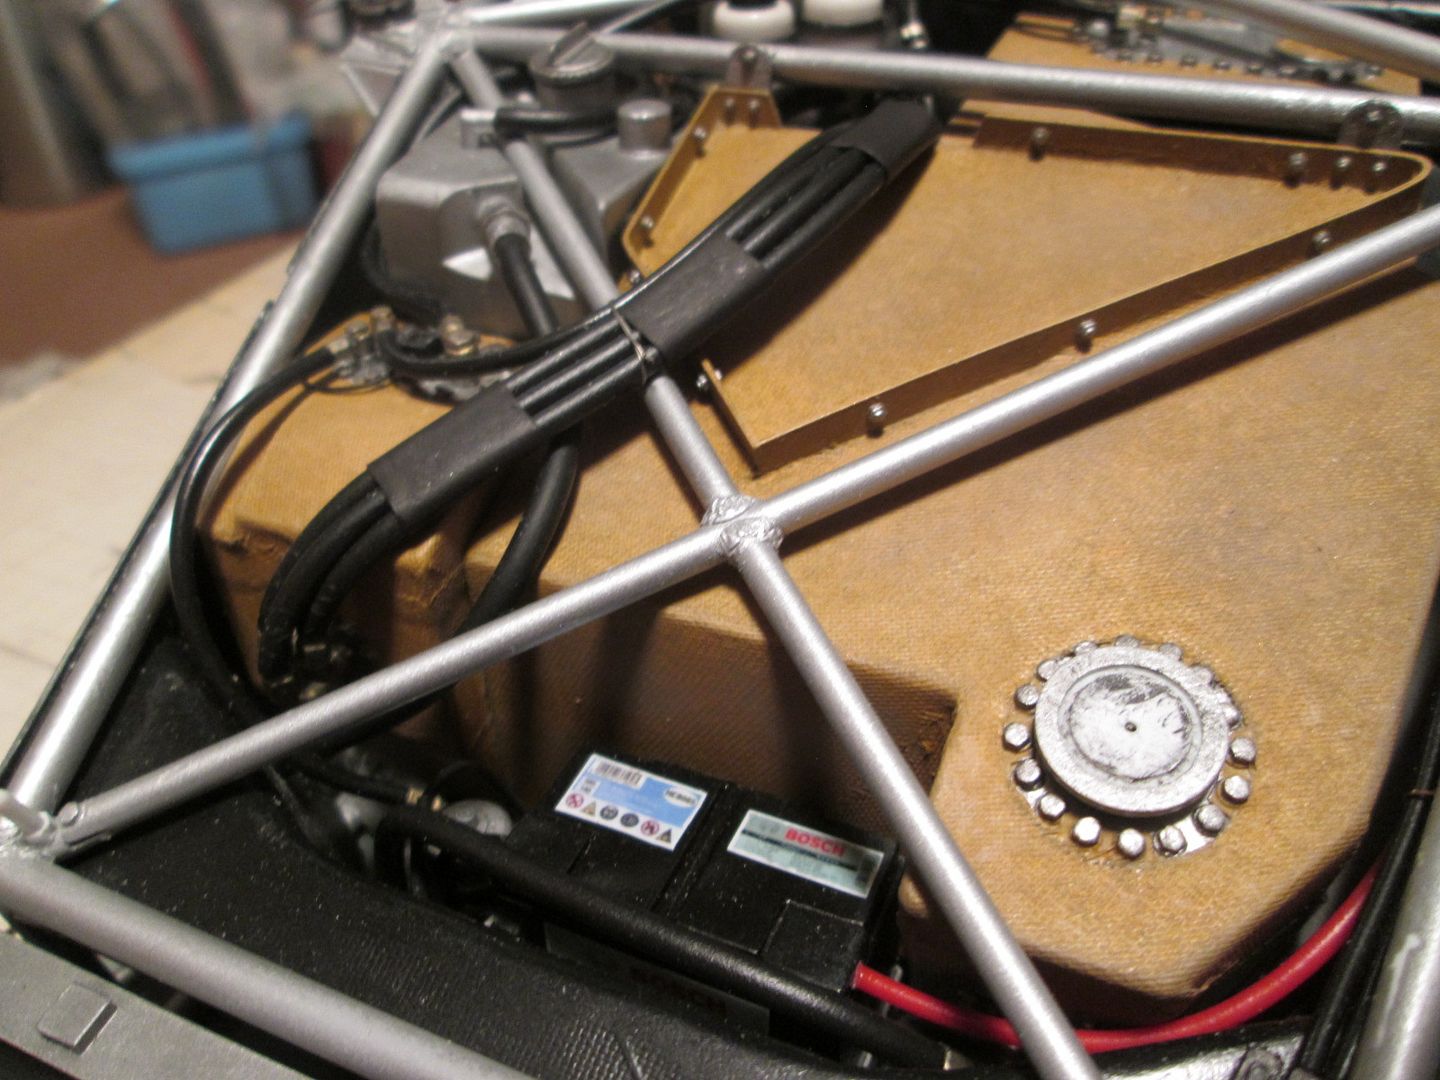 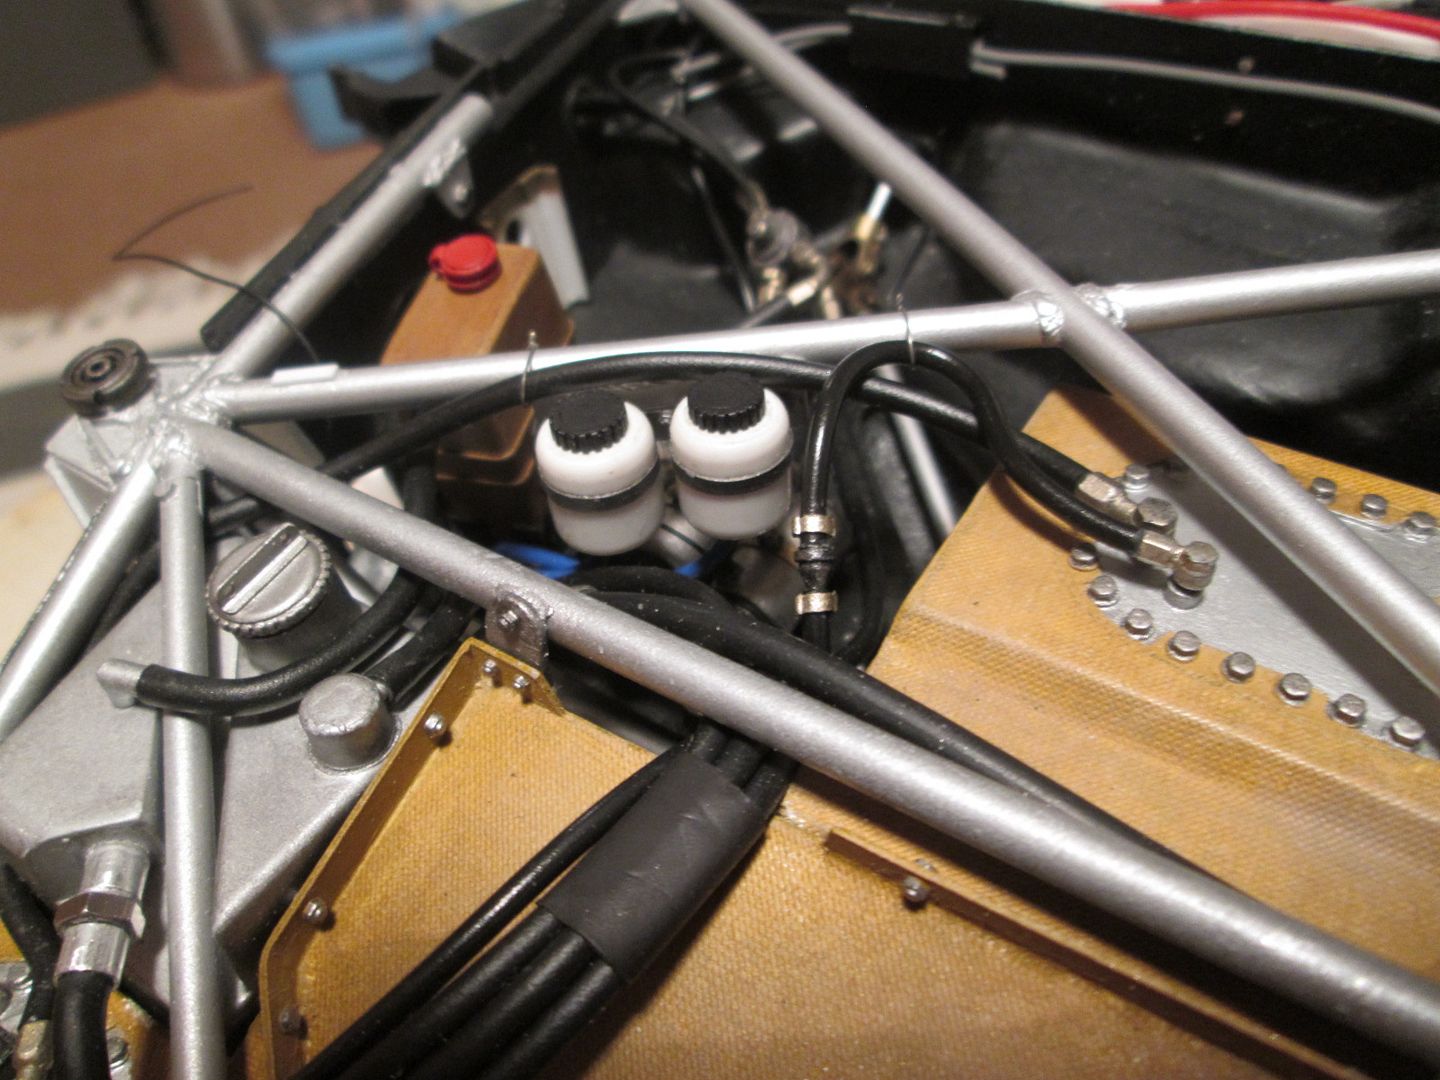 The two brake fluid reservoirs are still un-painted styrene, but were given a coat of gloss varnish to (hopefully) make them a little more realistic. A thin strip of painted styrene was added around the middle to match up with the mounting plate, and they were ready to fit. I haven't fitted the washer bottle and pump yet - I'm still undecided about the finish on this and might still re-do it. There's a few bits of wiring that will be tidied up when the dashboard top is added, too. At the very front, I drilled through the inner duct of the front radiators to pass through the oil pipe to the tank - this will be connected when the main exit ducts are fitted later on. What else? The seat has been attached to the mounting frame but has not been installed in the cockpit. I was going to do this during the last week (as it would then allow me to fit the steering column, indicator pod, dashboard top, etc) but decided against it until I've got the engine and gearbox fitted. It would make it difficult if I need to add more wiring into the cockpit, and it will certainly be easier to fit the gearbox, shift linkage, etc without the seat getting in the way! I'll have to be careful, though - getting the seat into the cockpit will be a challenge once the roof is on... 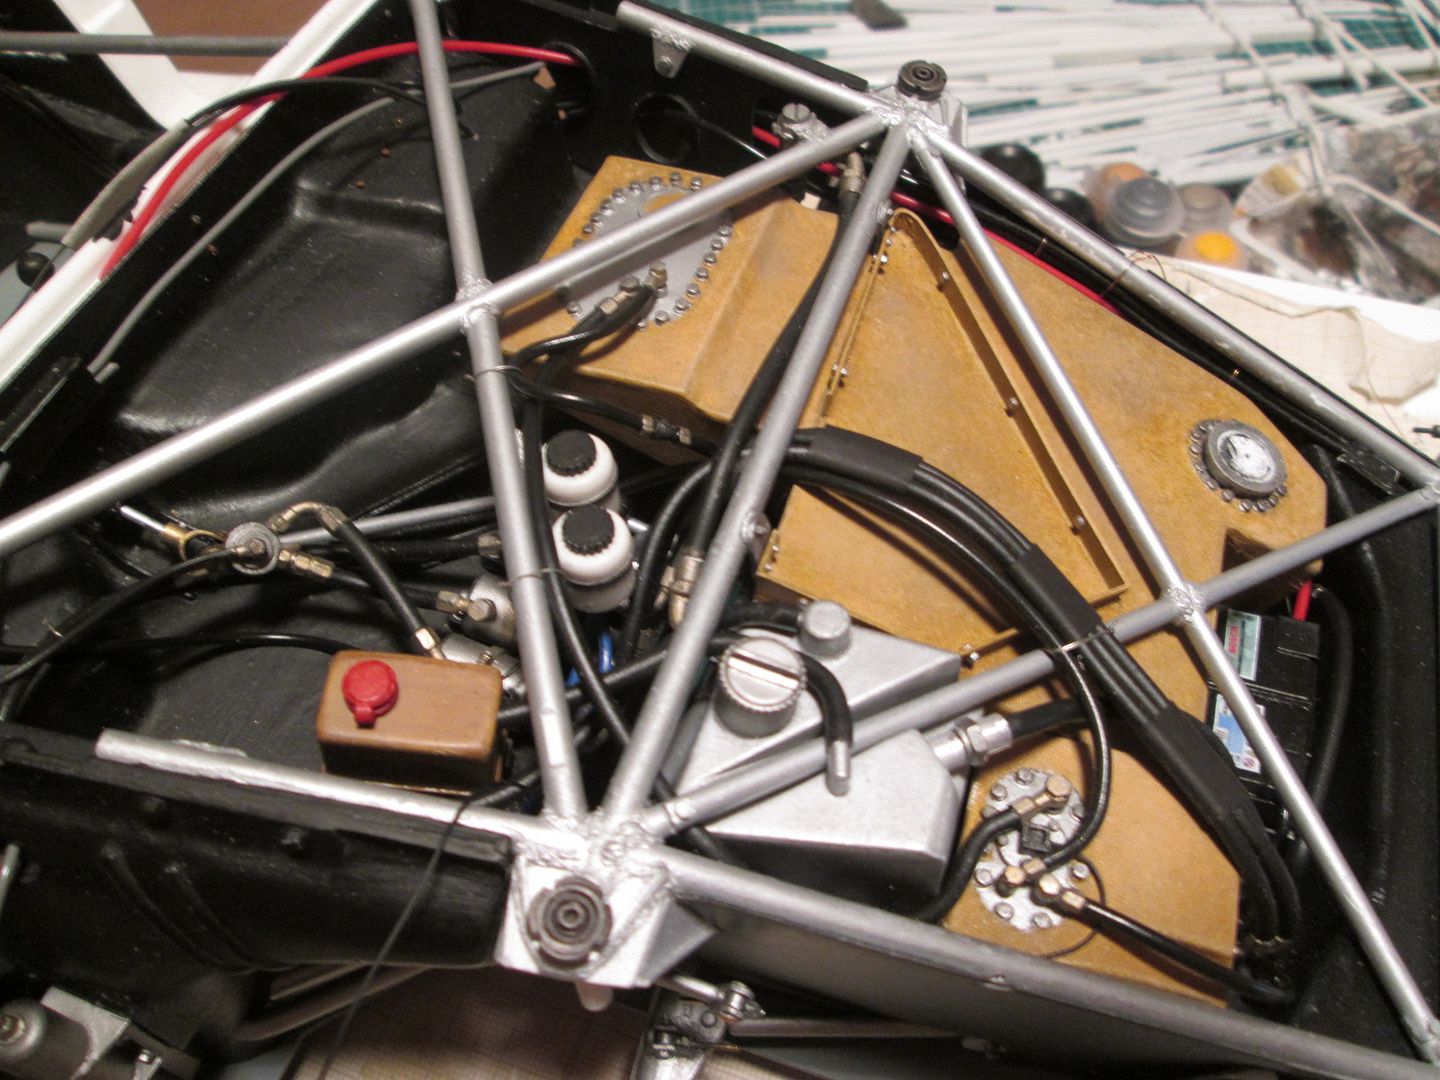 A couple of other things before I finish. The two blades have been attached at each end of the front anti-roll bar, and are ready to be connected to the lower wishbones once the ride-height is fixed. On the top of each front strut tower you can see a round boss - these will be glued once the suspension has been assembled. I've done some more painting on the struts and spring platforms in preparation for this, and will be revisiting the brake discs, etc, too. I need to make some fittings to attach the brake lines to the calipers - and the calipers themselves need to be painted soon, or I won't be getting far with assembling the suspension! That's it for tonight - more in a week or two. As always, thanks to everyone who's still bothering to see what I've been up to - even after six years! You know, I have a feeling this project might actually work out... All the best, SB |
|
|
|

|
| ||||||||||||||||||||||||||||||||||||||
 |
POST REPLY TO THIS THREAD |
 |
|
|