

|
| Search | Car Forums | Gallery | Articles | Helper | AF 350Z | IgorSushko.com | Corporate |
|
| Latest | 0 Rplys |
|
|||||||
| WIP - Motorbikes Post topics for any "Works In Progress" motobikes projects in this sub-forum. |
 |
 Show Printable Version | Show Printable Version |  Email this Page | Email this Page |  Subscribe to this Thread
|
|
|
Thread Tools |
|
|
#1 | |
|
AF Enthusiast
Join Date: Mar 2003
Location: Zephyrhills, Florida
Posts: 981
Thanks: 4
Thanked 5 Times in 5 Posts
|
Colin Edward's 50th Yamaha M1 in detail
Hopefully I can learn something from the amazing MotoGP builders on here with my first Top Studio detailed M1!!
I started with the swingarm first. I glued the halves together and added weld seams with beads of Tamiya liquid putty applied by thin brush. You can also see I carved out the kit ends in preparation for the photo etch pieces supplied in the TS set. 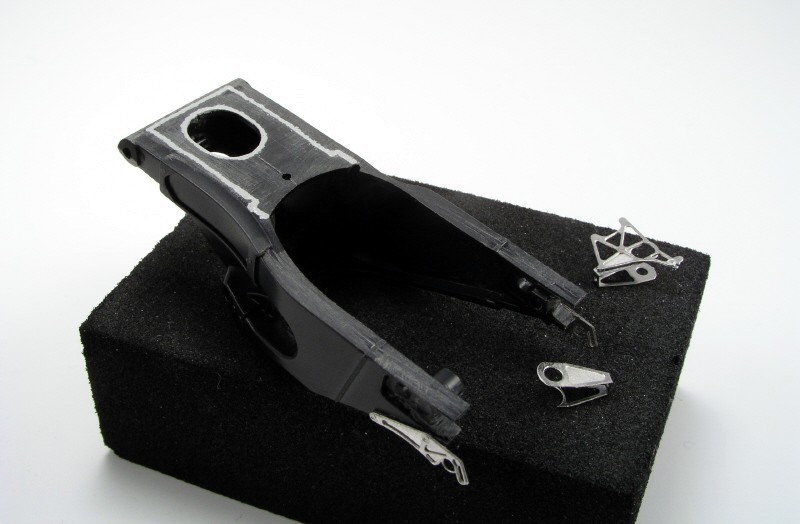 To make room for the resin TS heads up diplay and 2D boxes I had to hack off the kit plastic. I cleaned up the frame and got it ready for primer and paint. 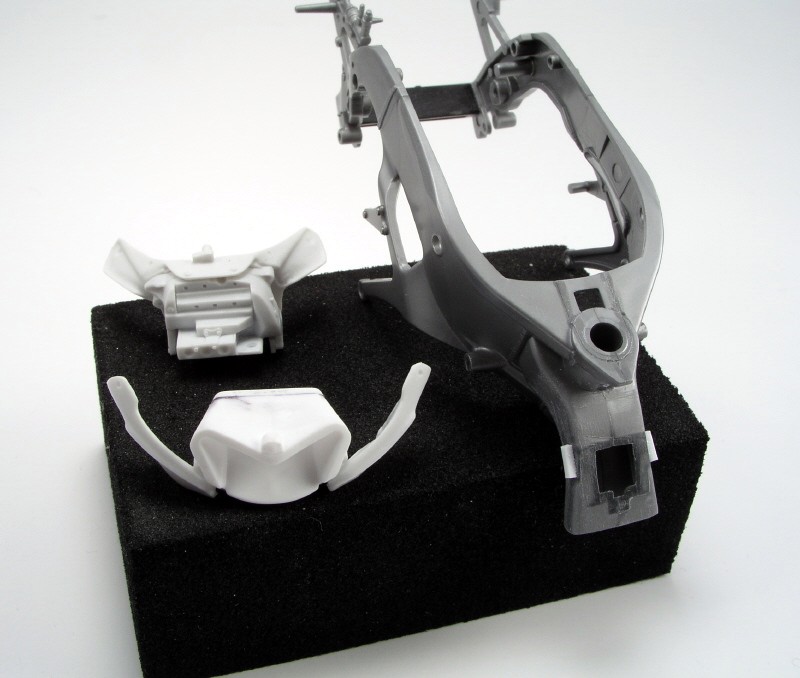 The front nose had the CF symmetrical intakes removed since they are not truly attatched to the front upper cowling. The center intake had a MM of plastic added to make it stick out more appropriately. 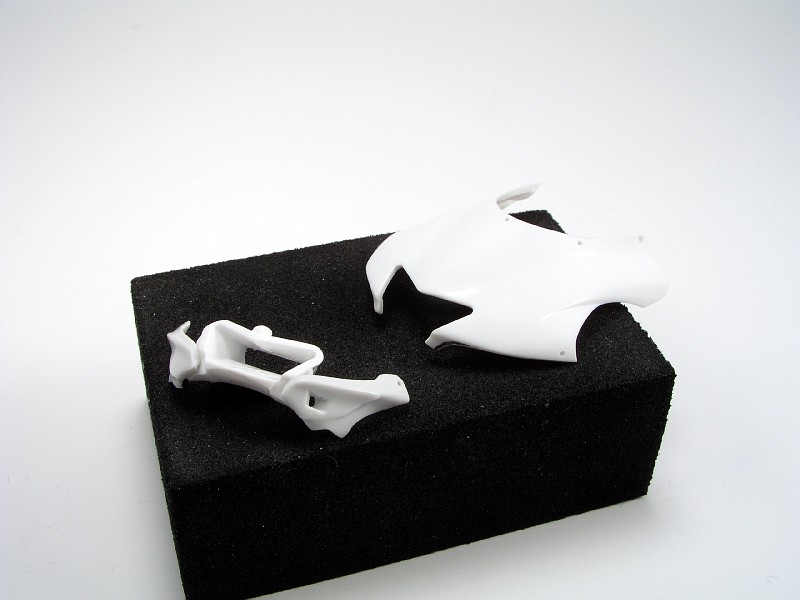 The swing arm is now in TS-29 semigloss paint and all Photoetch parts added to the rear tail ends from the TS set. 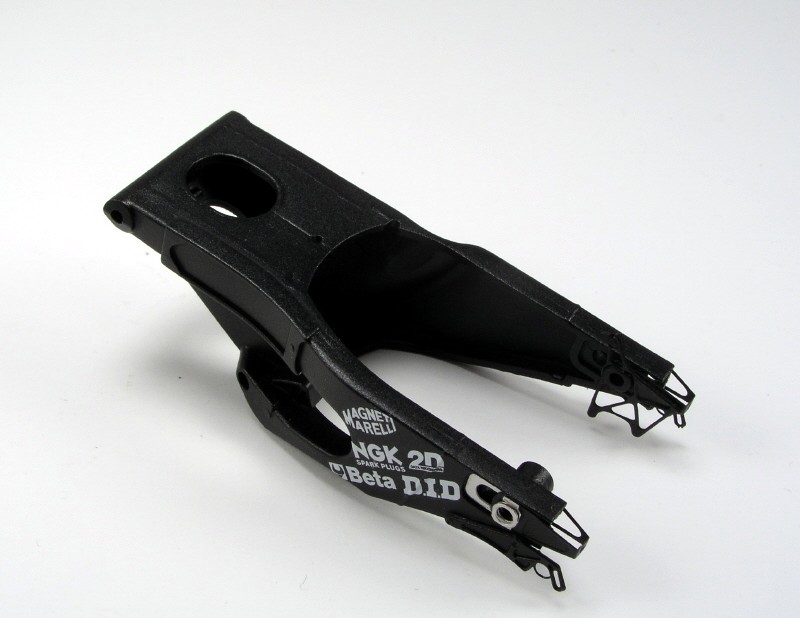 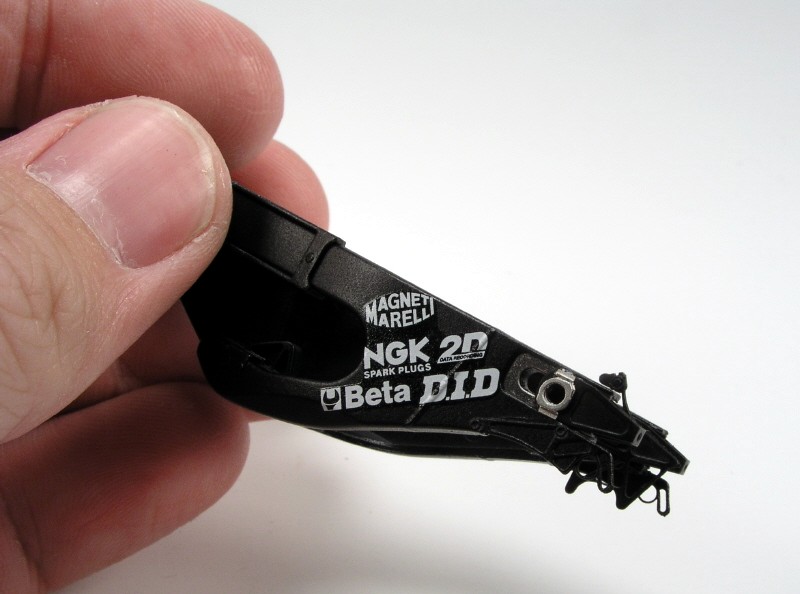 The frame was painted the same as the swingarm. I used KA models small CF decal for the front intake snout and Rennaissance for the foot plate. The swingarm nut surround and nameplate is PE pieces from the TS set. 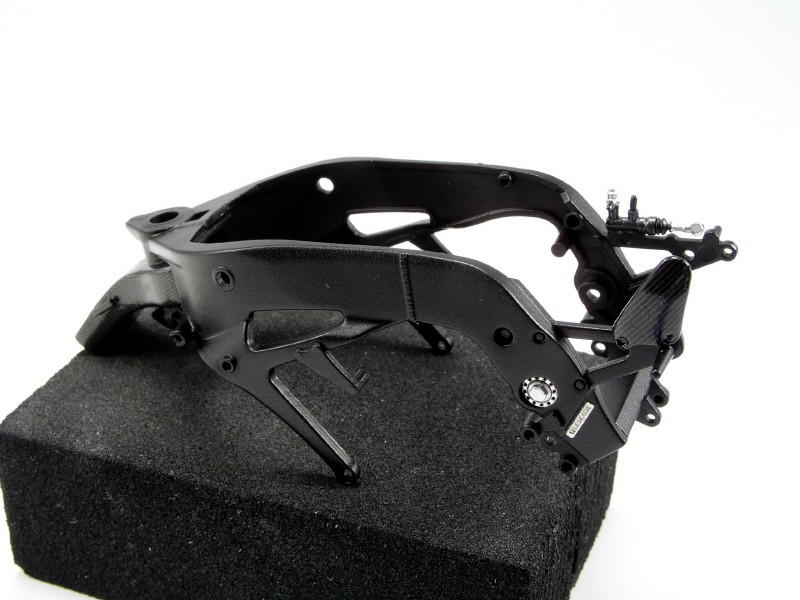 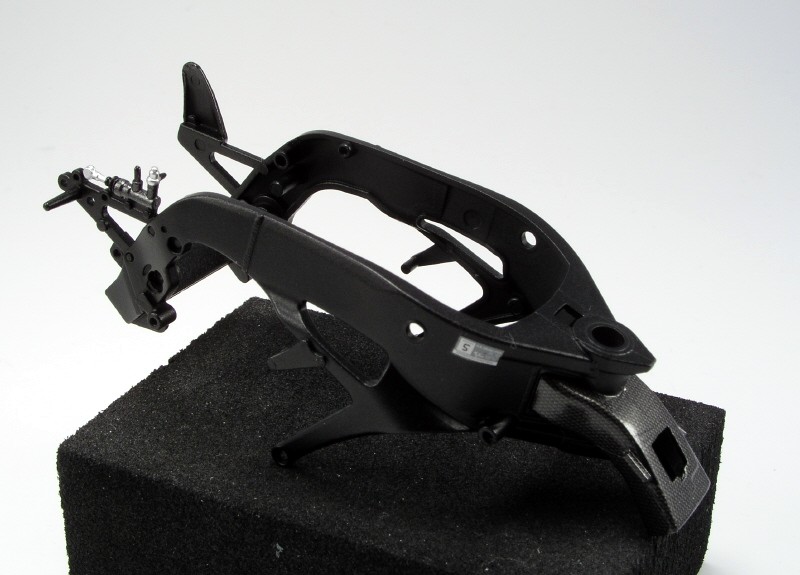 I made some modifications to the front handlebar unit. The throttle cables have 90 degree hardline coming out the top. I used #2 hardline and nuts for this purpose. I also added the resin bracket on the left bar from the TS kit. 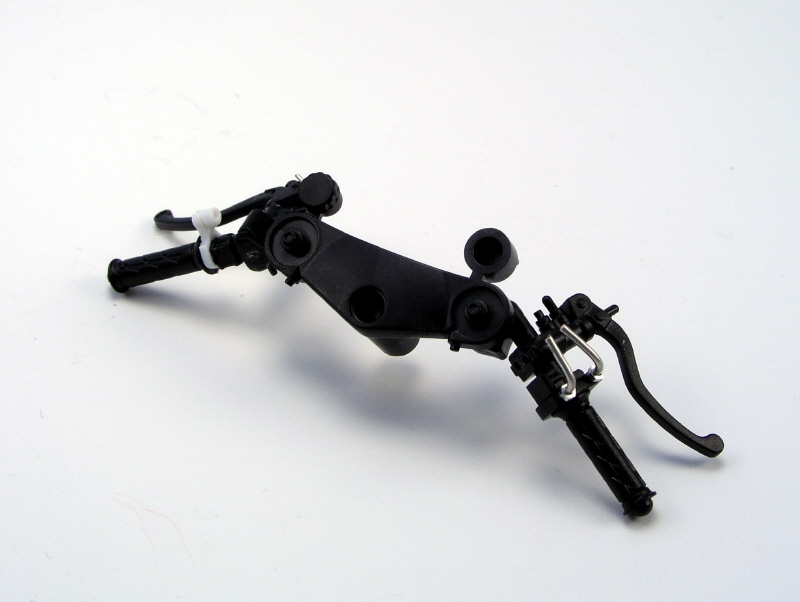 This is the completed front handlebar assembly. I made a new brake fluid resovoir from round solid rod, added the kit cap and layered it in electrical tape. Then I coated it in white glue and dipped it in embossing powder. To keep the powder in place I cleared the entire unit with gloss coat. The entire unit was painted again, with TS-29 black. The handlebar assemblies were painted with a mixture of gold and silver. I added some RB motion bolts that hold the bars in place on the 1:1 bike. Finally the brass fork caps were glued in place and topped off with PE caps from a KA crazy modeler M1 PE set. 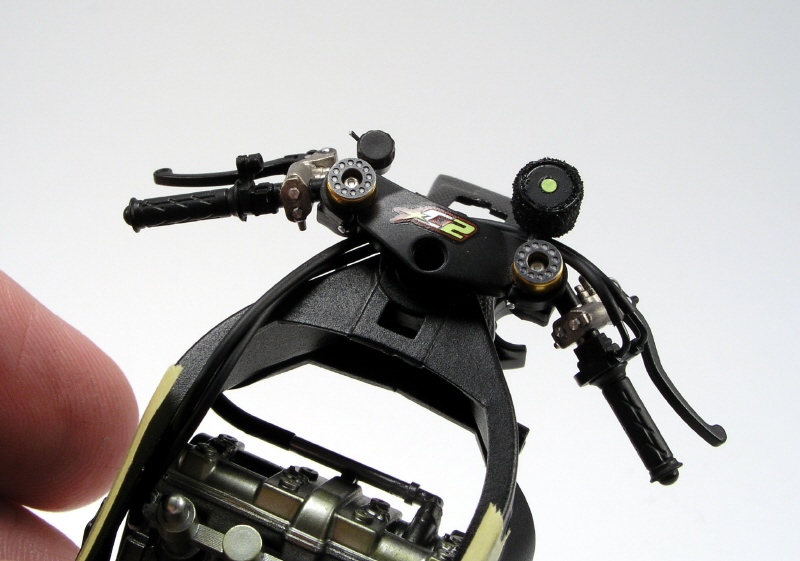 I also progressed on the engine! The block was painted with tamiya TS-14 followed by HOK Chrome. Then I carefully painted the metallic grey and flat aluminum heads with tamiya acrylics. I will let the pics speak for themselves on the rest of the detail painting that was done. 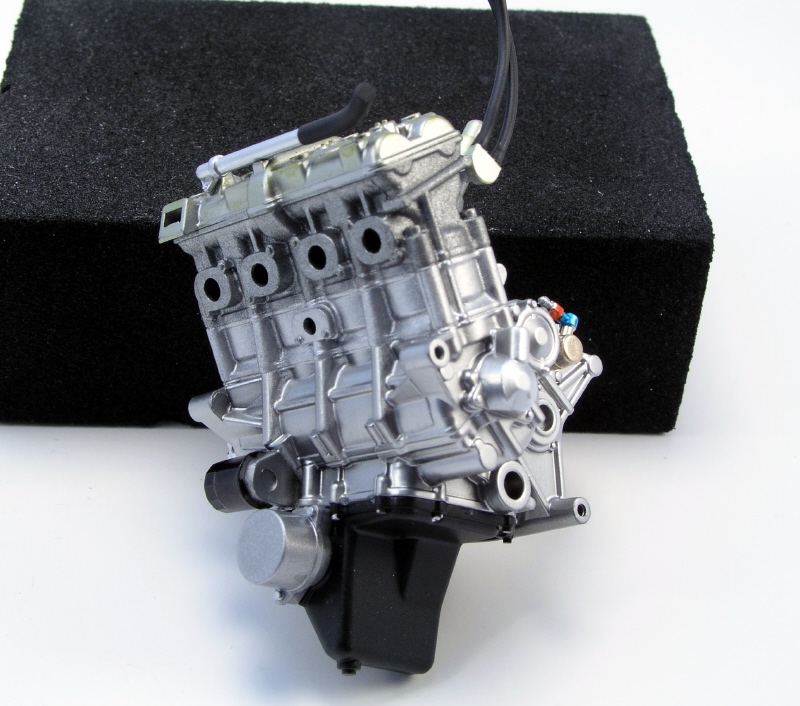 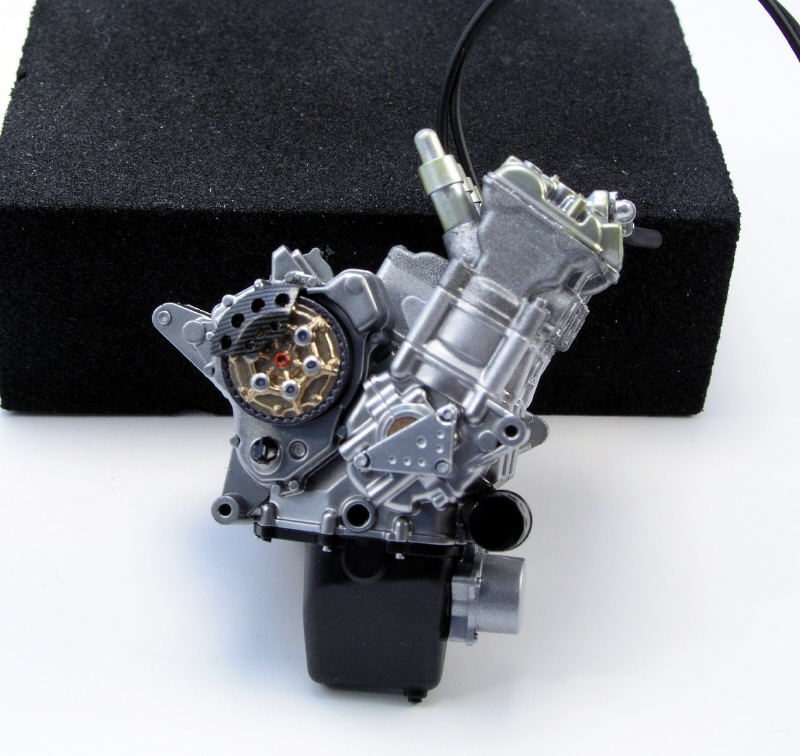 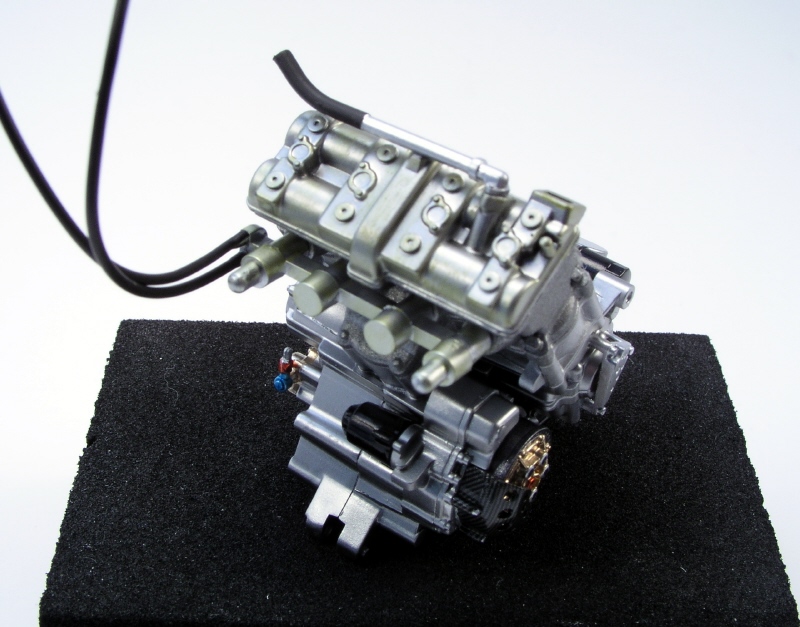 Once the engine was complete it was time to add it to the frame. Even though this one will be really detailed its nice to know the sub assemblies still go quick so it feels like you accomplished something! 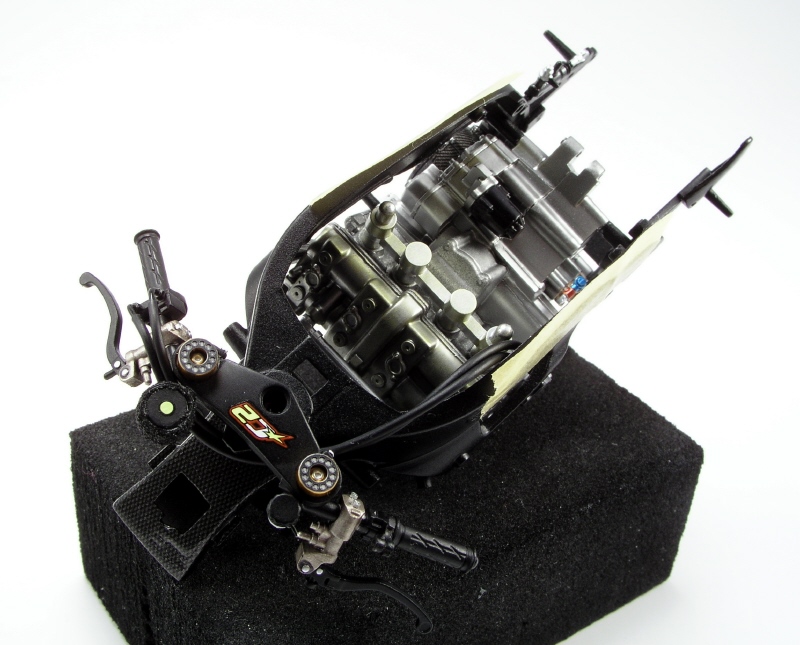 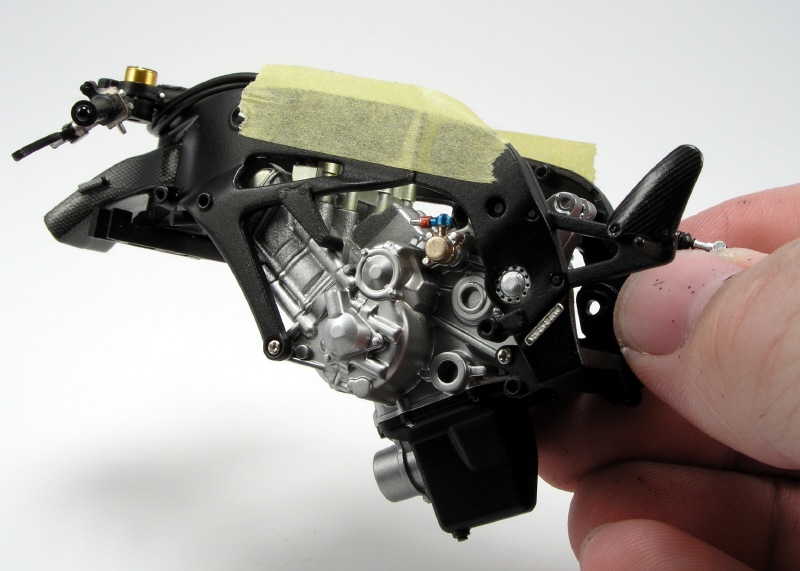 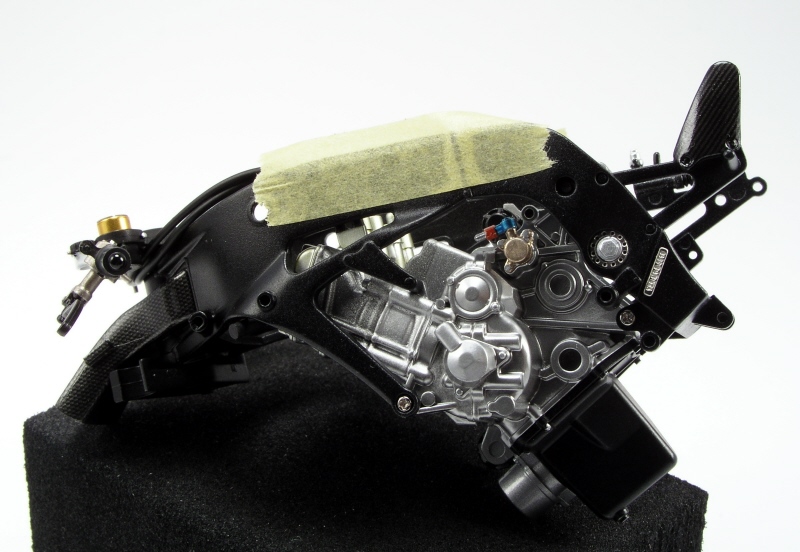 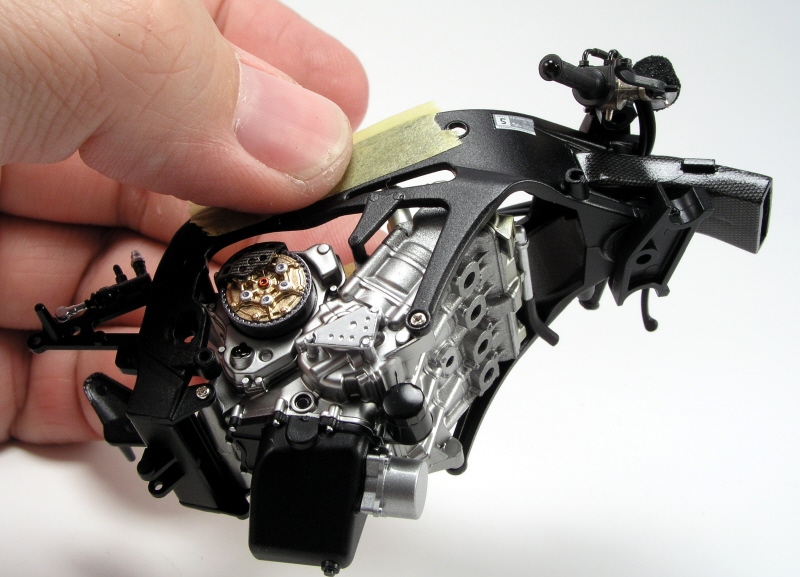 here is the start of the "gooey" stuff.... I detailed out the instrument cluster after it got CF decals and 2 part clear and plumbed it all based off of the TS wiring diagrams..... not bad for the first try on one of these very detailed kits.... 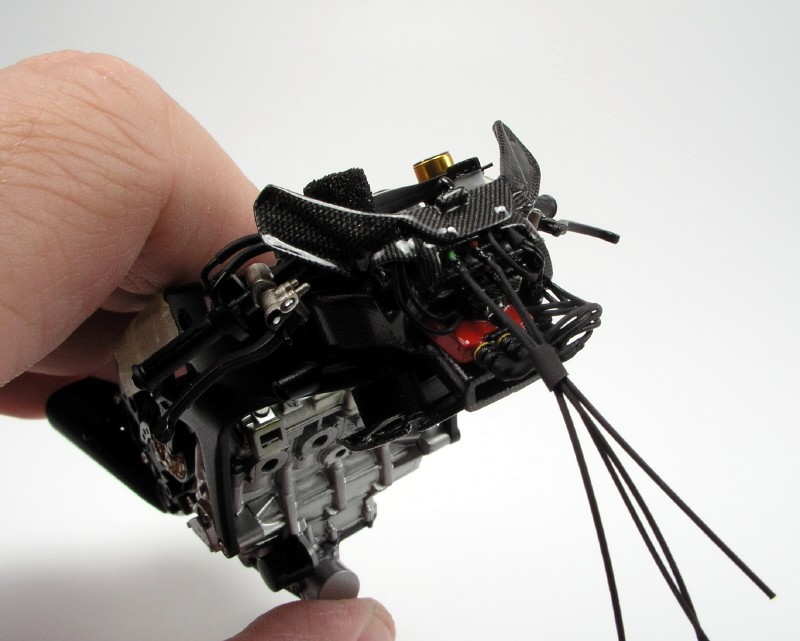 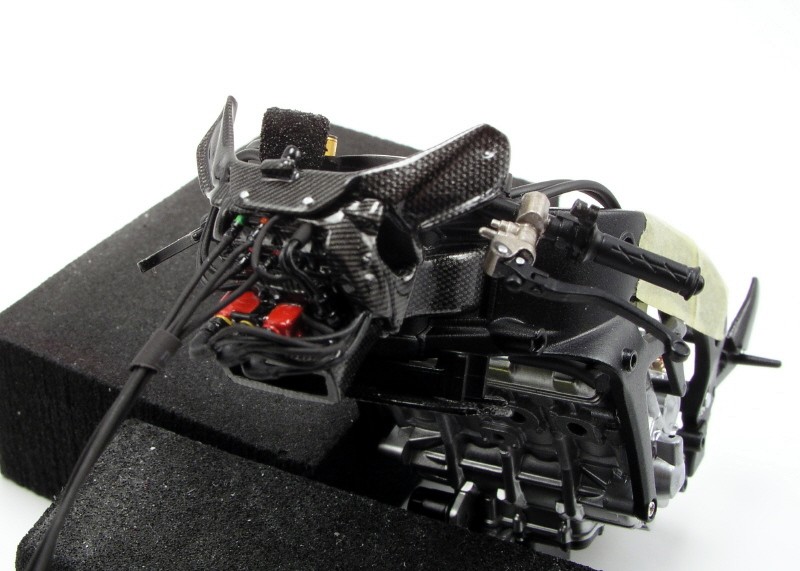 This is about 2 days worth of CF decaling and clear......SMS 1/20 twill weave was the CF of choice here. Airbox, and electronic boxes and plates.... 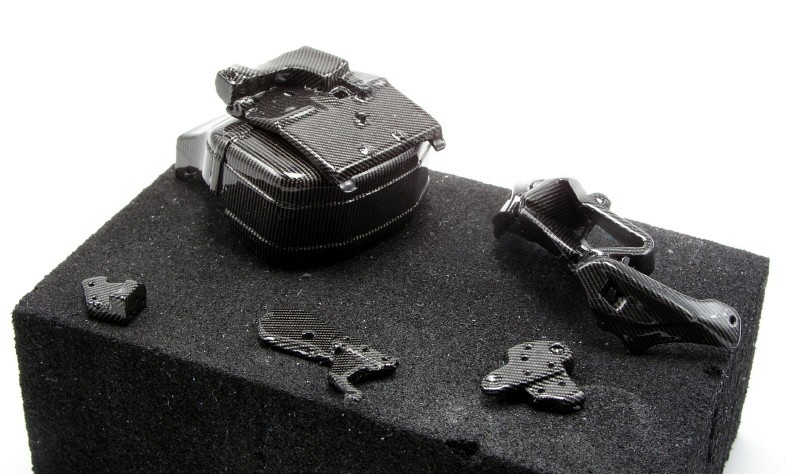 The rear fender was covered in renaissance dark twill CF and 2 part clear. 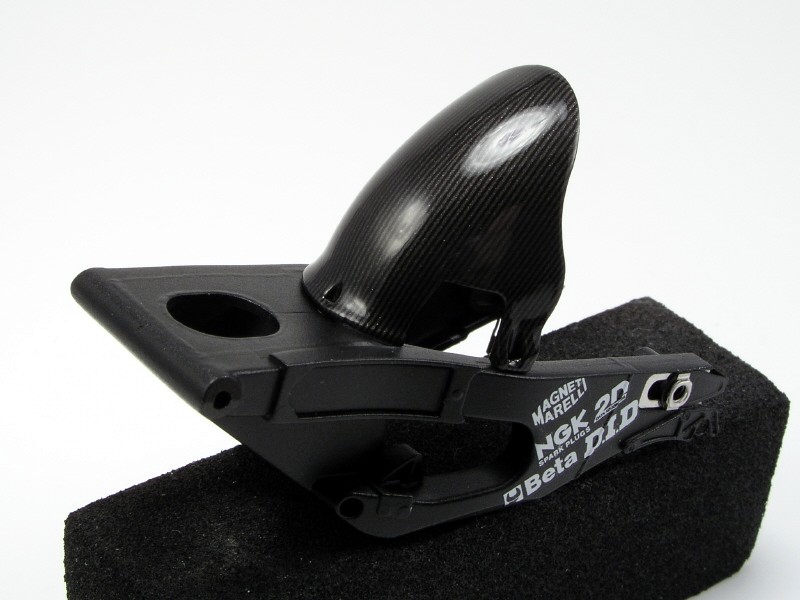 I think the coolest detail on these bikes is the cluster plate on top of the airbox full of managment components that TS gives you. Talk about intricate detail!!! Now its only tacked on there right now because I got other things to do before I strap it down permanantly. Its starting to get busy looking. I also slipped the swingarm on... The thing looks like a hunched up roach or something!! LOL! 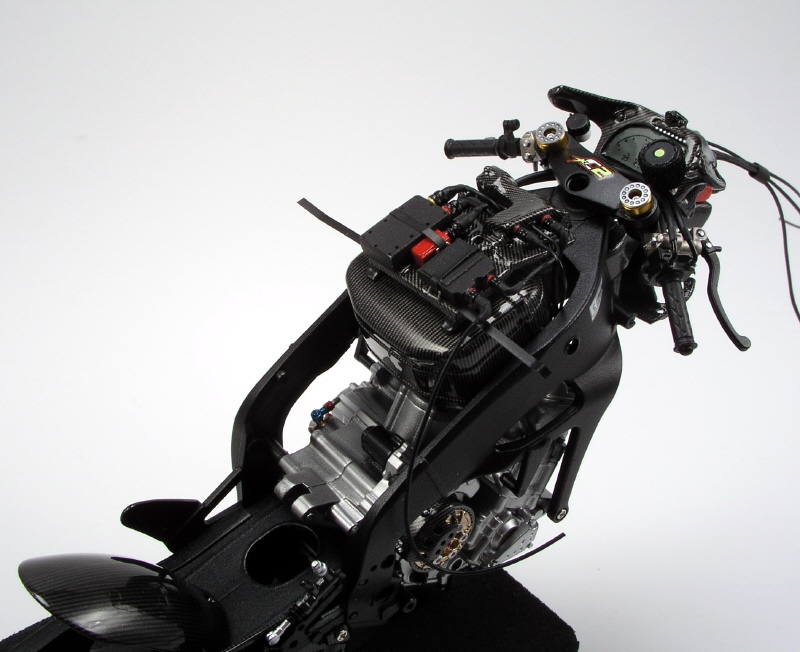 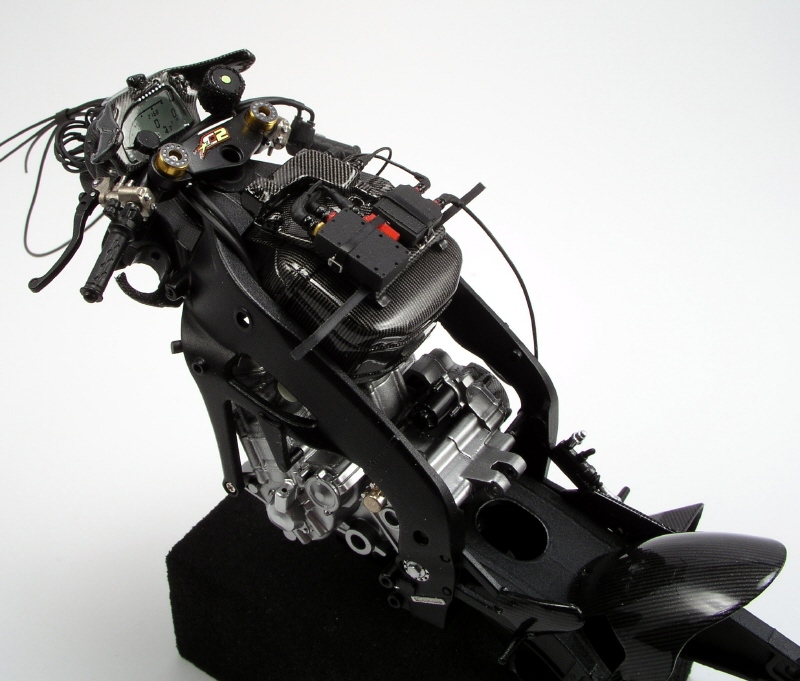 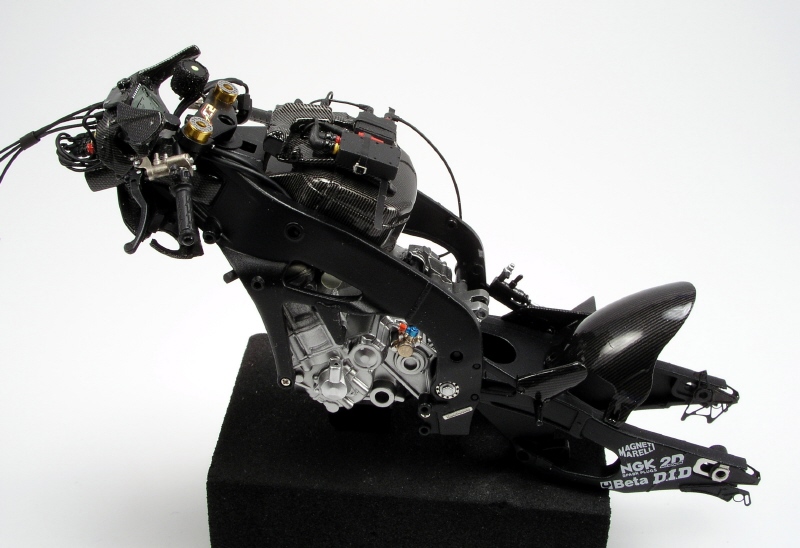 I also finished the wheels and tires tonight. That is a TS supplied PE rear rotor on the back wheel.. one of the most realistic I have ever seen. 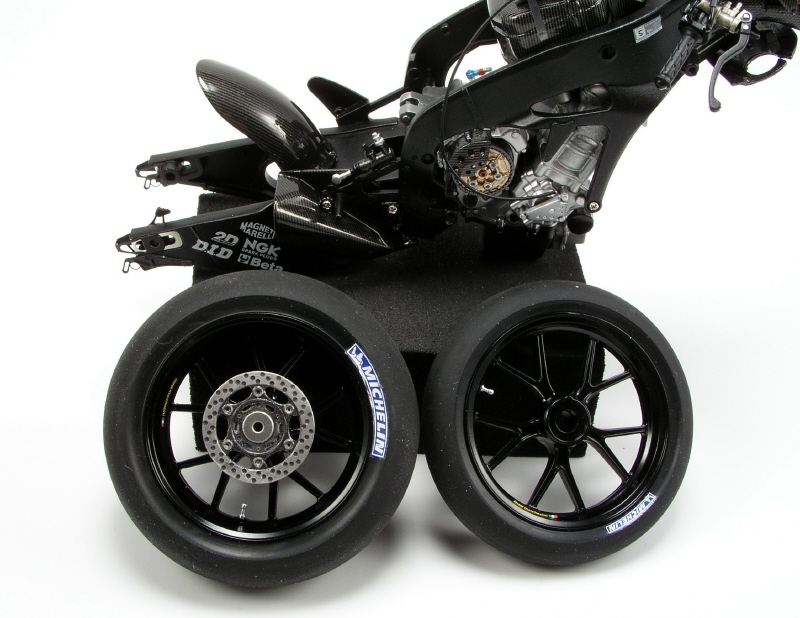 I detailed out the radiator and added PE hose clamps to it. The front recieved a black wash and chrome tape strips. I temporarily installed it to see how well it fits. 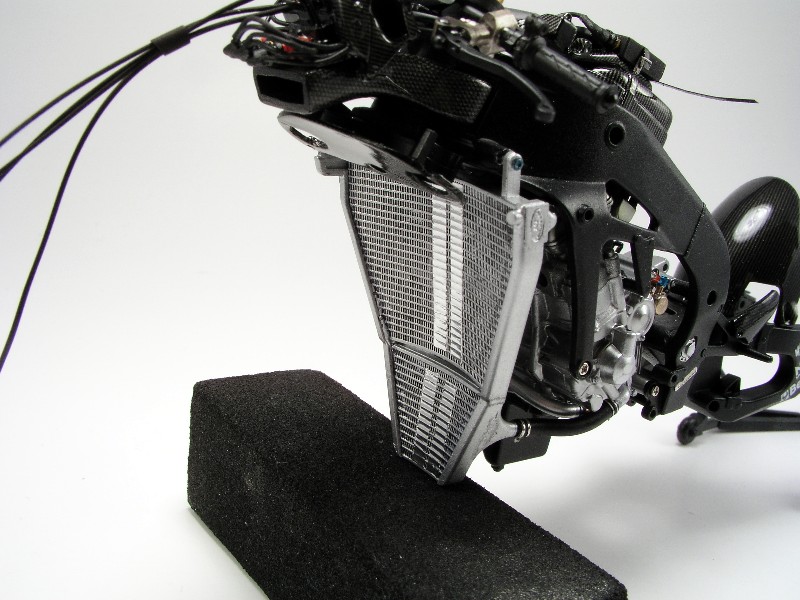 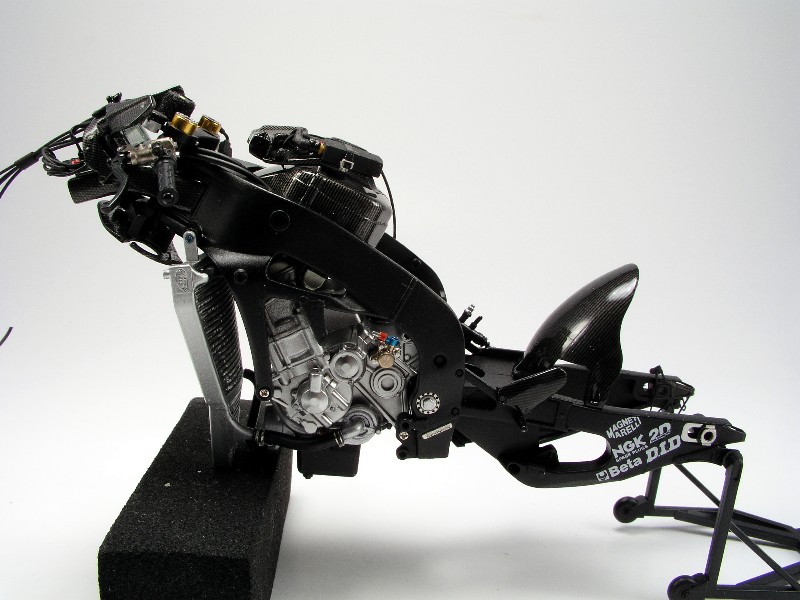 I also tackled another biggie; the exhaust...... First I cleaned up the parts and glued them together eliminating seams, etc.... then I drilled out the stock locations for the sensors and added the top studio resin pieces. Next I test fit the exhaust several times as I glued photo etch tabs for the exhaust springs. I also cut off the stock exhaust tip to make room for the topstudio piece. 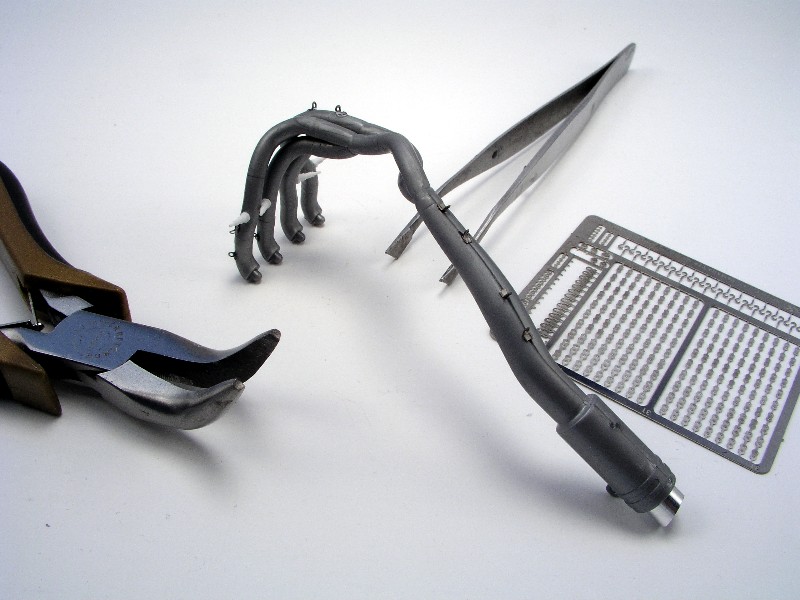 Next I laid down a coat of tamiya ts-14 gloss black as a base for alclad chrome. The results were spectacular! 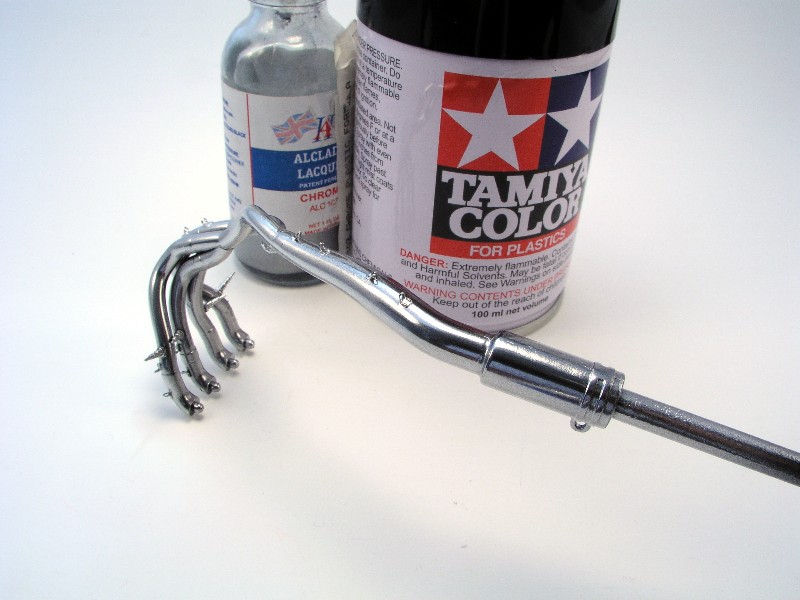 Next up came tamiya tape that took about an hour to do to get the weld seams masked off. Then I shot the exhaust with tamiya clear reds, blues,and orange. 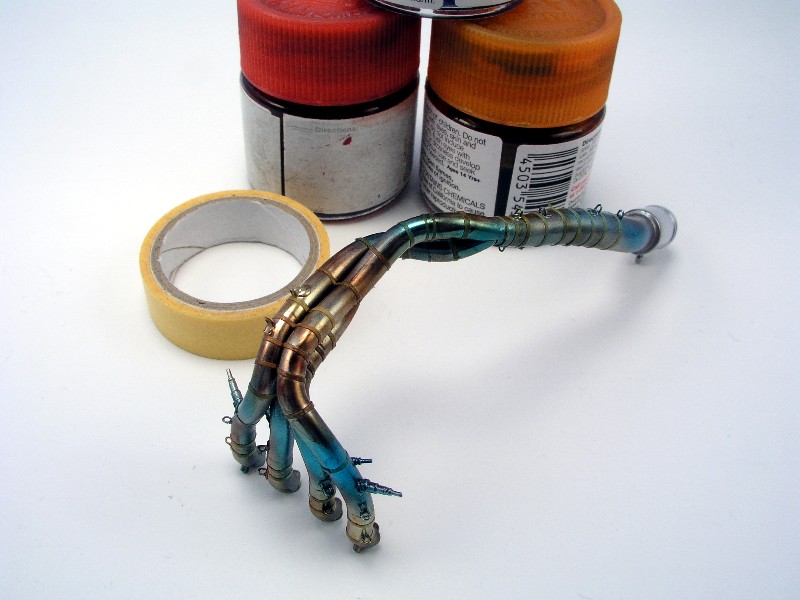 Once the tape was removed I highlighted the seams by brush with tamiya clear orange and blck mixtures, reds, blues, and oranges... Then I made the springs by wrapping fine wire around a drill bit in a vise. 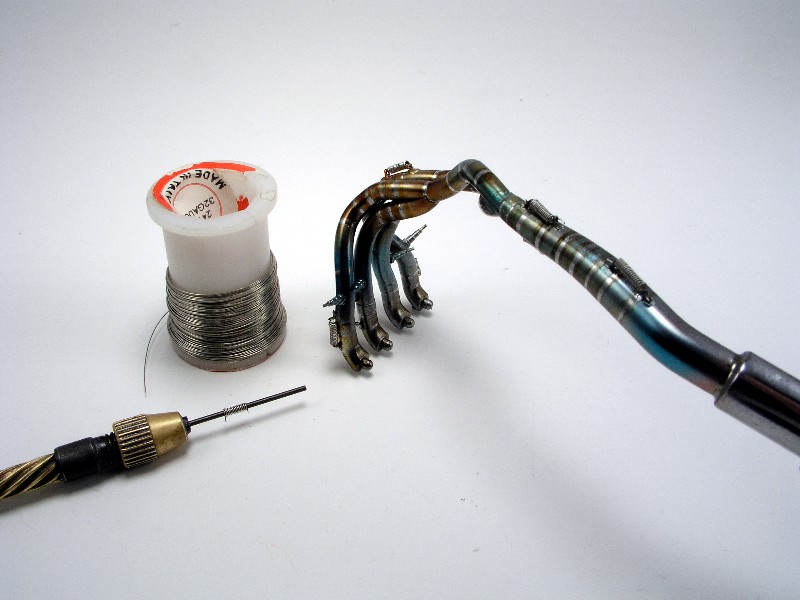 Finally I added the kit cf decal on the canister, wrapped the pe clamp in the kit place, glued the ts aluminum tip in place, and coated it with clear orange and smoke by brush. 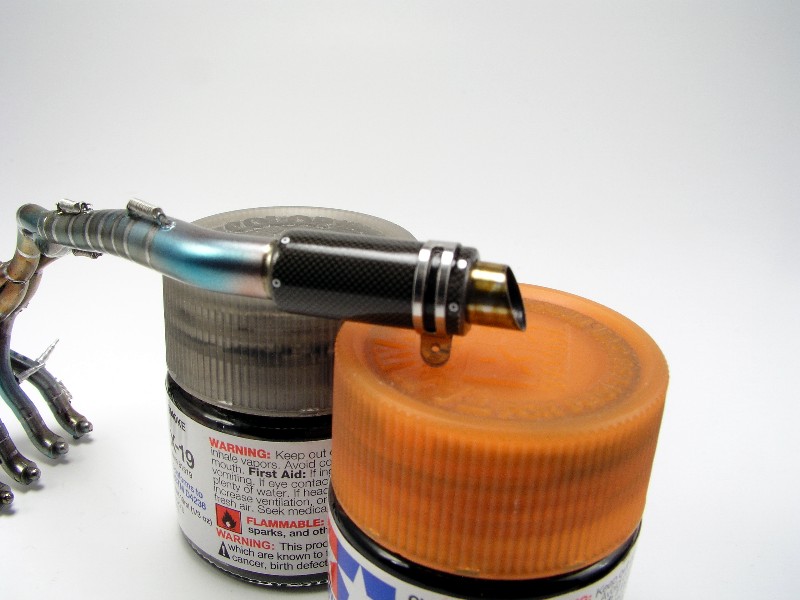 Voila!! the exhaust is complete! 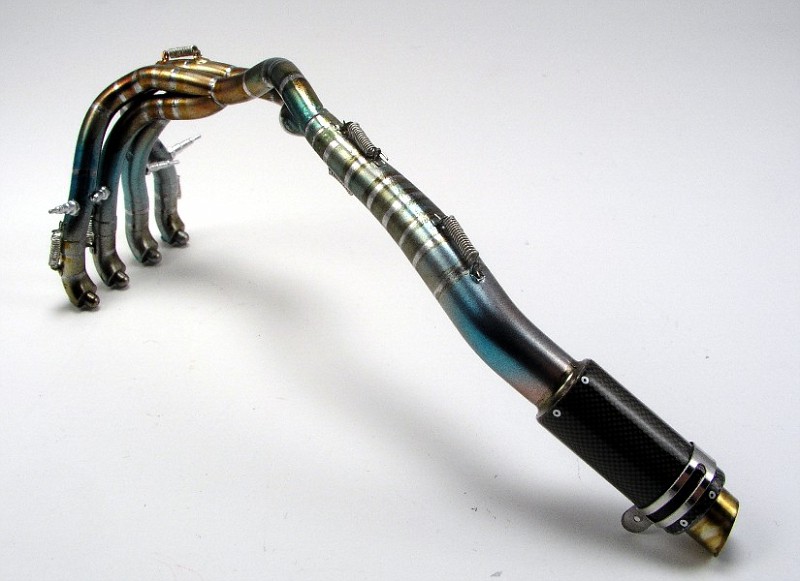 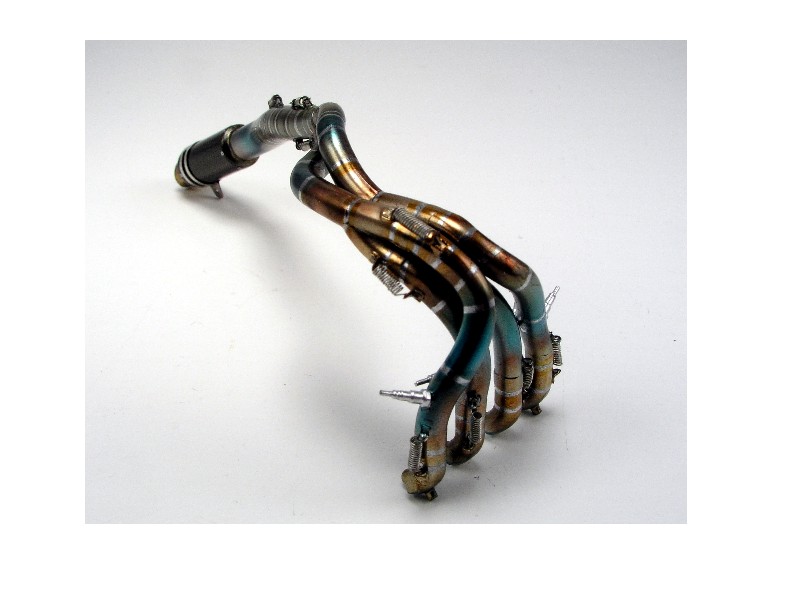 I have to say thetop studio tips on exhaust on their site are extremely helpful... since I am going wheels on this one I decided to build a PE chain from Crazy Modeler... its OK.... I dont think there is any substitute for a real TS chain, but I want to save that one for a wheels off build in the future with the chain laying on the rear swingarm 8) This one despite being PE was not easy... each link had to be glued on the sandwiched two piece sprocket and middle link parts! 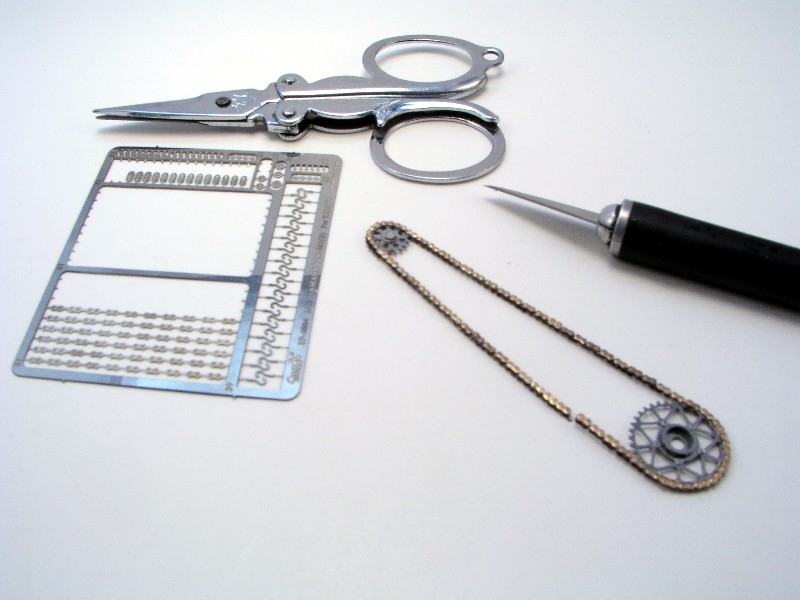 Here is the chain installed with the rear swingarm and wheel installed.....looks the part to me....especially with the nice PE sprocket. 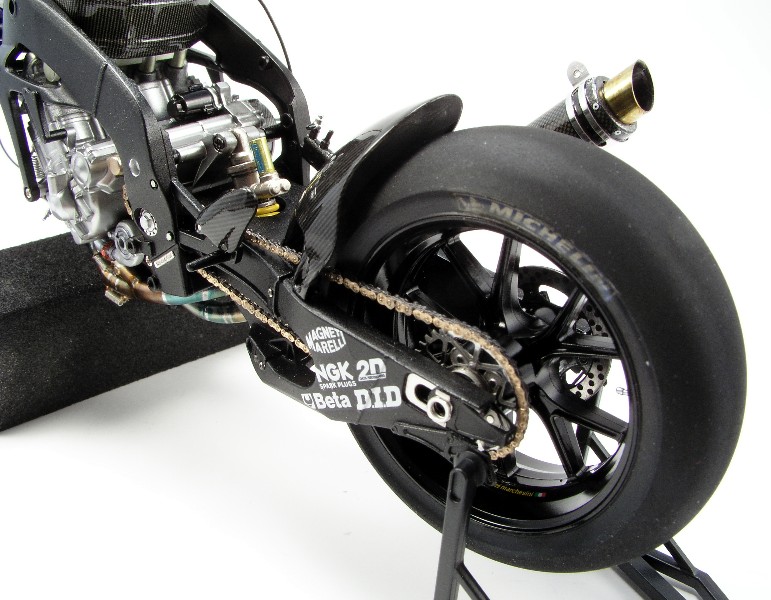 I added fine wire twisted around the handlebars as tie downs for the grips. 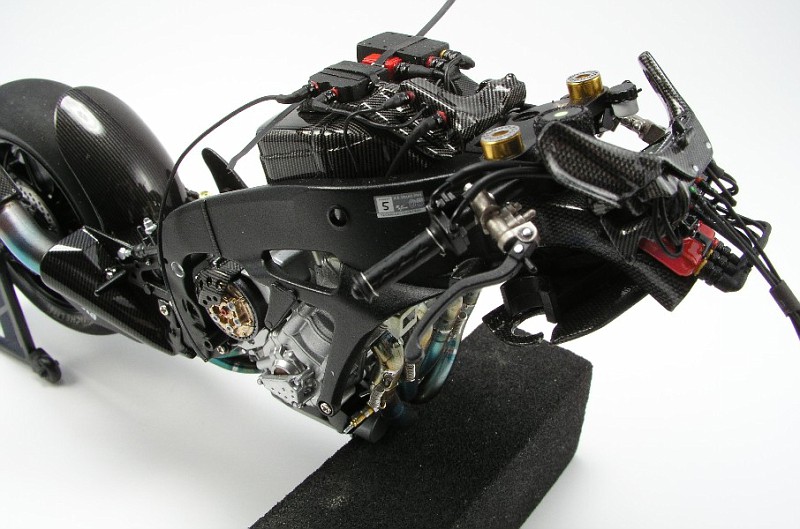 Some overallshots of the exhaust installed ready for the front fork assembly and tons more wiring that I am saving for a good day!!! 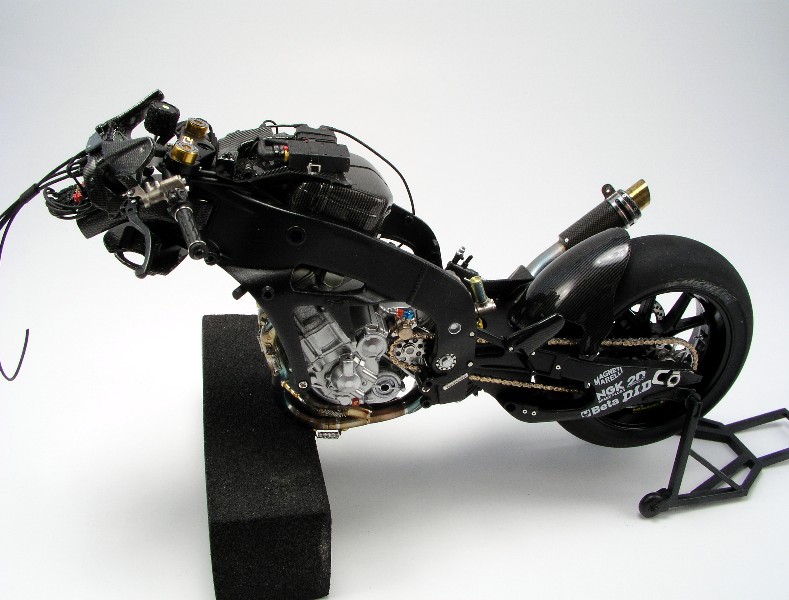 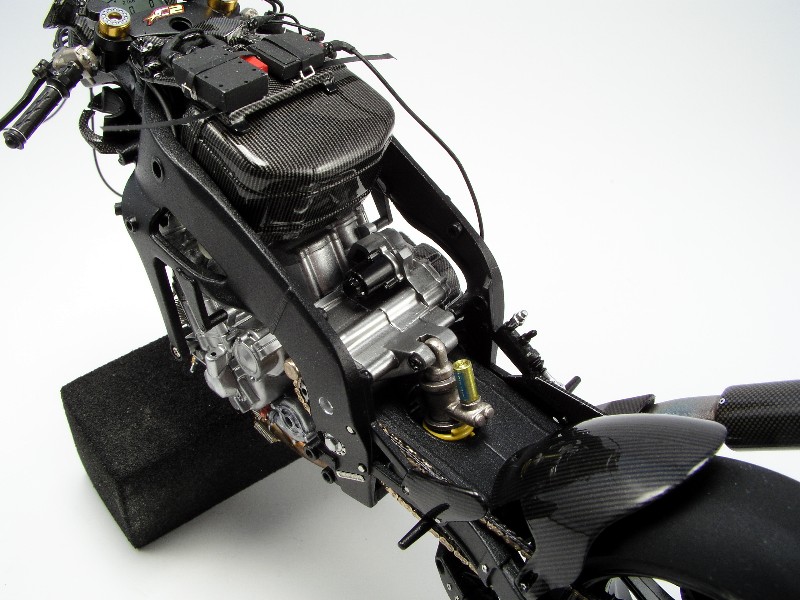 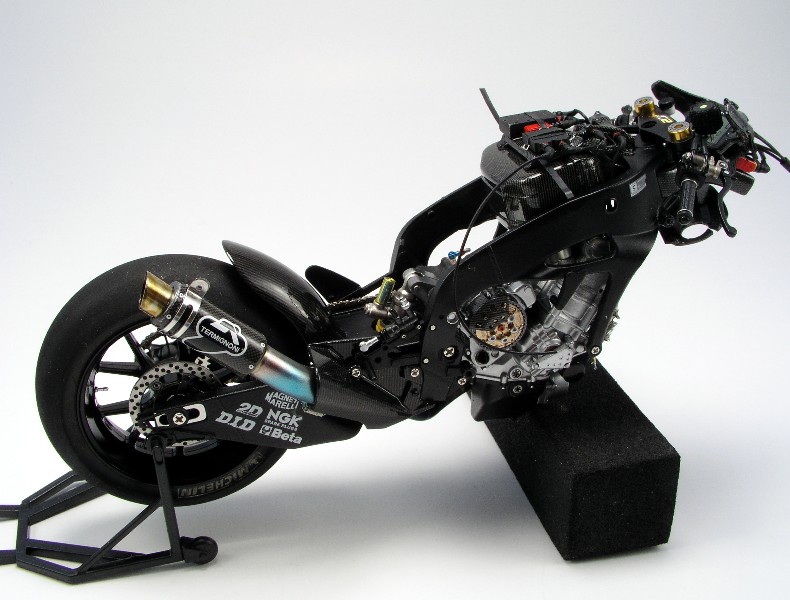 The New Year weekend had me slinging paint on some cowlings...... That is Tamiya chrome yellow, black, decals and omni clear. I also added Renaissance Twill weave to the inside panels of the seat cowling. It will be all exposed on the final build with a 2D wired box back there... 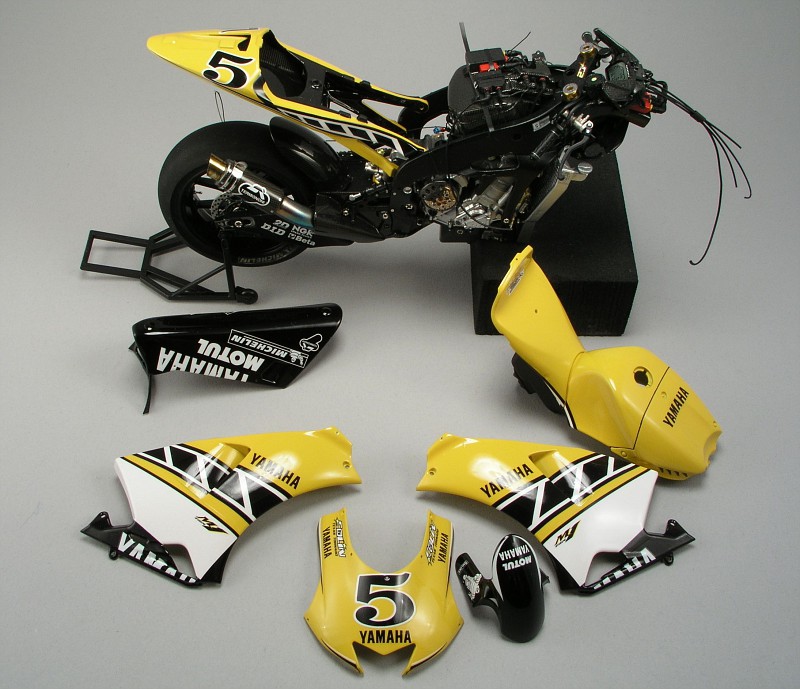 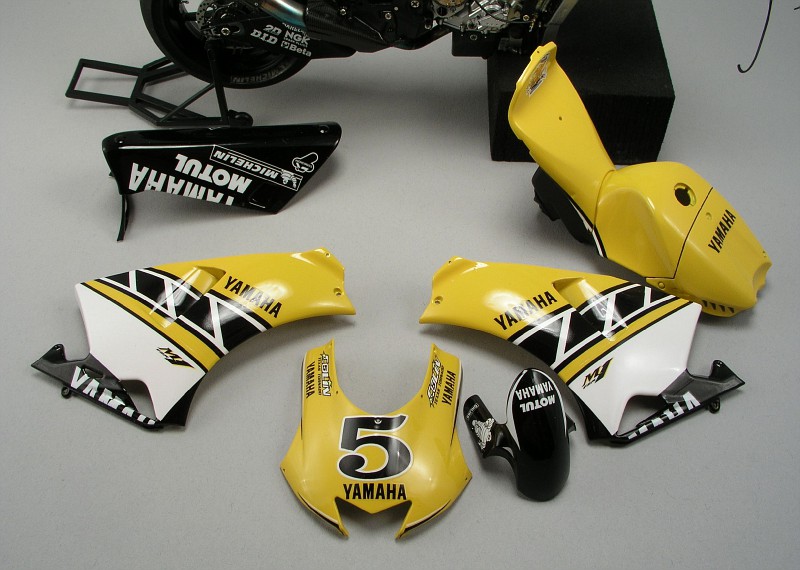 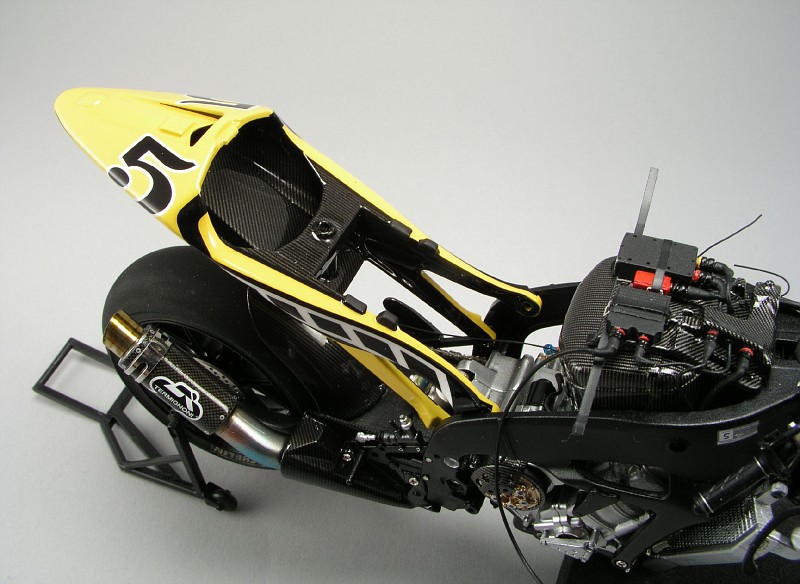 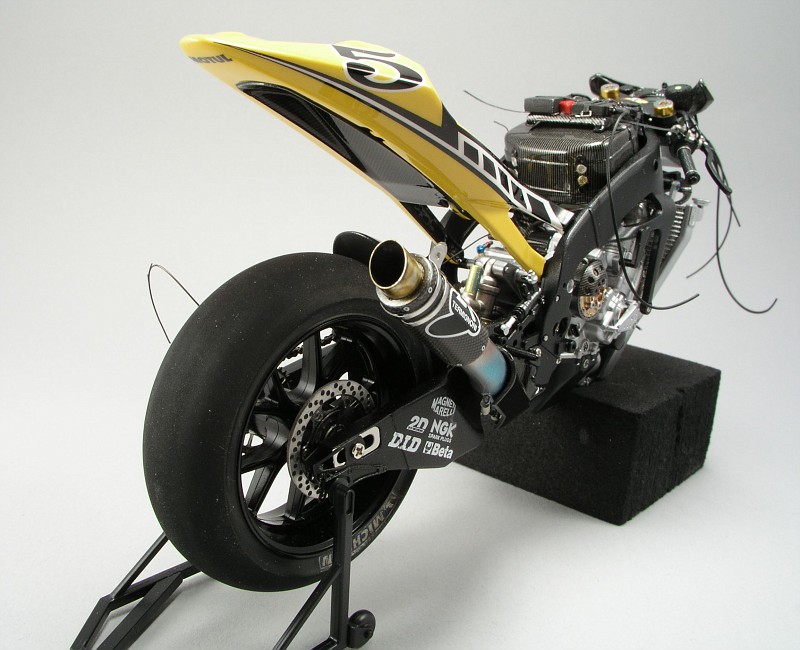 Now its time to get the front fork done and lots more wiring!! |
|
|
|

|
|
|
#2 | |
|
AF Regular
Join Date: Sep 2008
Location: Jacksonville, Florida
Posts: 310
Thanks: 11
Thanked 3 Times in 3 Posts
|
Re: Colin Edward's 50th Yamaha M1 in detail
super work!
|
|
|
|

|
|
|
#3 | |
|
AF Enthusiast
Join Date: Dec 2004
Location: Germany
Posts: 3,431
Thanks: 28
Thanked 79 Times in 73 Posts
|
Re: Colin Edward's 50th Yamaha M1 in detail
Outstanding job !!!
Exhaust looks fantastic!
__________________
Micha       
|
|
|
|

|
| The Following User Says Thank You to sportracer02 For This Useful Post: |
SkylineFan (01-08-2012)
|
|
|
#4 | |
|
AF Regular
Join Date: Jun 2008
Location: mallorca
Posts: 122
Thanks: 9
Thanked 9 Times in 9 Posts
|
Re: Colin Edward's 50th Yamaha M1 in detail
great work! *****
and thanks for lots of nice pictures. Will be a reference for me. |
|
|
|

|
| The Following User Says Thank You to miguel s For This Useful Post: |
SkylineFan (01-08-2012)
|
|
|
#5 | |
|
AF Regular
Join Date: Nov 2008
Location: Roma
Posts: 231
Thanks: 6
Thanked 3 Times in 3 Posts
|
Re: Colin Edward's 50th Yamaha M1 in detail
Hello Skyline you are doing a great job but the throttle cables semms to be oversized. You should have the correct size into the Top Studio set. Otherwise you may use a 0,5 wire. I don't know if you are able to change them at this stage but looking at all those details it should be a pity to leave them as they are....
|
|
|
|

|
|
|
#6 | |
|
AF Enthusiast
Join Date: May 2009
Location: Tucson, Arizona
Posts: 1,469
Thanks: 12
Thanked 126 Times in 120 Posts
|
Re: Colin Edward's 50th Yamaha M1 in detail
Not a bad start SkylineFan - I agree with the comment on the throttle cables - a bit too big. Otherwise it is looking pretty good. what did you use to glue the chain links?? cyano glue? The body panels look good too - John
|
|
|
|

|
| The Following User Says Thank You to John18d For This Useful Post: |
SkylineFan (01-08-2012)
|
|
|
#7 | ||
|
AF Enthusiast
Thread starter
Join Date: Mar 2003
Location: Zephyrhills, Florida
Posts: 981
Thanks: 4
Thanked 5 Times in 5 Posts
|
Re: Colin Edward's 50th Yamaha M1 in detail
Quote:
Yes, I used fast setting Zap Glue... Thanks DaveT |
||
|
|

|
|
|
#8 | |
|
AF Enthusiast
Join Date: Jun 2005
Location: north-eastern France
Posts: 2,959
Thanks: 15
Thanked 148 Times in 147 Posts
|
Re: Colin Edward's 50th Yamaha M1 in detail
Waow !!
 I'm far from being a bike specialist but seeing your fantastic build and the care given to details I really believe you have more to teach than to learn   Everything looks real !!   |
|
|
|

|
| The Following User Says Thank You to rallymaster For This Useful Post: |
SkylineFan (01-08-2012)
|
|
|
#9 | |
|
AF Enthusiast
Thread starter
Join Date: Mar 2003
Location: Zephyrhills, Florida
Posts: 981
Thanks: 4
Thanked 5 Times in 5 Posts
|
Re: Colin Edward's 50th Yamaha M1 in detail
More done on this one.. Front Fork, Brakes, calipers, and wheel... I used the tamiya detail up front fork set of course.
I still have some minor things to button up but its overall complete up front. I found a seller on ebay to replenish my shrink tubing stock... I will hold off on this one until I get that. Its coming from Japan. Thanks for looking. 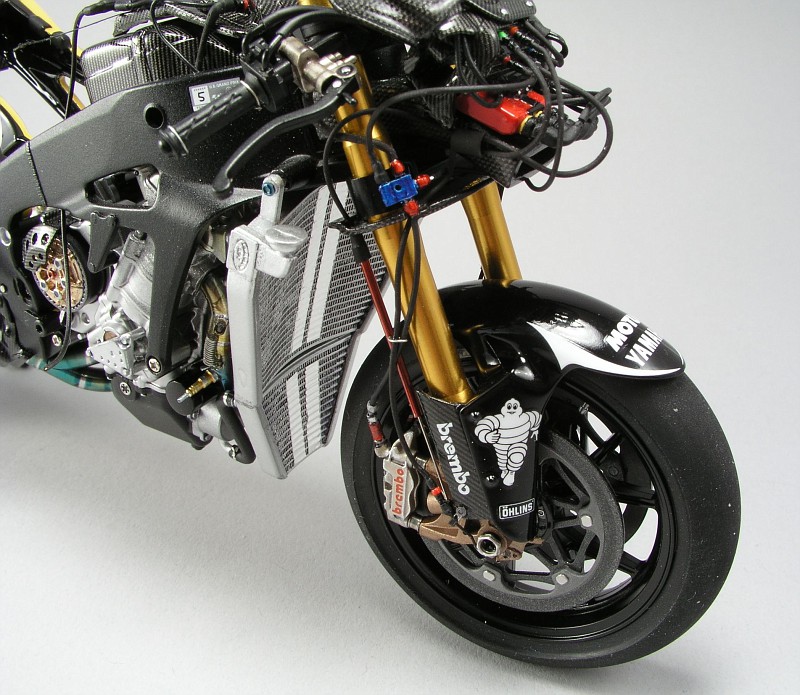 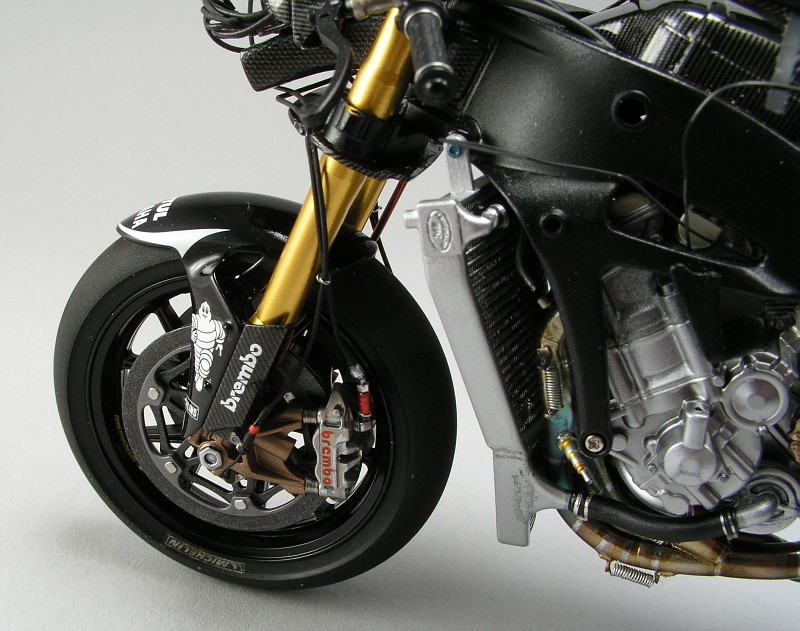 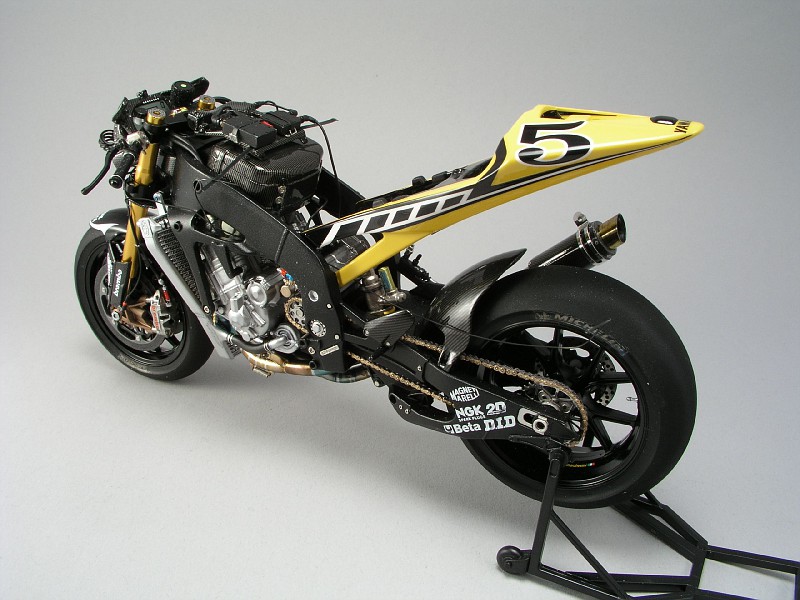 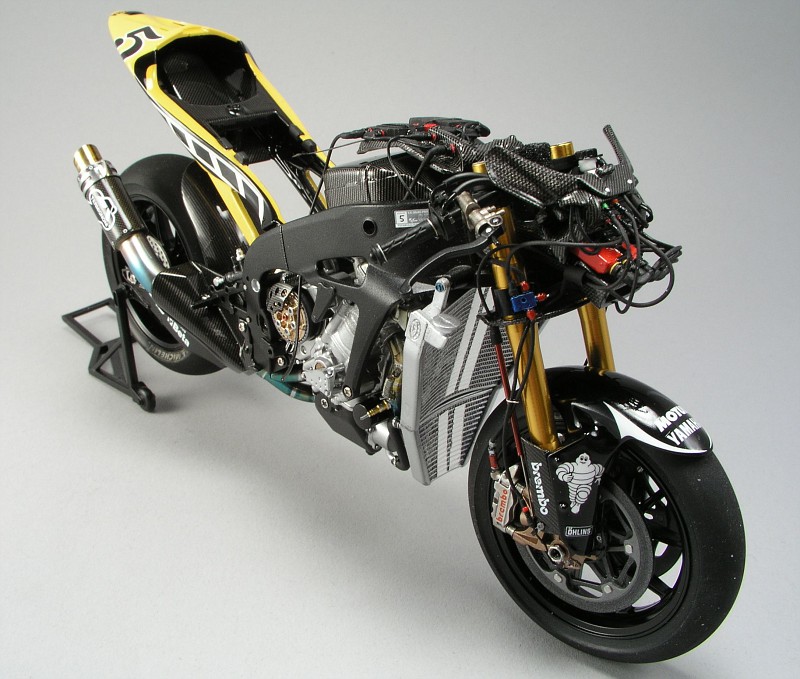 |
|
|
|

|
|
|
#10 | |
|
Registered User
Join Date: Nov 2009
Location: Seoul, South Korea
Posts: 174
Thanks: 0
Thanked 3 Times in 3 Posts
|
Re: Colin Edward's 50th Yamaha M1 in detail
WOW! It's GREAT. I have loved your car models but I'm gonna be a fan of your bike model.
By the way.... those topstudio parts of yours look better than mine. |
|
|
|

|
|
|
#11 | |
|
AF Regular
Join Date: Sep 2006
Location: Zaragoza
Posts: 232
Thanks: 3
Thanked 0 Times in 0 Posts
|
Re: Colin Edward's 50th Yamaha M1 in detail
Awesome work!!!
Really clean and nice!
__________________
My decal page http://decallab.blogspot.com/ |
|
|
|

|
|
|
#12 | |
|
AF Enthusiast
Join Date: May 2009
Location: Tucson, Arizona
Posts: 1,469
Thanks: 12
Thanked 126 Times in 120 Posts
|
Re: Colin Edward's 50th Yamaha M1 in detail
Very nice and cleanly done SkylineFan - this has come out as good as I've seen on the forum - your skills and attention to detail are worthy of merit. You - Sandro - Zedred - Andrea -and YoungGun have definitely upped the standards for a motoGP kit. Thanks for sharing this WIP with the forum - John
|
|
|
|

|
|
|
#13 | |
|
AF Enthusiast
Thread starter
Join Date: Mar 2003
Location: Zephyrhills, Florida
Posts: 981
Thanks: 4
Thanked 5 Times in 5 Posts
|
Re: Colin Edward's 50th Yamaha M1 in detail
Most of the Top Studio Resin is installed now for good. Including the Tank computer cluster. The wiring job is endless on these things and tedious to do because you have to keep it so clean. I copied what I saw a really good bike builder on AF from Japan I believe who I think is the best builder of these bikes out there. YongGun Park. He did the Valencia version of this very bike and I use it as reference often! Anyways, on one of his Camel Rossi M1 builds that was incredible he had this fabric like cover on the seat. I asked him what it was and he told me women's nylon stocking! What a great idea and so I added it to mine...
More soon! Any questions ask away! 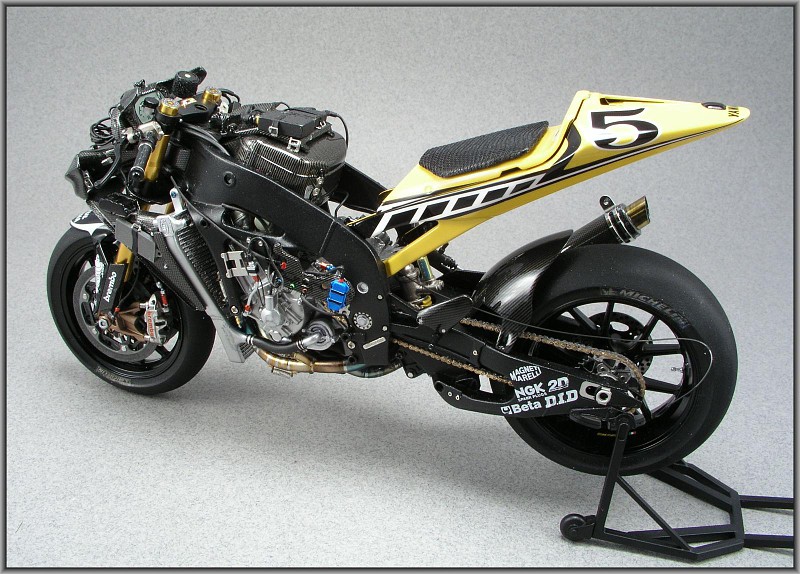 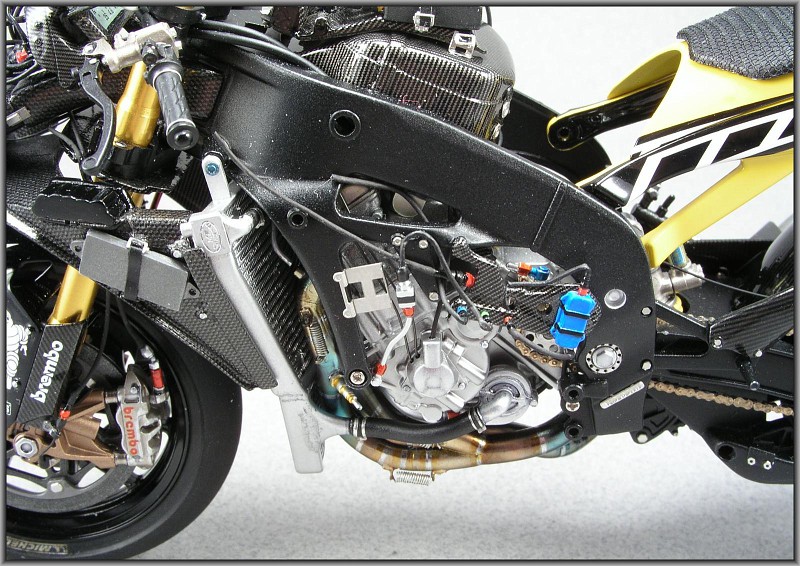 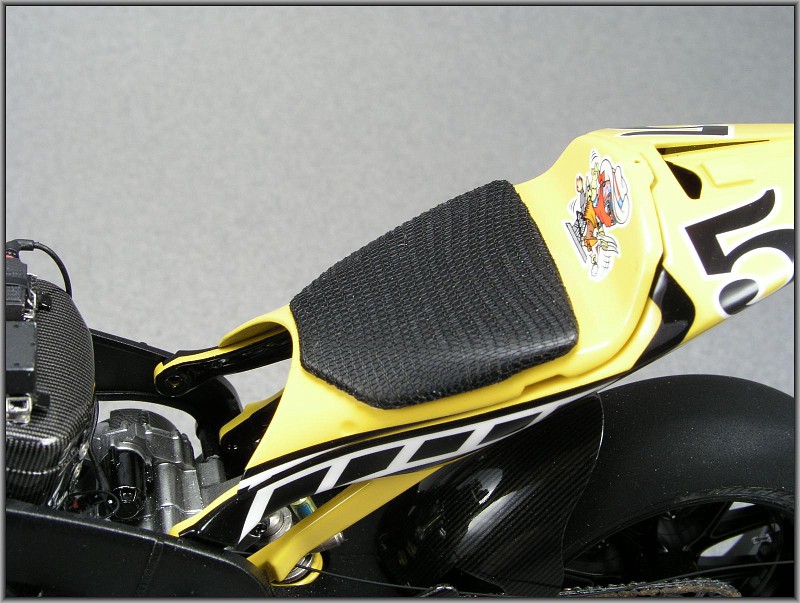 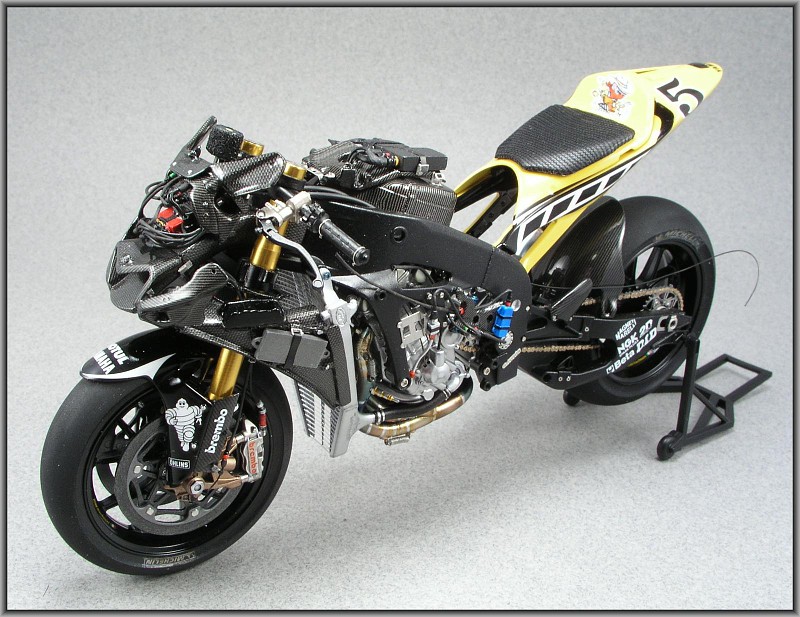 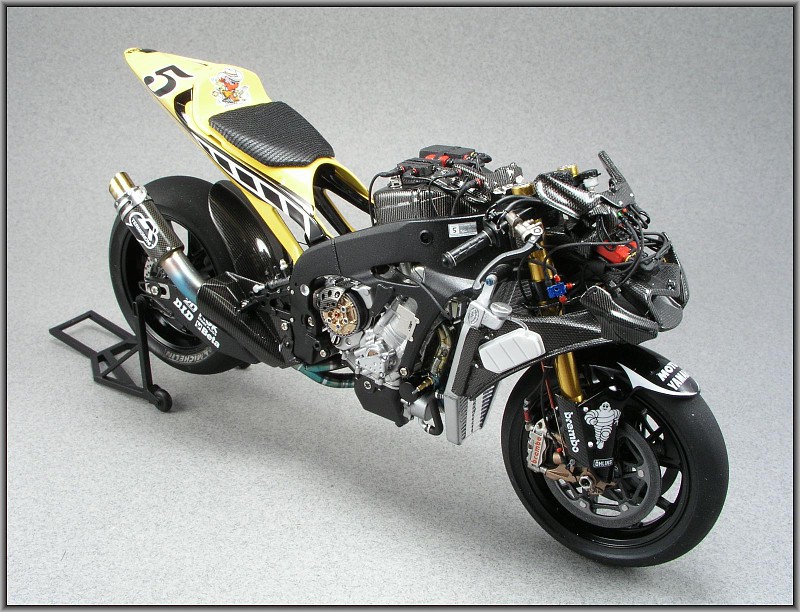 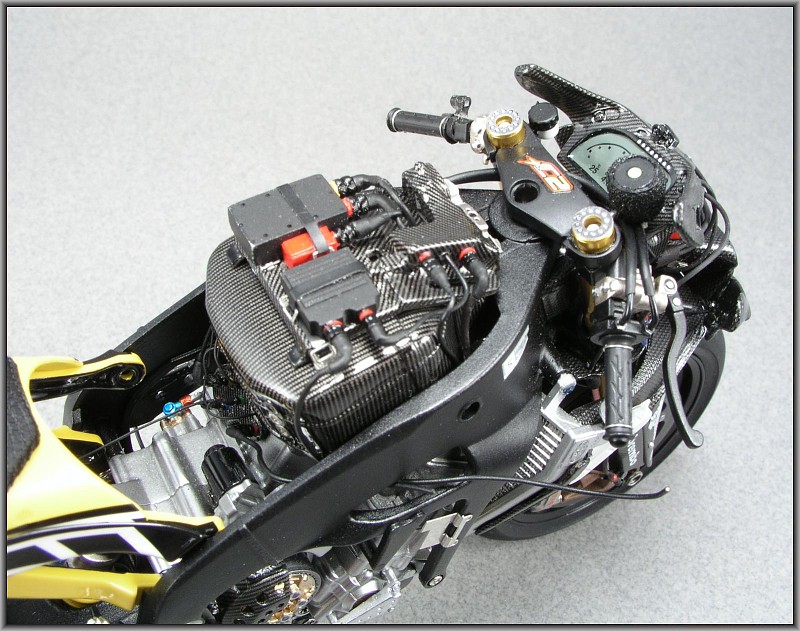 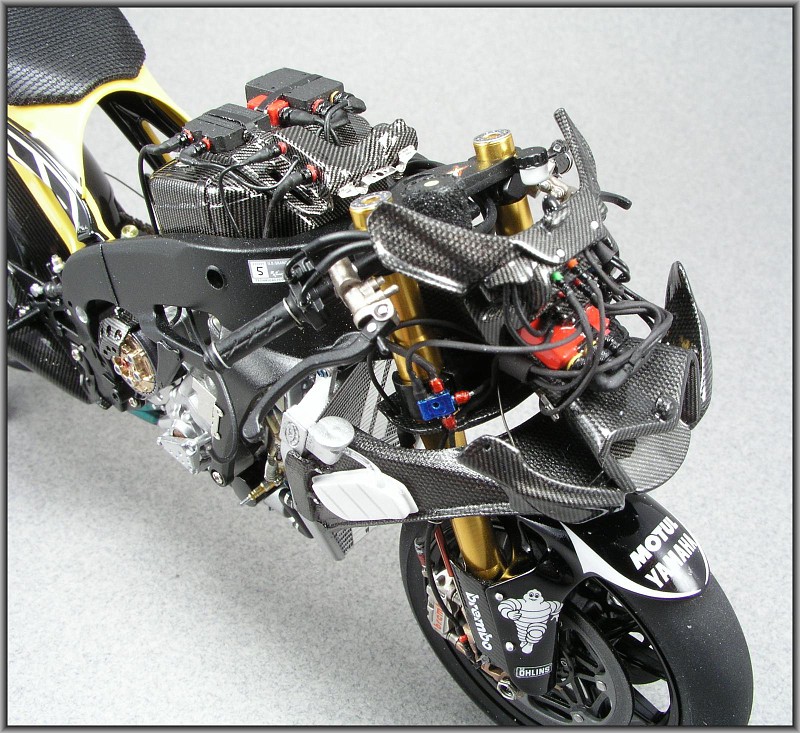 |
|
|
|

|
|
|
#14 | |
|
AF Enthusiast
Join Date: Jul 2005
Location: London
Posts: 899
Thanks: 3
Thanked 11 Times in 10 Posts
|
Re: Colin Edward's 50th Yamaha M1 in detail
Lovely model and excellent photography too. Good choice with The Texan Tornado! I've had the great pleasure of spending a rainy Donington afternoon with him years ago when filming for WSB...one of the nicest guys in bike racing!
 |
|
|
|

|
|
|
#15 | |
|
AF Fanatic
|
Re: Colin Edward's 50th Yamaha M1 in detail
Great model!
I have the same one to do (Fiat version) and instruction looks a bit hard to fallow, mostly on the wiring. You did a superb work there!
__________________
 CarsModeling.com. My Scale Model Cars blog. |
|
|
|

|
| ||||||||||||||||||||||||||||||||||||||
 |
POST REPLY TO THIS THREAD |
 |
|
|