|
|
|

|
|
| Search | Car Forums | Gallery | Articles | Helper | AF 350Z | IgorSushko.com | Corporate |
|
| Latest | 0 Rplys |
|
|||||||
| WIP - Motorsports Post topics for any "Work In Process" motorsports vehicles in this sub-forum. |
 |
 Show Printable Version | Show Printable Version |  Email this Page | Email this Page |  Subscribe to this Thread
|
|
|
Thread Tools |
 09-19-2008, 01:02 AM
|
#31 | |
|
AF Enthusiast
Join Date: Jun 2007
Location: Vienna
Posts: 2,399
Thanks: 57
Thanked 27 Times in 26 Posts
|
Re: Audi R8C LeMans 1999 Provence Moulage 1:43
Excellent work! I keep forgetting that this is a 1/43 model!
 |
|

|

|
|
09-19-2008, 01:23 AM
|
#32 | |
|
AF Enthusiast

Join Date: Dec 2004
Location: Germany
Posts: 3,431
Thanks: 28
Thanked 79 Times in 73 Posts
|
Re: Audi R8C LeMans 1999 Provence Moulage 1:43
Fantastic job !!!!
__________________
Micha       
|
|
|
|
|
|
09-19-2008, 03:06 AM
|
#33 | ||
|
AF Enthusiast

Join Date: Oct 2005
Location: Monza
Posts: 1,150
Thanks: 21
Thanked 56 Times in 38 Posts
|
Re: Audi R8C LeMans 1999 Provence Moulage 1:43
Quote:
 Wheels assembly and locking nuts are simply TOUCHING ! Robi |
||
|
|
|
|
09-19-2008, 08:22 AM
|
#34 | |
|
AF Enthusiast

Join Date: Sep 2006
Location: USA, Florida
Posts: 590
Thanks: 3
Thanked 6 Times in 6 Posts
|
Re: Audi R8C LeMans 1999 Provence Moulage 1:43
You have taken this basic kit and transformed it into something really outstanding.
__________________
Regards, Dave |
|
|
|
|
|
09-19-2008, 08:25 AM
|
#35 | |
|
AF Moderator
 
Join Date: Sep 2002
Location: Fort Worth, Texas
Posts: 3,246
Thanks: 31
Thanked 314 Times in 241 Posts
|
Re: Audi R8C LeMans 1999 Provence Moulage 1:43
Ahhh, perfection! Great job as usual!
|
|
|
|
|
|
09-25-2008, 03:38 PM
|
#36 | |
|
AF Enthusiast
Thread starter
Join Date: Aug 2005
Location: where "sky grey" is a colour
Posts: 822
Thanks: 3
Thanked 32 Times in 29 Posts
|
Re: Audi R8C LeMans 1999 Provence Moulage 1:43
Here we go with another update
. in fact the last one :-)
The area left to show is the rear end. First the lights. The kit again supplied decals for those ..no way! :-) Instead of trying to get a good paintjob with clear red and orange on some transparent part I used something different this time. At work I came across some bits of orange and red transparent film which naturally was more evenly tinted than any paint finish I could do. I glued little pieces of that onto aluminium reflectors using clear paint. Next time Ill try to photoetch the metal bits. Should be possible to get some sort of lens graphic into this. On top of that I glued the photoetched and painted frames. 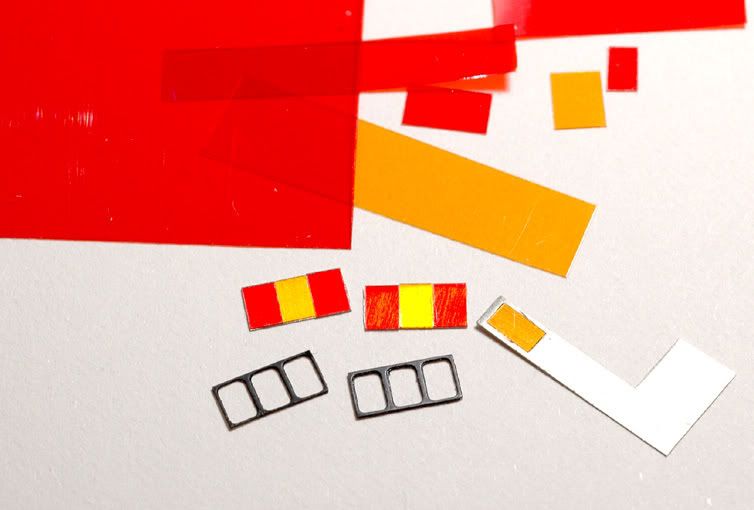 On the model they look like this: 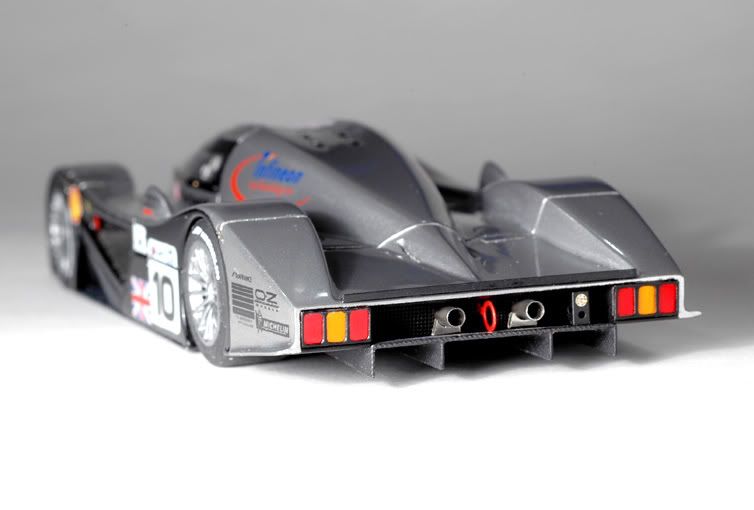 Apart from the lights i added some etched and painted mesh, the exhaust pipes made from 2mm aluminium tubing and painted with Alclad, the supports for those which i had to file by hand from nickle silver sprue bits because i forgot to etch them, the red painted tow hook ring from the kit, the air pressure connector for the internal lifting system made from my PE parts and a brass rivet and the diffusor which was painted and carbon fibered. After that it was time for the rear wing. I realized just now that I forgot to take pictures during its build so youll just have to believe me :-) The resin wing needed some re-shaping so the profile would actually fit to the indentations in the end plates. I then added the integrated gurneyflap with a 0,8mm strip of metal and two parts for the wing support. This was followed by the standard procedure of painting, decaling, sanding and polishing. 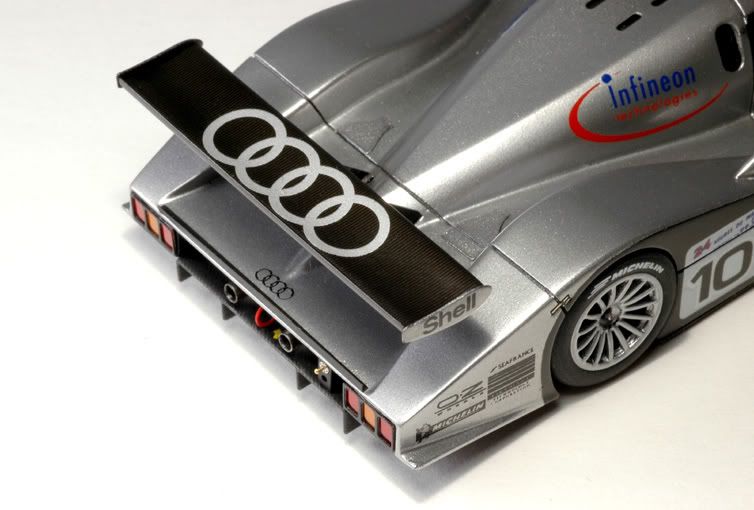 The wing support is all built up with my etched parts. The kit parts were overly simplified. I superglued all parts together, painted them gloss black and sanded and polished a bit where possible. Unfortunately the width doesnt exactly fit the wing and body anymore after assembly and painting and I should have changed the bottom end of the vertical parts ( compared to the kit parts ) to be able to better mount them to the body You dont really see it in the pictures but Im not very happy about the outcome. Ill leave it like this for now but next time I etch something Ill do an improved version and replace the support gotta have to after all the work I did so far :-) 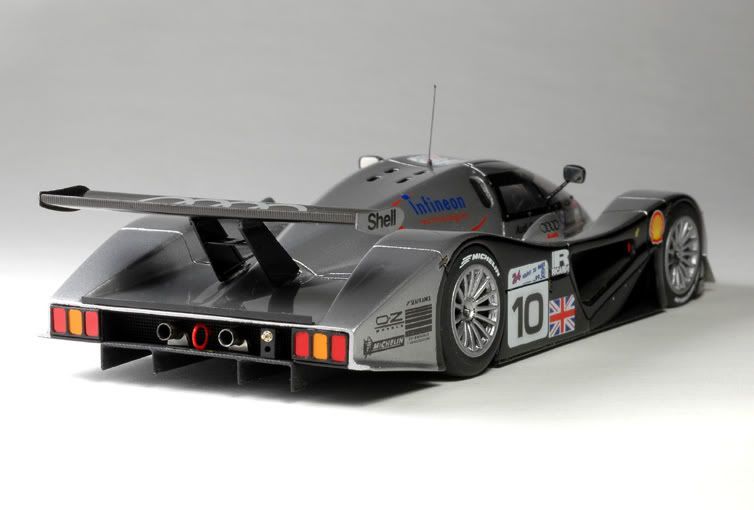 So now there wer only a couple of small bits and pieces left over. At the front I mounted the little flip-ups next to the headlights after painting, sanding and polishing them. For the wiper I had made some funky etched parts but they turned out to be a bit overly ambitious. They were so thin they disintegrated when I tried to work on them. That happens when you do 1:24 bits on a computer screen at the same time. You can easily loose the relation to their real sizes :-) In the end I modified the flat and chunky kit wiper and that looks o.k. as well. 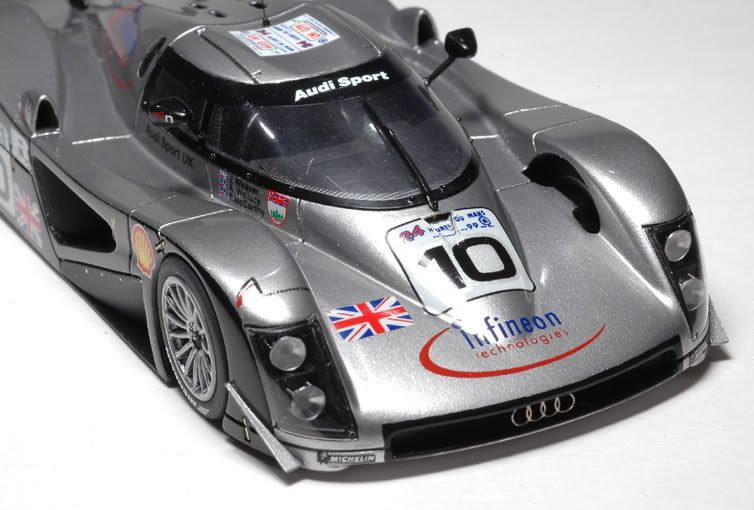 The final parts ( apart from the antenna :-) were the mirrors. As I mentioned at the beginning the kit came with 4 resin mirrors, none of which looked a lot like the real ones So I scratched them. With painting and finishing the little bummers took almost 2 days to make but I couldnt leave them unattended :-) So apart from the little issue with the rear wing the R8C is finished! Thats fine because Ive had enough of the model for the moment but I have to say I like the car more and more. Its now among my favourite LeMans cars! 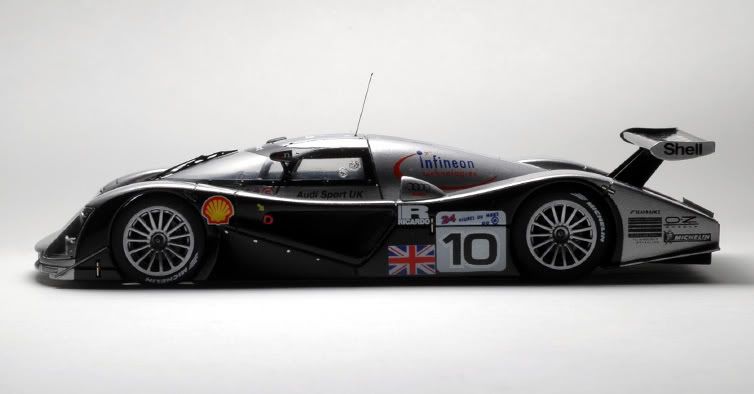 Thanks for your interest and comments again! You can find some more finished pictures here: http://www.automotiveforums.com/vbul...19#post5826719 |
|
|
|
|
|
09-26-2008, 04:31 AM
|
#37 | |
|
AF Regular

Join Date: Feb 2005
Location: Melfi
Posts: 238
Thanks: 24
Thanked 5 Times in 5 Posts
|
Re: Audi R8C LeMans 1999 Provence Moulage 1:43
I did not know this version of the Audi R8.
Congratulations good job also seen the scale. ciao
__________________
between kit and an other there is only the wait. www.modellismostatico.com Recent Works 
|
|
|
|
|
|
10-11-2008, 09:34 PM
|
#38 | |
|
AF Regular
 
Join Date: Jan 2007
Location: PANAMA
Posts: 103
Thanks: 0
Thanked 0 Times in 0 Posts
|
Re: Audi R8C LeMans 1999 Provence Moulage 1:43
its truly amazing the level of detail that its put here! INCREDIBLE, Keep it up!
|
|
|
|
|
|
|
POST REPLY TO THIS THREAD |
 |
|
|

