|
|
|

|
|
| Search | Car Forums | Gallery | Articles | Helper | AF 350Z | IgorSushko.com | Corporate |
|
| Latest | 0 Rplys |
|
|||||||
| WIP - Motorsports Post topics for any "Work In Process" motorsports vehicles in this sub-forum. |
 |
 Show Printable Version | Show Printable Version |  Email this Page | Email this Page |  Subscribe to this Thread
|
|
|
Thread Tools |
 05-26-2020, 03:18 PM
|
#16 | |
|
Loser

Join Date: Aug 2007
Location: Moscow
Posts: 1,170
Thanks: 110
Thanked 248 Times in 195 Posts
|
Re: Porsche 936 Turbo Tamiya 1/24
 Very good job with decals! Very good job with decals!
__________________
Best regards, Mikhail   
|
|

|

|
|
05-26-2020, 05:42 PM
|
#17 | |
|
AF Moderator
 
Join Date: Sep 2002
Location: Fort Worth, Texas
Posts: 3,246
Thanks: 31
Thanked 314 Times in 241 Posts
|
Re: Porsche 936 Turbo Tamiya 1/24
You making a jewel out of the turd. Great stuff.
__________________
The client is not always right. - Enzo Ferrari ItalianHorses.net    
|
|
|
|
|
|
05-27-2020, 07:33 AM
|
#18 | ||
|
AF Enthusiast
Thread starter
Join Date: Mar 2009
Location: Madrid
Posts: 649
Thanks: 109
Thanked 68 Times in 67 Posts
|
Re: Porsche 936 Turbo Tamiya 1/24
Quote:
|
||
|
|
|
|
05-27-2020, 07:34 AM
|
#19 | ||
|
AF Enthusiast
Thread starter
Join Date: Mar 2009
Location: Madrid
Posts: 649
Thanks: 109
Thanked 68 Times in 67 Posts
|
Re: Porsche 936 Turbo Tamiya 1/24
Quote:
|
||
|
|
|
|
05-30-2020, 04:10 PM
|
#20 | |
|
AF Regular
Join Date: Aug 2011
Location: Torino
Posts: 390
Thanks: 175
Thanked 62 Times in 58 Posts
|
Re: Porsche 936 Turbo Tamiya 1/24
Very nice decal job JesusM!
 |
|
|
|
|
|
05-31-2020, 05:14 AM
|
#21 | ||
|
AF Enthusiast
Thread starter
Join Date: Mar 2009
Location: Madrid
Posts: 649
Thanks: 109
Thanked 68 Times in 67 Posts
|
Re: Porsche 936 Turbo Tamiya 1/24
Quote:
|
||
|
|
|
|
05-31-2020, 06:54 AM
|
#22 | |
|
AF Enthusiast
Join Date: Sep 2014
Location: Crownsville, Maryland
Posts: 638
Thanks: 16
Thanked 104 Times in 95 Posts
|
Re: Porsche 936 Turbo Tamiya 1/24
Very nice paint and decals work Jesus.
__________________
Motorsport Modeling |
|
|
|
|
|
05-31-2020, 11:20 AM
|
#23 | |
|
ItaloSvensk

Join Date: Mar 2009
Location: Marstrand
Posts: 3,383
Thanks: 1,077
Thanked 296 Times in 270 Posts
|
Re: Porsche 936 Turbo Tamiya 1/24
very nice work as usual. Love those kind of racers.
Together with the early black widow is one of my fav ones.
__________________
Paolo - LoveGT40 Modelworks website www.alsoldatino.com my YT channel : https://www.youtube.com/channel/UCIp..._as=subscriber FB: https://www.facebook.com/alsoldatino |
|
|
|
|
|
05-31-2020, 02:46 PM
|
#24 | ||
|
AF Enthusiast
Thread starter
Join Date: Mar 2009
Location: Madrid
Posts: 649
Thanks: 109
Thanked 68 Times in 67 Posts
|
Re: Porsche 936 Turbo Tamiya 1/24
Quote:
|
||
|
|
|
|
05-31-2020, 02:49 PM
|
#25 | ||
|
AF Enthusiast
Thread starter
Join Date: Mar 2009
Location: Madrid
Posts: 649
Thanks: 109
Thanked 68 Times in 67 Posts
|
Re: Porsche 936 Turbo Tamiya 1/24
Quote:
|
||
|
|
|
|
06-16-2020, 06:36 AM
|
#26 | |
|
AF Enthusiast
Thread starter
Join Date: Mar 2009
Location: Madrid
Posts: 649
Thanks: 109
Thanked 68 Times in 67 Posts
|
Re: Porsche 936 Turbo Tamiya 1/24
Siguiente actualización del proyecto 936 Turbo, y esta trae tela!!
Y como primera foto, os muestro como quedaría la parte del motor del coche que trae el kit. No es mucho, pero con unas buenas pinturas, el resultado es muy bueno. Aquí veis los dos turbo, con los escapes, y las abrazaderas realizadas con cinta aislante eléctrica, que le he añadido unas tiras de aluminio autoadhesivo que se usa para la instalación de aire acondicionado. Aun está sin pegar puesto que el chasis no está acabado, y también le faltan algunos cables y tubos que lleva el coche real. Next update of the 936 Turbo project. And as a first photo, I show you how the part of the cars engine that comes with the kit would look. It is not much, but with good paints, the result is very good. Here you see the two turbo, with the exhausts, and the clamps made with electrical insulating tape, which I have added some self-adhesive aluminum strips that are used for the installation of air conditioning. It is still not pasted since the chassis is not finished, and it is also missing some cables and tubes that the real car carries.  Y ya que hablo del chasis, aquí os muestro su proceso: Primero, eliminamos las baras que traía en relieve. And since I talk about the chassis, here I show you its process: First, we eliminate the bars that it brought in relief. 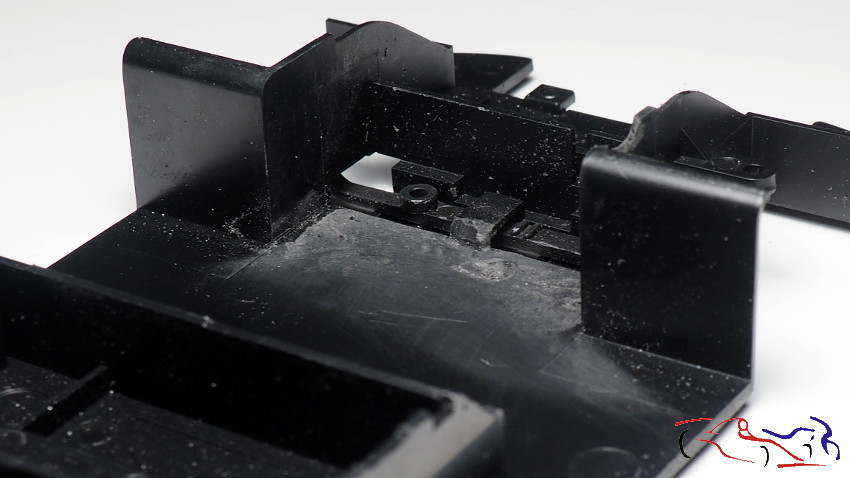 Preparamos una plancha para ocultar todo el conjunto de la dirección : We prepare a plastic sheet to hide the entire address set :  Y la enmasillamos con putty verde acrílica por todos los lados! And we put putty acrylic green putty on all sides! 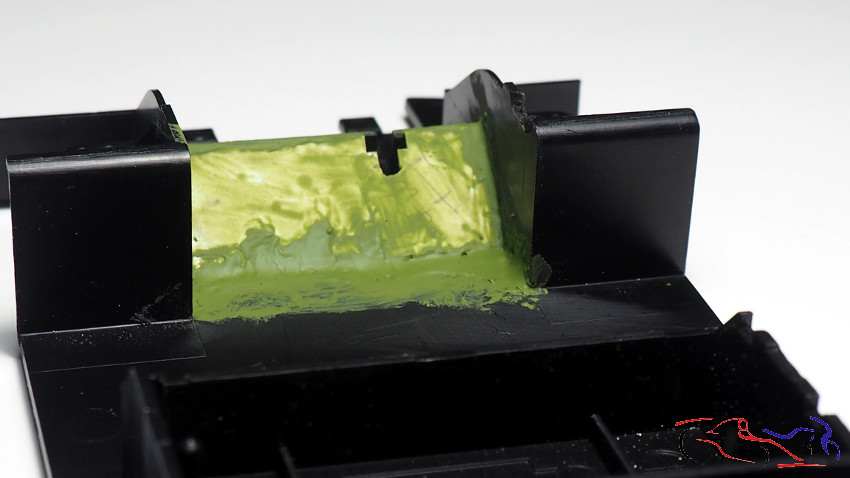 Lijamos Podemos observar el corte relizado para meter la barra del volante de la dirección: We sanded it. We can see the cut made where we will put the steering wheel rod:  Y pasamos al backet. De primeras le eliminamos los huecos de la espalda para los cinturones, y el hueco en los pies del asiento del copiloto para unos tubos. A su vez, damos forma a los laterales del mismo. And we go to the backet. At first we removed the holes in the back for the belts, and the hole in the feet of the passenger seat for some tubes. In turn, we shape the sides of it. 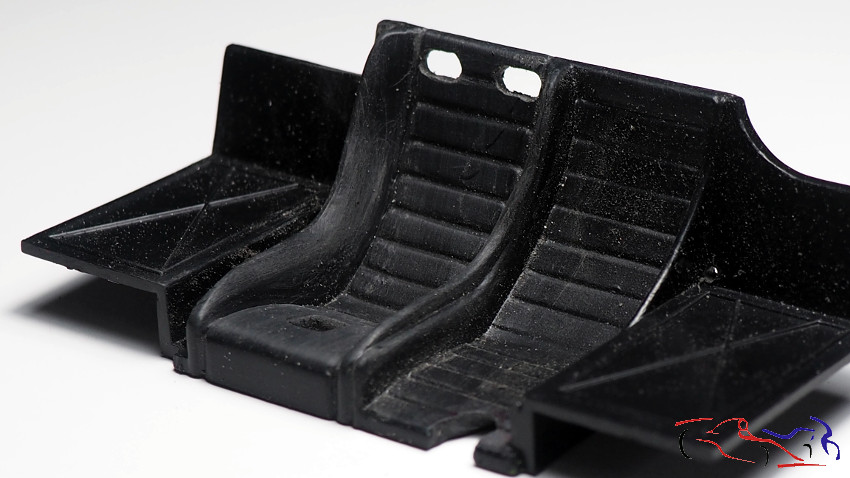 Y con masilla epoxy, le creo dos jorobas laterales: And with epoxy putty, I create two side humps: 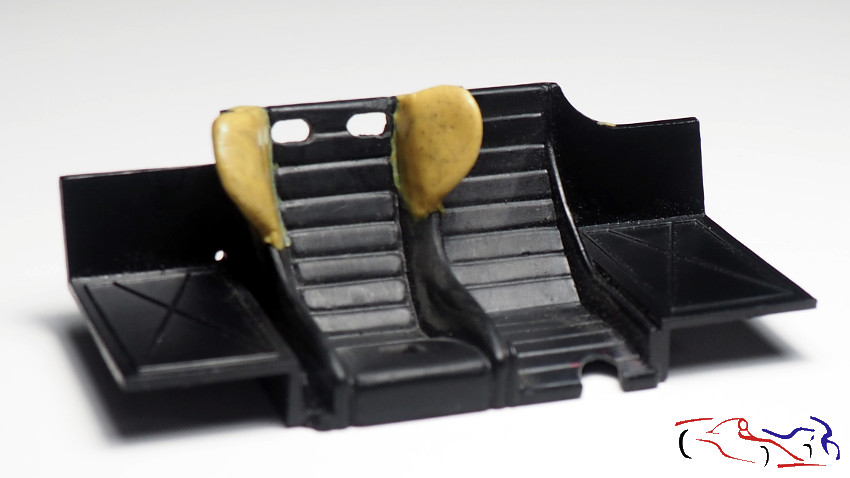 Una vez secas, las lijamos dejándolas en su correcta forma: Once dry, we sand them leaving them in their correct form: 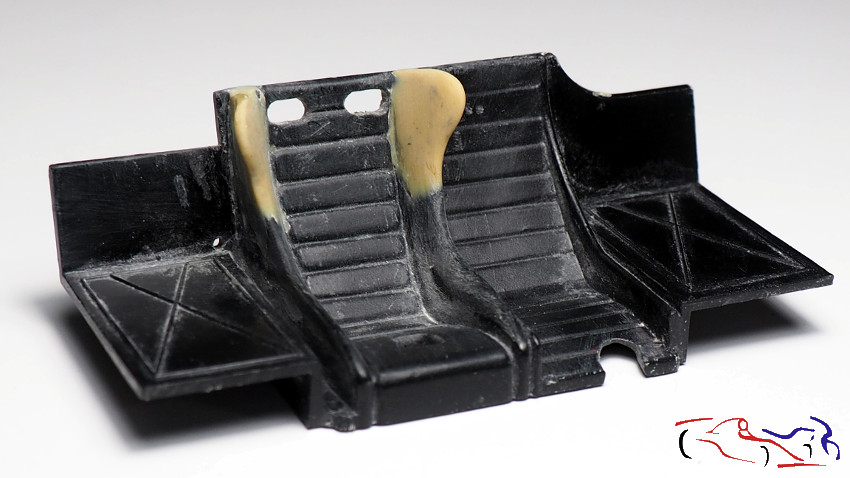 Aquí está colocado en el chasis: Here it is placed on the chassis: 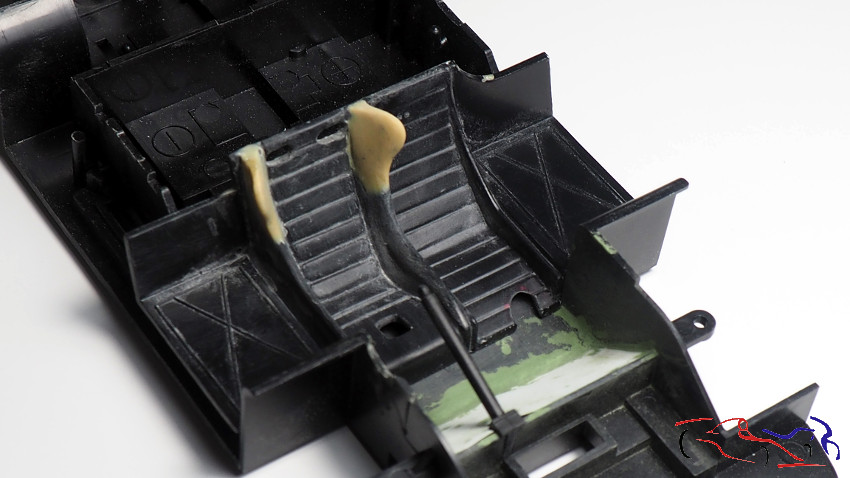 Detalles del cockpit: A su vez, voy modificando más piezas: al volante le voy a remplazar su parte central por una en fotograbado, y a la palanca del cambio, le voy a añadir la pieza que permite girar dicha palanca: Cockpit details: At the same time, I am modifying more parts: at the steering wheel I am going to replace its central part with one in photoengraving, and I am going to add the part that allows the lever to rotate: 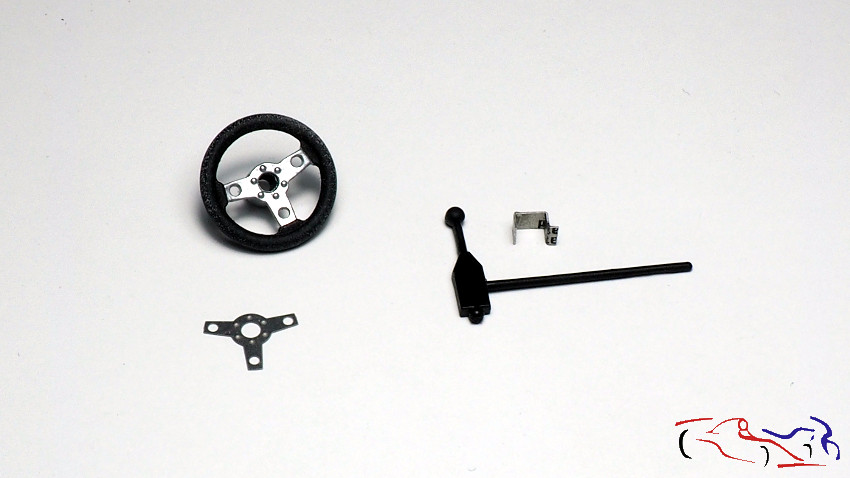 Aquí ya lo teneís cambiado: Here you can have updated: 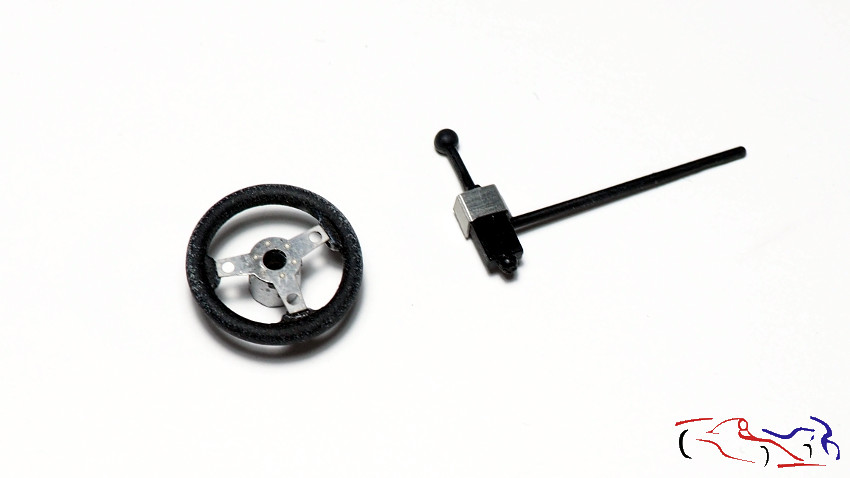 Y vamos con la carroceria. COmo había algunos errores en las calcas, decido barnizarla para pintar encima. Y uso la prediluida de Zero Paints. Le doy una capa finita, y después una húmeda después, quedando así de brillante: And we go with the bodywork. As there were some errors in the decals, I decide to varnish it to paint over it. And I use the prediluted Zero Paints. I give it a thin layer, and then a wet one afterwards, remaining this shiny: 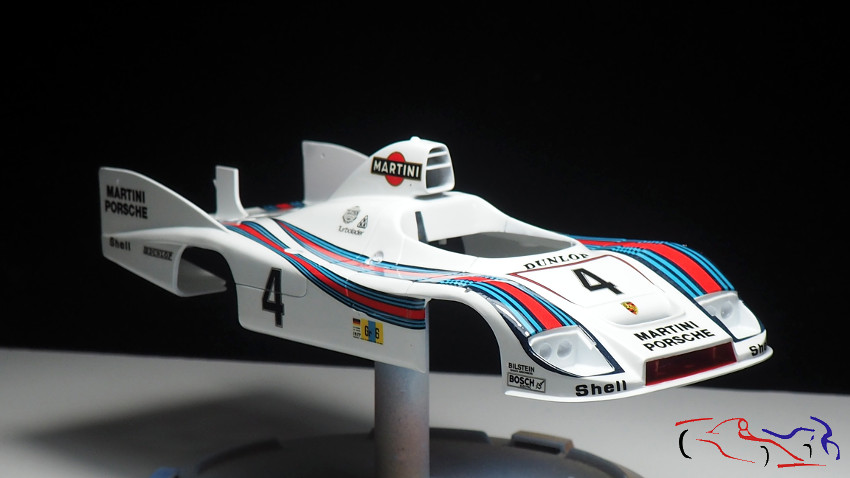 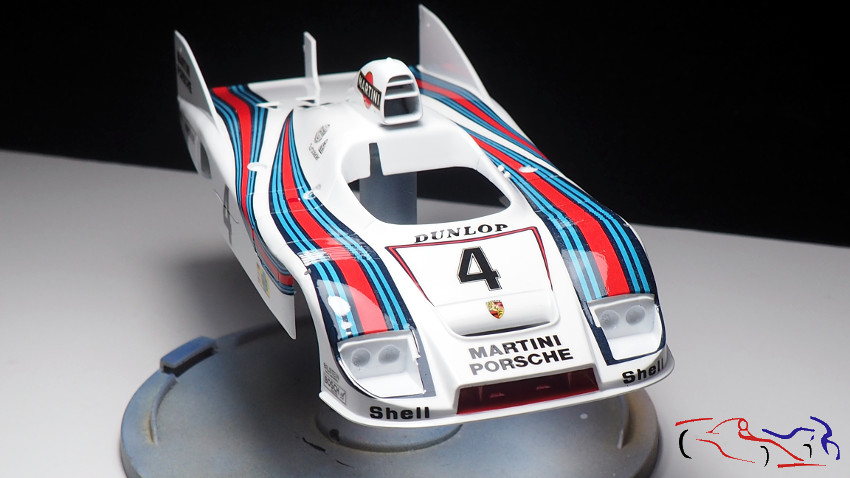 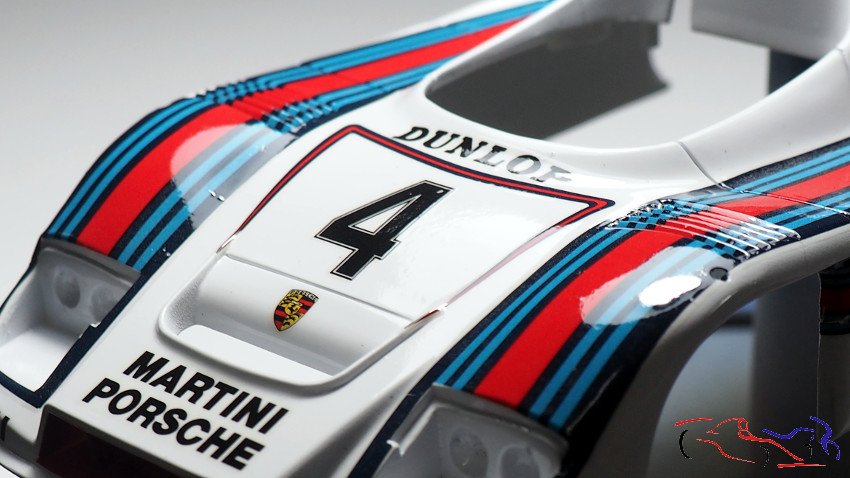 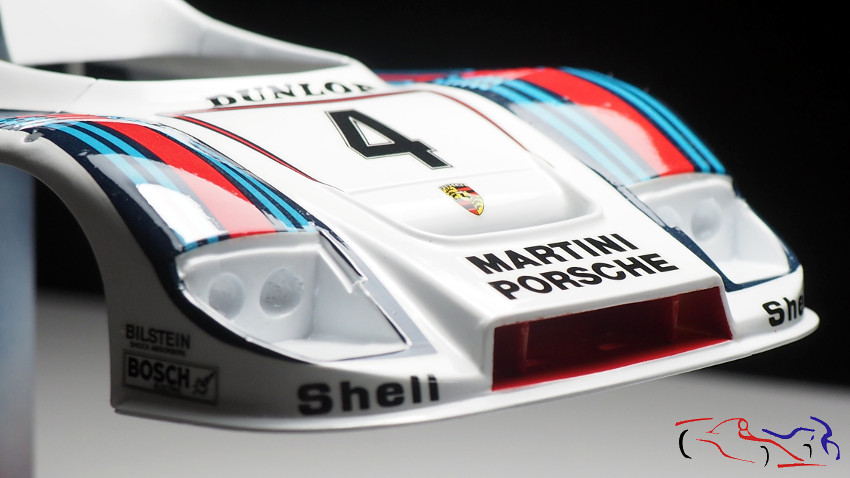 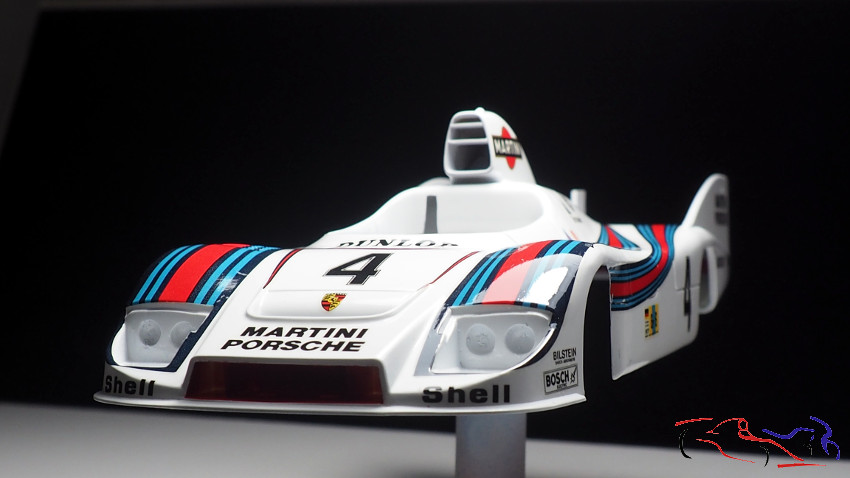 Pero alguna reacción me hizo en las calcas quedando de este modo en algunos sitios .. But some reaction made it in the decals in some places being in this way .. 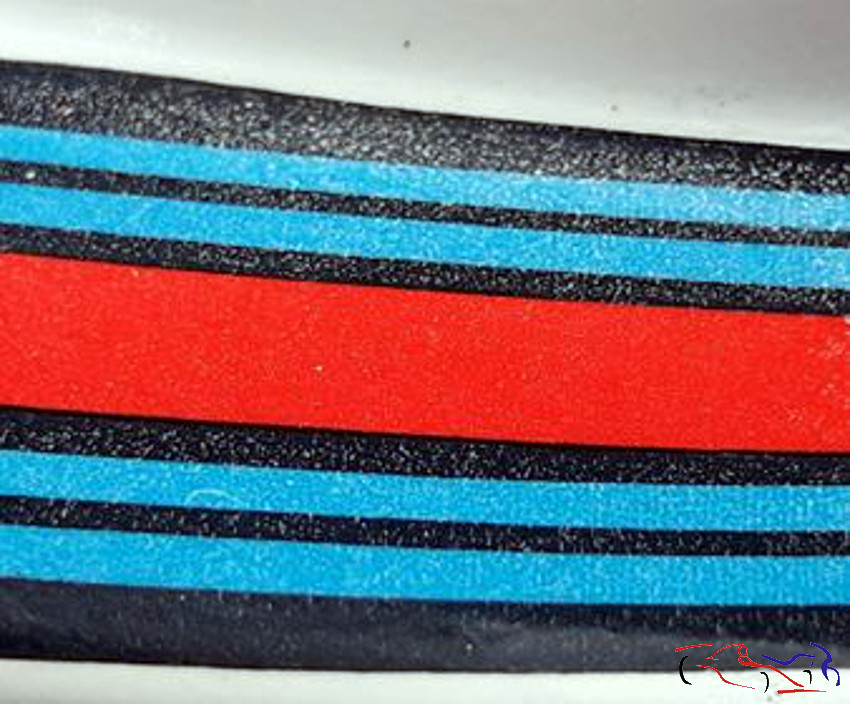 Por lo que decido comprar otro juego de calcas, y meter la carrocería en el baño de líquido de frenos, para empezar de nuevo So I decided to buy another set of decals, and put the body in the brake fluid bath, to start again: 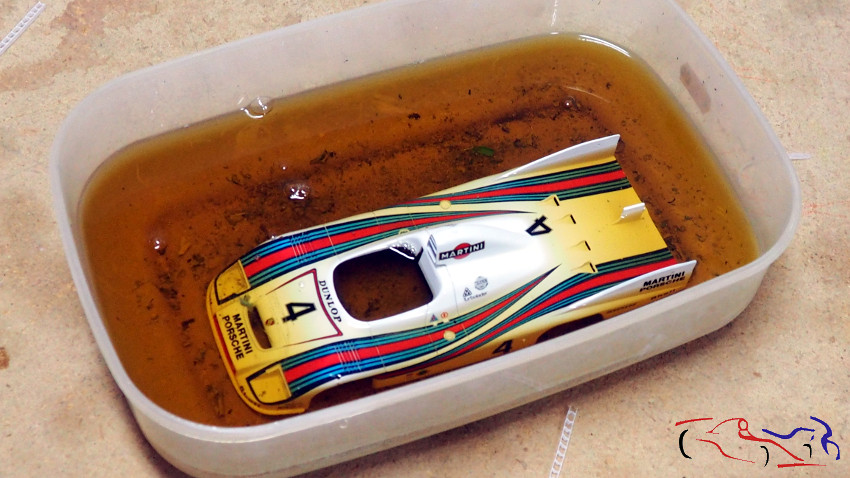 Después de 24 horas, parecía que segúia igual, pero al frotarla con el cepillo de dientes, empezó a despegarse todo, menos el putty!! After 24 hours, it seemed to be the same, but when rubbing it with the toothbrush, everything started to come off, except the putty !!  Y voilá, aquí está una vez lavada con jabón!! Y voilá, aquí está una vez lavada con jabón!! 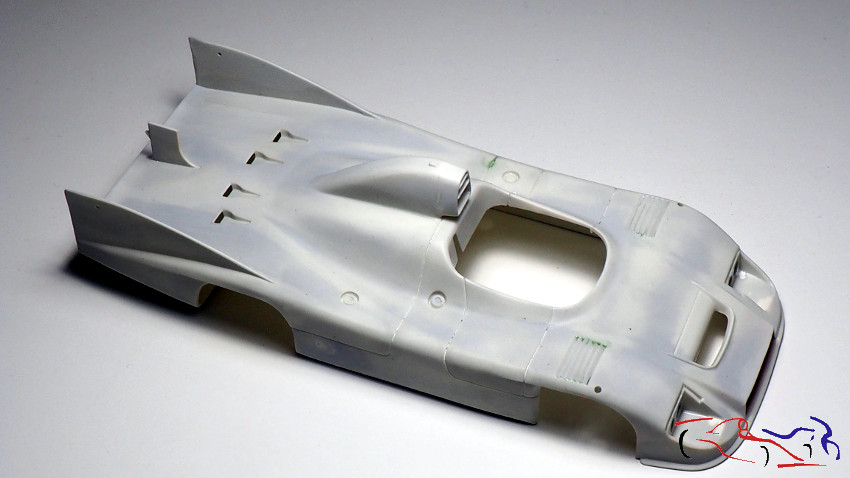 Una pequeña rotura en las aberturas de la derecha: A small break in the openings on the right: 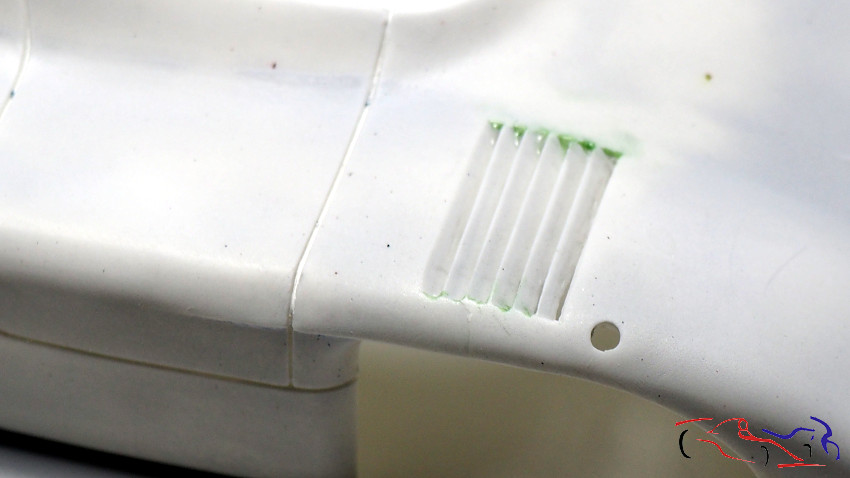 Y aprovecho para eliminar alguans cosas que sustiruiré: esos dos trocitos de plástico y la barra vertical de la tapa del depósito! And I take the opportunity to eliminate some things that I will replace: those two pieces of plastic and the vertical bar of the tank lid! 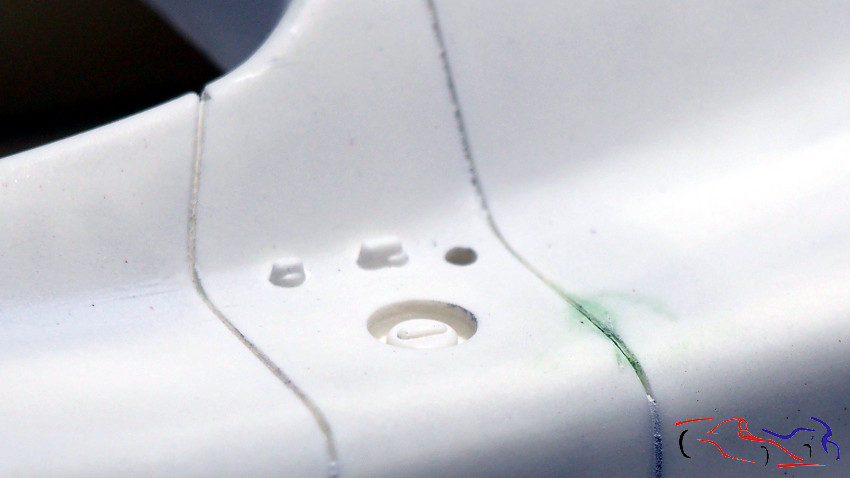 Otra pieza que voy a reemplazar es la luz que hay encima de la toma de aire: Another part that I am going to replace is the light above the air intake: 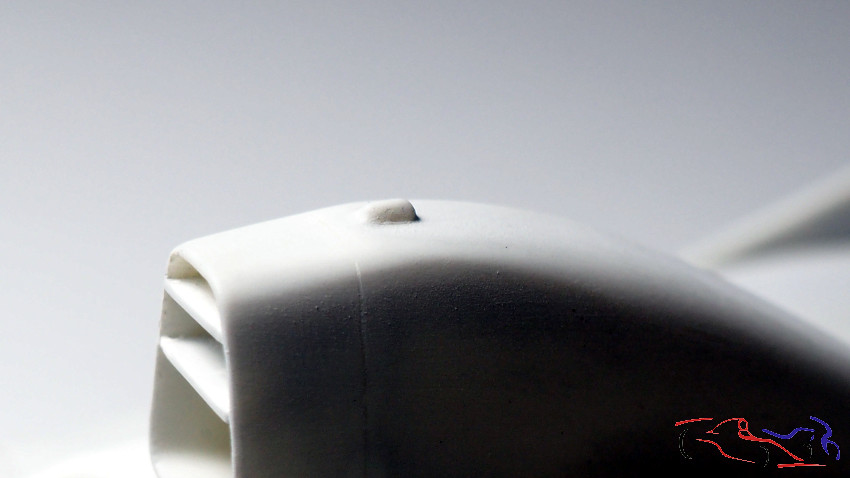 Y le doy imprimación blanca tamiya, la del bote, para tapar algunas huellas o rasguños: And I give it white tamiya primer, the one on the bottle, to cover some traces or scratches: 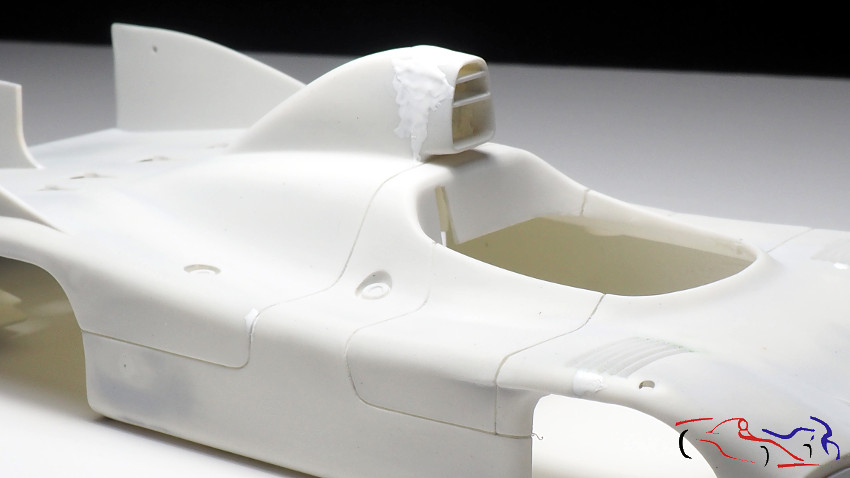 Este es el resultado, y lista para imprimar con Gravity: This is the result, and ready to prime with Gravity: 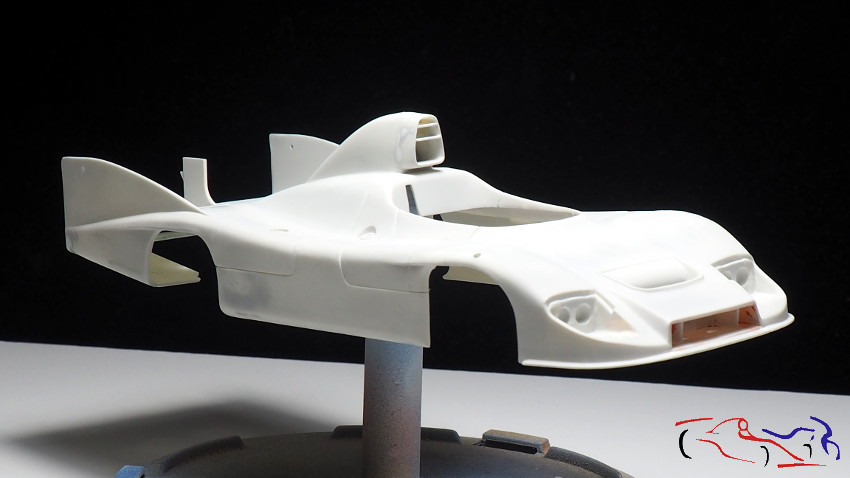 Pues ya está lista , de nuevo, para la pintura blanca: Well, it is ready, again, for white paint: 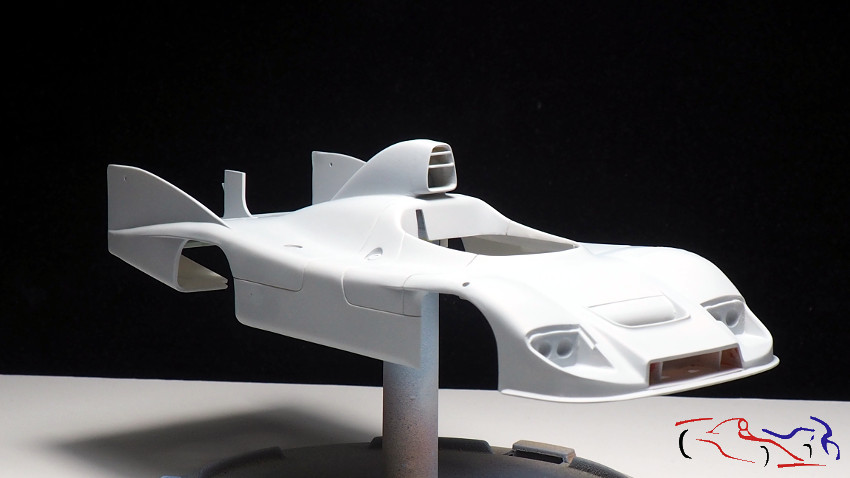 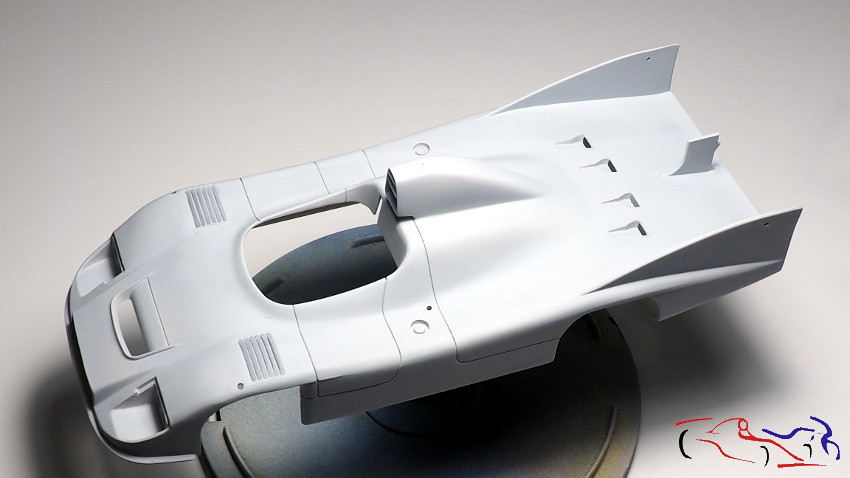 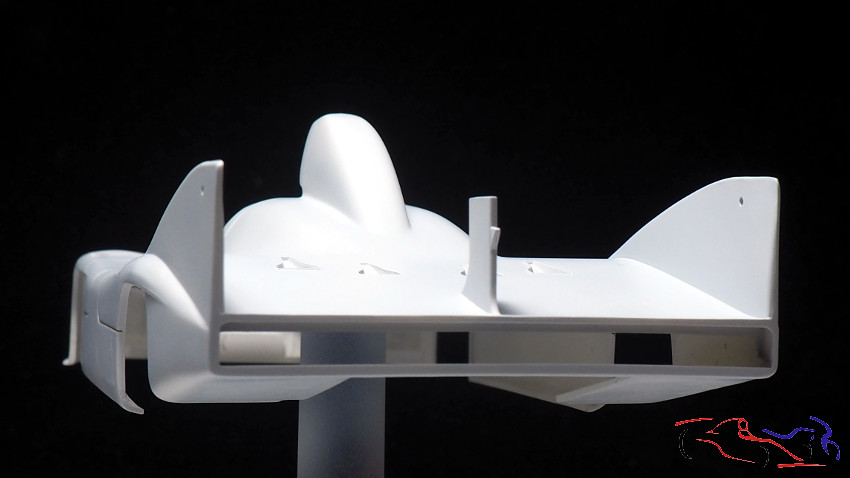 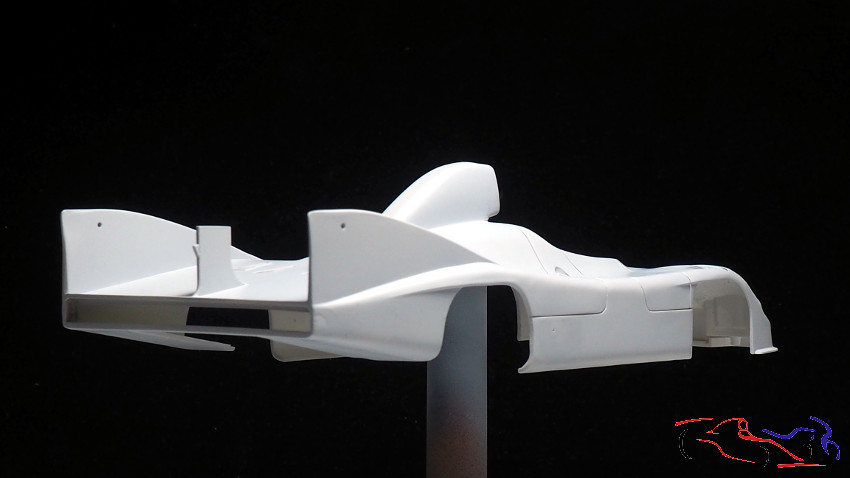 Lo siguiente será, la pintura blanca y seguir con el cockpit! Gracias por mirar y comentar! The next thing will be, the white paint and continue with the cockpit! Thanks for looking and commenting! |
|
|
|
|
|
06-17-2020, 01:46 PM
|
#27 | |
|
AF Regular
Join Date: Aug 2011
Location: Torino
Posts: 390
Thanks: 175
Thanked 62 Times in 58 Posts
|
Re: Porsche 936 Turbo Tamiya 1/24
What a pity for that nice paintjob JesusM! How did this happen? Were the decals the original or aftermarket?
|
|
|
|
|
|
06-18-2020, 07:36 AM
|
#28 | ||
|
AF Enthusiast
Thread starter
Join Date: Mar 2009
Location: Madrid
Posts: 649
Thanks: 109
Thanked 68 Times in 67 Posts
|
Re: Porsche 936 Turbo Tamiya 1/24
Quote:
|
||
|
|
|
|
06-23-2020, 07:29 AM
|
#29 | |
|
AF Enthusiast
Thread starter
Join Date: Mar 2009
Location: Madrid
Posts: 649
Thanks: 109
Thanked 68 Times in 67 Posts
|
Re: Porsche 936 Turbo Tamiya 1/24
Parece que me están cundiendo las jornadas en la cueva en estos días!! Ya tengo la carrocería blanca y radiante, lista para barniz y calcas
de nuevo!!
It seems that I am spreading the days in the cave these days! I already have a white and radiant body, ready for varnish and decals again !! 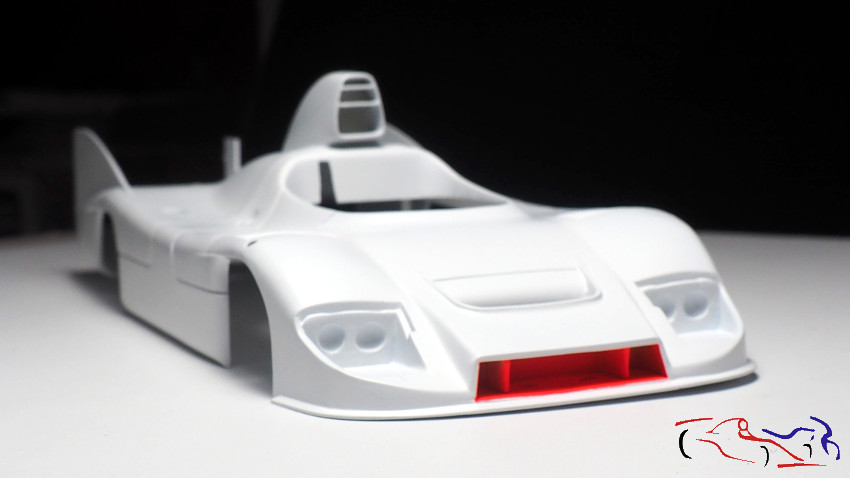 Una vez terminado de lijar y enmasillar la carrocería, la imprimo con Gravity: After finishing sanding and caulking the body, I print it with Gravity: 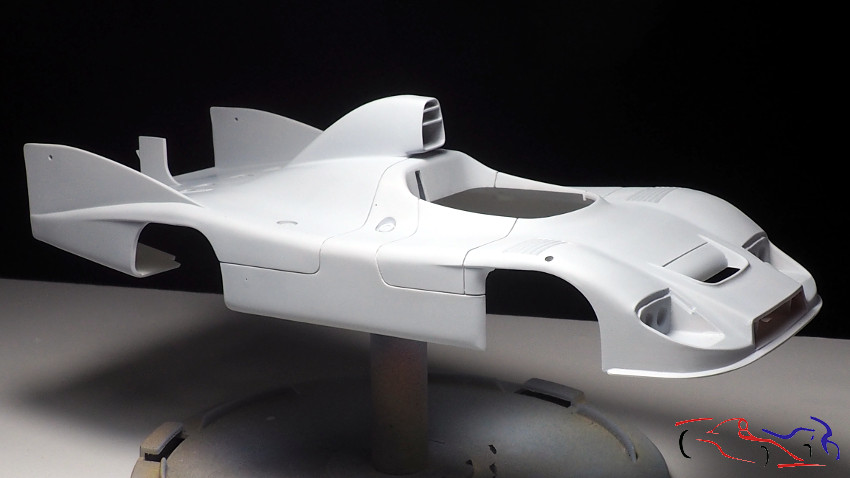 Y una vez seca, la paso una esponja de lija de grano 2000, muy suave y después la pinto con Zero Brillante: 4 capas muy finas, cubriendo la carrocería poco a poco: And once dry, I pass it a very soft 2000 grit sandpaper sponge and then I paint it with Zero Shining: 4 very thin layers, covering the body little by little: 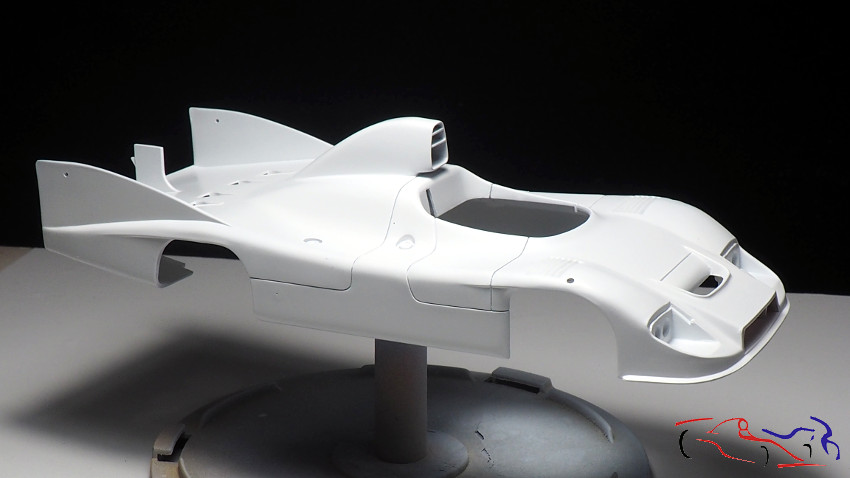 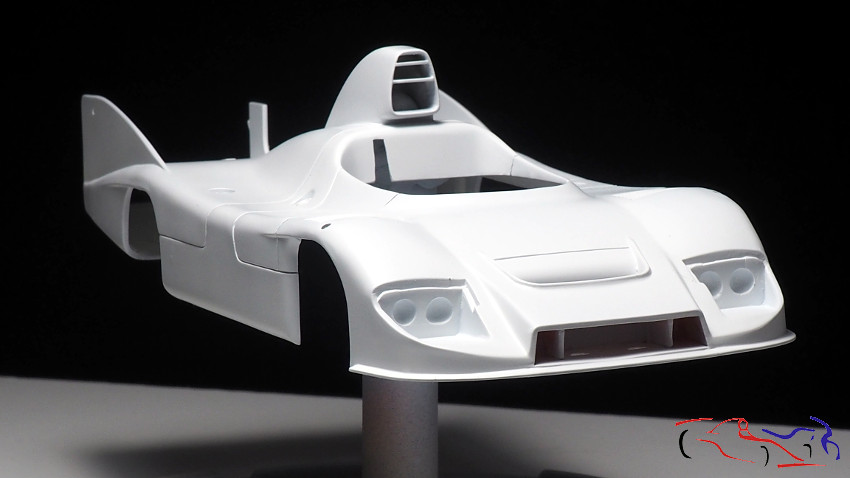 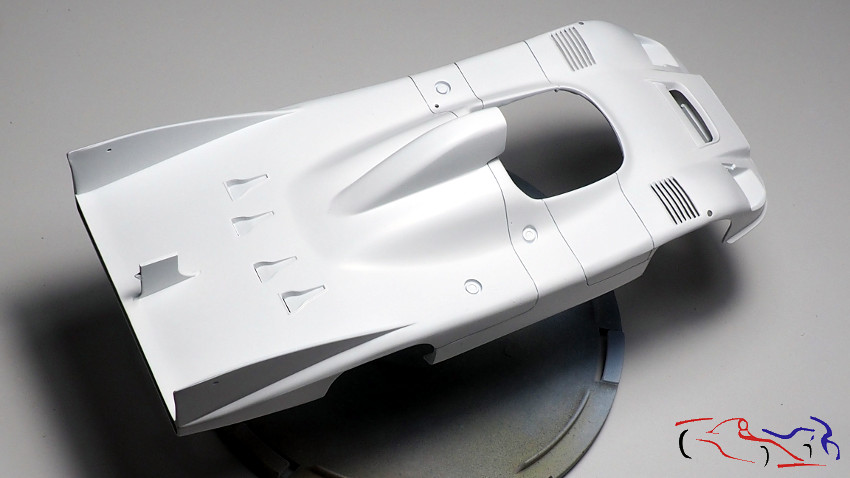 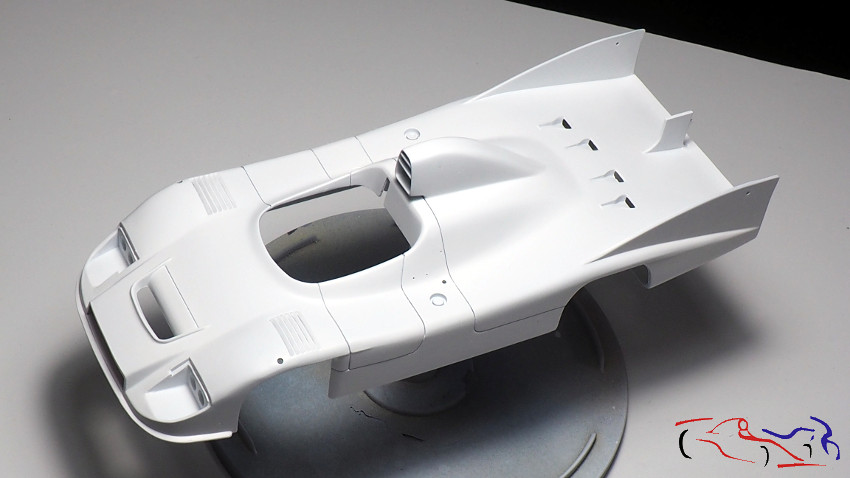 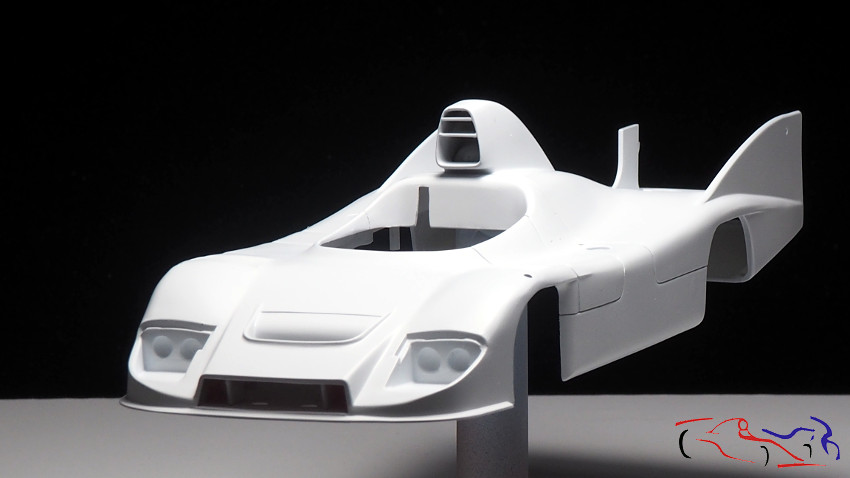 Una lijadita con grano 2000 de nuevo y enmascaro para el rojo. En esta vez, he usado el rojo de Zero previsto para los colores de M-Sport, que es más fluo, más vivo, como es el rojo de las calcas nuevas de Shunko que tengo. El resultado, lo podéis ver en la foto de inicio. A sandpaper with 2000 grit again and masking it for red. This time, I have used the red of Zero for the BMW M-Sport colors, which is more fluorescent, more vivid, as is the red of the new Shunko decals that I have. You can see the result in the body in the start photo. 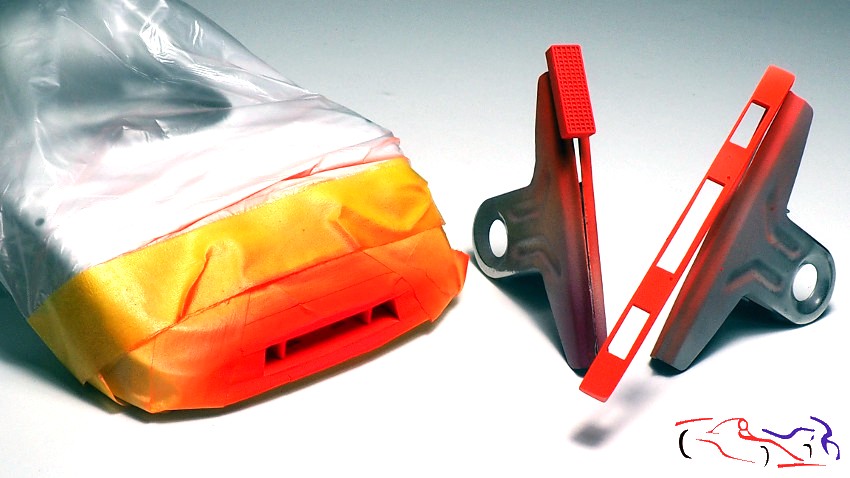 Pasamos al interior. He realizado el entramado de tubos del interior, de la parte que se ve, pegado con cianocrilato: We go inside. I have made the framework of tubes of the interior, from the part that is seen, glued with cyanoacrylate: 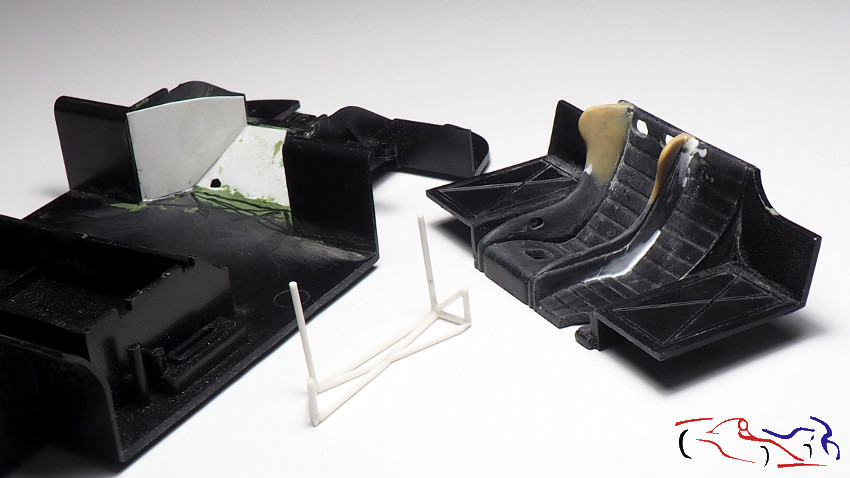 Asi es como queda en su sitio: This is how it looks on its site: 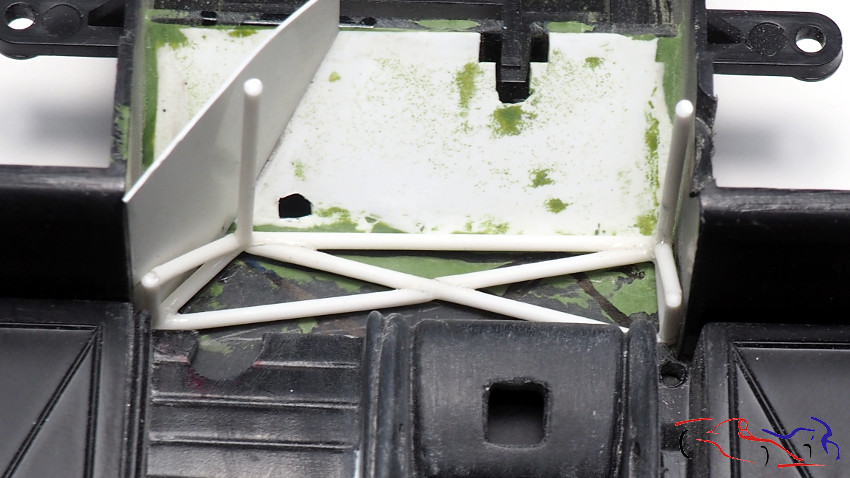 Y pintamos: el asiento con negro texturizado de Zero, y en satinado el resto de la pieza. Los tubos, el conjunto y la palanca del cambio con Aluminio también de Zero. And we painted it: the seat with Zeros textured black, and in satin the rest of the piece. The tubes, the tubes set and the gear lever with Aluminum also from Zero.  Al negro granulado, le he aplicado una capa de barniz mate de Alclad, para darle el acabado correspondiente. Aquí lo vemos con el resto de las piezas (no están todas aun). También vemos la palanca con los colores definitivos: I have applied a coat of Alclad matte varnish to the grainy black, to give it the corresponding finish. Here we see it with the rest of the pieces (they are not all yet). We also see the lever with the final colors: 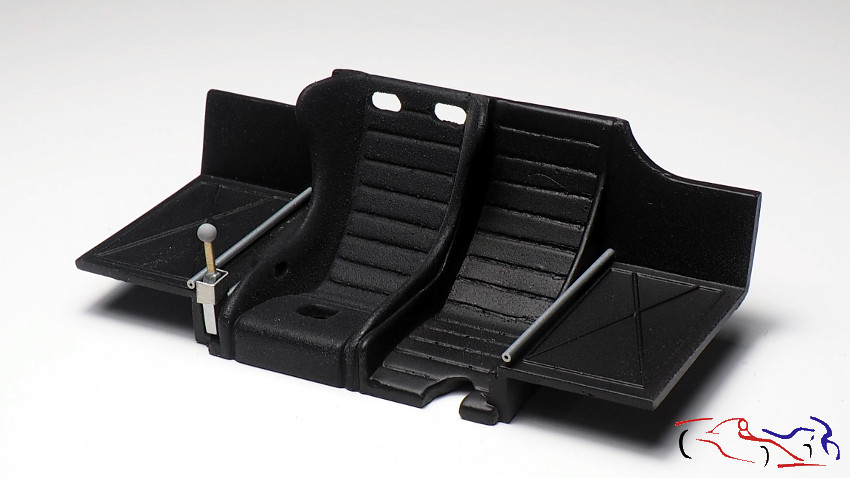 Pasamos al chasis: Imprimación parcial aplicada con Gravity: We go to the chassis: Partial primer applied with Gravity: 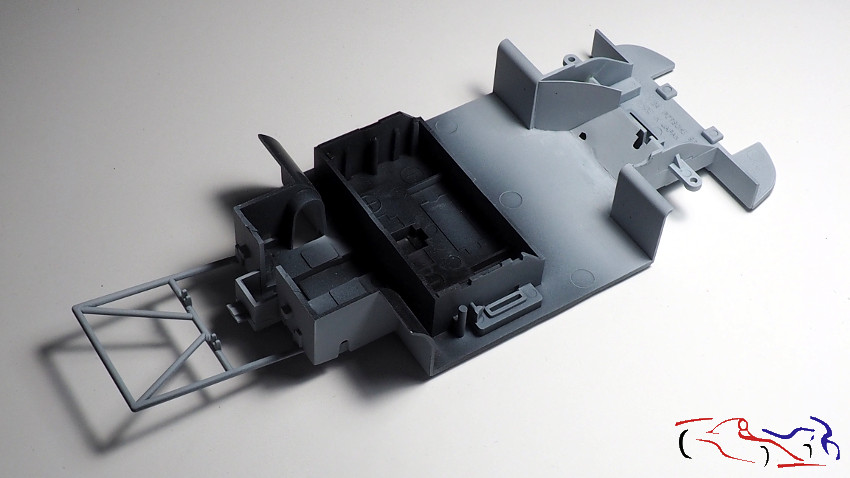 Y todos los bajos! And all the basses! 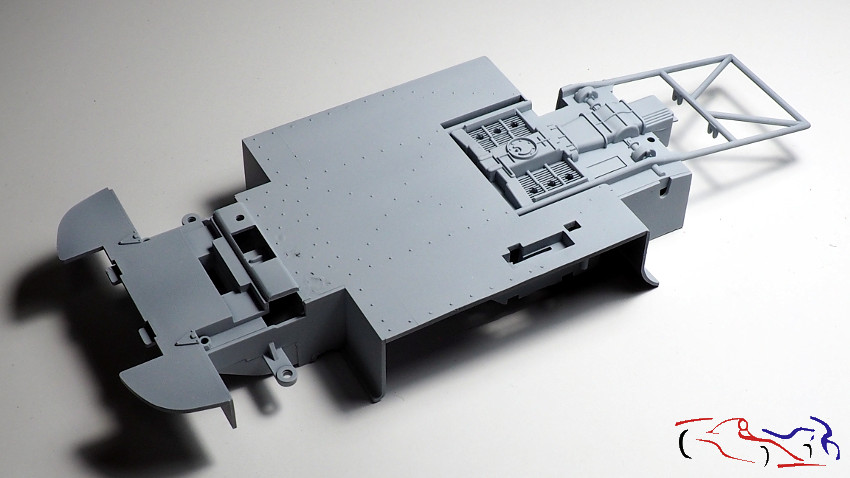 En la parte del cockpit, pintamos de amarillo Kevlar de Zero como base de las calcas que tengo que poner (vemos los tubos en su lugar definitivo). In the cockpit part, we paint Zero Kevlar yellow as the base of the decals that I have to put (we see the tubes in their final place).  Y aquí con los asientos. Se ven también los agujeros practicados para los cinturones laterales, y la trama texturizada del asiento: And here it is with the seats. You can also see the holes made for the side belts, and the textured frame of the seat: 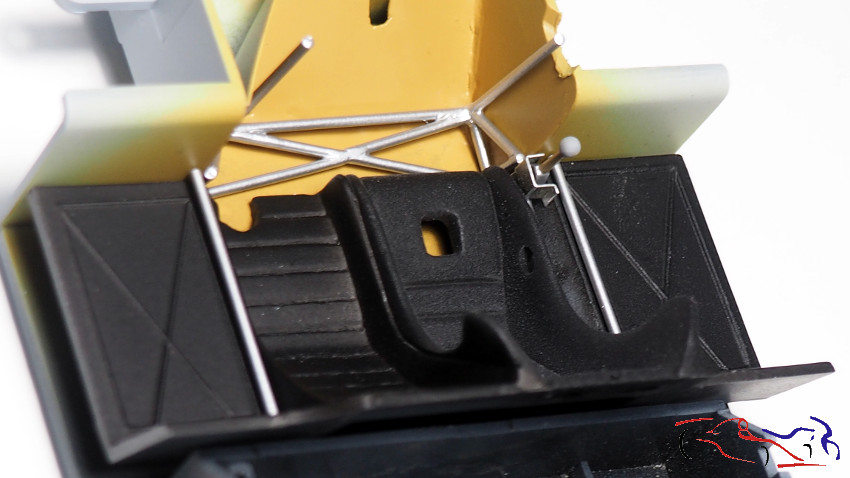 Enmascaramos y pintamos de negro semimate parte del chasis We mask and paint semi-matte black part of the chassis 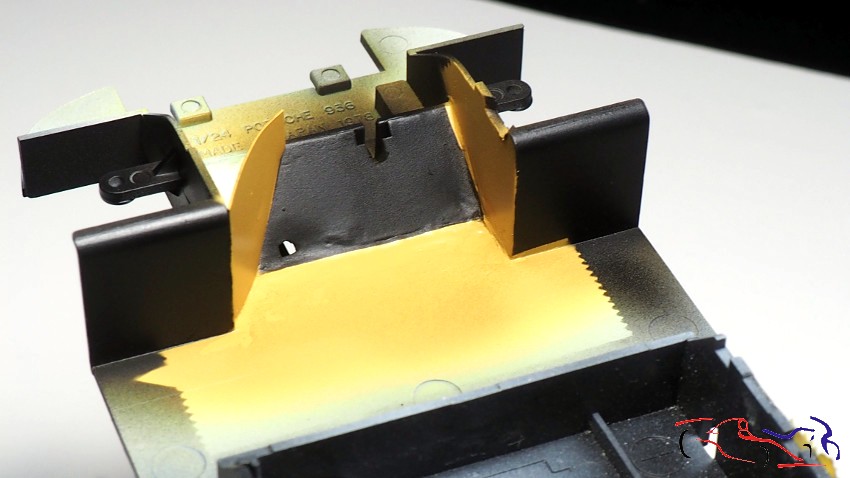 La parte trasera del chasis, también se ha pintado de negro semimate de Zero, siendo lo siguiente el color aluminio .que habrá que aplicar con difernetes tonos para diferenciar las piezas ..probaré con distintos acabados!! The rear of the chassis has also been painted in Zero semi-matte black, being the color aluminium the following step which will have to be applied with different shades to differentiate the parts .. I will try different finishes !! 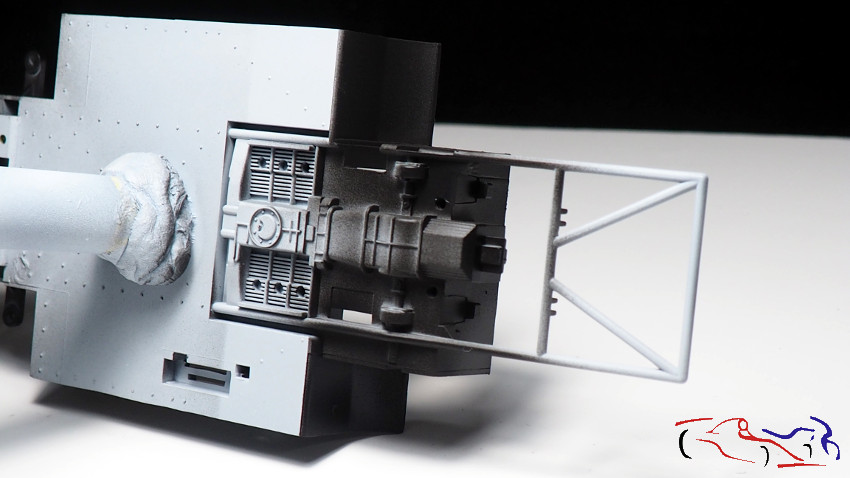 Unas de las piezas que eliminé de la carrocería en esta segunda etapa eran las pertenecientes a las palancas de extinción y del corta corriente. La de extinción, la sustituiré por una de resina de Scalelab, y el corta corriente, lo cogí del fotograbado del 936 de S27, lo doble un poco, y le añadí un tornillo por encima, y una tuerca por debajo. Está simplemente con la imprimación. Y a la antena, cogí la pase de la antena del kit, le ice un agujero, corté un tubo de 4mm y le pegué un trozo de plástico estirado. Decir que el plástico lo sustituí por un cable de metal. Some of the parts that I removed from the bodywork in this second stage were those belonging to the extinguishing levers and the current cut-off. I will replace the extinguishing one, with a resin one from Scalelab, and, I took the power cut-off from the photoengraving of the S27 936, I bent it a little, and added a screw on top, and a nut on the bottom. It is simply with the primer in the picture. And to do the antenna, I took the antenna pass from the kit, made a hole in it, cut a 4mm tube and glued a piece of stretched plastic. Say that the plastic was replaced by a metal cable. 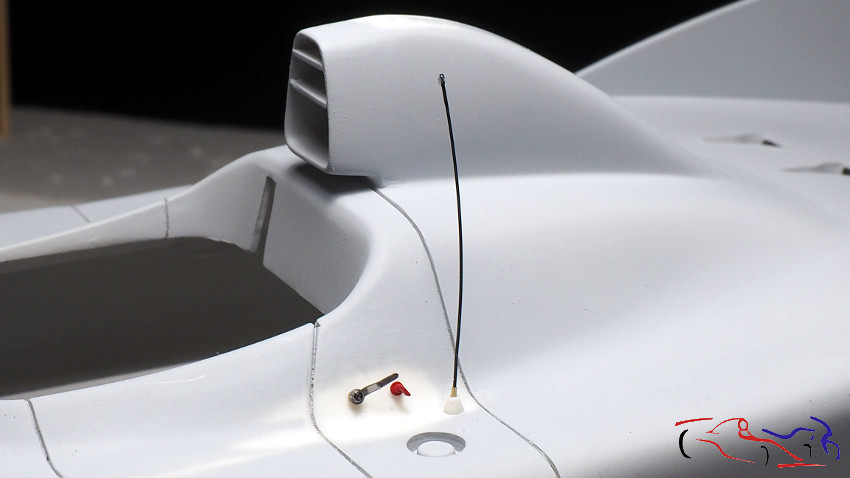 Mas detalles: el alerón trasero tiene un plano superior movible, y para fijarlo, tiene un dispositivo que se sujeta con el soporte vertical. Como base, uso plancha de cobre, tubos de cobre de 4mm y tubo de aluminio de 6mm exterior. Los tubos de cobre irán soldados a la pletina, en esos agujeros y More details: the rear wing has a movable upper plane, and to fix it, it has a device that is fixed with the vertical support. As a base, I use copper plate, 4mm copper tubes and 6mm aluminum outer tube. The copper tubes will be welded to the plate, in those holes and 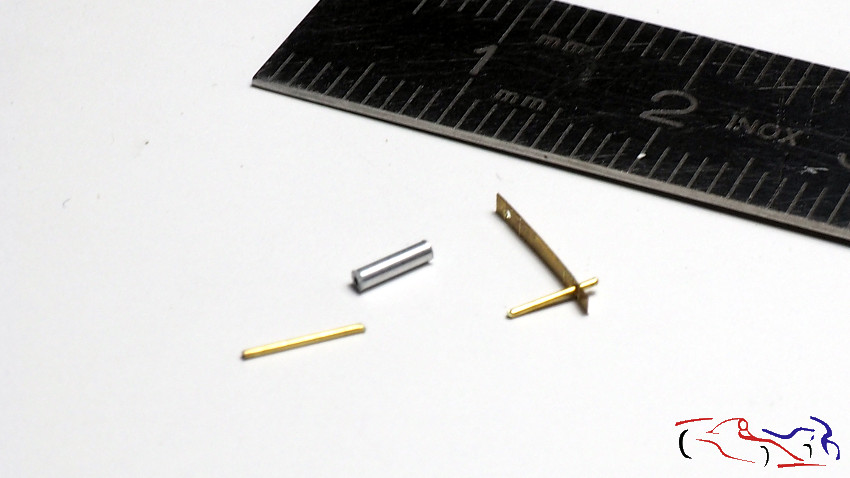 y aquí tenemos el resultado: las pletinas dobladas y soldadas, con el tubo de cobre petido en el de aluminio, y al final, la pieza que irá pegada en el alerón. Al lado, la antena. and here we have the result: the bent and welded plates, with the petite copper tube in the aluminum tube, and at the end, the piece that will be glued to the spoiler. Next to it, the antenna. 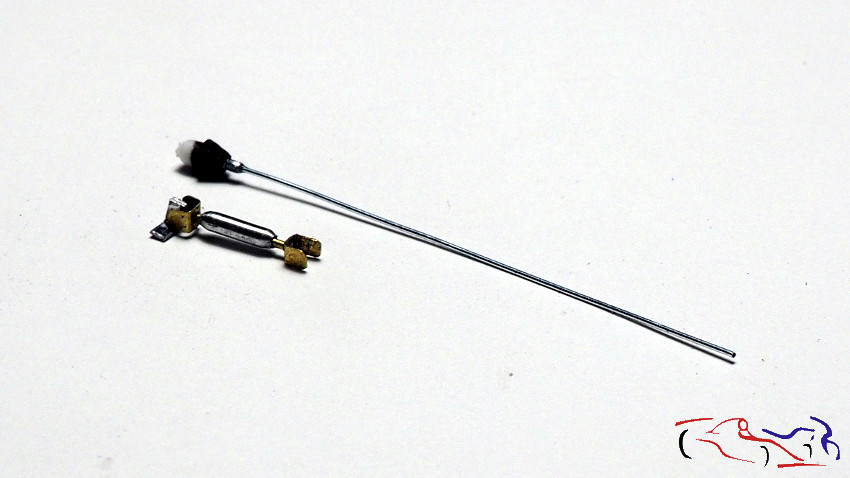 Y esto es todo por hoy!! Gracias por ver y comentar! And thats all by now!! Thanks for viewing and commenting! |
|
|
|
|
|
06-24-2020, 03:12 AM
|
#30 | |
|
AF Regular
Join Date: May 2010
Location: LIEGE
Posts: 401
Thanks: 148
Thanked 48 Times in 48 Posts
|
Re: Porsche 936 Turbo Tamiya 1/24
Always a pleasure to admire your updates Jesus. Looking forward to seeing the "new" finished body
|
|
|
|
|
|
|
POST REPLY TO THIS THREAD |
 |
|
|


