|
|
|

|
|
| Search | Car Forums | Gallery | Articles | Helper | AF 350Z | IgorSushko.com | Corporate |
|
| Latest | 0 Rplys |
|
|||||||
| WIP - Motorsports Post topics for any "Work In Process" motorsports vehicles in this sub-forum. |
 |
 Show Printable Version | Show Printable Version |  Email this Page | Email this Page |  Subscribe to this Thread
|
|
|
Thread Tools |
 01-16-2023, 07:56 AM
|
#1 | |
|
AF Enthusiast
Join Date: Mar 2009
Location: Madrid
Posts: 649
Thanks: 109
Thanked 68 Times in 67 Posts
|
Lancia Stratos 1979 J Bagration Hasegawa (1/24)
Una vez terminado el Ferrari GTC4, vamos a ir comenzando un kit que no me voy a complicar mucho en cuanto a añadidos: Lancia Stratos Hasegawa a escala 1/24. Para ello, tomaremos este kit correspondiente al rally de Montecarlo del año 1981:
Once finished the Ferrari GTC4, we are going to start a kit that It will not be complicated too much in terms of additions: Lancia Stratos Hasegawa in 1/24 scale. For this, we will take this kit corresponding to the 1981 Montecarlo rally: 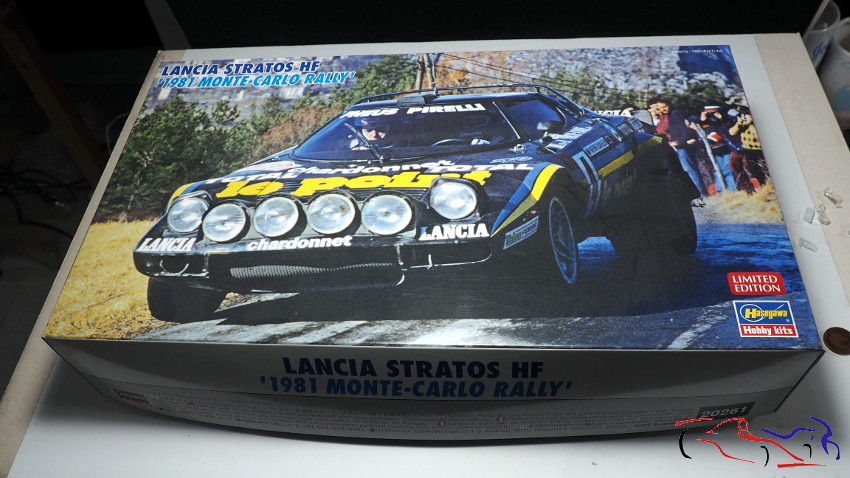 Y la versión escogida es la verde que usó Jorge de Bagration en los rallyes de España del año 1979: And the version chosen is the green one used by Jorge de Bagration in the 1979 Spanish rallies: 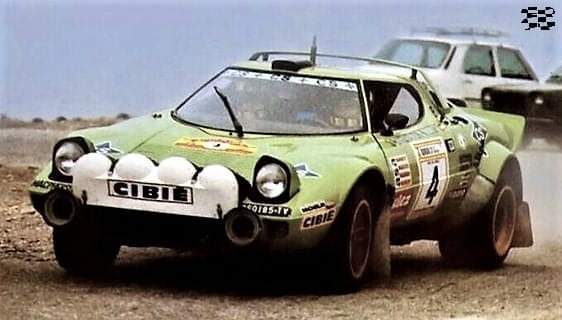 Y como complementos, tenemos la pintura de Gravity-Colors Spain, las llantas de aluminio de Studio27, y las calcas específicas realizadas para el rally “2000 Virajes”, que desafortunadamente, tuvo que retirarse por accidente. And as complements, we have the paint by Gravity-Colors Spain, the aluminium rims by Studio27, and the specific decals made for the rally “2000 Virajes”, which unfortunately, he had to be withdrawn by accident. 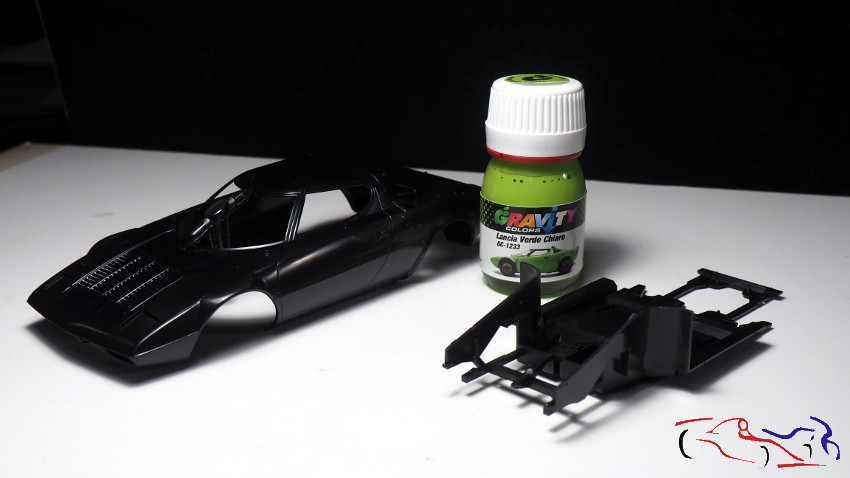 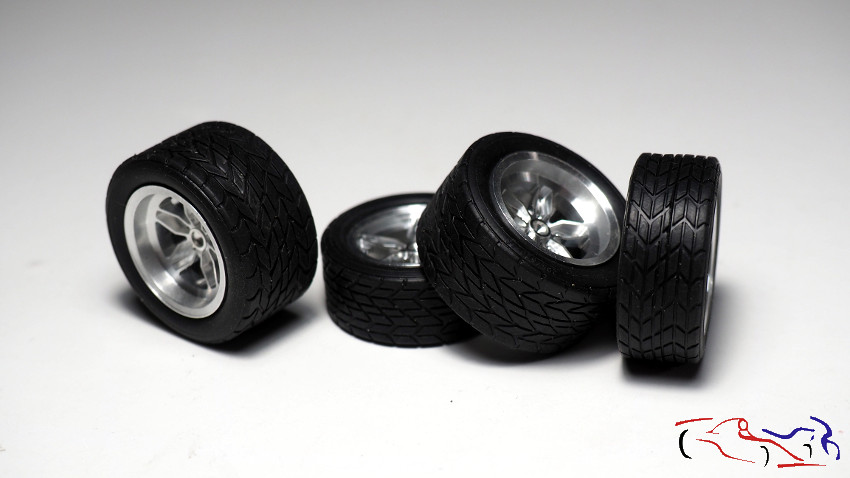 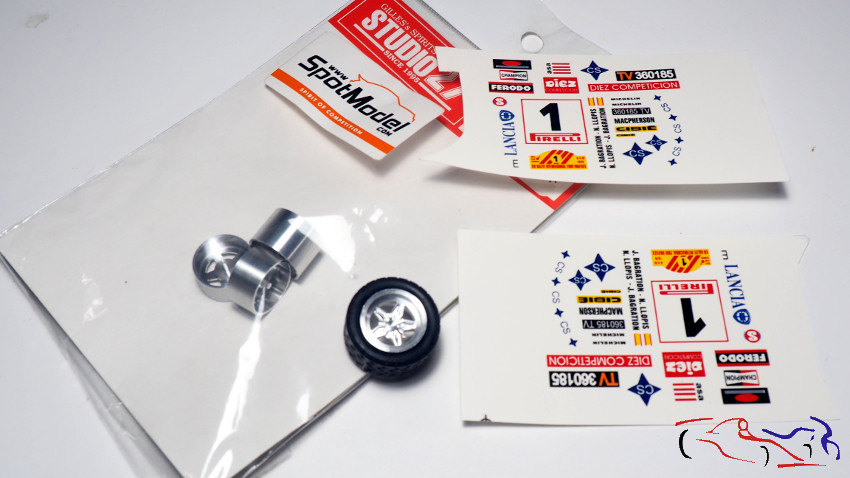 Lo primero que hago es revisar el encaje del chasis en la carrocería, pues viendo un video de un japonés que está haciendo un trabajo increible, se decide a cortar el capó y el portón trasero proque el chasis no encaja. Y es cierto: es muy dificil encajarlo. Y auqnue yo lo conseguí, no quiero ni pensar como se haría con toda la carrocería terminada!! Vemos en las siguientes imágenes, como el interior del paso de rueda no termina de entrar, porque los bajos de la carrocería se redondean hacía el centro. The first thing I do is to check the fit of the chassis to the bodywork, because watching a video of a Japanese guy who is doing an incredible job, he decides to cut the bonnet and the tailgate because the chassis doesn’t fit. And it’s true: it’s very difficult to fit it. And although I managed to do it, I don’t even want to think about how it would be done with the whole bodywork finished! We can see in the following pictures, how the inside of the wheel arch doesn’t fit, because the underbody is rounded towards the centre. 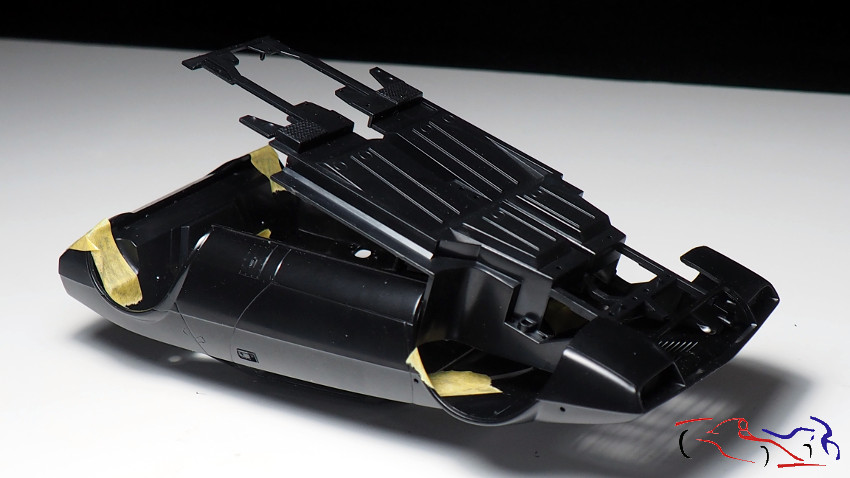 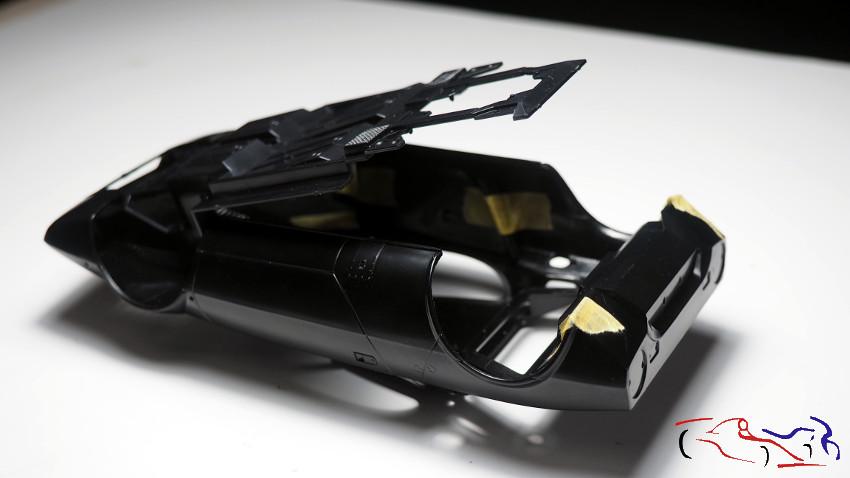 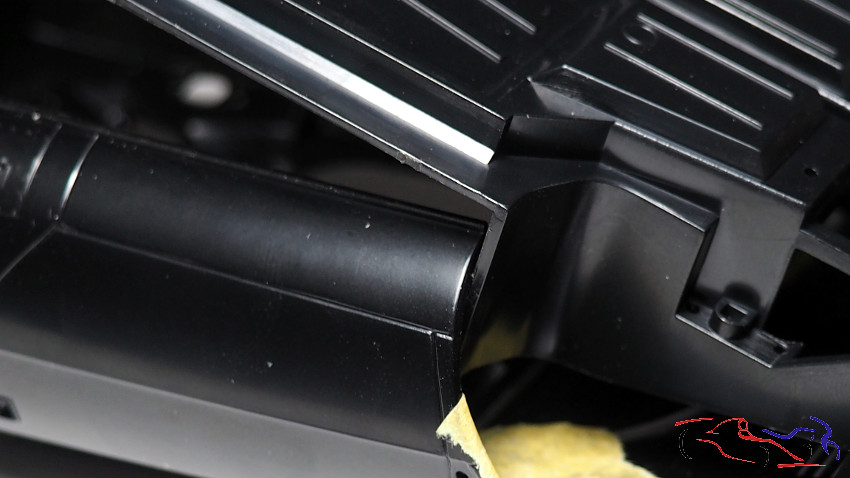 Entonces, lo que he hecho es cortar una L en os laterales del chasis para que entre bien, aunque tendré que rellenar los pasos de rueda interiores de delante, y hacer un apoyo del chasis en el interior de la carrocería. So, what I’ve done is to cut an L in the sides of the chassis to make a good fit, although I’ll have to fill the front inner wheel arches, and make a support for the chassis inside the body. 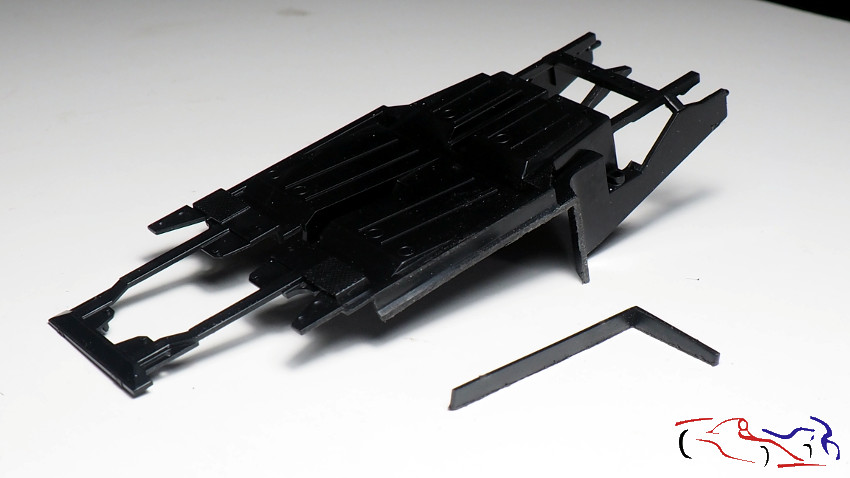 Más piezas que retocar: los pasos de reuda traseros vienen con una curvatura en el plano inclinado que no se corresponde al original, por lo que toca lijar e igualar. A su vez, vienen con unas marcas que corresponden a la linea longitudinal lateral de la carrocería, que existen, por lo que habrá que enmasillar. More parts to touch up: the rear wheel arches come with a curvature in the inclined plane that does not correspond to the original, so they need to be sanded and levelled. At the same time, they come with some marks that correspond to the lateral longitudinal line of the bodywork, which they do not exist, so it will be necessary to putty them. 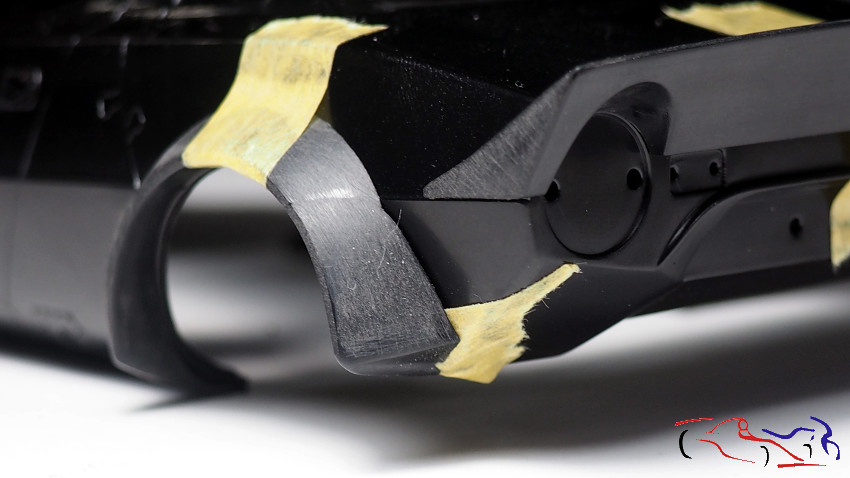 Aquí vemos bien la marca que hay que rellenar, manteniendo la linea d epanel que viene del porton trasero. También hay que redondear la esquina inferior delantera, que no tiene esa forma de pico: Here we can clearly see the mark to be filled in, keeping the panel line coming from the tailgate. The lower front corner, which does not have that beak shape, also needs to be rounded: 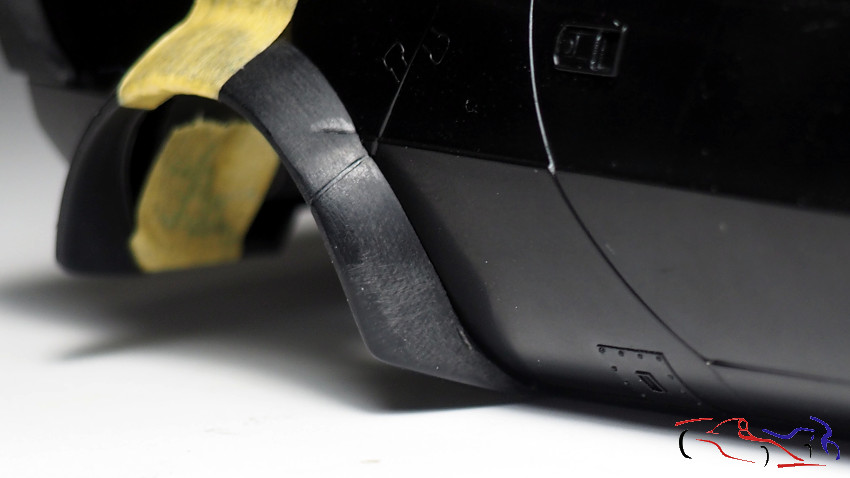 Y respecto a la deriva trasera, en genral las formas no son tan rectas, y hay que redondearlas un poco: And with regard to rear drift, in general the shapes are not so straight, and need to be rounded off a little: 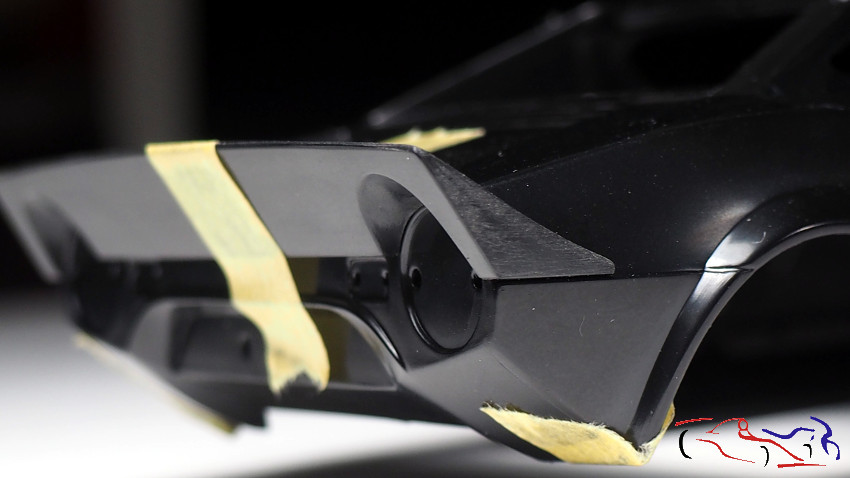 En cualquier caso, el coche es un clásico de los rallys con unas formas increibles. Una pena que sea negra la maqueta porque el negro para trabajarlo es muy malo!! In any case, the car is a rally classic with incredible shapes. It’s a pity that the model is black, because black is very bad to work with!  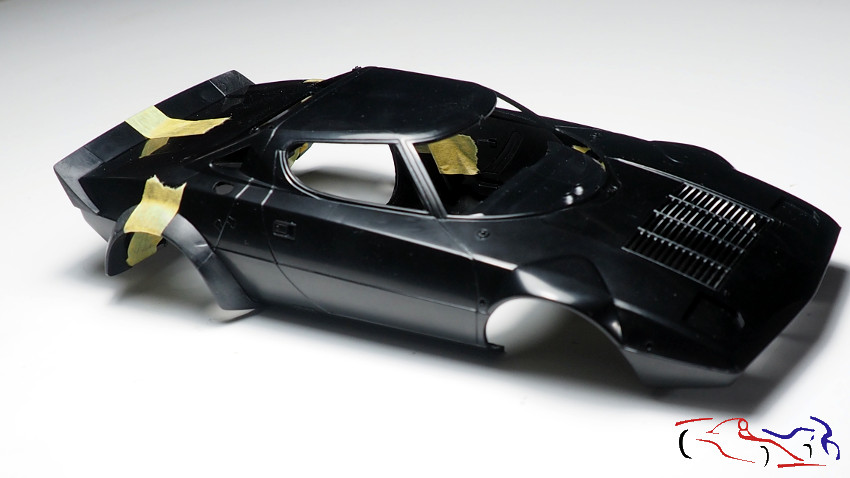 Gracias por ver y comentar!. Thanks for watching and commenting! Last edited by JesusM; 01-20-2023 at 07:57 AM. Reason: Script mistake fixed! |
|

|

|
| The Following User Says Thank You to JesusM For This Useful Post: |
mrgixxer (01-16-2023)
|
|
01-19-2023, 01:17 PM
|
#2 | |
|
AF Regular
Join Date: Aug 2011
Location: Torino
Posts: 390
Thanks: 175
Thanked 62 Times in 58 Posts
|
Re: Lancia Stratos 1979 J Bagration Hasegawa (1/24)
Great job on the Stratos Jesus! The fit of the chassis/body is quite difficult but you seem to solved it well! Those Studio 27 rims are beautiful in this natural aluminium color, it is too bad it has to be painted
 |
|
|
|
|
|
01-19-2023, 03:53 PM
|
#3 | ||
|
AF Enthusiast
Thread starter
Join Date: Mar 2009
Location: Madrid
Posts: 649
Thanks: 109
Thanked 68 Times in 67 Posts
|
Re: Lancia Stratos 1979 J Bagration Hasegawa (1/24)
Quote:
|
||
|
|
|
|
01-30-2023, 07:59 AM
|
#4 | |
|
AF Enthusiast
Thread starter
Join Date: Mar 2009
Location: Madrid
Posts: 649
Thanks: 109
Thanked 68 Times in 67 Posts
|
Re: Lancia Stratos 1979 J Bagration Hasegawa (1/24)
Continuamos preparando las piezas para imprimar del Lancia Stratos. Lo primero de todo, disculpad por las fotos porque al ser las piezas negras, se ven mal y tienen poco detalle. Y empezamos montando los soportes del motor, que no existe. Todo irá pintado de negro con sus toques metálicos. Esto era necesario para probar que la carrocería ajustara bien:
We continue preparing the parts for priming the Lancia Stratos. First of all, sorry for the photos, because the parts are black, and they look bad with very little detail. We start assembling the engine mounts, which does not exist. Everything will be painted black with metallic touches. This was necessary to test that the bodywork fit well: 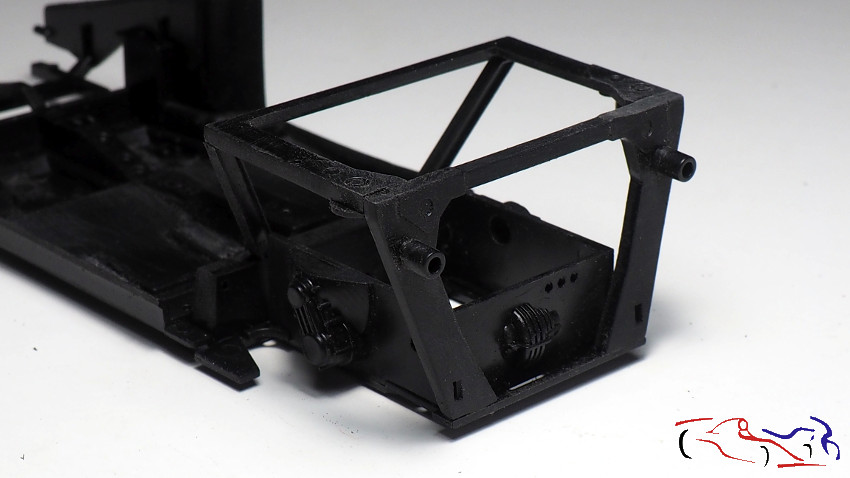 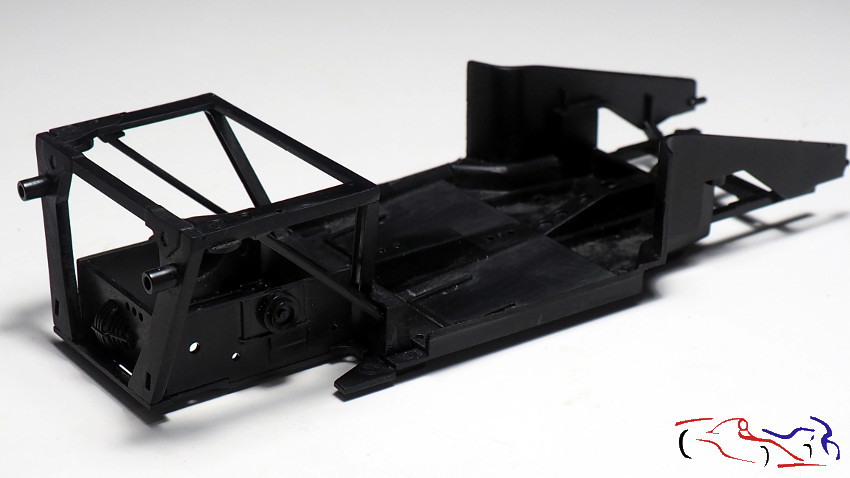 Una vez colocados los soportes anteriores, probamos a ver como quedan los tubos de escape, que creo que tendré que mejorar Once the previous brackets are in place, we try to see how the exhaust pipes look like, which I think Ill have to improve 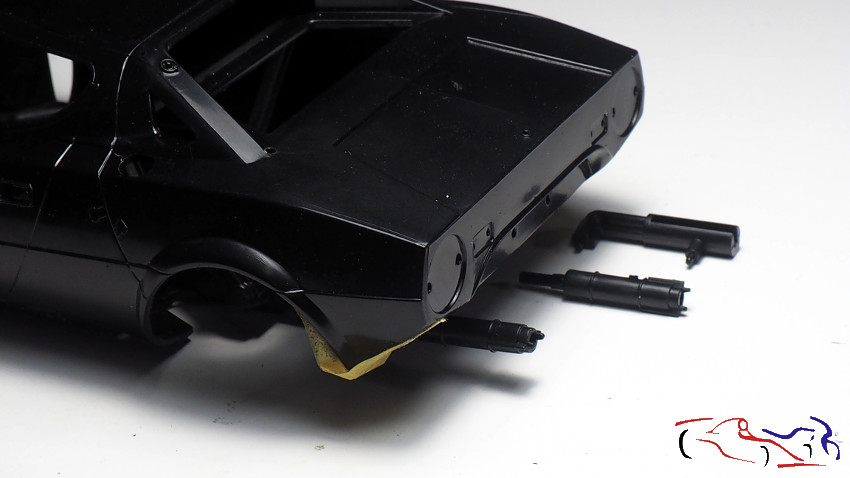 El siguiente paso es gastar los neumáticos y para eso, voy a usar ls nuevas llaves de vaso que he comprado, de varias medidas. Pongo los neumáticos en las llave correspondiente y ésta en el taladro. En la segunda foto vemos la diferencia entre la rueda inclinada (ya lijada) y la vertical de la derecha, que está sin lijar. The next step is to wear out the tyres and for that, Im going to use the new socket spanners I bought of various sizes. I put the tyres in the sockets and the sockets in the drill. In the second photo we can see the difference between the inclined wheel (already sanded) and the vertical one on the right, which is unsanded. 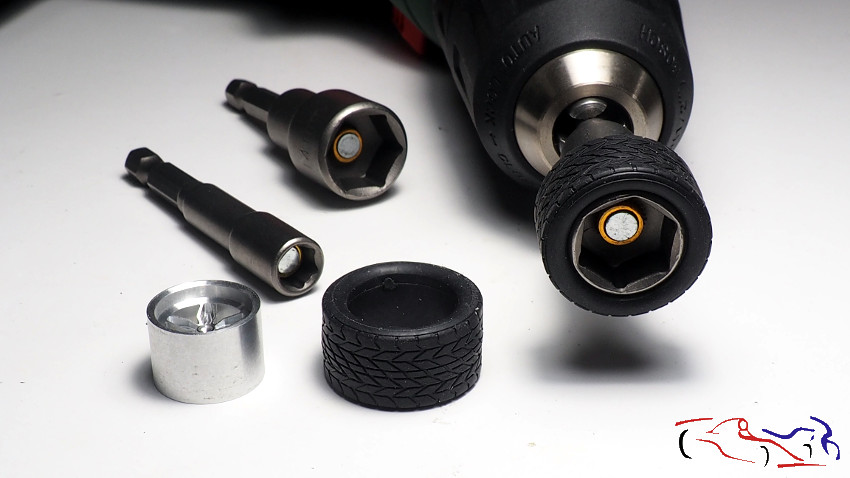  Otra pieza que mejoro: la palanca del cambio de marchas. Elimino el tubo de plástico y le pongo un trozo de broca de 1 mm: Another part I improve: the gear shift lever. I remove the plastic tube and put a piece of 1 mm drill bit in it: 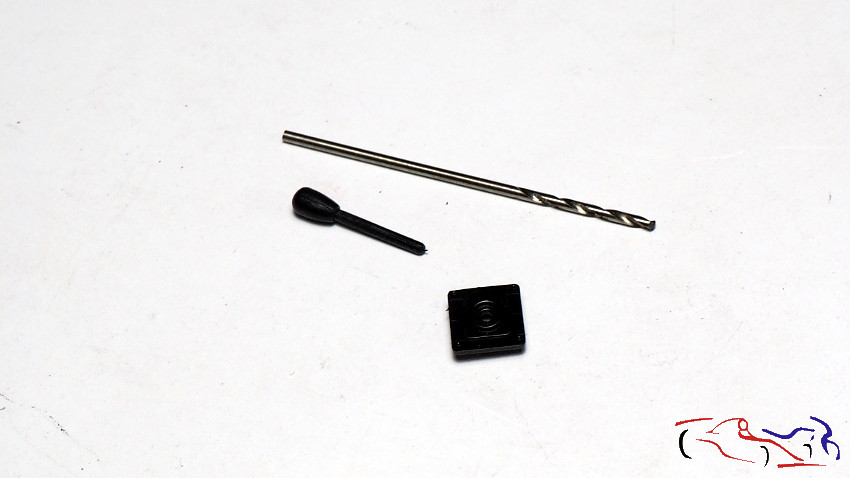 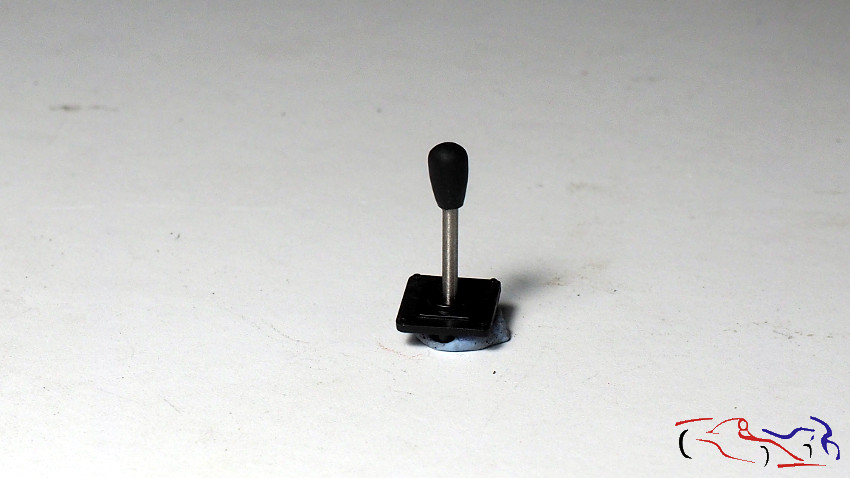 Ahora es el turno de los asientos. Tenemos los reposacabezas que van unidos por unos trozos de plástico, que sustituiremos por varillas de metal. Primero hacemos los agujeros en el asiento, con una broca de 0,4 mm, FIjaremos entonces el reposacabezas por detrás, y haremos sus agujeros a la misma medida que el asiento. Ponemos las varillas y tapamos con plástico blanco, las fijaciones iniciales. El resultado es notable! Now it is the turn of the seats. We have the headrests, which are attached by pieces of plastic, which we will replace with metal rods. First we make the holes in the seat, with a 0.4 mm drill bit, then we will fix the headrest from behind to the seat, and we will make the holes at the same size as the seat. We put the rods and cover with white plastic, the initial fixings. The result is remarkable! 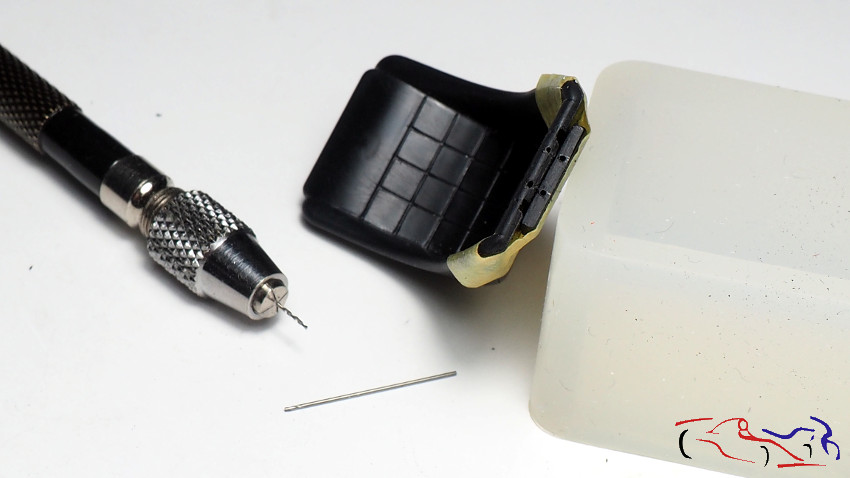 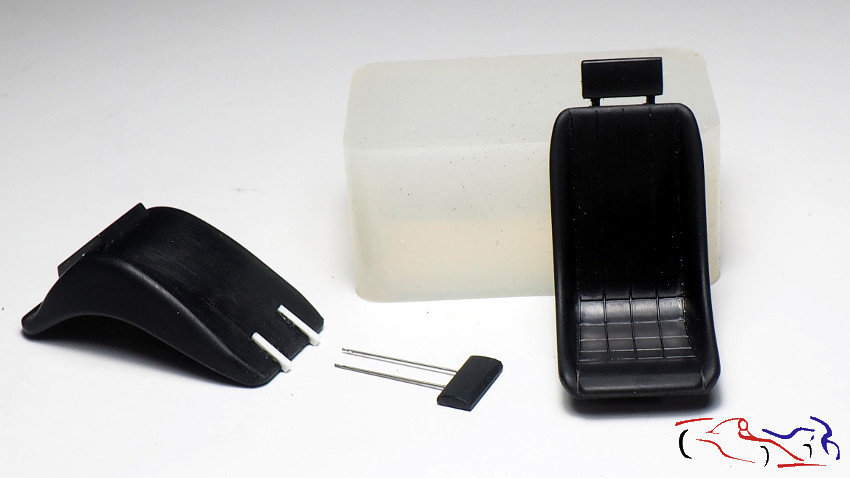 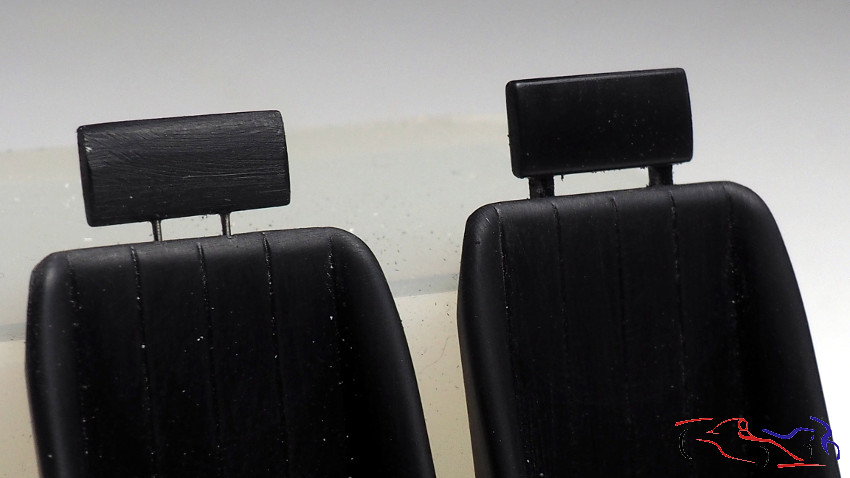 SI recordáis del post anterior, recorté los laterales del chasis para que se pudiera introducir mejor en la carrocería, pero una parte de los pasos de rueda delanteros se eliminaba, y había que taparlas. Para ello, coloco primero cinta de enmascarar y pinto las formas de las piezas, según la forma interior de la carrocería. If you remember from the previous post, I cut out the sides of the chassis so that it could be better inserted into the bodywork, but part of the front wheel arches were removed, and they had to be covered. To do this, I first put masking tape and paint the shapes of the pieces, according to the interior shape of the bodywork. 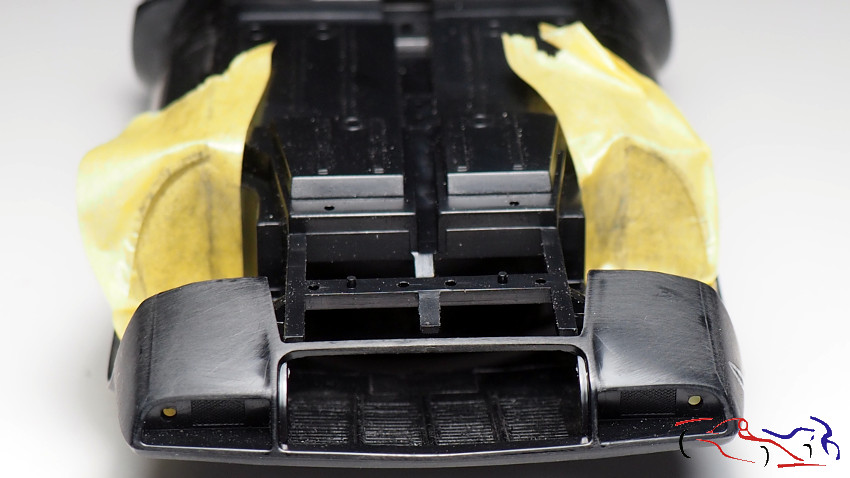 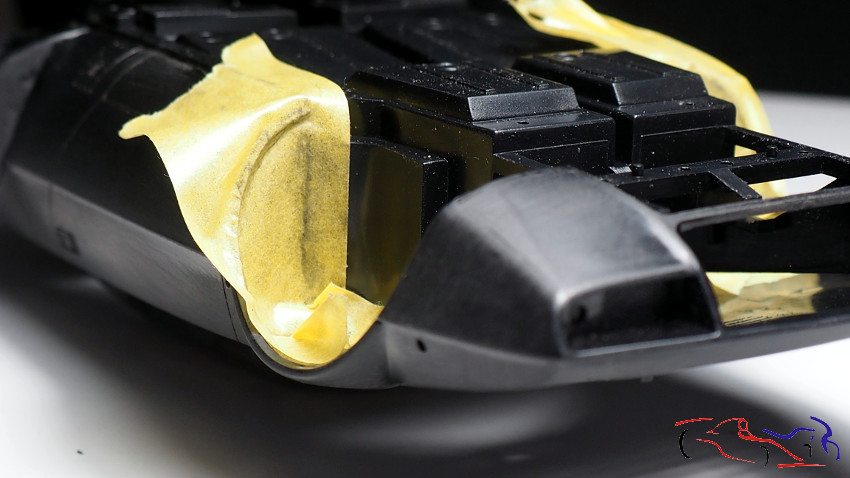 A continuación, paso las platillas a plástico de 1mm, recorto, ajusto y pego en su sitio. Depsués aplico masilla Tamiya de Poliuretano: Next, I transfer the stencils to 1mm plastic, cut, adjust and glue them in place. Then I apply Tamiya Polyurethane putty: 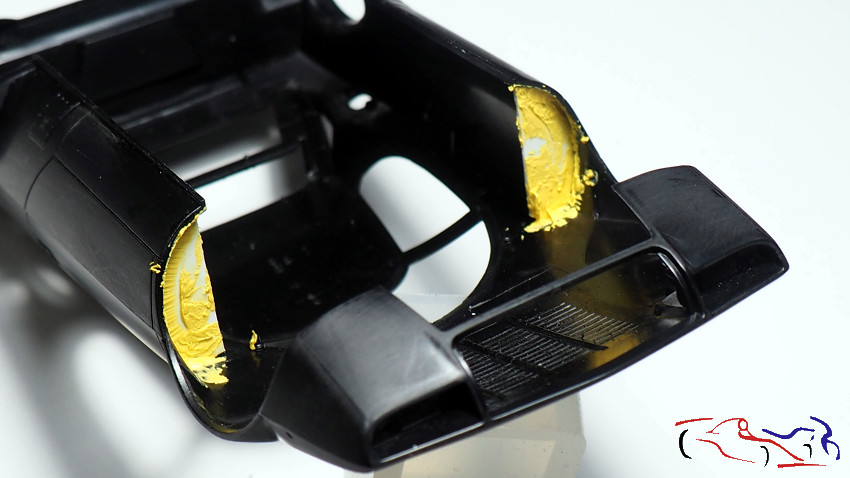 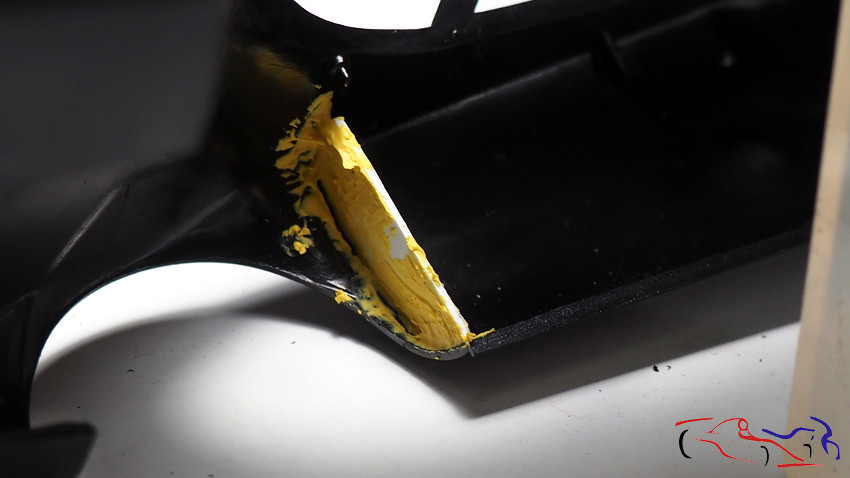 Y ya que usamos la masilla, la aplico en las piezas de la carrocería donde he visto huecos: los aletines traseros y el arco superior. Decir, que antes repasé las lineas de los paneles y los bordes de las ventanas, asi como una lijada a toda la carrocería. Lo siguiemte será lijar la masilla e imprimar: And since we are using the putty, I apply it on the parts of the bodywork where I have seen holes: the rear wheel arches and the upper wing. Before that, I went over the lines of the panels and the edges of the windows, as well as sanding the whole bodywork. Next I will sand the putty and prime: 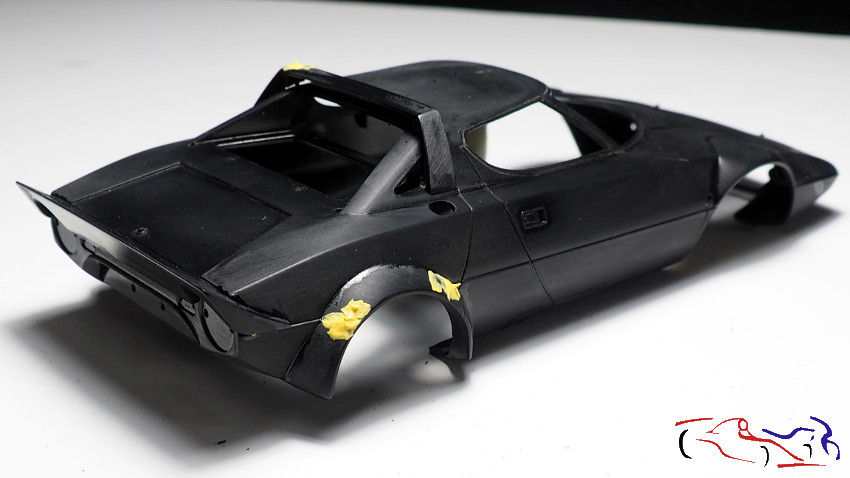 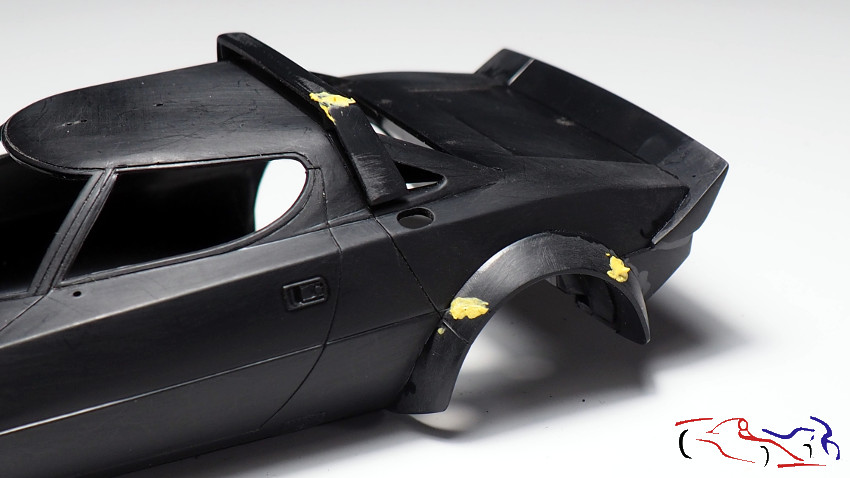 Y por supuesto, colocar todas las piezas para su proceso de imprimación y posterior pintura: And of course, to place all the pieces for the priming and painting process: 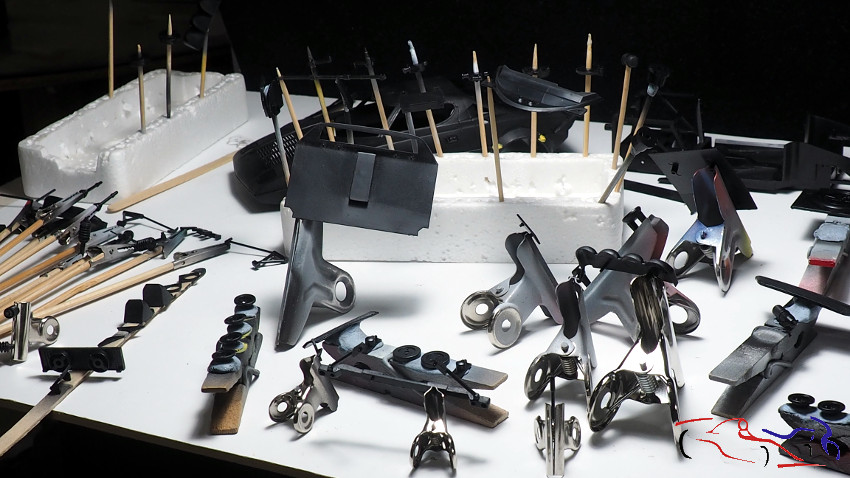 En el siguiente post, veremos ya las piezas normalmente en un color claro, donde revisaremos los posibles fallos. Gracias por ver y comentar! In the next post, we will look at the parts normally in a light colour, where we will check for possible faults. Thanks for watching and commenting! |
|
|
|
|
| The Following User Says Thank You to JesusM For This Useful Post: |
mrgixxer (01-31-2023)
|
|
02-14-2023, 06:00 AM
|
#5 | |
|
AF Enthusiast
Thread starter
Join Date: Mar 2009
Location: Madrid
Posts: 649
Thanks: 109
Thanked 68 Times in 67 Posts
|
Re: Lancia Stratos 1979 J Bagration Hasegawa (1/24)
En esta entrada, empezamos a quitar el color negro de las piezas con imprimación y colores. Y lo primero es la carrocería, que le damos para empezar, una capa de imprimación blanca de Tamiya a spray:
In this entry, we start to remove the black colour of the parts with primer and colours. And the first task is the bodywork, which we start with a coat of white Tamiya spray primer: 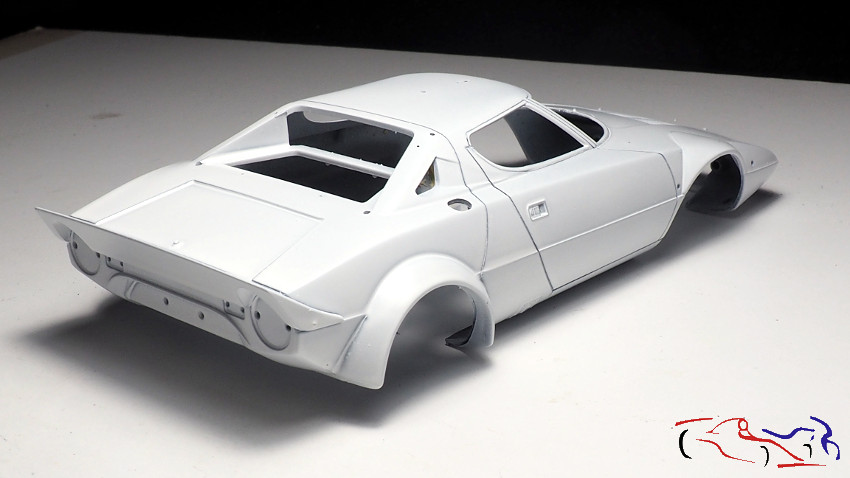 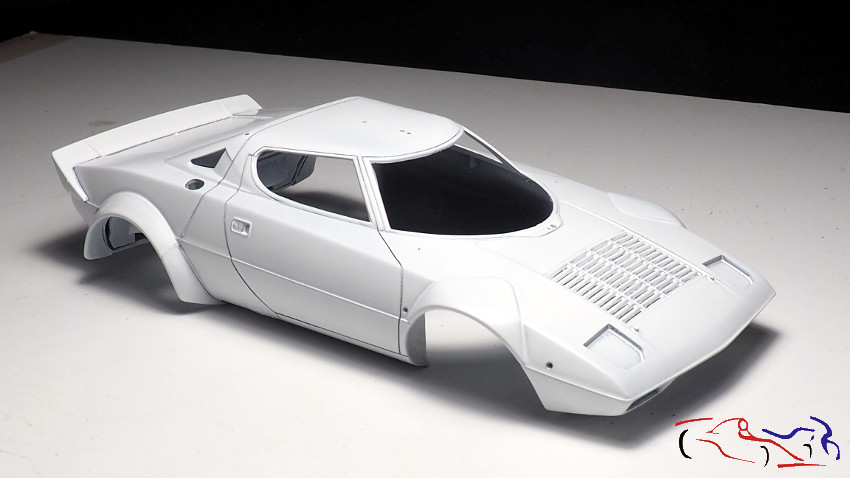 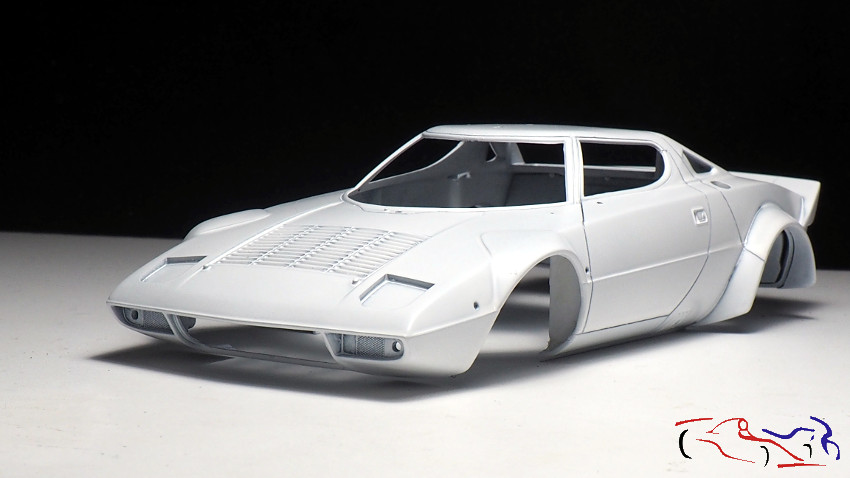  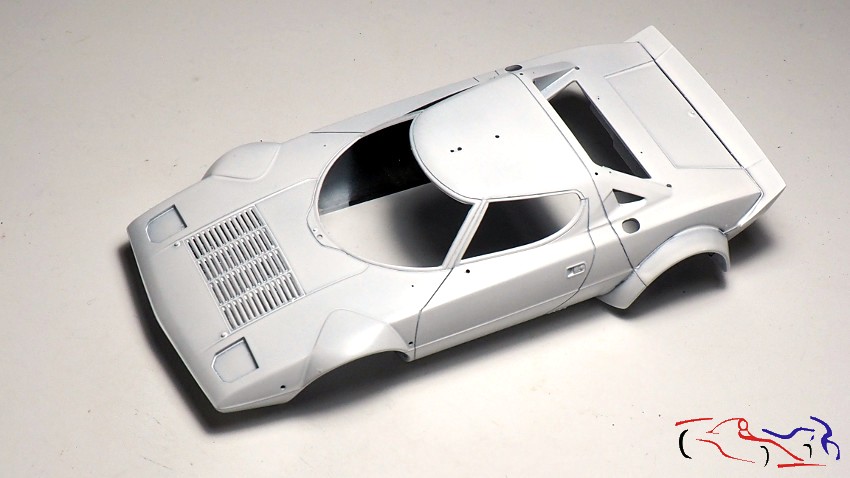 Otras tomas realizadas poniendo la carrocería en un soporte. Quiero decir que el color negro de la carrocería se cubrió perfectamente con el blanco de la imprimación. Other shots were taken by placing the bodywork on a stand. I want to say that the black colour of the bodywork was perfectly covered by the white primer.  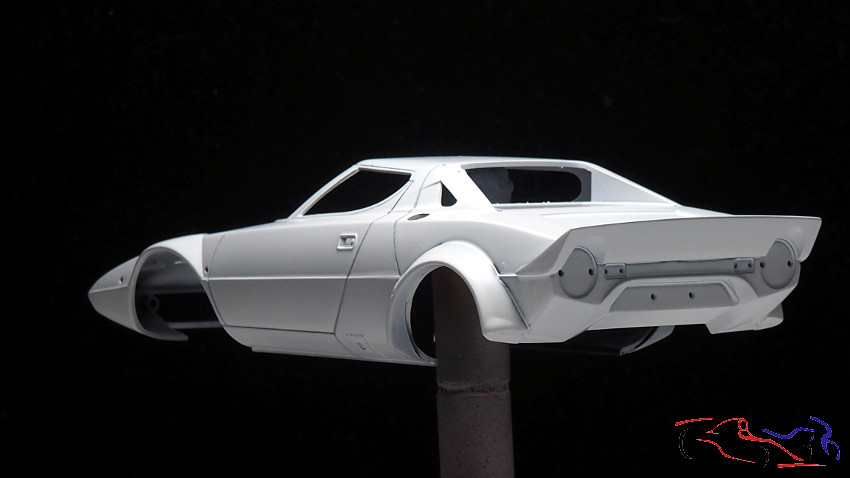 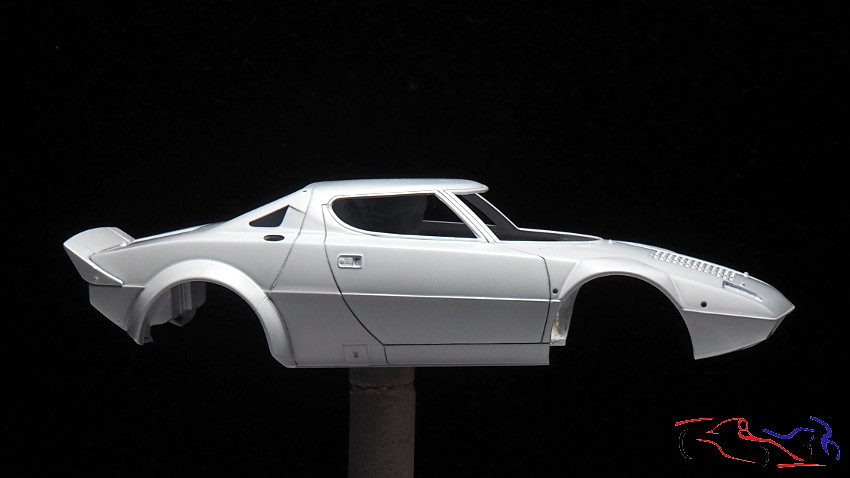 Y junto con la carrocería, imprimí también el chasis: And along with the body, I also printed the chassis: 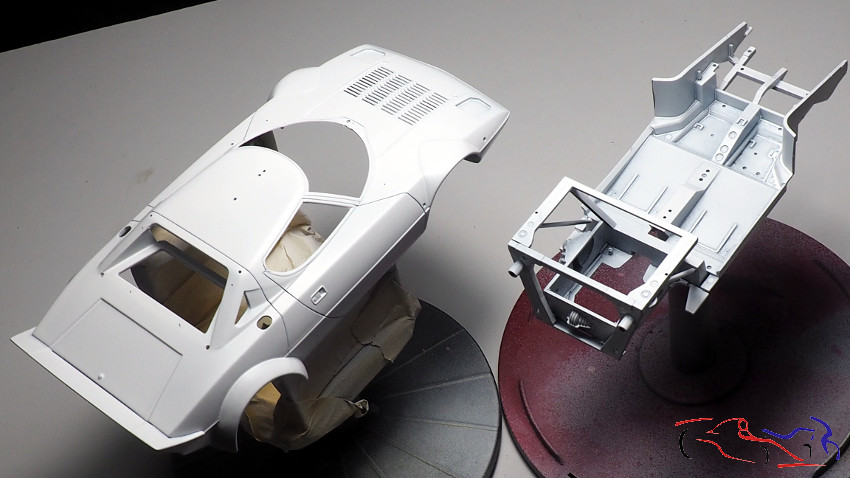 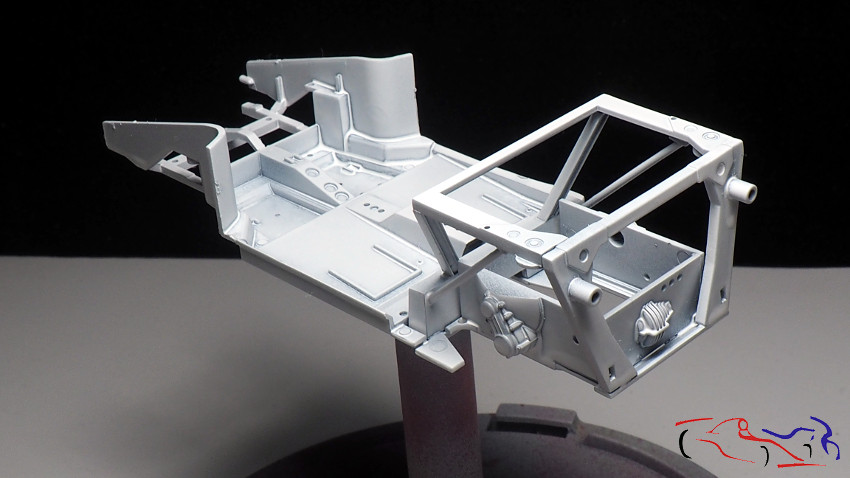 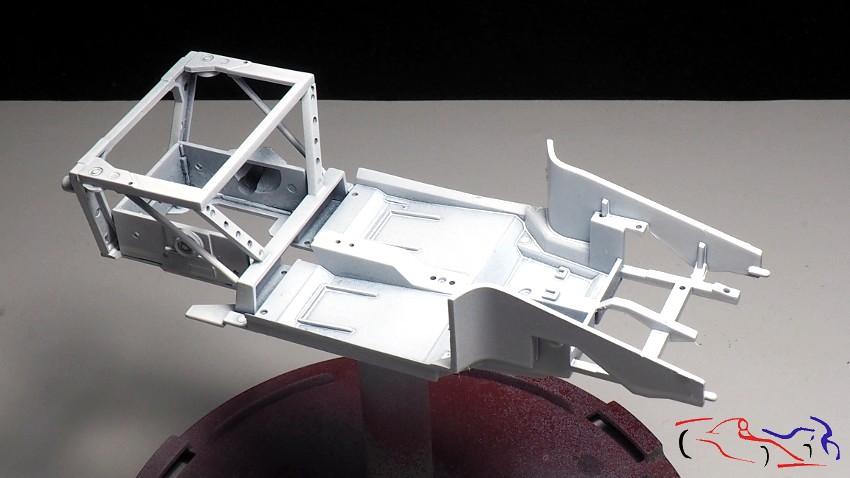 Más piezas: los asientos, los imprimí con el gris oscuro de Gravity, porque aplicaré la pintura negra de la gama Focus: More parts: I primed the seats with Gravity's dark grey, because I will apply the black paint from the Focus range: 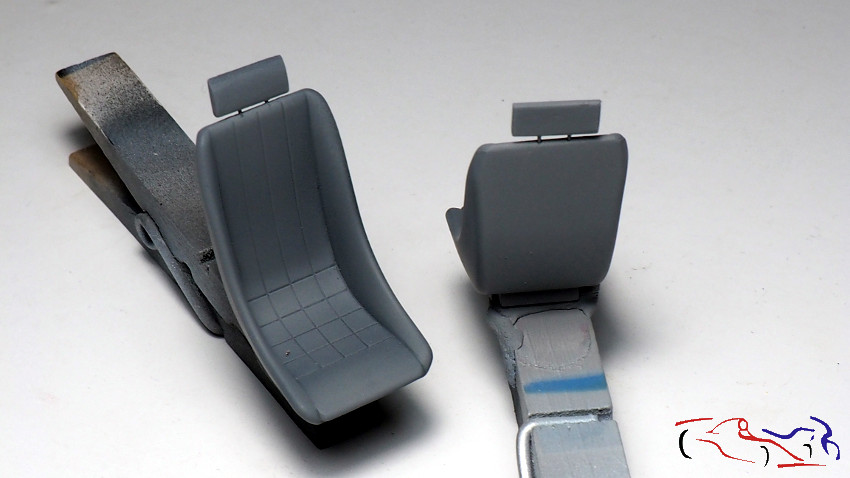 Y junto a los asientos, más piezas en sus soportes. En las pinzas utilizo Blue-tack para fijar las piezas, mientras que en la varilla de madera, utilizo cinta adhesiva de doble cara. And next to the seats, more parts in their holders. On the clamps I use Blue-tack to fix the parts, while on the wooden rod, I use double-sided tape. 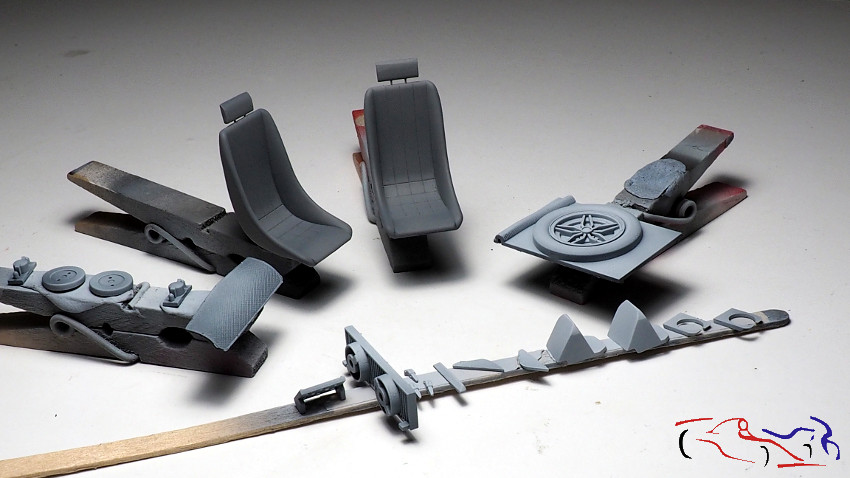 Aquí os muestro las piezas que van en verde Gravity, y que previamente imprimí: la carrocería, el alerón del techo, la cubierta de los faros y el frontal de la parrilla de faros: Here I show you the parts in Gravity green, which I previously primed: the body, the roof spoiler, the headlight cover and the front of the headlight grille: 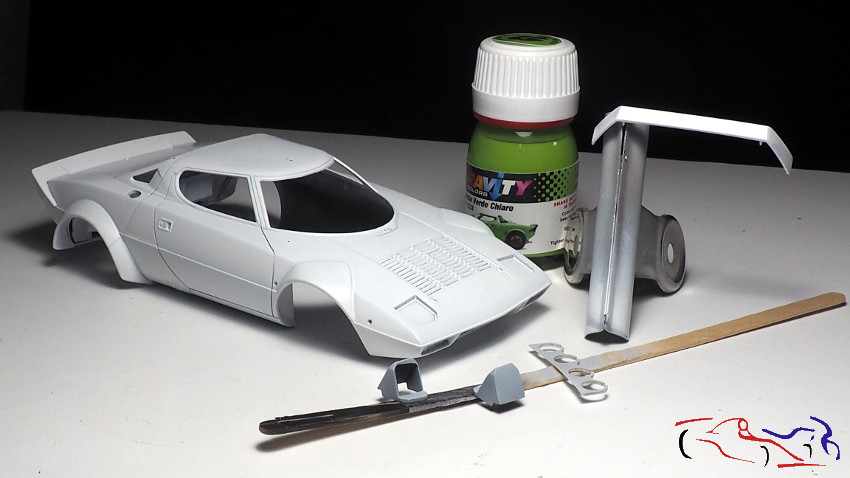 Apliqué tres manos de pintura verde. Después, lijé un poco la superficie y le volví a dar otra capa de pintura: I applied three coats of green paint. Then I sanded the surface a little and applied another coat of paint: 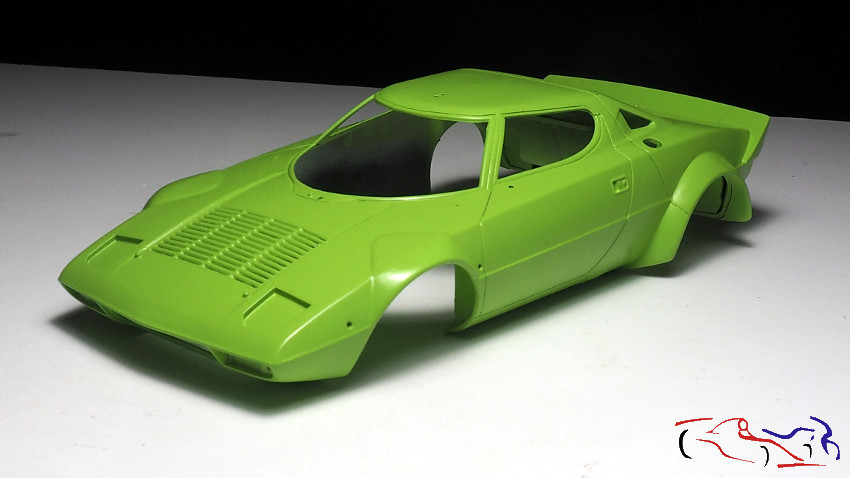 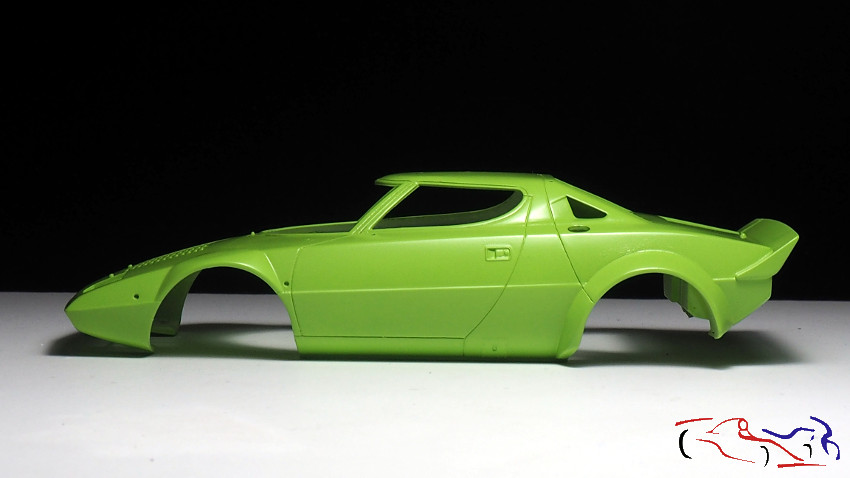 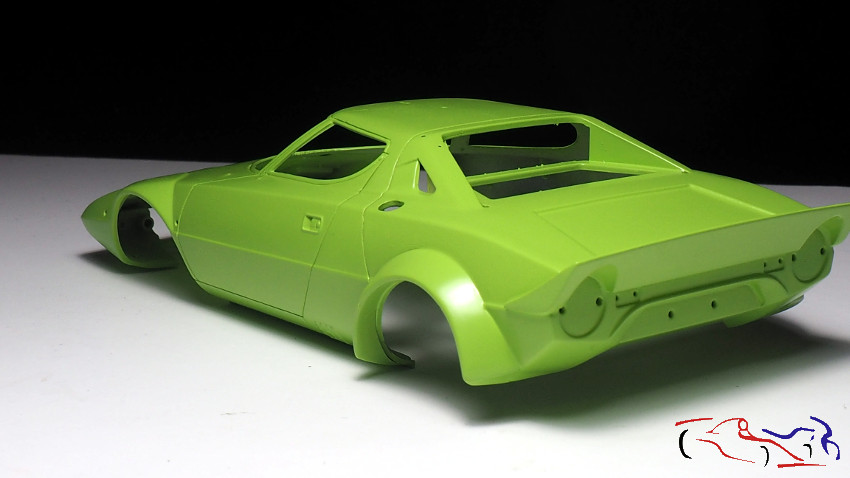 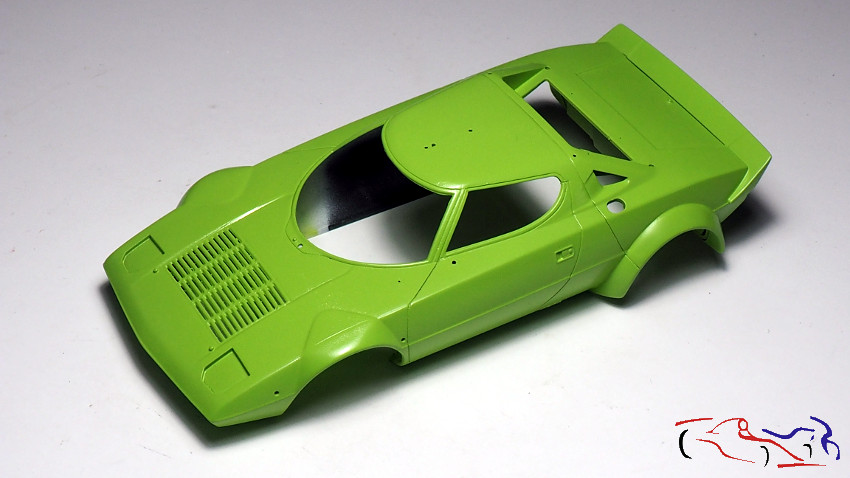 A su vez, también pinté otras piezas con otros colores, como el chasis, de negro mate de Zero Paints, el cual coloqué en la carrocería. En la segunda foto, se ven perfectamente los añadidos que hice en los pasos de rueda delanteros de la carrocería, los cuales irán pintados también de negro mate como todo el interior: At the same time, I also painted other parts with other colours, such as the chassis, in matt black from Zero Paints, which I placed on the bodywork. In the second picture, you can see perfectly the additions I made in the front wheel arches of the bodywork, which will also be painted matt black as the whole interior: 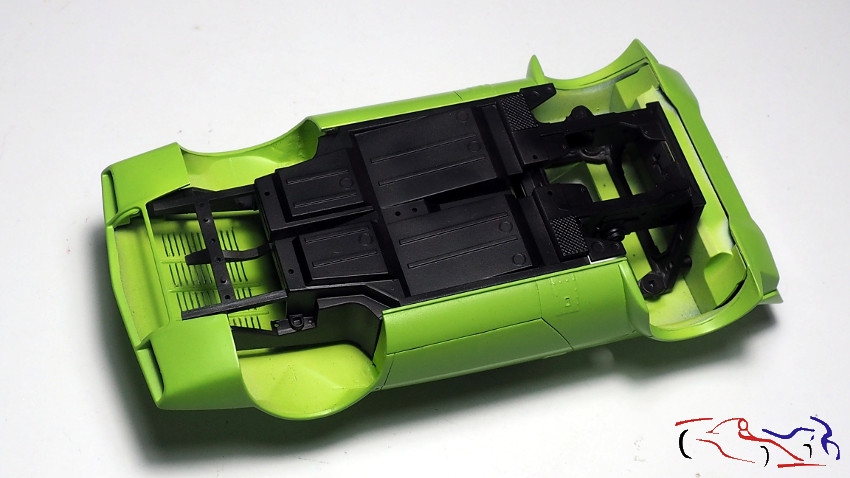 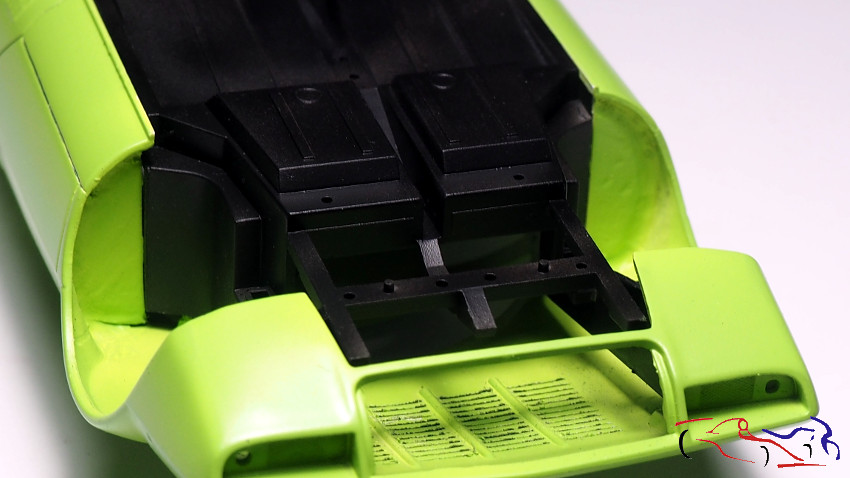 Aquí os muestro las piezas ya pintadas en sus colores, que van directamente en la carrocería: Here I show you the parts already painted in their colours, which go directly on the bodywork: 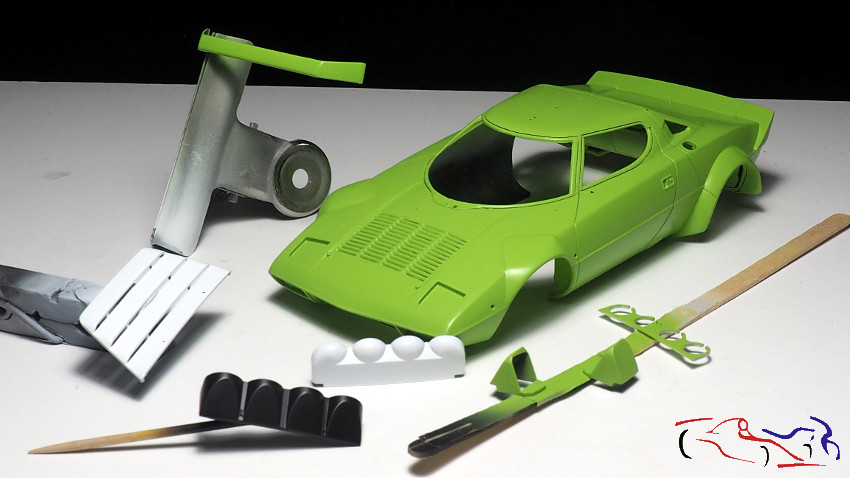 Para las piezas blancas use pintura DS color, que me pareció muy buena: I used DS colour paint to the white parts, which I found very good: 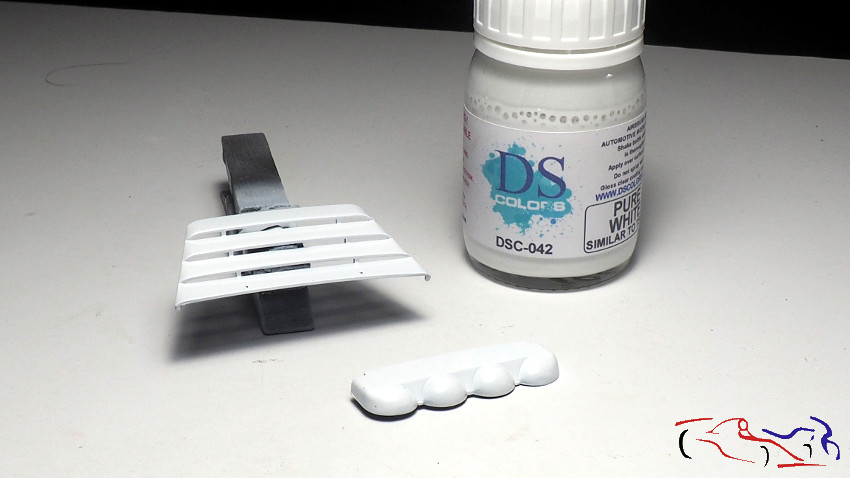 Las piezas en color acero, las pinté con Stainless Steel de Extreme Metal de AK: The steel coloured parts were painted with Stainless Steel from AK Extreme Metal: 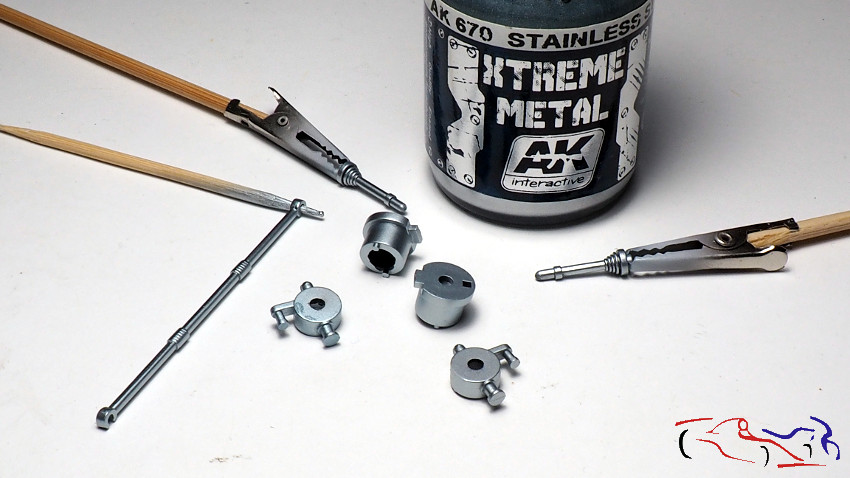 Para las piezas plateadas, usé Zero Metal Chrome, con muy buen resultado. Muchas de esas piezas, tendrán posteriormente más colores, como son los muelles de la suspensión o los discos de freno: For the silver parts, I used Zero Metal Chrome, with very good results. Many of these parts will later have more colours, such as the suspension springs or brake discs:  Y por supuesto, negro mate de Zero para muchas piezas más!! And of course, matte black from Zero for many more pieces! 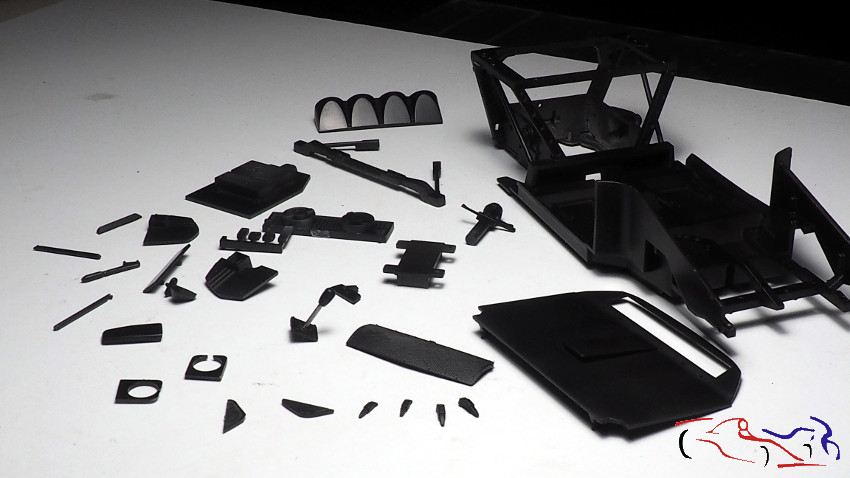 Por último, os pongo el sistema de fijación que le voy a realizar para sujetar el coche a la base: un agujero en esa pieza que cubre la transmisión, y le pego una tuerca, donde el tornillo se enroscará una vez introducido por debajo de la base. Finally, I'm going to show you the fixing system I'm going to make to fix the car to the base: a hole in the piece that covers the transmission, and I stick a nut, where the screw will be screwed once it is inserted under the base. 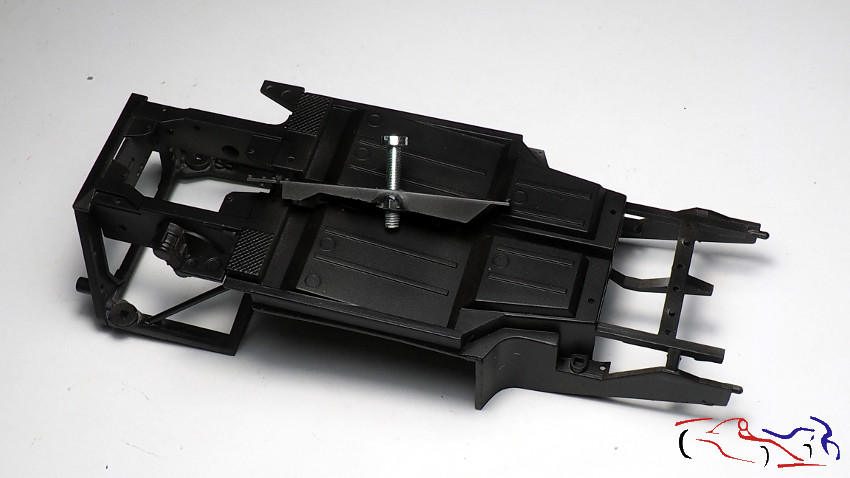 En la siguiente entrada, seguiremos con más pintura y quien sabe si pondré las calcas! Gracias por ver y comentar. In the next entry, we'll continue with more paint and who knows if I'll put the decals! Thanks for watching and commenting. |
|
|
|
|
| The Following User Says Thank You to JesusM For This Useful Post: |
mrgixxer (02-18-2023)
|
|
02-27-2023, 10:14 AM
|
#6 | |
|
AF Enthusiast
Thread starter
Join Date: Mar 2009
Location: Madrid
Posts: 649
Thanks: 109
Thanked 68 Times in 67 Posts
|
Re: Lancia Stratos 1979 J Bagration Hasegawa (1/24)
Seguimos con el Lancia Stratos y la pintura de sus distintas partes. Ahora vamos a tratar las llantas de aluminio de Studio27, que tienen una realización muy buena, siendo un poco frustrante, el pintarlas con lo bien que están hechas. Pero antes de nada, les hice los taladros para las válvulas de inchado:
We continue with the Lancia Stratos and the painting of its different parts. Now we are going to deal with the aluminium rims of Studio27, which have a very good realization, being a bit frustrating to paint them with how well they are made. But first of all, I drilled the holes for the valves: 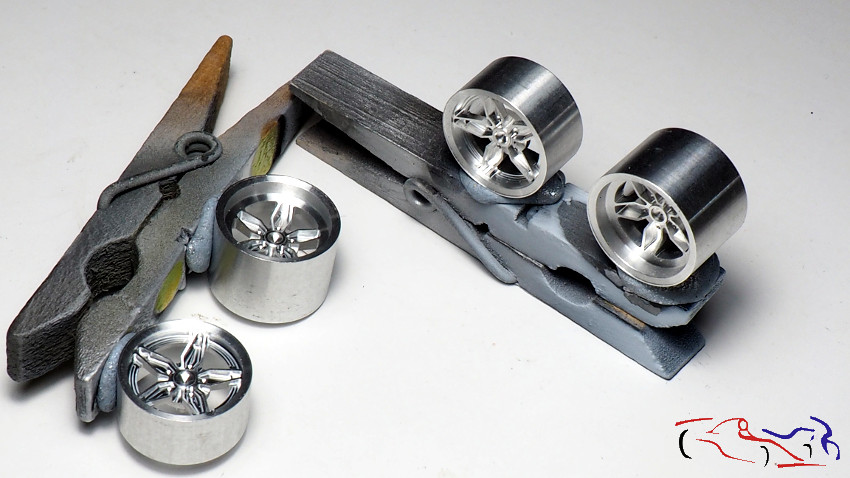 Primero les di varias capas finas de imprimación Gravity, que sirve para metal, para terminar aplicando pintura amarilla de Zero, en ese tono que es el que más se parecía de los que tenía: First I gave them several thin coats of Gravity primer, which can be used for metal, to finish by applying yellow paint from Zero, in that shade, which is the one that most resembled the ones I had: 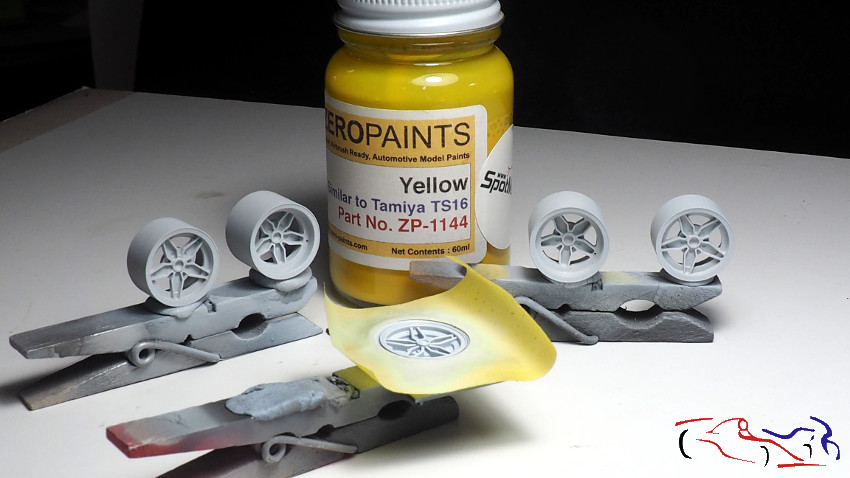 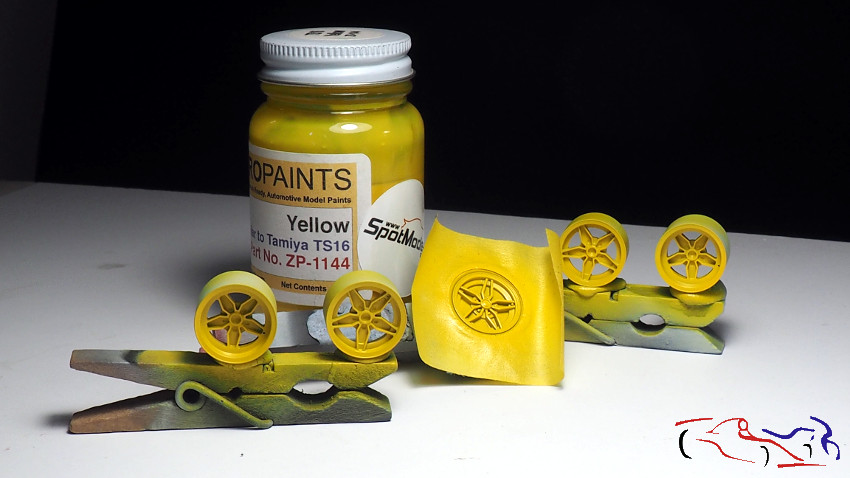 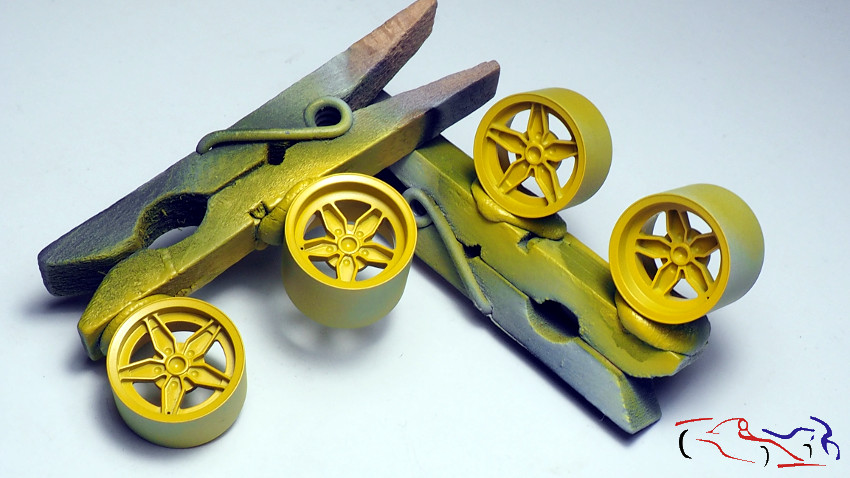 Y lógicamente, no pude resistirme a ponerlas con la carrocería!! And of course, I couldnt resist putting them with the bodywork! 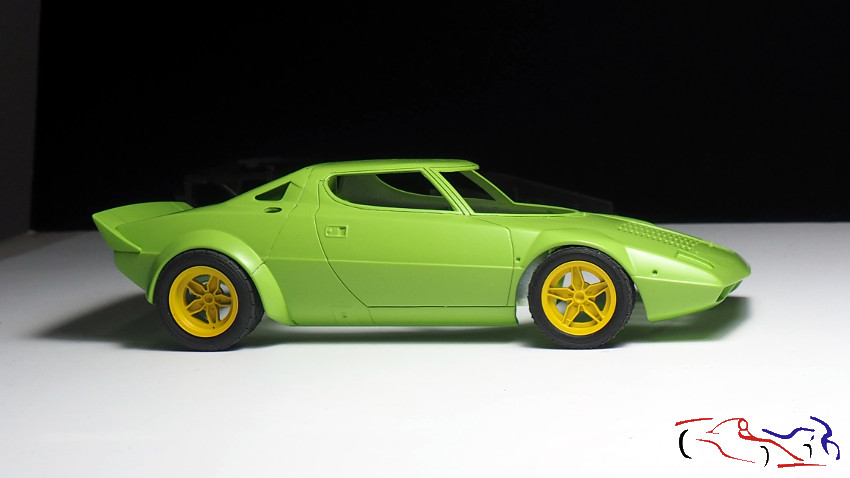 Y ya que estamos con la carocería, pues le pusimos las calcas, compradas a una tienda local de España. Usé el liquido numero 1 de Micro, que fue suficiente, ya que las calcas eran muy delgadas y se colocaron bien. And while were at it, we put on the decals, bought from a local shop in Spain. I used Micros liquid number 1, which was enough, as the decals were very thin and they were well placed. 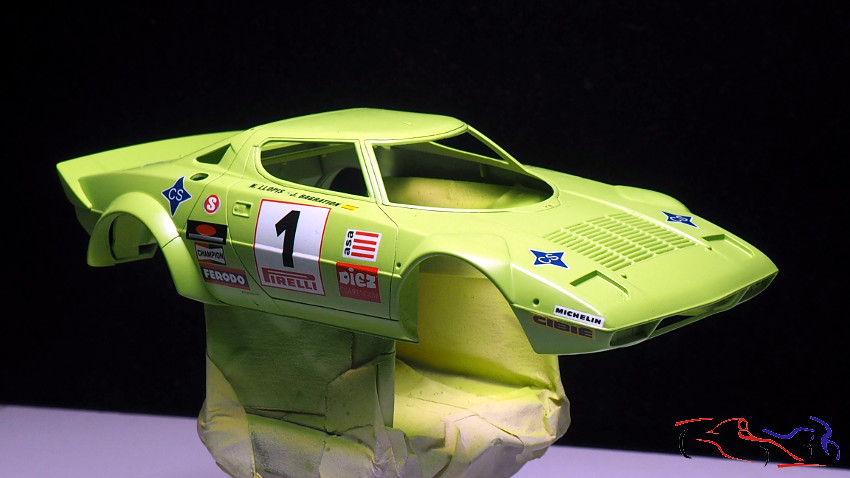 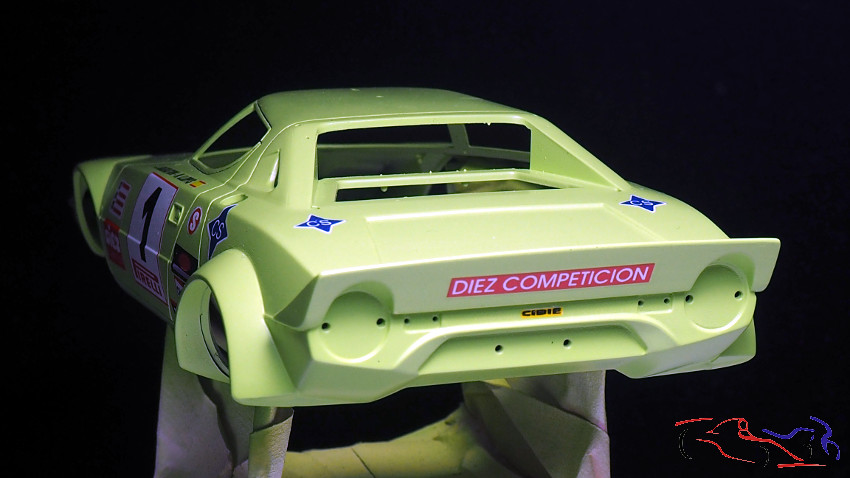 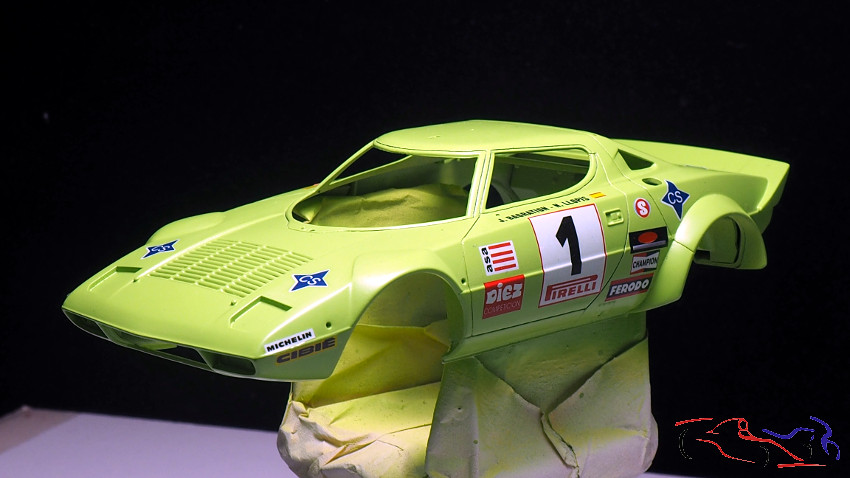 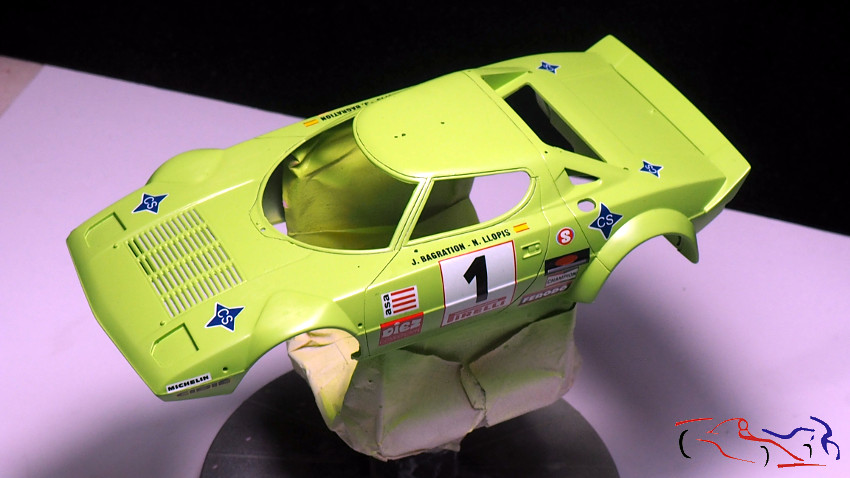 http://blog.maquetea.com/wp-content/...rVer-04-13.jpg Pasamos a los amortiguadores, y su proceso de pintura. Primero lo di, después de la imprimación, una capa de AK Chrome, para pintar el vástago interior de los muelles. Después metí cinta de enmascarar entre los muelles, para pintar de blanco todo el conjunto. Una vez seco, enmascaré todo el muelle, para pintar de negro semimate. En la siguente foto, podeis ver de izquierda a derecha, el amortiguador con la cinta levantada que permitia pintar de negro, la pieza con la cinta entre las vueltas del muelle, otar pieza después de ser pintada de negro, y finalmente, el amortiguador terminado. Si se hace tranquilamente, no hay porque ponerle un muelle verdadero para que parezca real! We moved on to the shock absorbers, and their painting process. First I gave them, after priming, a coat of AK Chrome, to paint the inner rod of the springs. Then I put masking tape between the springs, to paint the whole thing in white. Once dry, I masked the whole spring, to paint it in semi-matt black. In the following picture, you can see from left to right, the shock absorber with the tape lifted that allowed to paint black, the piece with the tape between the turns of the spring, another piece after being painted black, and finally, the finished shock absorber. If it is done quietly, there is no need to put a real spring on it to make it look real! 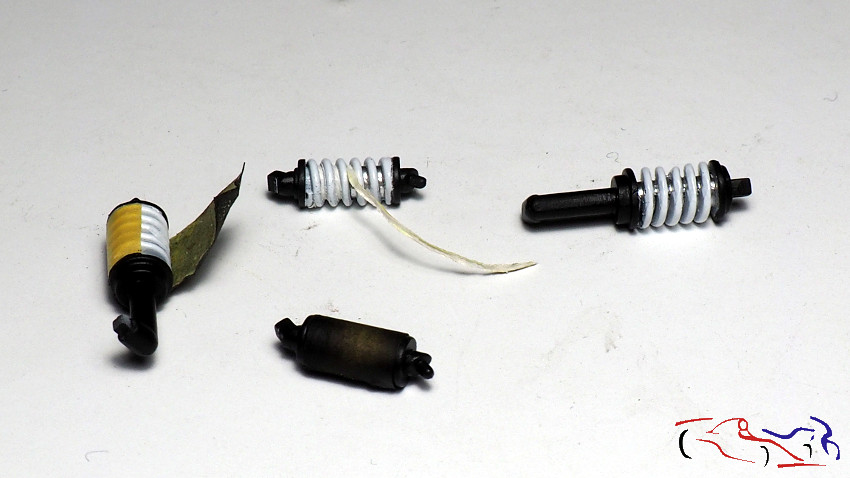 Otro añadido al kit: la pieza que separa el cockpit del motor, lleva un revestimiento por la parte de los pilotos, y yo se la hago con papel metálico que vienen en algunos productos lácteos. Hago una plantilla con cinta de enmascarar, la traspaso al material, la corto y la pego. Ahora viéndola, voy a pintarlas de negro satinado, que es así como va en realidad: Another addition to the kit: the piece that separates the cockpit from the engine has a covering on the pilots side, and I make it with metallic paper that comes in some dairy products. I make a template with masking tape, transfer it to the material, cut it and glue it. Now looking at it, Im going to paint it satin black, which is how it really goes: 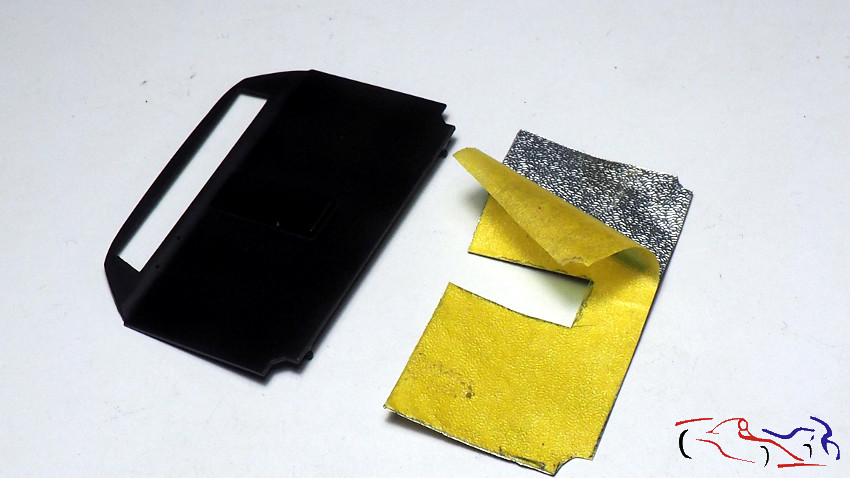 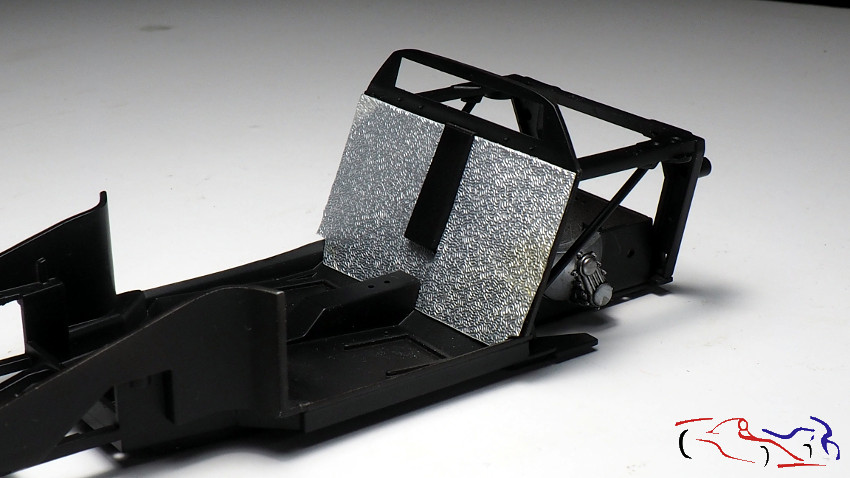 Otra pieza que se pinta de negro mate con los tonos metálicos en Stainless Steel de AK. Posteriormente, le he aplicado el Black Panel Liner de Tamiya, tanto a la pieza como a lo pintado del chasis, para resaltar volumenes y dar profundidad: Another piece painted in matte black with the metallic tones in AK Stainless Steel. Later, I applied Tamiyas Black Panel Liner, both to the piece and to the painted chassis, to highlight volumes and give depth: 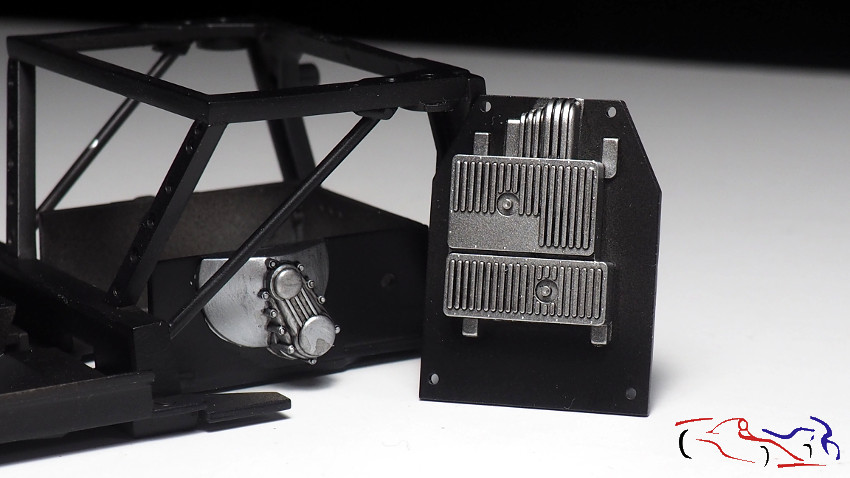 Respecto a los tubos de escape, piezas negras, los sustituyo por tubos de latón y aluminio que previamente he pasado por el torno particular (un taladro de brocas), para afinar el grosor del aluminio, y redondear un poco, el borde del latón. En las dos fotos siguientes, os muestro como se adaptan los tubos a las piezas del kit, y como quedan en el chasis: Regarding the exhaust pipes, the black parts in the pictures, I replace them with brass and aluminium pipes that I have previously passed through the particular lathe (a drill), to refine the thickness of the aluminium, and round a little, the edge of the brass. In the following two photos, I show you how the tubes are adapted to the kit parts, and how they fit in the chassis: 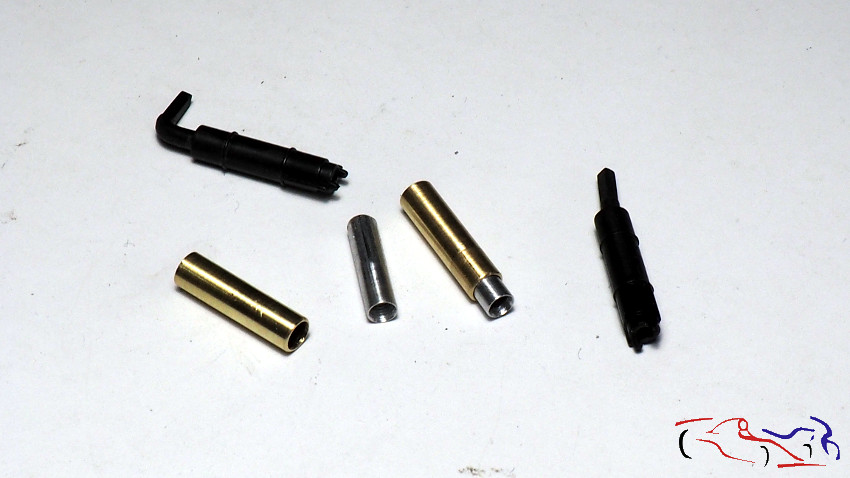 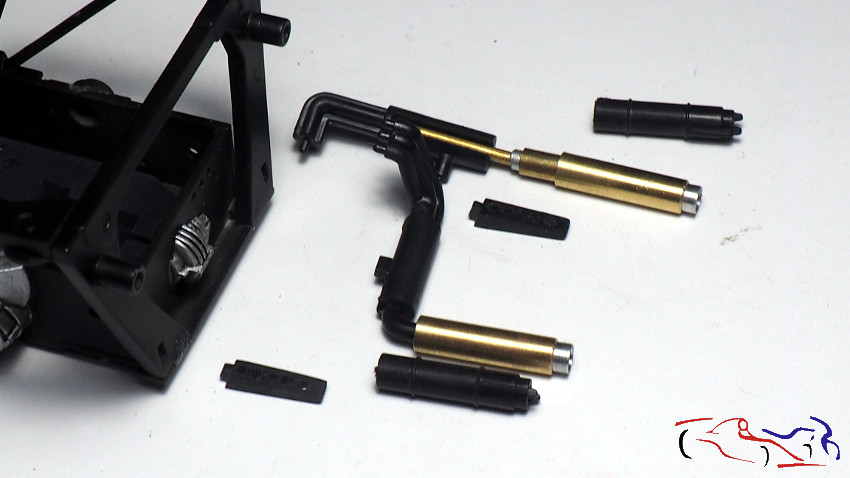 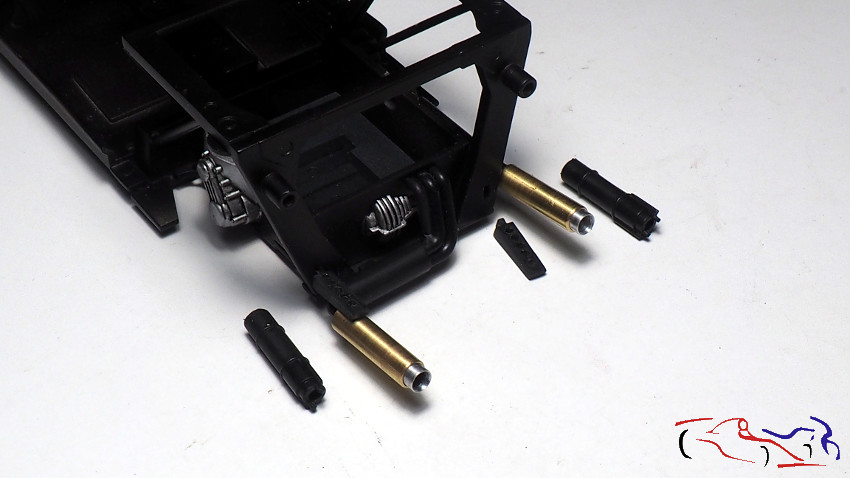 Y para terminar, piezas pintadas de negro, que son difíciles de mostrar: And finally, pieces painted black, which are difficult to show:  Destacamos los asientos y los guarnecidos de las puertas, que fueron pintados con Gravity Nero Pantera de su gama Focus, donde se notan los tonos más claros y los más oscuros . Highlights include the seats and door trim, which were painted in Gravity Nero Pantera from their Focus range, where lighter and darker tones are evident .. 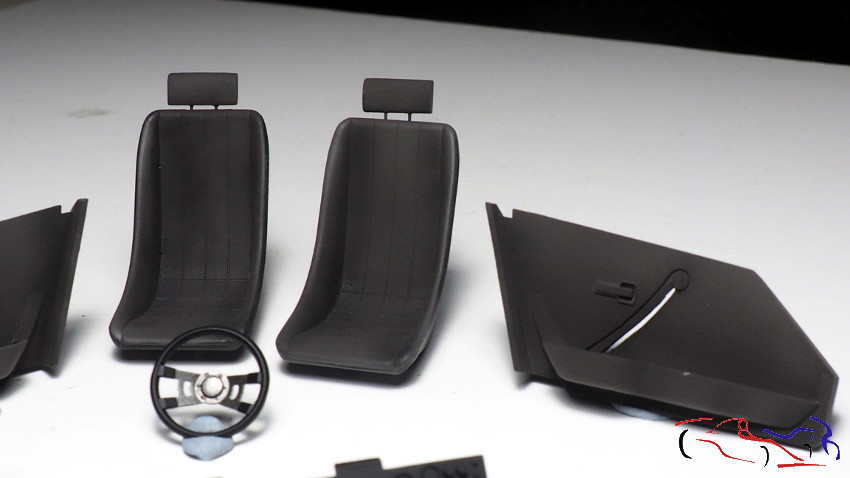 .y el volante que se pintó primero con gris metálico de Zero, se enmáscaró, y depsués le di negro mate al exterior del volante, el mismo que apliqué al salpicadero. . and the steering wheel which was first painted with metallic grey from Zero, masked, and then I gave the outside of the steering wheel a matt black, the same as I applied to the dashboard. 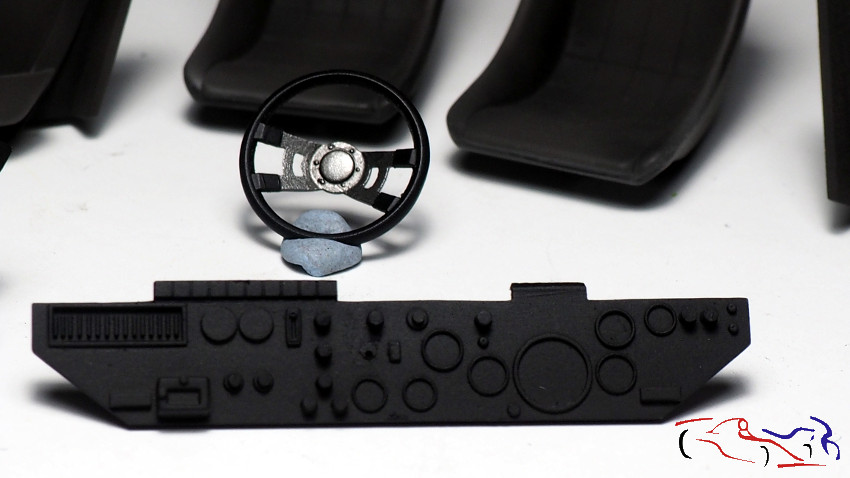 Como véis, los detalles que estoy añadiendo al kit no vienen de ningún TK, y solo de materioales o proceso de pintura que podemos tener en casa. Gracias por ver y comentar!! As you can see, the details Im adding to the kit dont come from any TK, and only from materials or painting process that we can have at home. Thanks for watching and commenting! |
|
|
|
|
| The Following User Says Thank You to JesusM For This Useful Post: |
mrgixxer (03-02-2023)
|
|
03-01-2023, 03:26 PM
|
#7 | |
|
AF Regular
Join Date: Aug 2011
Location: Torino
Posts: 390
Thanks: 175
Thanked 62 Times in 58 Posts
|
Re: Lancia Stratos 1979 J Bagration Hasegawa (1/24)
Hello Jesus, great progress as usual on the Stratos! I love those details and machined exhaust parts! Also the color combination is fantastic!
|
|
|
|
|
|
03-02-2023, 03:11 AM
|
#8 | |
|
AF Regular

Join Date: May 2008
Location: Saint-Petersburg Russia
Posts: 184
Thanks: 20
Thanked 3 Times in 3 Posts

|
Re: Lancia Stratos 1979 J Bagration Hasegawa (1/24)
wery nice WIP!
__________________

|
|
|
|
|
|
03-03-2023, 09:45 AM
|
#9 | |
|
AF Enthusiast

Join Date: Oct 2005
Location: Monza
Posts: 1,150
Thanks: 21
Thanked 56 Times in 38 Posts
|
Re: Lancia Stratos 1979 J Bagration Hasegawa (1/24)
Very nice job, as usual Jesus. Thanks for sharing inspiring work and photos :-)
|
|
|
|
|
|
03-23-2023, 07:00 AM
|
#10 | |
|
AF Enthusiast
Thread starter
Join Date: Mar 2009
Location: Madrid
Posts: 649
Thanks: 109
Thanked 68 Times in 67 Posts
|
Re: Lancia Stratos 1979 J Bagration Hasegawa (1/24)
Thanks to all for your comments!! Very appreciated!
|
|
|
|
|
|
03-23-2023, 07:06 AM
|
#11 | |
|
AF Enthusiast
Thread starter
Join Date: Mar 2009
Location: Madrid
Posts: 649
Thanks: 109
Thanked 68 Times in 67 Posts
|
Re: Lancia Stratos 1979 J Bagration Hasegawa (1/24)
Más trabajos realizados en el Lancia Stratos verde, y como veis en la siguiente foto, ya le he dado mucho color a las piezas, entre ellas, las llantas, y los tubos de escape, que son quizás, los que más destacan.
More work done on the green Lancia Stratos, and as you can see in the next picture, I have already given a lot of colour to the parts, among them, the rims, and the exhaust pipes, which are perhaps, the ones that stand out the most. 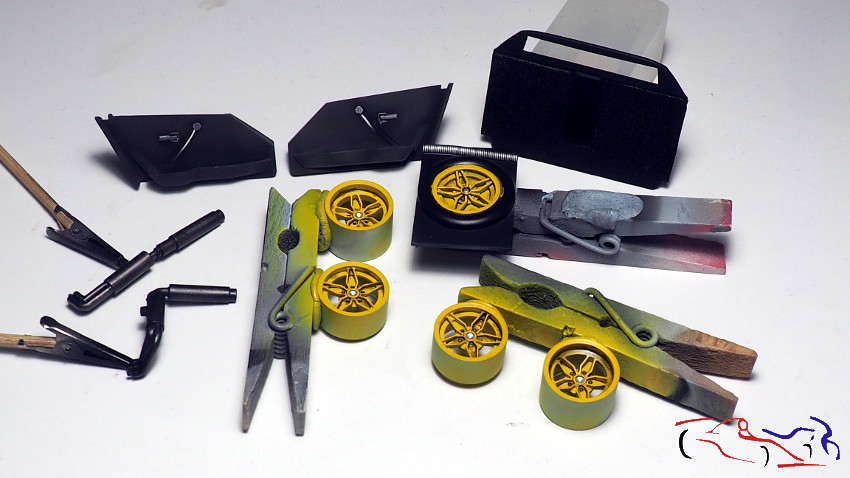 Los paneles interioes de las puertas, ya los tenía pintados con la pintura Nero Pantera de Focus, y ahora les he pintado la palanca de apertura y el tirador para abrir y cerrar el cristal con plata de Vallejo: The interior door panels were already painted with Focus Nero Pantera paint, and I have also painted the opening lever and the handle to open and close the glass with Vallejo silver: 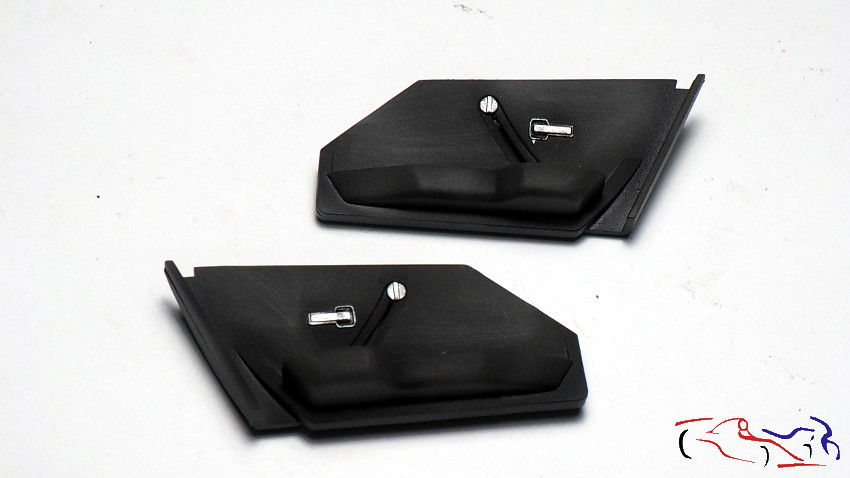 En cuanto a las llantas, después del amarillo de Zero, las he dado un lavado con el Panel Liner negro de Tamiya, al que he repasado con un bastoncillo posteriormente. No he querido que fuera un detalle fino e incluso, he eliminado un poco del amarillo, viéndose el aluminio en algunas zonas. Esto es debido al desgaste que he querido aplicar. También le he puesto las tuercas de fotograbado y las vávulas de inflado: As for the rims, after the yellow from Zero, I gave them a wash with Tamiyas black Panel Liner, which I then went over with a cotton swab. I didnt want it to be a fine detail and I even removed a little of the yellow, showing the aluminium in some areas. This is due to the wear I wanted to apply. I have also put the photoetched nuts and the inflation valves: 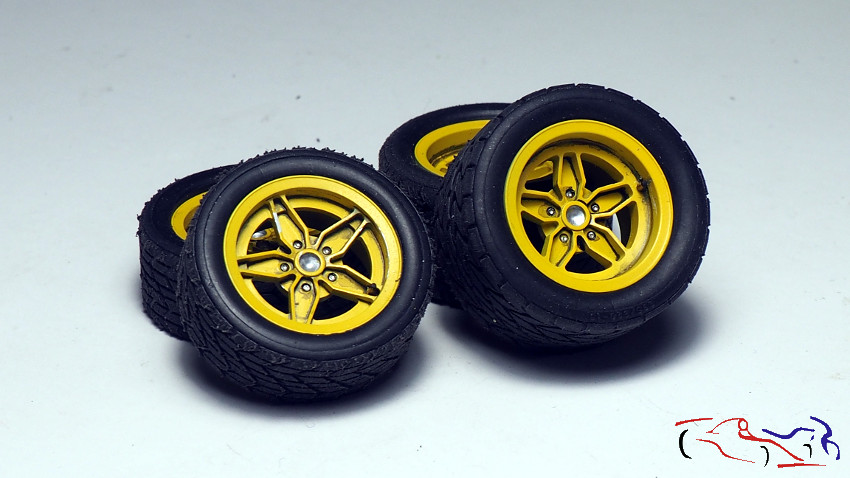 Y como tengo ya muchas piezas listas, empiezo a pegarlas de acuerdo a las instrucciones: And as I have a lot of pieces ready, I start gluing them together according to the instructions: 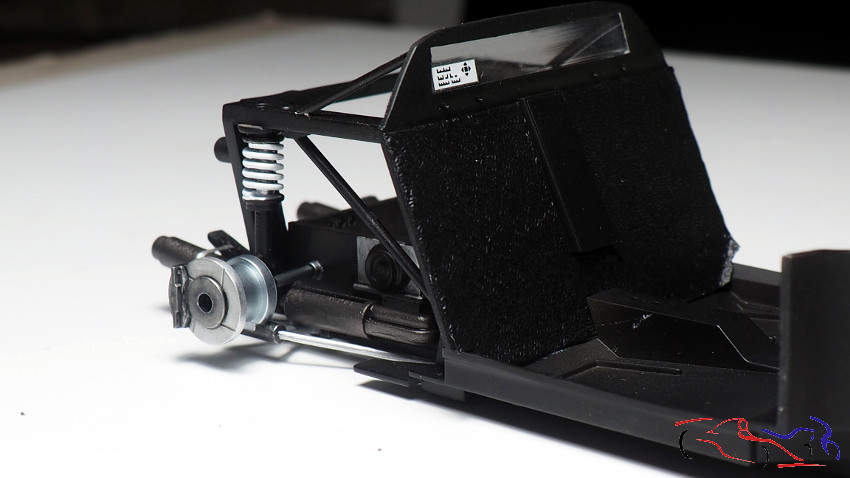 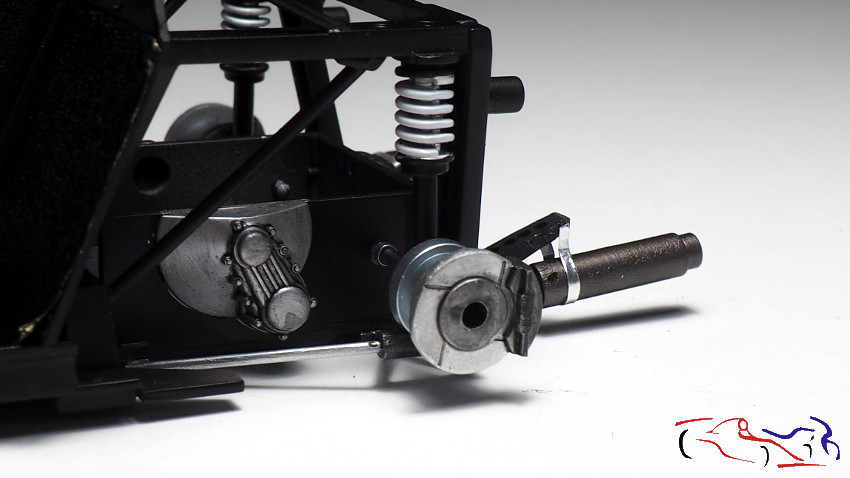 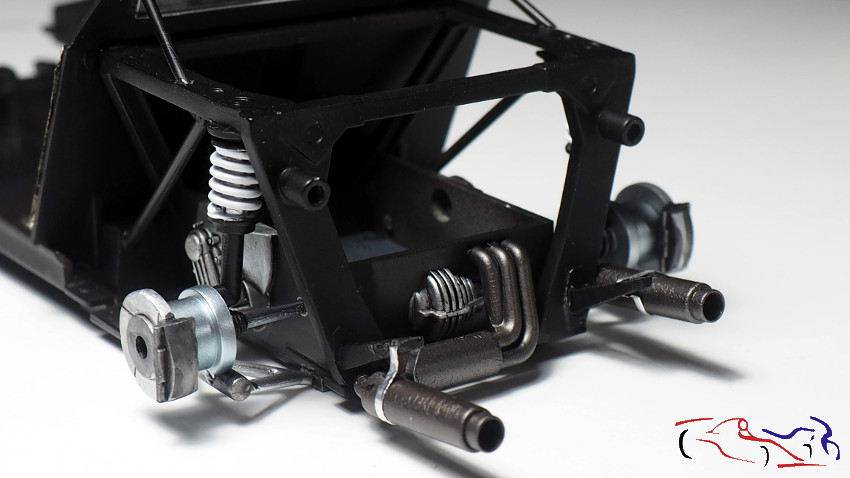  Destacar el radiador delantero pintado con acero y un lavado de panel liner negro y el cortafuegos pintado con el negro semi mate de la gama LP de Tamiya: Highlights include the front radiator painted with steel with a black liner panel wash and the firewall painted with the semi-matt black from the Tamiya LP range:  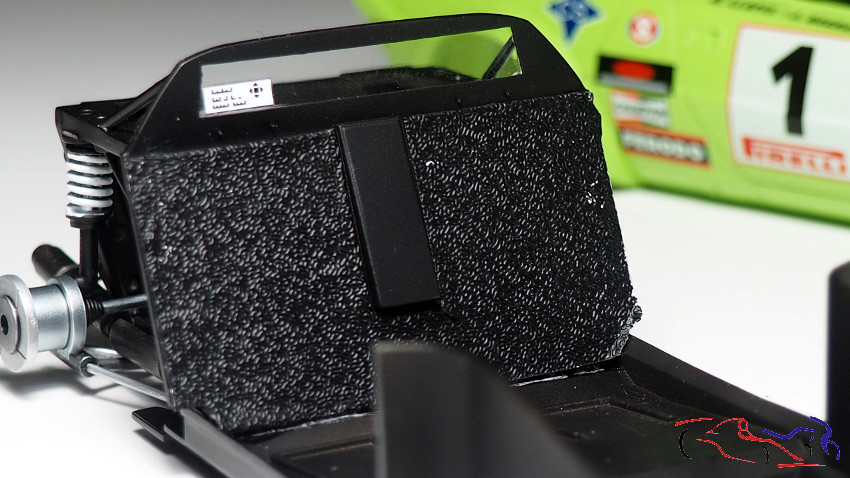 Y pasamos al salpicadero. puestas las calcas y pintadados los pulsadores, les puse resina transparente para darles brillo. Coloqué el cortacorriente de Decalcas, pinté de blaco los fusibles, y puse cinta adhesiva metálica a los pulsadores inferiores con un lavado de panel liner negro, y lo pegué todo: And now we move on to the dashboard. Once the decals were put on and the buttons painted, I applied some clear resin to give them a shine. I put the Decalcas cutter, painted the fuses white, and put metallic adhesive tape on the lower push buttons with a wash of black liner panel, and glued it all together: 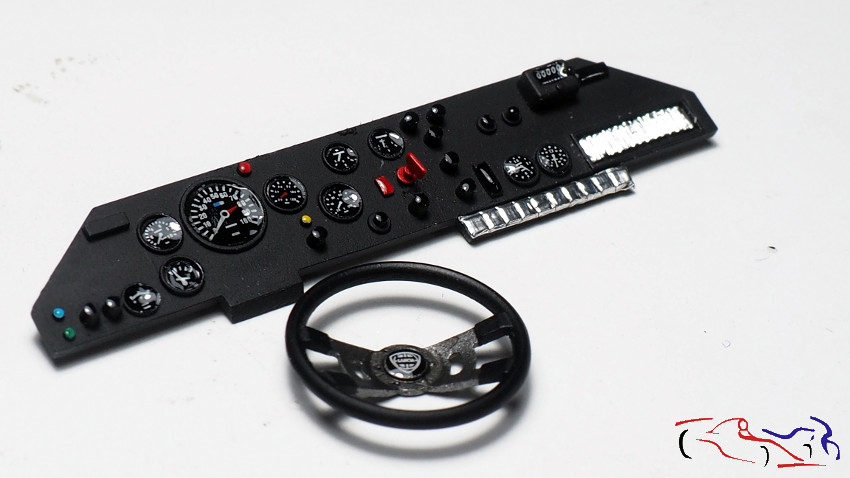 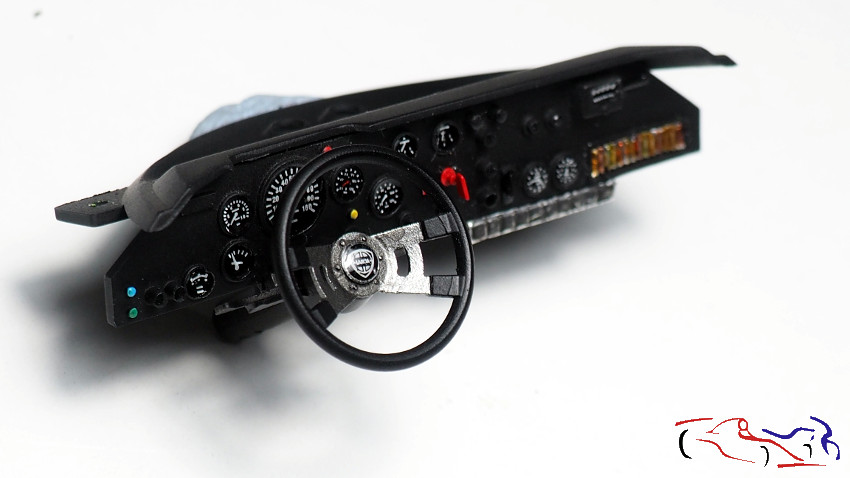 Y también, dentro del chasis, ponemos todo lo que no son los asientos. Los extintores, uan vez lacados junto a la carrocería, le pongo cinta adhesiva metálica en las fijaciones, con un toque de panel liner negro en los bordes, y pinto las partes negra y plata de Vallejo con pincel. El simil d ela rueda de recambio, lleva el mismo proceso que las otras cuatro, y pintando la goma cn el Negro Rubber de Zero. And also, inside the chassis, we put everything that is not the seats. The fire extinguishers, once lacquered at the same time than the body, I put metallic adhesive tape on the fixings, with a touch of black panel liner on the edges, and I paint the black and silver parts of Vallejo with a paintbrush. The spare wheel similar, takes the same process as the other four, and painting the rubber with Zeros Black Rubber. 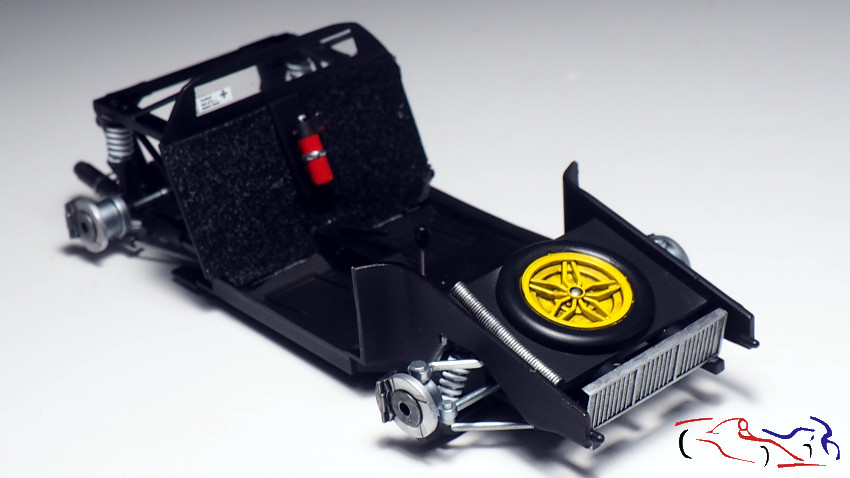 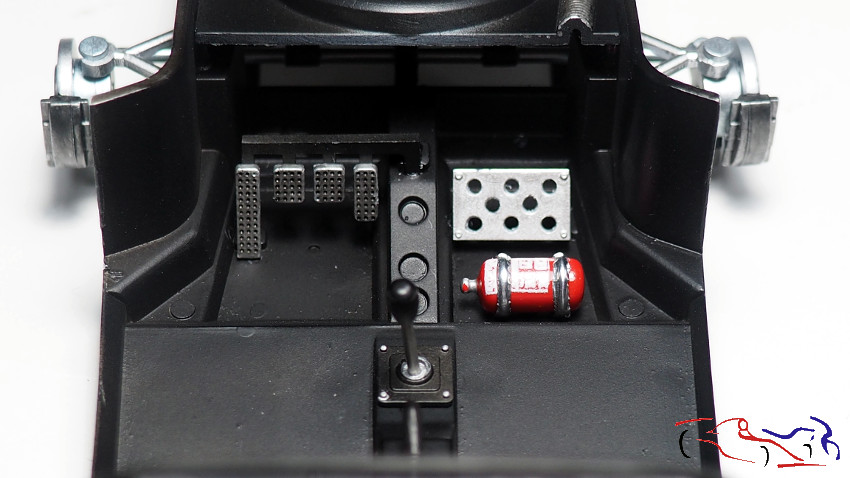 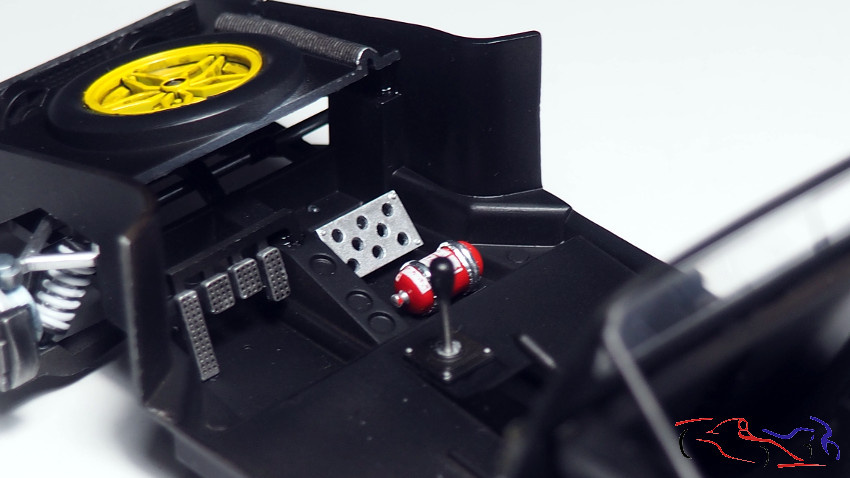 Un proceso que quería hacer es poner la tapa de los faros auxiliares con imanes, para que fuera facilmente, de quita y pon. Podéis ve ren el interior de la tapa los imanes, que van pegados cobre un trozo de plastico para sacarlos más y que queden al rasante de los propios faros. EL otro imán va pegado por detrás del plástico verde de los faros: One process I wanted to do is to put the cover of the auxiliary headlights with magnets, so that it was easy to remove and put on. You can see on the inside of the cover the magnets, which are glued to a piece of plastic to remove them more and to be flush with the headlights themselves. The other magnet is glued to the back of the green plastic of the headlights:  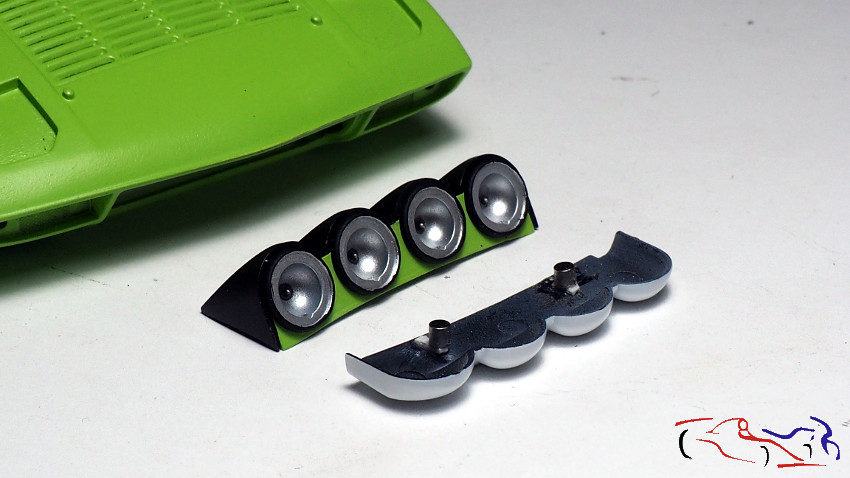 Como ejemplo visual, os añado este video que muestra su funcionamiento: As a visual example, I add this video showing how it works: https://youtu.be/BoXqv7K0xBo Y sin más, pasamos a la carrocería, la cual ya está lacada en las siguientes fotos. He utilizado la laca de Number5, en proporción 2  0,5, habiendo tapado el interior: 0,5, habiendo tapado el interior:And without further ado, lets move on to the bodywork, which is already lacquered in the following photos. I used Number5 lacquer, in a 2 0.5 ratio, having covered the interior: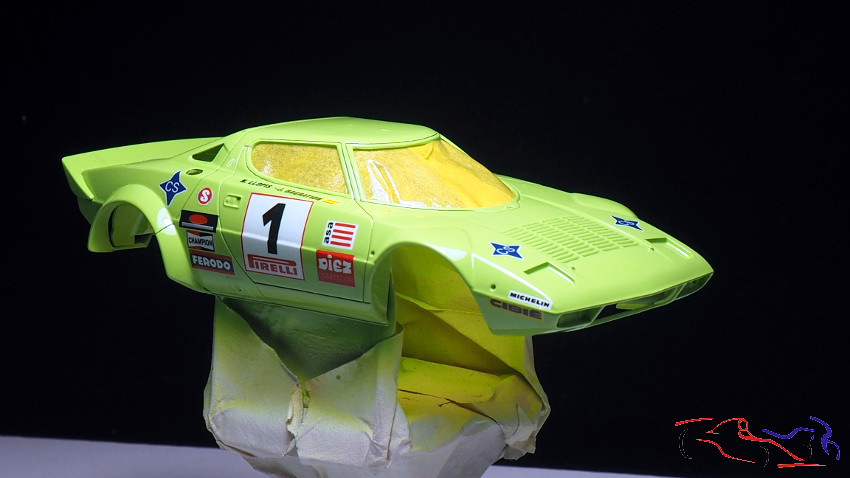 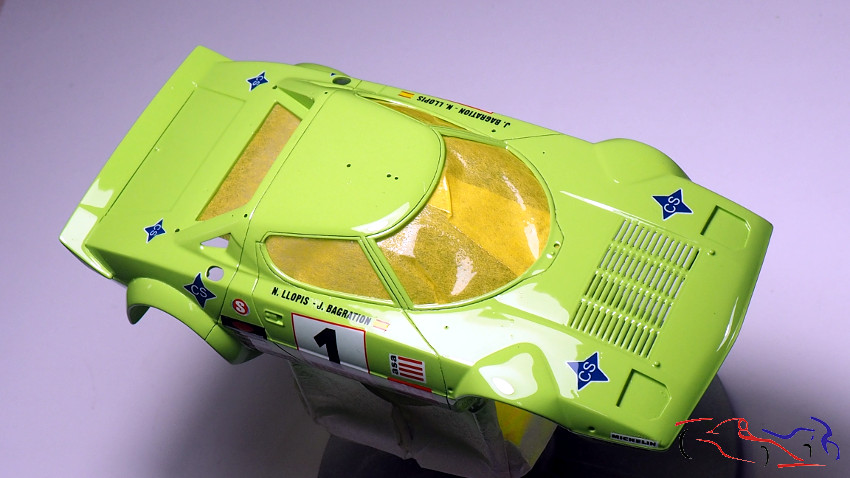 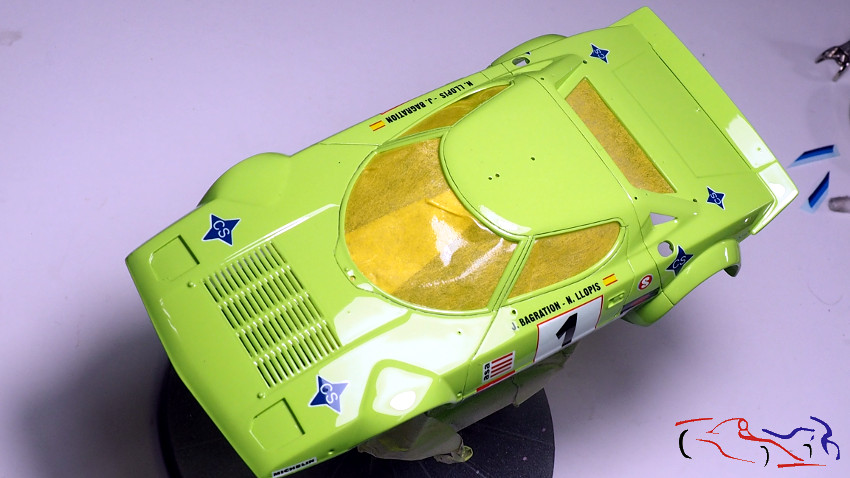 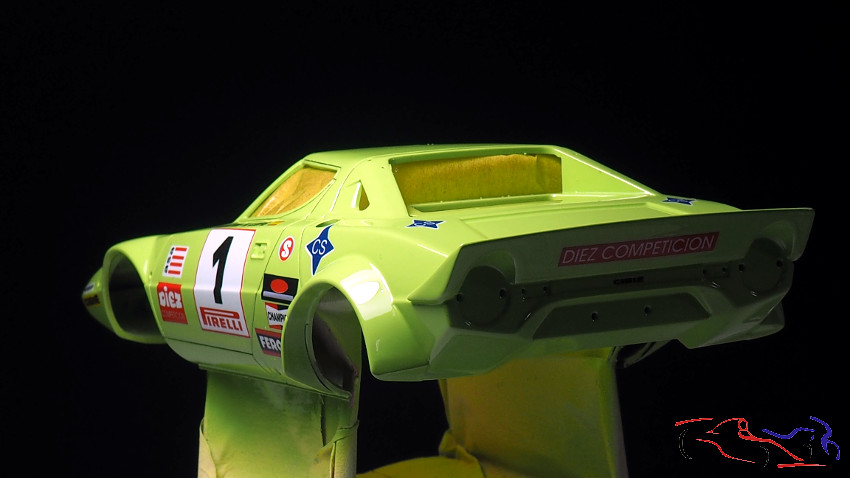 Y ahora, las fotos una vez pulido, sin sacar mucho brillo porque en aquellos, años, los coches no eran tan brillantes co o ah0ra: And now, the photos once polished, without taking too much shine because in those years, the cars were not so shiny as they are now: 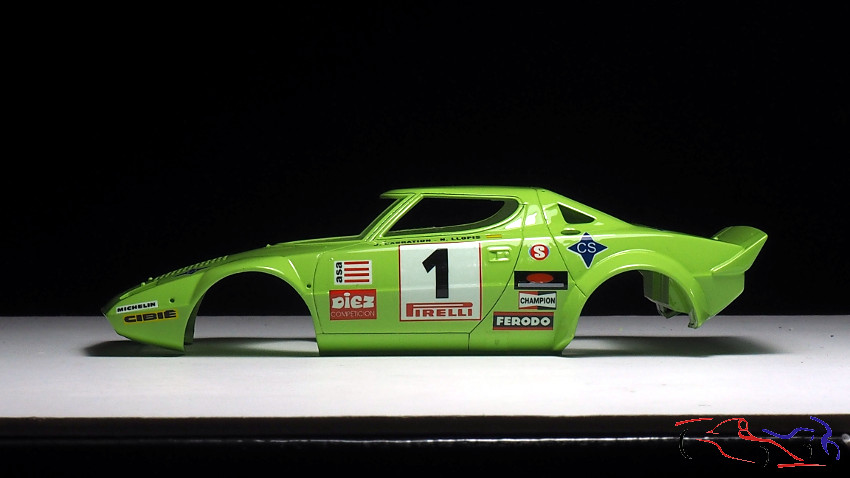 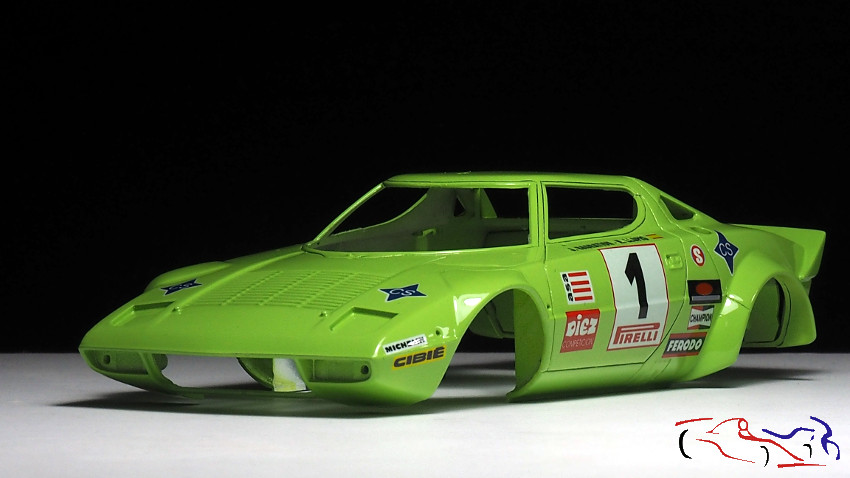 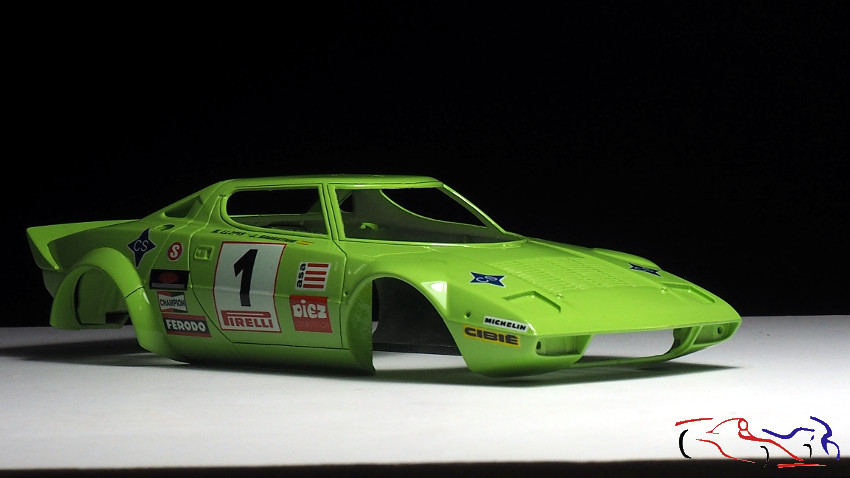 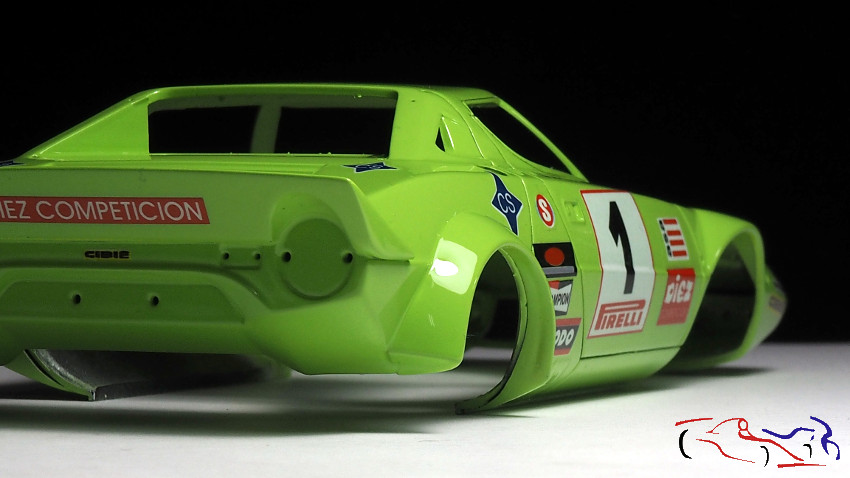 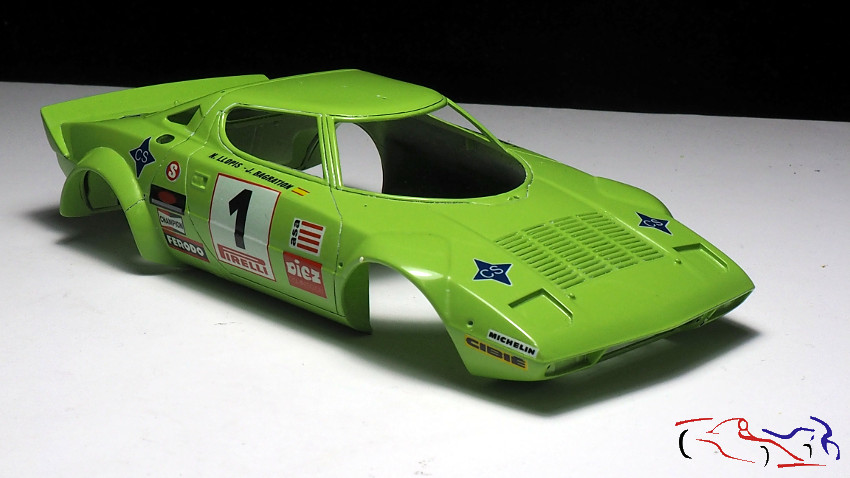 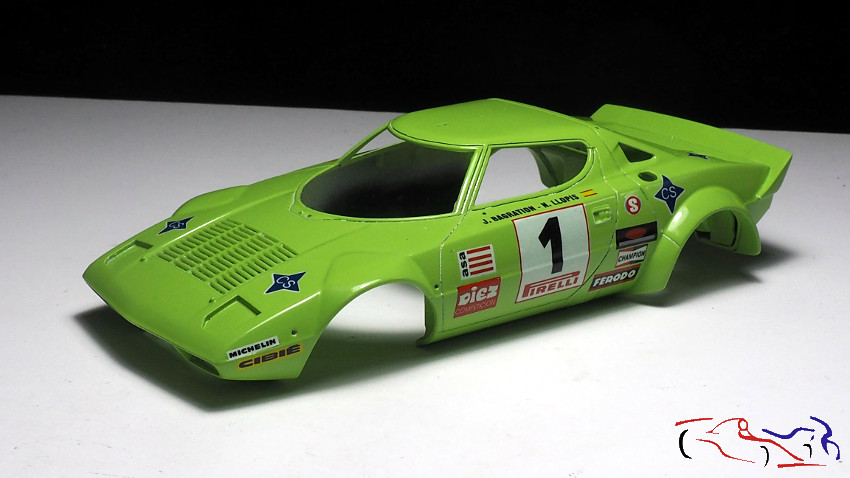  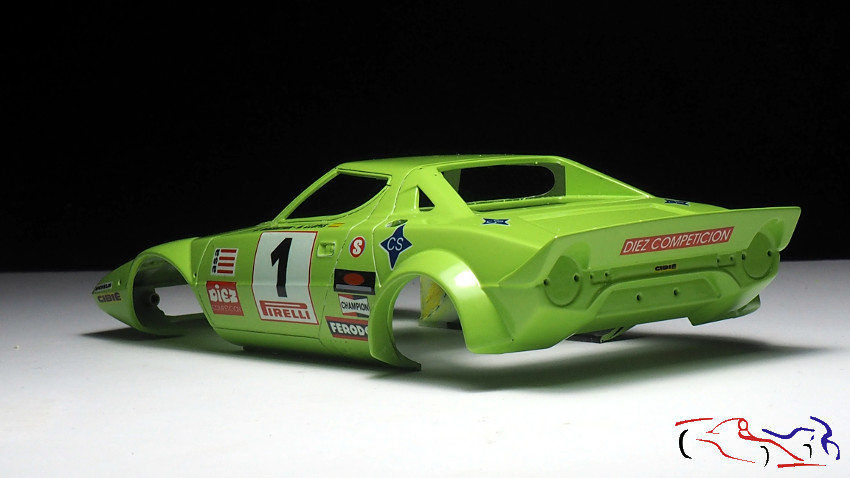 Gracias por mirar y comentar!! Thanks for watching and commenting! |
|
|
|
|
|
03-24-2023, 02:58 PM
|
#12 | |
|
AF Enthusiast

Join Date: Oct 2012
Location: Doornenburg , Netherlands
Posts: 502
Thanks: 80
Thanked 74 Times in 74 Posts
|
Re: Lancia Stratos 1979 J Bagration Hasegawa (1/24)
This is a very cool looking Stratos. The amount of work you put in detailling is phenomenal.
__________________
my English is not perfect but hopefully be readable |
|
|
|
|
|
05-09-2023, 07:26 AM
|
#13 | ||
|
AF Enthusiast
Thread starter
Join Date: Mar 2009
Location: Madrid
Posts: 649
Thanks: 109
Thanked 68 Times in 67 Posts
|
Re: Lancia Stratos 1979 J Bagration Hasegawa (1/24)
Quote:
|
||
|
|
|
|
05-09-2023, 07:41 AM
|
#14 | |
|
AF Enthusiast
Thread starter
Join Date: Mar 2009
Location: Madrid
Posts: 649
Thanks: 109
Thanked 68 Times in 67 Posts
|
Re: Lancia Stratos 1979 J Bagration Hasegawa (1/24)
Seguimos ya casi terminando el Lancia Stratos verde del año 1979 y e hecho, ésta será la ultima entrada antes de que os enseñe la maqueta terminada. Lo primero va a ser el proceso de pulido, para lo cual, lijé toda la carrocería con lija de 1500 y 3000, siempre con agua:
We are almost finishing the green 1979 Lancia Stratos and in fact, this will be the last entry before I show you the finished model. The first thing is going to be the polishing process, for which I sanded the whole bodywork with 1500 and 3000 grit sandpaper, always with water: 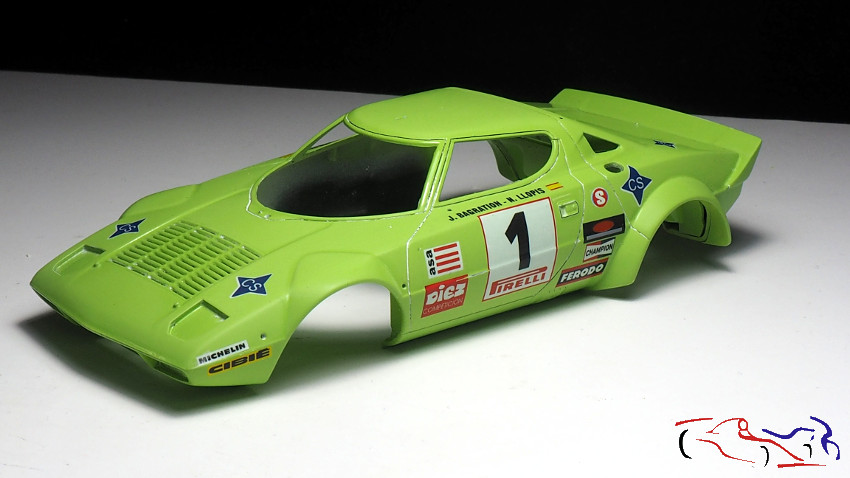 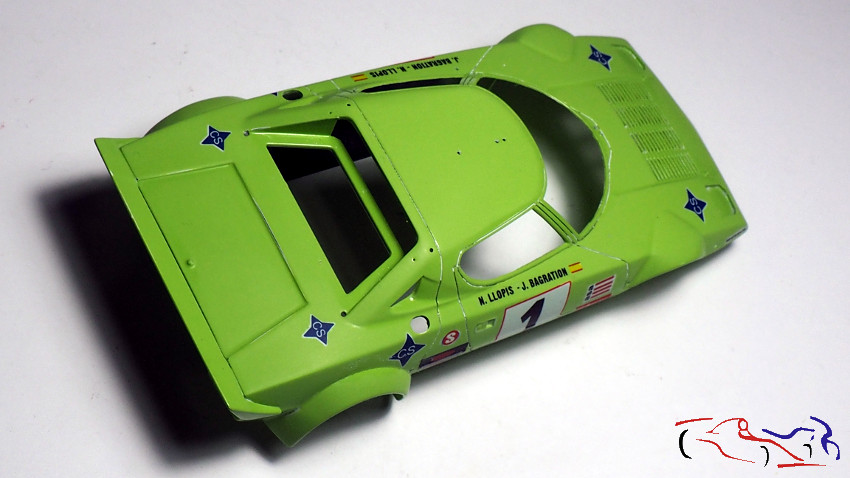 Una vez que la carrocería estaba lijada, limpia y seca, procedí a pulirla con el pulimento Number5, dejando la carrocería no del todo brillante, pues en aquella época, no se tenían los brillos de ahora: Once the bodywork was sanded, clean and dry, I proceeded to polish it with Number5 polish, leaving the bodywork not quite shiny, because at that time, they didnt have the shine we have today: 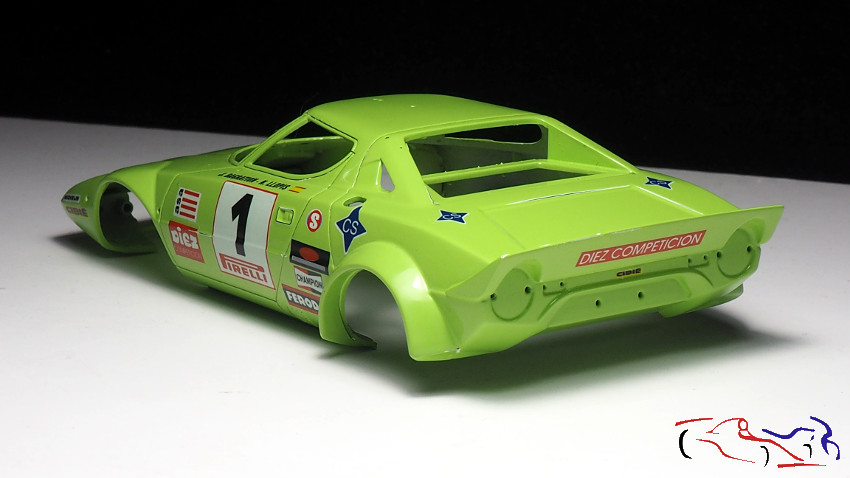 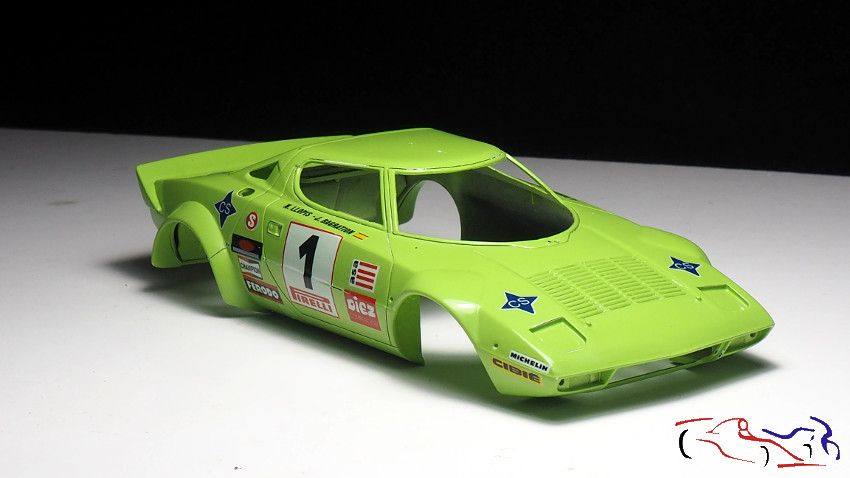 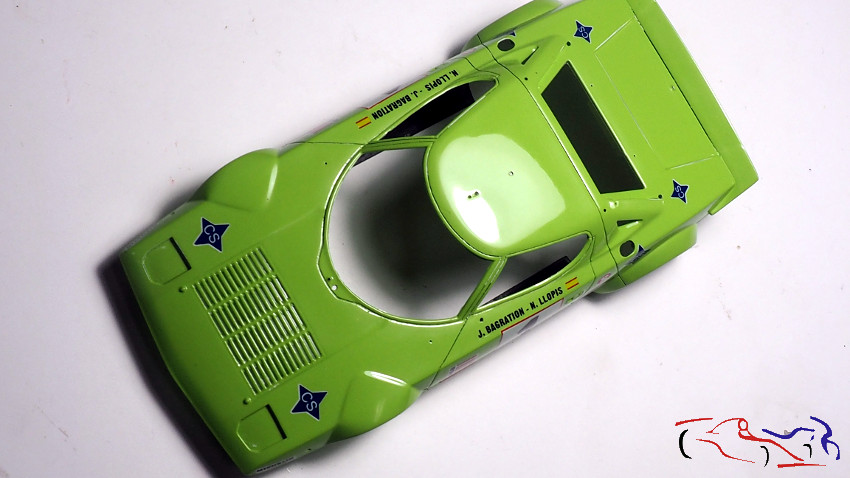 El siguiente paso era pintar con negro mate de Tamiya LP, los marcos de los cristales, los bajos de la carrocería y el interior. Para ello, enmascaramos todo, empezando por la parte de los cristales, y siguiendo con el corte de la máscara a lo largo de la línea que tiene la carrocería. Y previo al corte con cuchilla nueva, repasé las líneas con un palillo de madera. Después pinté con el negro todo lo descrito y aproveché también para pintar el frente de los faros escamoteables del Lancia. The next step was to paint the window frames, the underbody and the interior with Tamiya LP matt black. To do this, we masked everything, starting with the part of the crystals, and continuing with the cut of the mask along the line that has the bodywork. And before cutting with a new blade, I went over the lines with a wooden stick. Then I painted with black everything described above and I also took the opportunity to paint the front of the retractable headlights of the Lancia. 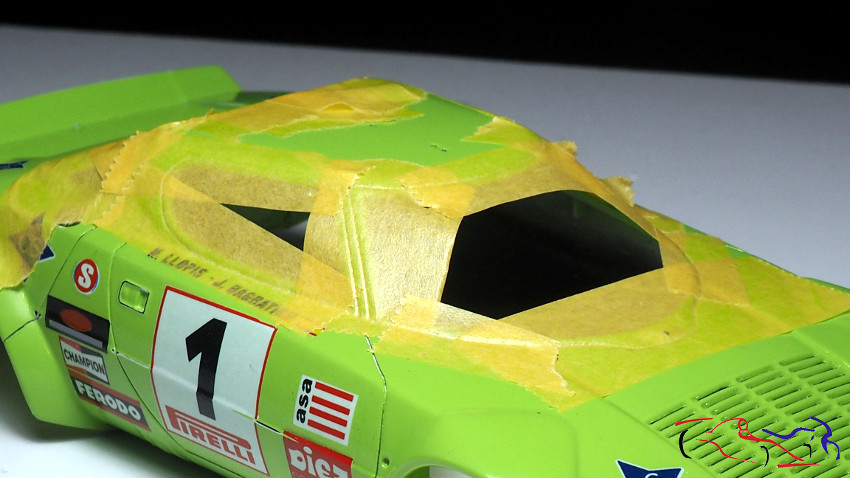  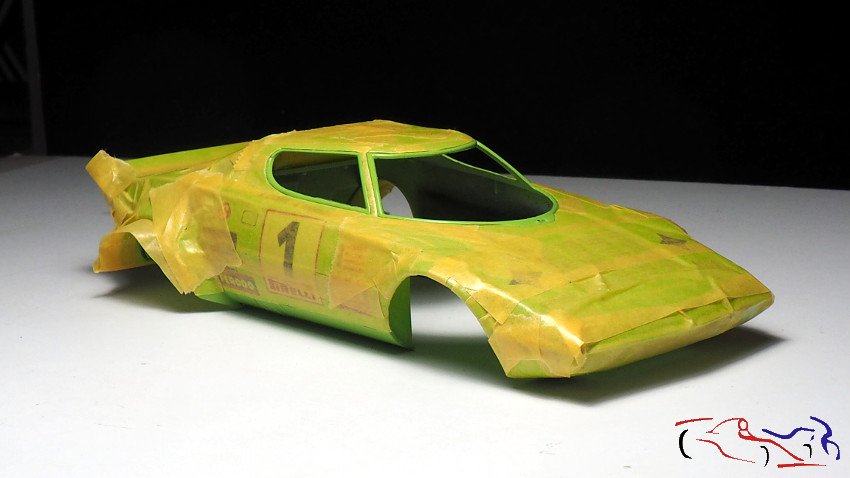 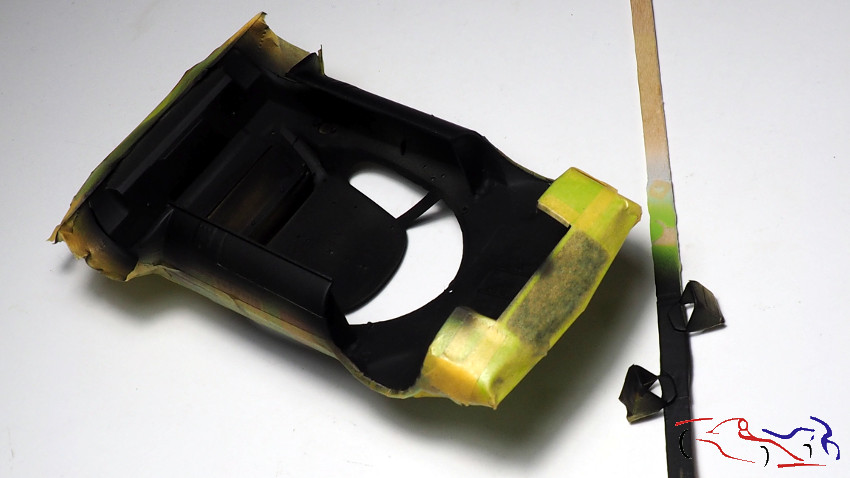 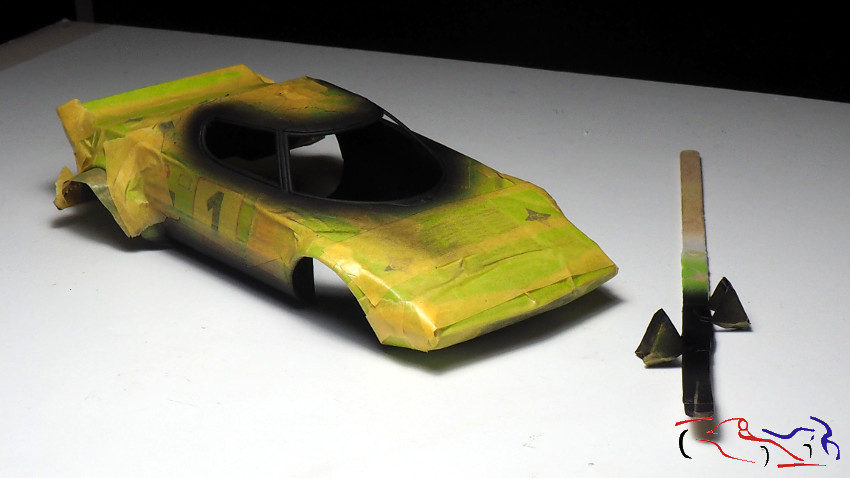 El resultado es el siguiente, una vez eliminé las máscaras: The result is as follows, once I removed the masks: 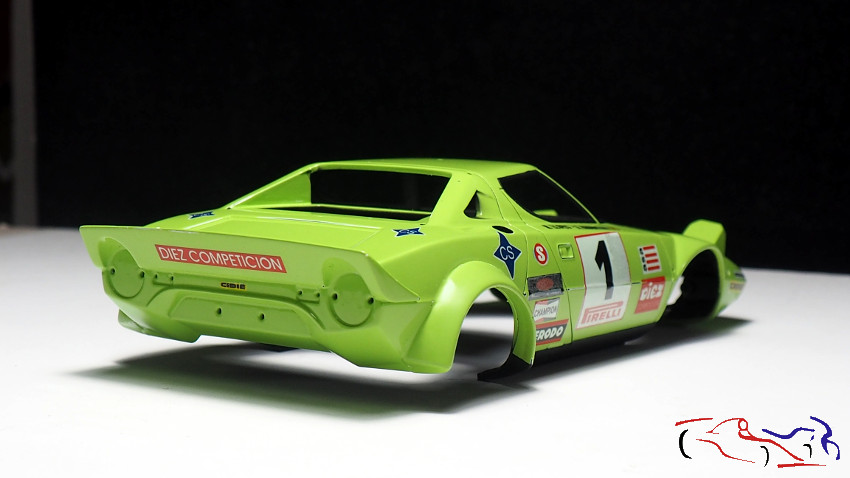 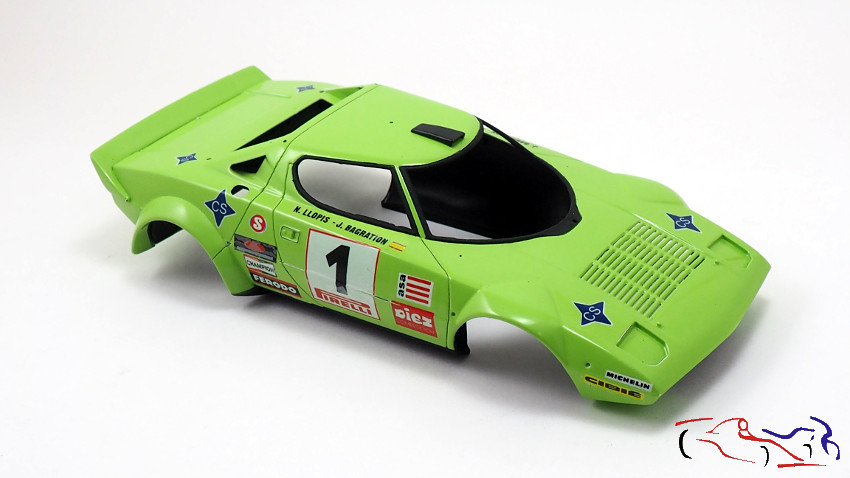 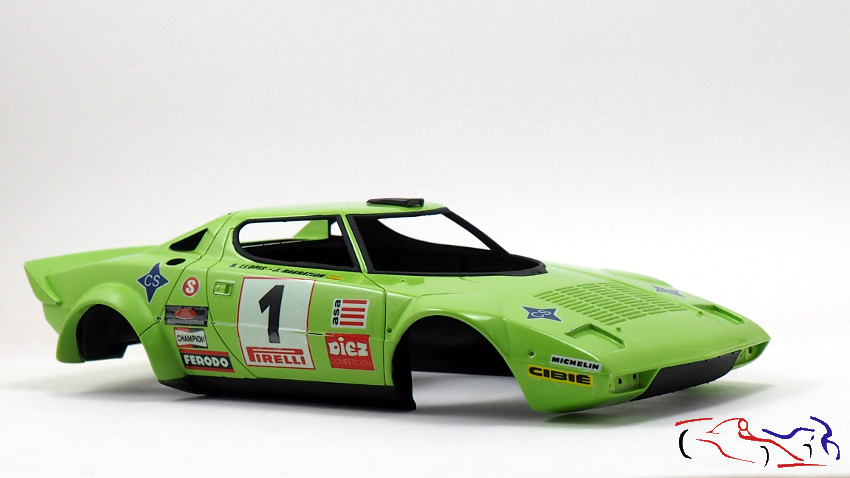 El siguiente paso es empezar a pegar todas las piezas que previamente había preparado, o que se tenían que pegar con el intyerior pintado, como los cristales. Para ellos. utilicé Ultra Glue de MIG, que aparte de quedarse trasparente, se puede eliminar los restos secos con agua. También pegué el salpicadero y los paneles de las puertas, asi como las entradas de gasolina. The next step is to start gluing all the pieces that I had previously prepared, or that had to be glued with the painted interior, such as the glass. For them, I used Ultra Glue from MIG, which apart from remaining transparent, you can remove the dried remains with water. I also glued the dashboard and door panels, as well as the fuel inlets. 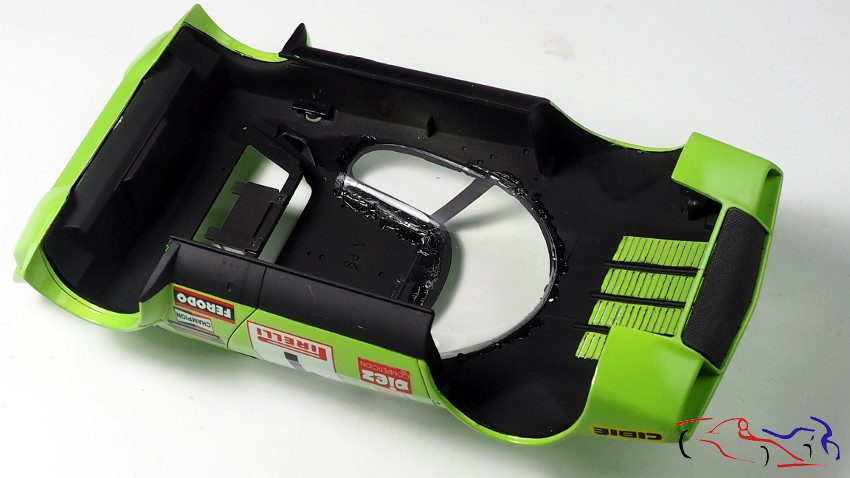 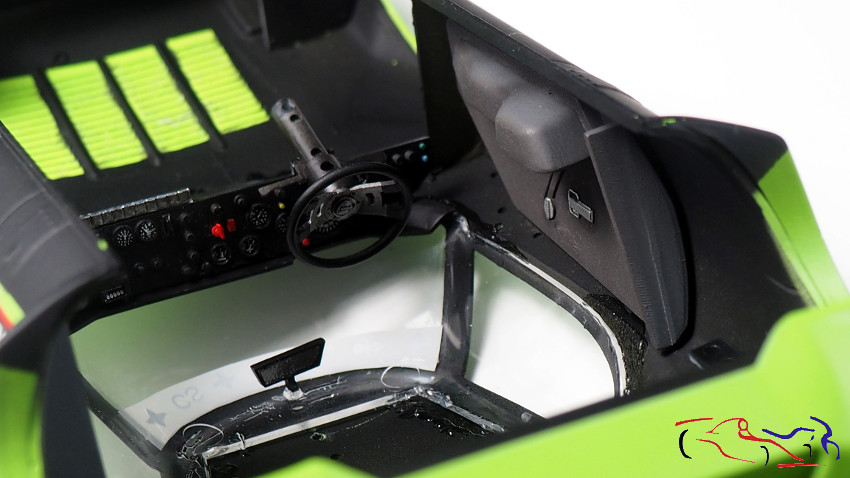 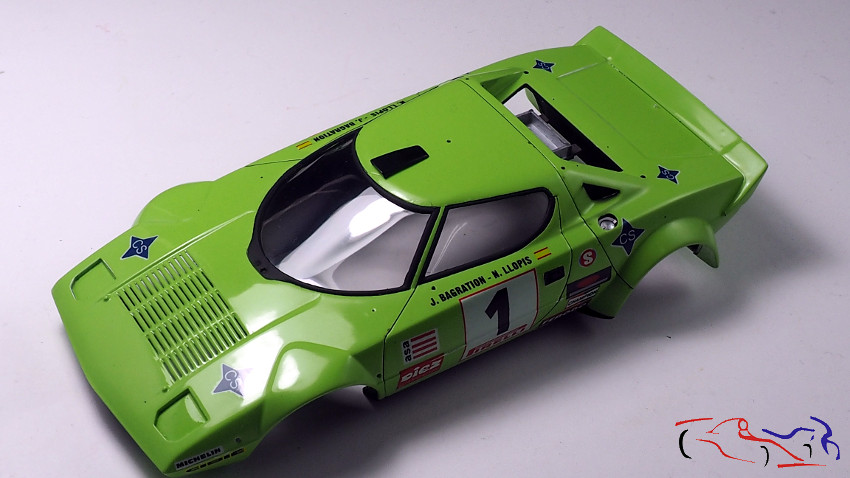 El interior ya lo tenía avanzado, a falta de los asientos, pues les faltaban los cinturones. Cogí cinturones de tela negra, los fotograbados de Decalcas para las hebillas y unas calcas que tengo de algún aftermarket. The interior was already finished, except for the seats, as they were missing the belts. I took black fabric belts, Decalcas photoetched parts for the buckles and some decals I have from some aftermarket. 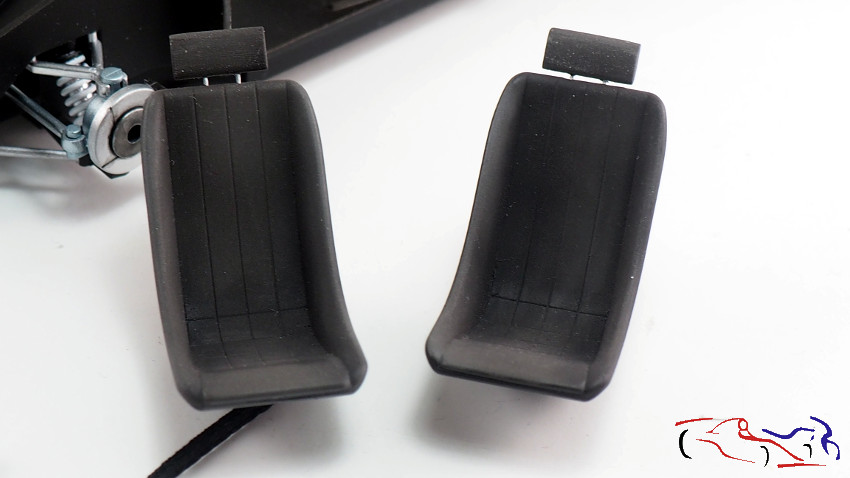 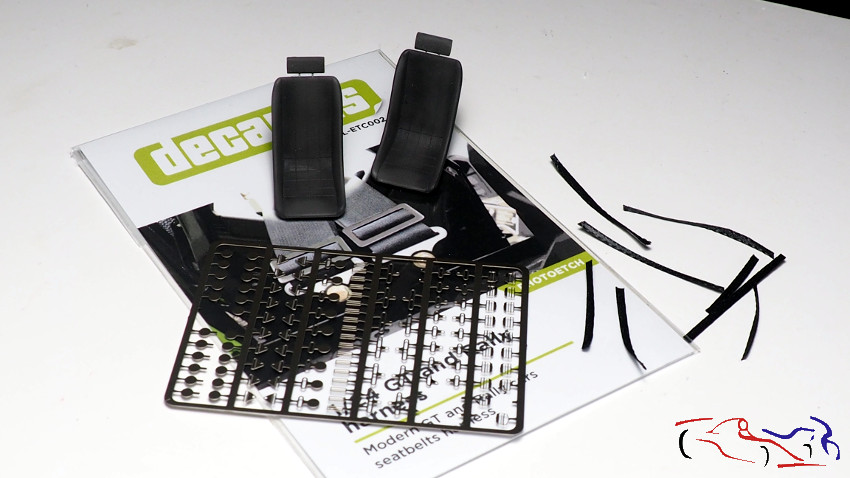 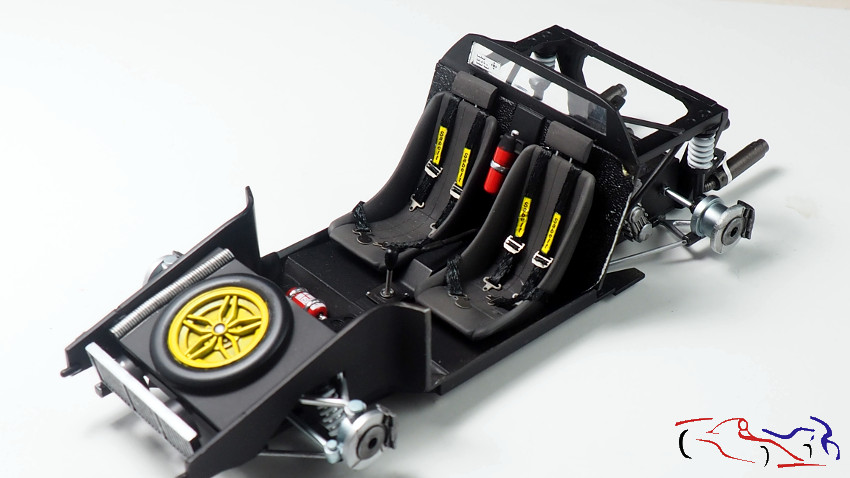 Más piezas que vamos terminando. A los faros, les pego los cristales con resina UV, la cual endurezco con la lampara de UV, en unos 30/40 segundos, siendo el resultado muy bueno. Y al retrovisor externo, le pongo la película Chrome de Hasegawa, que es autoadhesiva: More pieces that we are finishing. To the headlights, I glue the lenses with UV resin, which I harden with the UV lamp, in about 30/40 seconds, and the result is very good. And to the external rearview mirror, I put the Chrome film from Hasegawa, which is self-adhesive: 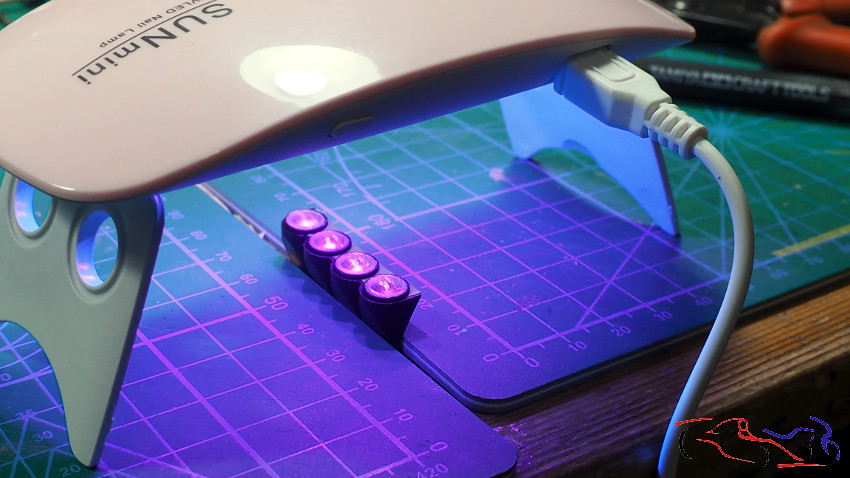 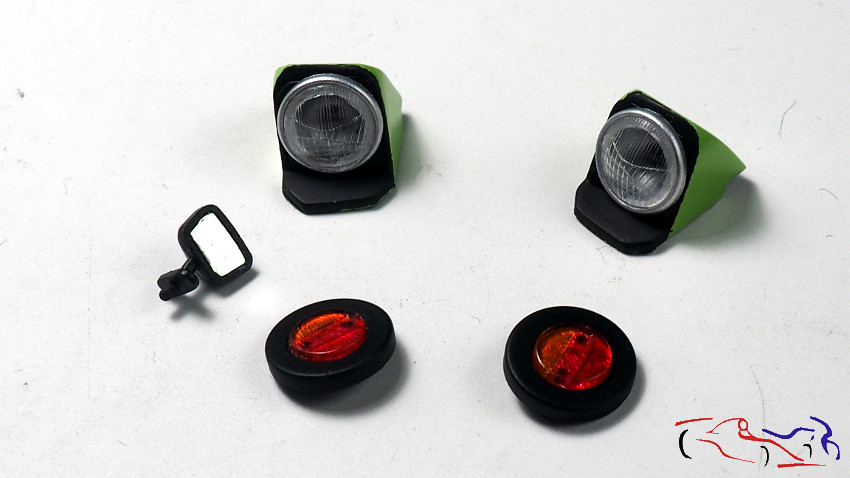 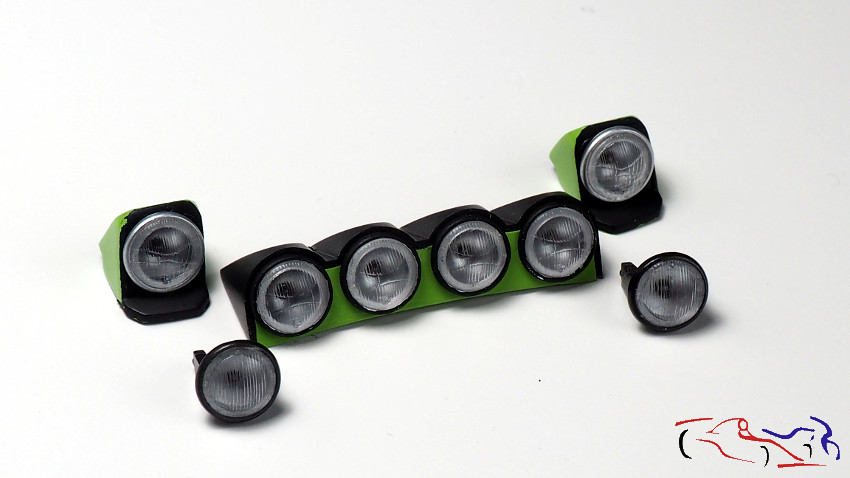 Viendo fotos del coche original, y la hoja de calcas que tenía, había otras dos puntos que fallaba: faltaba la calca de Cibié del protector de los faros, que hice en el ordenador e imprimé en hoja transparente de calcas, y el parasol del cristal, que era pequeña. Para esta última, hice una plantilla sobre calca virgen blanca, y le puse encima los logos recortados de la calca original. Looking at photos of the original car, and the decal sheet I had, there were two other points that were missing: the Cibié decal of the headlight protector, which I made on the computer and printed on a transparent decal sheet, and the glass sun visor, which was small. For the latter, I made a template on white blank decal, and put the logos cut from the original decal on top of it. 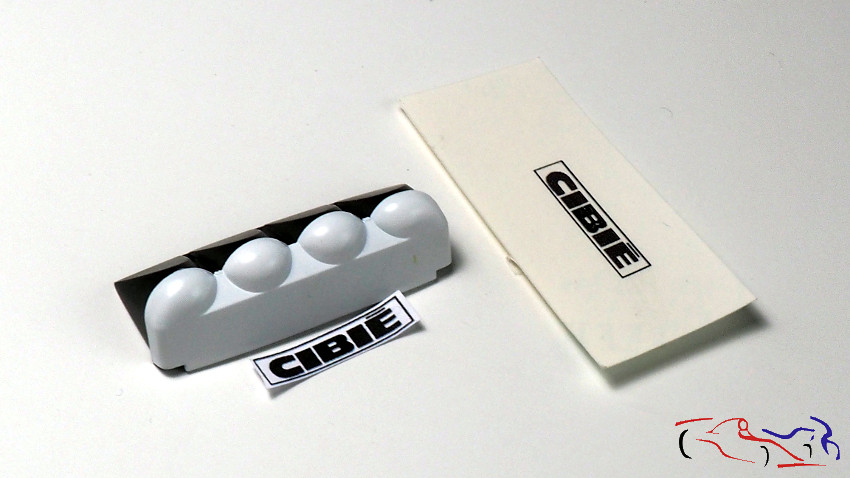 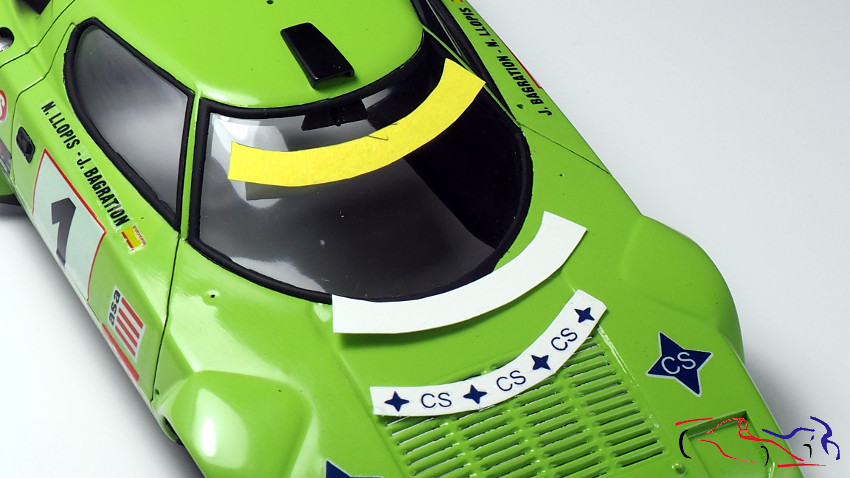 Y ya finalmente, encajé el chasis en la carrocería, con mucho cuidado, pero ese mucho cuidado no fue suficiente. Una vez puesta, la volteé para ver como había quedado y empezó a sonar algo dentro se había forzado el volante y se había soltado!! Pensé en abrirla de nuevo, pero lo deseché, porque al fin y al cabo, el interior se ve poco!! And finally, I fitted the chassis to the body, with great care, but that great care was not enough. Once it was in place, I turned it over to see how it had turned out and something started to rattle inside the steering wheel had been forced and had come loose! I thought about opening it again, but I discarded it, because after all, you cant see much inside! 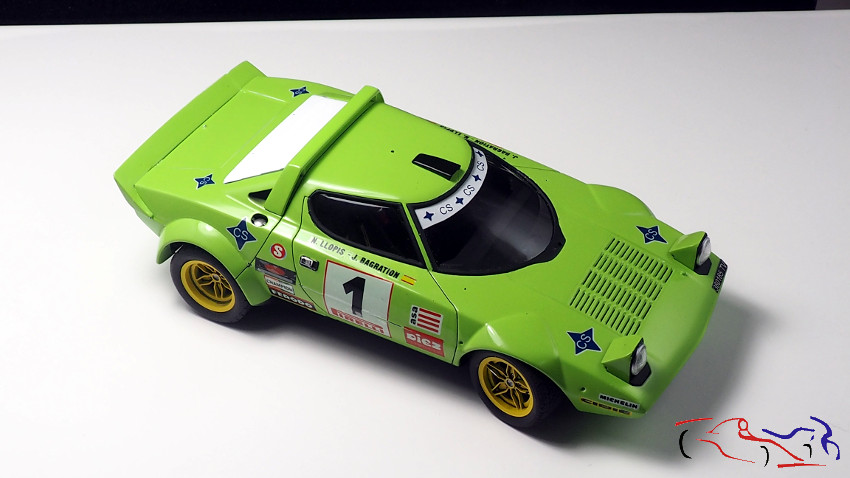 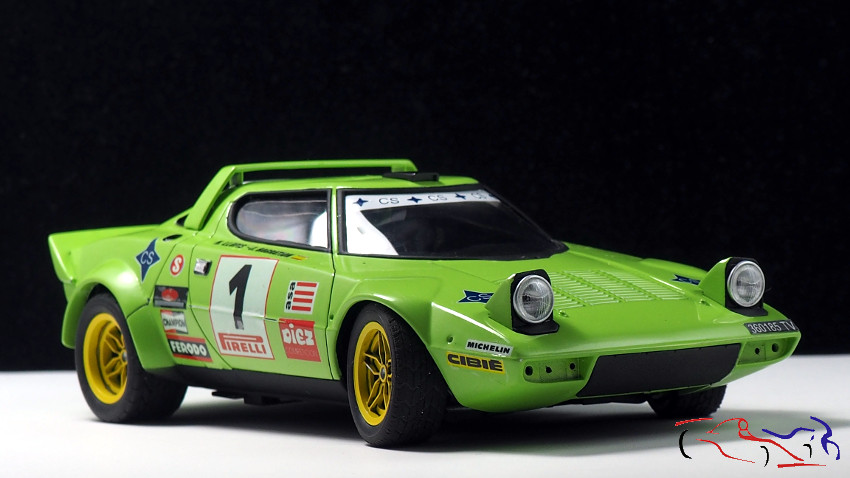 Y ahora, fotos casi finales, donde podéis ver como queda el conjunto y los detalles puestos. Decir que faltan el limpiaparabrisas, la entena y unas fijaciones del capó trasero, que me va a mandar DAB models. Destacar un fallo que hice al pulir la carrocería: algunas partes se ven si color ni calca, ya que me excedí al lijar. Fallo que tengo que controlar en el futuro!! And now, almost final photos, where you can see how is the set and the details. I have to say that the windscreen wipers, the rear bonnet and some fixings for the rear bonnet are missing, which DAB models is going to send me. I have to point out a mistake I made when polishing the bodywork: some parts can be seen without colour or decals, as I went too far when sanding. A mistake that I have to control in the future!  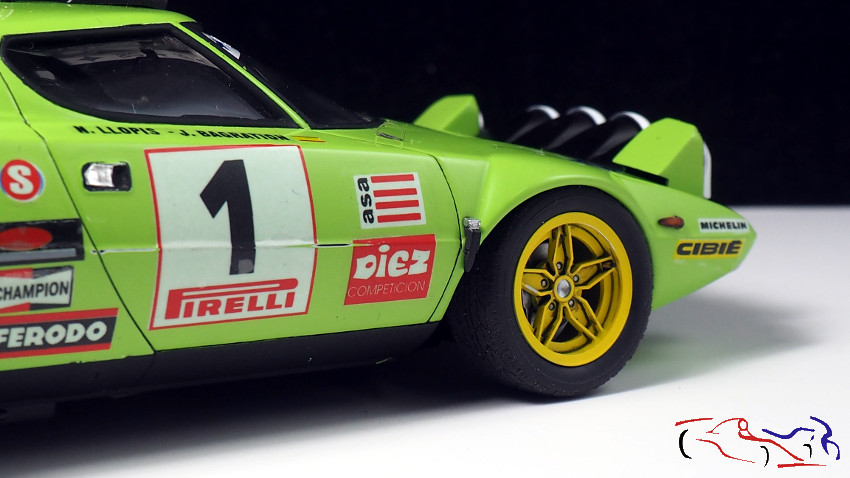 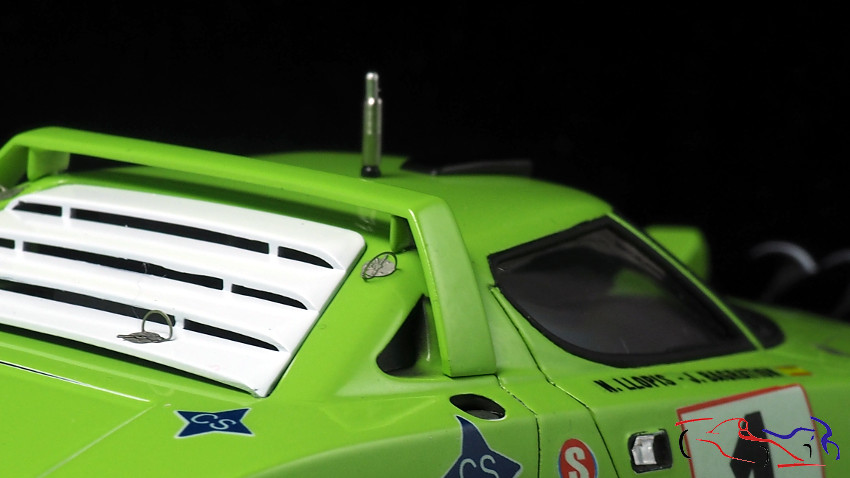 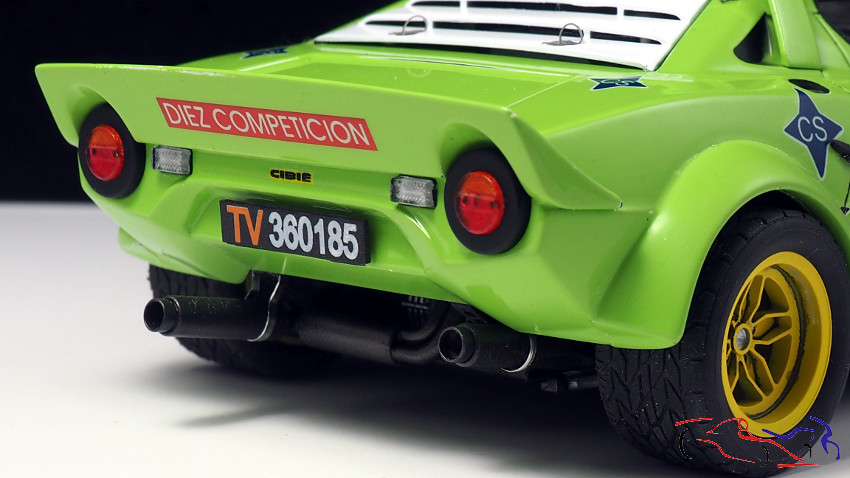 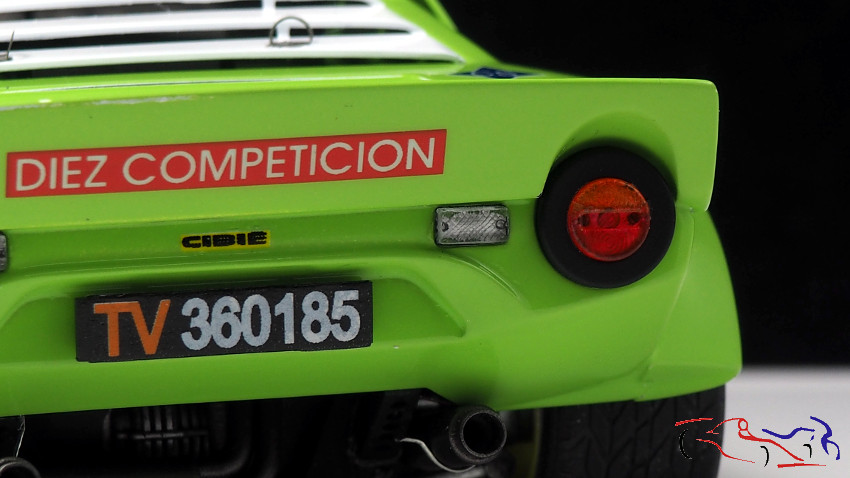 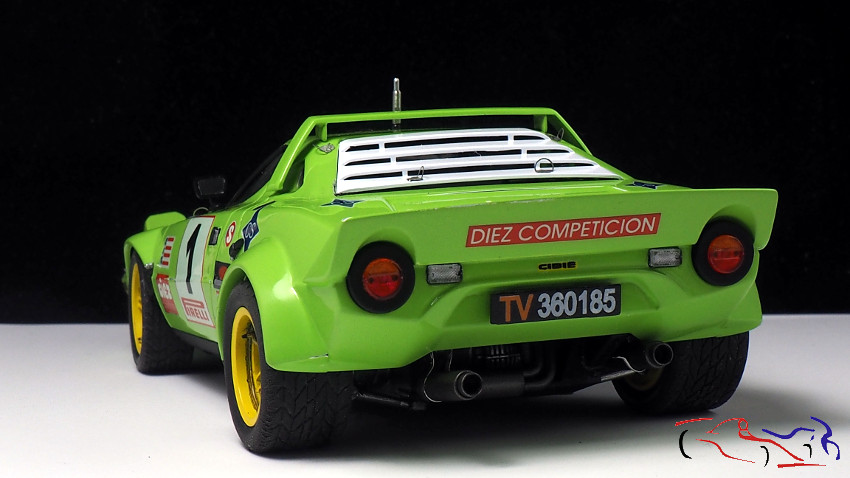 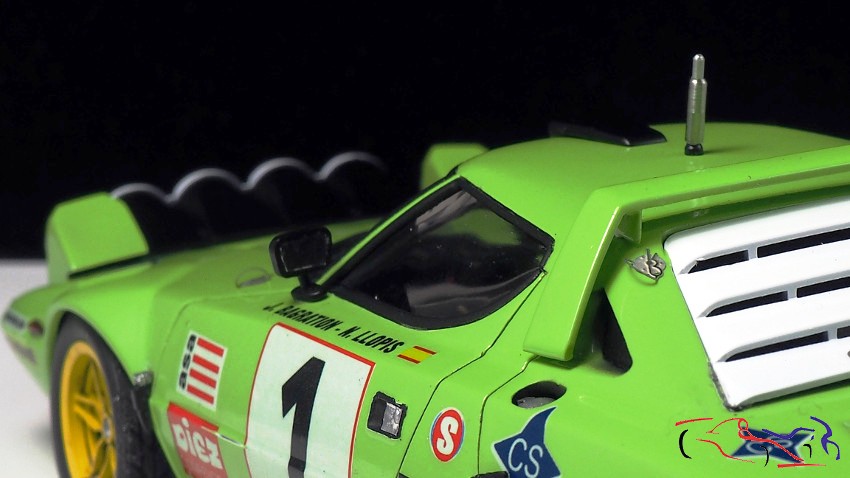 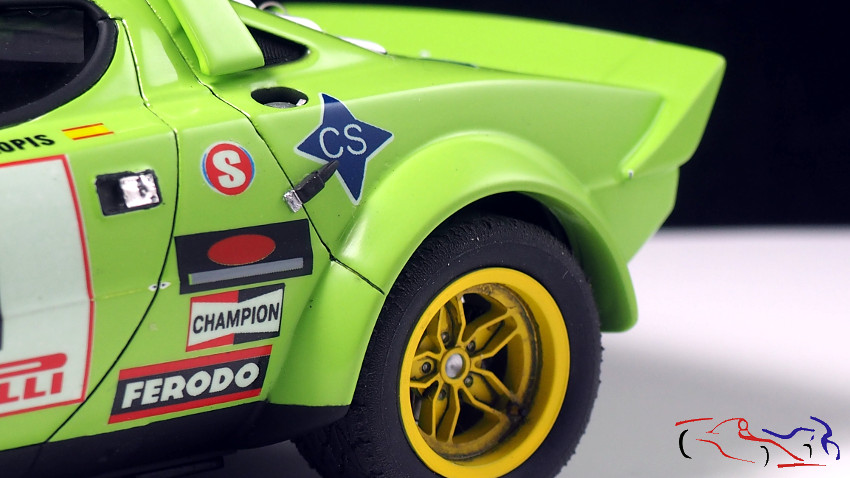 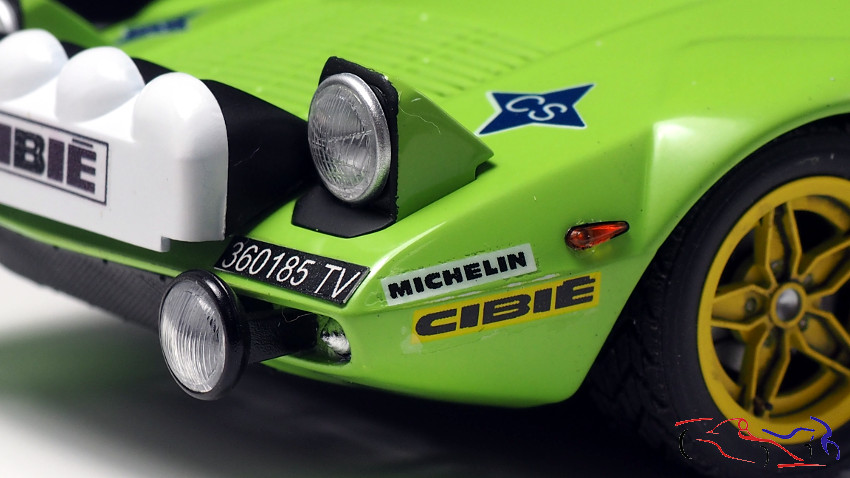 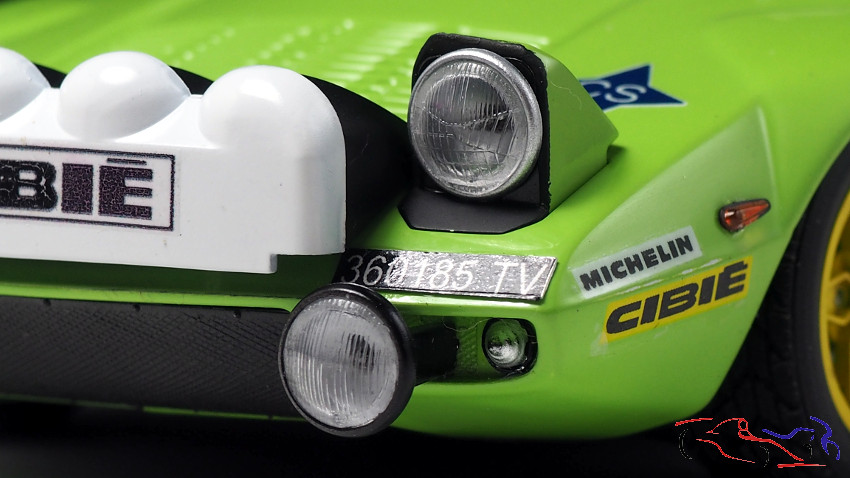 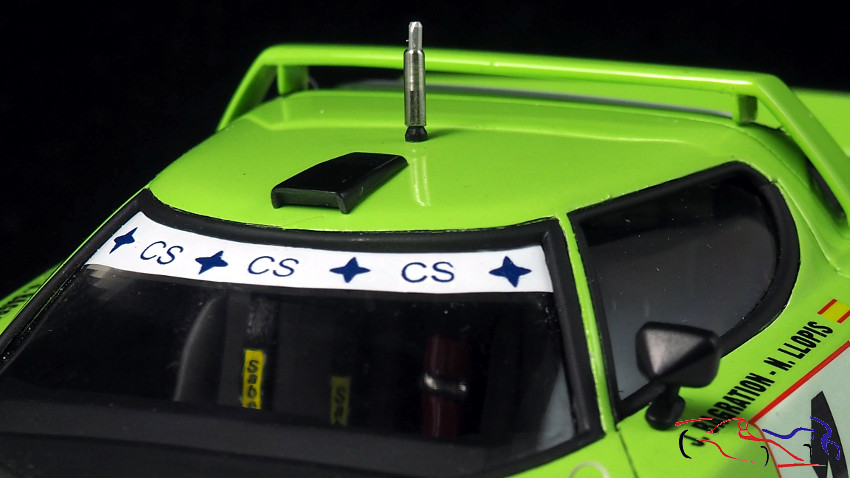 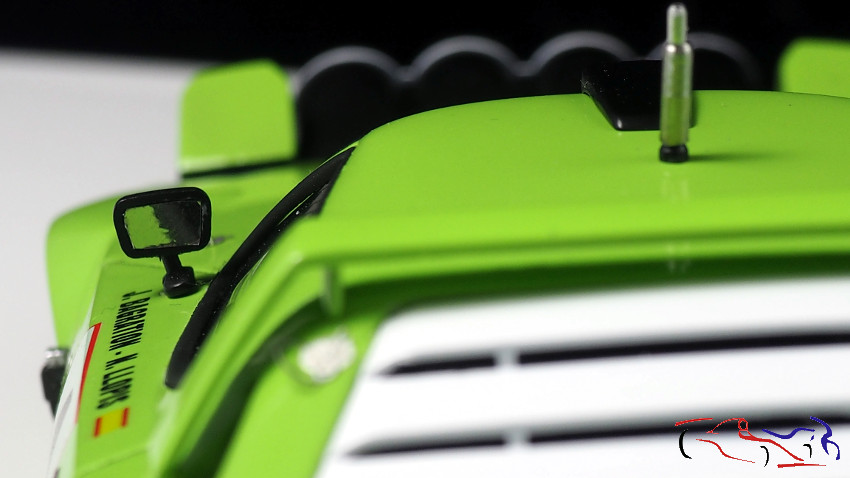 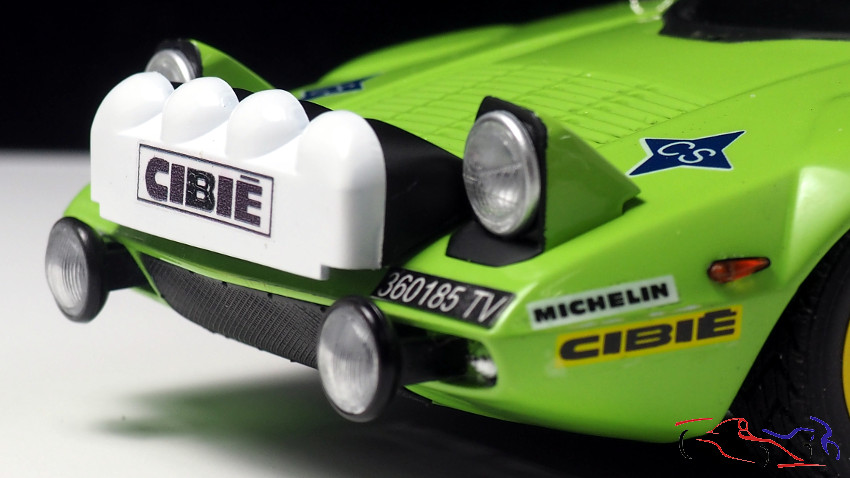 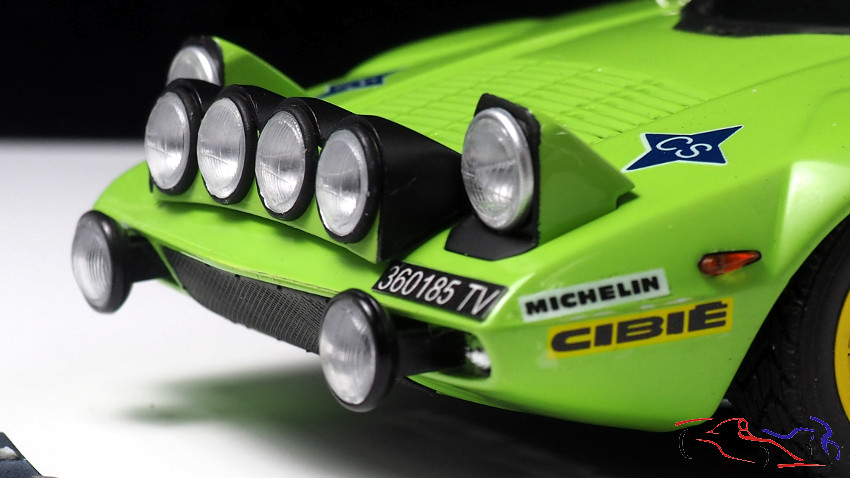 La siguiente entrada será la de las fotos finales, con los comentarios sobre la maqueta y el proceso. Gracias por ver y comentar!! The next post will be the final photos, with comments on the model and the process. Thanks for watching and commenting! |
|
|
|
|
|
05-13-2023, 03:56 PM
|
#15 | |
|
AF Regular
Join Date: Aug 2011
Location: Torino
Posts: 390
Thanks: 175
Thanked 62 Times in 58 Posts
|
Re: Lancia Stratos 1979 J Bagration Hasegawa (1/24)
Hello Jesus, fantastic work on the Stratos, superb details as usual! Looks great in this color!
|
|
|
|
|
|
|
POST REPLY TO THIS THREAD |
 |
|
|


