|
|
|

|
|
| Search | Car Forums | Gallery | Articles | Helper | AF 350Z | IgorSushko.com | Corporate |
|
| Latest | 0 Rplys |
|
|||||||
| WIP - Motorbikes Post topics for any "Works In Progress" motobikes projects in this sub-forum. |
 |
 Show Printable Version | Show Printable Version |  Email this Page | Email this Page |  Subscribe to this Thread
|
|
|
Thread Tools |
 05-22-2011, 11:40 AM
|
#1 | |
|
Razor Sharp Twit
 
Join Date: Mar 2004
Location: london
Posts: 5,863
Thanks: 0
Thanked 25 Times in 21 Posts
|
WIP Italeri MV Agusta F4 2004 Special Parts 1:9
Ok, like many of you I am terrible at buying new kits and then starting them before finishing any of the many that are already on my desk so here is my latest purchase.
Italeri MV Agusta F4 (750) 2004 Special Parts. This kit is a rebox of the original Protar Swift Kit of the MV Agusta F4 750 but with a different decal set and some slightly different parts to represent a later special edition of the bike. This being a Swift Kit, it doesn't come with the nice-ish seperate linked chain or the working rear suspension but I'll deal with that later. First things first. Main cowl. 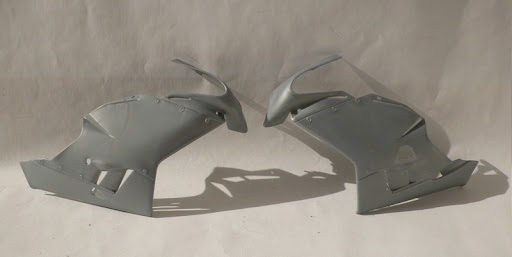 Not bad looking but horrible and quite typical Protar locating for the join i.e bad... There were also a few sink holes to deal with 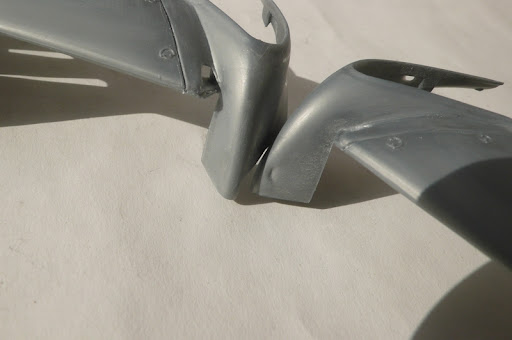 And the molded on pins that hold on the panels will need to removed and replaced. 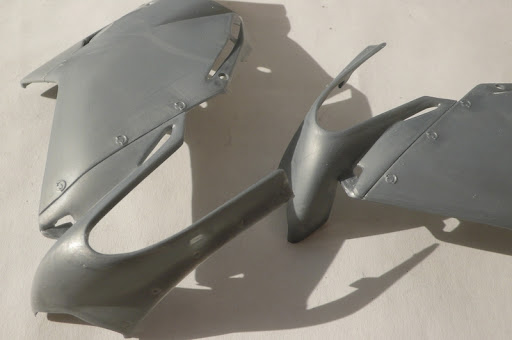 This is the rear shock assembly. 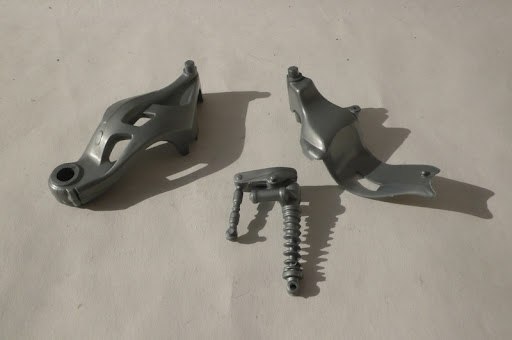 and in place in the rear swing arm. 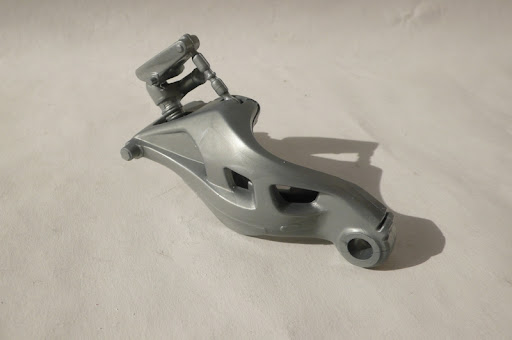 I know that on the original High Quality kit, this came as a multi-part assembly but without that at hand I'll have to seperate the pieces myself and work in a moving solution later. That would also let me get rid of the join line that should be there on the inner face of the swingarm. Chassis frame.  A not bad representation of the tube frame. It's not 100% but I've heard that some of the Swift Kits had horribly simplified chassis so I'm glad this isn't too bad. Here, I've already fixed the two halves together. Luckily, there's enough flex in the frame to allow me to squeeze in parts afterwards. The engine. 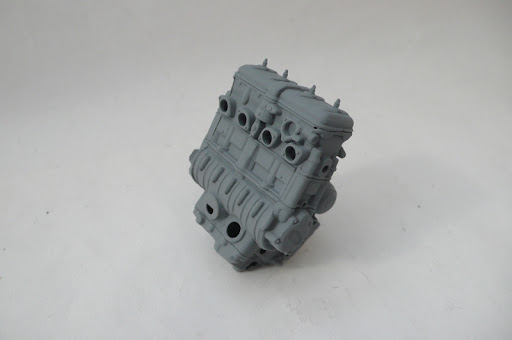 Again, typical of a Protar kit of this period in that there is detail but it all a bit soft and oversized. Some main bolts are molded as a big lump that needed to carved out and some of the lines were deepend/redefined with a fresh blade tip before primer. ...and because once I opened the box I couldn't keep my hands out of it, I prepped, primed and painted the body panels.  As you can see, I removed the left hand side panel so you can display it that way. The molded on pins were removed and drilled out so I'll have to make some new better looking pins of my own to hold the panel in place when complete. The blue stripes are included in kit as decals but they don;t match the blue I was going to use so I used them to make positive masks for when I sprayed the silver. I then made negative masks and sprayed the blue. Paints are: Silver = Hycote Double Acrylic Ford Strato Silver Blue = Tamiya TS-50 Mica Blue There is also a bit of an error between the seat and upper seat cushion. I wrongly assumed that the seat would cover up that little bit of body work so left it unmasked. Alas, I'll have to carefully sand that blue out and possible touch up with some more silver. Finally for now, a quick mock up of some parts. 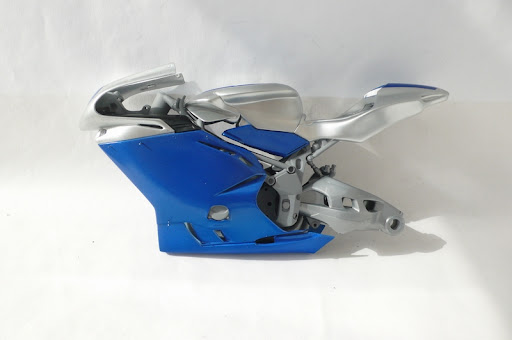 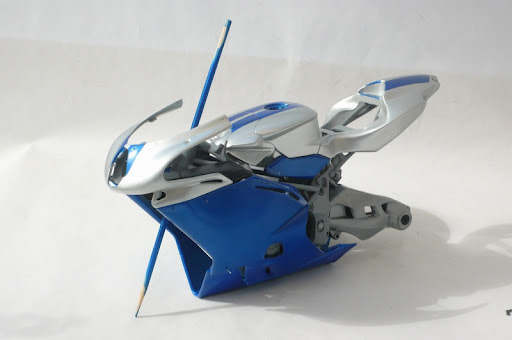
__________________
AF's Guidelines Read them. __________________  Currently in the process of re-hosting my photos. If any go missing, drop me a PM. |
|

|

|
|
05-22-2011, 12:35 PM
|
#2 | |
|
Forza Schumacher

Join Date: Mar 2001
Location: Tallinn
Posts: 6,695
Thanks: 9
Thanked 19 Times in 19 Posts
|
Re: WIP Italeri MV Agusta F4 2004 Special Parts 1:9
I really like what you've done this far. This silver works very well with this blue.
Are you sure you want a working swingarm? It's a static model...
__________________
 Would love to resume my duties as AF's own official thread bastardizer!!!   1:29:53.435 || 207.316 || 310.596 |
|
|
|
|
|
05-22-2011, 03:51 PM
|
#3 | |
|
AF Enthusiast
Join Date: Dec 2004
Location: Warsaw
Posts: 550
Thanks: 1
Thanked 6 Times in 4 Posts
|
Re: WIP Italeri MV Agusta F4 2004 Special Parts 1:9
Color scheme/combination is imho simply awesome. Superb choice. I will stay tuned...
|
|
|
|
|
|
05-22-2011, 04:51 PM
|
#4 | |||
|
Razor Sharp Twit
Join Date: Mar 2004
Location: london
Posts: 5,863
Thanks: 0
Thanked 25 Times in 21 Posts
|
Re: WIP Italeri MV Agusta F4 2004 Special Parts 1:9
Quote:
Separating it into parts would allow me to reassemble the whole swing arm/shock assembly after gluing the two halves of the swing arm together. This is my primary concern as what I want to do is remove the join line. I just figured that if I'm going to do this anyway, it isn't that much more work to get a sort of working rear as the swing arm isn't fixed firmly onto chassis. I think I'd end up just making a facsimile as I would in a car kit. Quote:
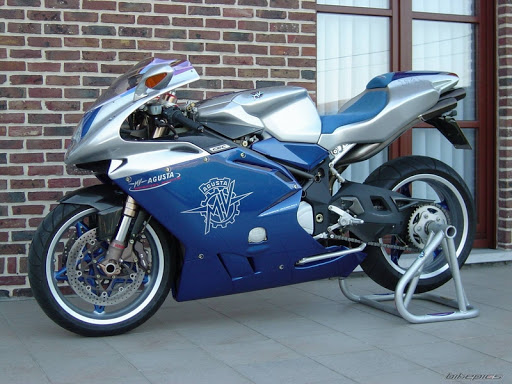 The kit I really wanted to get and build is of the original red, silver and gold bike. 
__________________
AF's Guidelines Read them. __________________ Currently in the process of re-hosting my photos. If any go missing, drop me a PM. |
|||
|
|
|
|
05-23-2011, 06:48 PM
|
#5 | |
|
Registered User
Join Date: Nov 2009
Location: Seoul, South Korea
Posts: 174
Thanks: 0
Thanked 3 Times in 3 Posts
|
Re: WIP Italeri MV Agusta F4 2004 Special Parts 1:9
Fantastic job with poor kit!
|
|
|
|
|
|
05-25-2011, 10:05 AM
|
#6 | |
|
Razor Sharp Twit
Join Date: Mar 2004
Location: london
Posts: 5,863
Thanks: 0
Thanked 25 Times in 21 Posts
|
Re: WIP Italeri MV Agusta F4 2004 Special Parts 1:9
just a quick update.
Decalled the body cowls. Mica Blue is a pretty good match for the decals' blue, especially for the fine lettering on the "F4" logos. The decals are also very nice to work with. They are very thin but still very strong and the clear parts are very clear and fine. A little setting solution later and they were nearly invisible. 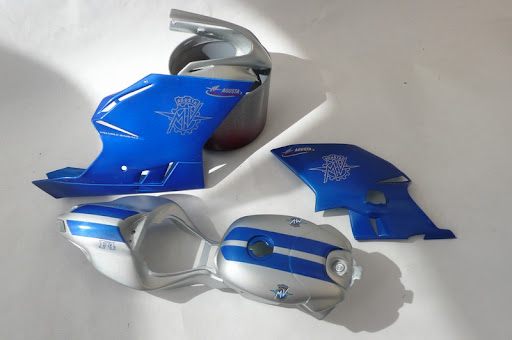 No clear on it yet and if I'm being honest, this bit makes me a little anxious. So far, I've avoided racing cars because I didn't want to face clearing over decals...
__________________
AF's Guidelines Read them. __________________ Currently in the process of re-hosting my photos. If any go missing, drop me a PM. |
|
|
|
|
|
05-25-2011, 01:49 PM
|
#7 | |
|
AF Regular

Join Date: Oct 2005
Location: WASHINGTON
Posts: 357
Thanks: 11
Thanked 15 Times in 14 Posts
|
Re: WIP Italeri MV Agusta F4 2004 Special Parts 1:9
I always use 2K/ 2 Pack to clear decals on my kits and have never ever had any trouble with it, but if you still don't want to chance that, try some Johnsons Klear over them.
gpz900ra7.
__________________
  MY 1:1 toy MY 1:1 toy
|
|
|
|
|
|
06-09-2011, 05:49 PM
|
#8 | |
|
Razor Sharp Twit
Join Date: Mar 2004
Location: london
Posts: 5,863
Thanks: 0
Thanked 25 Times in 21 Posts
|
Re: WIP Italeri MV Agusta F4 2004 Special Parts 1:9
been a bit busy so just a small update.
photos were taken indoors under flourescent light so I'll take better ones tomorrow when I should get some parts painting done. I also got hold of a complete set of service manuals for the bikes so I've been looking at the kit parts and resisting the urge to fill in the missing parts. First of all, chassis frame halves cememted together, painted and (some of) front fork painted.  The chassis frame was first primed roughly with automotive primer before I sprayed on a good coat of Hycote Double Acrylic Ford Graphite Grey. Once that had cured enough to mask, I did so and sprayed the rear section with Hycote Double Acrylic Aluminium. Didn't put clear on it as the real chassis isn't fully gloss finished. The front fork was hand painted in mixed Citadel paints Shining Gold and Mithril Silver. It's not perfect and really, I would've like to have fabbed some up out of brass and aluminium. Put the engine block together, filled in the seams and gave it base coat of Hycote Aluminium before a generous wash of Citadel Mitril Silver mixed with a little Tamiya XF-1 Flat Black and extra X-20a thinner because brush paints doesn't like to sit on the Hycote if it's diluted with water too much.  There's some little bits of fabbing to do here. In the photo, you can see where on the real engine, the termostat would go. The odd thing is, the space/hole is there in the kit for it but the part doesn't exist. It's probably in the full detail version though. Now for the rear suspension. I said before that I was going to articulate it but after a very brief moment's thought, I decided against it. I went ahead with seperating most of the components though. He's most of it along with the spring and damper parts I knocked up out of 0.6mm Jewellery wire, styrene rod and a bit of aluminium. 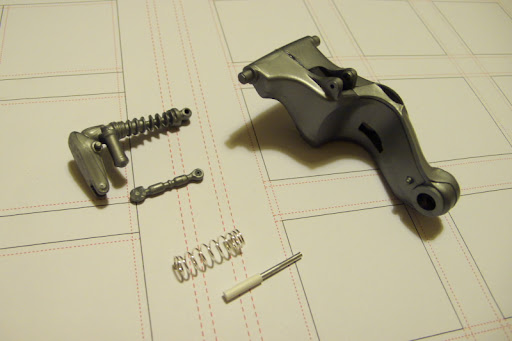 Because the spring is a bit loose, I had to add a couple of small discs of styrene to hold its position. Small circles courtesy of my bargain buys from hong kong $10 store.  What it looks like put together.  At this point, the molded on reservoir bugged me so I removed that and made the correct pipe for it. Not very good photo of it so I'll update this photo tomorrow. 
__________________
AF's Guidelines Read them. __________________ Currently in the process of re-hosting my photos. If any go missing, drop me a PM. |
|
|
|
|
|
06-16-2011, 11:17 AM
|
#9 | |
|
Razor Sharp Twit
Join Date: Mar 2004
Location: london
Posts: 5,863
Thanks: 0
Thanked 25 Times in 21 Posts
|
Re: WIP Italeri MV Agusta F4 2004 Special Parts 1:9
quick update.
better shot of the chassis with bare engine in place. 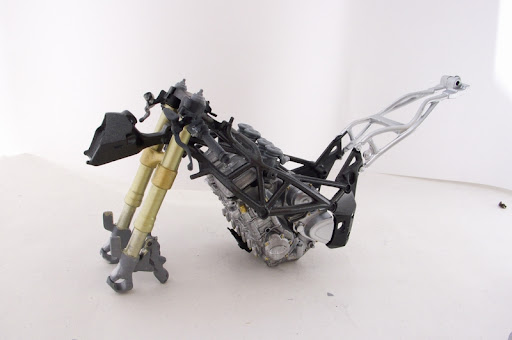 front forks not quite finished yet as the calipers and that while section that holds the wheel still needs to be fixed detail wise and painted. engine block has had bolts picked out in a dark gold. the two parts of the swing arm has been glued together, seem fixed and painted along with the suspension parts. 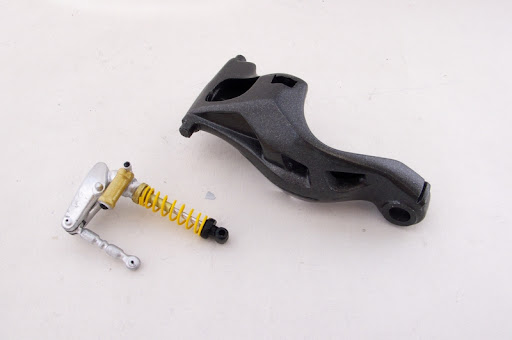 the control rod(?) is now a separate part but the shock itself I left molded onto the part. what it all looks like together. 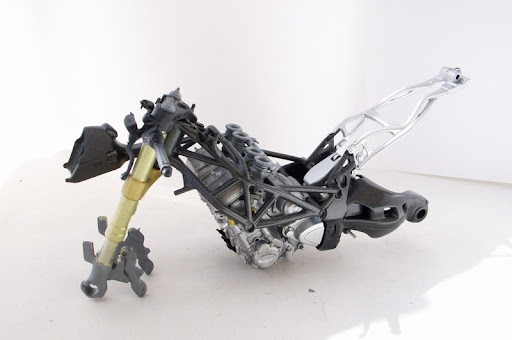 and as suspected, it is all pretty much hidden and will be even more so when the wheel is in place. 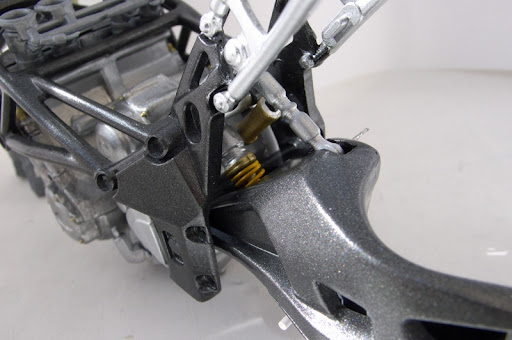 and that's it for the major parts. got a bit of carbon decalling to do before I tackle the wiring and plumbing of the thing from whatever I can decipher from the service manuals.
__________________
AF's Guidelines Read them. __________________ Currently in the process of re-hosting my photos. If any go missing, drop me a PM. |
|
|
|
|
|
06-19-2011, 03:58 AM
|
#10 | |
|
Registered User
Join Date: Nov 2009
Location: Seoul, South Korea
Posts: 174
Thanks: 0
Thanked 3 Times in 3 Posts
|
Re: WIP Italeri MV Agusta F4 2004 Special Parts 1:9
WOW... They look great.
|
|
|
|
|
| ||||||||||||||||||||||||||||||||||||||
|
POST REPLY TO THIS THREAD |
 |
|
|


