|
|
|

|
|
| Search | Car Forums | Gallery | Articles | Helper | AF 350Z | IgorSushko.com | Corporate |
|
| Latest | 0 Rplys |
|
|||||||
| WIP - Motorsports Post topics for any "Work In Process" motorsports vehicles in this sub-forum. |
 |
 Show Printable Version | Show Printable Version |  Email this Page | Email this Page |  Subscribe to this Thread
|
|
|
Thread Tools |
 02-25-2013, 02:12 PM
|
#196 | |
|
AF Enthusiast
Thread starter
Join Date: Nov 2008
Location: Norwich
Posts: 649
Thanks: 21
Thanked 111 Times in 87 Posts
|
Re: 1/8 Porsche 935/78 'Moby Dick'
Hello again,
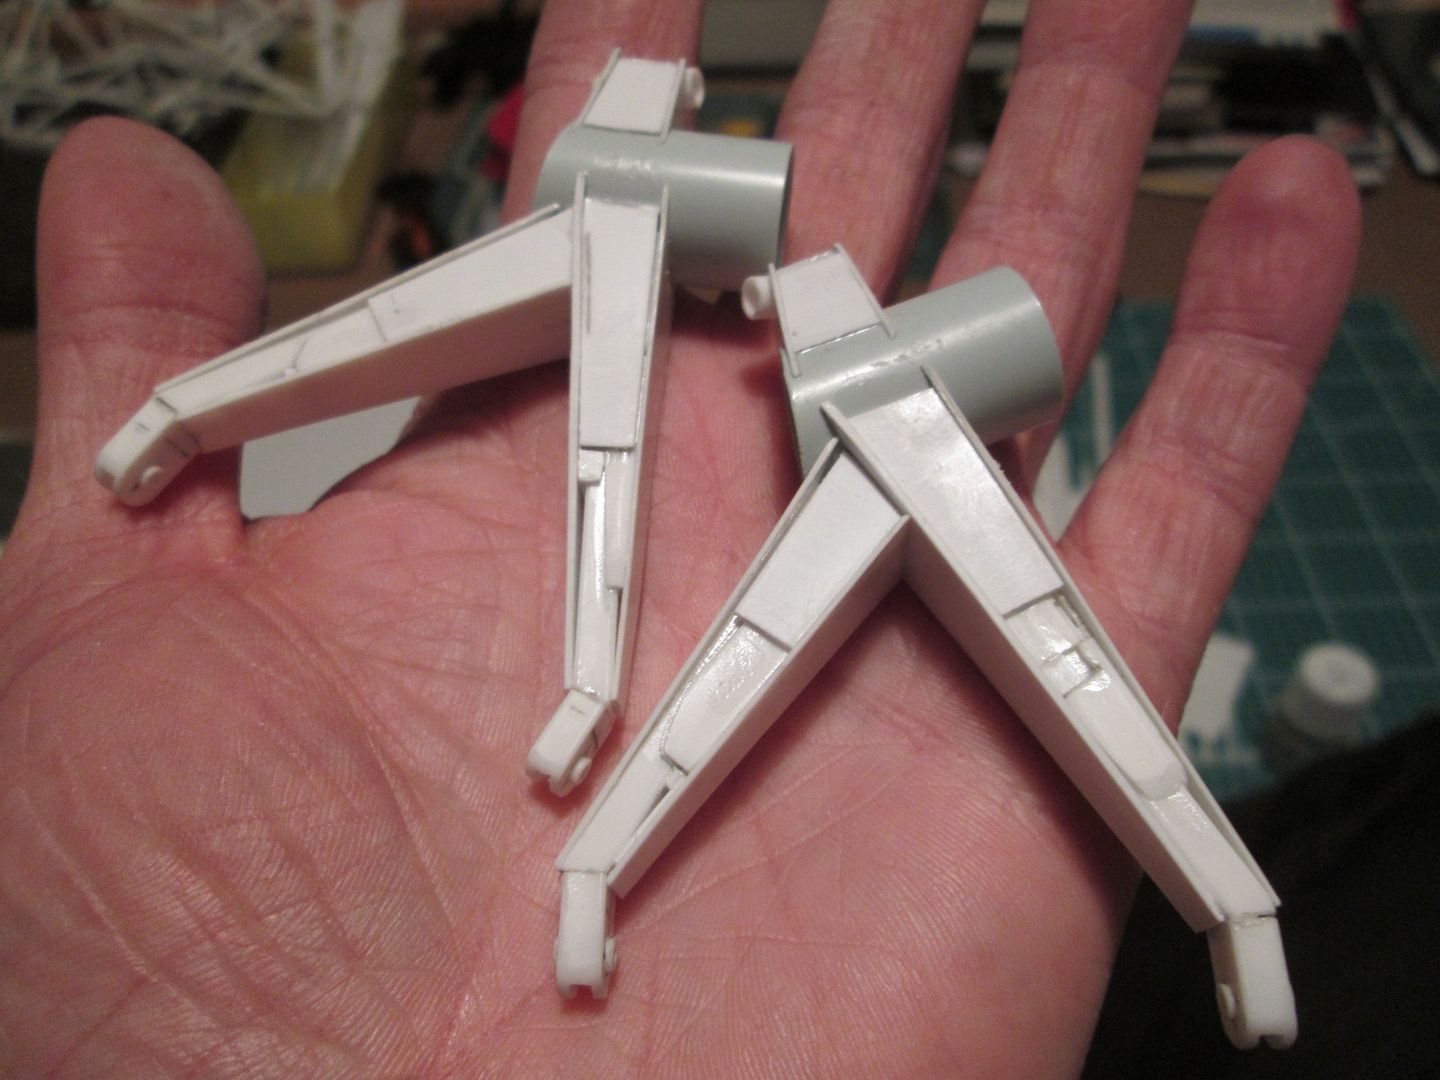
First up this week is more detail on how I put together the rear dampers. Here you can see the components for the shaft / eye section: 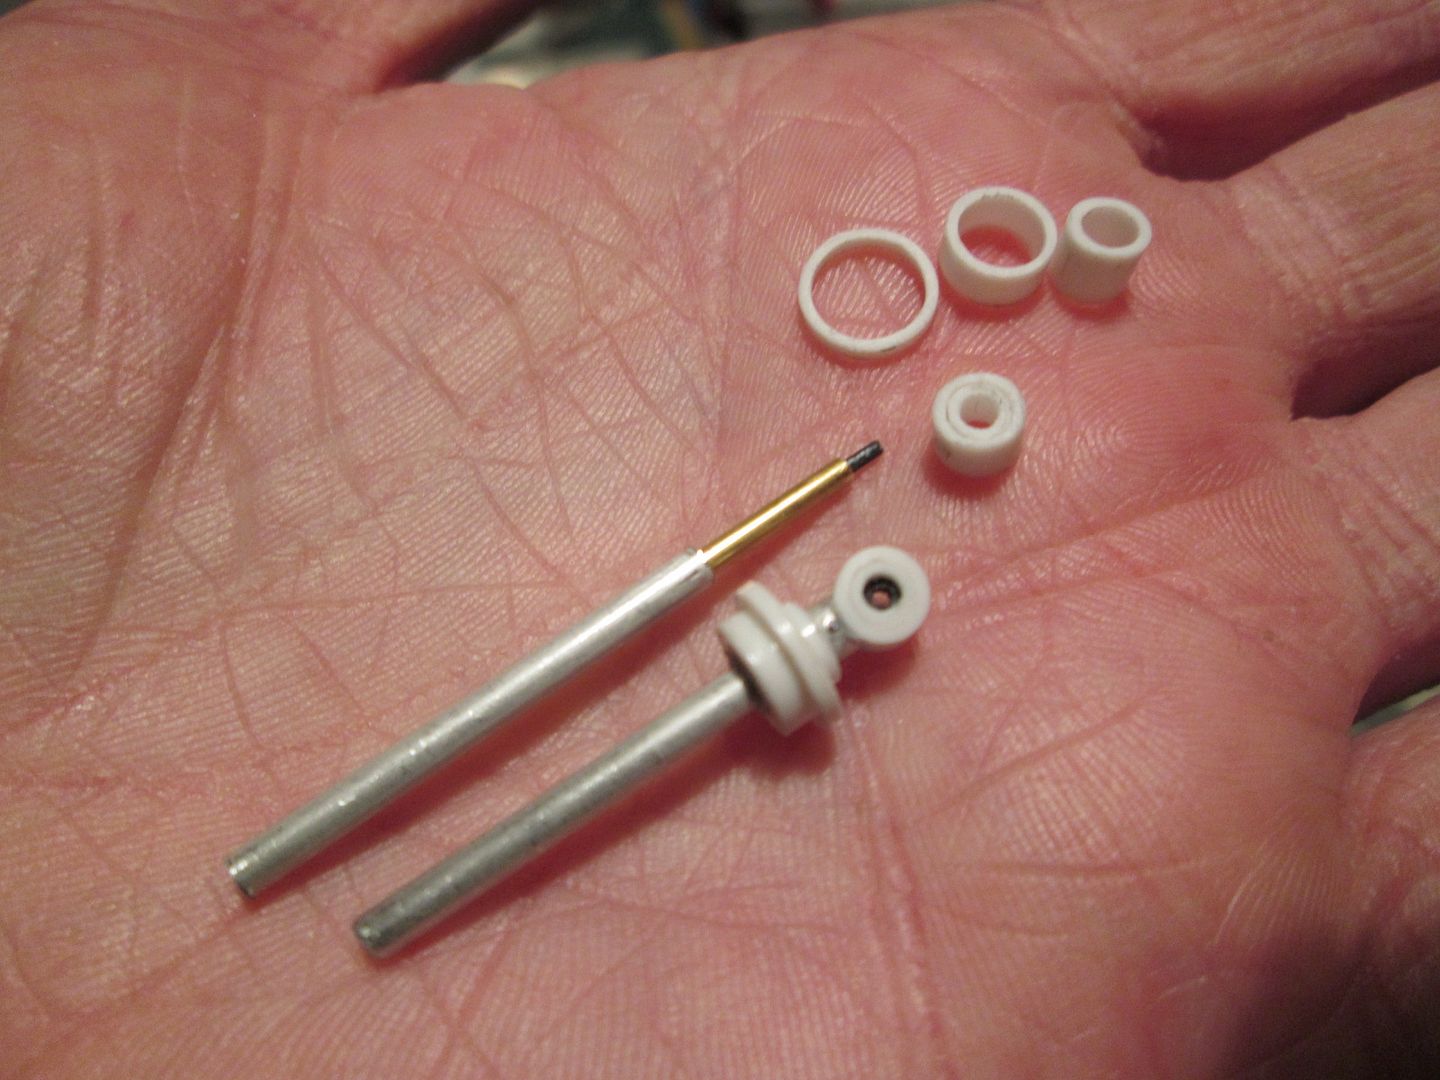 Note how the ali shaft has a brass tube core, with a pin inside that which actually goes into the top loop. I'll add greenstuff around the spring collar to tidy it all up, too. Inside the eye of the finished shaft you can see a small black ring - this is a very short length of wire sheath which allows the damper some movement once it is fitted in place. Next, the main body of the damper. Again, everything was sleeved down from the main 1/4" outer body, and the bottom eye pinned securely: 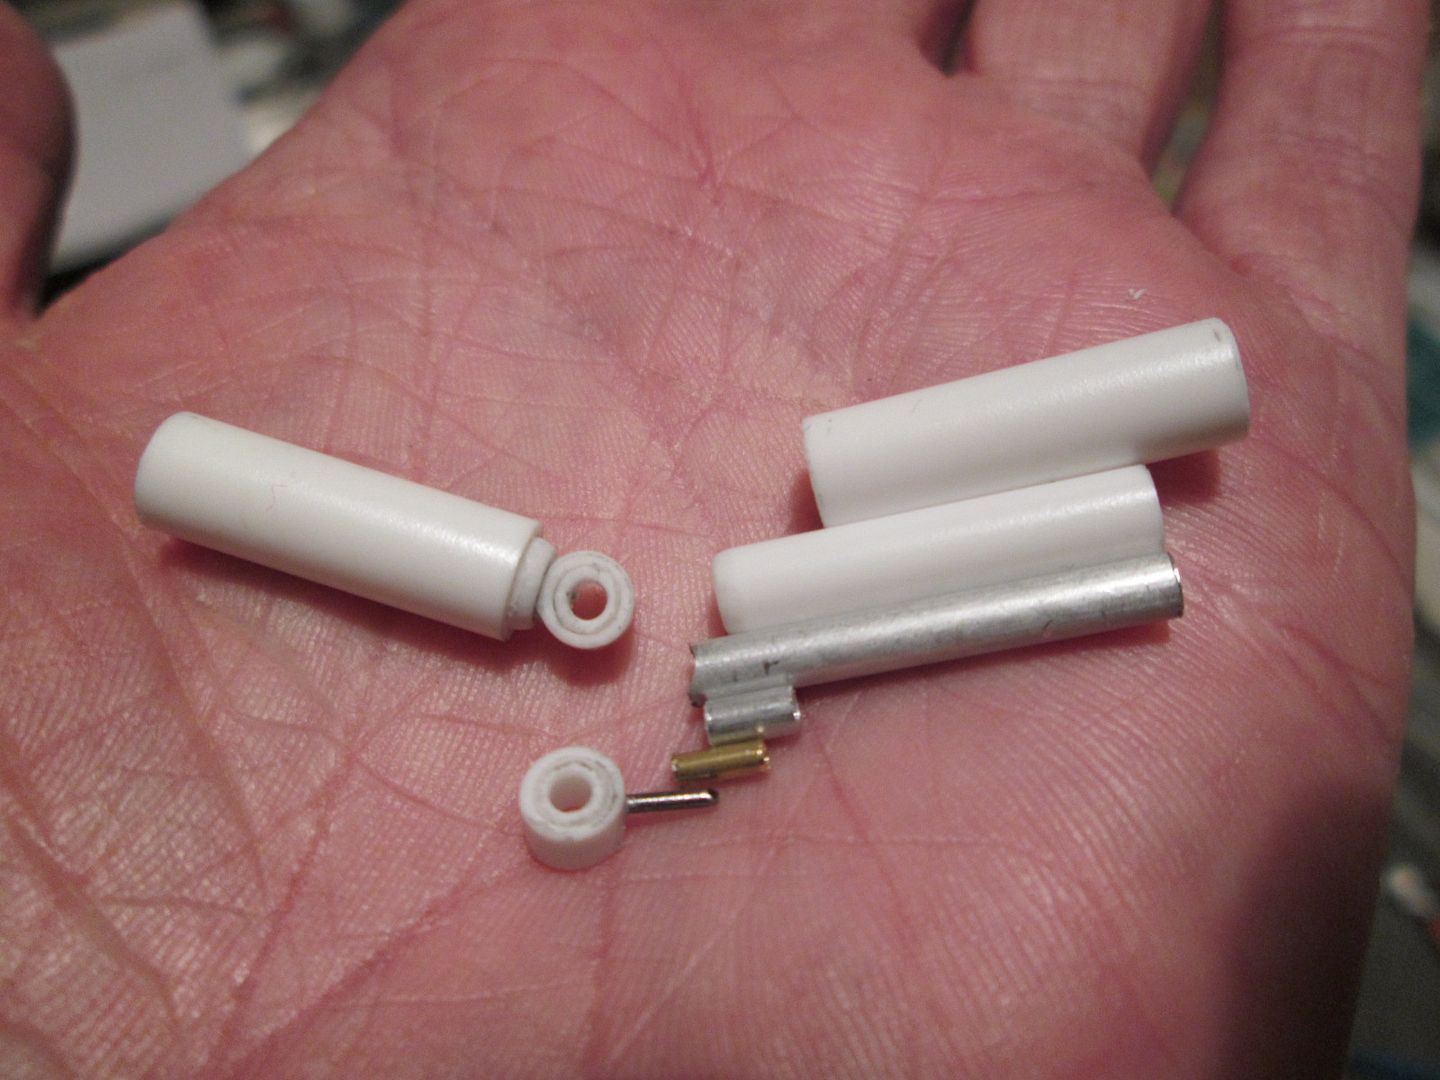 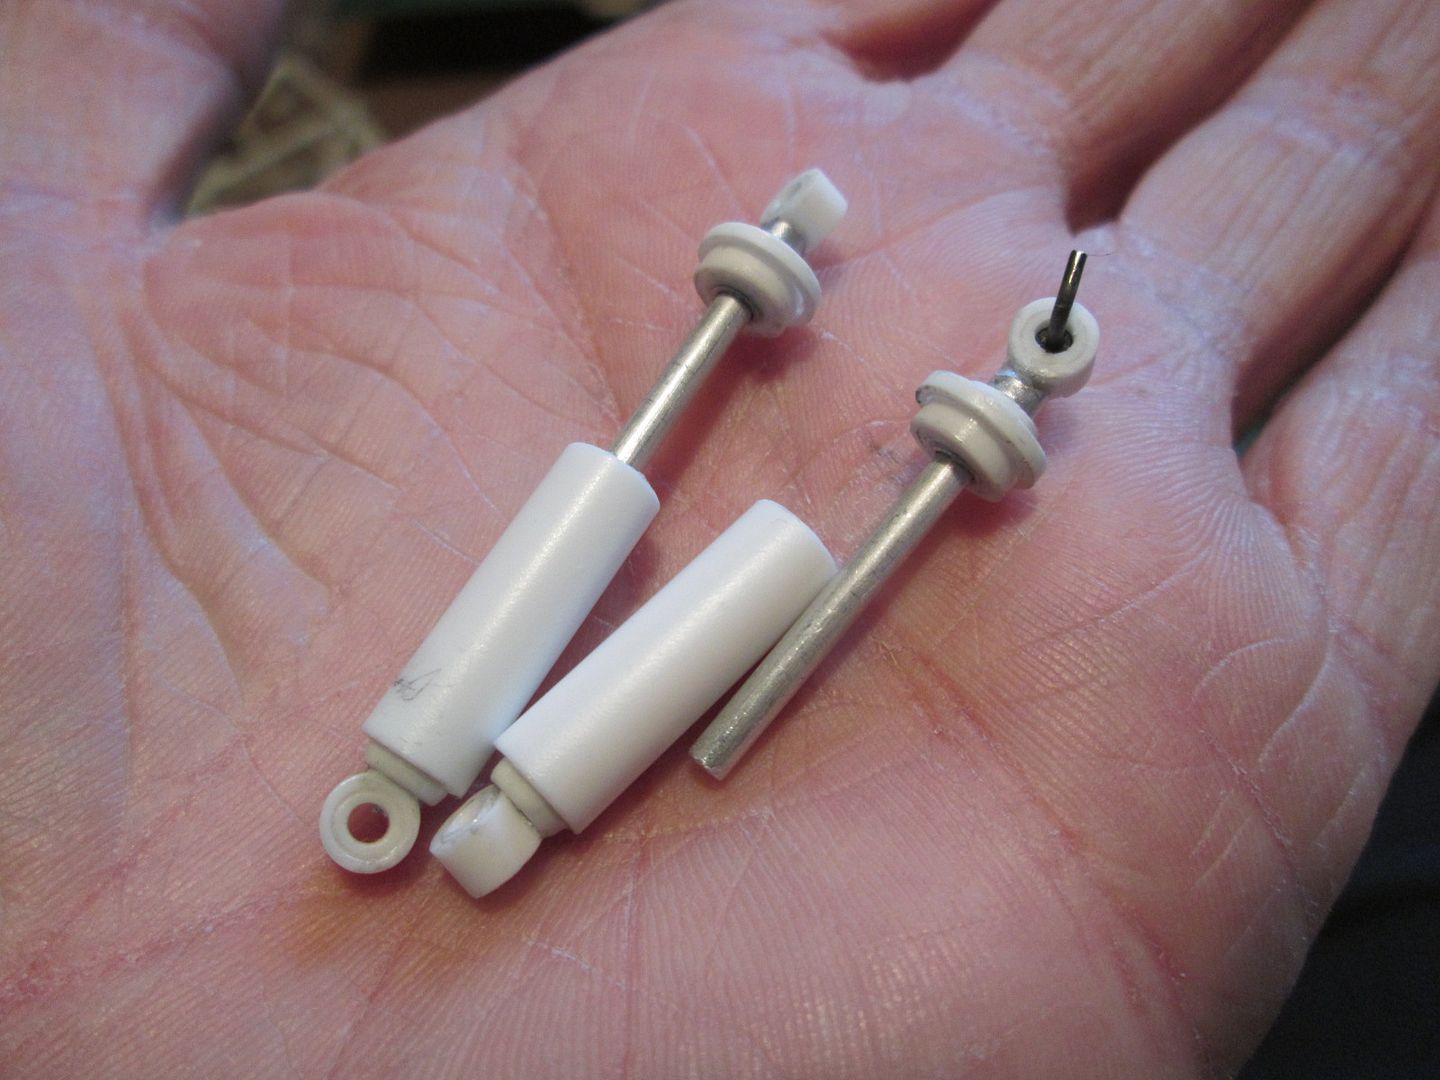 This is as far as I need to go with these right now. I'll make the adjustable spring platforms in time, and also add some fine thread detailing to the outer body, etc. I eventually settled on a design for the top damper mountings and CA'd them in place under the chassis beam. I added some small angle sections inside to reinforce them, then applied greenstuff all around - this still needs a little tidying up. 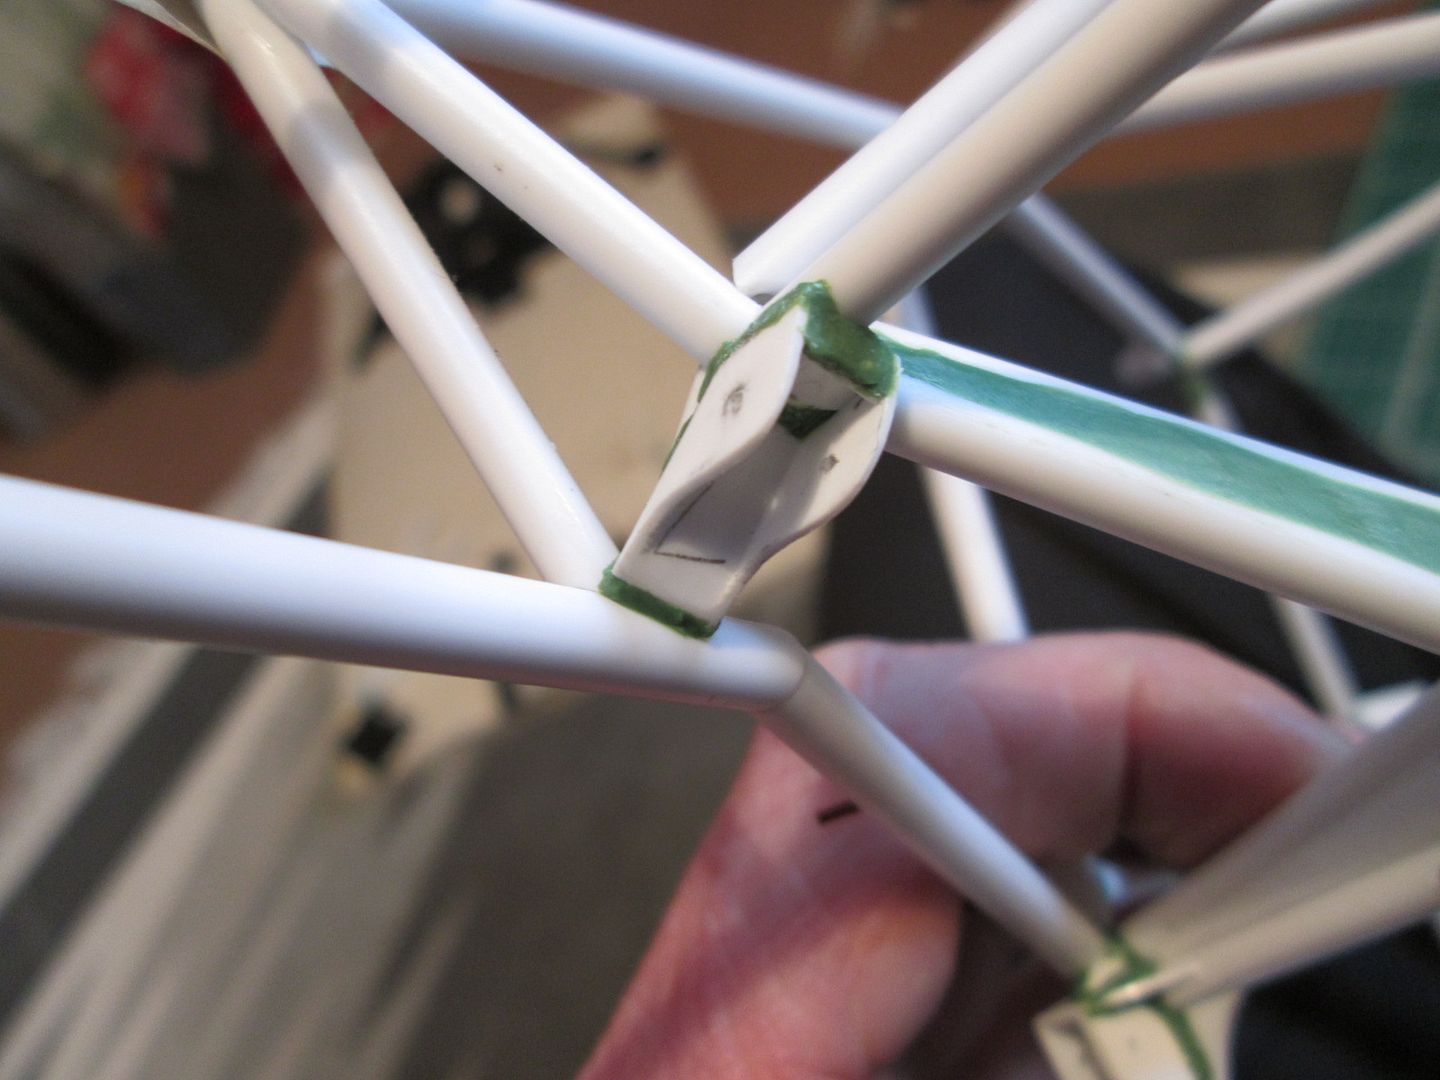 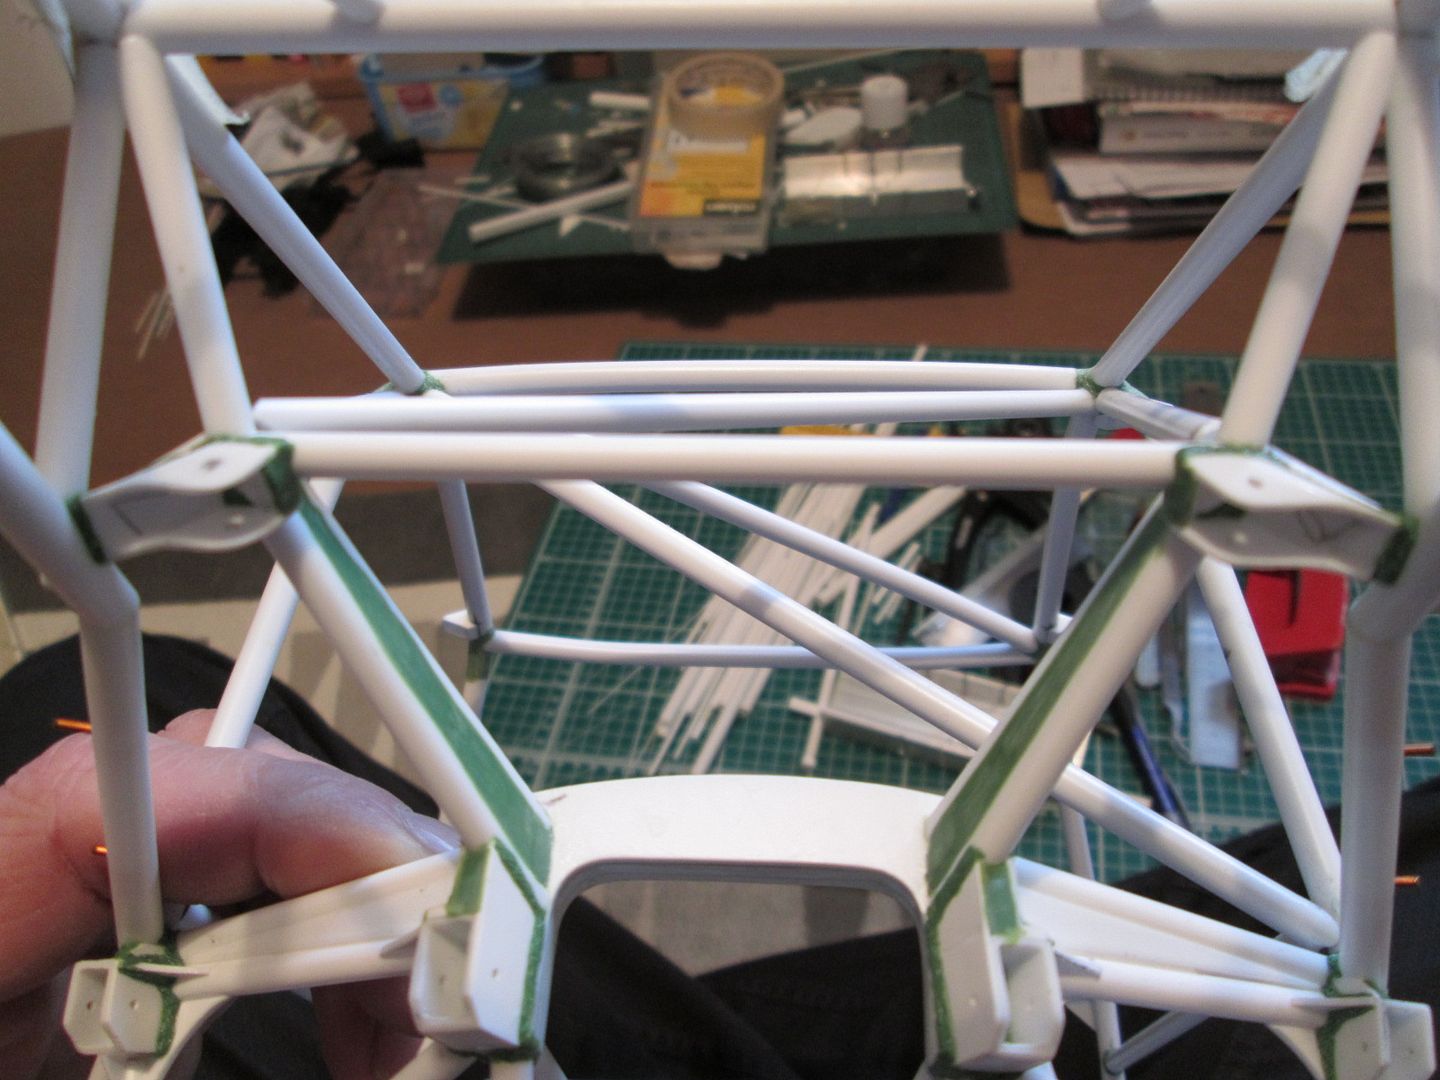 Finally, I returned to the rear trailing arms. The job now was to add the outer skins and bulk-out the core structure, whilst continually trying to improve the strength. As the outer shape of the two legs are tapered, not straight, I've added pieces of channel section to give the skin panels a solid fixing. The upper and lower faces will be filled with a combination of styrene and greenstuff... 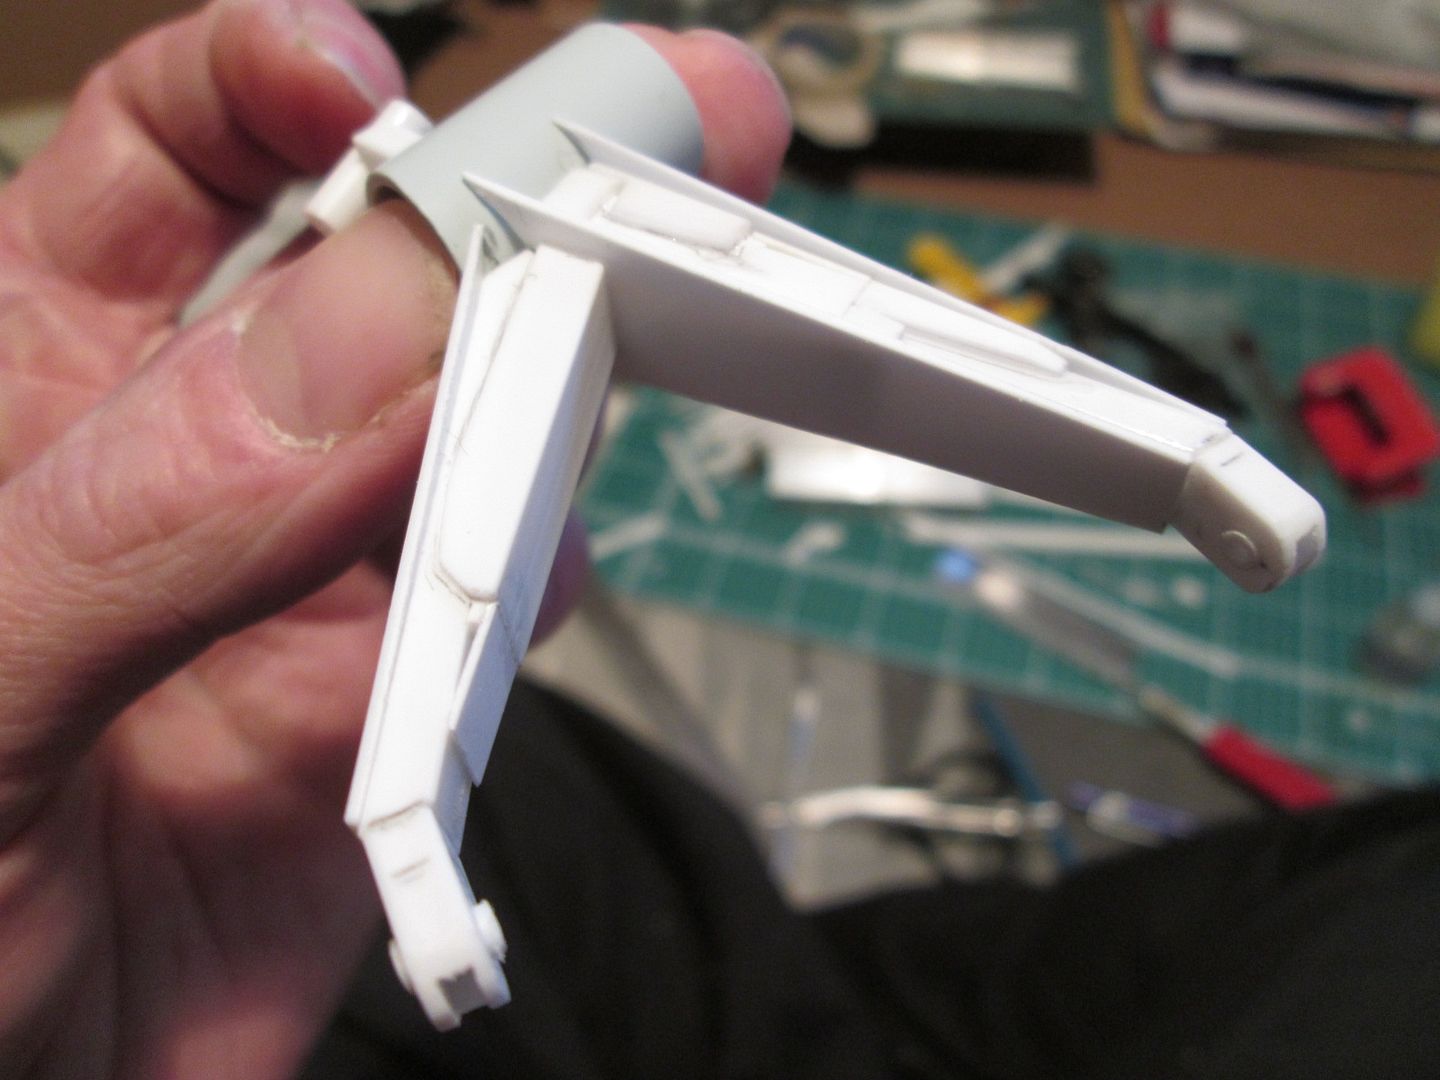 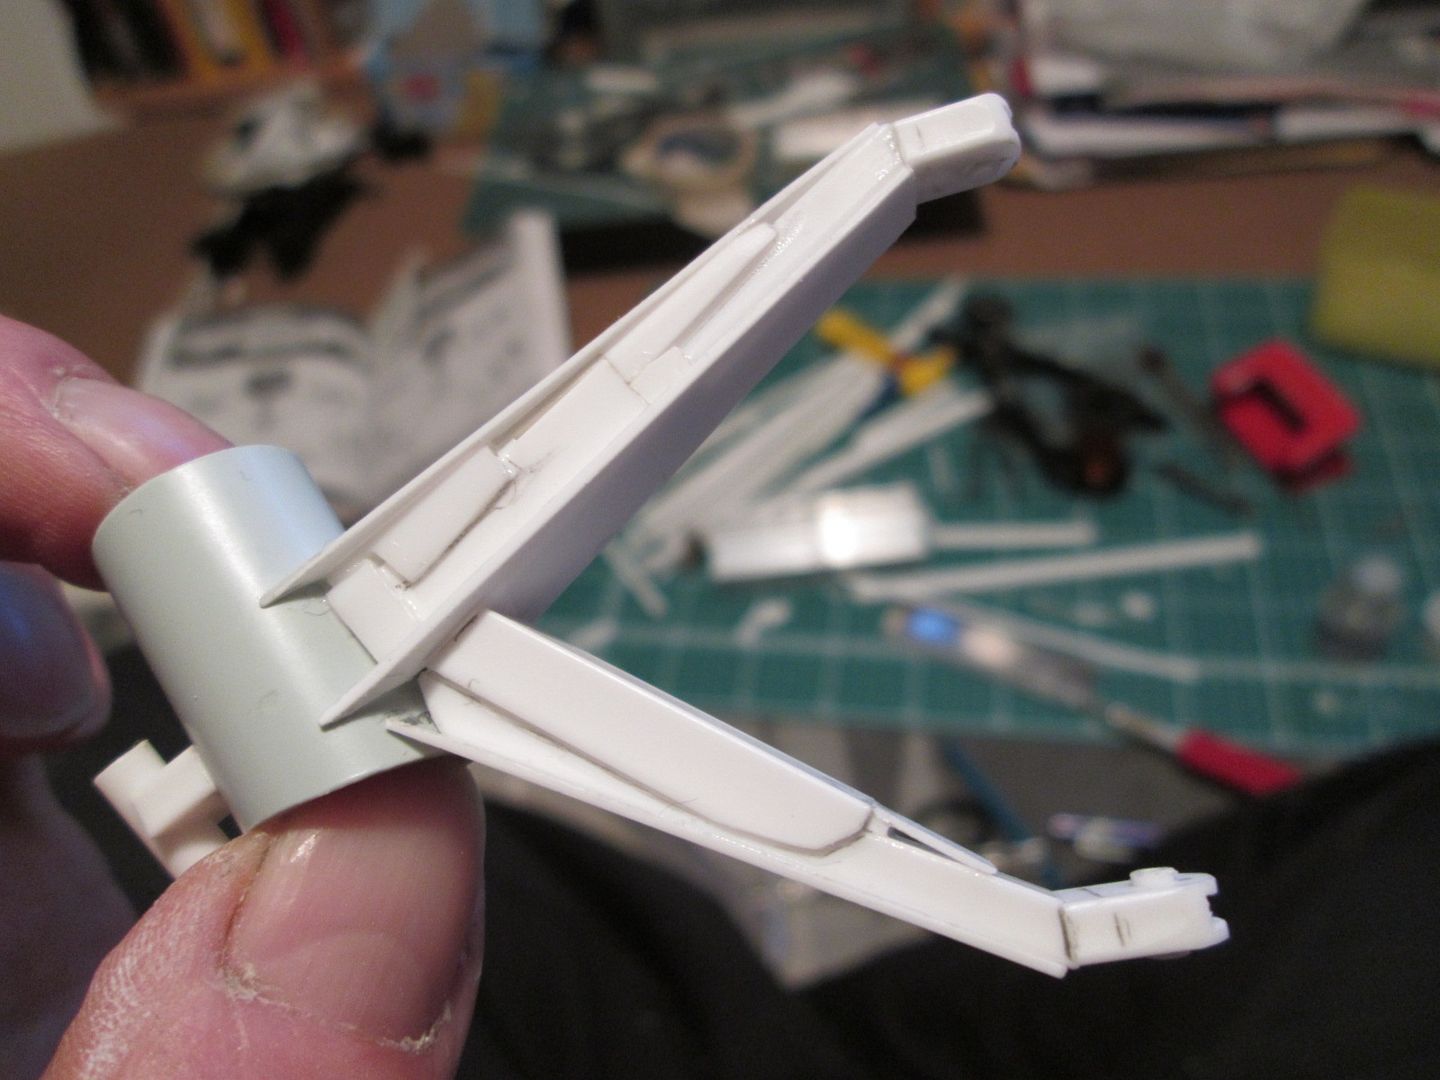 Once the two legs of each trailing arm are finalised I can sort out the proper mounting for the dampers. There'll also be some caliper mounting brackets to add later, and some small tags for attaching brake lines. Then I can think about the hubs, discs, etc and putting it all together... Have a good week, SB |
|

|

|
|
02-26-2013, 03:12 AM
|
#197 | |
|
AF Enthusiast

Join Date: Sep 2003
Location: Albany, Oregon
Posts: 1,557
Thanks: 0
Thanked 1 Time in 1 Post
|
Re: 1/8 Porsche 935/78 'Moby Dick'
Something that has always been on my mind while reading your posts:
Is it some sort of miracle that your clever use of Legos just happens to put everything in the perfect position? Unless you're taking some liberties in where things actually end up, I find myself unable to understand how it works out so well with *just* Legos. That is... unless the original 1:1 cars were built with scaled up Lego jigs, I guess. Hah. That said, your work is absolutely amazing, and I learn so much every time I read one of your updates. Please, keep it up! You're doing great! |
|
|
|
|
|
02-26-2013, 03:40 AM
|
#198 | |
|
AF Enthusiast

Join Date: Jan 2004
Location: Gellivare
Posts: 1,989
Thanks: 1
Thanked 22 Times in 22 Posts
|
Re: 1/8 Porsche 935/78 'Moby Dick'
Incredible build! Just astonishing!
__________________
Best Regards Anton |
|
|
|
|
|
02-26-2013, 02:15 PM
|
#199 | |
|
AF Enthusiast
Thread starter
Join Date: Nov 2008
Location: Norwich
Posts: 649
Thanks: 21
Thanked 111 Times in 87 Posts
|
Re: 1/8 Porsche 935/78 'Moby Dick'
Hi Matthew,
Regarding the Lego, it's not a miracle - it's a combination of pure luck, the large scale, and the lack of official dimensions to work from. The challenge is making sure everything stays square and true, and for me Lego is the most convenient (and flexible) way of doing this. If I have to add small packing spacers to get the measurements I need, that's not a problem, but it's surprising how often it works out to an exact 'brick'. Many of the tubes are fitted freehand, of course, so it's not necessary to jig every single one - just enough to define the structure. Of course, sometime next year when the engine and gearbox doesn't fit and the bodywork is all over the place, maybe I'll be thinking of a different technique for the next project...! SB |
|
|
|
|
|
02-27-2013, 02:59 AM
|
#200 | |
|
AF Enthusiast
Join Date: Mar 2009
Location: Madrid
Posts: 649
Thanks: 109
Thanked 68 Times in 67 Posts
|
Re: 1/8 Porsche 935/78 'Moby Dick'
Simply clean and perfect. Thanks again for sharing it!!
|
|
|
|
|
|
03-04-2013, 02:19 PM
|
#201 | |
|
AF Enthusiast
Thread starter
Join Date: Nov 2008
Location: Norwich
Posts: 649
Thanks: 21
Thanked 111 Times in 87 Posts
|
Re: 1/8 Porsche 935/78 'Moby Dick'
Hello again,
So, after adding the outer panelling to both trailing arms I set about creating the proper extensions for the damper mountings. The core for this was a short piece of 3/8" x 1/4", with a smaller piece sleeved inside, and 0.5mm sideplates: 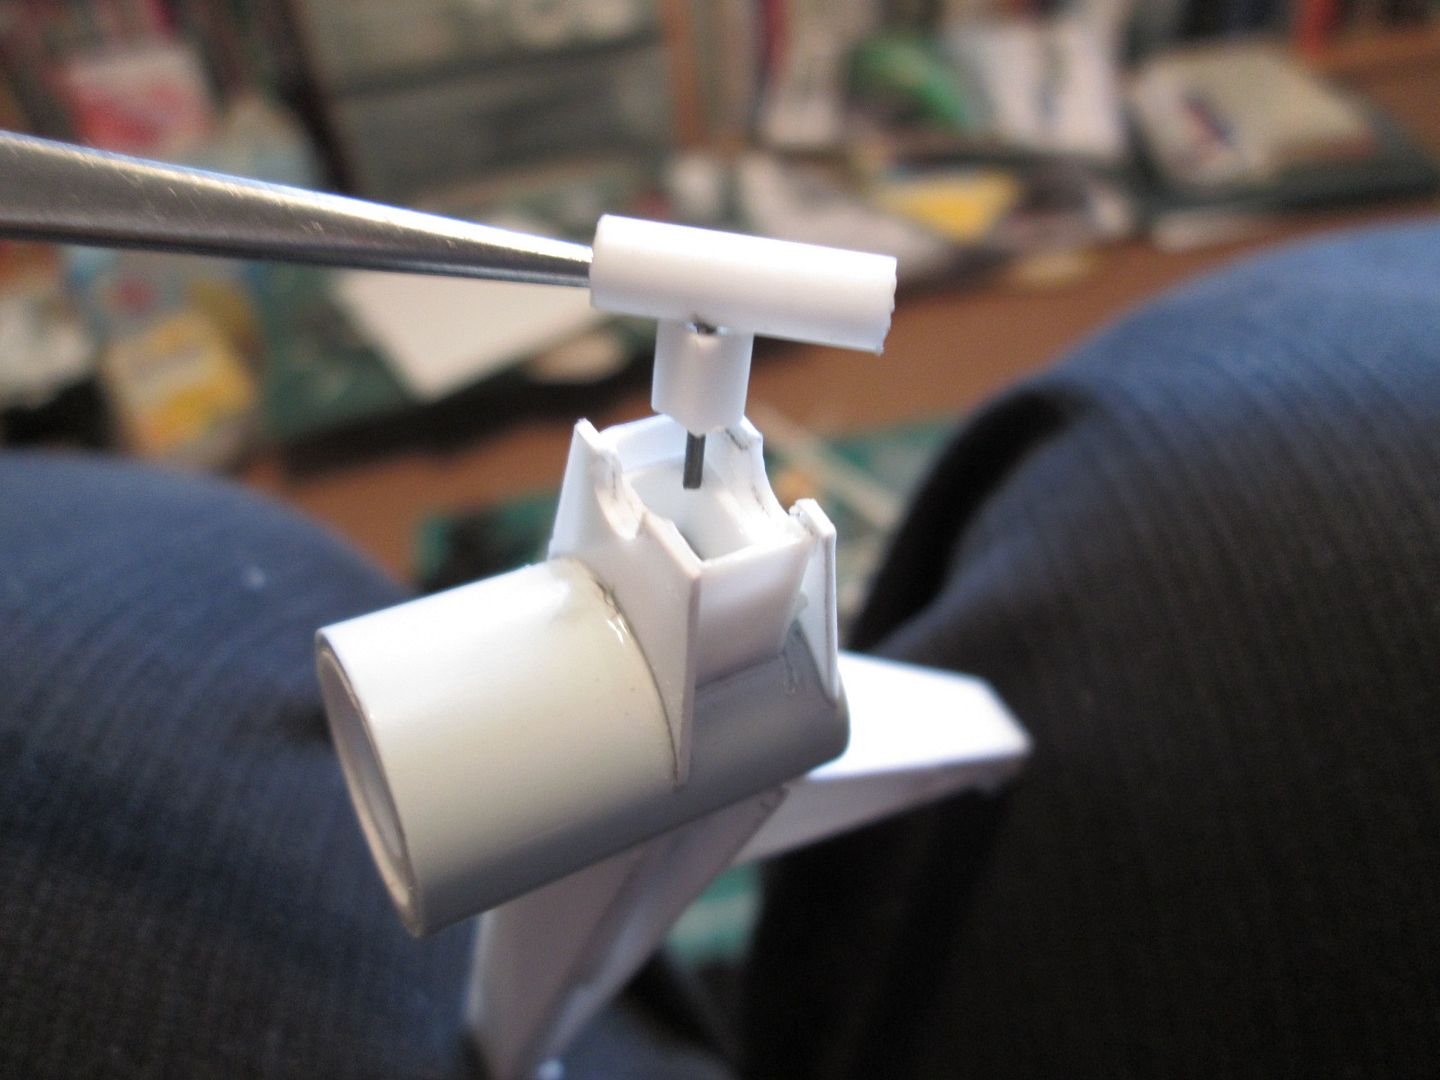 The actual pick-up for the damper is fitted into the end of the trailing arm and is pinned through into the main bearing housing section - I can then use a combination of ali and styrene tube to attach the damper eye. Here you can see where I've started filing down the two pairs of pins which strengthen the trailing arms joint with the bearing housing. Also, you can maybe just see where I've added some small pieces of styrene into the ends of the 3/8 x 1/4 box to fill it out: 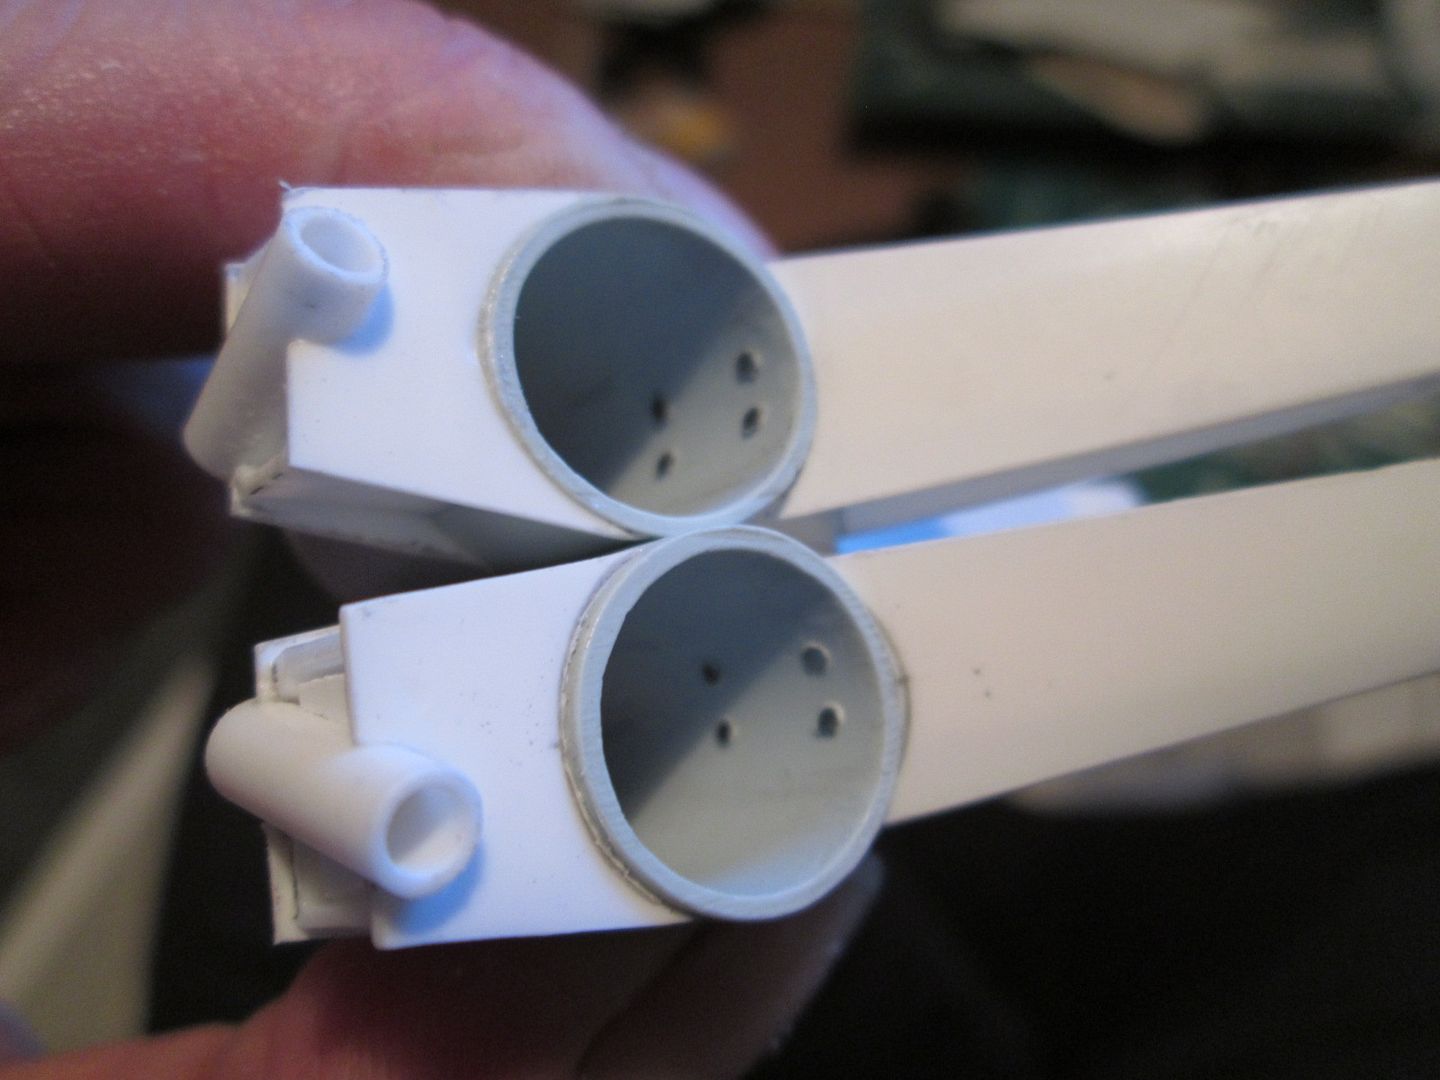 ...and just to prove I've added the sideplates: 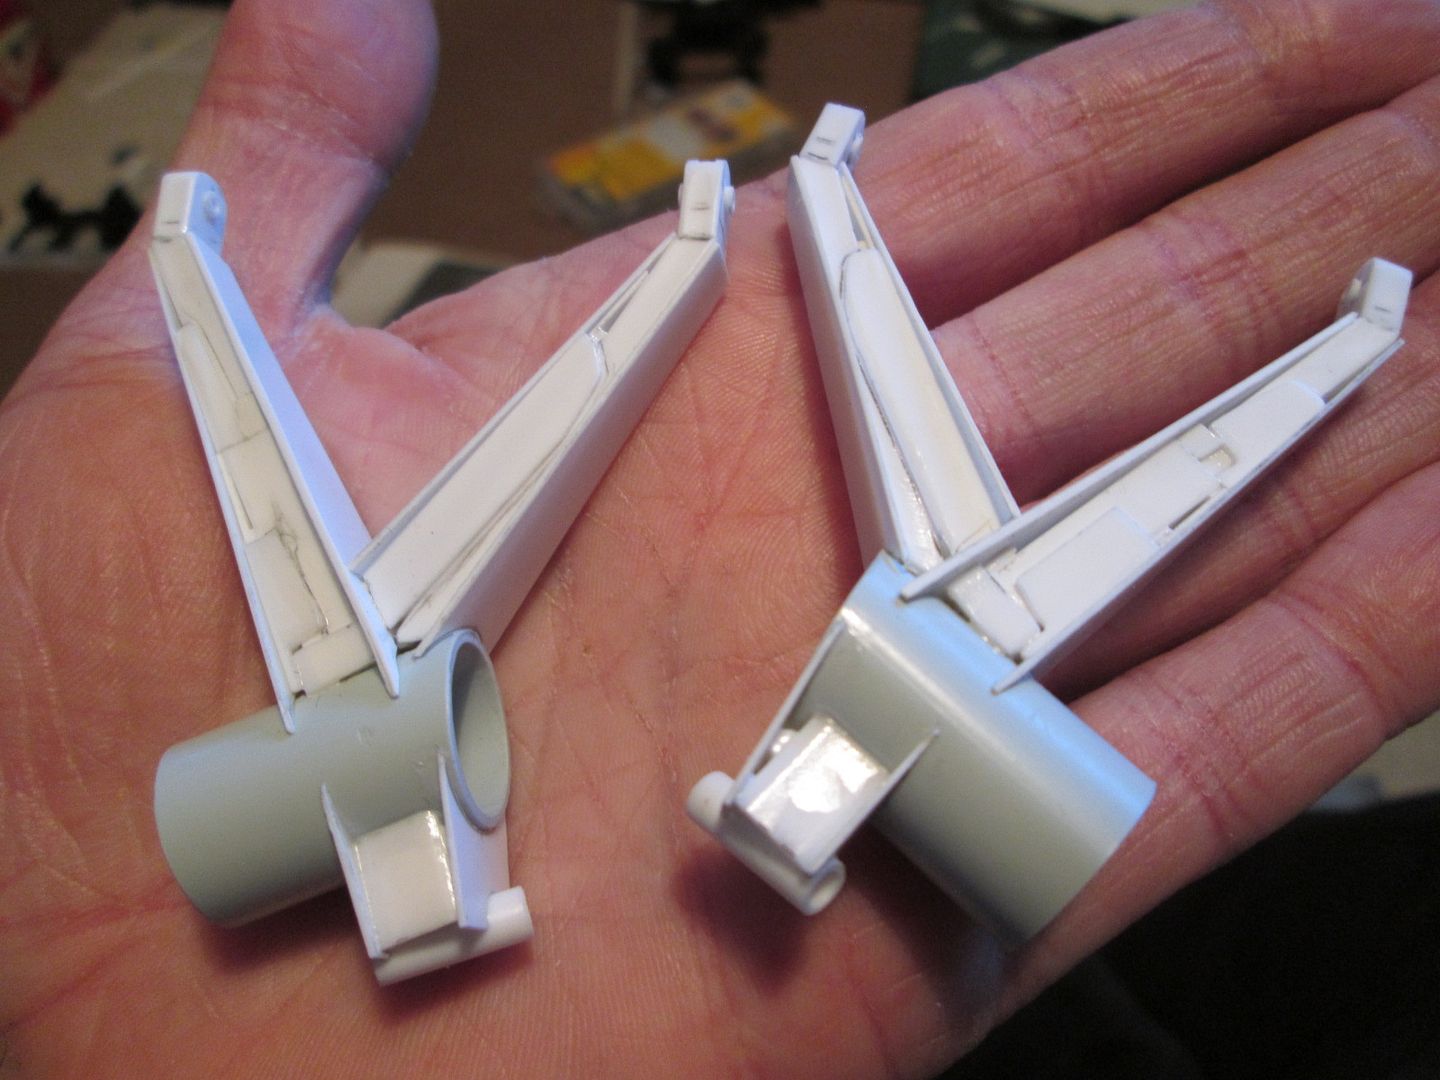 So, I can now re-fit the trailing arms and add the dampers: 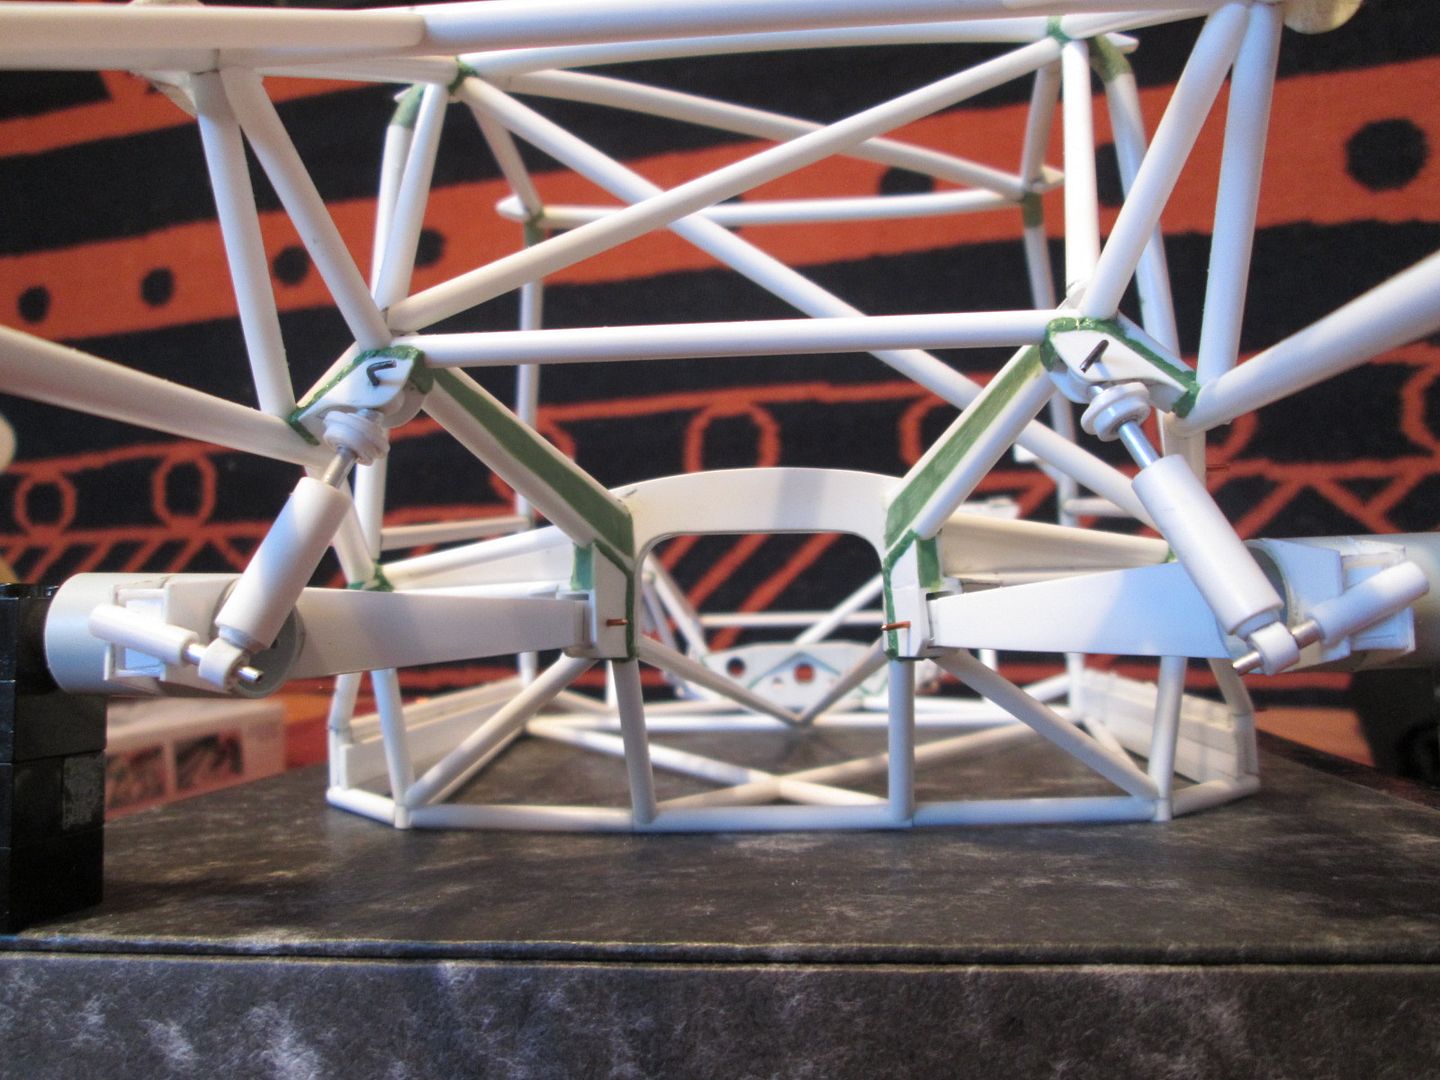 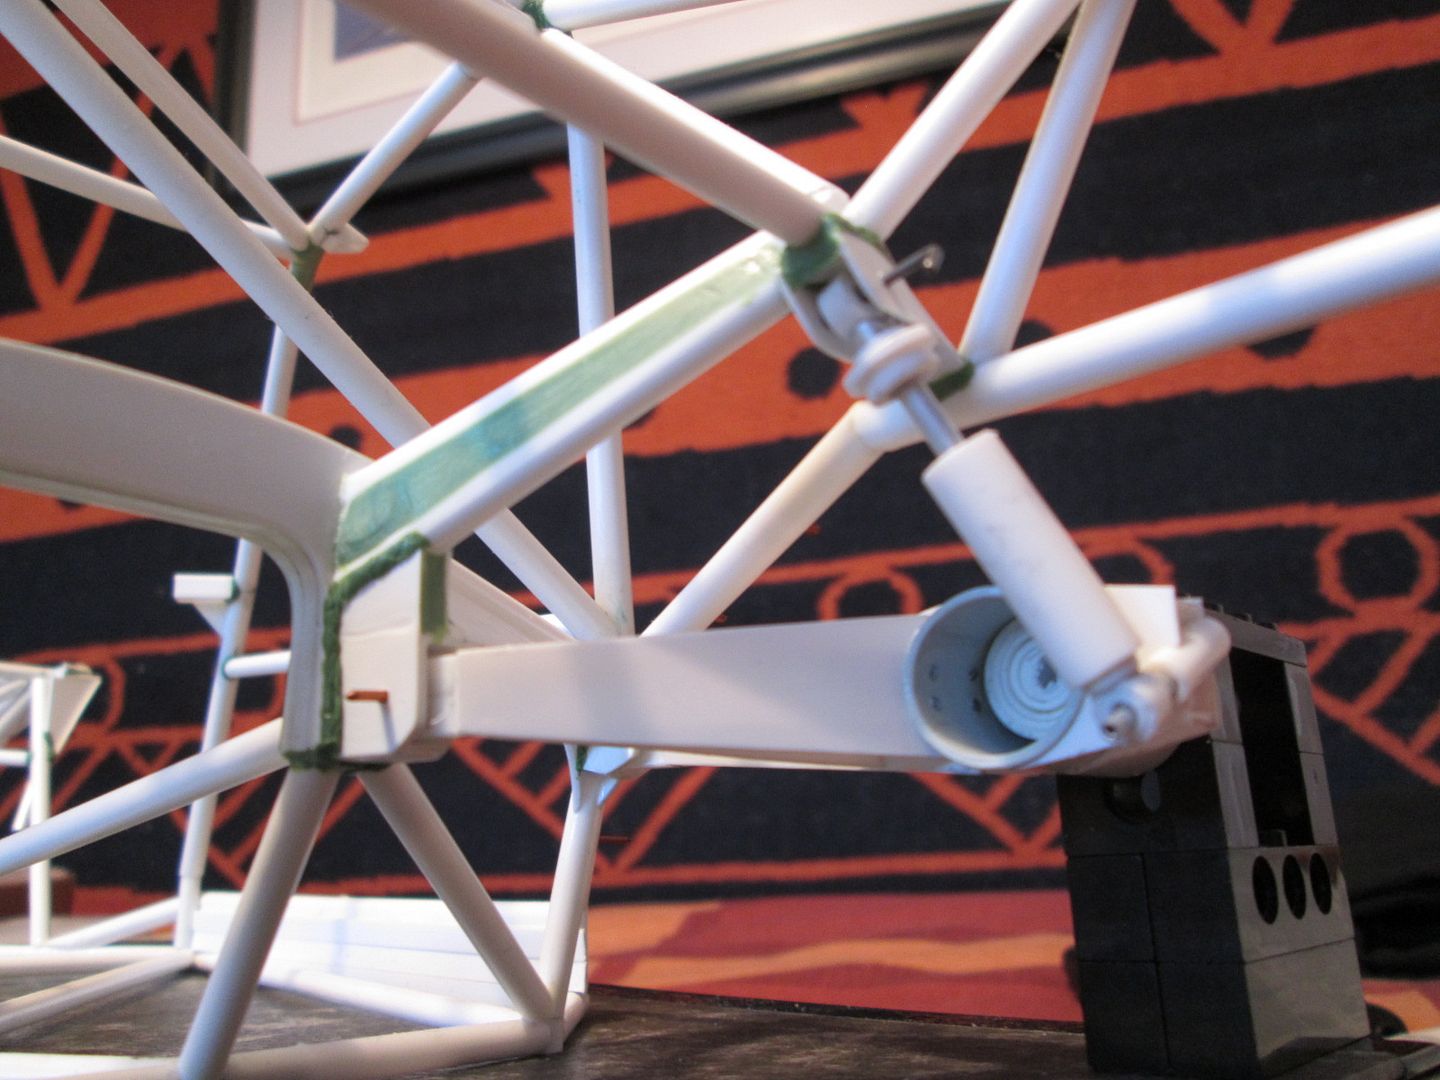 The pins between the dampers and the trailing arms are a temporary fix - I don't have to worry about finalising these just yet. I could leave the arms as they are for now, but I want to continue with them and add the upper and lower surfaces - so that's the job for this week. So far, so good... SB |
|
|
|
|
|
03-10-2013, 04:30 PM
|
#202 | |
|
AF Enthusiast
Thread starter
Join Date: Nov 2008
Location: Norwich
Posts: 649
Thanks: 21
Thanked 111 Times in 87 Posts
|
Re: 1/8 Porsche 935/78 'Moby Dick'
Hmmm...I'm slightly fed up now: this is the third time tonight I've started writing this update, and each time I've managed to lose it somehow before completion. So, it's all about getting the trailing arms greenstuffed; first, I added a few pieces of styrene sheet to fill some of the gaps:
 Then, the first layer of greenstuff. It looks a bit rough, but it's easy enough to file and sand it flat afterwards. 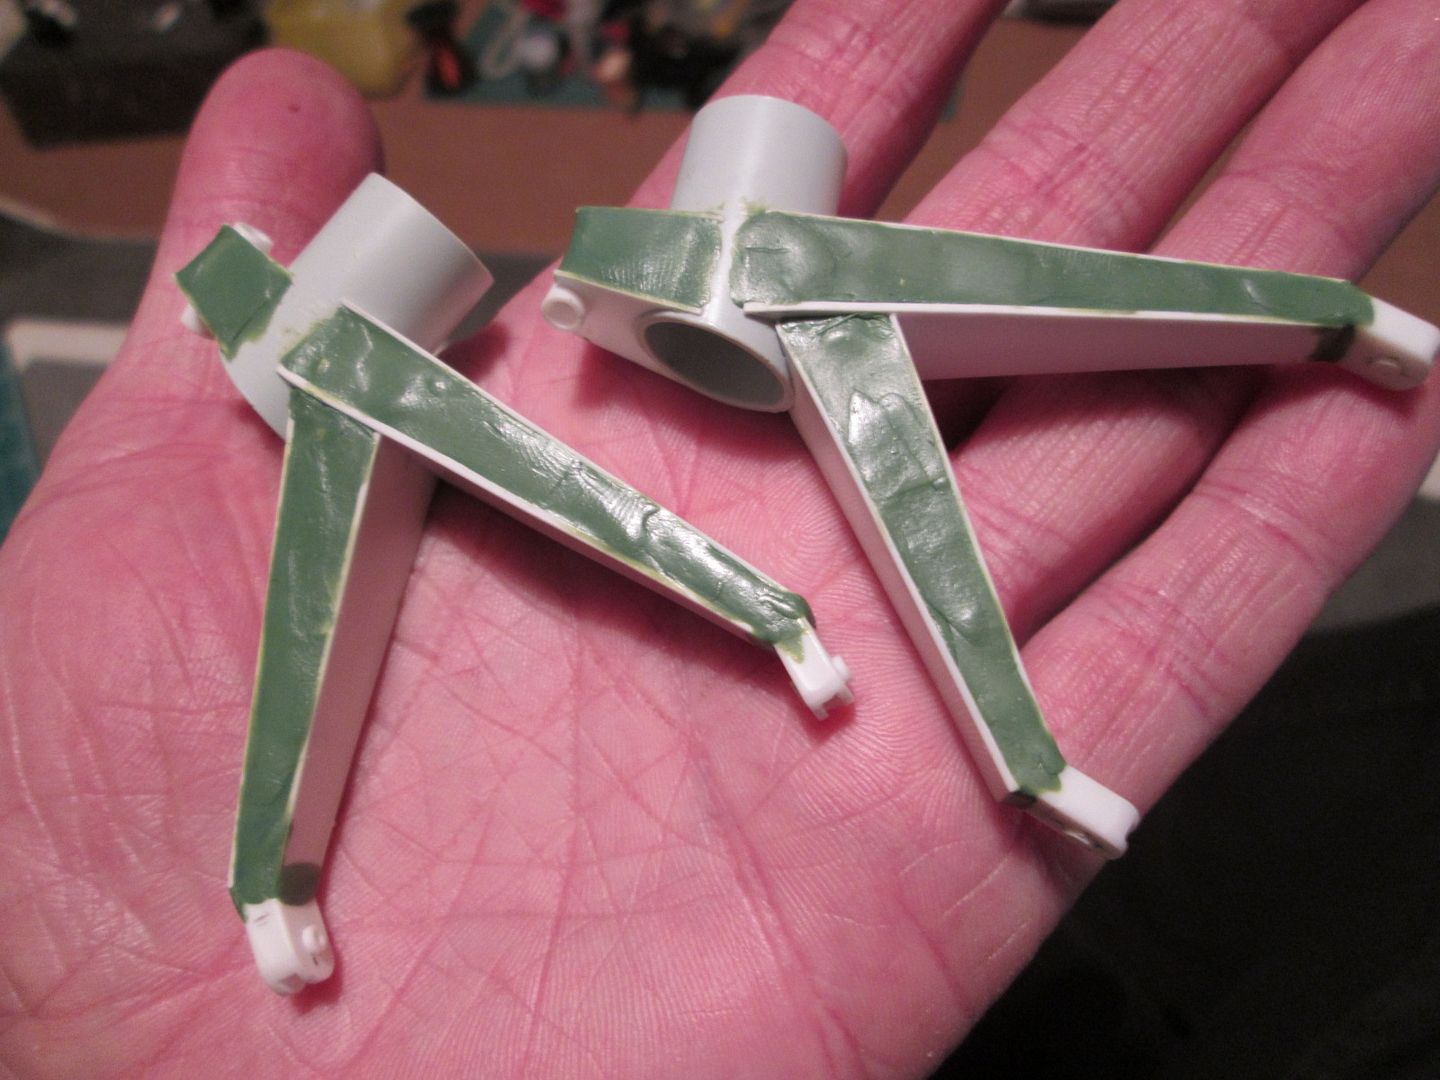 I also added the small triangular extensions to the outer arm: 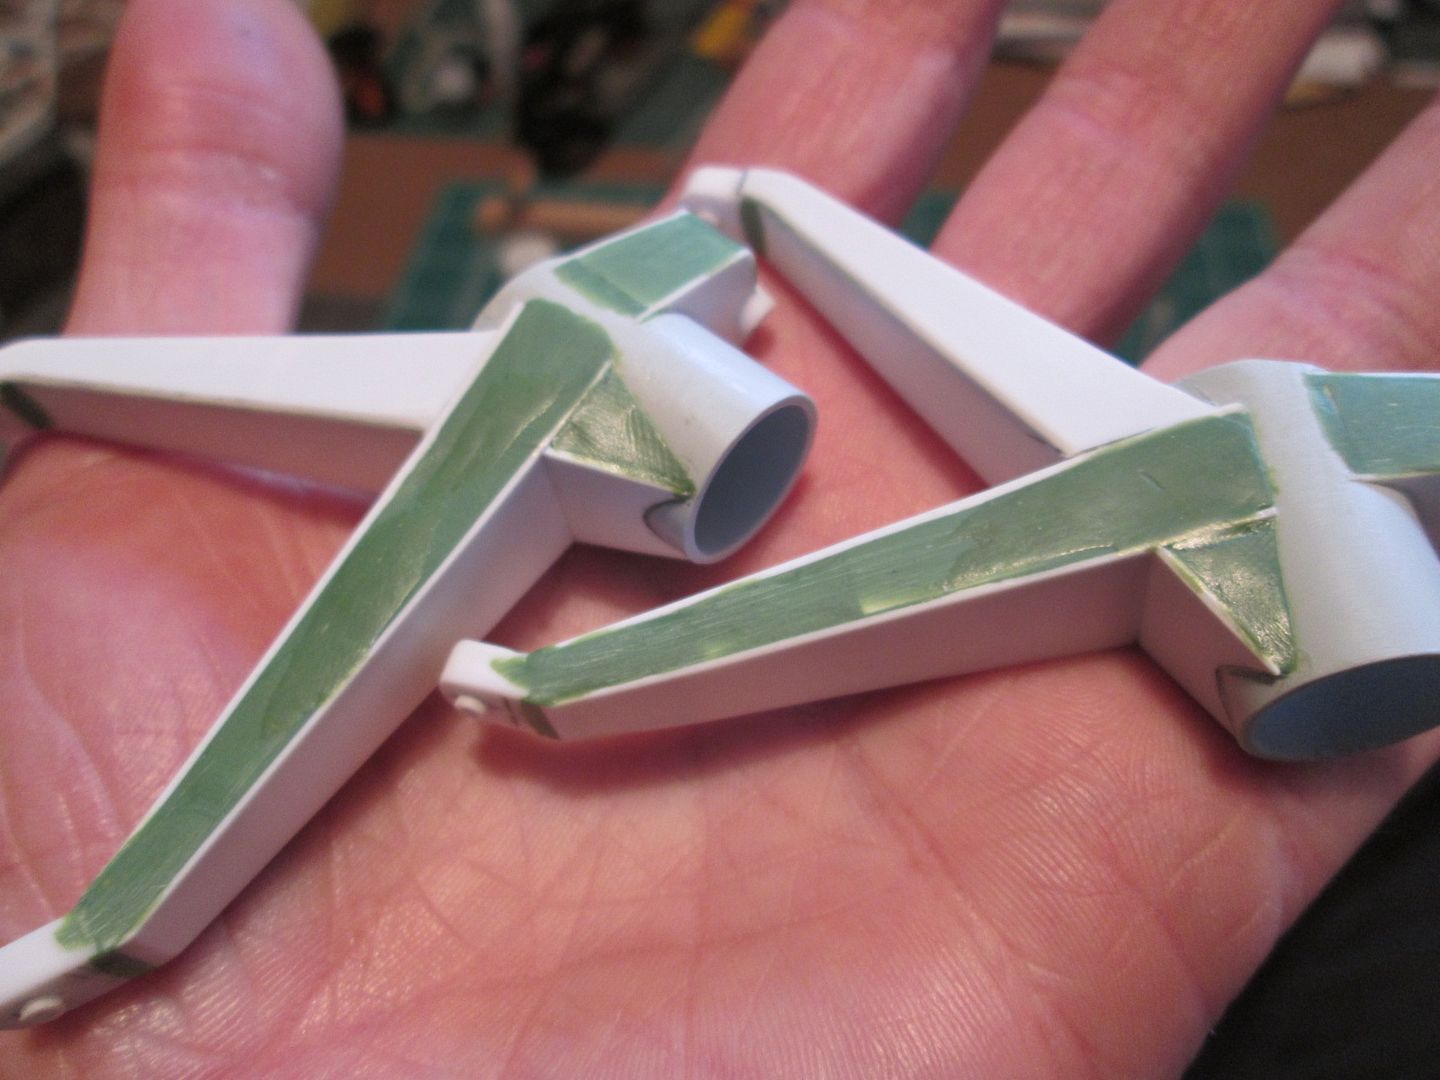 Finally, here you can see some extra detailing - I've beefed-up the main pivot points, added the small crescent-shaped plate to the inside face of the arm, and the tube detailing on the other arm: 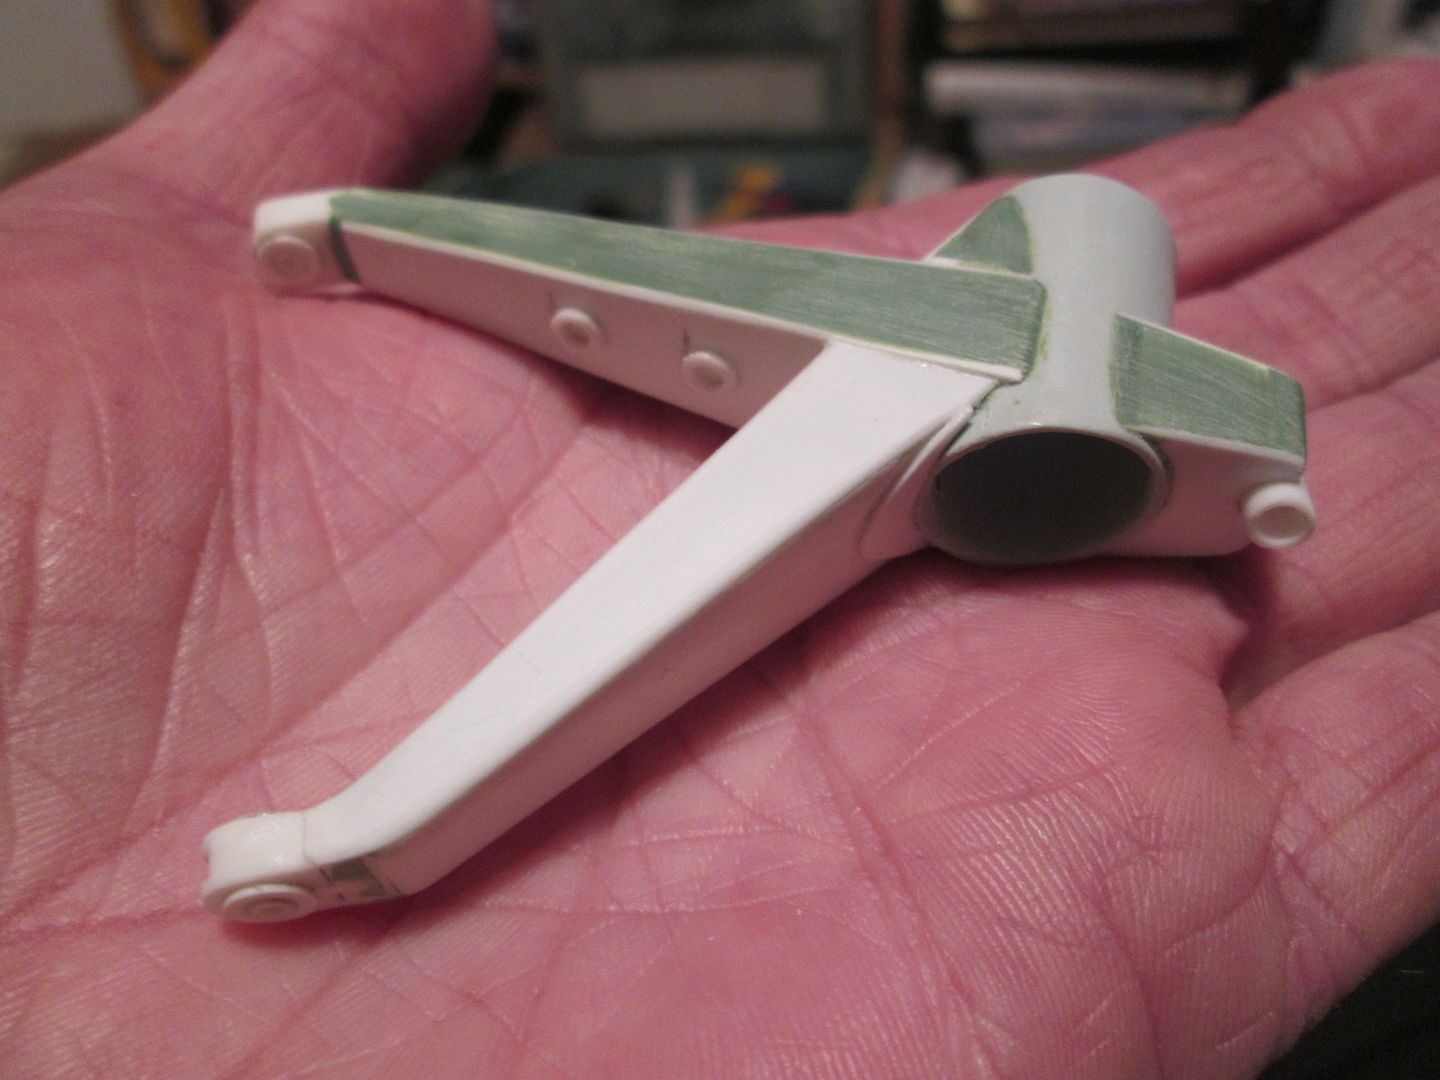 There's still more work to be done - more greenstuff detailing, caliper mountings, top and bottom reinforcing plates, etc - but right now they're complete enough to be able to move on to something else. Ideally, this would be the wheels, discs and calipers as I still want to create a rolling chassis before starting on the engine, gearbox or interior. Next, I finished off the detailing for the ends of the steering rack. I'd glued the pieces of styrene tube together some time ago, and now added the taper to create the main body of the rubber boot: 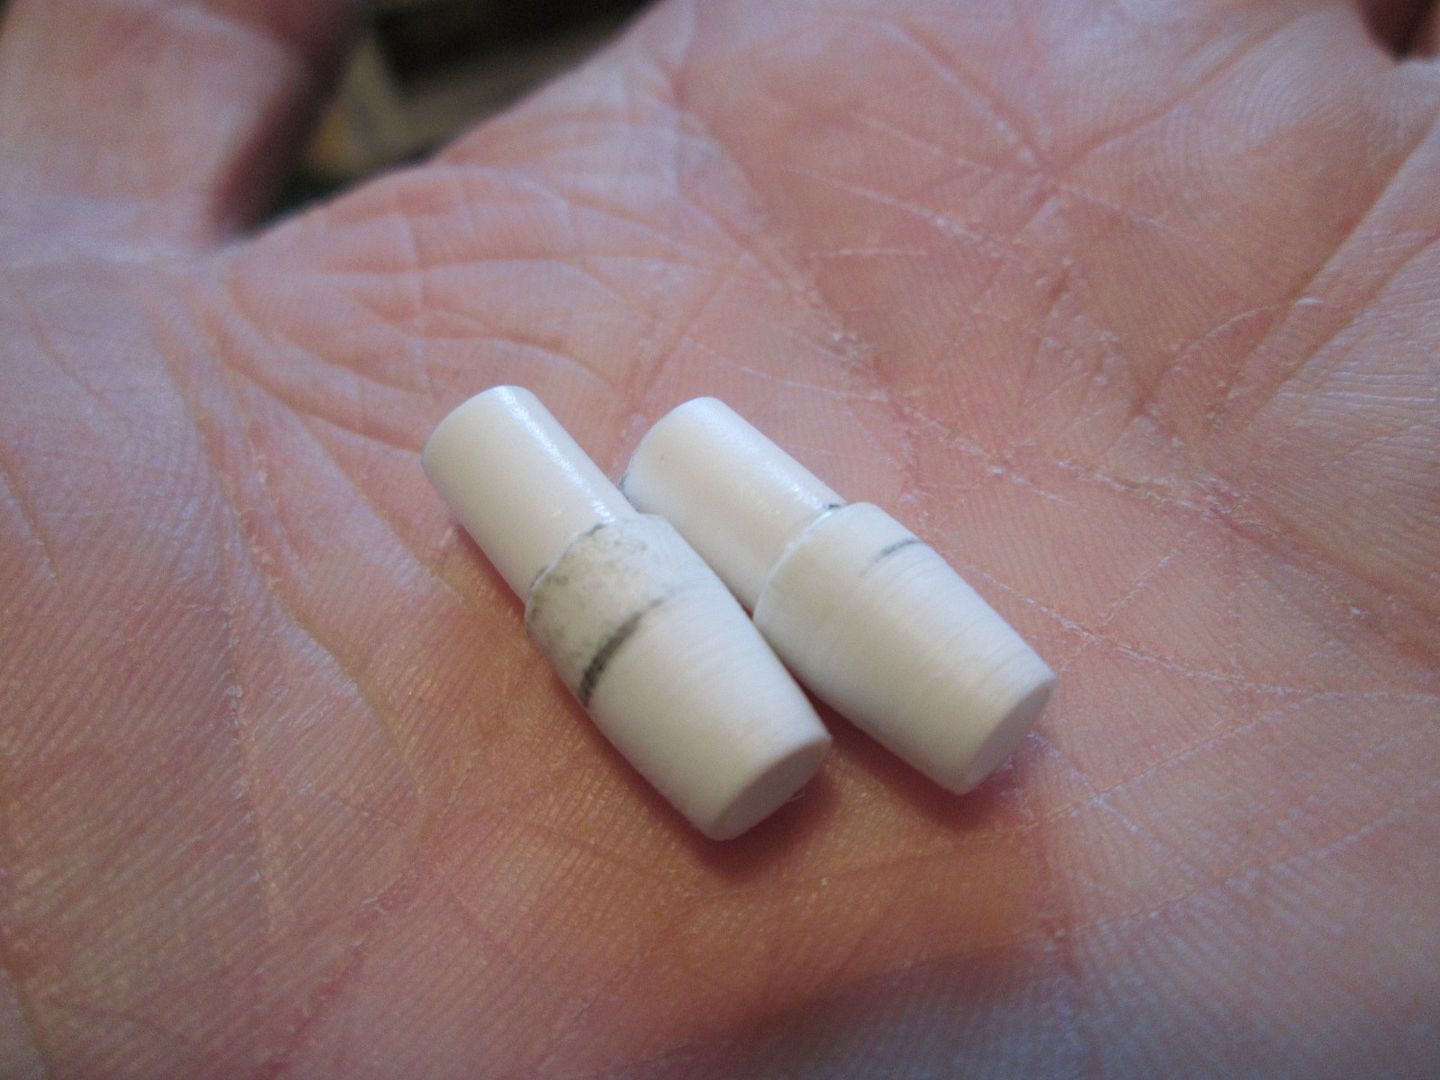 They were trimmed to length, and I then made the two small components on the right by layering together three pieces of punched styrene: 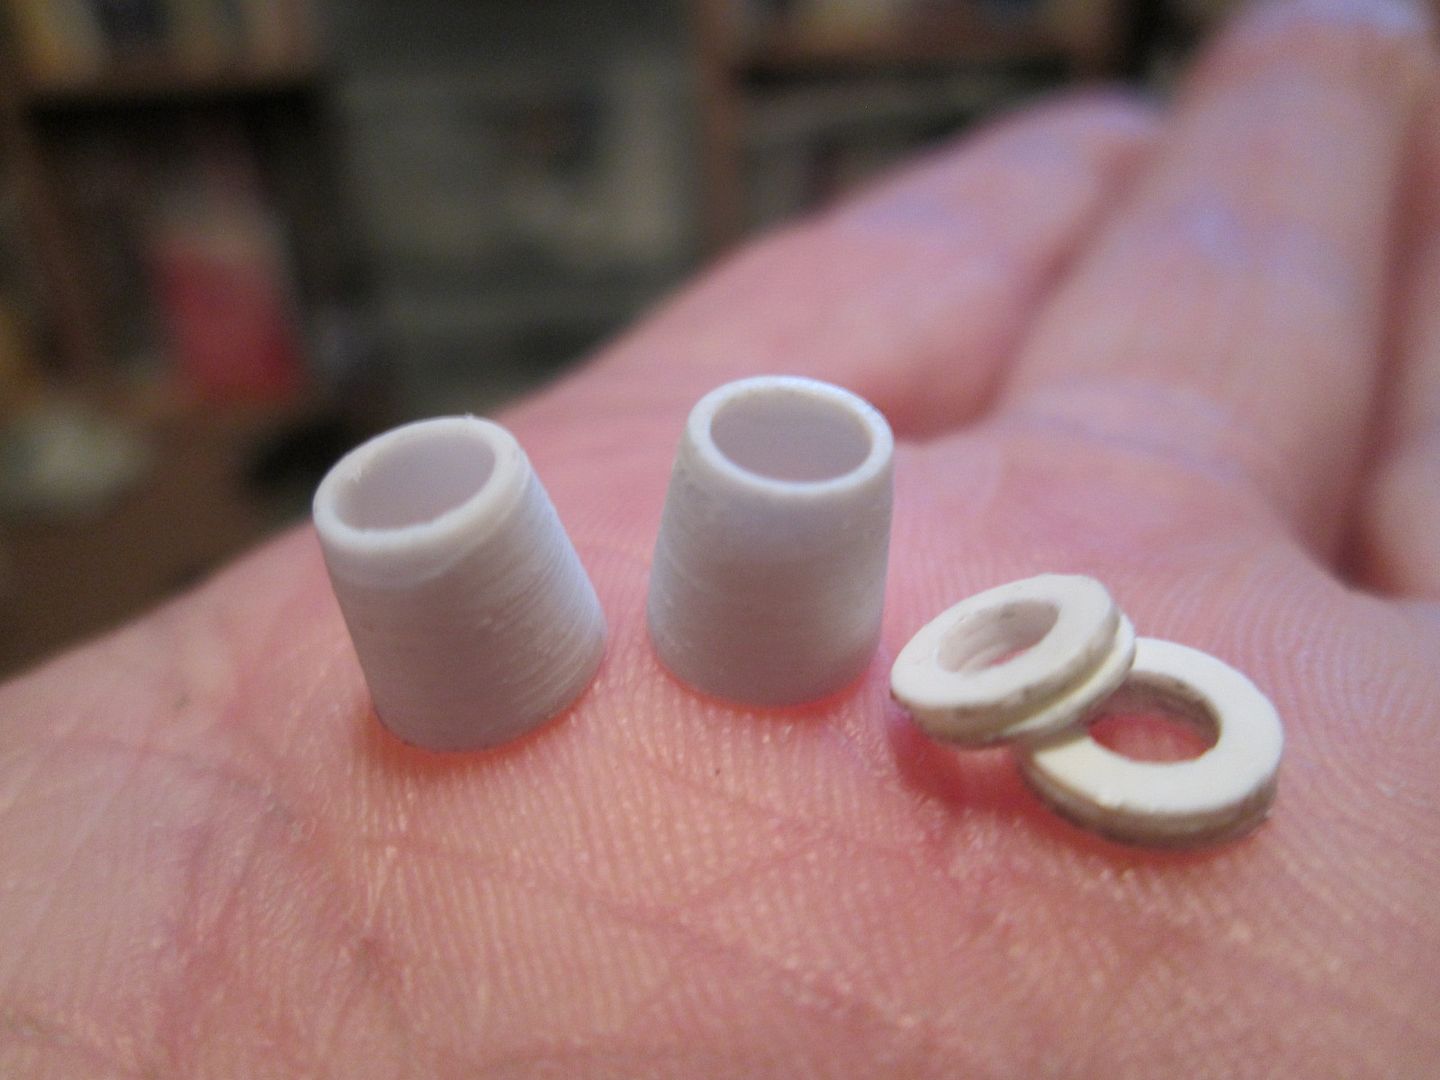 ...and it all goes together on the steering rack like this: 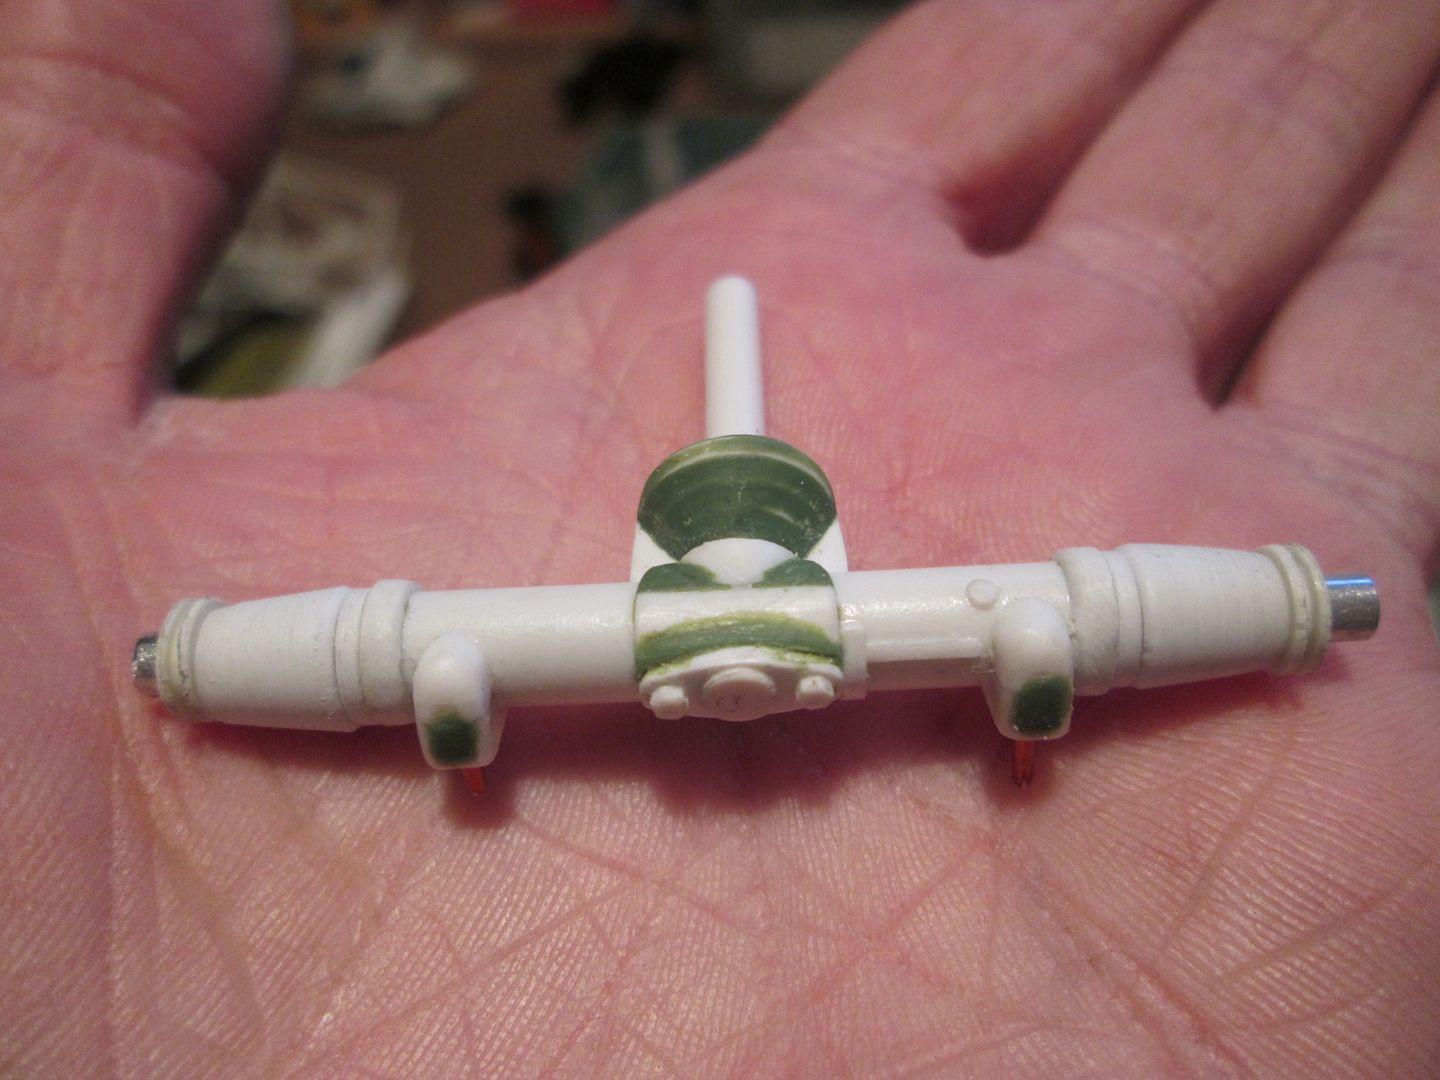 This leaves just the rack bar, the end clevis' and the trackrods to make - jobs for another time, I think. I'm not too sure what I'll have to show you next weekend - hopefully something other than the trailing arms again! Have a good week, SB |
|
|
|
|
|
03-10-2013, 05:39 PM
|
#203 | |
|
AF Regular

Join Date: Jun 2005
Location: london
Posts: 414
Thanks: 3
Thanked 22 Times in 20 Posts
|
Re: 1/8 Porsche 935/78 'Moby Dick'
Arms are looking great. I will have to try green stuff.
 |
|
|
|
|
|
03-17-2013, 12:34 PM
|
#204 | |
|
AF Enthusiast
Thread starter
Join Date: Nov 2008
Location: Norwich
Posts: 649
Thanks: 21
Thanked 111 Times in 87 Posts
|
Re: 1/8 Porsche 935/78 'Moby Dick'
...on the subject of 'greenstuff', I've now got some new 'liquid greenstuff' to try out. As the name suggests it's a fluid version that comes pre-mixed - I've not used it on anything yet, but it could be useful for running into gaps, etc.
Anyway, back to the update. I decided to take the plunge and get on with making the brake discs; as with the 908-3 they're drilled and ventilated...only this time there's more holes. The 908 discs had about 20-odd rows of drillings, with four holes in each row...my 935 discs have 24 rows, alternating between five and six holes. So, that's 132 holes per disc face to be marked, drilled, and cleaned up, two faces per disc, for four discs. Let the drilling commence... 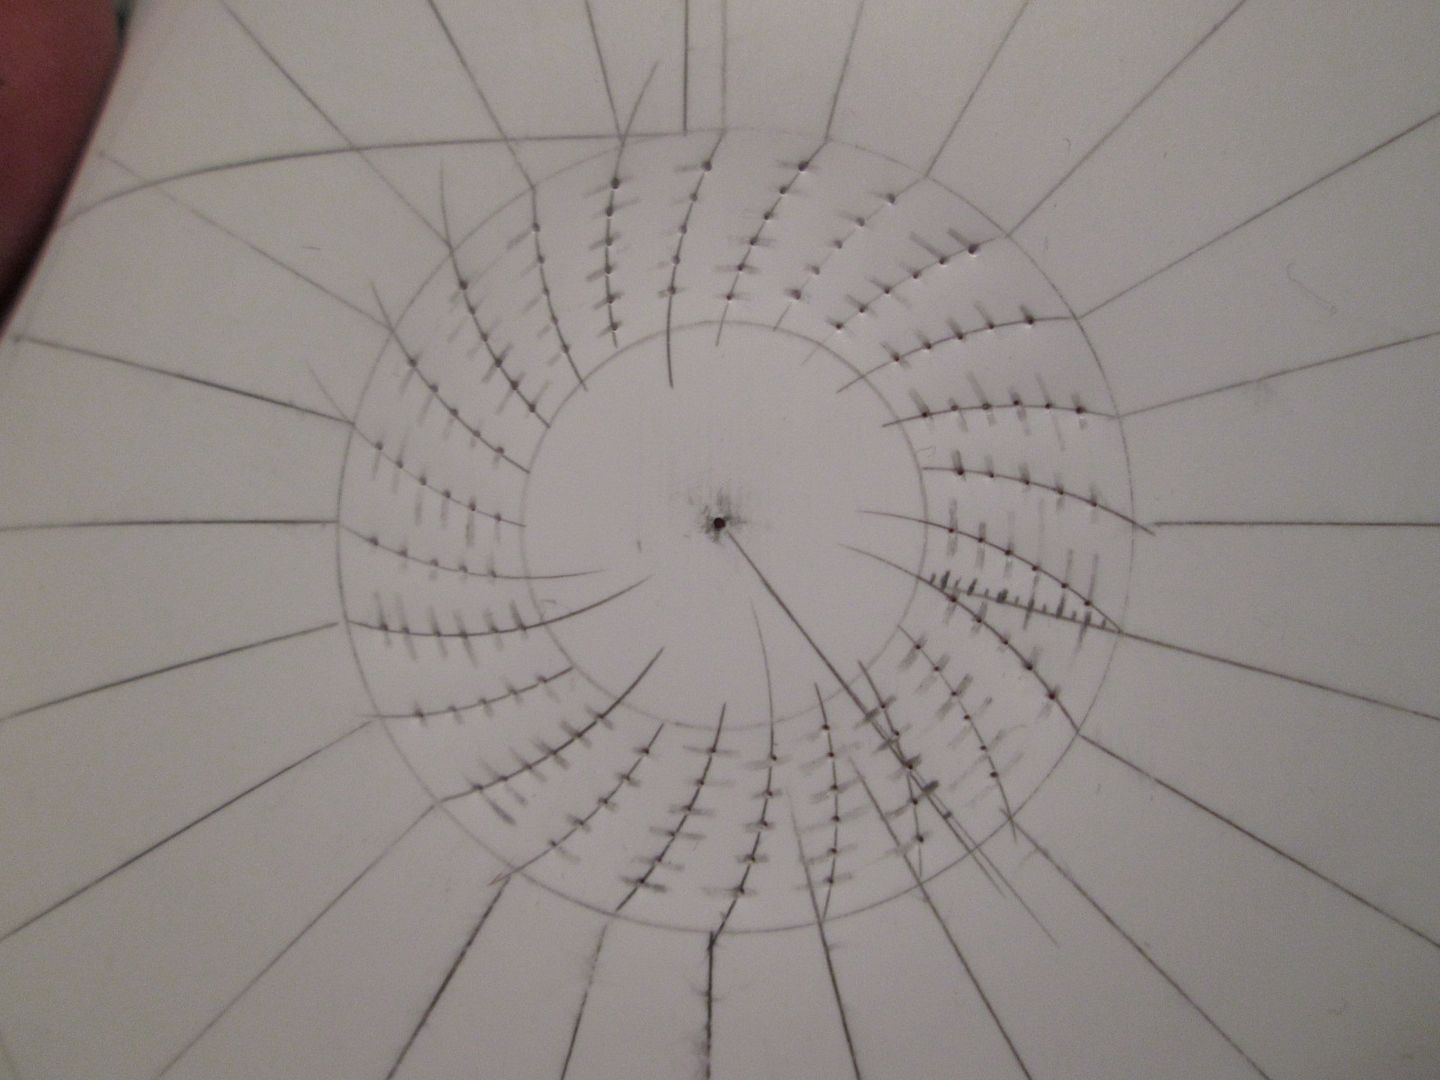 I made this template in thin styrene sheet and will use it to mark each set of holes, hopefully making sure that I can keep the two sides of each disc aligned properly. The basic disc face was partially cut from 0.75mm styrene with the compass cutter, but not completely - I wanted to leave it attached to the sheet to make it easier to mark the holes. The template was taped in place, then the holes pricked through....and then I could start drilling. Here's the two rear discs in their un-assembled state:  The inner fins are 10mm lengths of 1 x 2.5mm strip, with a slight chamfer on the outer end. They're glued in place not quite reaching the outer edge of the disc face - this is correct for the Freisinger rebuild. Before I glue the two halves together I'll paint the inside surfaces, but that's a job for later. I'm planning to add some extra detailing inside the back face of each disc, to show where the separate outer bell is attached, but I'll do this once I have all four basic discs cut and drilled. 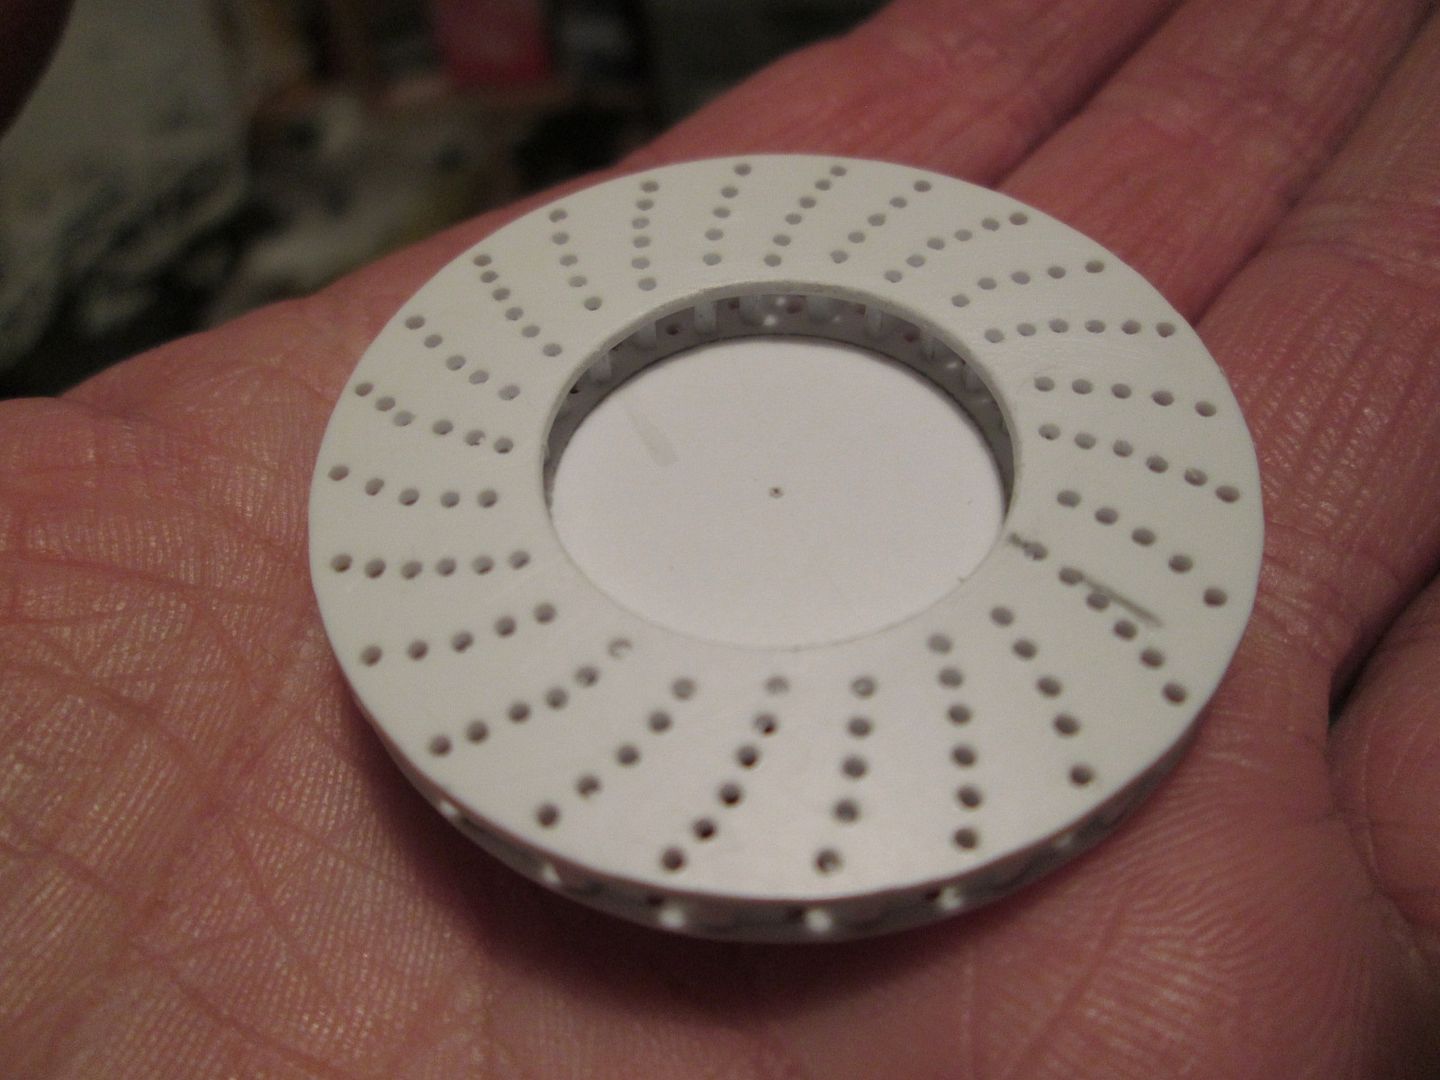 ...okay, slightly out of focus but you get the idea! There won't be a hub 'flange' as such as the disc will fit straight over the centrelock axle and sit against the hub carrier. I've made a start on the front two discs and will continue with these during the week - this probably means I won't do an update next weekend as it will effectively be a repeat of this one! Making the discs like this is a bit mind-numbing, but the end result is usually worth the effort - it's good to know that once they're done, I won't have to do them again (until the next project!). That's it for now, SB |
|
|
|
|
| The Following User Says Thank You to ScratchBuilt For This Useful Post: |
freakray (03-17-2013)
|
|
03-17-2013, 01:01 PM
|
#205 | |
|
AF Regular

Join Date: May 2009
Location: CAP FERRET
Posts: 171
Thanks: 0
Thanked 10 Times in 10 Posts
|
Re: 1/8 Porsche 935/78 'Moby Dick'
As usual, i'm speechless...
As usual, what an impressive work! I'm waiting for the next update... |
|
|
|
|
|
03-17-2013, 04:48 PM
|
#206 | |
|
AF Enthusiast

Join Date: Jul 2005
Location: London
Posts: 899
Thanks: 3
Thanked 11 Times in 10 Posts
|
Re: 1/8 Porsche 935/78 'Moby Dick'
Sheeeeet SB!
I was about to suggest you'd need a decent dividing head and index wheel for that job - but indeed, YOU don't!!!  |
|
|
|
|
|
03-17-2013, 05:51 PM
|
#207 | |
|
AF Modelrater
 Join Date: Jul 2002
Location: Forks Township, Pennsylvania
Posts: 12,894
Thanks: 18
Thanked 63 Times in 56 Posts
|
Re: 1/8 Porsche 935/78 'Moby Dick'
Seriously, I think there is a lesson to be learned from every one of your thread updates. I had been puzzling in my head how to create the disks for a 1/12 build I am in the early stages of planning and you just answered everything for me. Thank you!
__________________
|
|
|
|
|
|
03-18-2013, 02:28 PM
|
#208 | |
|
AF Enthusiast
Join Date: Sep 2011
Location: Redwood City, California
Posts: 651
Thanks: 0
Thanked 39 Times in 39 Posts
|
Re: 1/8 Porsche 935/78 'Moby Dick'
Just the usual splendid craftsmanship...
 ianc |
|
|
|
|
|
03-18-2013, 02:59 PM
|
#209 | |
|
Blarg! Wort Wort Wort!
Join Date: Mar 2006
Location: Quezon City
Posts: 2,120
Thanks: 64
Thanked 101 Times in 100 Posts
|
Re: 1/8 Porsche 935/78 'Moby Dick'
splendid attention to detail!
__________________
olly olly oxen free |
|
|
|
|
|
04-01-2013, 09:33 AM
|
#210 | |
|
AF Enthusiast
Thread starter
Join Date: Nov 2008
Location: Norwich
Posts: 649
Thanks: 21
Thanked 111 Times in 87 Posts
|
Re: 1/8 Porsche 935/78 'Moby Dick'
Back again...
Once I'd made the second set of disc components I was looking at how to take them a little further. So far - other than the number of holes - they're no different to the 908's...but I could see where I could add extra detail. As the discs are a two-part design with a separate bell, there is a ring on the inside face where everything bolts together - once everything is assembled you're hardly going to see these, but I thought they should be there: 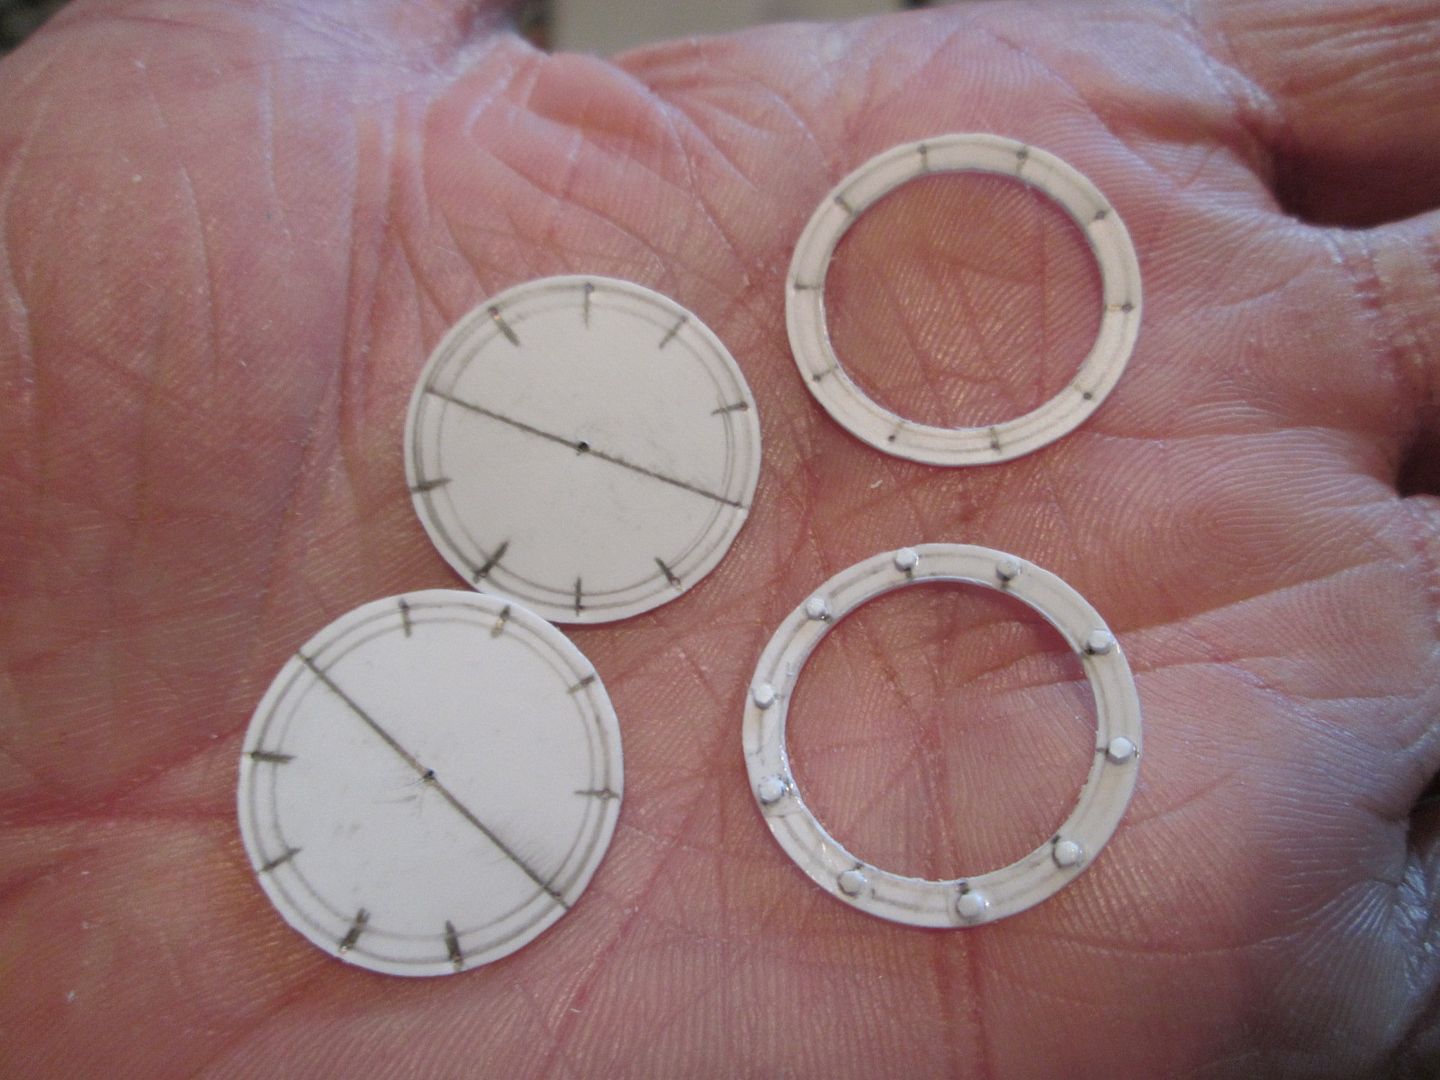 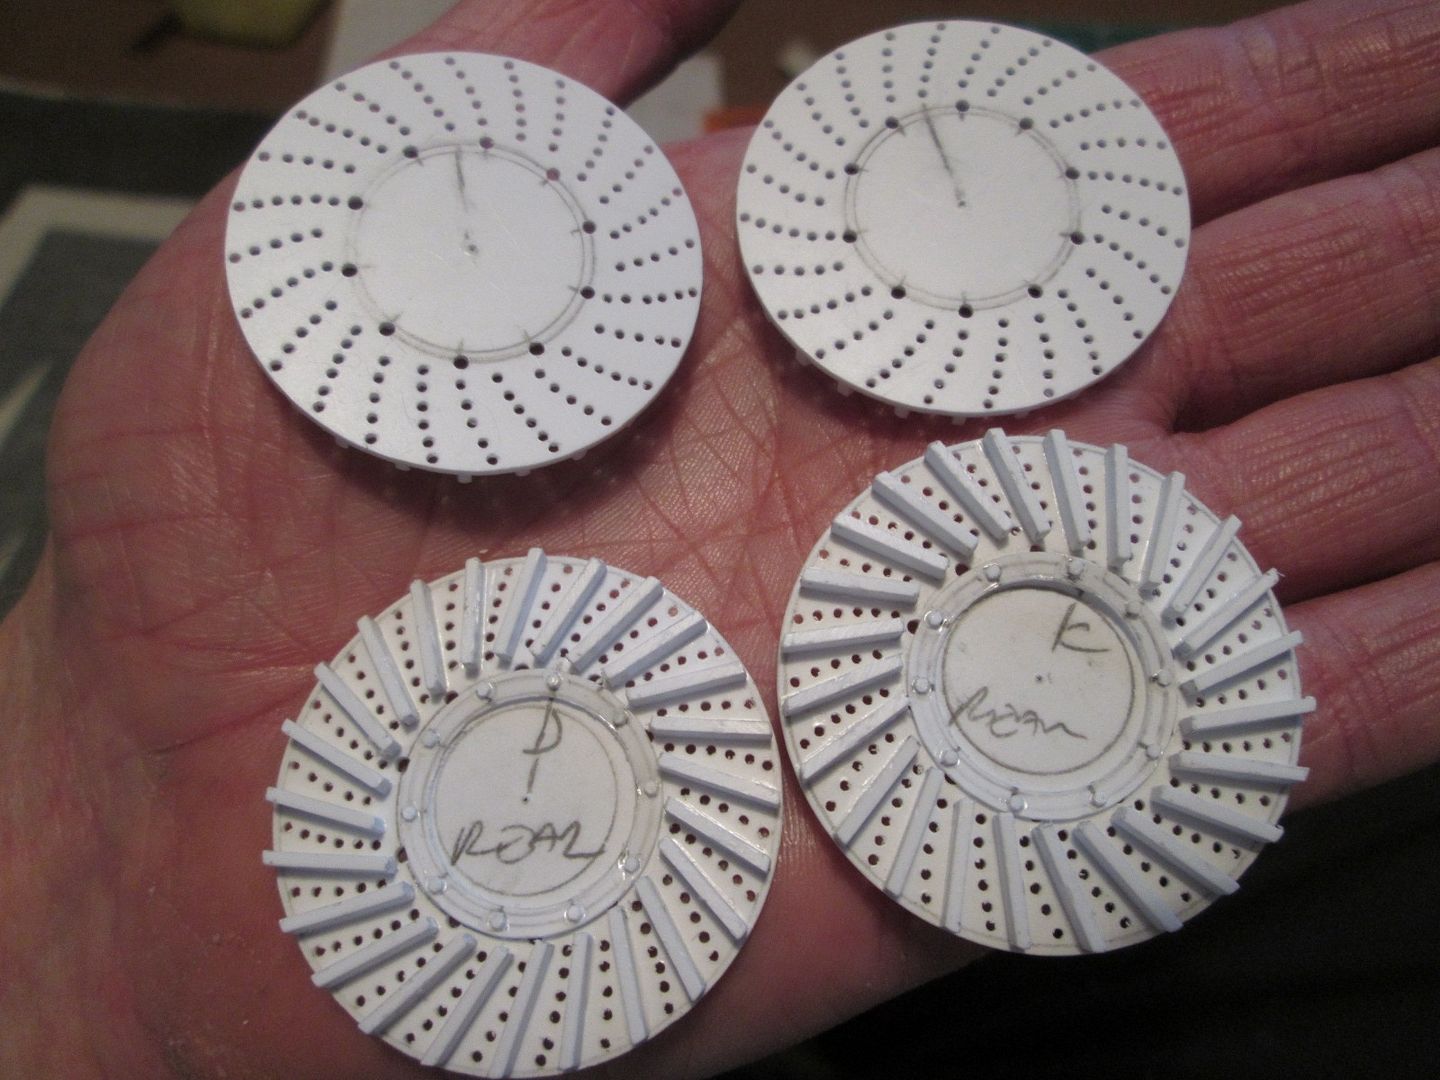 I've also added a set of ten larger holes to each disc - these remain partly visible once the outer bell is added later. Before gluing the two drilled faces together I wanted to add some colour to the inner faces of the discs - it would be easier to do this now than later. So, a black undercoat followed by a light drybrush with Boltgun Metal and Shining Gold: 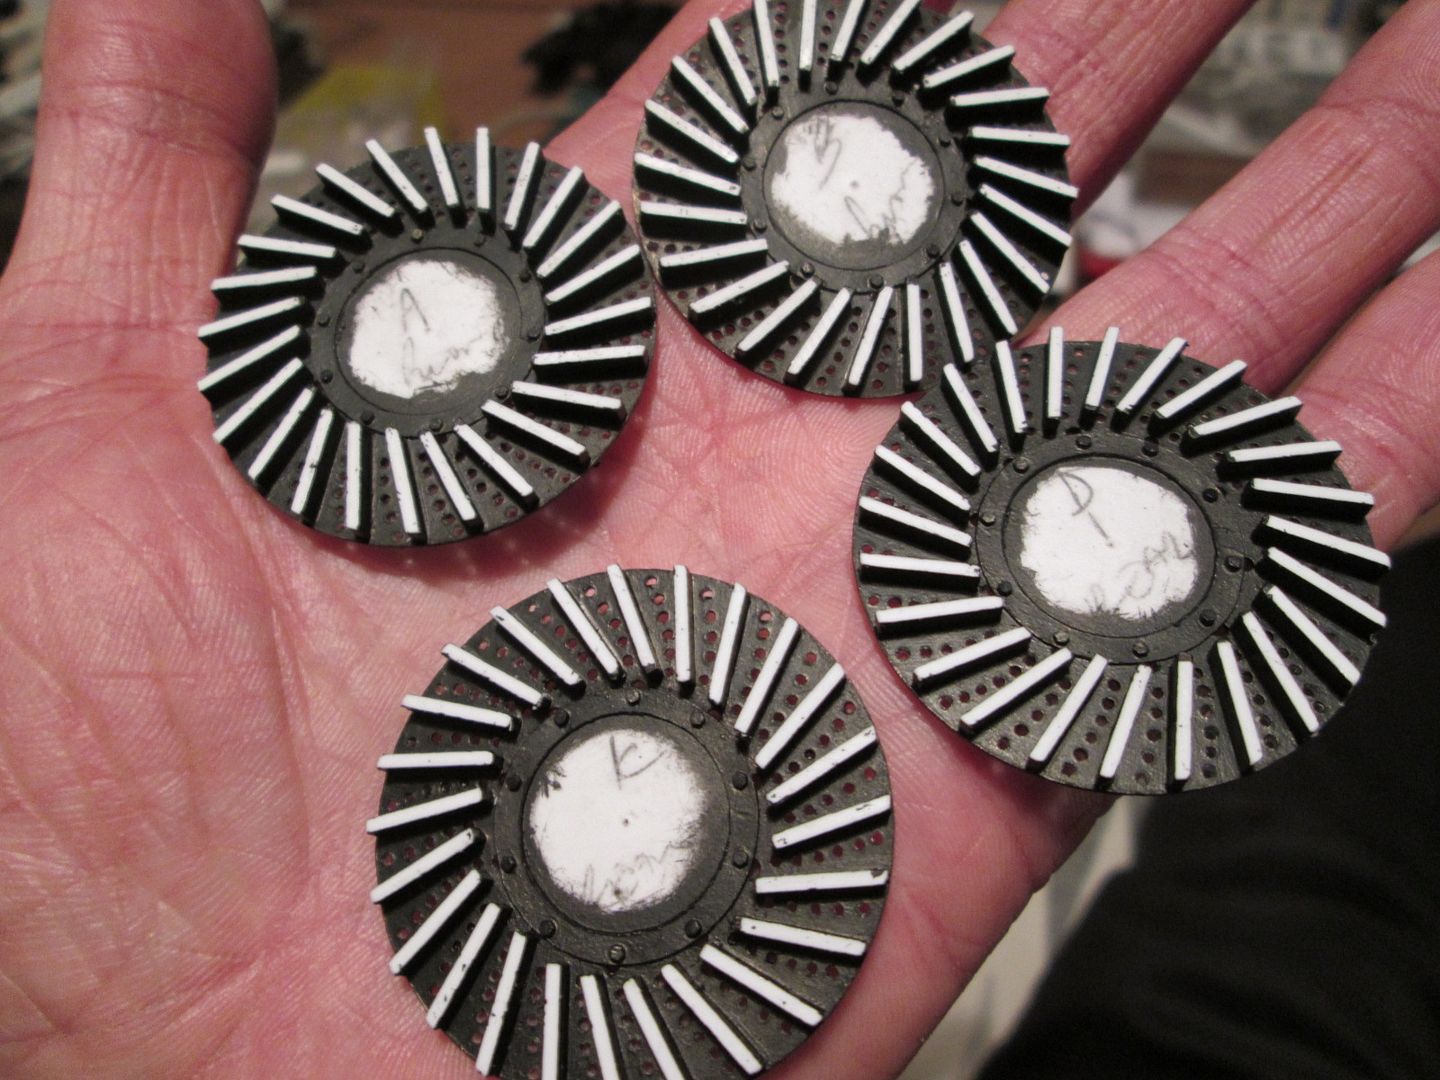 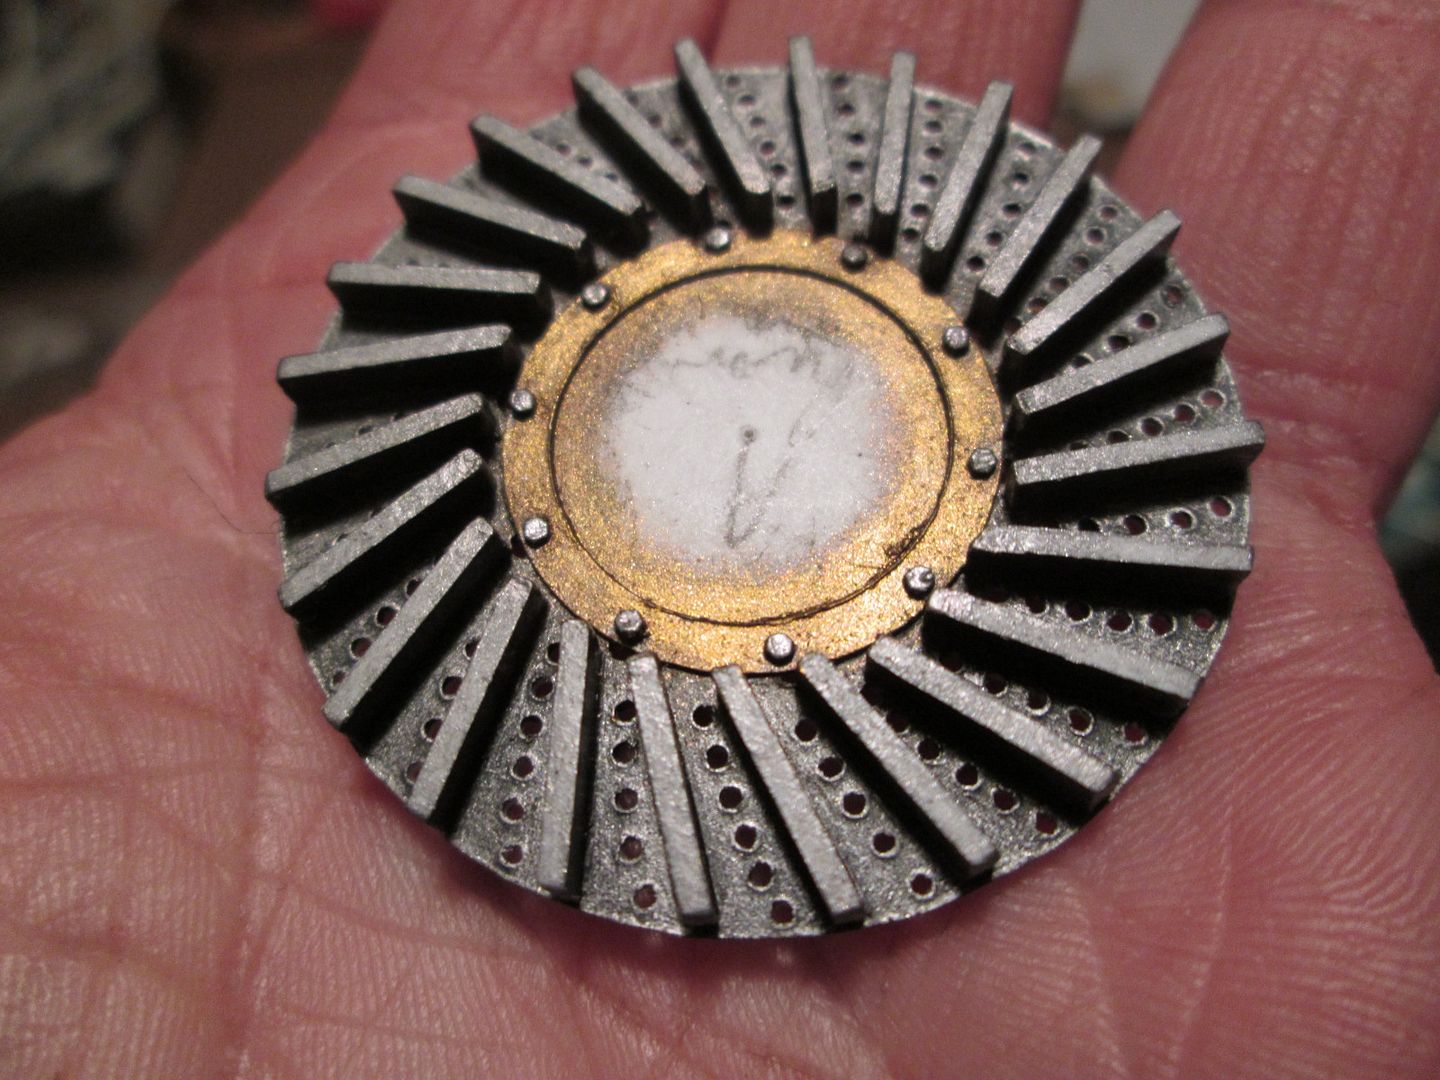 I've been careful to keep eveything marked so I can get the correct alignment, so it was easy enough to glue the discs together: 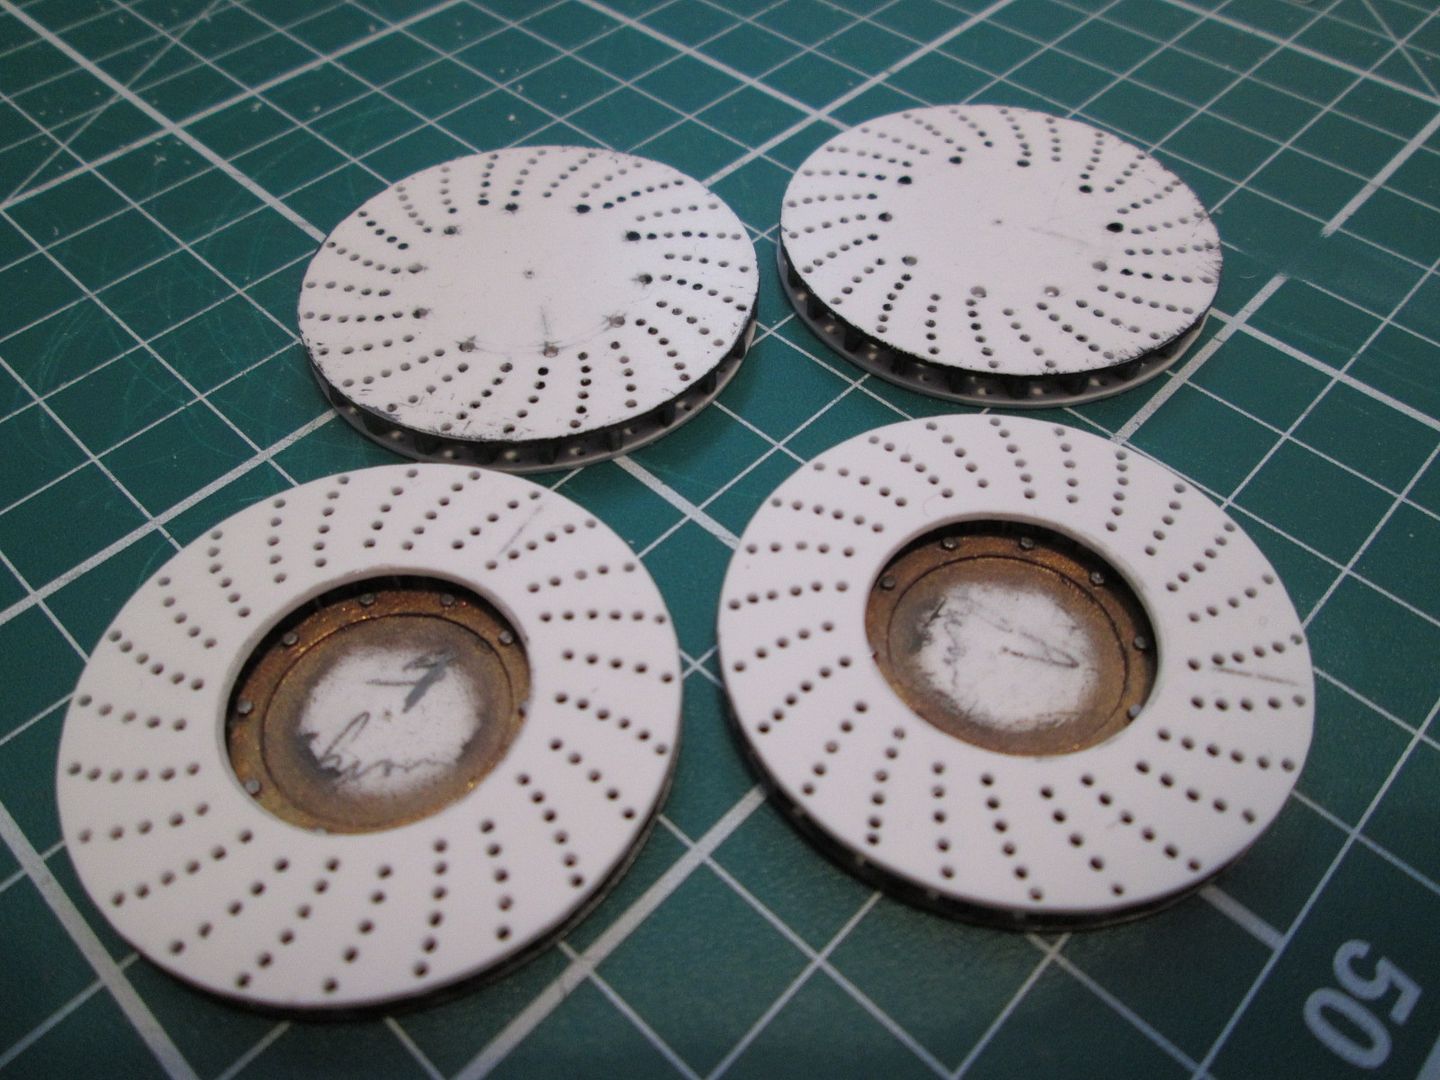 I wasn't able to paint the inner surface of the top disc before gluing, but this won't be such a pain to do now. The outer faces can wait until much later in the build...maybe I'll take them to Le Mans again! This weekend was a good opportunity to spend some time preparing for the next stage of the build. I've been putting off tackling the wheels for some time, but with the discs and suspension coming together it was going to start causing a bottle-neck - so I made my final calculations for the diameters I wanted and drilled four holes in my foam block with the adjustable cutter. Each wheel would be made from three main parts - the inner and outer rims, and the centre. The rims would start as three layers of 0.5mm strips, cut to length to get a snug fit into the foam block, then glued together - this was how I spent most of Saturday afternoon... 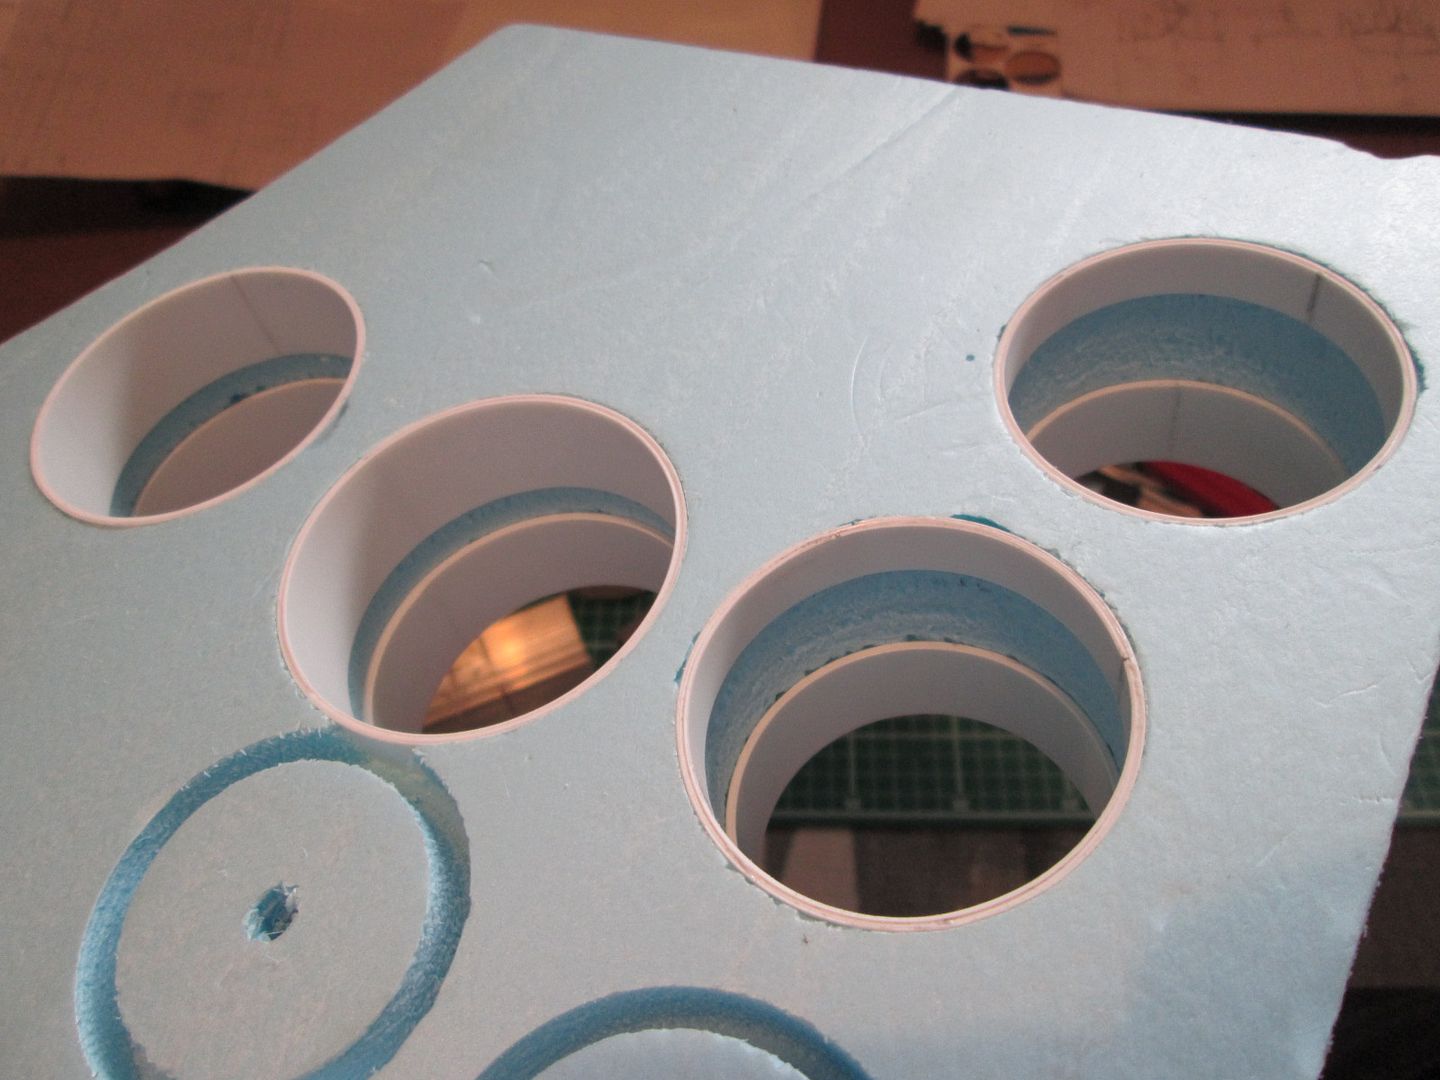 I wanted the centres to be 3mm thick, so this was easy enough - two outer skins of 0.5mm, and a 2mm spacer in between. I coiled three strips of 1.5 x 2mm to give a solid outer edge, then filled the centre with a stack of discs which were left-overs from both the 917-10 and the 908-3 projects...I was hoping to find a good use for them sometime! 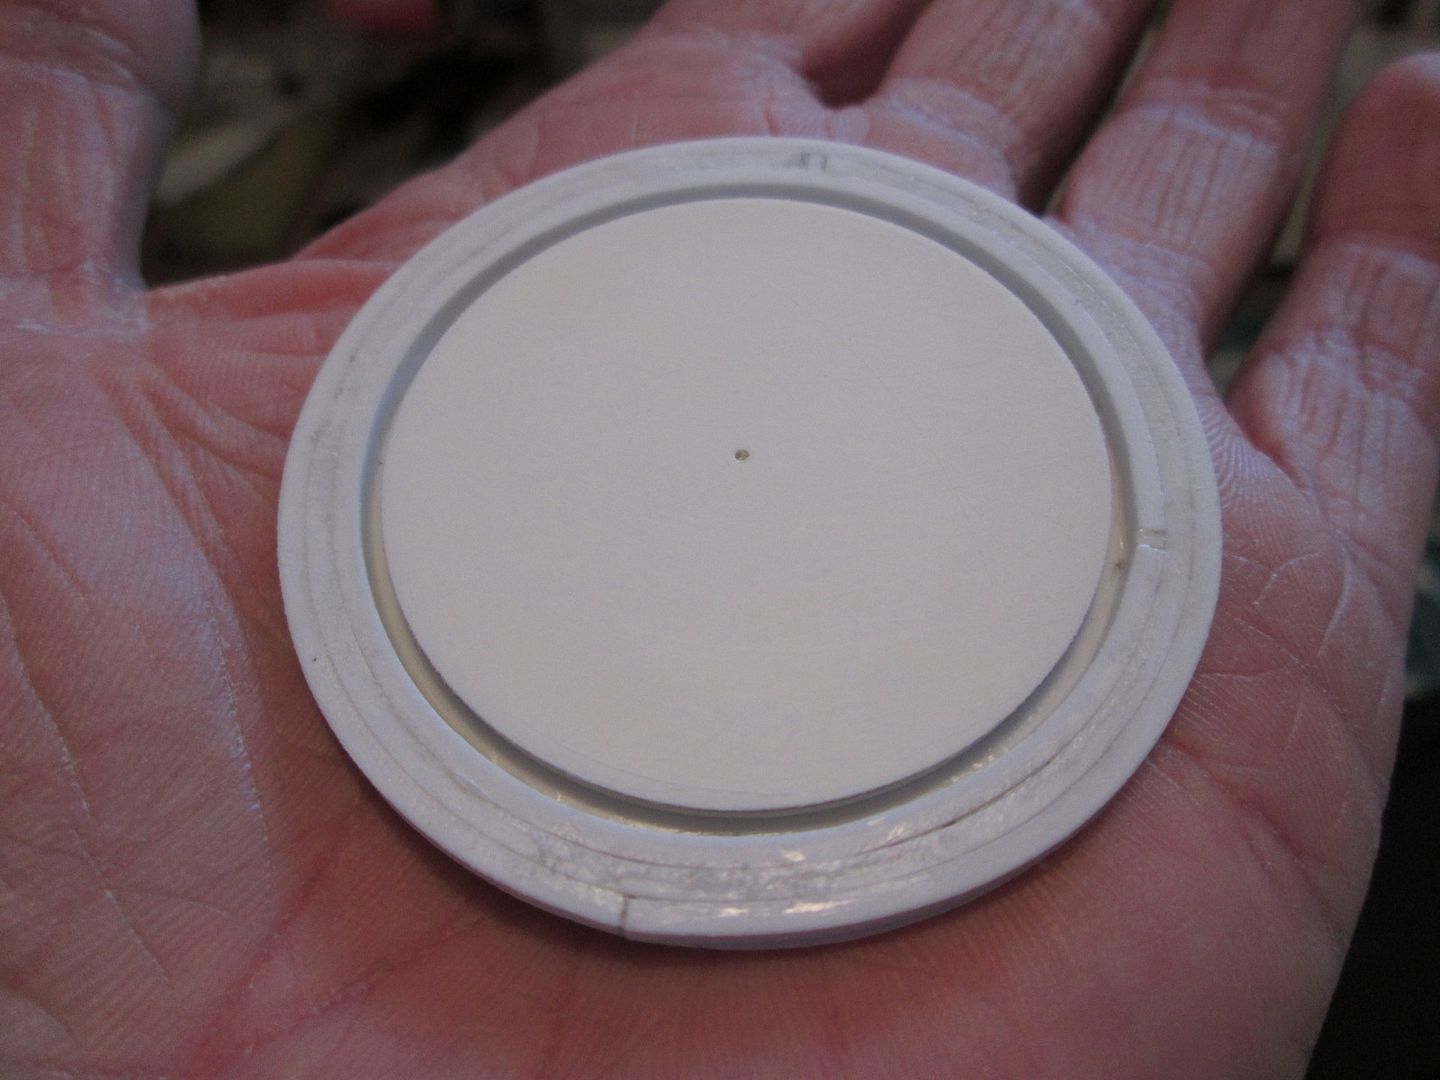 For now I've only made two centres, one each front and rear - this will be enough for me to continue with sorting out the hubs, disc bells and brake calipers. There should be plenty of room with the rears, but the front wheels are that much smaller - but it should be okay. 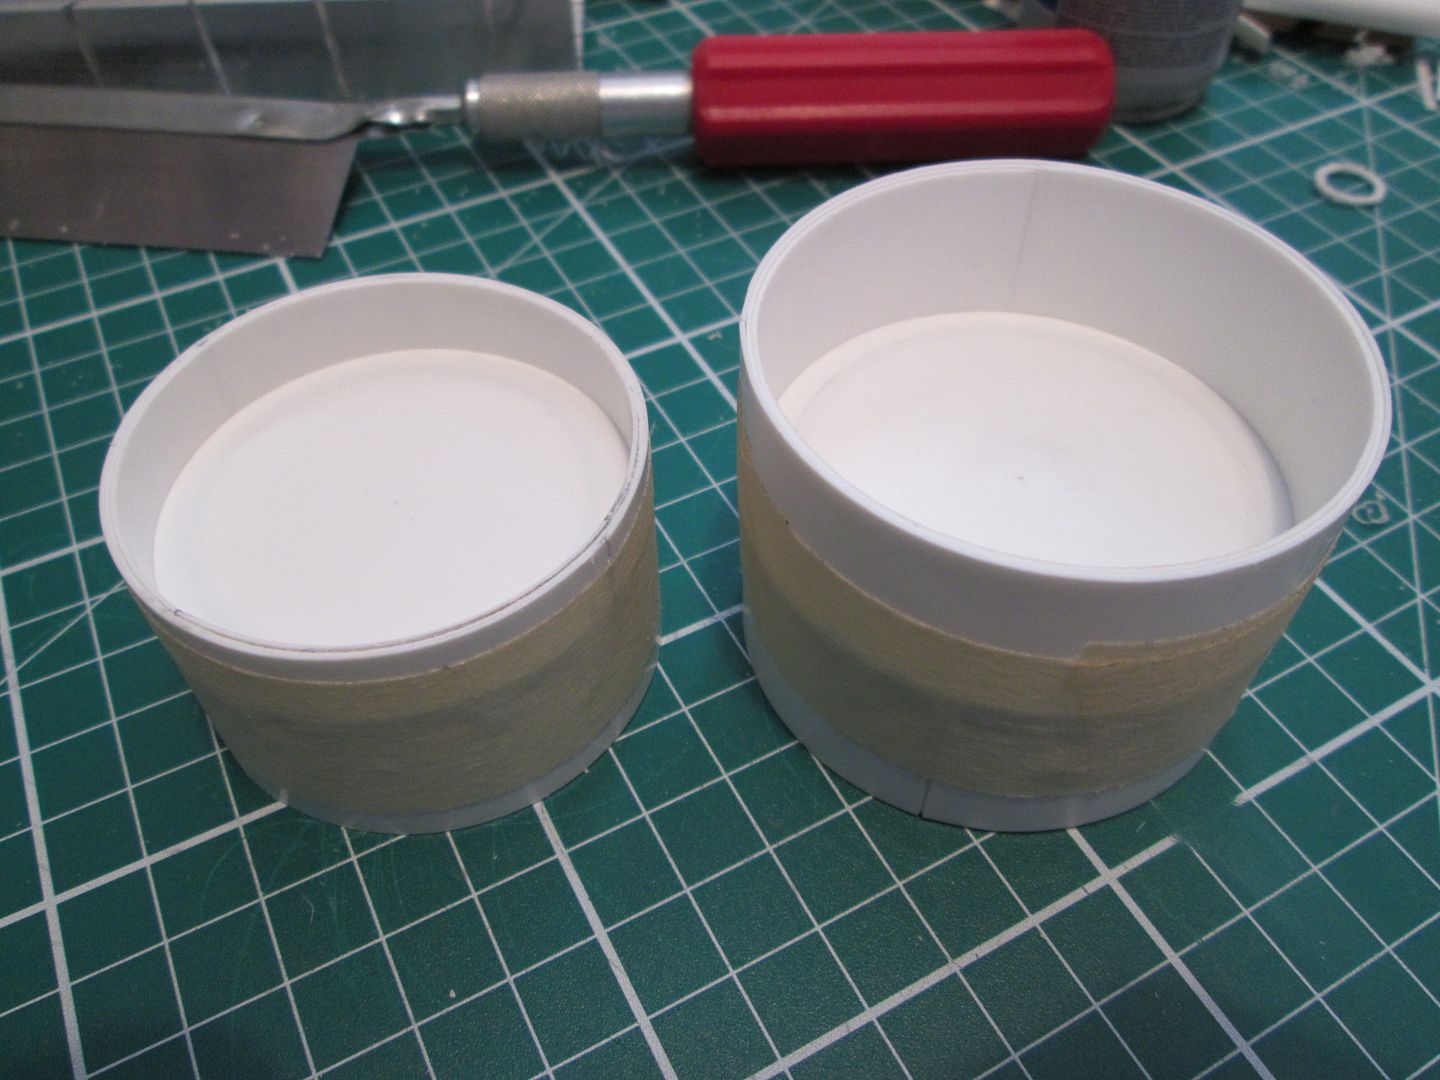 Clearly there will be plenty of extra work required to get these looking as they should, but it's a start. The centres will not be fully detailed, for the simple reason that they do not need to be fully detailed (okay, and a set of spoked BBS rim centres is too much for me to contemplate...). Any detail on the outer face of the wheel centre will be completely hidden once the fibreglass cooling cones are fitted...so that's my get-out-of-jail card. Please, don't give me a hard time over this...! So, there's now plenty of things I can be getting on with over the next few weeks - the calipers alone will probably take two or three weeks to sort out. The tyres will be cut from foam again, but not for a while - they're quite vulnerable to getting chipped, marked or otherwise damaged, so they really don't want to be hanging around for months. That's it for today - should be back to normal next weekend. All the best, SB |
|
|
|
|
| ||||||||||||||||||||||||||||||||||||||
|
POST REPLY TO THIS THREAD |
 |
| Thread Tools | |
|
|


