|
|
|

|
|
| Search | Car Forums | Gallery | Articles | Helper | AF 350Z | IgorSushko.com | Corporate |
|
| Latest | 0 Rplys |
|
|||||||
| How-to | Technical Info A wealth of information at your disposal. |
 |
 Show Printable Version | Show Printable Version |  Email this Page | Email this Page |  Subscribe to this Thread
|
|
|
Thread Tools |
 01-06-2008, 02:48 AM
|
#1 | |
|
AF Enthusiast

Join Date: Mar 2005
Location: bowling green, Kentucky
Posts: 600
Thanks: 2
Thanked 1 Time in 1 Post
|
How to change your lower intake manifold gaskets and valve cover gaskets
Heres my contribution to the many how-tos on replacing your lower intake manifold gasket. My truck is a 1997 Jimmy.
Symptoms of a leaking lower intake manifold gasket are: a) smell of antifreeze outside the vehicle, after driving b) mystery loss of coolant (doesnt visibly drip because its being burned in combustion) c) lifter tap noise when you first start the vehicle (due to oil being washed away by coolant in the lifter valley) d) coolant in the oil (sometimes) I got a Fel-Pro gasket kit which included valve cover gaskets so I changed those as well. You will need: Replacement gasket (I recommend Fel-pro) RTV (recommend Permatex 2 or 3) standard metric and SAE sockets, extensions, and ratchets torque wrench pliers large adjustable wrench and large screwdriver (or GM fan clutch removal tool) small Torx driver-set or bit-set 5/16 18NC tap and die highly recommended 5 qts of oil to refill 4 extra qts of oil to flush Coolant to refill Acetone Lots of rags and paper towels Paint marker or White-Out Recommended but not necessary: flashlight, small mirror, magnetic part retriever tool, sandwich bags to store and label parts, Sharpie marker and masking tape to label wiring harness *Take a good picture before you begin. You may need to reference it when putting things back together. Heres how she looks ...  STEP 1: Remove negative battery cable. 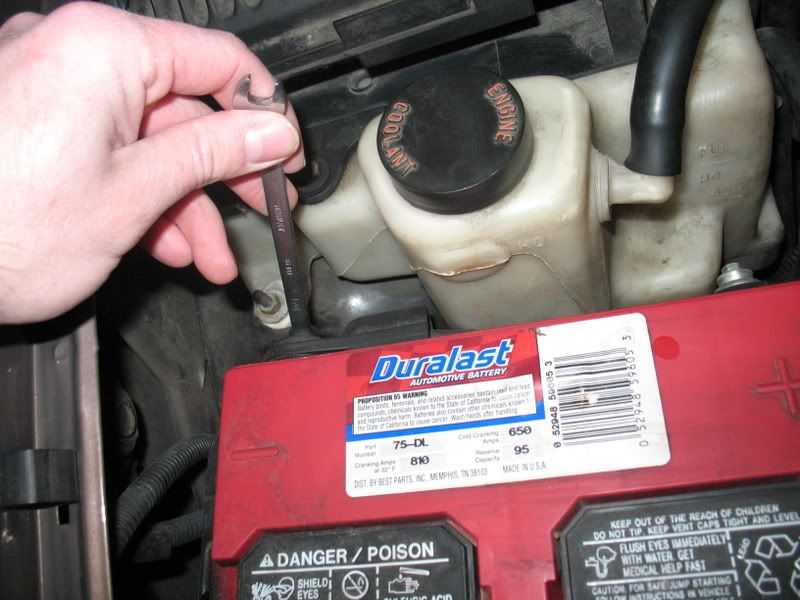 STEP 2: Remove upper fan shroud. Three bolts up front, two on each side. Label the bolts. STEP 3: a) Disconnect and label the electrical connector to your Mass Air Flow (MAF) sensor and your Intake Air Temperature (IAT) sensor both are connected to the air intake tube. b) Remove the crankcase fresh-air tube from the air-intake to the passenger side valve cover (it just pulls out of the valve cover). c) Remove air intake tube. d) Stuff a rag in the throttle body opening so that nothing falls into the plenum  STEP 4: Disconnect and label the vacuum line from the brake booster. 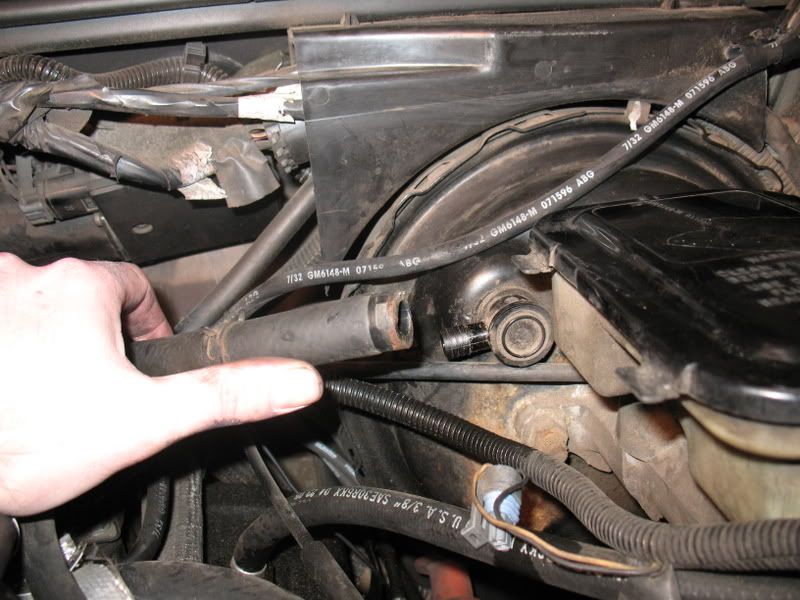 STEP 5: Remove the fan. You can rent-for-free a GM fan remover tool at Autozone, or just use a large adjustable wrench and large screwdriver as a wedge. 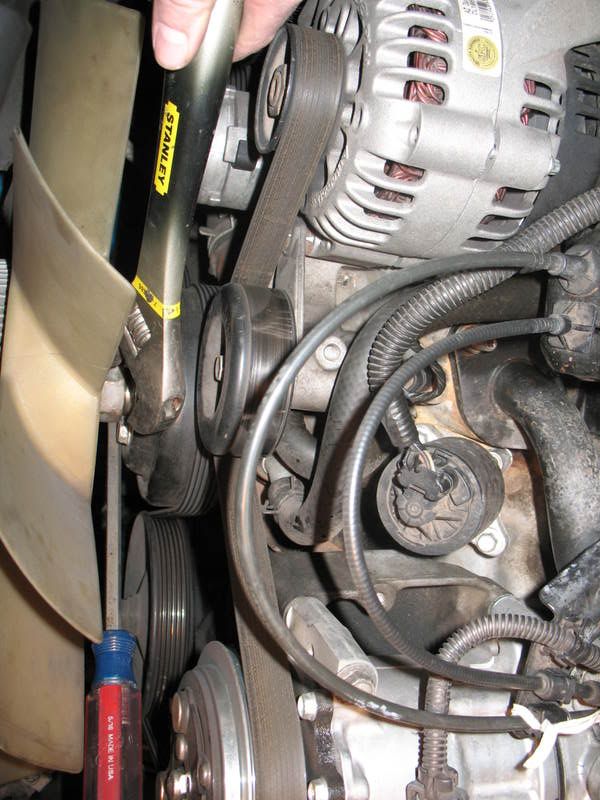 STEP 6: Remove belt. This is done by placing a 3/8 inch drive ratchet into the square slot on the belt tensioner. Turn the ratchet against the spring pressure to release tension on the belt. STEP 7: Disconnect the two metal brackets that attach the throttle cable and cruise control cable to the throttle body. Label the nuts and bolts. Sorry, this picture only shows the one bracket but you get the idea. (Yes, I use a twist-tie to keep the broken plastic hold-down from rattling ...) 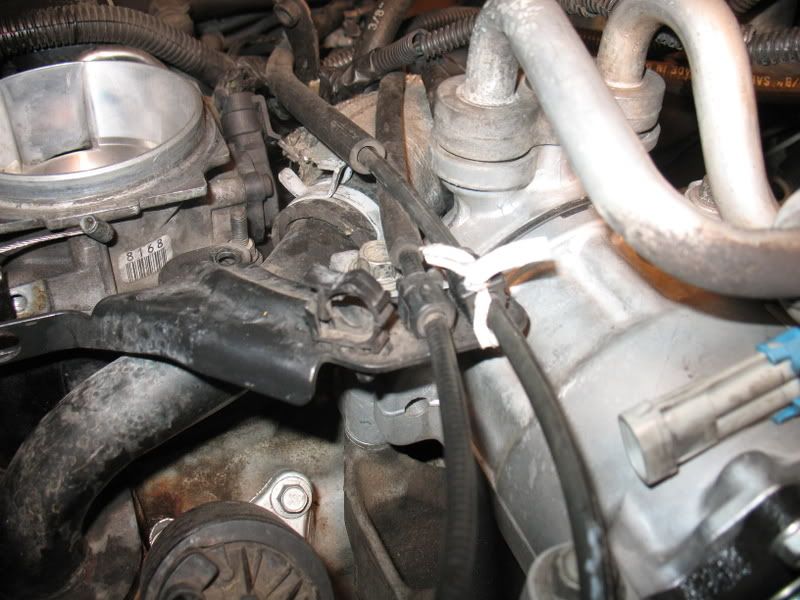 STEP 8: Disconnect the throttle cable and cruise control cable from the throttle body. The cable with the plastic end just pops off. Just push it. 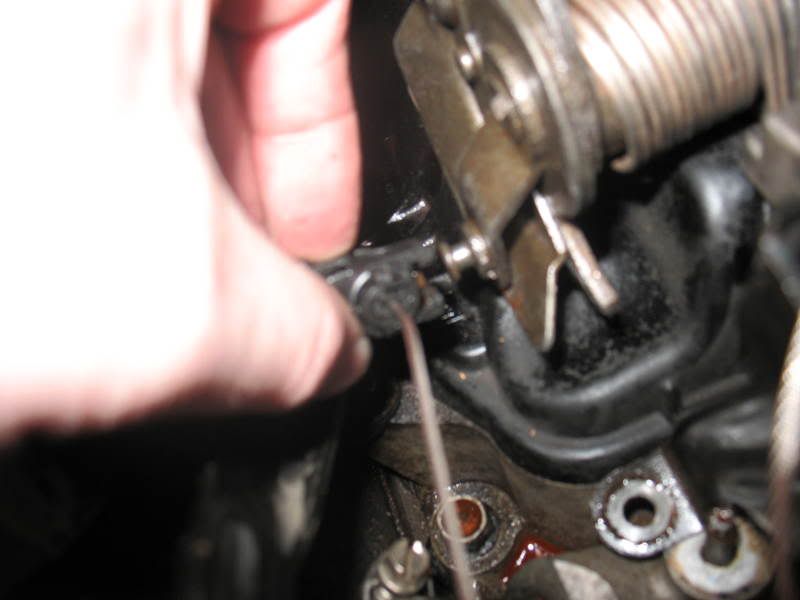  The other cable detaches by opening the throttle plate (which puts slack on the cable) and pushing the cable out of the slot. 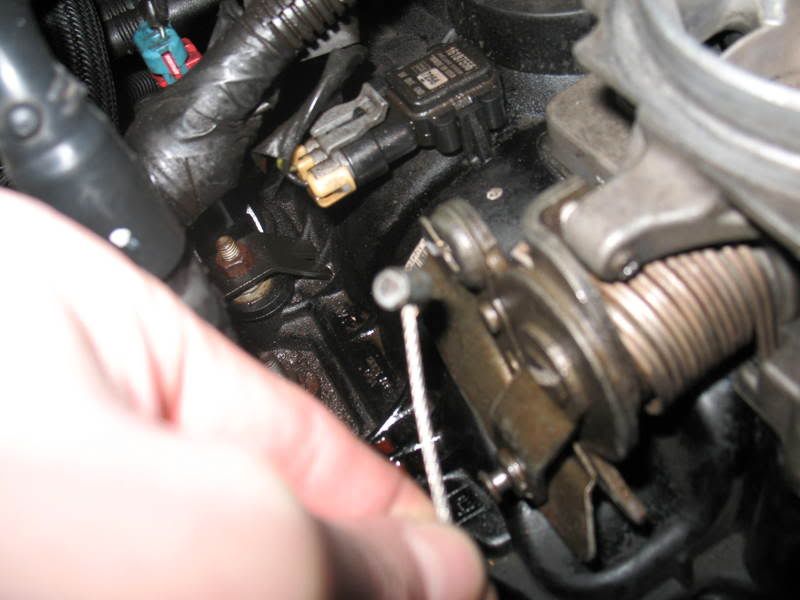 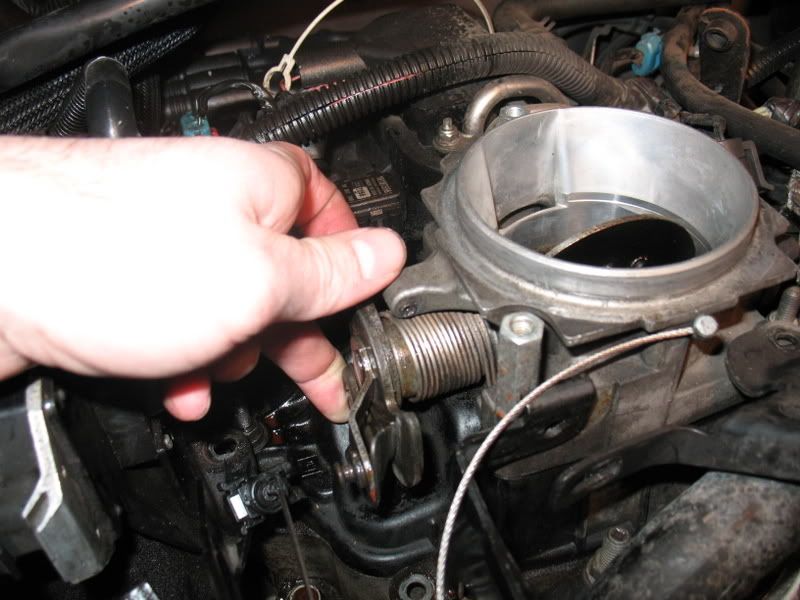 Place the cables out of the way and off to the drivers side of the engine compartment. 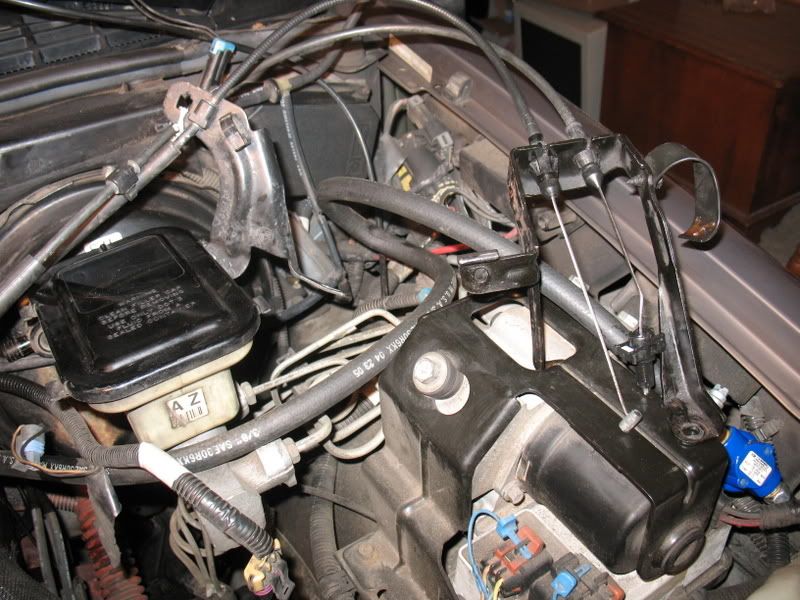 STEP 9: Disconnect and label two electrical connectors. Your EGR and the one that goes into the thermostat housing (I think this is the coolant temperature sensor). 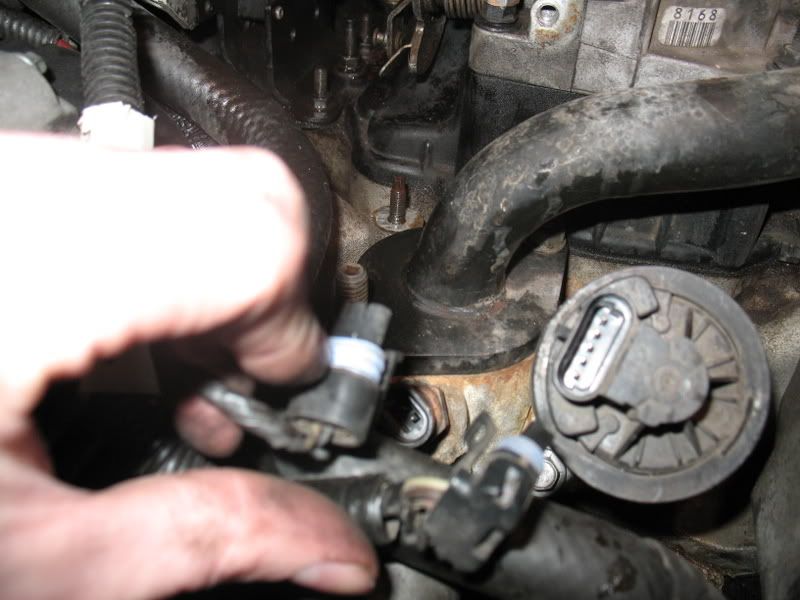 STEP 10: Disconnect and label the two electrical connectors to your A/C compressor. There is one in the back and one on top. My compressor looks a little different because it is a Sanden clone but the original H6s look pretty similiar and the connectors are identical. b) Remove and label the four bolts that hold the A/C compressor to the A/C compressor mounting bracket. It is not necessary to discharge your A/C. Carefully place the compressor over on the passenger side of the engine. Try not to kink the hoses. Mined sat pretty much behind top the ECM.  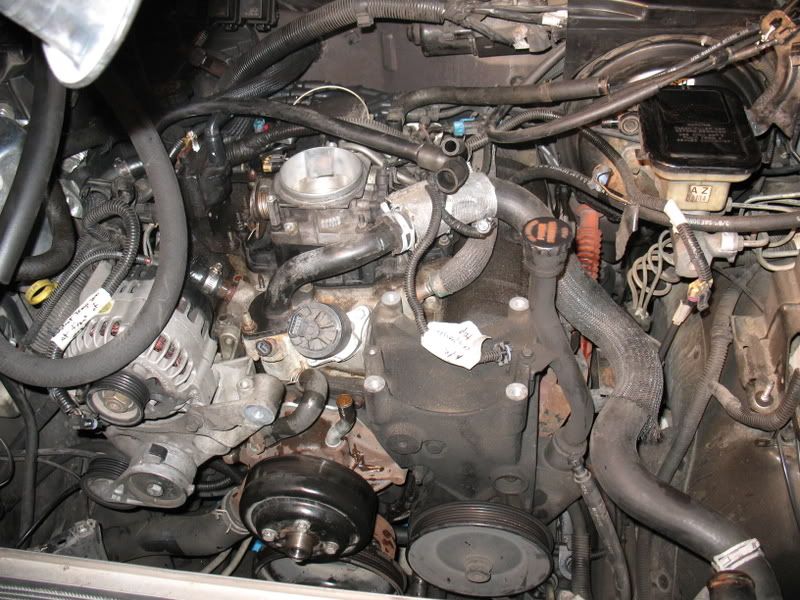 STEP 11: a) Disconnect this electrical connection. I dont know what this one is. I just labeled both ends with the letter A. b) Disconnect and label the two electrical connectors at the right side of the throttle body. One is your Idle Air Control (IAC) and the other your Throttle Position Sensor (TPS). 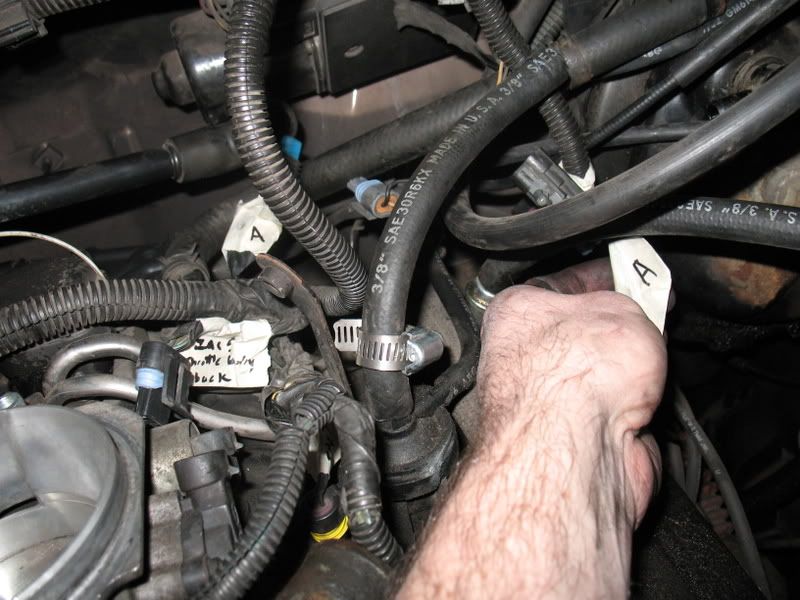 STEP 12: a) Drain coolant. I do this by disconnecting the lower radiator hose and letting it pour into a bucket underneath. b) Remove upper radiator hose at both ends (the radiator end and the end of the tube coming out of the thermostat housing on the intake). c) Remove both heater hoses. Remember which one goes where and generally how they lay across the top of the engine and weave through the electrical harness. One hose goes from the water pump to the firewall (right side) -- the other from the intake to the firewall (left side). d) Disconnect the small bypass hose behind the idler pulley. You only need to disconnect the end that attaches to the intake. STEP 13: Remove idler pulley. STEP 14: a) Remove the electrical connector at the side of the alternator. b) Remove the nut at the back of the alternator. Disconnect the two wires. Take note of how they go together. You may need a back-up wrench to prevent the stud from spinning. 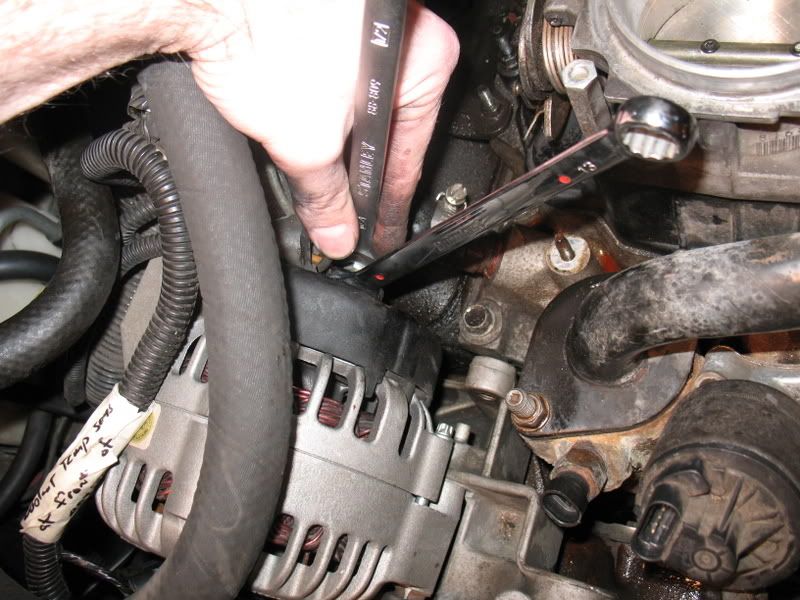 STEP 15: a) Remove and label two bolts that hold the alternator to its bracket b) Remove alternator (you may need a large screwdriver or small prybar to get it out). c) Remove belt tensioner. 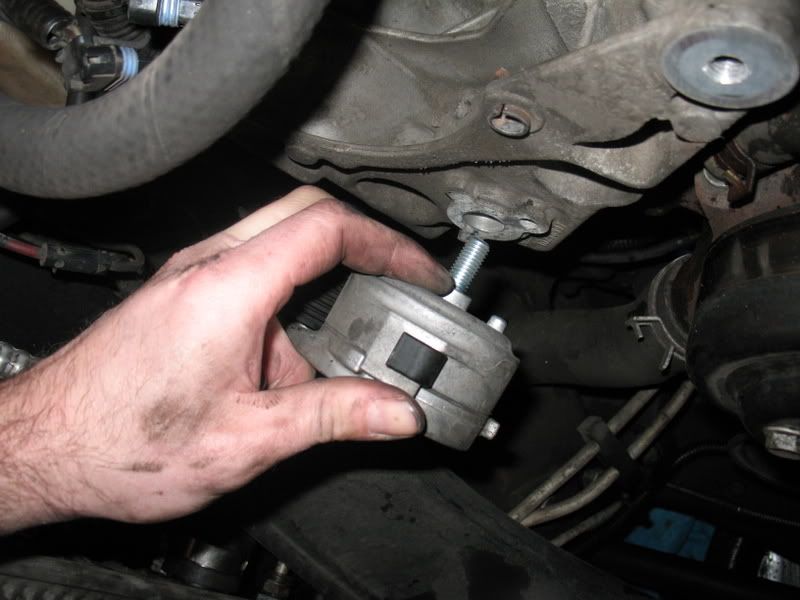 STEP 16: Remove power steering bracket. a) Begin by loosening the bolt on the bottom right side of the P/S pump next to the steering shaft. Theres no need to remove it completely just loosen it. The bolt hold a letter C shaped bracket which you can see in the pictures. b) Next, remove and label the nut that is at the bottom front of the pump between the P/S pulley and the crankshaft pulley. It is easy to access from underneath. c) Now, remove and label the nuts and bolts on the front of the P/S pump. The pump will slide off the long bolt coming out of the head. Theres no need to remove the long bolt. Dont pull the bracket completely off the bolt, just pull it away a few inches. d) Theres no need to disconnect any other P/S lines 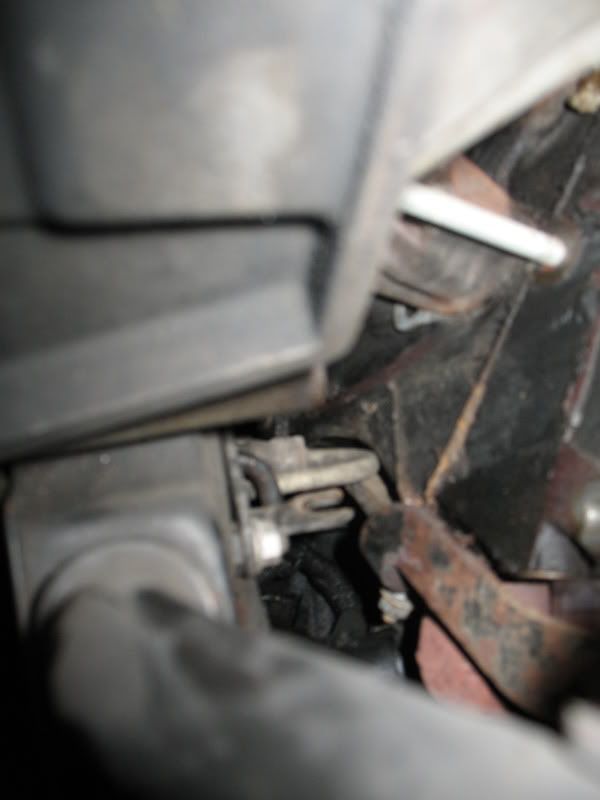 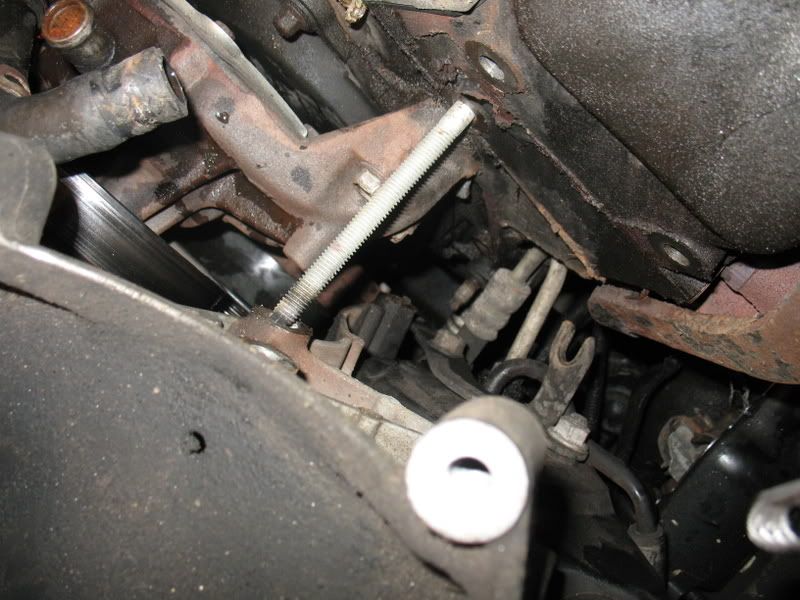 STEP 17: a) Disconnect the drivers side spark plug wires from the distributor cap. Note how they are routed. Label the wires if necessary. Be sure to use the brackets that hold and separate the wires they help to keep them from getting burned on the exhaust manifold. The engine front to back is 1, 3, 5. The distributor cap is 3, 1, 5. Theres no need to disconnect the passenger-side spark plug wires from the distributor cap. b) Disconnect this hose from the intake plenum 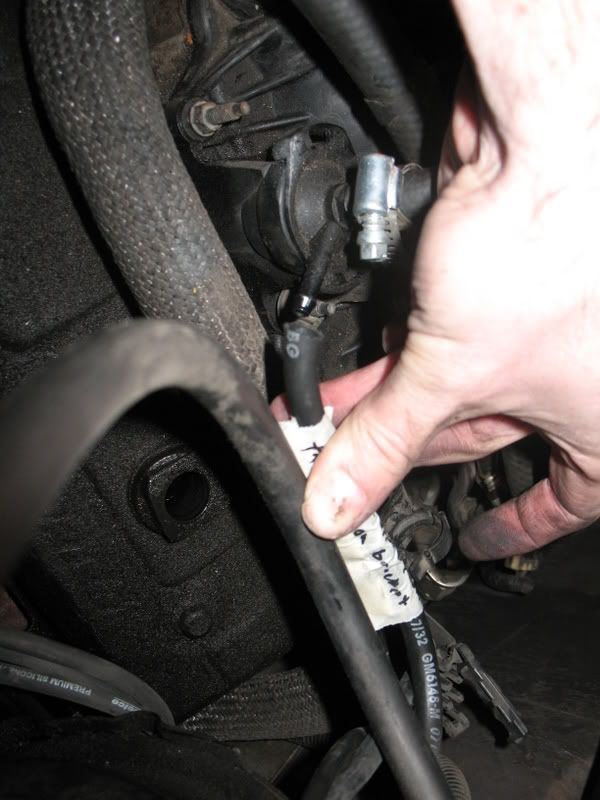 STEP 18: a) Disconnect EGR hose going into the front of the intake. b) Disconnct the EGR hose bracket. There is a bolt at the top rear of the intake which holds the bracket to the intake. Remove the bolt to free the bracket. c) Gently push the hose over to the right and out of the way. 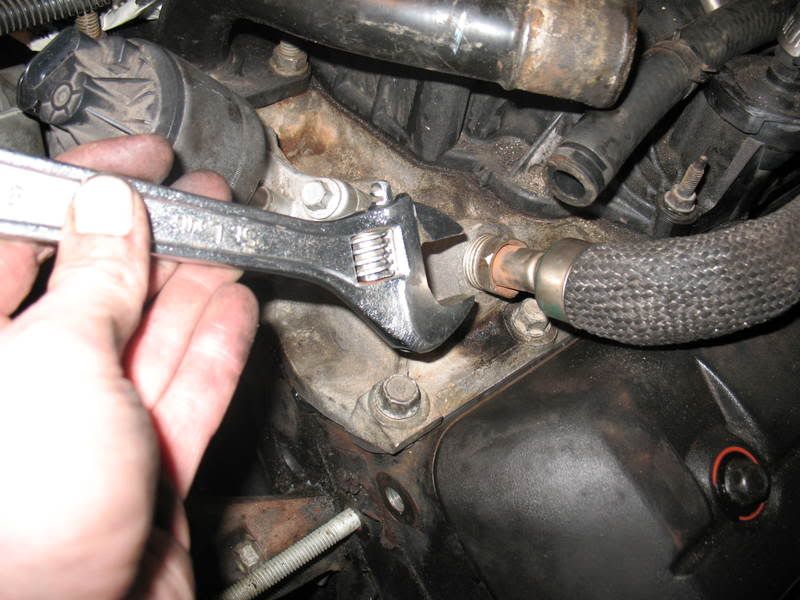 STEP 19: a) Disconnect and label all electrical connections to the coil. Remove the coil mounting bracket and remove the coil. b) Disconnect and label the Mass Air Pressure (MAP) sensor on top the plenum. STEP 20: Disconnect the large square fuel injection connector at the top of the plenum. Gently squeeze the pin and then gently pry the tabs at the side. 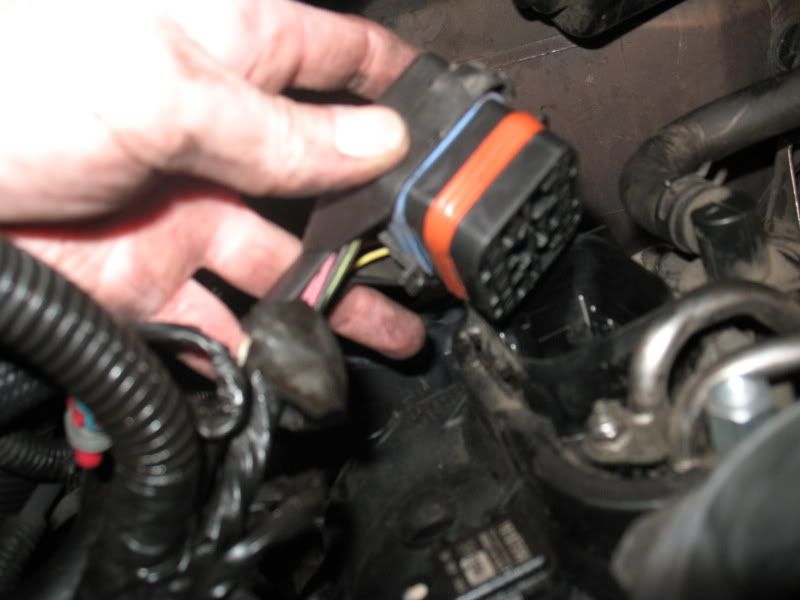 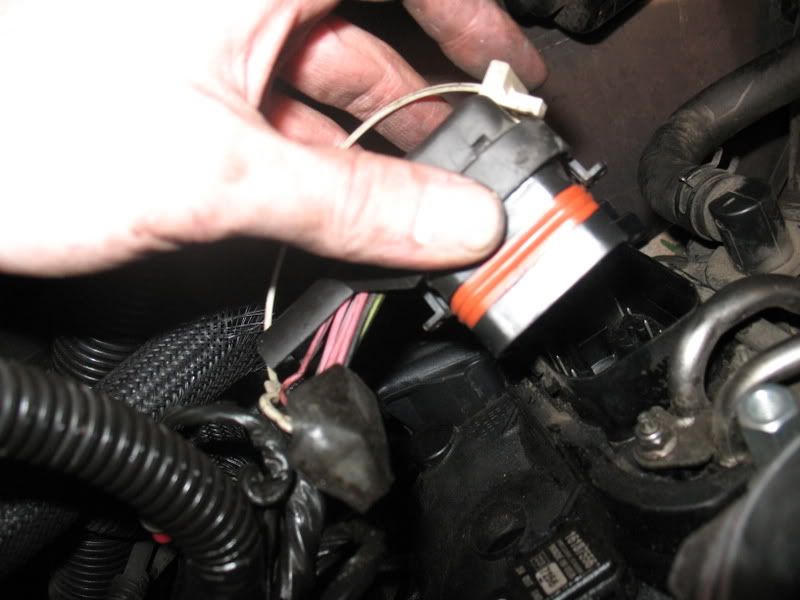 STEP 21: Disconnect the EVAP hose. There is a little tab on each end of the hose. Push it down to release the hose. If you cant yet reach the back connection dont worry, you can get it later. 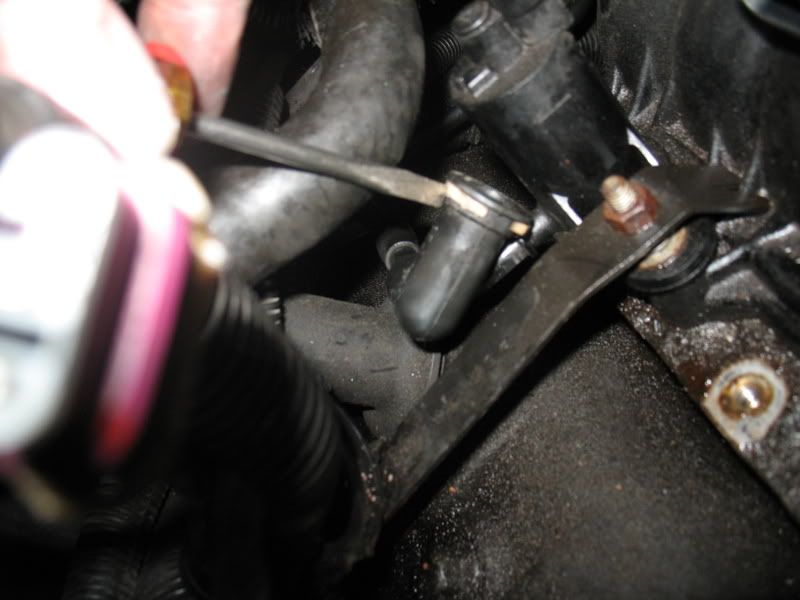 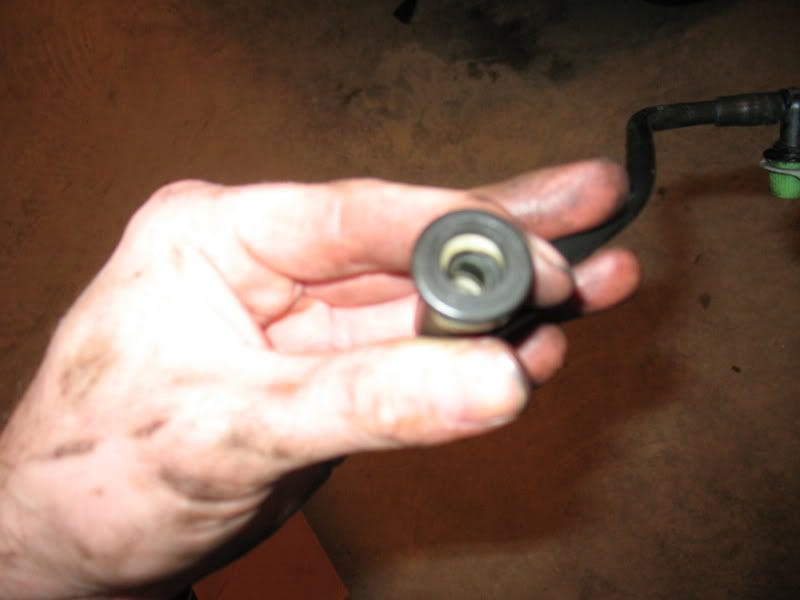 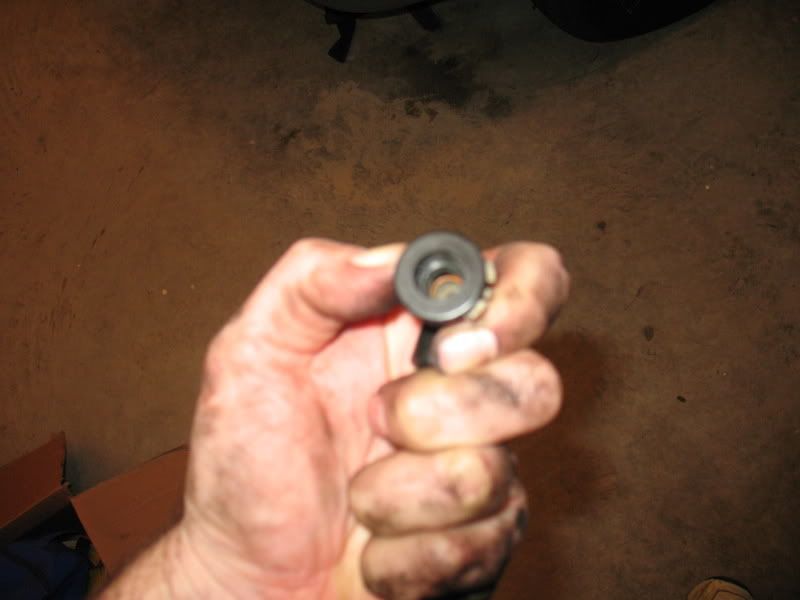 STEP 22: *By now you should be able to move much of the electrical harness from right-to-left over and out of the way. a) Remove and label the two Torx screws and take off the distributor cap. Push it off the left. b) Take a paint marker or White-Out and mark the relationship of the rotor to the housing. Though not absolutely necessary, I also marked the relationship of the distributor hold-down flange to the manifold. The more marks the better. You dont want to get everything back together only to find that your distributor (timing) is off by a tooth or two. c) Remove and label the two screws on top the rotor and take off the rotor d) Disconnect the electrical connection to the distributor e) Remove the distributor hold-down bolt f) Carefully remove distributor 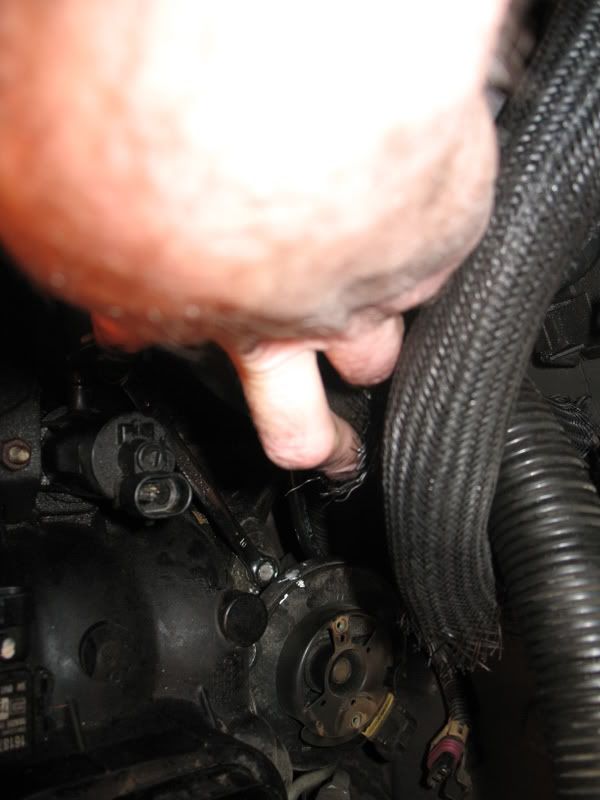 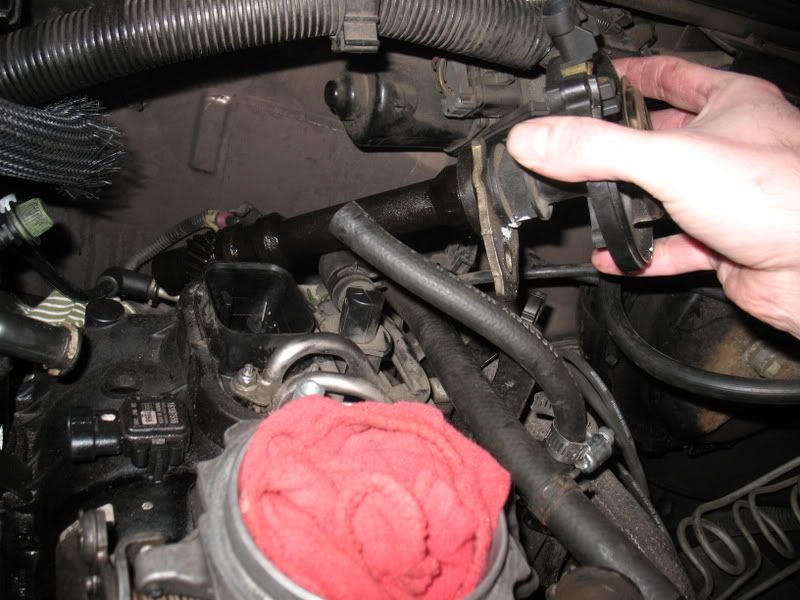 STEP 23: a) Disconnect this electrical connection. I believe it is the oil pressure sensor. b) Get that back EVAP line now if you had trouble reaching it before. 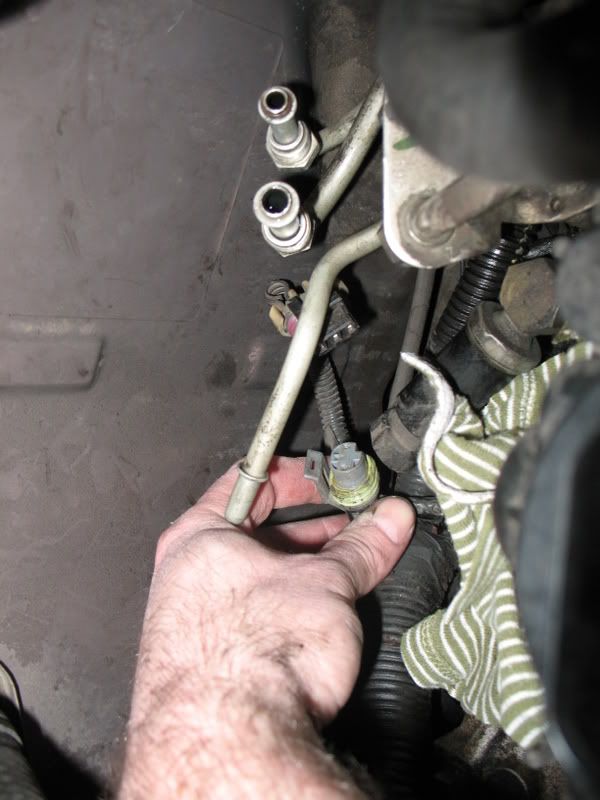 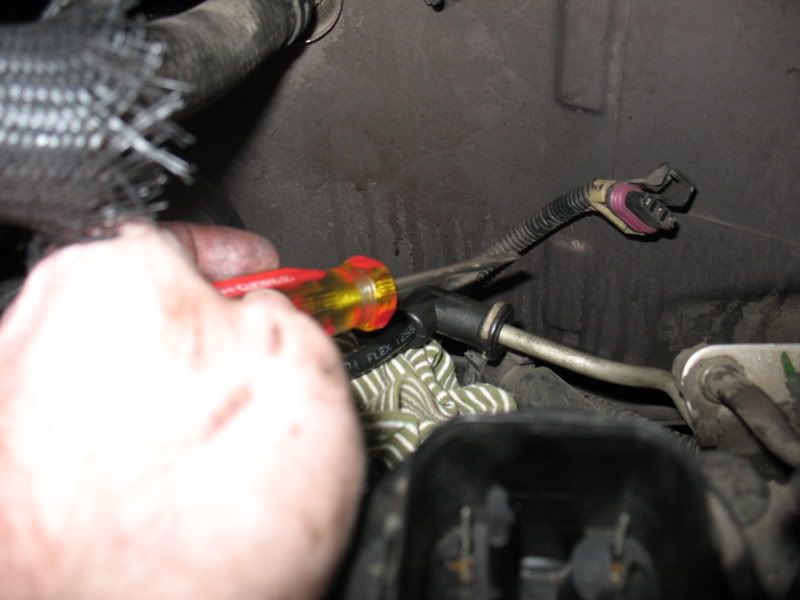 STEP 24: a) Relieve your fuel pressure by finding the Schraeder valve at the top of the plenum. It looks like a bicycle tire valve. Unscrew the cap. Place a heavy rag on top so that you dont get sprayed in the eyes. With the rag on top, press the valve. You wont get alot of fuel but some will come out. This de-pressurizes the system. b) Disconnect your fuel lines at the back of the plenum. Use a back up wrench if necessary. I used adjustable wrenches. Righty-tighty-leftsy-loosie still applies. Each line fits inside the other so, after the fittings are loosened you will still have to push the lines back to order to fully separate them. 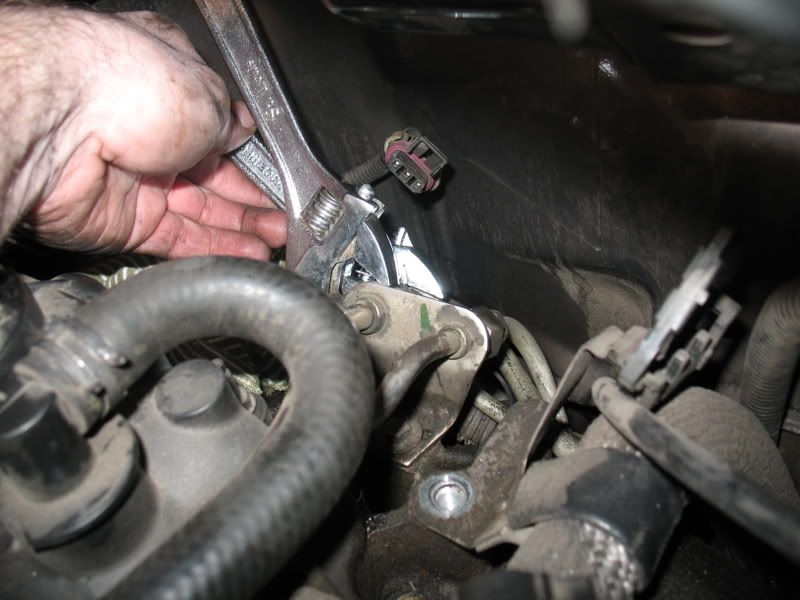 STEP 25: In small increments, loosen, remove, and label the eight bolts that hold the intake to the heads. When re-installing, I recommend using the same bolt in the same location and no to mix-and-match bolts. The manifold will most likely be stuck. At the front of the engine, I gently used a prybar between the crankcase cover and the thermostat housing. Of course, dont wedge a prybar in between the manifold and the block or youll gouge or mar the mating surfaces. Heres how it looked. You can see the puddles of coolant in the valley, especially on the back passengers side. 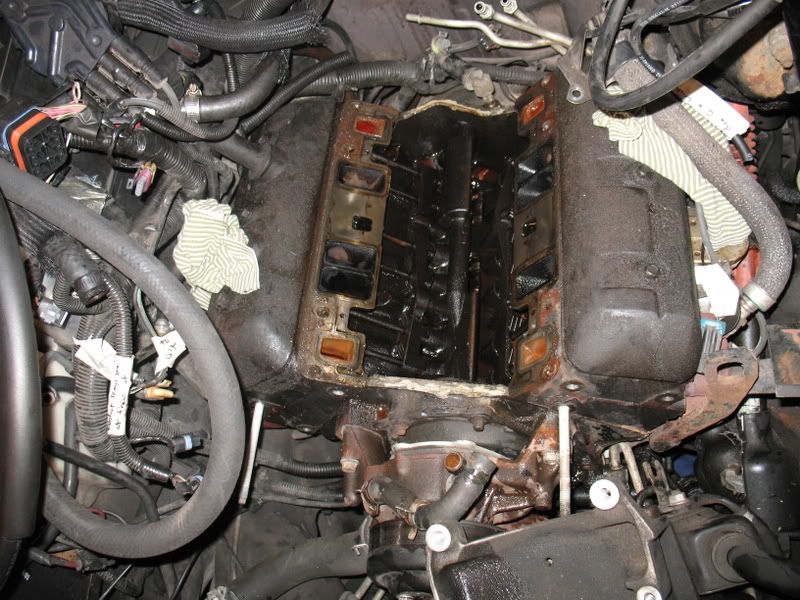 Look at that sludgey sludge ! 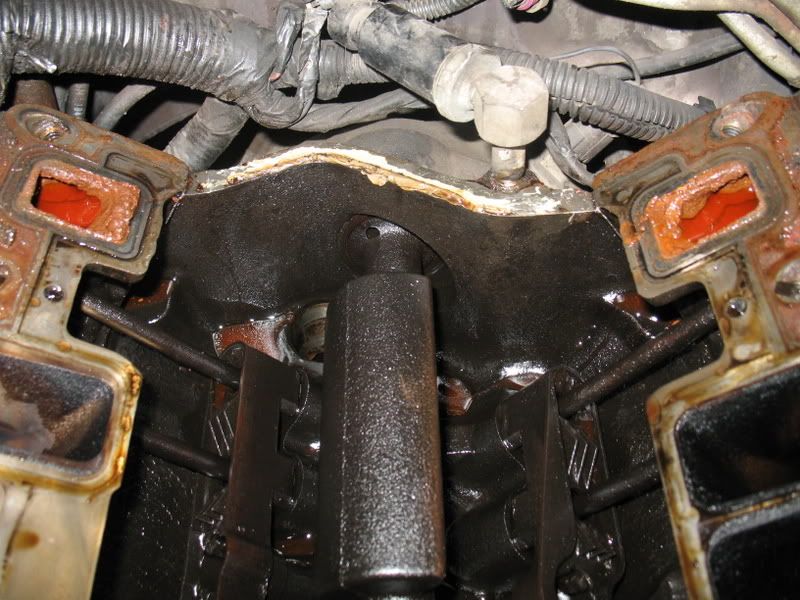 Random picture of the dog ...  Heres the intake after pulling it ... 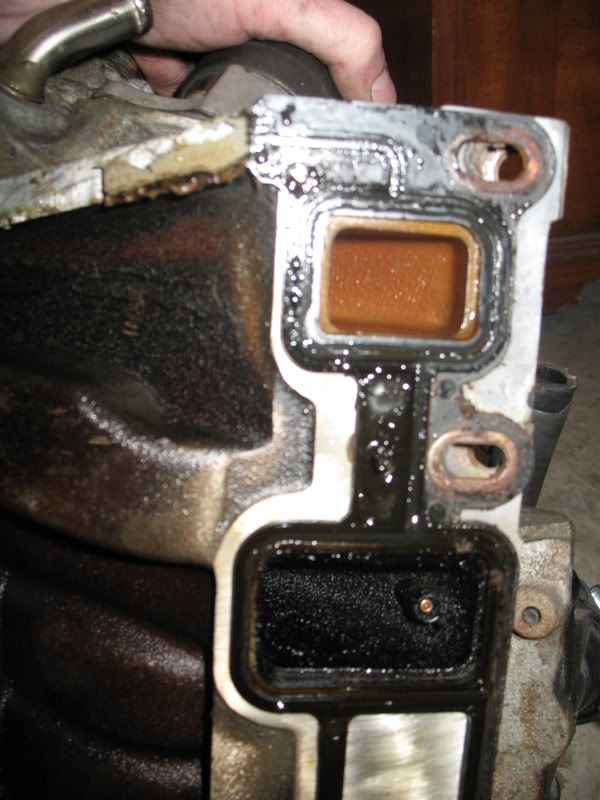 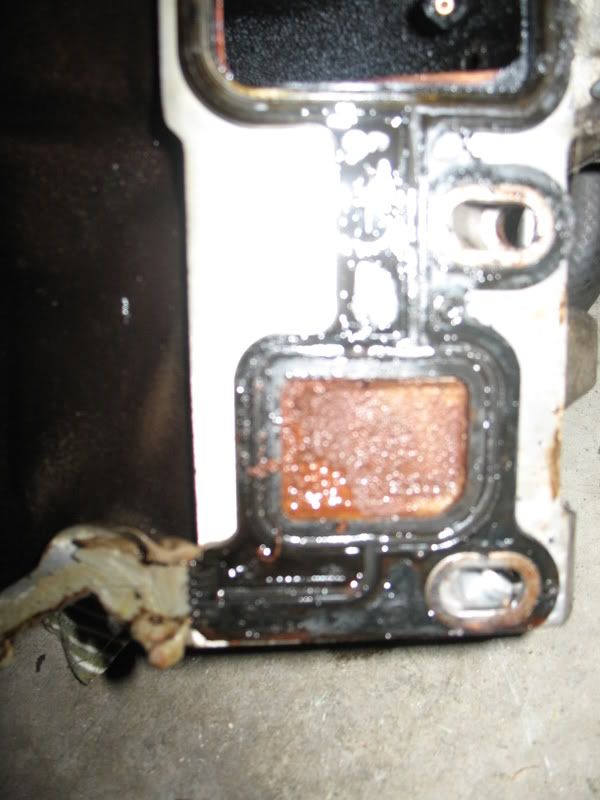 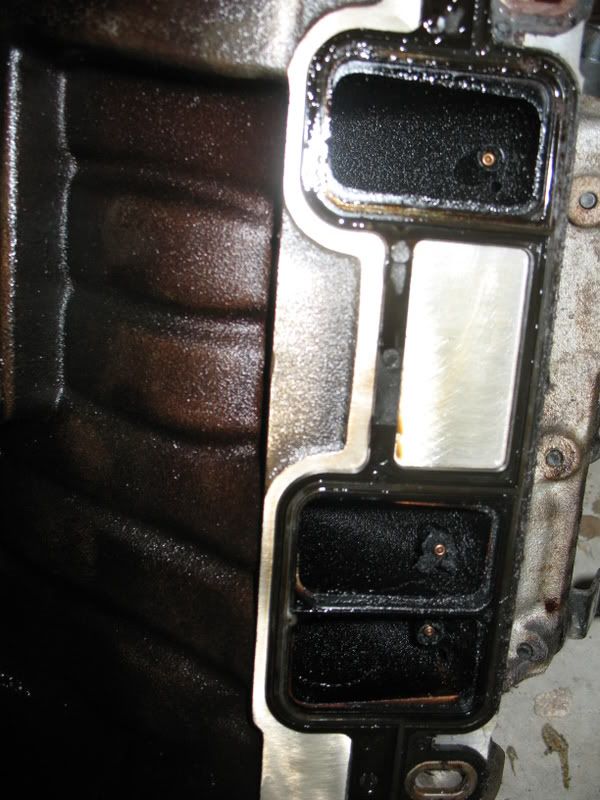 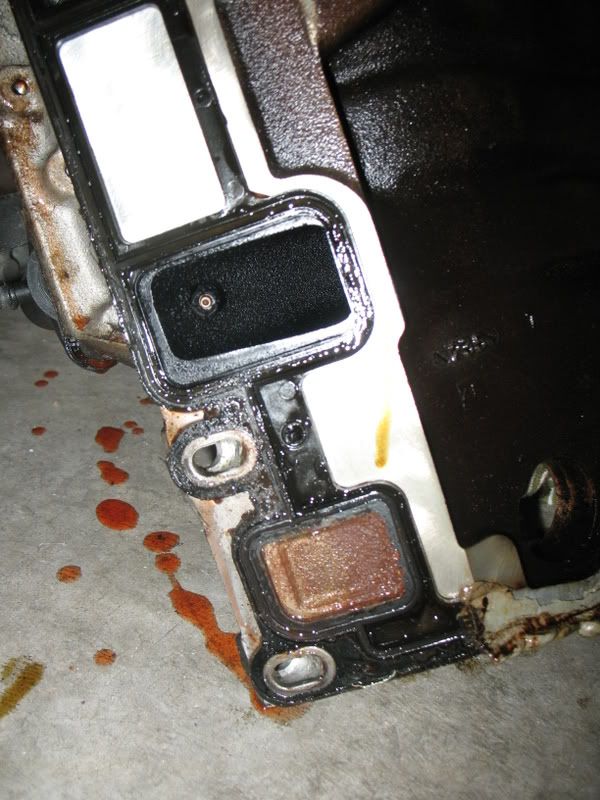 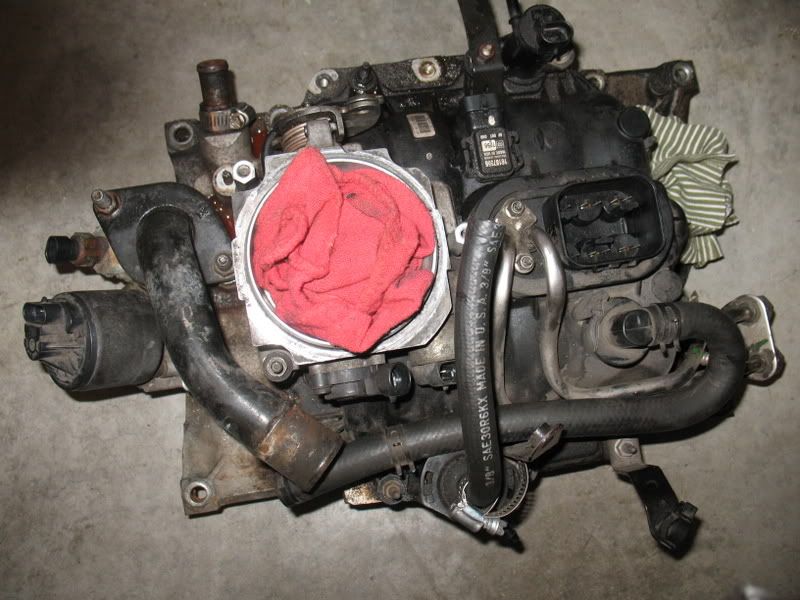 STEP 26: Clean the intake mating surface. Use a gasket scraper to scrape all traces of gasket material. Then use acetone to clean and remove any oil. I got mine nice and clean. There was some light pitting though ... 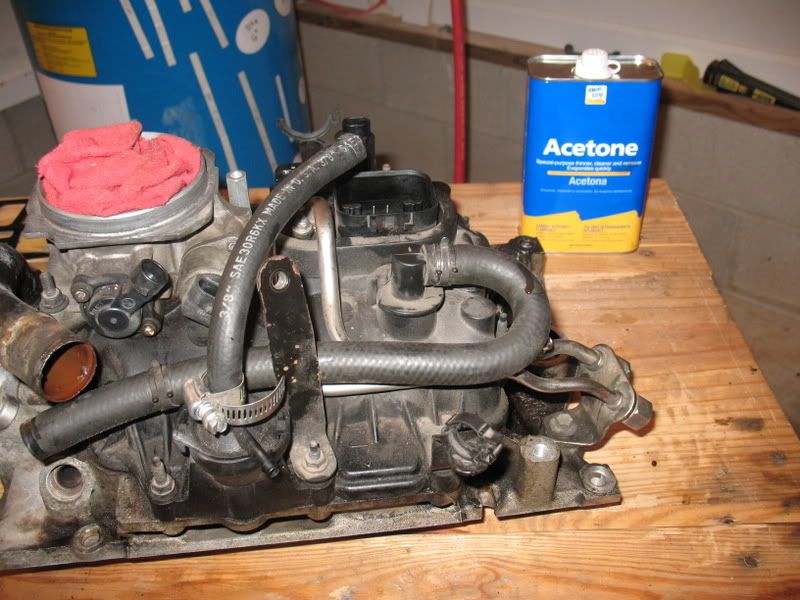 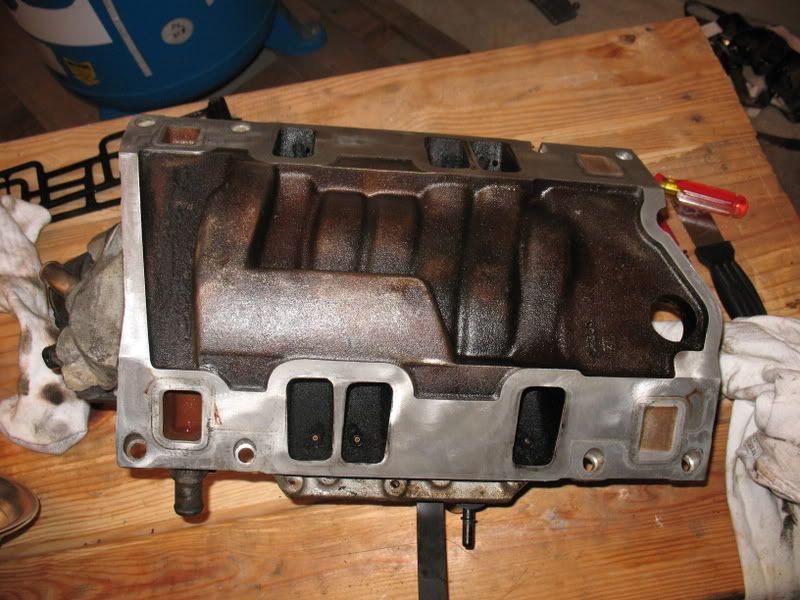 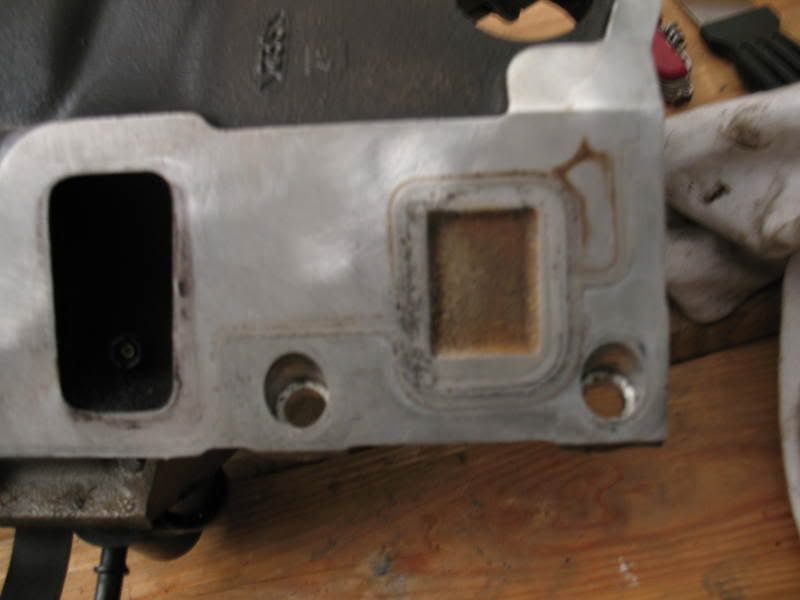 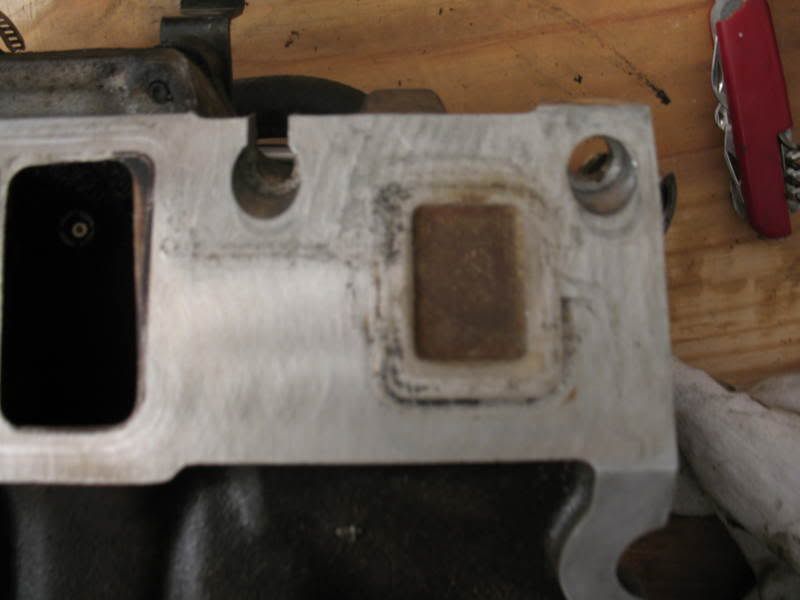 STEP 27: At this point, I decided to replace the valve cover gaskets since I already had the gaskets and I had things taken apart this far. To remove the valve covers, simply remove the three bolts that hold it down. NOW, HERE IS THE MOMENT YOUVE BEEN WAITING FOR ... A SIGHT NEVER-BEFORE SEEN BY A BLAZER / JIMMY OWNER ... A SIGHT SOOOO INCREDIBLY RARE AND SPECTACULAR ... CLEAN VALVE COVERS !!!!!!!!!!!! 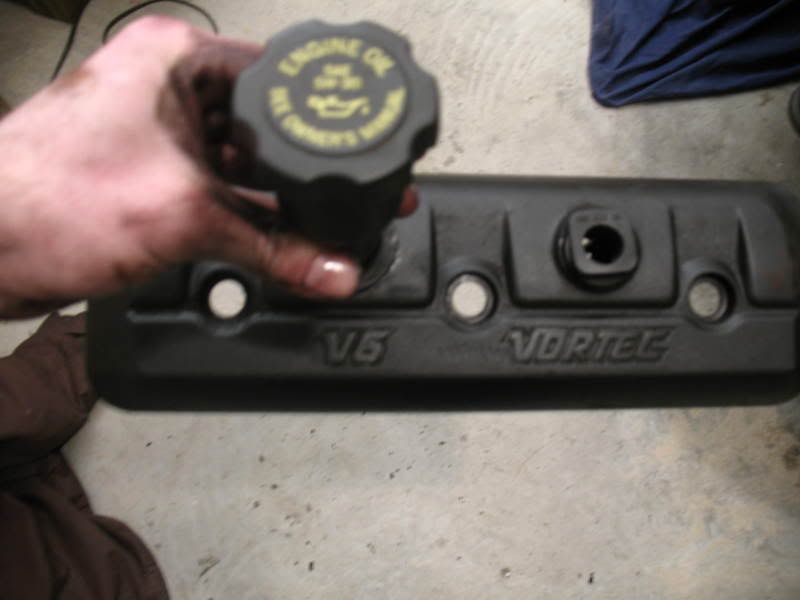 ... you didnt know it said Vortec did you ?? ... it was too #$@#% dirty !!... haha !! ... Heres the new top plugs and gasket ... 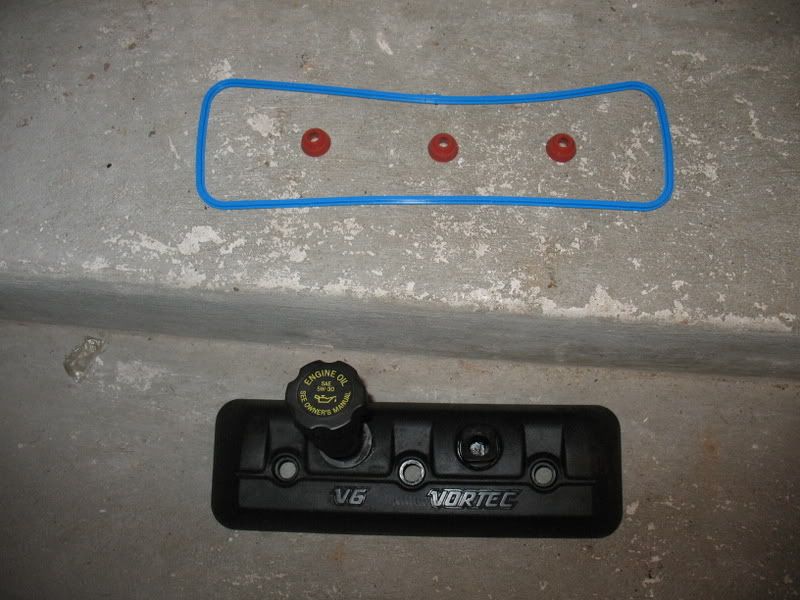 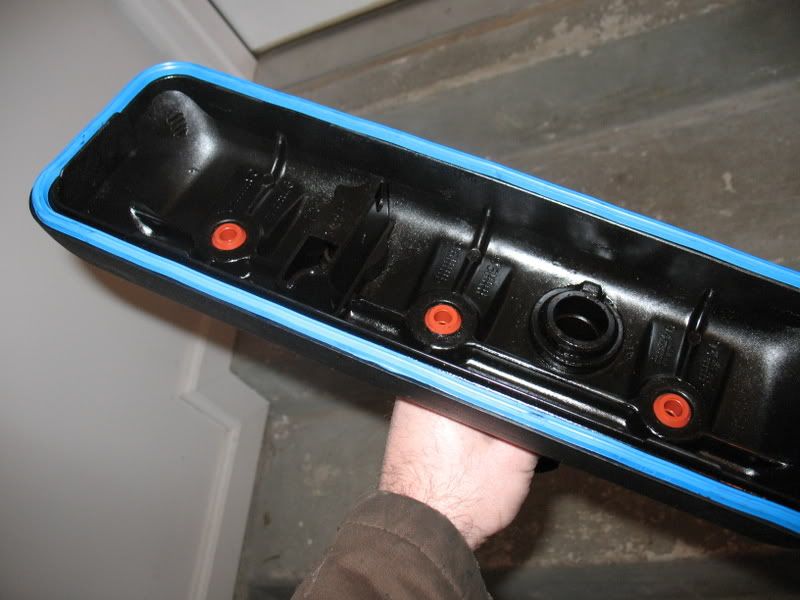 Heres what was underneath ... see that back left side ... 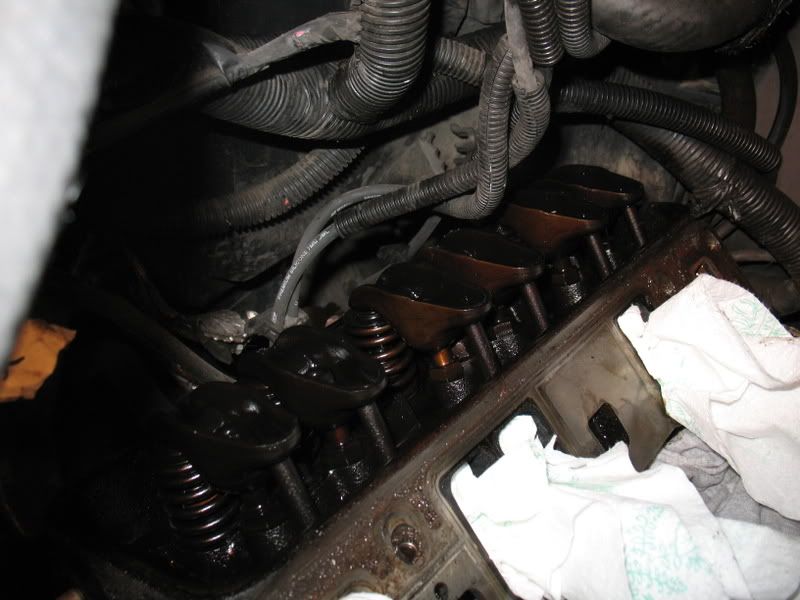 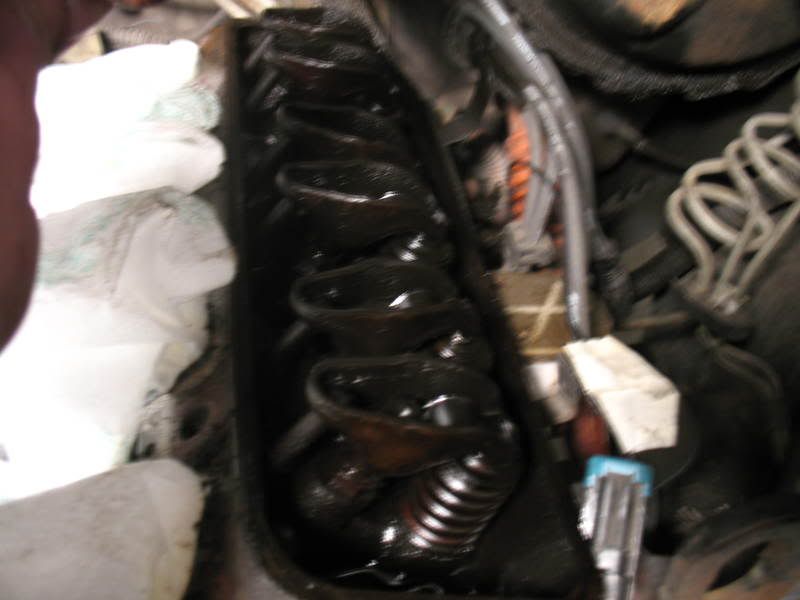 Dont forget to cover the lifter valley and intake ports with rags and paper towels to protect them from debris and accidentally dropping a socket or something into the engine. 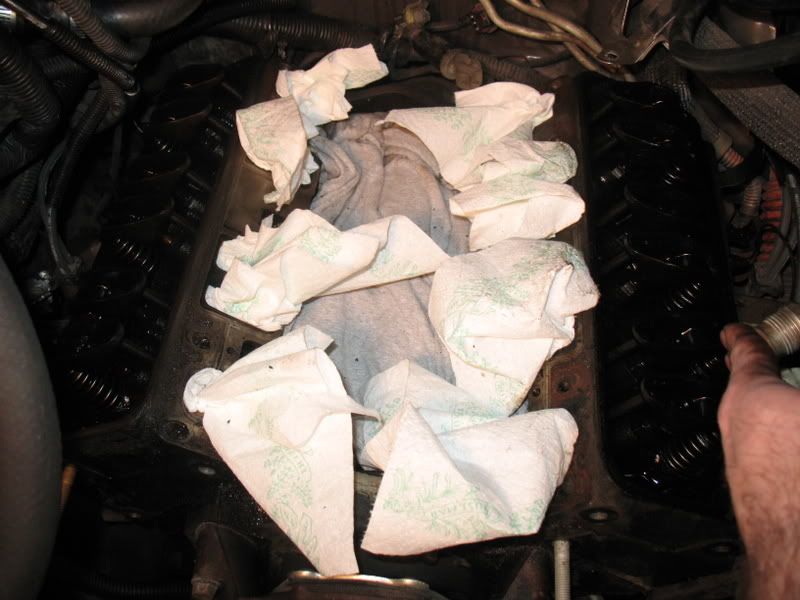 STEP 28: Clean the block and head mating surfaces. Use a gasket scraper to scrape all traces of gasket material. Then use acetone to clean and remove any oil. Use those rags to keep debris from getting into the engine. STEP 29: The lower intake manifold gaskets are designed to seal at very low torque on the bolts. Proper torque readings are essential. My manifold bolts and bolt holes had alot of dirt, grime, and sludge on them --- enough to skew torque readings. Though its tedious (and a little dangerous you dont want to strip a thread or get threads crossed inside the engine head!) I highly recommend tapping out the bolt holes. Likewise, run a die over each bolt to clean it. You can also use the Acetone to clean the grime off the bolts. Do this carefully. I recommend working the tap and die back and forth slowly to help loosen the dirt and allow it to fall out. Let the the cutters do the work. Dont force anything. Make sure you get a good start on the first few threads. 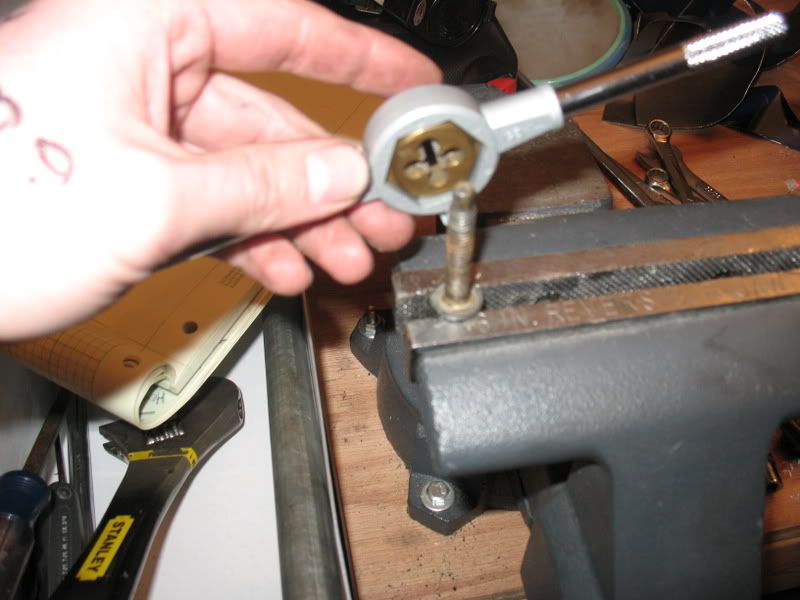 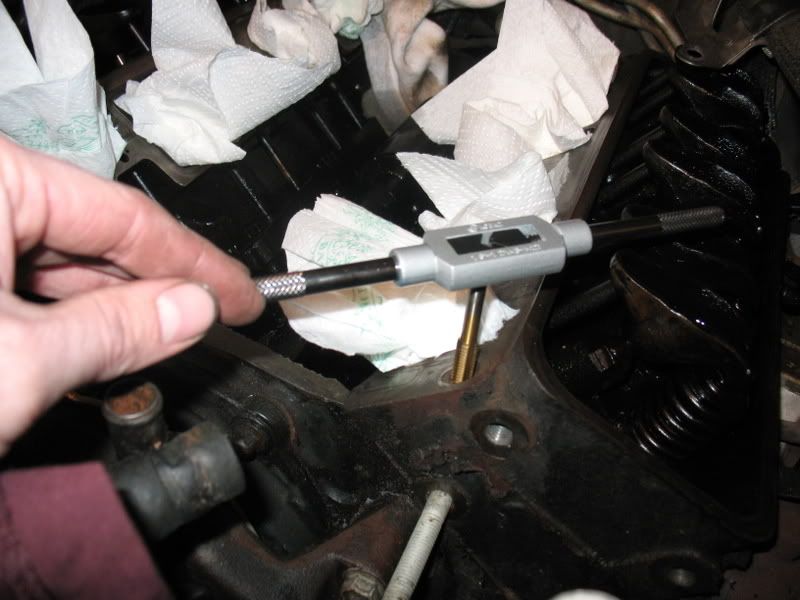 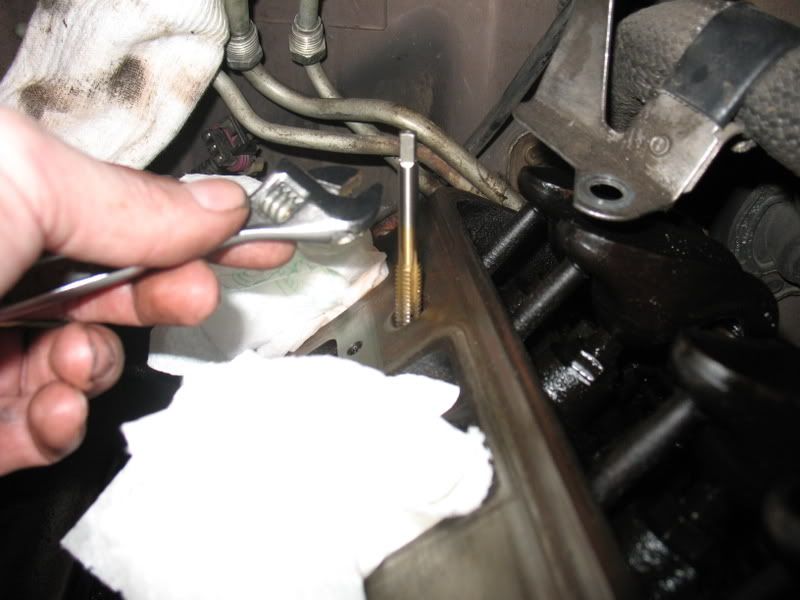 STEP 30: Open your oil pan drain plug and allow the oil to drain. Now pour several quarts of cheap oil over the open heads and lifter valley. Try to wash or flush the engine of all the coolant contamination. I think I used four quarts, maybe more ... 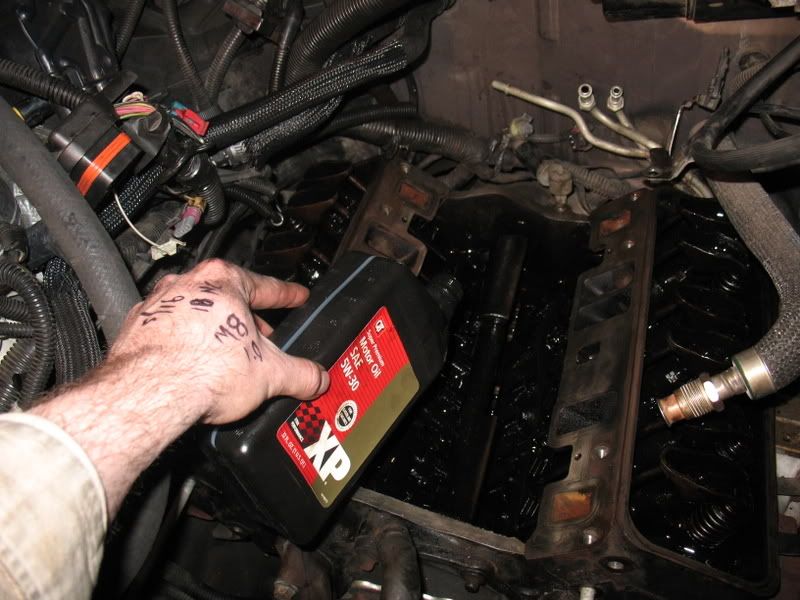 ] ]STEP 31: REASSEMBLY: **I put my valve covers with their new gaskets back on before the intake manifold. Simply re-install the bolts. *** It may help to do a dry assembly of the intake gaskets and intake so that you can see how everything goes together and how the intake is rather heavy. a) run a bead of RTV across the front and rear of the block. Extend the bead up onto the heads by about a half inch. 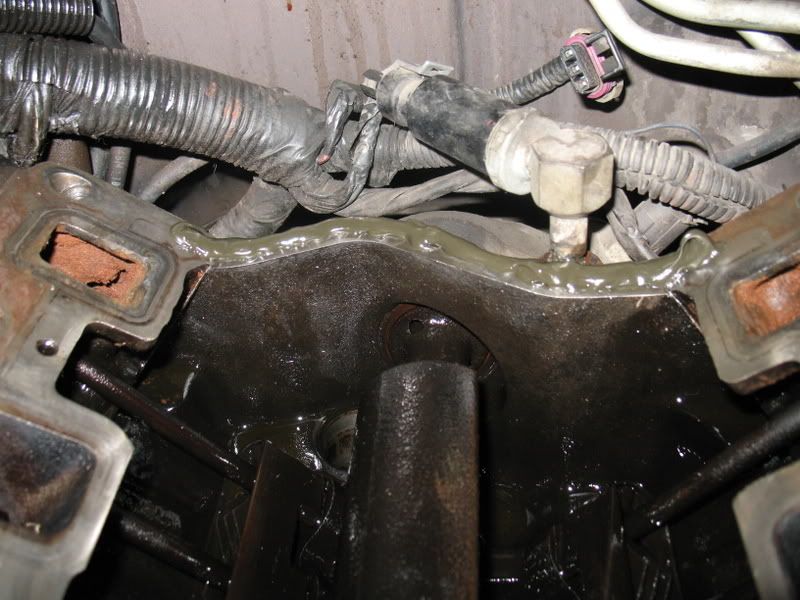 Oops ... I accidentally smudged the front one with my arm ... had to put some more on ... 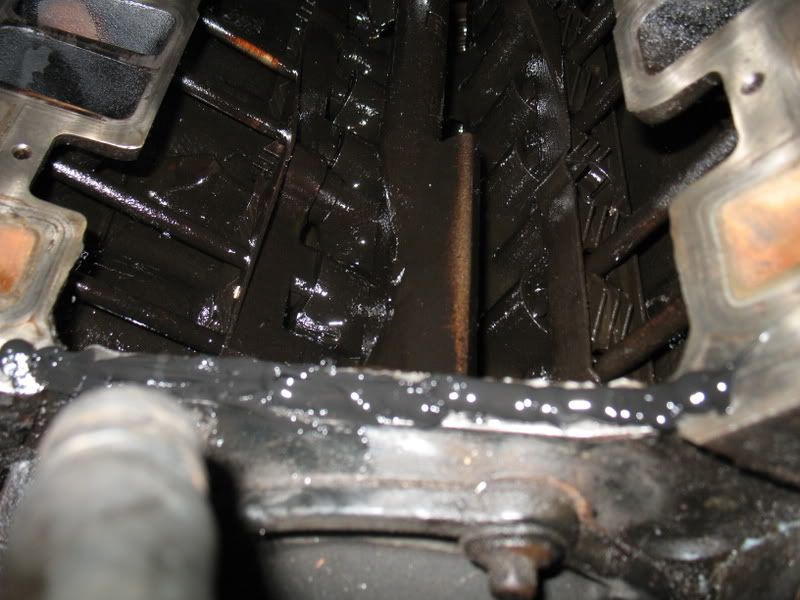 b) Next, drop the intake on top. If the bolt holes dont line up, dont slide it or youll slide the RTV off the block. Rather, pick it straight up and try again. c) Apply a dab of thread-locker to each of the eight bolts and install finger-tight d) Torque the eight bolts in the correct sequence, three separate times. The first time to 89 inch lbs. The second time to 106 inch lbs. The third time to 132 inch lbs. The torque sequence is 5 6 2 4 3 1 7 8 The rest is the reverse of removal. I recommend letting the RTV cure for 24 hours. After that, re-assemble, refill fluids, and check for leaks. ENJOY ! |
|

|

|
|
01-06-2008, 04:17 AM
|
#2 | |
|
AF Regular
 Join Date: Nov 2007
Location: Alpena, Michigan
Posts: 416
Thanks: 0
Thanked 0 Times in 0 Posts
|
Re: How to change your lower intake manifold gaskets and valve cover gaskets
EX-A-Lant post. what more can I say
|
|
|
|
|
|
01-06-2008, 09:50 AM
|
#3 | |
|
GM S-Series Mod
 
Join Date: Aug 2005
Location: Westminster, Maryland
Posts: 2,650
Thanks: 0
Thanked 1 Time in 1 Post
|
Re: How to change your lower intake manifold gaskets and valve cover gaskets
excelent
 . i'll update the table of contents. Just out of curiousity, how many miles were on your truck when you did this? . i'll update the table of contents. Just out of curiousity, how many miles were on your truck when you did this?
__________________
2000 Chevy Blazer ZR2 Performance Mods: Numerous Suspension Mods: Some, but not enough Exterior Mods: Just Right 1987 Buick Turbo T Dark Red Low 11 sec sleeper  .030 4.1 block, PT6262E, & other odds and ends.... My Cardomain |
|
|
|
|
|
01-06-2008, 10:11 AM
|
#4 | ||
|
AF Enthusiast
Thread starter
Join Date: Mar 2005
Location: bowling green, Kentucky
Posts: 600
Thanks: 2
Thanked 1 Time in 1 Post
|
Re: How to change your lower intake manifold gaskets and valve cover gaskets
Quote:
approx 148, 000 |
||
|
|
|
|
01-06-2008, 10:35 AM
|
#5 | ||
|
GM S-Series Mod
Join Date: Aug 2005
Location: Westminster, Maryland
Posts: 2,650
Thanks: 0
Thanked 1 Time in 1 Post
|
Re: How to change your lower intake manifold gaskets and valve cover gaskets
Quote:

__________________
2000 Chevy Blazer ZR2 Performance Mods: Numerous Suspension Mods: Some, but not enough Exterior Mods: Just Right 1987 Buick Turbo T Dark Red Low 11 sec sleeper .030 4.1 block, PT6262E, & other odds and ends.... My Cardomain |
||
|
|
|
|
01-06-2008, 12:40 PM
|
#6 | |
|
Newbie mod

Join Date: Dec 2004
Location: Toronto
Posts: 1,477
Thanks: 0
Thanked 2 Times in 2 Posts
|
Great write up, excellent pictures.
|
|
|
|
|
|
01-08-2008, 07:56 PM
|
#7 | |
|
AF Newbie
Join Date: Mar 2006
Location: Gander
Posts: 97
Thanks: 0
Thanked 0 Times in 0 Posts
|
Re: How to change your lower intake manifold gaskets and valve cover gaskets
I'm changing mine tomorrow and i couldn't find the torque spec and sequence any were, but thanks to you, i can put it back together so my wife can over heat it again. great post.
|
|
|
|
|
|
01-08-2008, 08:27 PM
|
#8 | ||
|
AF Enthusiast
Thread starter
Join Date: Mar 2005
Location: bowling green, Kentucky
Posts: 600
Thanks: 2
Thanked 1 Time in 1 Post
|
Re: How to change your lower intake manifold gaskets and valve cover gaskets
Quote:
Good luck tomorrow. Take your time. The torque specs I used I got from another post (89, 106, 132). They are the same in my Haynes repair manual except for the first (instead of 89 inch lbs, Haynes says 24 inch lbs). 24 inch lbs of course is 2 foot lbs which most torque wrenches don't even have a setting that low. Anyhow, I went with the 89 first. Also, just a FYI, I had to flush the heck out of my cooling system after doing the intake because I loosened up some DexCool junk. After the flush, things seem fine. Good luck. |
||
|
|
|
|
04-28-2008, 09:32 PM
|
#9 | |
|
GM S-Series Mod
Join Date: Aug 2005
Location: Westminster, Maryland
Posts: 2,650
Thanks: 0
Thanked 1 Time in 1 Post
|
Re: How to change your lower intake manifold gaskets and valve cover gaskets
I'll add my experience here. Just changed my intake gaskets a couple days ago and took almost 5hrs to complete with a friend giving me a hand. Before this the dealer i bought the truck from mixed in green coolant and it turned the dexcool into a sludge. I flushed it twice and replaced with green coolant. I had no coolant in the lifter valley but the edge of the gaskets were eatin away and it was torn in one spot. Did have sludge built up in the rear cooling ports in the heads. I used felpro's as replacements and they are twice the thickness of the stock ones. The kit also includes gaskets for the upper intake, distributor, and all other o-rings. I was able to pull the power steering pump foward enough to get the manifold out without removing the fan. I also removed the fuel lines from the top of the manifold instead of the rear. If this is done, replace the o-rings on the fuel lines and put the little bracket back on the correct way. Fuel will leak out when you prime the system if you don't do this.
__________________
2000 Chevy Blazer ZR2 Performance Mods: Numerous Suspension Mods: Some, but not enough Exterior Mods: Just Right 1987 Buick Turbo T Dark Red Low 11 sec sleeper .030 4.1 block, PT6262E, & other odds and ends.... My Cardomain |
|
|
|
|
|
05-12-2008, 09:51 PM
|
#10 | |
|
AF Newbie
Join Date: Nov 2003
Posts: 67
Thanks: 6
Thanked 0 Times in 0 Posts
|
Re: How to change your lower intake manifold gaskets and valve cover gaskets
This is an excellent post created by DRDD. I just finished doing mine today and have a couple of hints that might be helpful to anyone else who follows this thread. (Mine's a '96, so other years might be a little different, but not by much)
1. I didn't remove the fan, as I saw no reason to do so. It doesn't interfere with removing or replacing the manifold. 2. You don't have to remove the alternator - just unbolt the large bracket from the engine (after you remove the tensioner) and pull it forward a bit, just like the PS bracket. 3. If you find it a contortionists nightmare to get to the distributor hold down nut, you can make it alot easier by removing the plastic upper manifold first. These instructions remove everything as one big chunk, which is fine, but knowing that the plastic housing can be easily removed for better access to the distributor is nice to know. Also, I removed the fuel input line at the injector block at the top of the housing and carefully positioned it out of the way to get the manifold out. I just couldn't get enough leverage back at the firewall. My knees still hurt from being stretched out over the length of the engine.... 4. Once the upper manifold bolts are removed from the lower manifold, all that holds it together is an "O" ring around the injector connector housing. This is good info. to know. Hope this helps the next courageous shade-tree mechanic. |
|
|
|
|
|
05-13-2008, 08:29 PM
|
#11 | |
|
AF Regular

Join Date: Nov 2003
Location: Auburn, Massachusetts
Posts: 214
Thanks: 0
Thanked 0 Times in 0 Posts
|
Re: How to change your lower intake manifold gaskets and valve cover gaskets
Rather than stuff a rag in the throttle body, I like to use a 3" dia. rubber pipe cover. 1 1/2" caps an be used for radiator outlets. These can be got at Home depot or the like in the plumbing section for under $5 and are reusable. It is secured by a clamp. Secure and clean.
|
|
|
|
|
|
06-25-2008, 07:28 AM
|
#12 | |
|
AF Newbie
 Join Date: Apr 2006
Location: Diamond, Ohio
Posts: 18
Thanks: 0
Thanked 0 Times in 0 Posts
|
Help on Step 18A
Thanks for posting the great How-To. Everything was going smooth up until step 18A. Seeing the EGR hose nut was corroded I soaked it with Liquid Wrench and gave it a crank. It came loose easily but twisted and cracked the hollow tube that connects to the hose. I will have to replace it and need to know the name of the hose so that I can get it from the parts store. You refer to it as an EGR hose but I can't seem to find it at the online parts stores by that name.
Thanks Jimmy |
|
|
|
|
|
08-04-2008, 02:10 PM
|
#13 | |
|
AF Newbie
Join Date: Aug 2008
Location: Miami, Florida
Posts: 1
Thanks: 0
Thanked 0 Times in 0 Posts
|
Re: How to change your lower intake manifold gaskets and valve cover gaskets
Awesome post! I'm a new member here because of it. Thank you!
|
|
|
|
|
|
09-30-2008, 03:50 AM
|
#14 | |
|
Guest
Posts: n/a
|
Re: How to change your lower intake manifold gaskets and valve cover gaskets
Hope the contributor finds my Question about your gaskets
 -------------------------------------------------------------------------------- Does the lifter noise you get every now and then mean it's the gaskets leaking? Can it also be the radiator not cooling the oil good enough? When I first bought this truck I never had it make the lifter noise.Not knowing for sure what oil to use I just replaced it with Castrol GTX 10/30 because there was a sticker under the hood. On hot days not every time,but when I started after driving around I would get the noise.I never got it from COLD/First starts just starts after being driven awhile. I noticed my fan running a little more than usual and open the radiator and WOW It was almost black looking.I flushed the whole system twice.To the point there was all clear water.Also noticed the gasket sealer around the intake is white looking as if this had been done. I ordered a new radiator and after trying to find how to remove the 4 cooling lines I saw your post. NOW I'M WORRIED. Any suggestions would be nice. Oh.170,000 4.3 ltr. |
|
|
|
|
06-25-2009, 12:27 AM
|
#15 | ||
|
AF Newbie
Join Date: Jun 2009
Location: Kentwood, Michigan
Posts: 7
Thanks: 0
Thanked 0 Times in 0 Posts
|
Re: How to change your lower intake manifold gaskets and valve cover gaskets
Quote:
Thanks again!! |
||
|
|
|
|
|
POST REPLY TO THIS THREAD |
 |
|
|


