|
|
|

|
|
| Search | Car Forums | Gallery | Articles | Helper | AF 350Z | IgorSushko.com | Corporate |
|
| Latest | 0 Rplys |
|
|||||||
| Slot Car Modeling Discuss and show Slot Cars that you have modified, or that you have collected. |
 |
 Show Printable Version | Show Printable Version |  Email this Page | Email this Page |  Subscribe to this Thread
|
|
|
Thread Tools |
 12-25-2006, 09:42 AM
|
#1 | |
|
AF Newbie
Join Date: Nov 2003
Posts: 75
Thanks: 0
Thanked 1 Time in 1 Post
|
Dodge Viper GTS (mold making, Gfk lamination)
Hello Guys
Some spare time on X-mas, discovered this part of the AF forum via Fola Thought I'd share some of my work. This is actually an old project, some of this stuff I've posted before on my site , but it kinda got buried away in all the topics, so I thought why not post it here. I'm a sportscar fan and a 1/24 slotracer. I started this project because ever since I saw the first Vipers run at Le Mans I really loved that car. There are some nice Viper kits out there...but unfortunately they are all 1/25. Now for the modellist that's not a problem..its just a bit smaller. But I wanted to race my Viper, and race it competitively! As the competition was running 1/24 bodies which gave them the max allowed trackwidth (83mm) my Viper needed to be at least just as big. At least there was a decal sheet available for this car by Carpena, so in the restricted time available ( just 5 weeks to the next race) I could concentrate on building "just" the body.  For starters I needed to find a 1/24 Viper that could serve as a baseline. I looked at all the available models (Maisto, Burago ect. etc., but in the end setlled for the old Carrera slotcar Viper. Although there were many flaws in the body, it had the right basic proportions and as it was a plastic body, a material I was comfortable with and used to work on. First I set out to correct the major flaws, the side windows were way too big as were the headlights, of course the front splitter had to be reworked completely. The reccesed door area behind the front fenders on the carrera body was too shallow and the roof was too high. So I started with removing whatever offended me. Grilles in front of the windshield were milled out, all the raised ridges round the windows were sanded flat, the resessed area behind the front fenders was deepened and the front splitter was sanded flush with the bodywork. 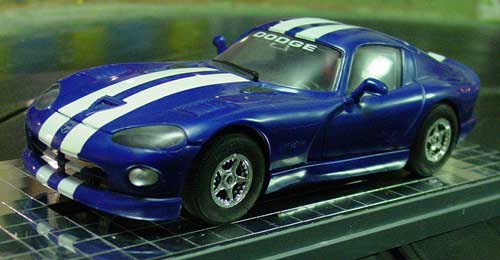 Next step was to build up the major shapes for which I mostly used Milliput and TAMIYA modelling epoxyputty. The fenders were widened to a true scale 81,5mm (Carrera body was 75mm) at the front and 82,5 at the rear. A roof scoop was added, side windows and rockerpanels were reshaped. With a lot off sanding, filler and endless checks against the ref pics slowly the general shape started to take form. Whenever I lost track of what still needed to be done I used a coat of Tamiya grey primer to check how the body looked in a "uni" color, I also used the primer as a "spray" filler to even out the hard to reach parts like the arera around the hood/windshield. Unfortunately it wasn't until 2 weeks before I started to make the first pictures , by then most of the modifications had been done. 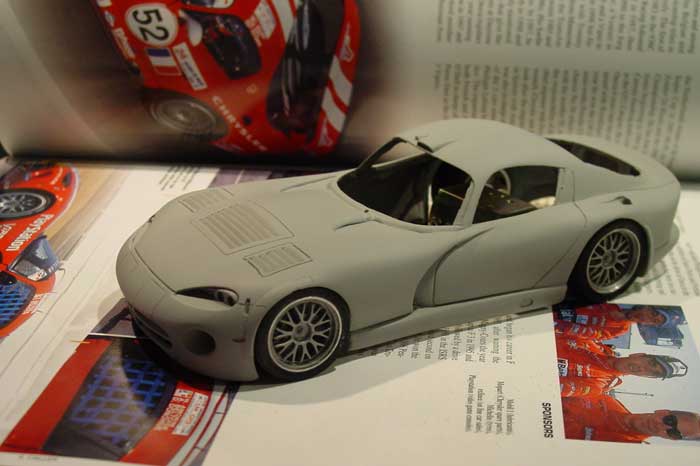 The Naca duct on the hood has been removed, new Naca ducts were milled on top of the rear fenders. I also milled the slots for the exhaust pipes and the hood fastners, the intention being to detail these later with Scaleproduction PE fastners. Headlights were reshaped and detailed with parts taken from the Revell kit. For my first attempt to make new tunnels for the "lower fender" lights I used some plastic tube, but I wasn't satisfied with how these "blended" into the bodywork. So removed them and stuffed a big blob of miliput in the holes and started drilling and milling until I got the right "look". Most difficult job was creating the louvres on the hood. These were first scribed along a ruler with a #11 scalpel and then milled with a Proxon and a very steady hand....yeah right...easier said than done. After all that sanding and priming it was time to rescribe all the panel lines and the outlines for the 2 centre lights. I cut some templates so I would get a good simitry, only to find that as I swapped them to the other side.....the body wasn't as simetrical as I thought  back to the drawingboard. back to the drawingboard.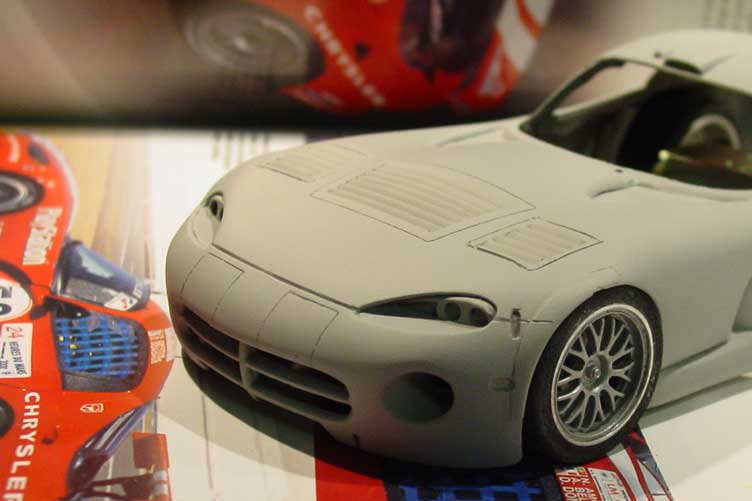 Two weeks later..the race was getting awefully close now and my team mates were getting a bit nervous (did I metion the Viper was going to run in a team endurance) as I still had to cast the mold, laminate the body, add the lights etc etc. So I started adding the last details to the master. By now all the openings and the windows were closed with sheet styrene to prepare the body for the silicon mold. I'd managed to improve the simitry, which with all those curves and swooping lines on the body was hard to get right....and in the end.. I didn't. 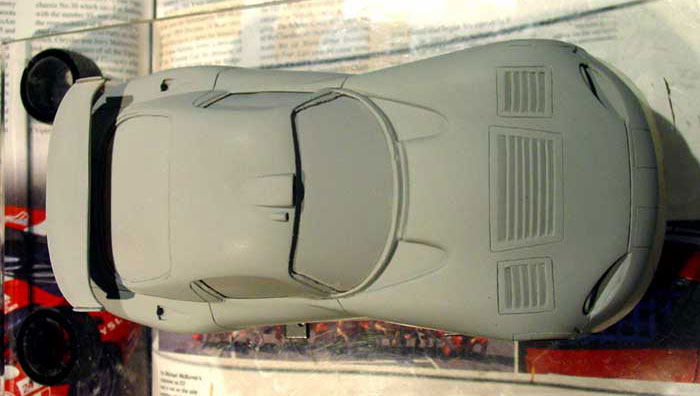 Work now concentrated on the back of the car. With the help of some good reference photo's (mainly from the Le Mans 24hrs yearbook's) the differential coolers underneath the spoiler and the exit duct/ grille in the back panel were added. I saved these small parts for last so their detail would not be lost underneath multiple layers of primer . 2 rectangular holes were cut in the body between the slots for the rear spoiler supports.The small radiators were cut to size from Porsche 962 oil coolers found in my "left over parts" box. 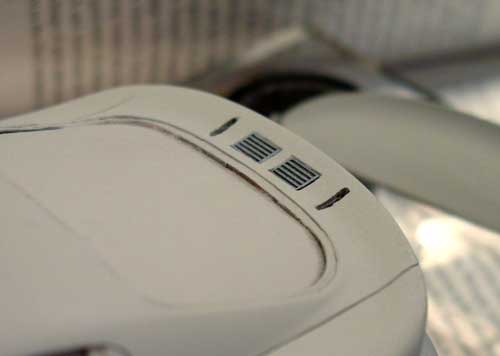 The differential cooler exhaust grille was scratchbuild by layering thin strips of sheet styrene on top of each other (like rooftiles). The resin rear spoiler came from the Scaleproduction Viper kit and although actually 1/25 still looks in good proportion with the rest of the car. The rear lights had been reshaped so tI could fit the clear lenses from the Revell kit, again these are 1/25, but for these small details the difference hardly shows. The diffuser came from an unused (I wonder why) Revel CLK GTR. 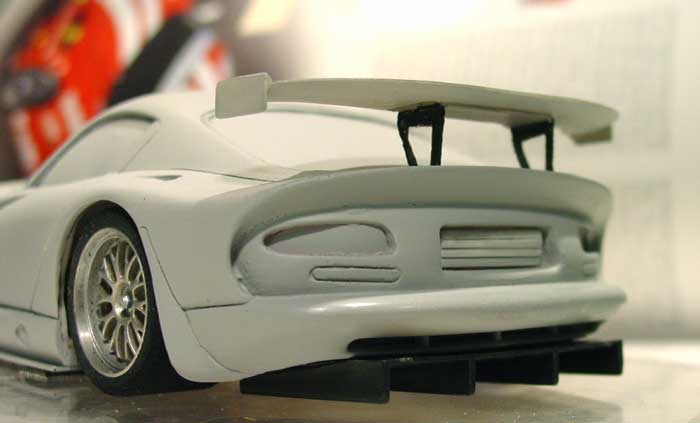 Rear Spoiler The Viper rear wing rests on these very thin twin supports, on the Studio27 and Scaleproduction kit these are nice but fragile PE parts. Not really suited for life as an "endurance" slotcar. (where you must make a pitstop to remount a lost rearwing). So I needed something strong but with an "open" look. In the end I used 0.5 mm clear lexan to replicate the supports. First I used a warm plier to bend a rough U shape bracket. Then I milled a rectangular recess for the bracket in the Wing. Mounted with with strong doublle sided adhesive tape (carpet tape) the bracket is flush with the Wing underside. I then trimmed the bracket to the correct shape and just painted the suports black on the clear lexan. Here's a detail shot of how the U shaped bracket is fixed to the rearwing. The whole spoiler support/wing combination is strong, flexible but still detailed to scale. 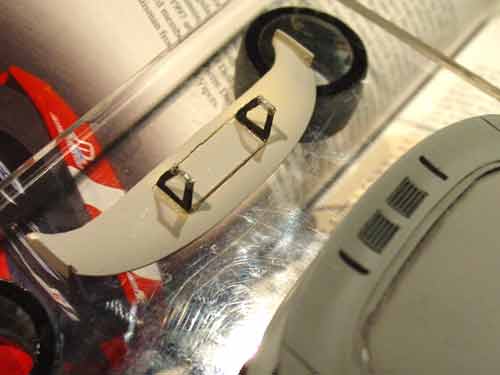 With all the details modelled to their "correct" shape, the Viper was shot once more with a light coat of primer and test fitted with the front splitter and sideskirts over the chassis to verify the correct wheel and ground clearances. Finally the Snake was ready to go for a swim! 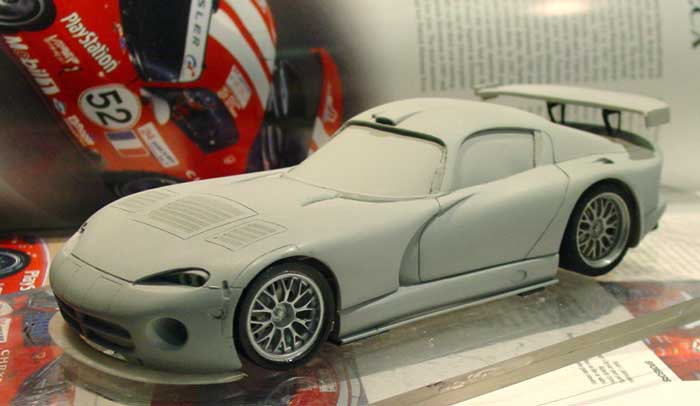 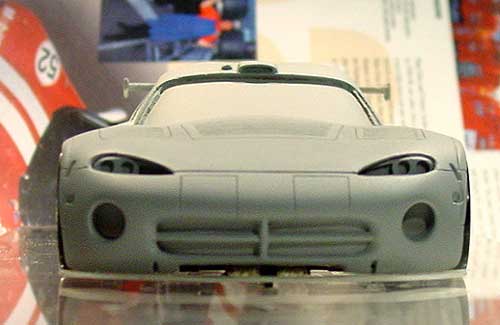 Making the Silicone Mold Casting a silicone mold is actually a quite easy,......be it a little bit messy job. For the average 1/24 GT you'll need ± 600gr of silicone, 30gr hardner, some sheetplastic, tamiya putty or miliput and some mdf to make a box to cast the silicon in. Oh... and some Maskol, very handy stuff! As the master will be completely submerged in the silicon you need to close all openings in the body. I used sheetplastic and milliput to close off the wheel arches. The Maskol was used to completely seal the body and later also to seal the mdf box. Miliput rolled into a string is used to temporarely "glue" the master on the "bottom" of the box. This is absolutely nessecary because otherwise the master will start to "float" in the silicone. 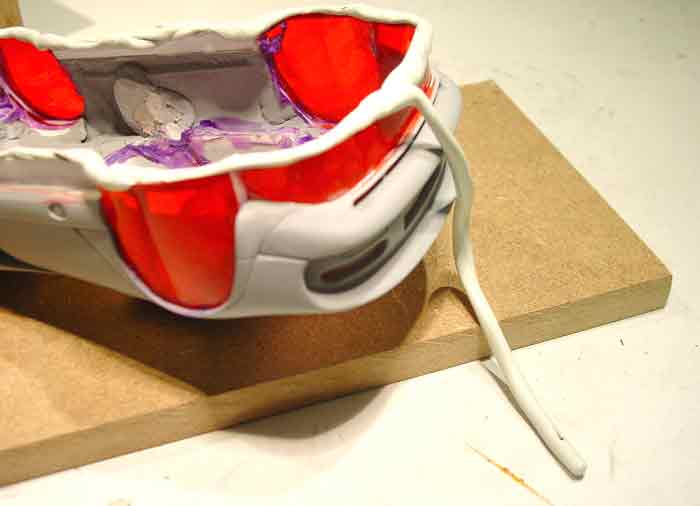 As you can see I used the milliput to raise the master 5-10 mm above the floor. Its a matter of thinking upside down when you make a mold. Mounted this way it will give you a better definition of where the underside of the body stops. 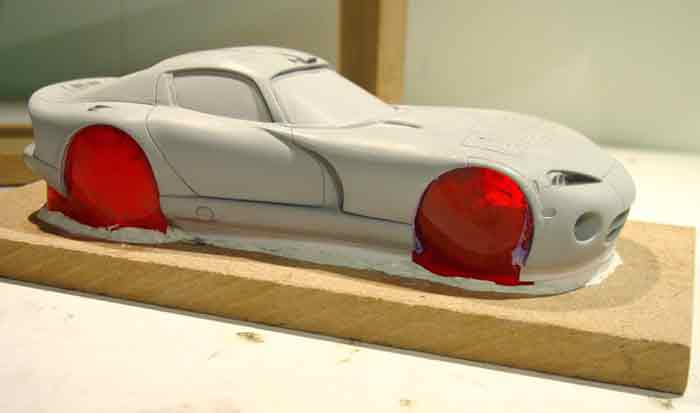 Here the master sits inside the assembled "Box", I used 10mm thick mdf for my box and screwed all the panels together so it would be easy to (dis)assemble time after time. Depending on the dimensions of your master, the box should be ± 2cm oversized. If the box is too "tight" the walls of the silicon mold will become too thin too keep their proper shape. If the box is too big you need much more silicon...which is a waste of money! In the pic you can see the maskol used to seal the box panels. Needless to say that it is most important that the box is totally square. As you "flip" the mould "upside down" before you start laminating the new body. If the Box is not completely square, you might distort the silicone mold, and all copies will have the same distorsion. 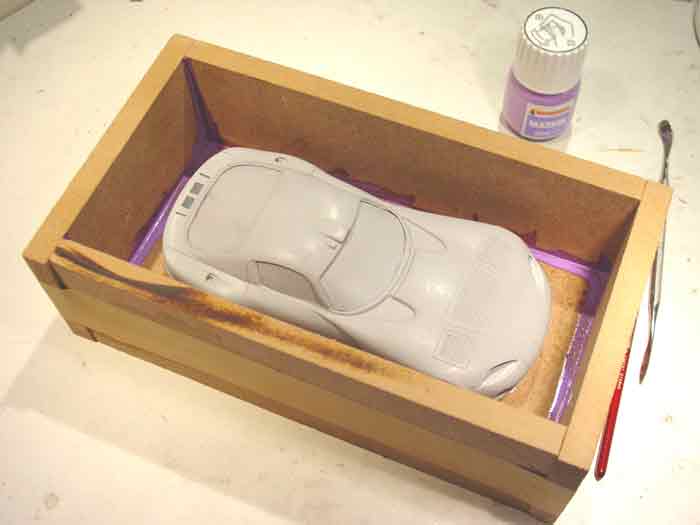 Next step is to mix the silicone. Here you need an accurate scale, a lot of disposable plastic cups, spoons and some latex free gloves. Why latex free?...well because some silicones can react to latex gloves and will refuse to harden..... better be safe than sorry! As the silicone I used needs only 5% harder, mixing it evenly it is crucial, so I usually prepare several small portions off 150gr instead of mixing the whole lot in one go. Stirring the silicone without creating to much air bubbles takes a bit of practice, obviously a vacuumchamber would help here, but I (still) haven't got one so I use another trick. I usually place the cups with silicone on a "vibrating platform". Sounds complicated but actually its nothing more than a badly balanced electromotor glued into a plastic box. Select a rpm where the motor vibrates most and put the cups onto the box. You'll see how most of the air bubbles are "vibrated to the surface  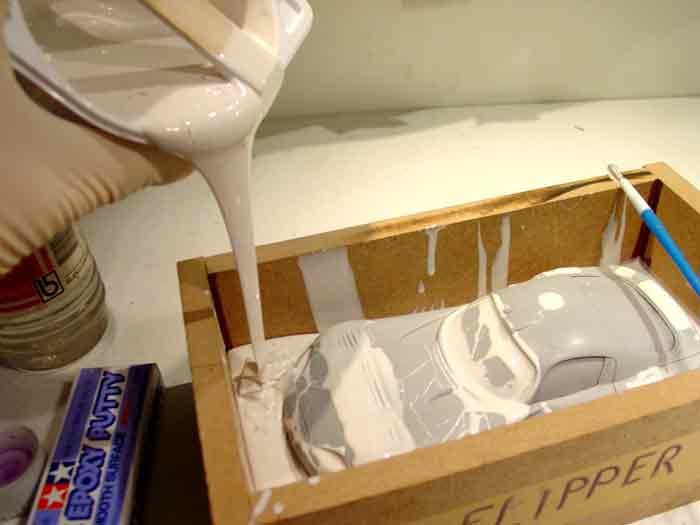 So with the silicone mixed and "vibrated" its time to pour. Care should be taken when you start pouring the silicone, your main concern will be to prevent air pockets. Pour slowly in one corner of the box so the silicon can flow slowly around the master pushing away the air as the level rises. Brushing the tricky areas like the headlamps and grille with silicone before pouring also helps to iliminate airpockets. 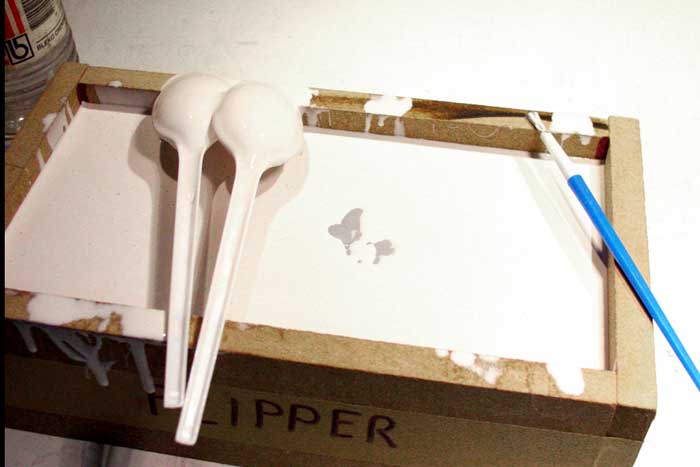 And just as the roof goes under..... I ran out of silicone. Should this happen, no problem...just mix some more and continue pouring! If you're completely out of silicone and the shops are closed!!! Just let the silicone set (takes ± 12- 16hrs)which should be more than enough time to buy some new. Mix the last part and then continue pouring on top of the hardened silicon! 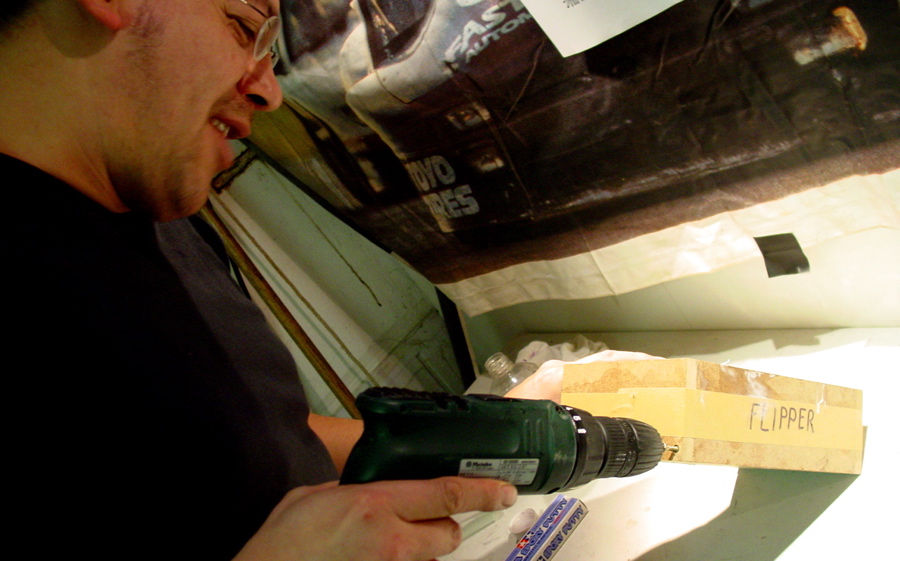 After 16hrs (should actually be more than 24, but I was running out of time) I started to open the casting box... Removing the side panels was easy, but as the master was glued to the floor panel................this was were things got a bit hairy. 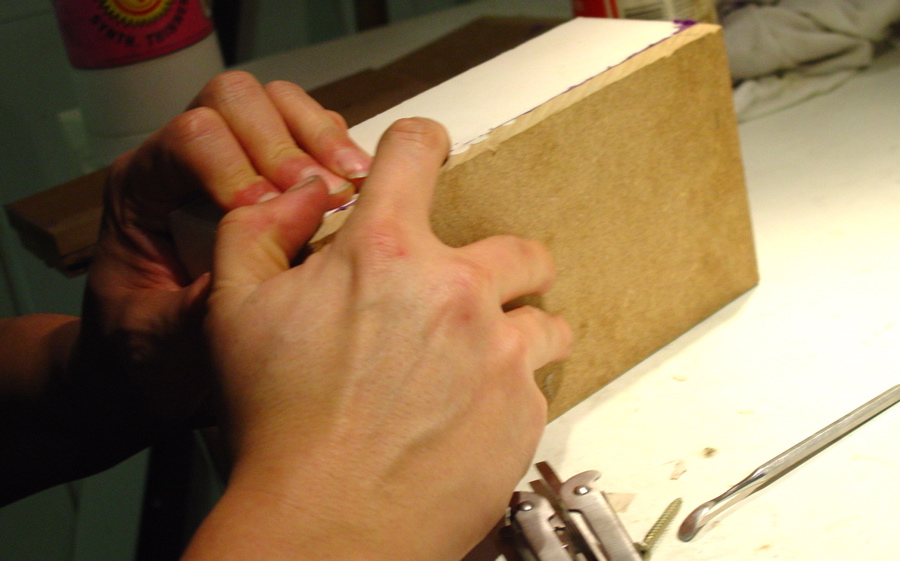 As I applied a bit more force, a sudden "plop" and the silicone came free of the floor panel..... Unfortunately with the master still in the mold. Dispite my carefull attempts to completely seal the master with maskol, there seemed to have been spots I overlooked. 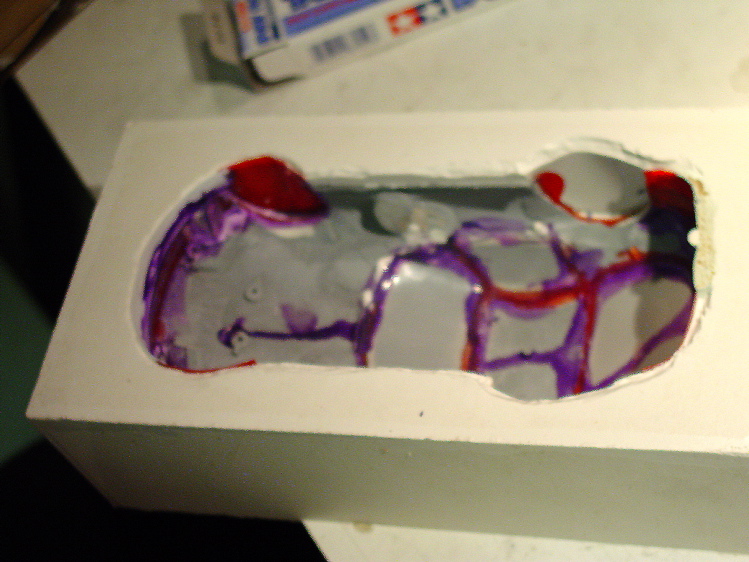 At several places the silicone had seeped inside the master, keeping it firmly fixed in the mold. (sorry for the fuzzy image...I must have been quite shaken as I took the shot Using a scalpel to cut away the offending silicone I was soon able to release the Master from the mold and reveal the bare silicone in all its beauty... 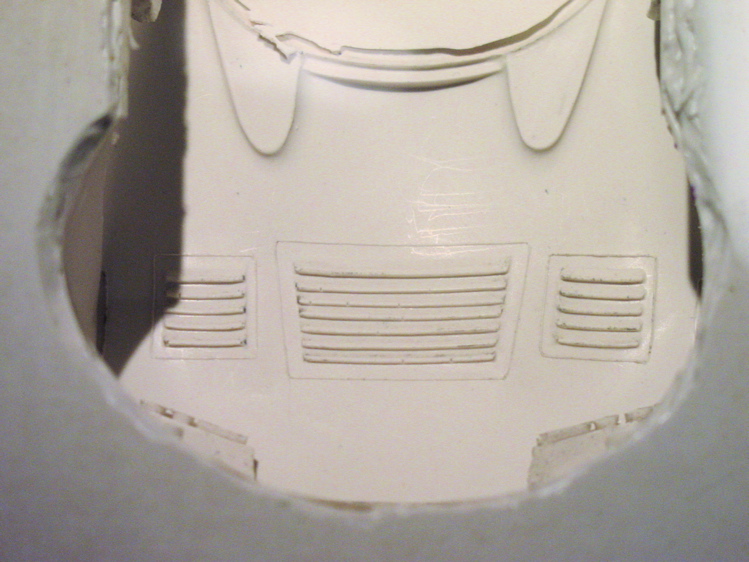 All the hard work of the past couple of weeks wre now finely cast in silicone. Time to start laminating. 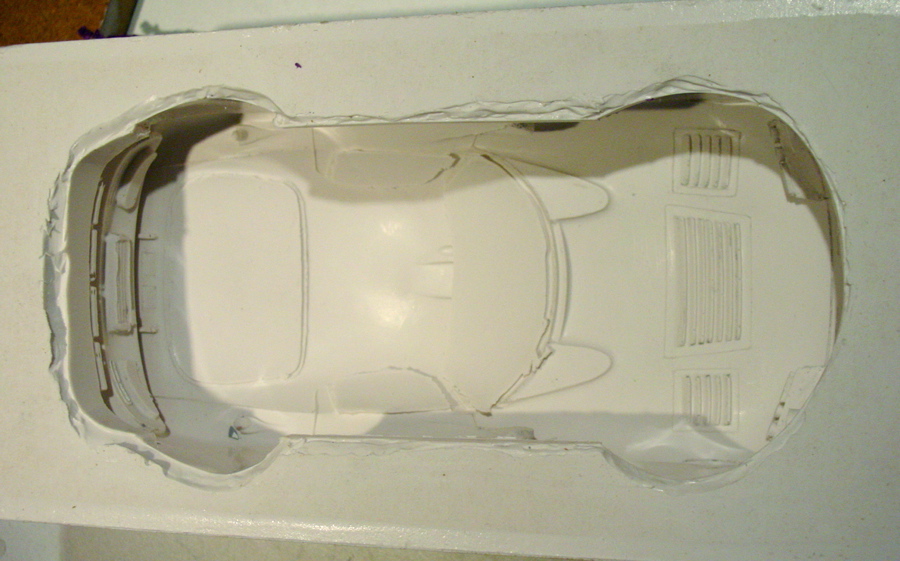 Ooops way past bed time...to be continued
__________________
Tamar 
Last edited by Tamar; 12-26-2006 at 07:41 PM. Reason: Update |
|

|

|
|
12-26-2006, 03:57 PM
|
#2 | |
|
Supermodified
 
Join Date: Sep 2003
Location: Lorain, Ohio
Posts: 3,374
Thanks: 0
Thanked 8 Times in 8 Posts
|
Re: Dodge Viper GTS (mold making, Gfk lamination)
Looks stellar, Tamar. Your conversion work on the body is really impressive.
__________________
Proud Owner/Operator of Haven Raceway and Hobby! |
|
|
|
|
|
12-26-2006, 07:46 PM
|
#3 | |
|
AF Newbie
Thread starter
Join Date: Nov 2003
Posts: 75
Thanks: 0
Thanked 1 Time in 1 Post
|
Re: Dodge Viper GTS (mold making, Gfk lamination)
THX
I just updated the post to make it more into an comprehensive article. The original was done "on the fly" 2 years ago, whilst building against the clock to get the car finished in time. Never got to finish it completely (the article) so I try to correct that flaw now. hope you find it usefull Will post part II this week
__________________
Tamar
|
|
|
|
|
|
|
POST REPLY TO THIS THREAD |
 |
| Thread Tools | |
|
|

