|
|
|

|
|
| Search | Car Forums | Gallery | Articles | Helper | AF 350Z | IgorSushko.com | Corporate |
|
| Latest | 0 Rplys |
|
|||||||
| WIP - Street Post topics for any "Works In Progress" street vehicles projects in this sub-forum. |
 |
 Show Printable Version | Show Printable Version |  Email this Page | Email this Page |  Subscribe to this Thread
|
|
|
Thread Tools |
 04-16-2007, 03:24 PM
|
#61 | |
|
AF Enthusiast
 Join Date: Jul 2005
Location: Cheshire, Connecticut
Posts: 872
Thanks: 0
Thanked 1 Time in 1 Post


|
Re: At Sixes and Sevens: Super 7 Group Build
This is looking really good! I love the shift lever/knob. But I have to be stupid and ask, what gauges are in front of the passenger?
PS: Stance and wheels look PERFECT for the car.
__________________
 
|
|

|

|
|
04-17-2007, 01:40 AM
|
#62 | |
|
Authorized Vendor

Join Date: Oct 2005
Location: Vicenza - veneto de rassa
Posts: 3,909
Thanks: 6
Thanked 46 Times in 41 Posts
|
Re: At Sixes and Sevens: Super 7 Group Build
Great job buddy, time to start your iron-glue bomb
   LOL LOL
__________________
 gio gio
|
|
|
|
|
|
04-17-2007, 02:04 AM
|
#63 | ||
|
AF Fanatic
Thread starter

Join Date: Dec 2004
Location: Up the creek with no paddle
Posts: 5,888
Thanks: 7
Thanked 16 Times in 15 Posts
|
Re: At Sixes and Sevens: Super 7 Group Build
Quote:
A modeling friend in the States sent me some 32AWG white wire and it arrived yesterday so I spent an hour this morning fixing it on the seats with CA glue. I don't know if this piping was standard on all S7s but it was clearly visible in some of my reference shots so I put it on there. I don't think I will by making the effort to do the rivets though  I've not done something like this before and I have to say that my already high respect for Tang's 612 interior rose even higher - this is pretty fiddly work to do cleanly and I only had to do about 5% of what he did!! Here are a couple of reference shots 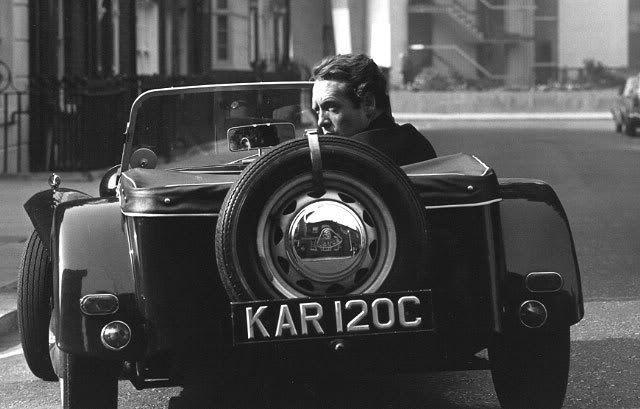 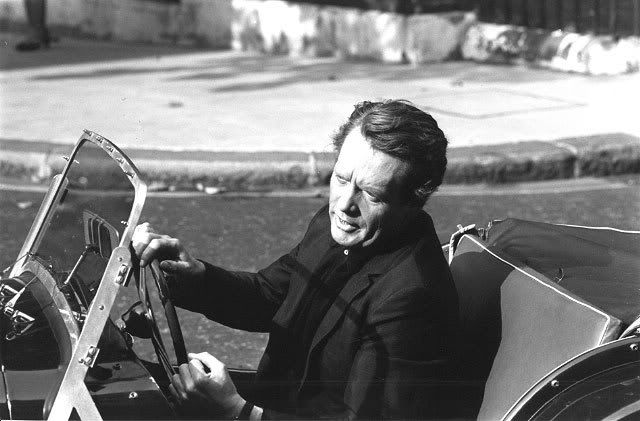 And here's how it came out for me. I went a little "wonky" in places but as J-M would say.."tant pis" 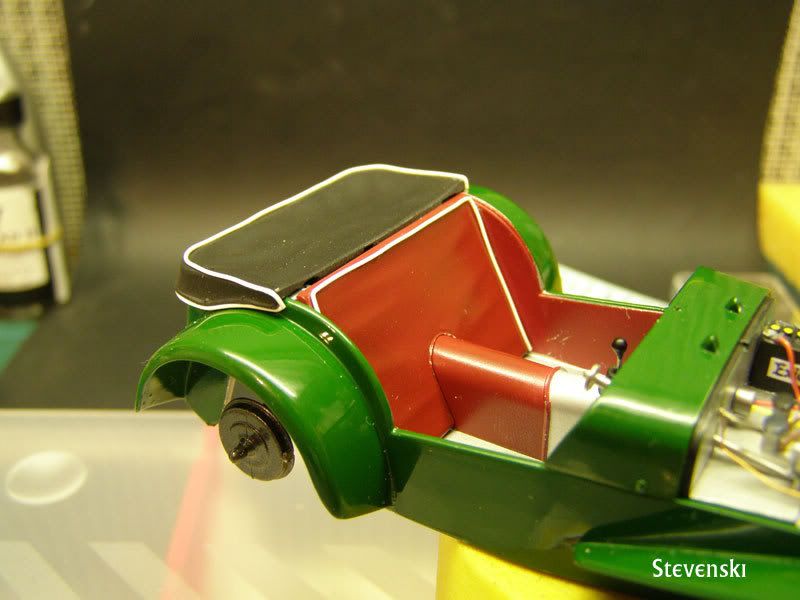 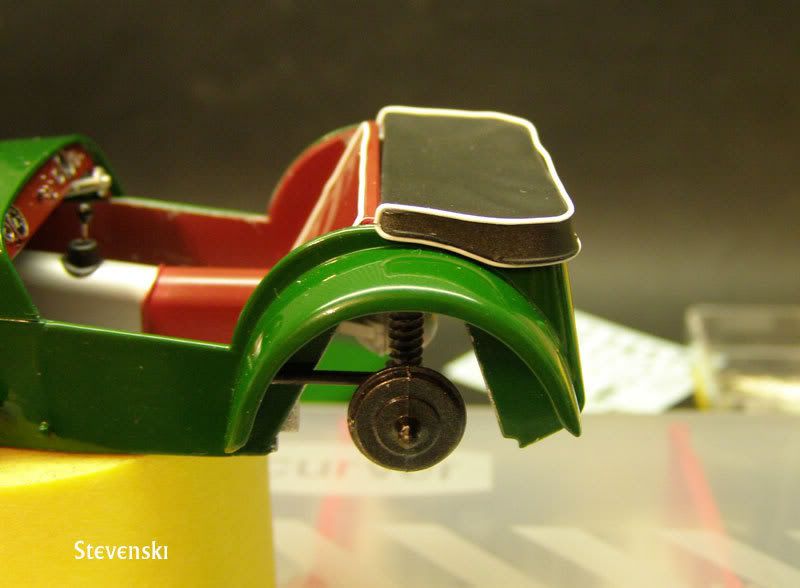 Thanks for looking in.
__________________
Guideline for happy modeling: Practice on scrap. Always try something new. Less is more. "I have a plan so cunning, you could put a tail on it and call it a weasel" - Edmund Blackadder |
||
|
|
|
|
04-17-2007, 10:33 AM
|
#64 | |
|
AF Enthusiast

Join Date: Jun 2005
Location: Céroux-Mousty
Posts: 506
Thanks: 11
Thanked 5 Times in 5 Posts
|
Re: At Sixes and Sevens: Super 7 Group Build
Not "Tant Pis" !!!!
Nice, really nice, should I say! Just need some rivets (com'on, Steve.......  ) to be finished! ) to be finished!Nice Work you did on that litlle nice green car! Cheers, Jamme
__________________
WIP: LaFerrari Tamiya 1/24 |
|
|
|
|
|
04-17-2007, 12:15 PM
|
#65 | |
|
AF Enthusiast

Join Date: Jun 2005
Location: Red Lake, Ontario
Posts: 2,519
Thanks: 3
Thanked 28 Times in 28 Posts
|
Re: At Sixes and Sevens: Super 7 Group Build
That trim is very slick and put on flawlessly. It's stuff like this and your wiring job and research that to me is what modelling is all about. Having seen your efforts and great work, I am thinking of going back to easter egg painting.
__________________
  
|
|
|
|
|
|
04-17-2007, 01:02 PM
|
#66 | |
|
AF Enthusiast

Join Date: Nov 2002
Location: Brussels/Milano
Posts: 2,909
Thanks: 10
Thanked 3 Times in 3 Posts
|
Re: At Sixes and Sevens: Super 7 Group Build
 Oli |
|
|
|
|
|
04-17-2007, 01:30 PM
|
#67 | |
|
AF Enthusiast

Join Date: Aug 2005
Location: Chengdu. CHN
Posts: 1,269
Thanks: 20
Thanked 36 Times in 19 Posts
|
Re: At Sixes and Sevens: Super 7 Group Build
Hi my friend long time no skype lol~~~ I remembered that you said you'll build this OOB at the very beginning and seems I'm fooled lol~ It's rather a highly detailed wonderful job you've done so far! I really love what you've done on those small attachments and engine details, I know that they requires great patience and well planning as well as good skills. You've done awesome works on the seats which look so realistic man! I especailly appreciate that the curve of the wires looks very natural and smooth, that's hard even for some great materials. Bravo!
 |
|
|
|
|
|
04-18-2007, 02:29 PM
|
#68 | ||
|
AF Fanatic
Thread starter
Join Date: Dec 2004
Location: Up the creek with no paddle
Posts: 5,888
Thanks: 7
Thanked 16 Times in 15 Posts
|
Re: At Sixes and Sevens: Super 7 Group Build
Thanks gents.
Quote:
 Put some light staining on the muffler this evening. I feel I am geting better at this each time - practice makes perfect (still a long way to go though )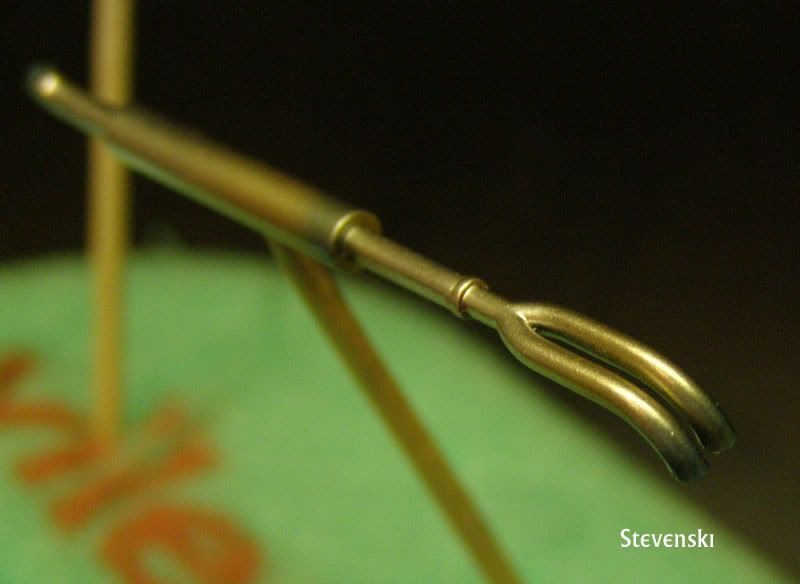 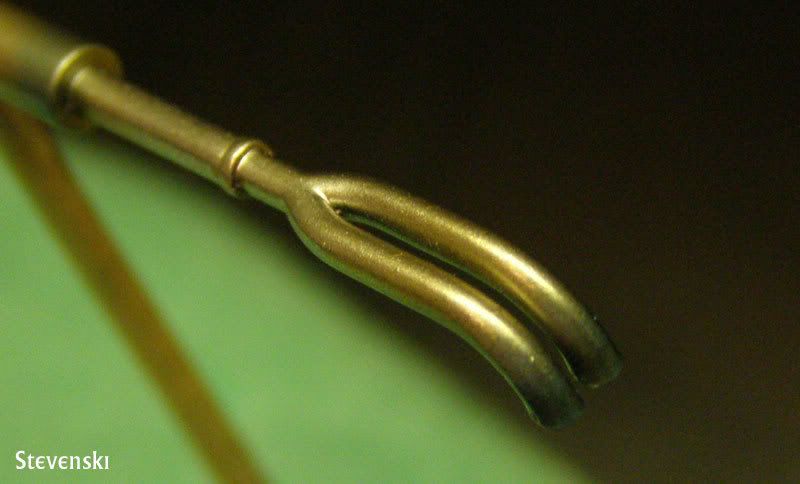
__________________
Guideline for happy modeling: Practice on scrap. Always try something new. Less is more. "I have a plan so cunning, you could put a tail on it and call it a weasel" - Edmund Blackadder |
||
|
|
|
|
04-18-2007, 08:51 PM
|
#69 | |
|
AF Fanatic
Thread starter
Join Date: Dec 2004
Location: Up the creek with no paddle
Posts: 5,888
Thanks: 7
Thanked 16 Times in 15 Posts
|
Re: At Sixes and Sevens: Super 7 Group Build
Just for J-M
Added some p/e studs 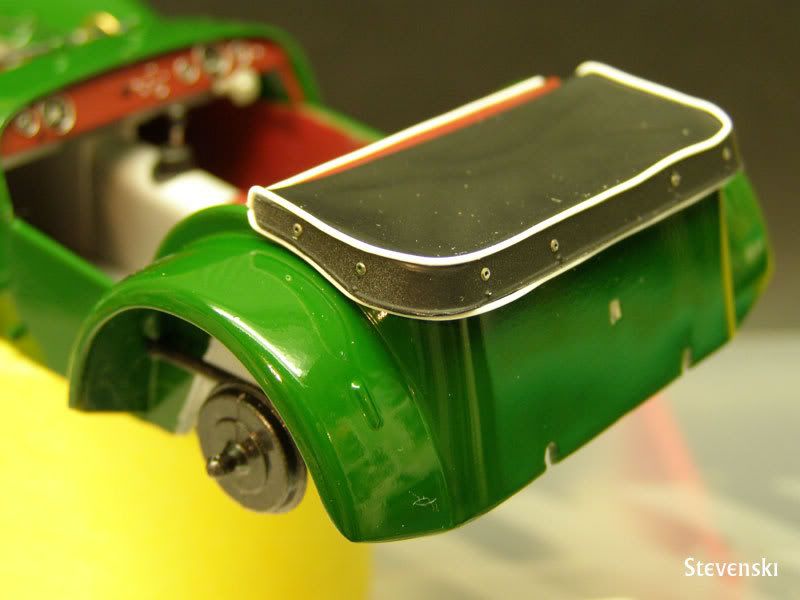 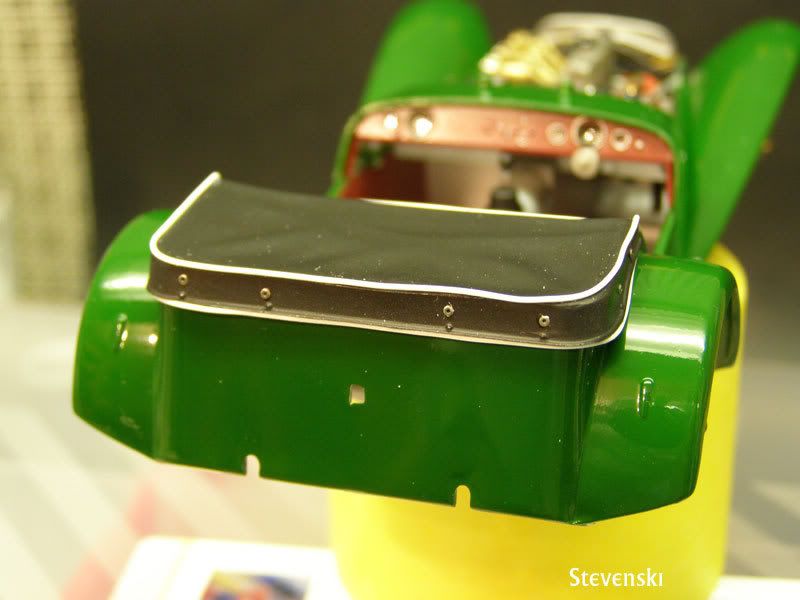
__________________
Guideline for happy modeling: Practice on scrap. Always try something new. Less is more. "I have a plan so cunning, you could put a tail on it and call it a weasel" - Edmund Blackadder |
|
|
|
|
|
04-19-2007, 12:40 AM
|
#70 | |
|
Authorized Vendor
Join Date: Oct 2005
Location: Vicenza - veneto de rassa
Posts: 3,909
Thanks: 6
Thanked 46 Times in 41 Posts
|
Re: At Sixes and Sevens: Super 7 Group Build
Where you purchased the PE dusts?
Great so far! BRAVIIIIIZZIMO, you deserve more remole!
__________________
gio
|
|
|
|
|
|
04-19-2007, 12:41 AM
|
#71 | |
|
AF Enthusiast
Join Date: Jun 2005
Location: Céroux-Mousty
Posts: 506
Thanks: 11
Thanked 5 Times in 5 Posts
|
Re: At Sixes and Sevens: Super 7 Group Build
Aaaahhhh, Voilà!!!!!
Nice touch the PE nuts. Should have been roud ones, but OK, I'm a difficult guy! Nice anyway! Cheers, Jamme
__________________
WIP: LaFerrari Tamiya 1/24 |
|
|
|
|
|
04-19-2007, 01:57 AM
|
#72 | ||
|
AF Fanatic
Thread starter
Join Date: Dec 2004
Location: Up the creek with no paddle
Posts: 5,888
Thanks: 7
Thanked 16 Times in 15 Posts
|
Re: At Sixes and Sevens: Super 7 Group Build
Quote:
   you are right of course! They are so small and my eyes aren't so good. you are right of course! They are so small and my eyes aren't so good.When I was cutting them off late last night, I thought they were round  This time it IS tant pis
__________________
Guideline for happy modeling: Practice on scrap. Always try something new. Less is more. "I have a plan so cunning, you could put a tail on it and call it a weasel" - Edmund Blackadder |
||
|
|
|
|
04-19-2007, 09:40 AM
|
#73 | |
|
AF Regular

Join Date: Feb 2006
Location: NorCal!, California
Posts: 475
Thanks: 0
Thanked 0 Times in 0 Posts
|
Re: At Sixes and Sevens: Super 7 Group Build
looks great, ski!
|
|
|
|
|
|
04-19-2007, 11:14 AM
|
#74 | |
|
AF Enthusiast
Join Date: Aug 2005
Location: Chengdu. CHN
Posts: 1,269
Thanks: 20
Thanked 36 Times in 19 Posts
|
Re: At Sixes and Sevens: Super 7 Group Build
damn that looks real...
|
|
|
|
|
|
04-23-2007, 02:30 AM
|
#75 | |
|
AF Fanatic
Thread starter
Join Date: Dec 2004
Location: Up the creek with no paddle
Posts: 5,888
Thanks: 7
Thanked 16 Times in 15 Posts
|
Re: At Sixes and Sevens: Super 7 Group Build
So close to finishing this quickie OOB build
 Did some stuff that I am quite pleased with this weekend. First, I remade the rear indicators that pissed you all off so much Had a piece of clear sprue messing up the bench and remembered whaty someone said so I gave it a try... all hand shped with sanding sticks in 10 minutes ( and a great demo on the power of polishing!!) First steps. 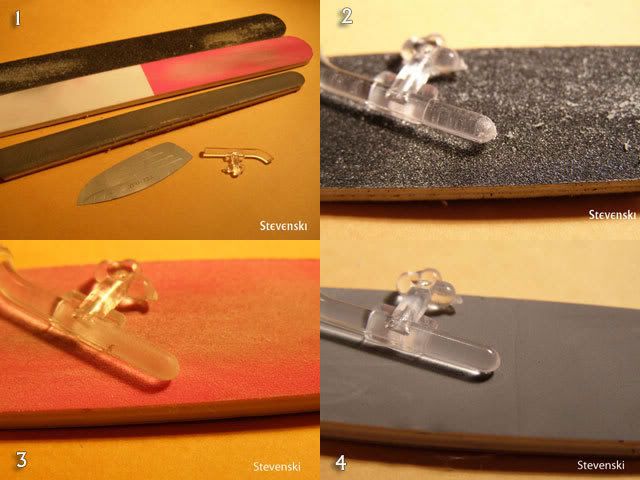 just to show how clear it was after final polishing stick...(is Sean sees this, he should recognise the image )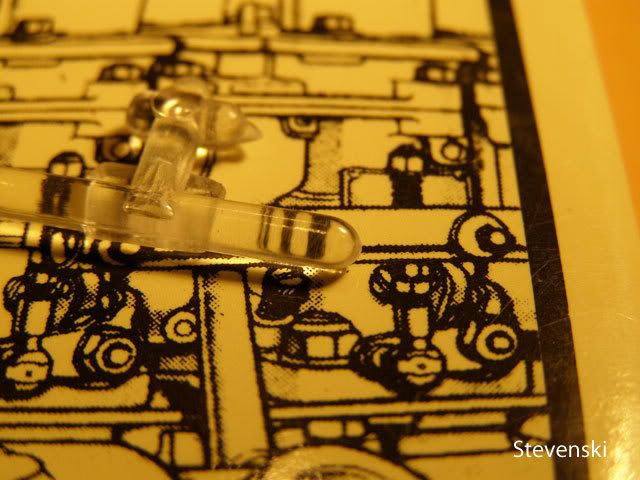 Sliced of the tops with p/e/ saws and painted with clear orange.... 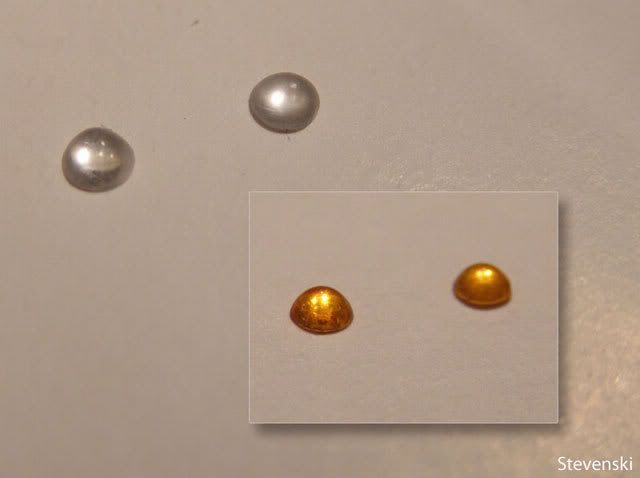 made bases with slice of plastic rod painted with Alclad Alu, glued in positioning pin on back and drilled out the rear fender for cleaner placement (wish I had done that with the brake lights  ).. )..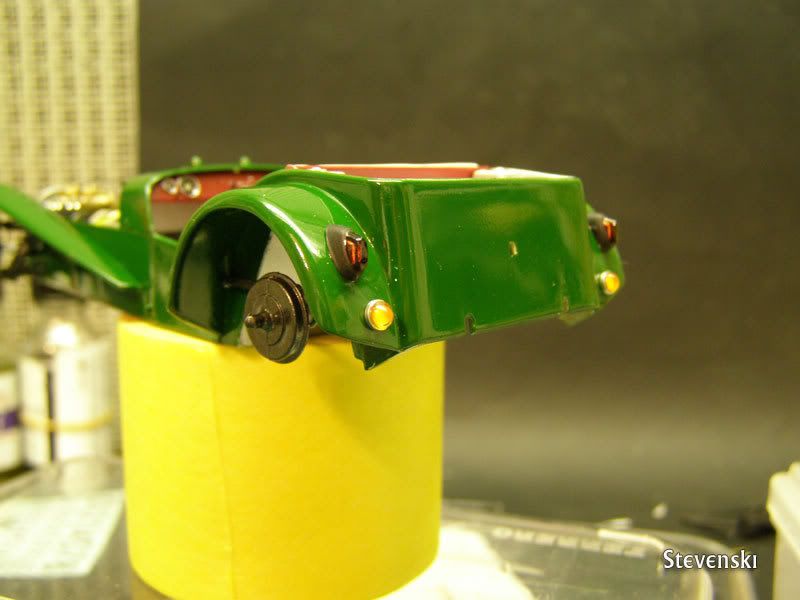 close up... 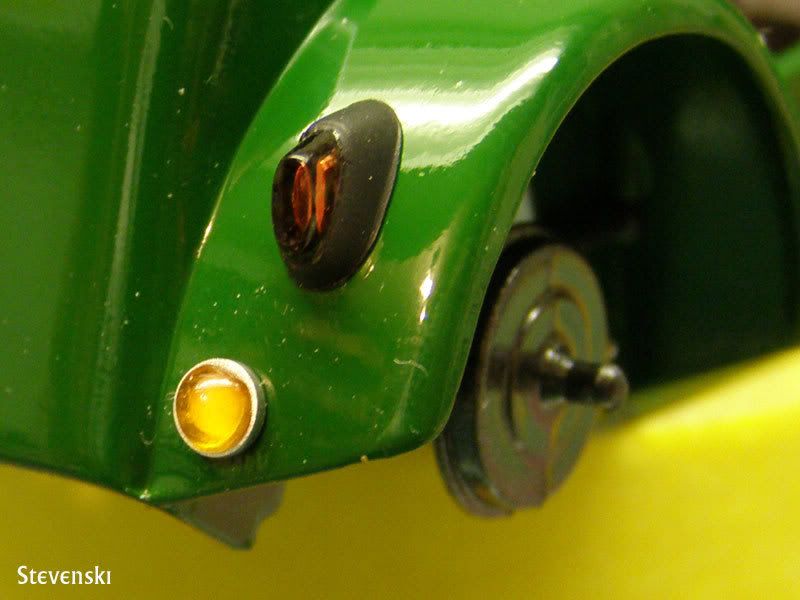 Next, based on my most valuable reference photo. 1. The number plates. Tried to find a suitable font but couldn't find one so first I made plates with regular font but it just wasn't good enough or some people, so I tried again by using the ref pic and photo shop.  Glued in place. Amazingly, the p/e grill is the single BAD fitting part of the whole Tamiya kit  Forget trying to fit it with the tabs - cut them off, sand off the nubs and epoxy it in place instead... Forget trying to fit it with the tabs - cut them off, sand off the nubs and epoxy it in place instead...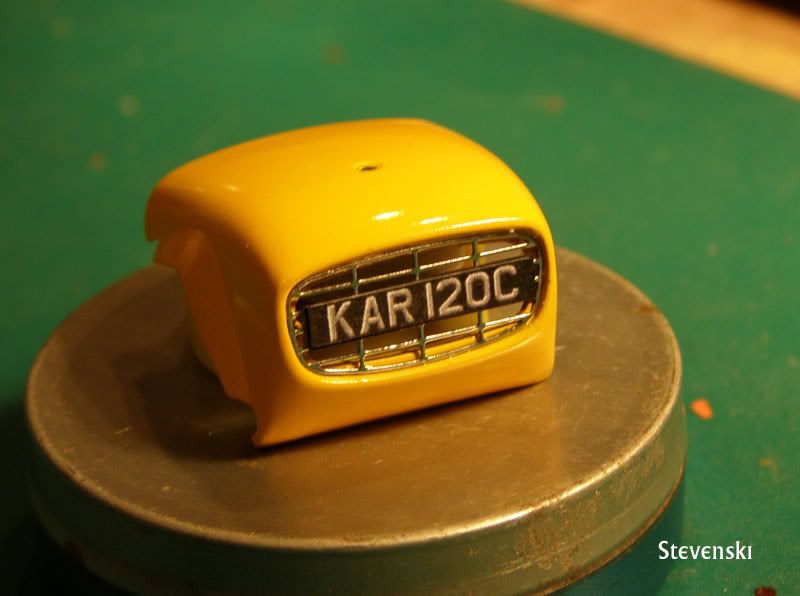 Fom the same photo I prepared the leather strap for holding the spare wheel. Tamiya masking tape and some wire for the buckle. Funnily enough none of my daughters had a brown marker pen in their school bags so I used firstly a blue sharpie and then rand a red one over that. The two inks mixed and I got brown (obviously art classes 30 years ago were worthwhile after all )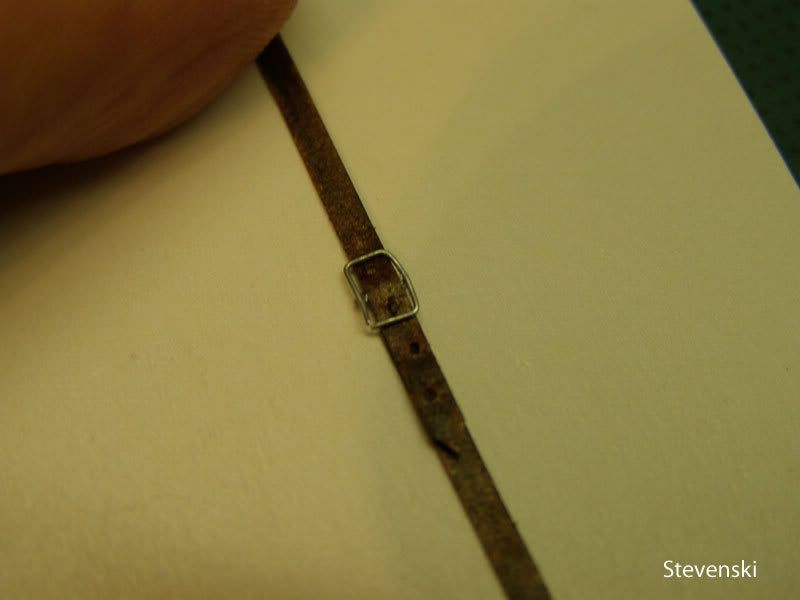 Now for my favorite Take a look at the close up on the ref pic. 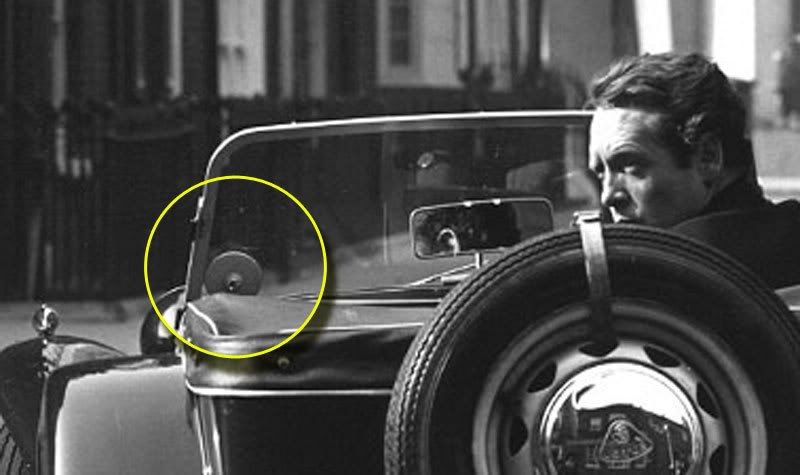 See that disc on the windscreen? That's a UK tax disc holder. A quick google search turned up an image which I edited and reduced in photo shop and printed off on regular paper. I made a simple holder with a styrene disc painted with grey primer and the attaching knob with a piece of hex rod.... 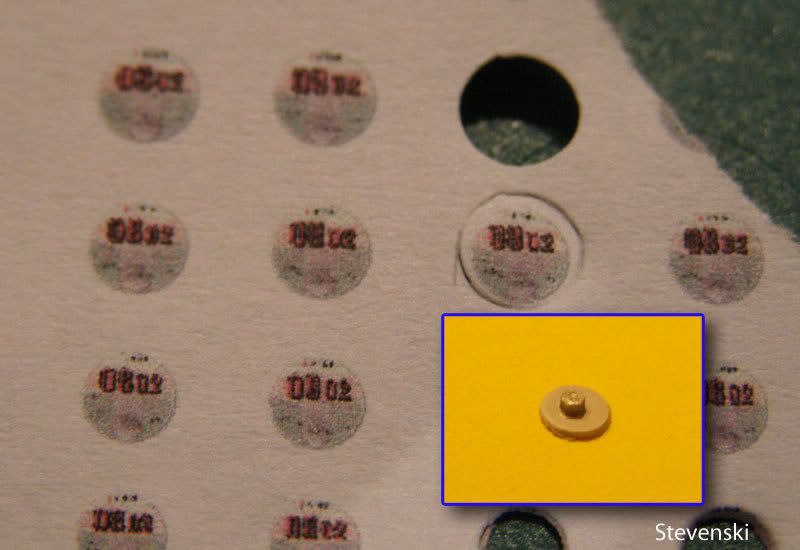 The whole thing was attached to the inside of the windscreen with Kristal Klear PVA glue...  Hope you enjoyed that - I did! Some of the work could be cleaner but I hurried and it does quite good in reality. Thanks for looking in
__________________
Guideline for happy modeling: Practice on scrap. Always try something new. Less is more. "I have a plan so cunning, you could put a tail on it and call it a weasel" - Edmund Blackadder |
|
|
|
|
|
|
POST REPLY TO THIS THREAD |
 |
|
|

