|
|
|

|
|
| Search | Car Forums | Gallery | Articles | Helper | AF 350Z | IgorSushko.com | Corporate |
|
| Latest | 0 Rplys |
|
|||||||
| WIP - Motorsports Post topics for any "Work In Process" motorsports vehicles in this sub-forum. |
 |
 Show Printable Version | Show Printable Version |  Email this Page | Email this Page |  Subscribe to this Thread
|
|
|
Thread Tools |
 07-06-2011, 05:24 PM
|
#16 | |
|
AF Enthusiast
Join Date: Feb 2009
Location: Palm Desert, California
Posts: 610
Thanks: 108
Thanked 44 Times in 40 Posts
|
Re: Fujimi 1993 Ferrari F40 LM
I thought for sure that was the 1/16 kit. Amazing skills!
|
|

|

|
|
07-24-2011, 08:47 AM
|
#17 | |
|
AF Newbie
Thread starter

Join Date: Jan 2011
Location: Johannesburg
Posts: 38
Thanks: 32
Thanked 6 Times in 5 Posts
|
Re: Fujimi 1993 Ferrari F40 LM
Hi all,
Thank you very much for your kind words. As you would've realised by now I am a rather slow builder... Time for an update though: After completing the interior, I turned my attention to the chassis. All very much straight forward. I added CF to the rear wheel wells, as well as the missing metal supports 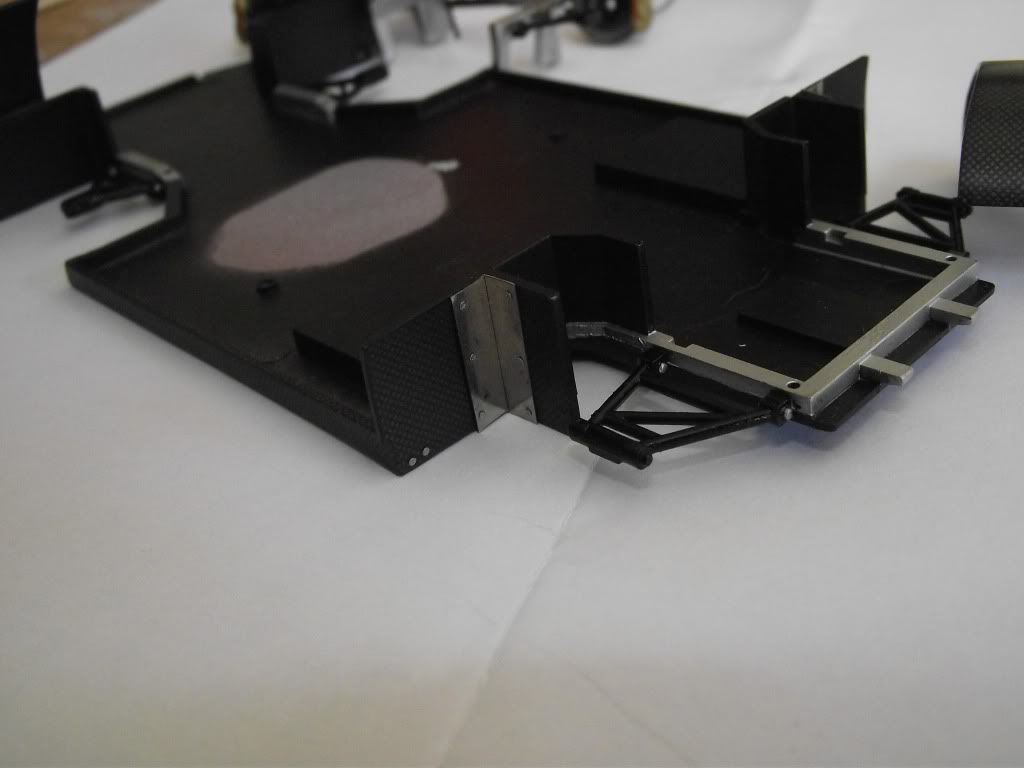 On the front, the chassis is fine for the standard road F40, but because the LM body is wider, I had to add 2mm each side of the wheel wells to make the chassis sit flush with the body. The wheel wells also don't have tops. I added thin plastic card that will bend over and conform to the right shape once the body is in place. 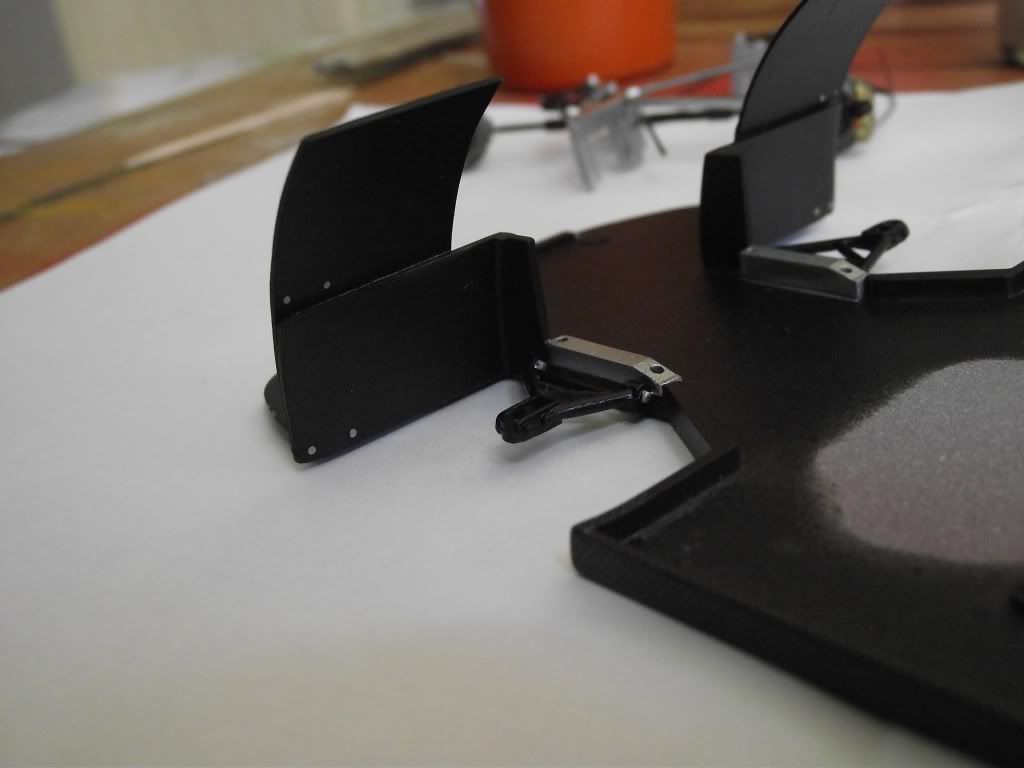 Next I turned my attention to the brakes. The front brakes were fine and the kit PE faces added. The rear brakes however had park brakes moulded in. Not even road F40's had these MR Fujimi... Anyway, I sanded them off and modified PE faces from the Hobby Design F40 kit to fit. Brembo logos from the spares box were added 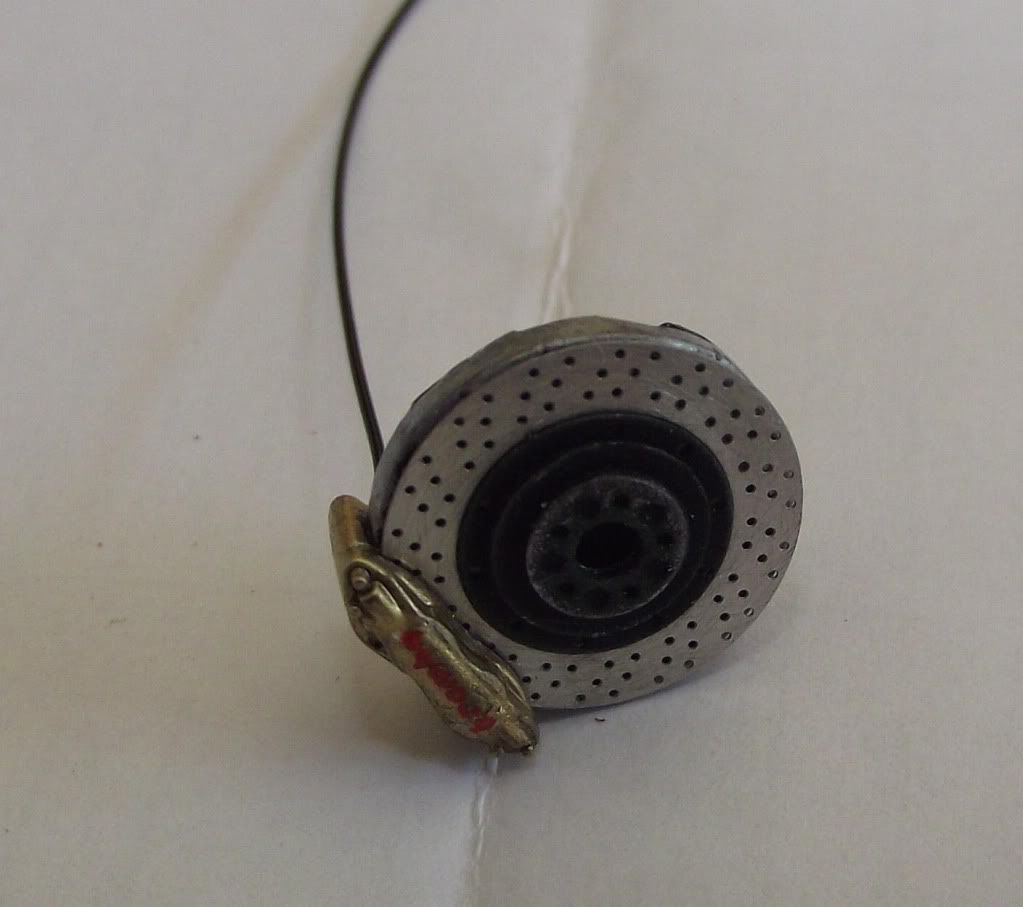 Next up was the suspension. The kit parts were painted up and detailed using various PE nuts, bolts and screws 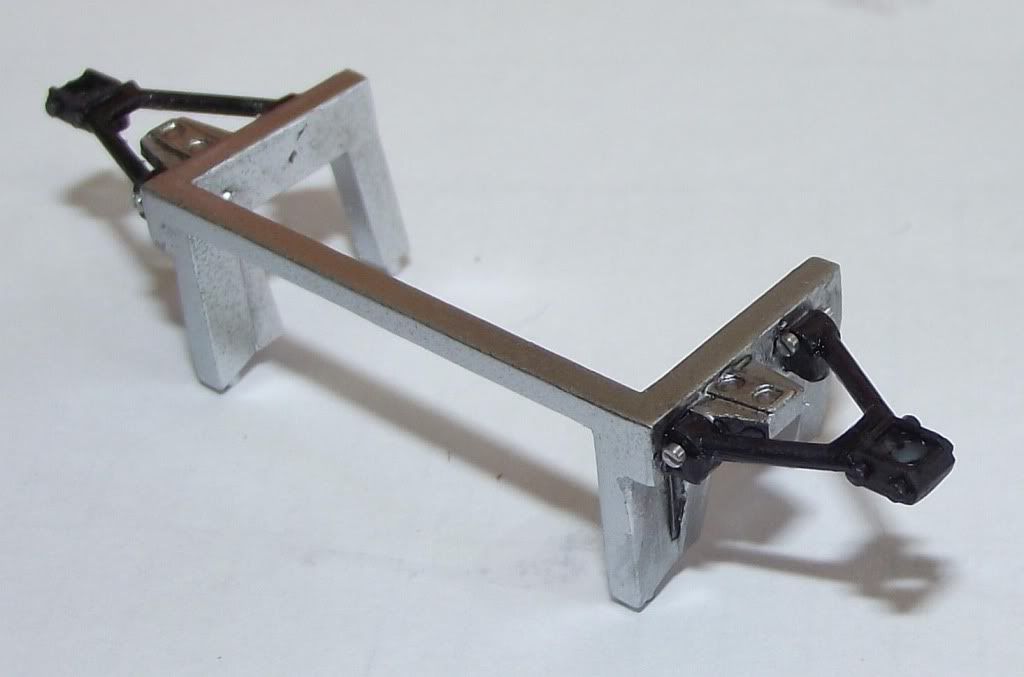 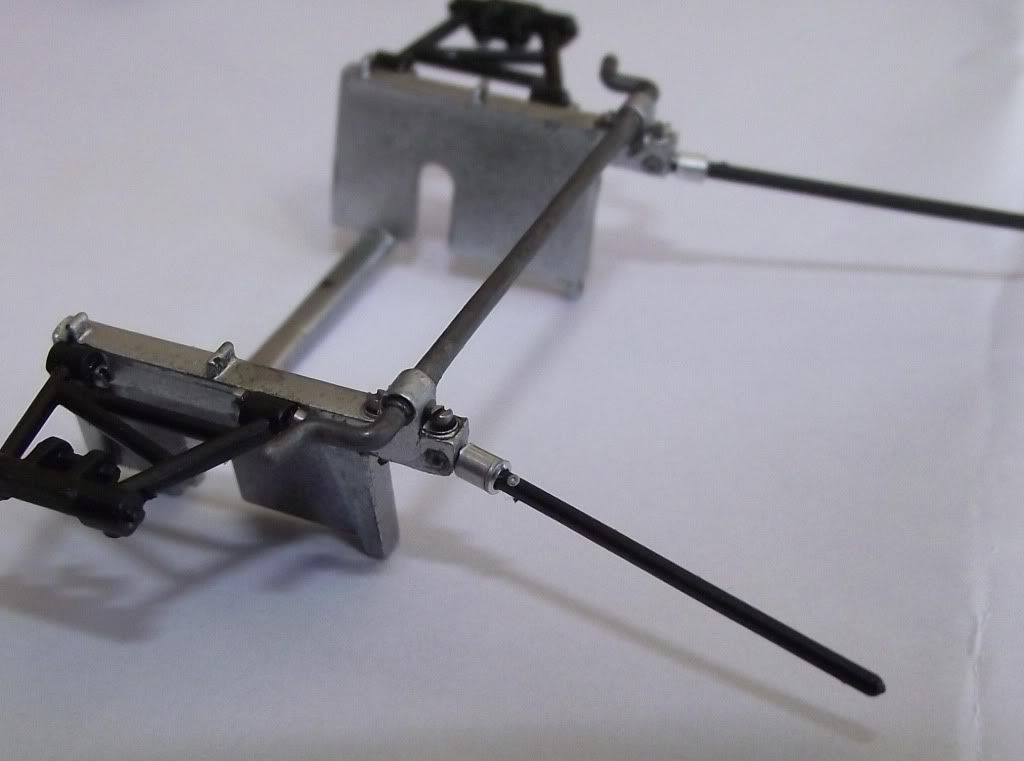 Now onto my favourite part of the build, that mighty V8! I started playing around with the intercoolers. The road F40 intercoolers were supplied, but waaayyyy too narrow to represent an LM's. I had resin F40 GTE coolers, but they were too wide for the LM. So out came the plastic card and my saw, 2mm strips later we had the right width 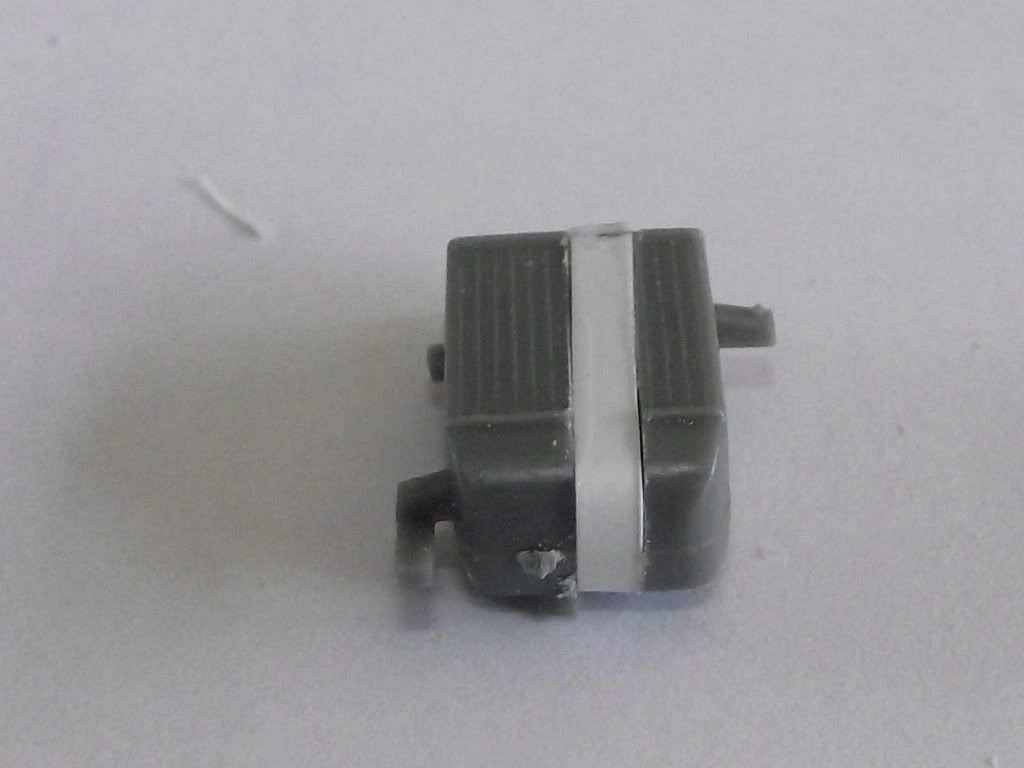 Here is a comparison between modified and supplied intercooler 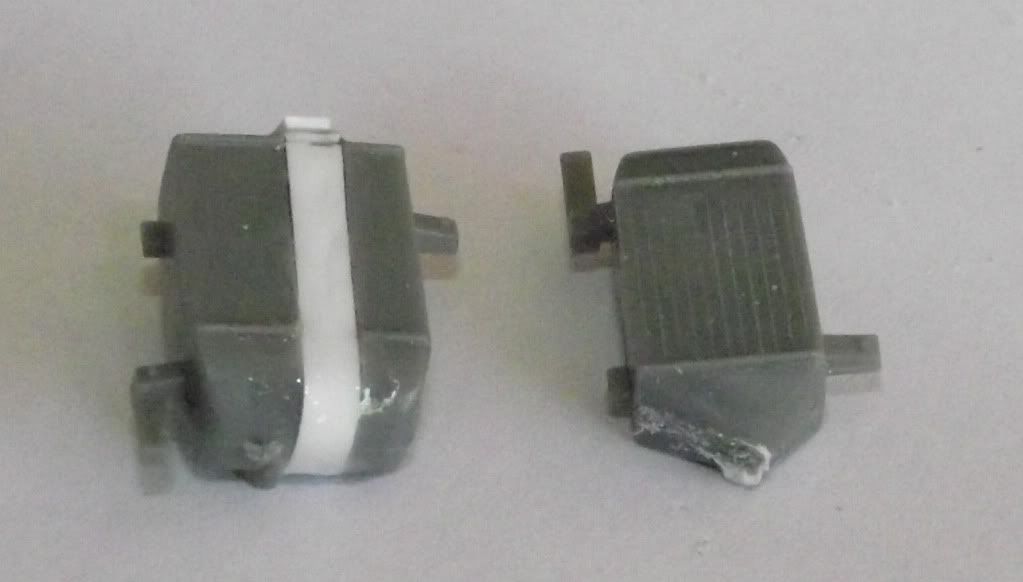 I sanded off all the details 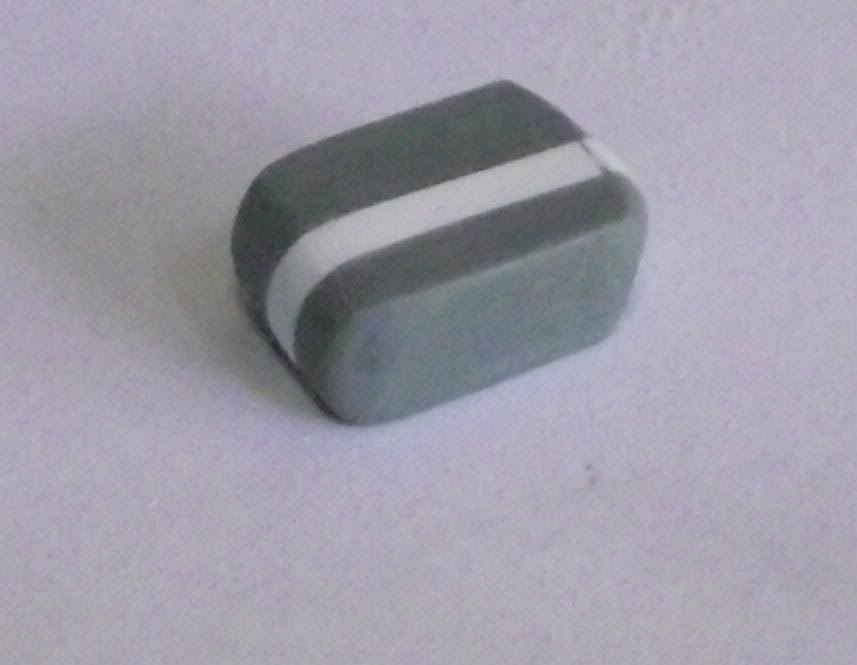 And added some brackets 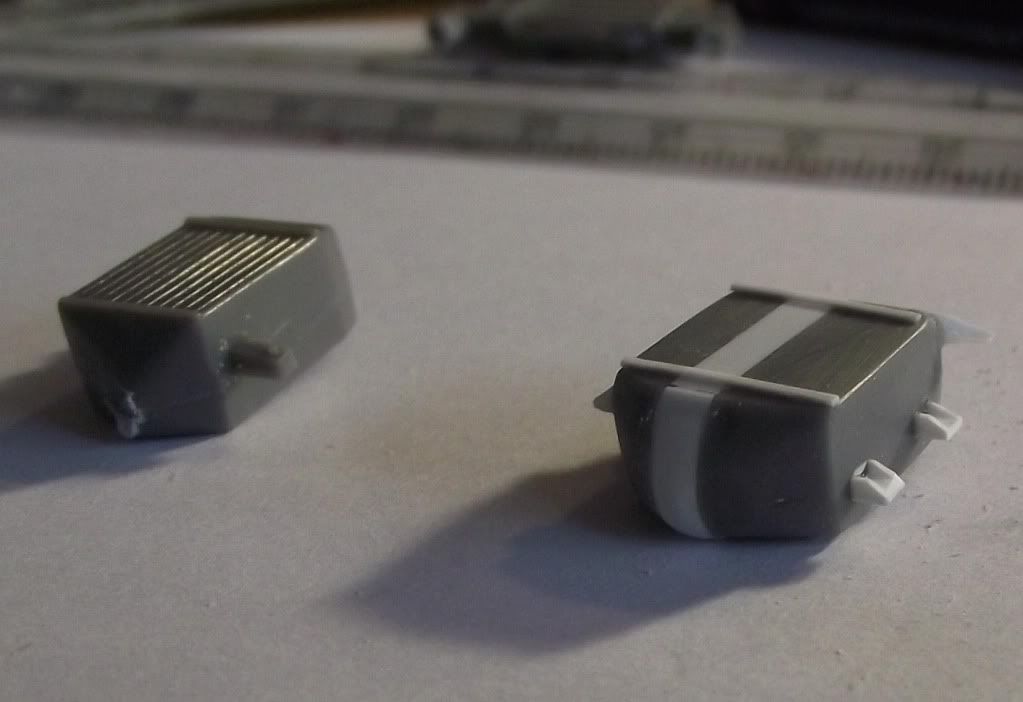 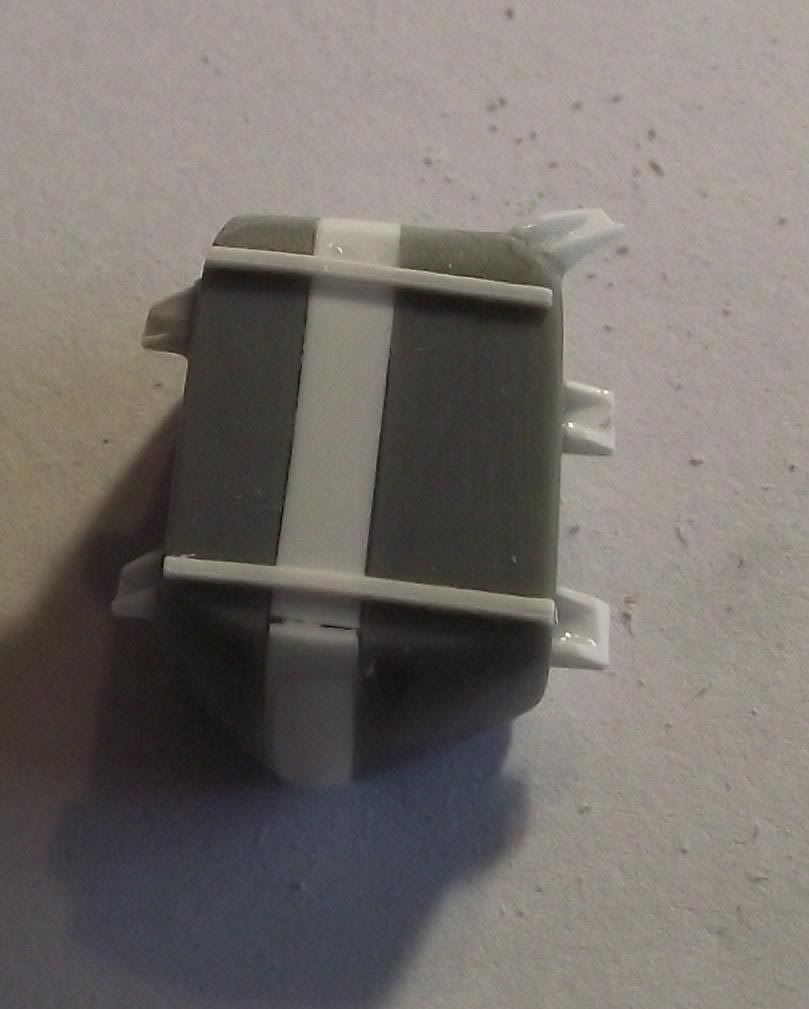 I then grew tired of intercoolers, so I went onto the oil filter. Again in the kit is is represented by a large plastic blob... I made a base plate using card and BMF  And modified a Tamiya filter 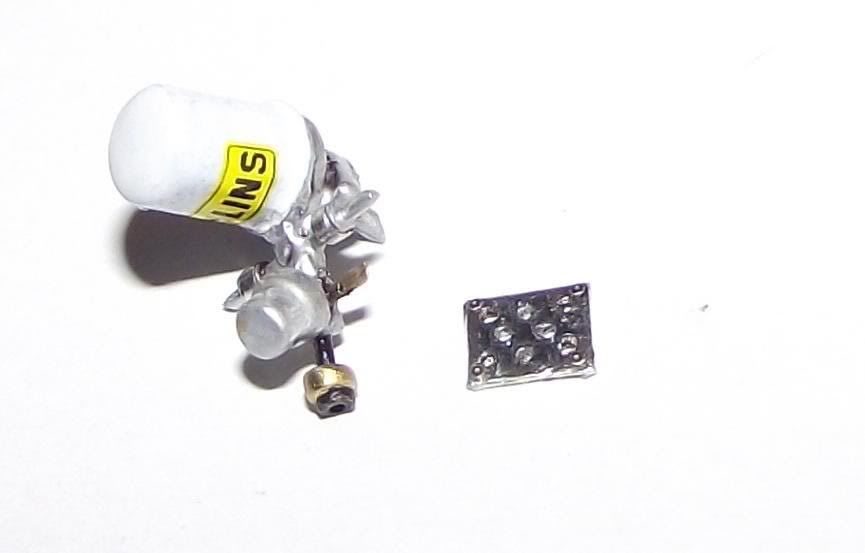 The decal came from the spares box. Only afterwards when I Googled "OHLINS" did I learn they make shocks and not oil filters  . Lesson, 2AM is not the best time to get creative.... . Lesson, 2AM is not the best time to get creative....There is a gap between the kit engine and gearbox. This was filled with plastic card, detailed with sprue 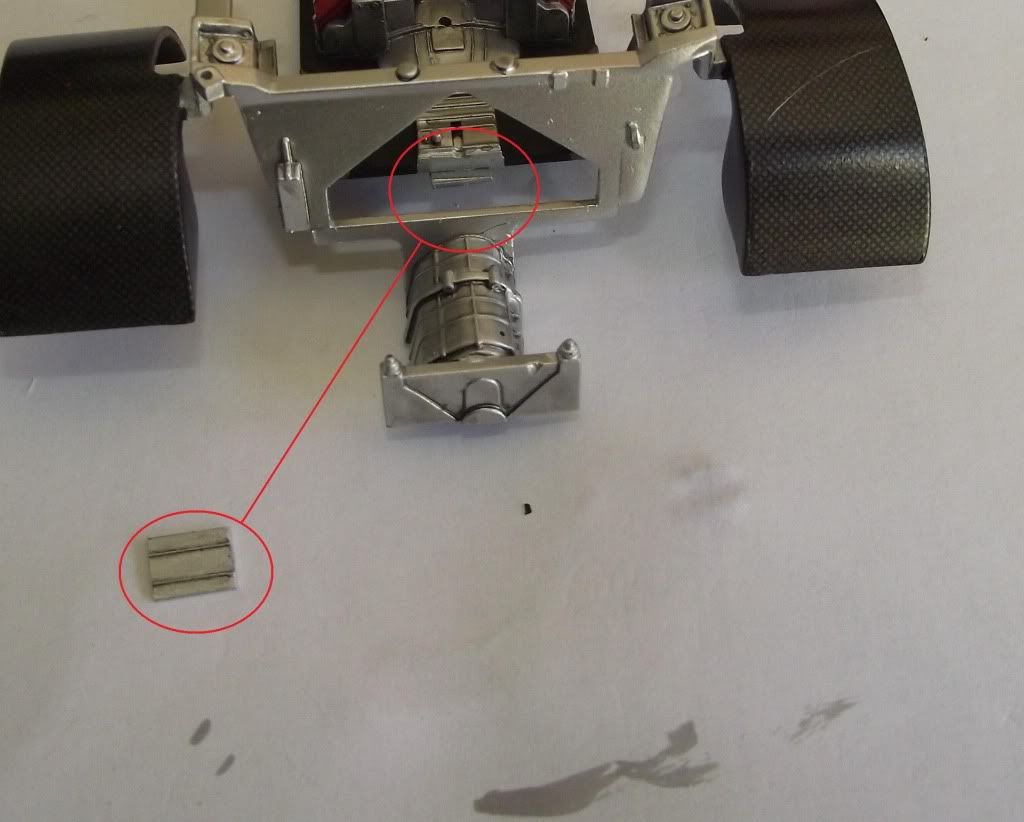 The filter installed 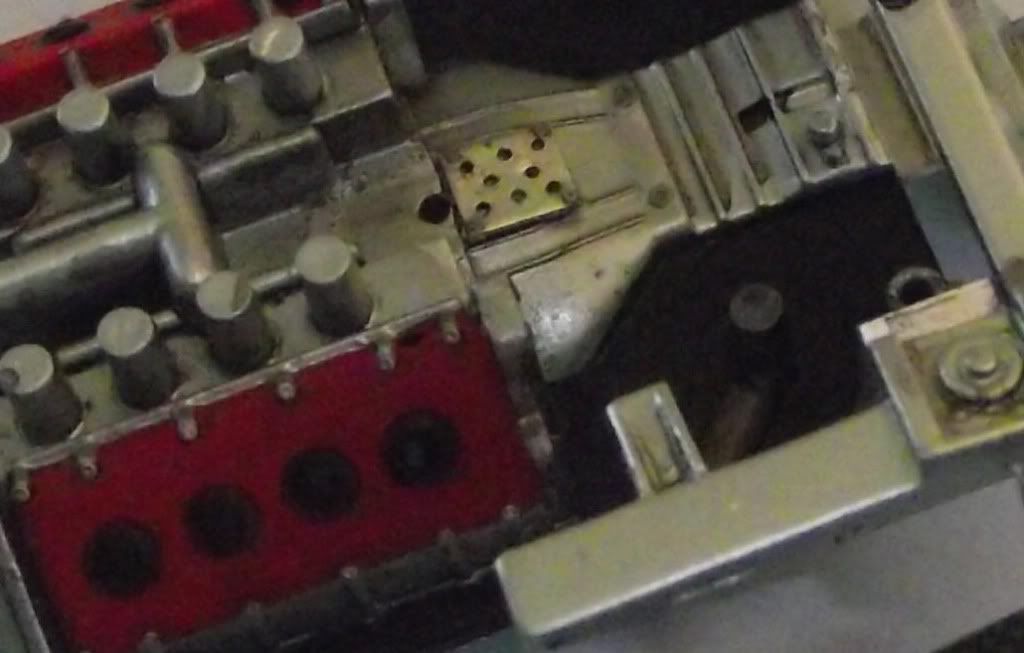 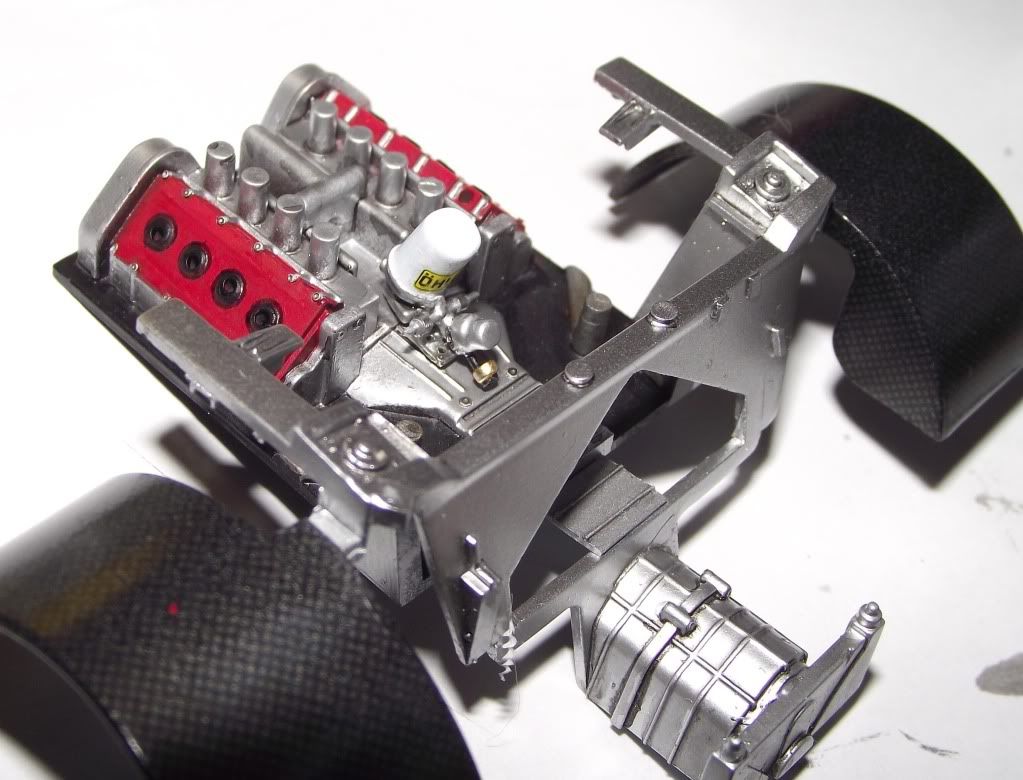 Next the turbos were plumbed and the blocked wired in such a manner as to hide the fact that there is only half an engine there. (So this is where Tamiya got the stupid idea for half an engine from...) 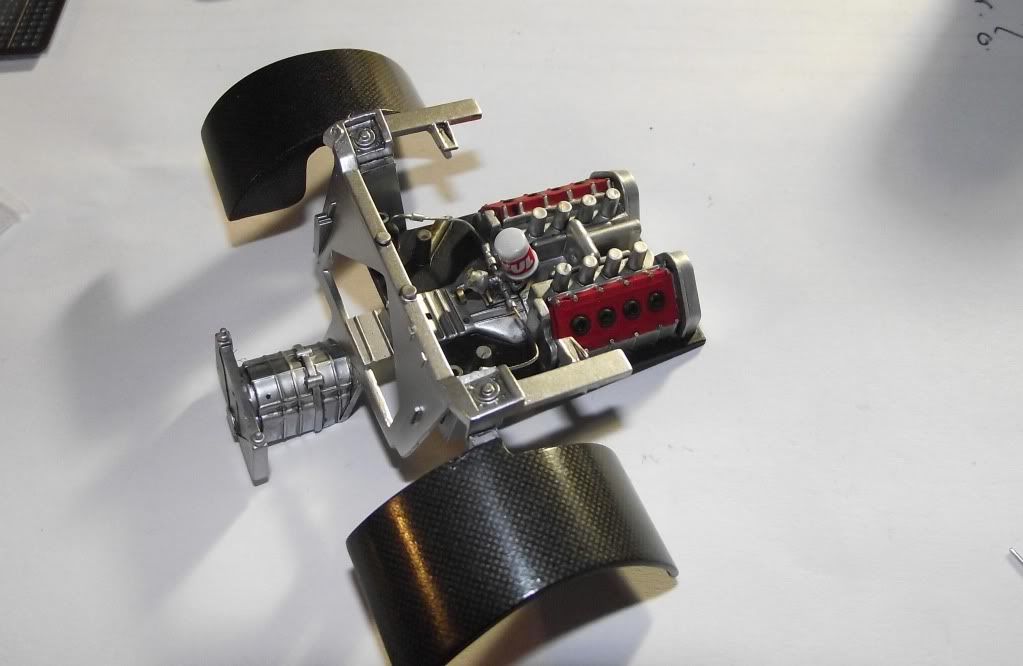 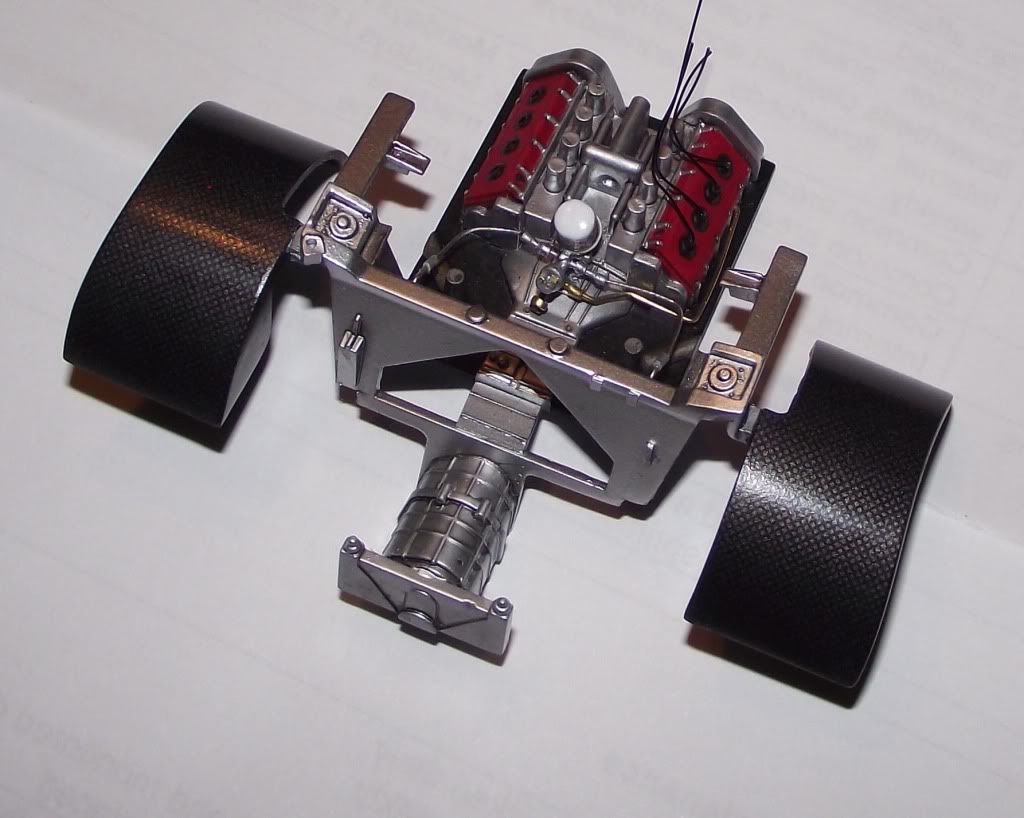 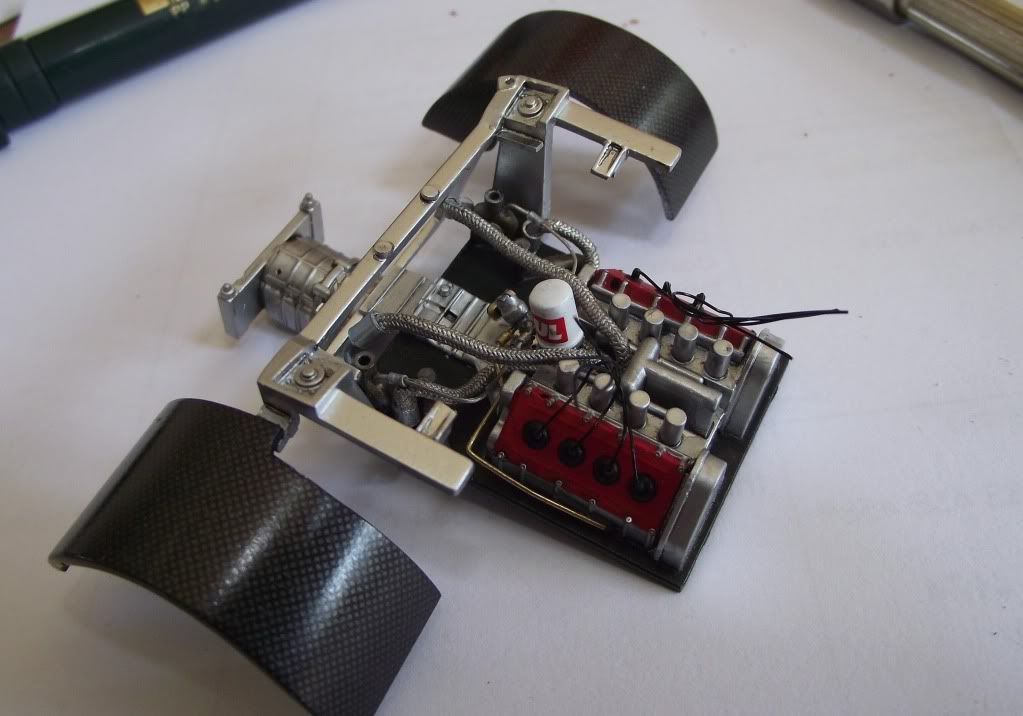 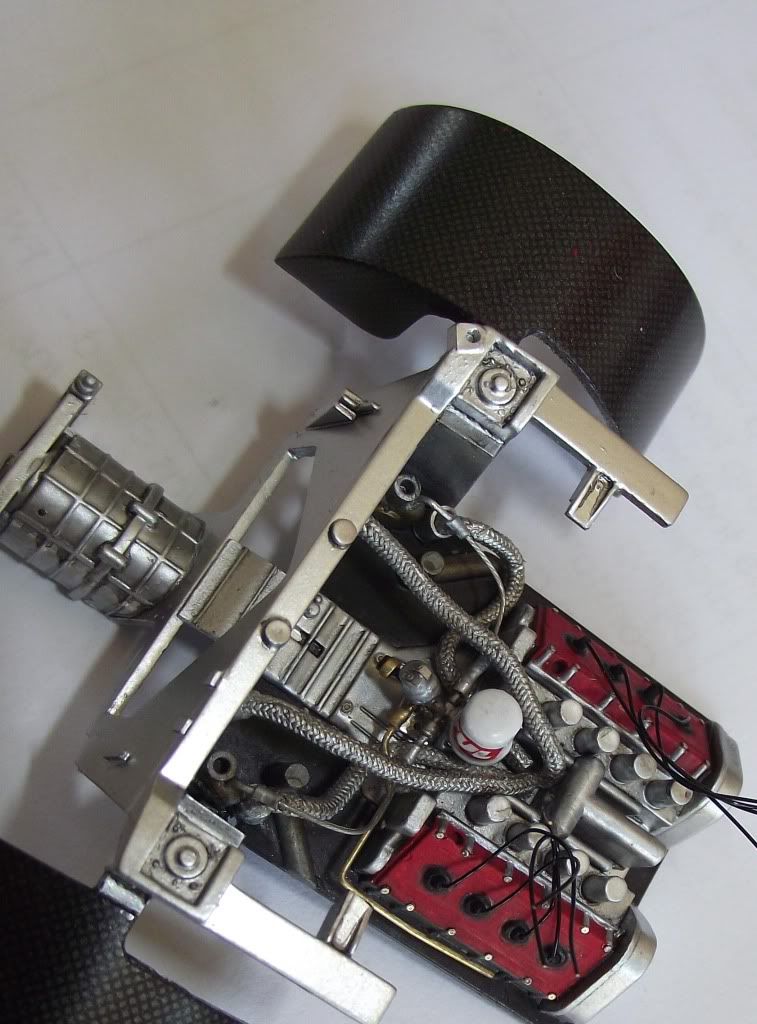 Small electrical boxes etc were scratch built using reference photos and installed  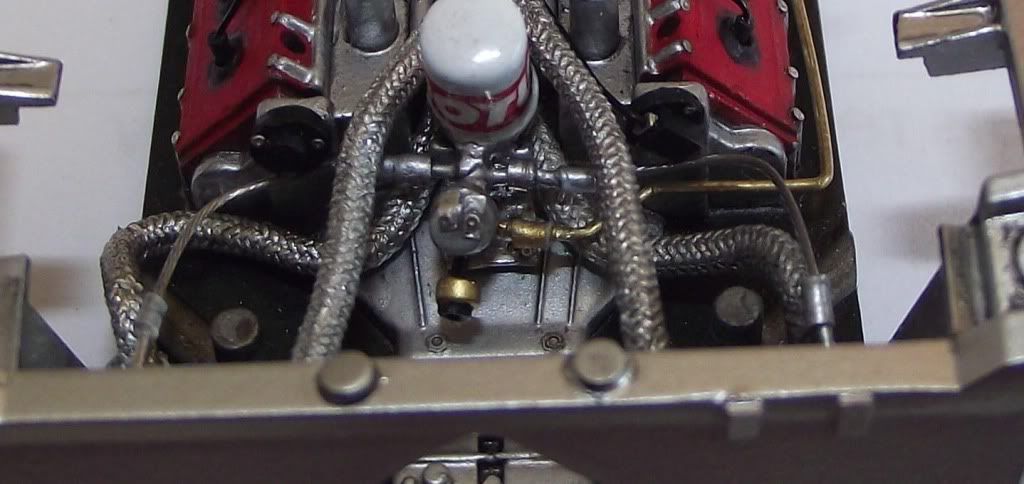 The missing shocks were made from wire, aliminium tubing and plastic and were installed 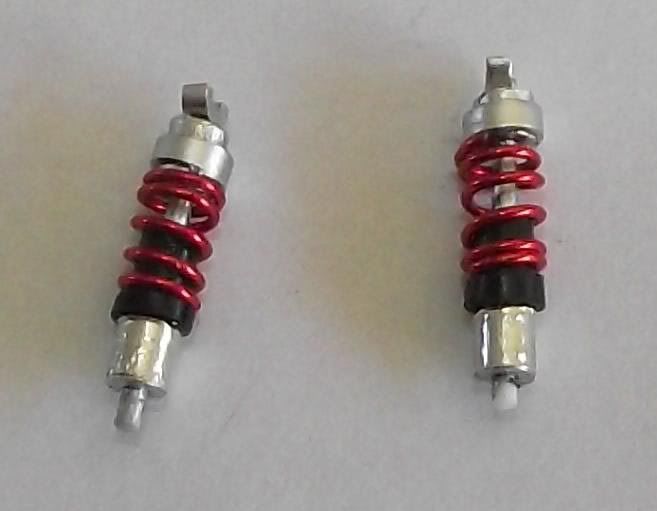 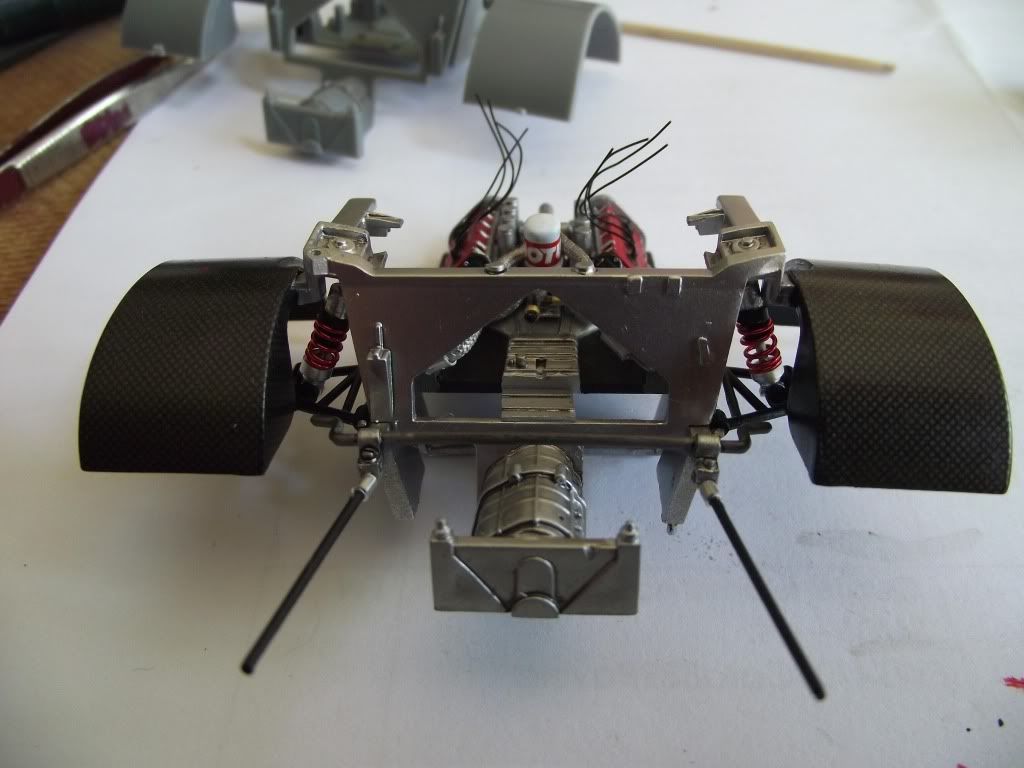 The missing "box" in the back was made using a KA models PE part, detailed with rivets and some stretched sprue, again using my photos for reference 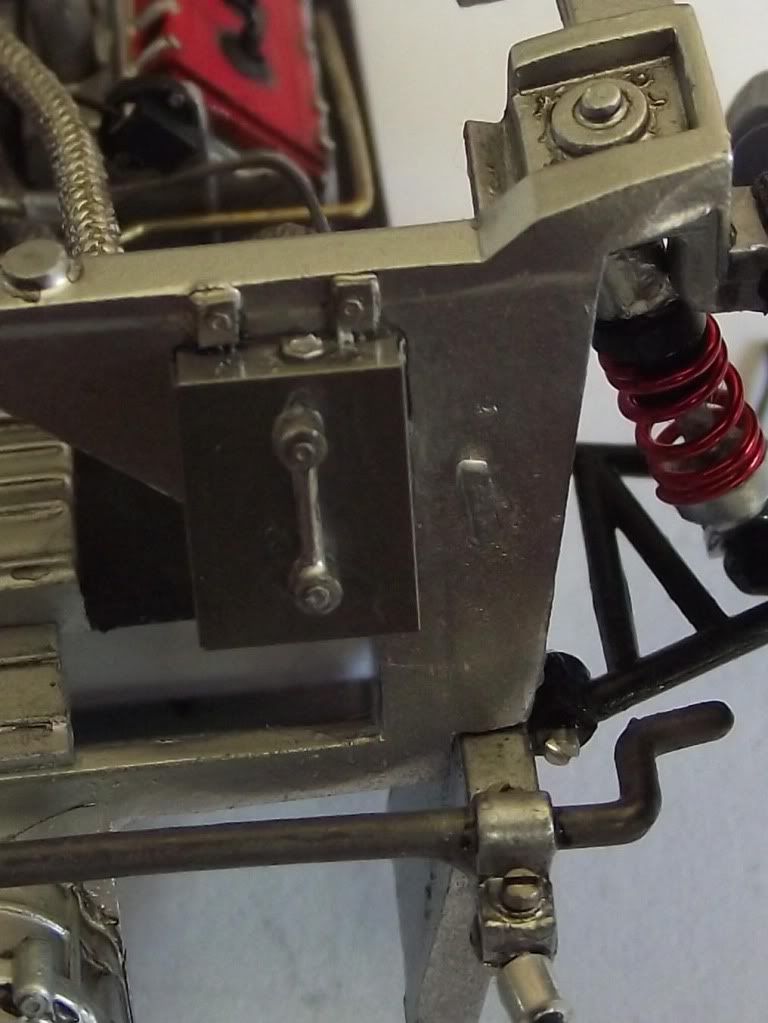 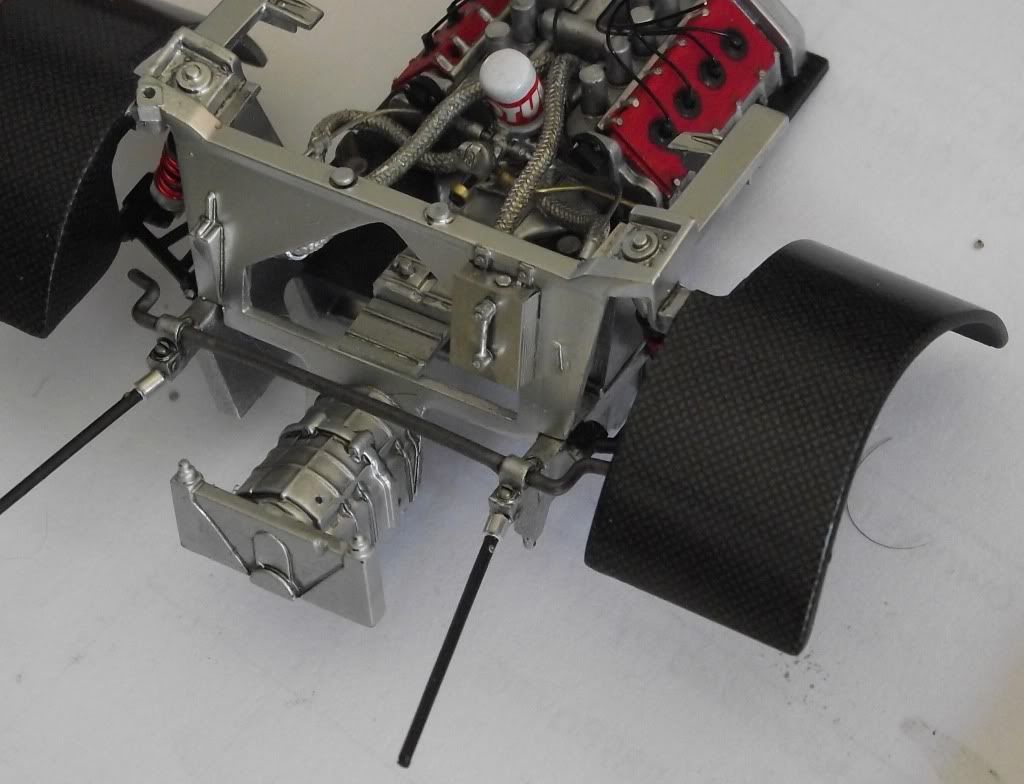 Sitting back and comparing, I think its coming together from the old Fujimi kit... 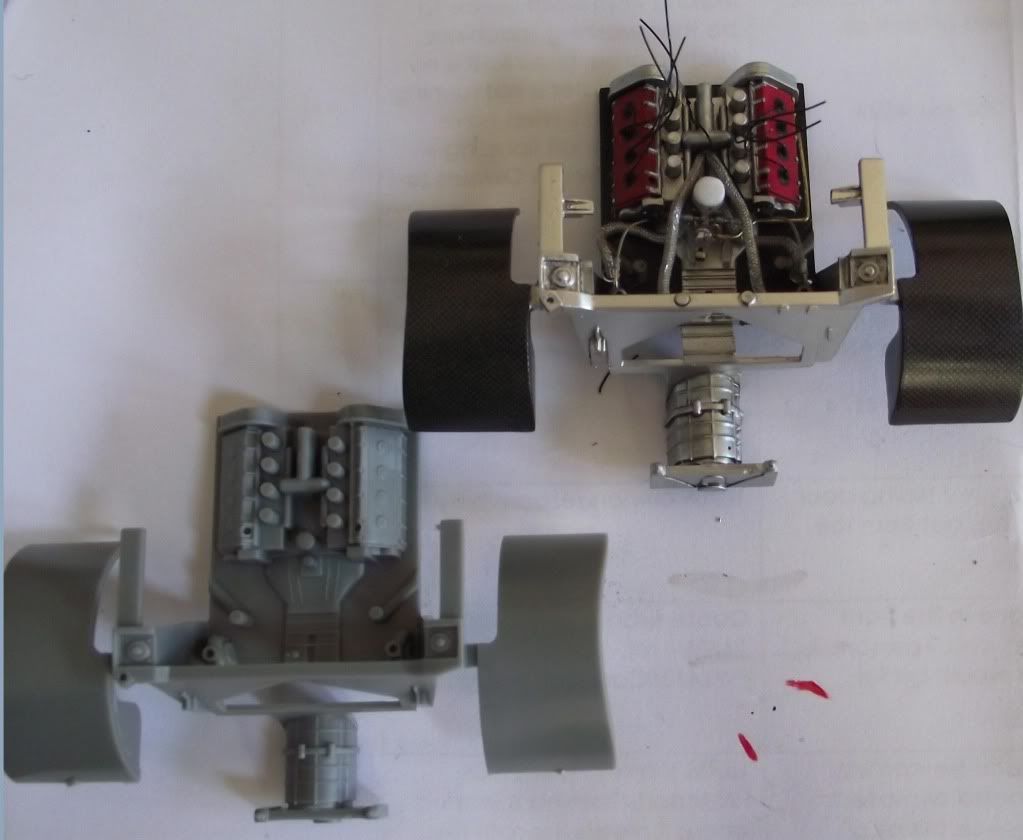 Next I'll revisit those intercoolers. Thanks for looking! Francois
__________________
"You are never too old to have a happy childhood" |
|
|
|
|
|
07-24-2011, 08:55 AM
|
#18 | |
|
Forza Schumacher
 
Join Date: Mar 2001
Location: Tallinn
Posts: 6,695
Thanks: 9
Thanked 19 Times in 19 Posts
|
Re: Fujimi 1993 Ferrari F40 LM
Good stuff!
__________________
 Would love to resume my duties as AF's own official thread bastardizer!!!   1:29:53.435 || 207.316 || 310.596 |
|
|
|
|
|
07-25-2011, 03:15 AM
|
#19 | |
|
AF Enthusiast

Join Date: Mar 2004
Location: Gold Coast, AUSSIE!!!!
Posts: 827
Thanks: 26
Thanked 32 Times in 32 Posts
|
Re: Fujimi 1993 Ferrari F40 LM
absolutely stunning!!
__________________
   
|
|
|
|
|
|
07-25-2011, 12:08 PM
|
#20 | |
|
AF Enthusiast

Join Date: Sep 2009
Location: Sauerland
Posts: 511
Thanks: 1
Thanked 35 Times in 35 Posts
|
Re: Fujimi 1993 Ferrari F40 LM
Great work. Go on!!!
|
|
|
|
|
|
07-25-2011, 04:46 PM
|
#21 | |
|
AF Moderator

Join Date: Sep 2002
Location: Fort Worth, Texas
Posts: 3,246
Thanks: 31
Thanked 314 Times in 241 Posts
|
Re: Fujimi 1993 Ferrari F40 LM
Excellent work!
__________________
The client is not always right. - Enzo Ferrari ItalianHorses.net    
|
|
|
|
|
|
07-26-2011, 07:54 PM
|
#22 | |
|
AF Enthusiast
Join Date: May 2007
Location: Chicago, Illinois
Posts: 1,000
Thanks: 5
Thanked 29 Times in 26 Posts
|
Re: Fujimi 1993 Ferrari F40 LM
Very nice. That Fujimi kit really is simple.
Tom Tanner/Scale Designs/Ferrari Expo 2012-Chicago March 2012 |
|
|
|
|
|
08-01-2011, 01:04 AM
|
#23 | |
|
AF Enthusiast

Join Date: Jun 2006
Location: Swalmen, Netherlands
Posts: 798
Thanks: 3
Thanked 14 Times in 14 Posts
|
Re: Fujimi 1993 Ferrari F40 LM
Fantastic build.
Lots of scratchbuilding going on. Very impressive. I like all the details you're adding. It's just spot on. Looking forward to the next update. Oh, and to qualify as a slow builder, you'll need to take at least 2 years finishing a build...  |
|
|
|
|
|
08-09-2011, 01:34 PM
|
#24 | |
|
AF Newbie
Thread starter
Join Date: Jan 2011
Location: Johannesburg
Posts: 38
Thanks: 32
Thanked 6 Times in 5 Posts
|
Re: Fujimi 1993 Ferrari F40 LM
Hi guys
Time for a quick update: The Fujimi kit includes, as per the norm by now, the standard exhaust pipe for a road F40. The LM however had no resinators or a catalytic converter. It only had 3 pipes straight from the turbo's right out the back... Out came various pieces of Evergreen styrene, my reference photos, lots of CA and plenty swearing. PE brackets were added, tips are from the Tamiya Ferrari F40 MonteShell. Note the PE clamps behind the tips, courtesy from Top Studio. 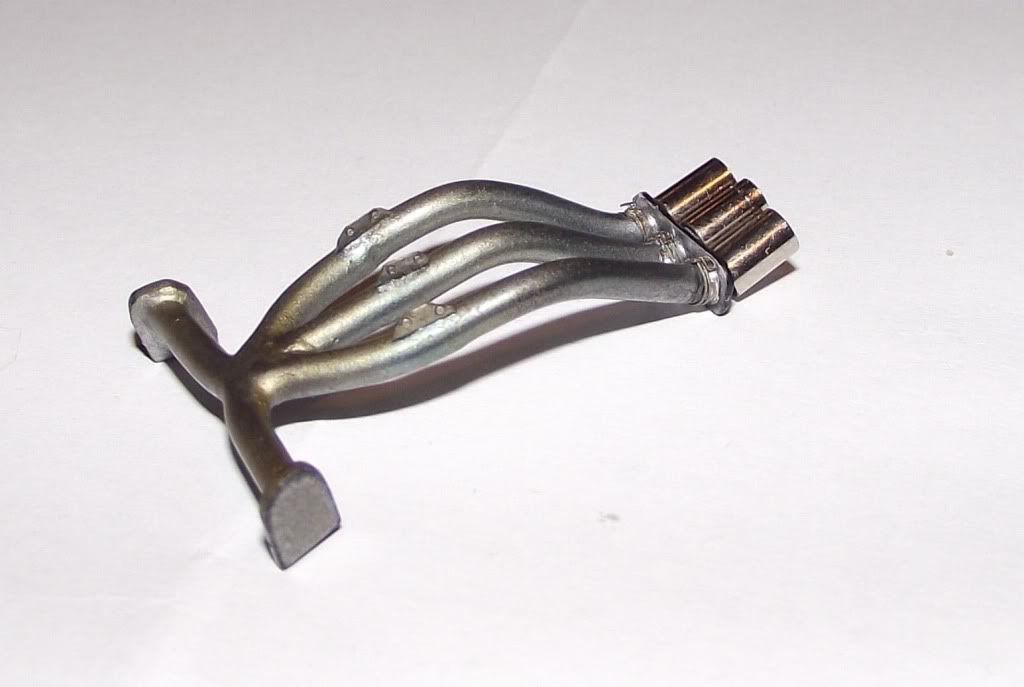 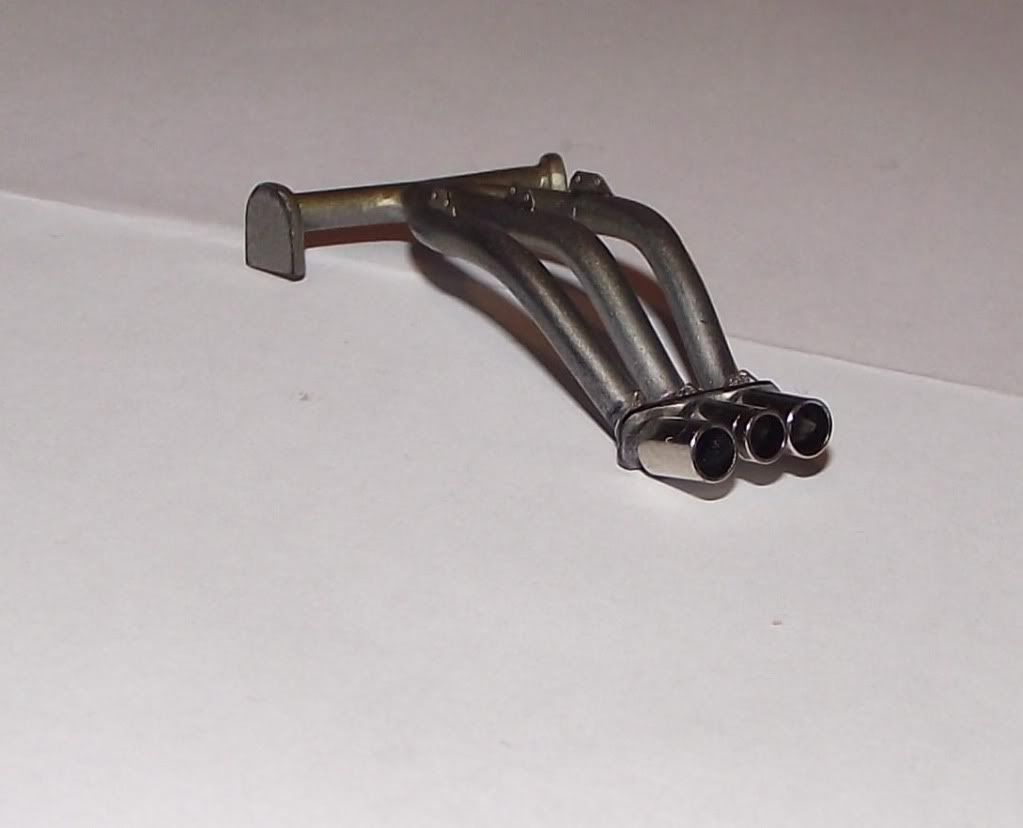 Installed onto the engine 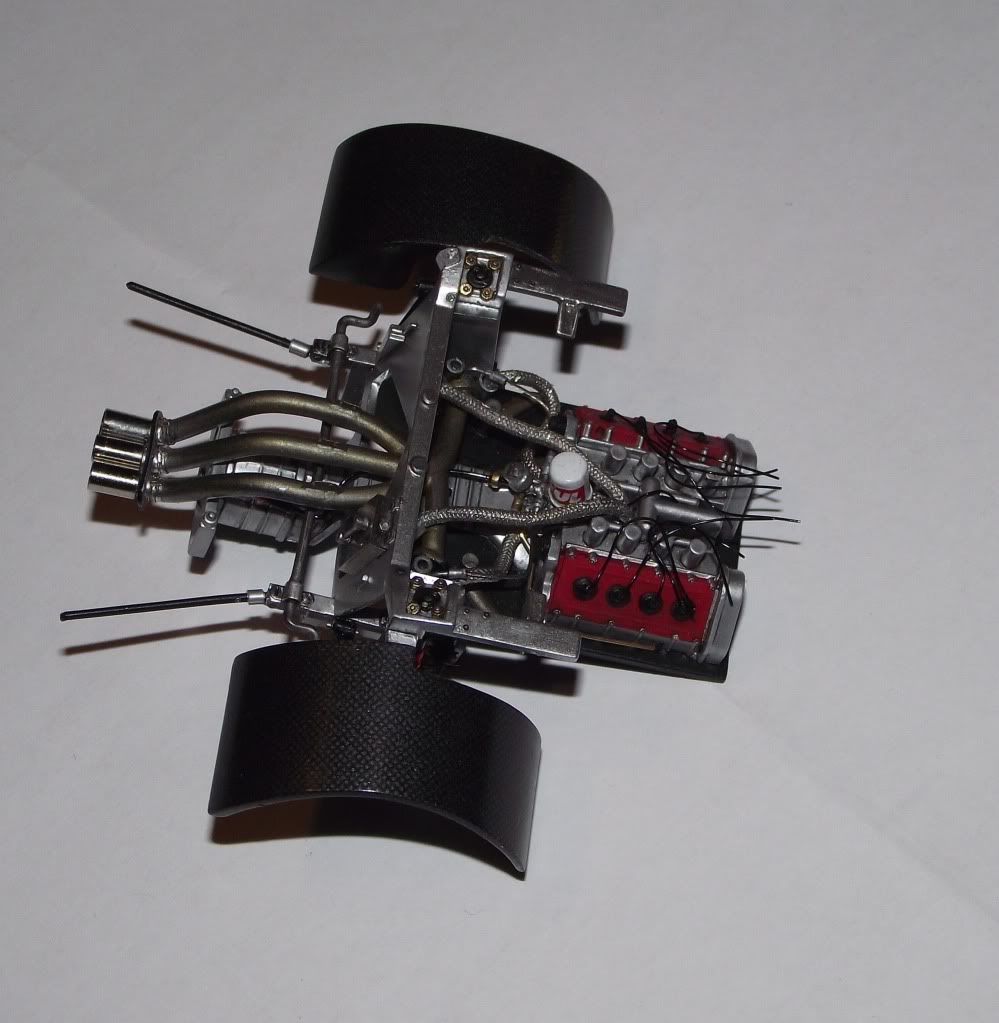 Next up was the dump valve for the turbo's. Compared to the road version, the valve was almost double in size and had a very specific shape and shiny polished finished. I tried using different pieces of aliminium tubing and styrene, but gave up after the millionth attempt, not happy with the results. In the interim I added the tension springs to the piping using 0.3mm wire. One Monday morning, walking through the hardware store, I found the PERFECT dumpvalve... Take a guess where its from? A BMF band with wire detail was added.  The valve came from a 50 cent fuse  Installed onto the engine   Back to the intercoolers. They were painted up with Tamiya lacquers, received nuts and bolts from Hobby Design. radiator mesh is from Finishers, a must have product for every modeler's spares box!  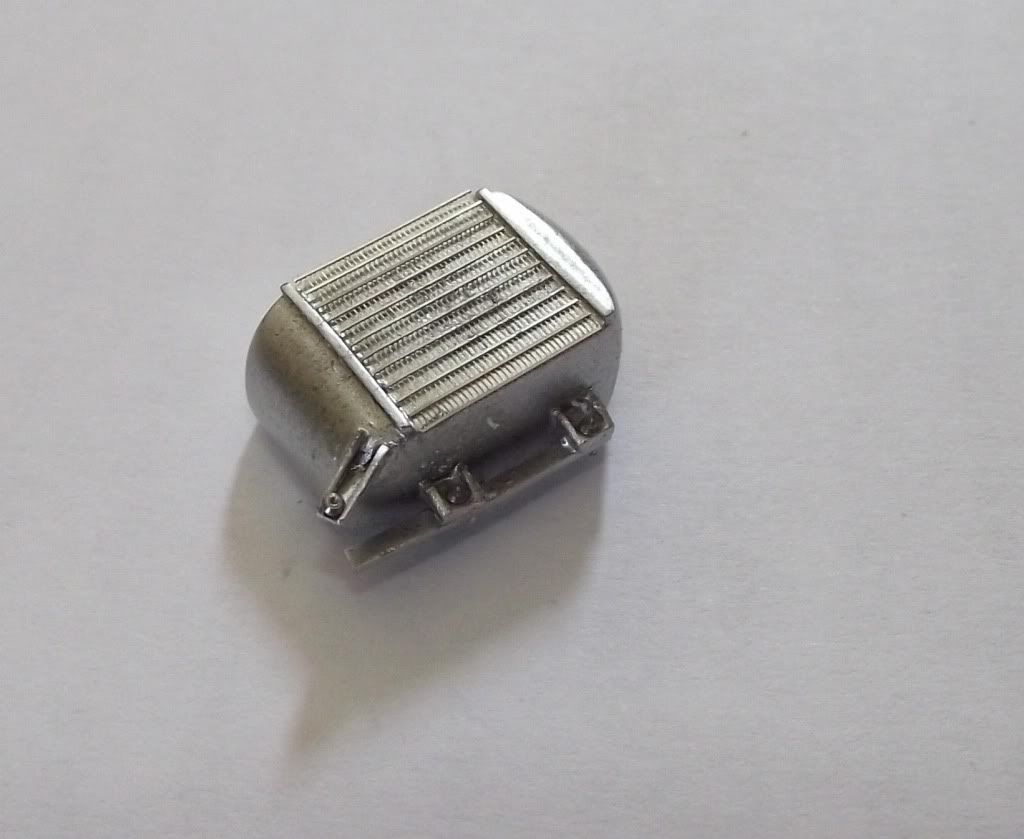 The intake plenum was adapted in size to fit the intercoolers. Bolts again from Hobby Design. BMF and red electrical tape finished it off  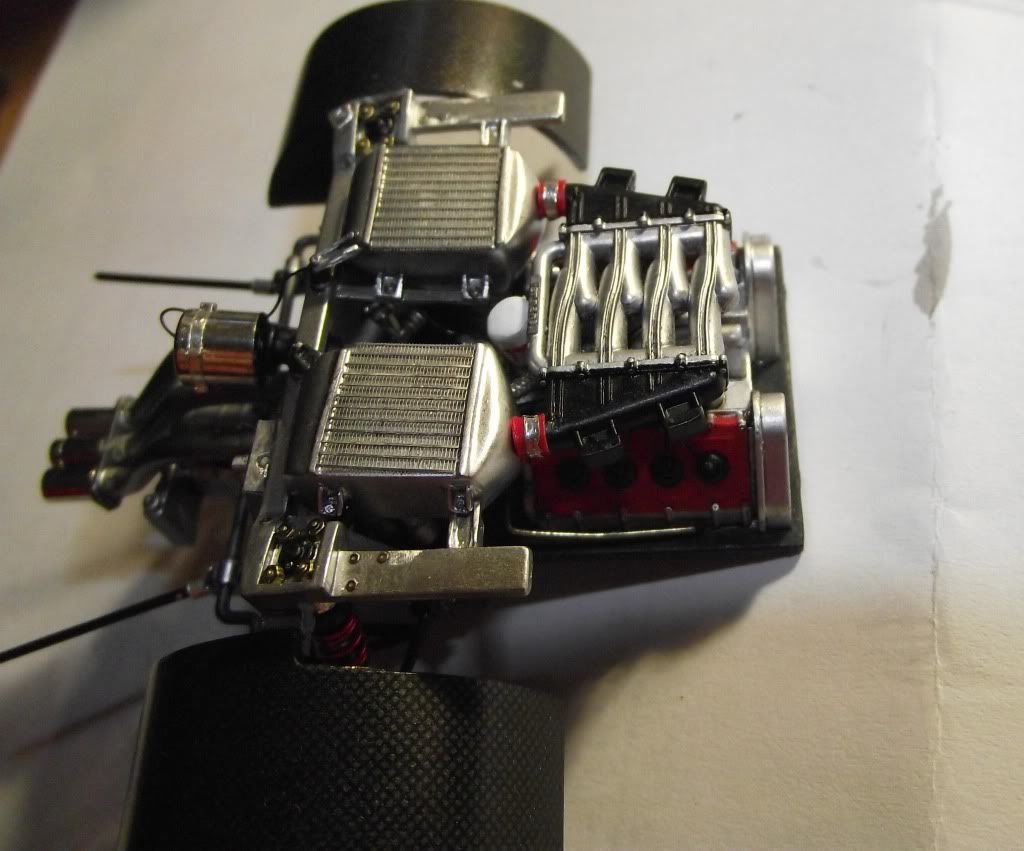 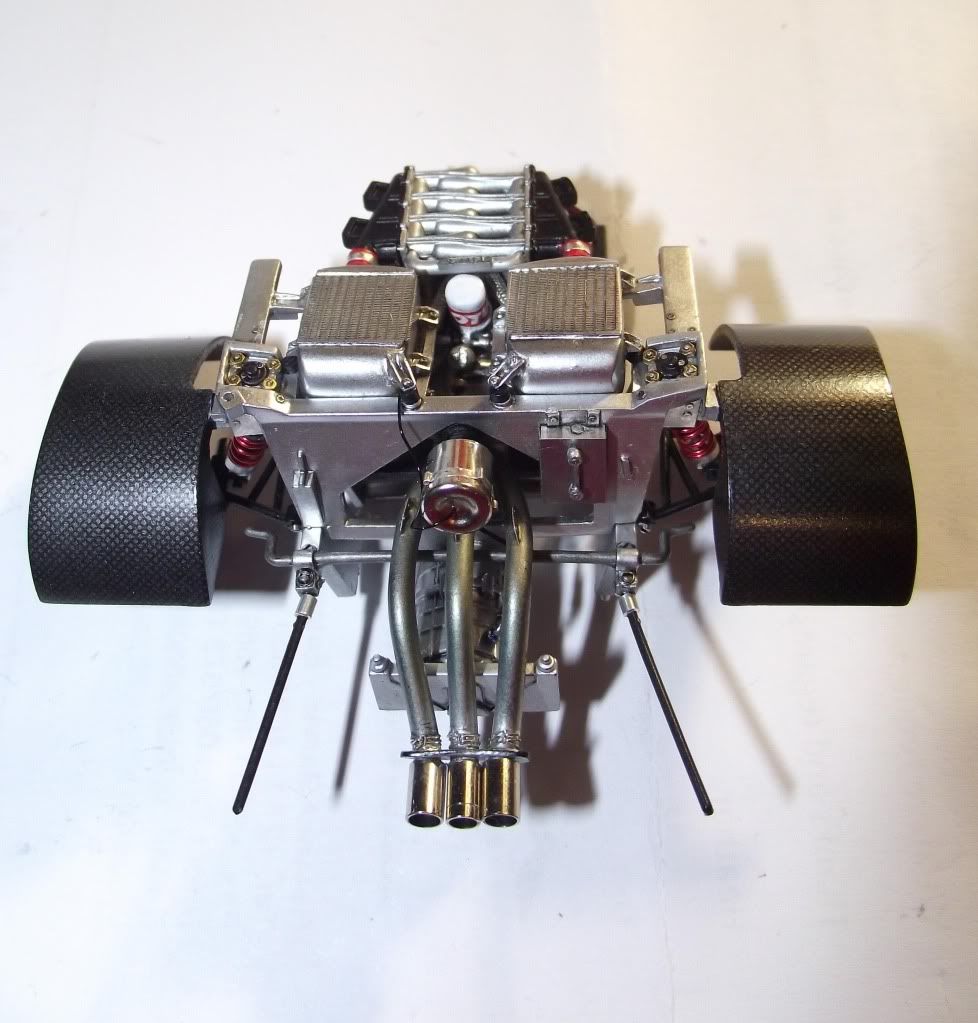 Things are really coming together now. Some wiring and plumbing left around the engine, then I can start the body. Thanks for looking! Francois
__________________
"You are never too old to have a happy childhood" |
|
|
|
|
| The Following User Says Thank You to tifosi16 For This Useful Post: |
tmc301 (09-03-2011)
|
|
08-10-2011, 02:54 AM
|
#25 | |
|
AF Enthusiast
Join Date: Sep 2009
Location: Sauerland
Posts: 511
Thanks: 1
Thanked 35 Times in 35 Posts
|
Re: Fujimi 1993 Ferrari F40 LM
Hi
Good idea with the fuse. Your work 1A. |
|
|
|
|
|
08-20-2011, 12:37 PM
|
#26 | |
|
AF Enthusiast

Join Date: Aug 2005
Location: Chengdu. CHN
Posts: 1,269
Thanks: 20
Thanked 36 Times in 19 Posts
|
Re: Fujimi 1993 Ferrari F40 LM
You're pushing a Fujimi kit to MFH level of detail mate! Fabulous work!
|
|
|
|
|
|
09-02-2011, 10:09 PM
|
#27 | |
|
AF Enthusiast

Join Date: Jul 2003
Location: Madison, Wisconsin
Posts: 2,493
Thanks: 7
Thanked 8 Times in 8 Posts

|
Re: Fujimi 1993 Ferrari F40 LM
simply beautiful, im glad i found this prior to it getting finished, good job man
__________________

|
|
|
|
|
|
09-05-2011, 03:49 AM
|
#28 | |
|
AF Enthusiast
Join Date: Feb 2009
Location: Palm Desert, California
Posts: 610
Thanks: 108
Thanked 44 Times in 40 Posts
|
Re: Fujimi 1993 Ferrari F40 LM
I have this same kit. Until now i never thought it could be built into high detail like this . Amazing work. I will definitely steal your fuse trick.
|
|
|
|
|
|
09-05-2011, 06:23 AM
|
#29 | |
|
AF Newbie

Join Date: Apr 2008
Location: Athens
Posts: 79
Thanks: 0
Thanked 4 Times in 4 Posts
|
Re: Fujimi 1993 Ferrari F40 LM
Amazing detailing and build!
Keep Up  |
|
|
|
|
|
09-08-2011, 02:06 PM
|
#30 | |
|
AF Newbie
Thread starter
Join Date: Jan 2011
Location: Johannesburg
Posts: 38
Thanks: 32
Thanked 6 Times in 5 Posts
|
Re: Fujimi 1993 Ferrari F40 LM
Hi all,
Thank you so much for the kind comments, it really helps to keep me motivated! Ok, so some progress shots: The engine has been mated to the chassis and the cockpit. Small details added and the wiring and plumbing tidied up. 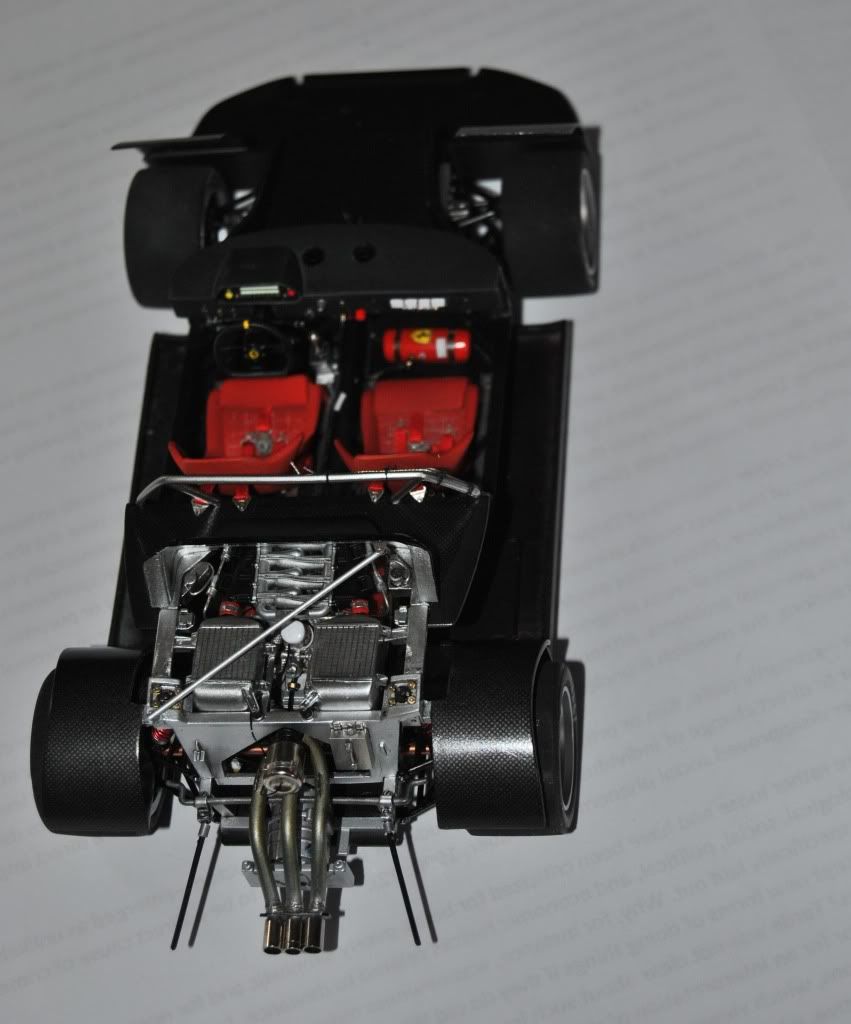 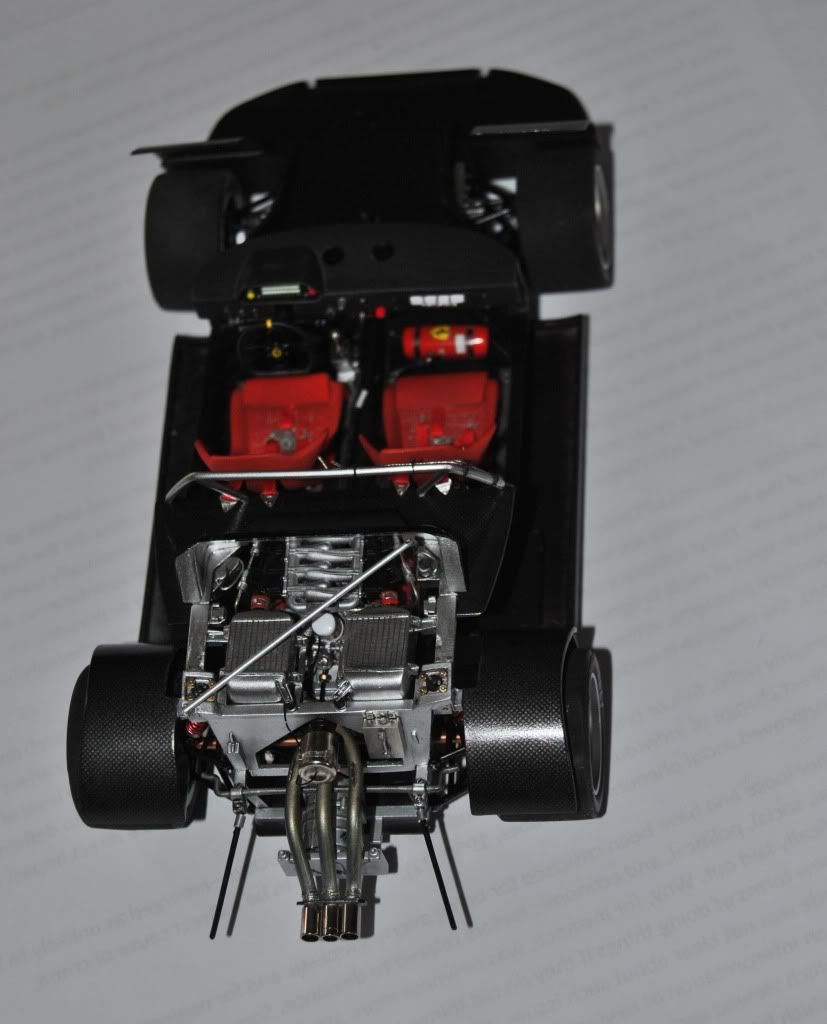  The kit wheels were stripped from their chrome and repainted silver. OZ decals were added (thanks Gerhard!) as well as valves and the center lock pin made from thin wire. Tyres were spun on a drill to scuff them up. Now I need some advice... I painted on the Pirelli logos on the tyres, but I am not convinced by their look. The car, although a racing car in essence, won't carry any liveries when finished, only a Rosso Corsa paintjob... Do I keep the logos or do I remove them? 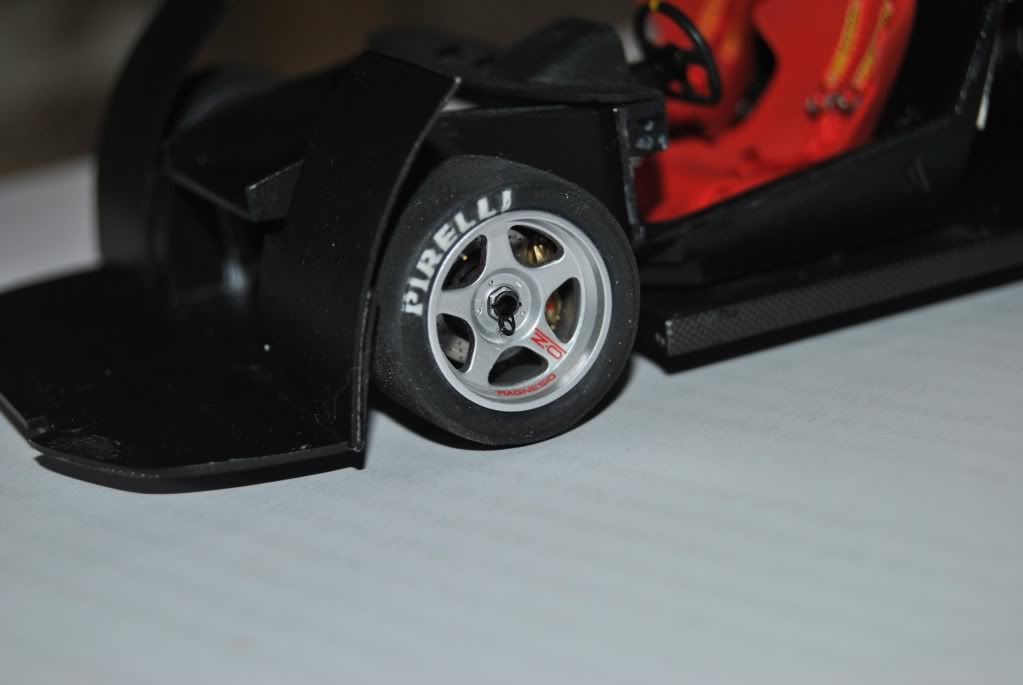 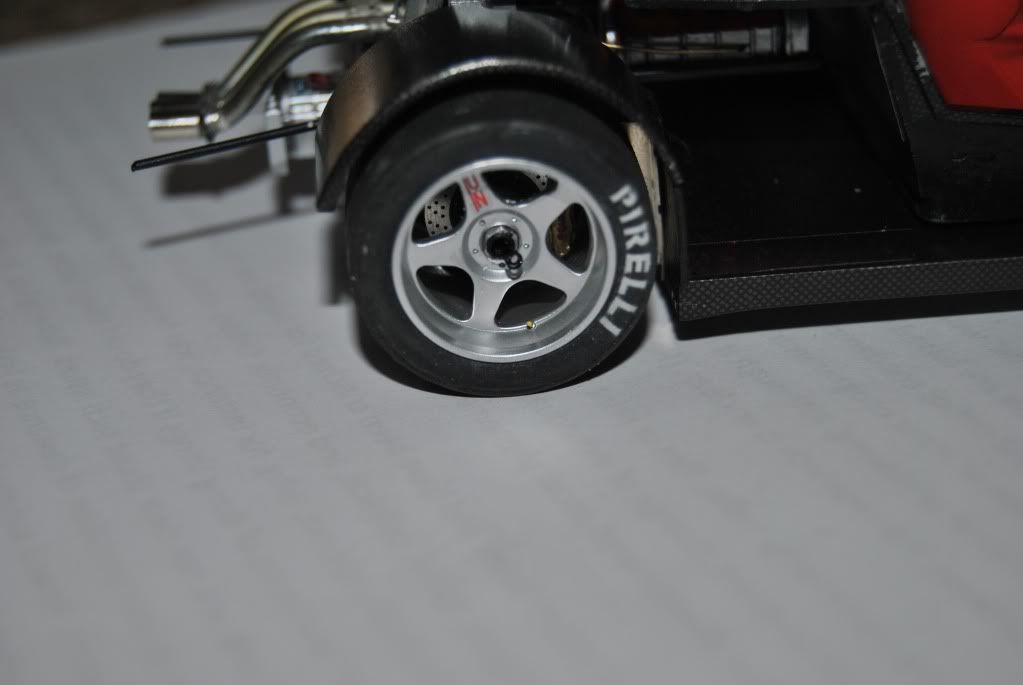 Now this is where the fun starts. The body of the F40LM shares more panels with the full on racing GTE's than with a normal F40. In my honest opinion, NONE of the kits on the market accurately carry the right shape. The Tamiya kit is too long, the Fujimi kit is too fat, the Italeri kit is a toy. Again, my opinion. The Hiro kit and the Studio 27 kit of the GTE is probably the most accurate, but not without their flaws. I have all of the above kits, and it is quite interesting to place all the bodies next to each other and compare. Now back to the Fujimi body. It is about 4mm to short in front, the nose slants a little bit too much. Also, the roof is about 2mm too wide (doesn't sound like much, but makes a big difference). This I can all live with. The major issue for me however was all at the front. The front arches flare so much, that they actually protrude the rear ones, the front intake is completely wrong for all 19 LM's built (bar the prototype, which was a completely different car) and it is missing the NACA duct. This is where I had to go back to my original concept, correct what I can without giving up the fun aspect and driving myself nuts in the process. This is what I did: I started by correcting the lip on the front intake using plastic card. The NACA duct was grafted on from a Tamiya 350 Nismo 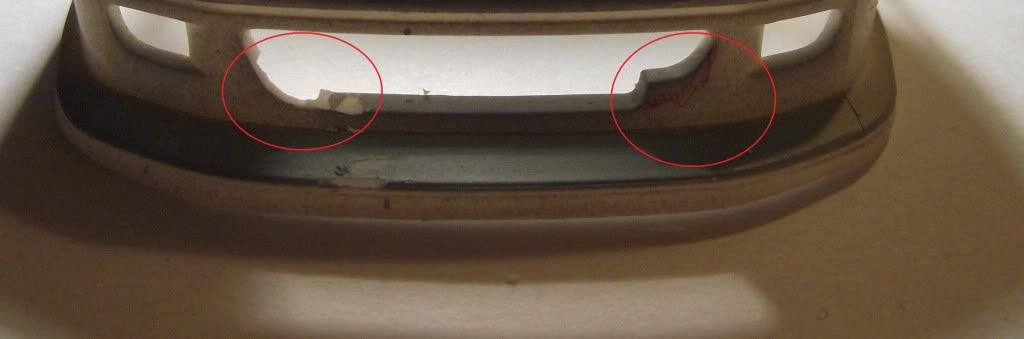 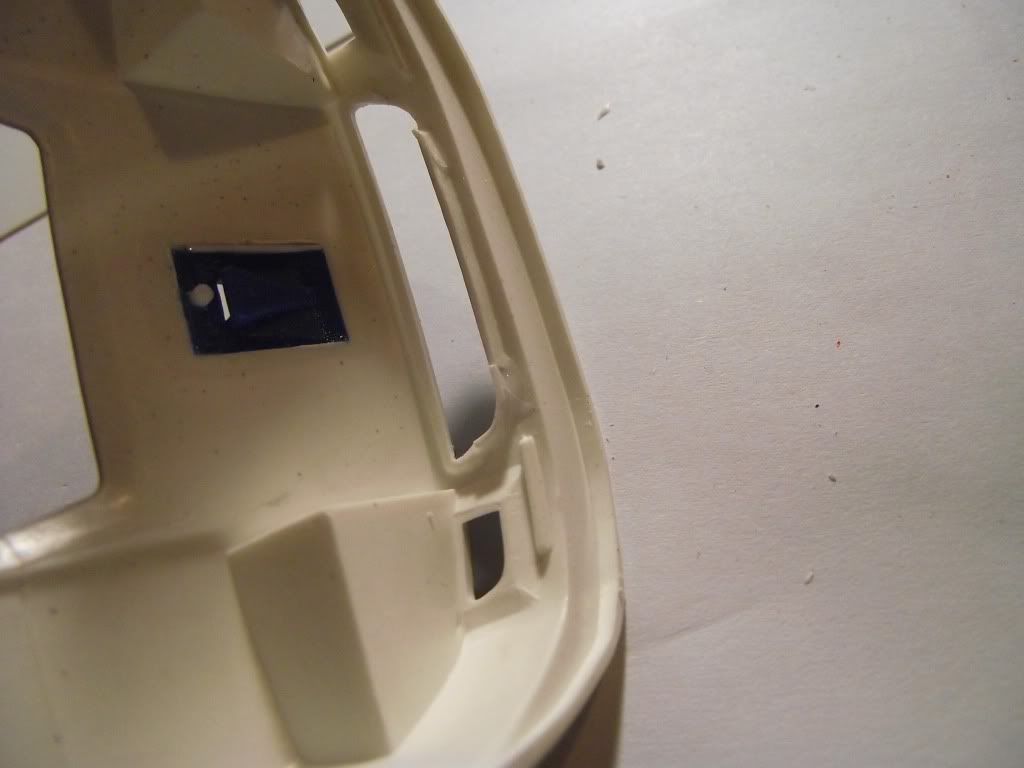 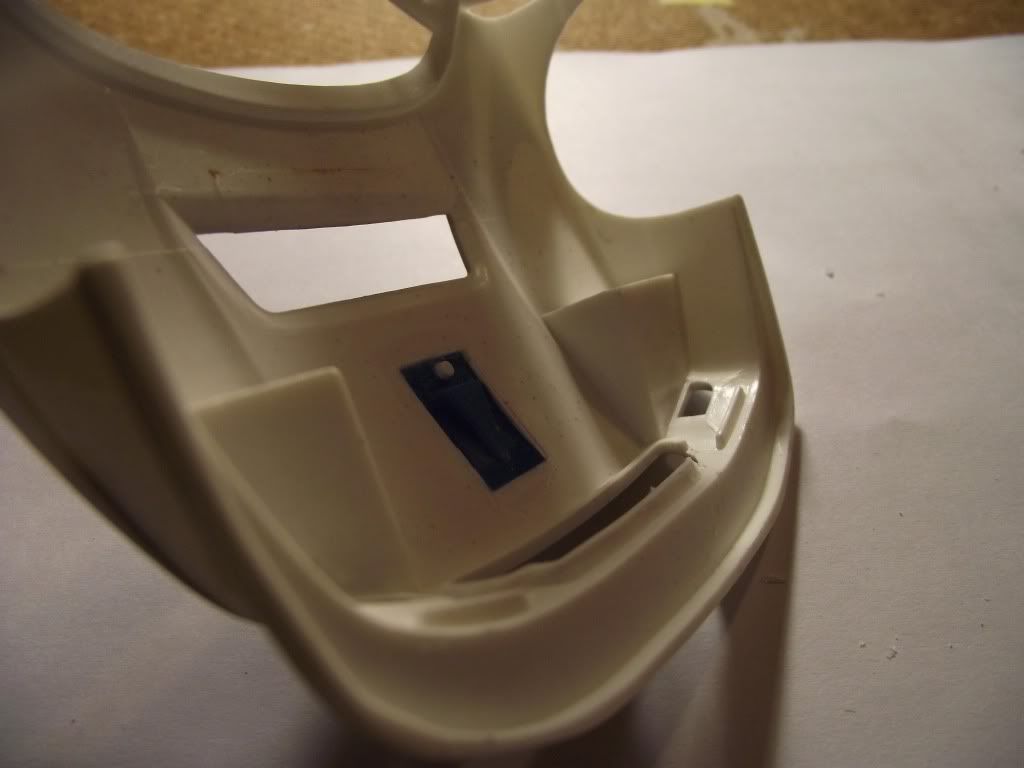 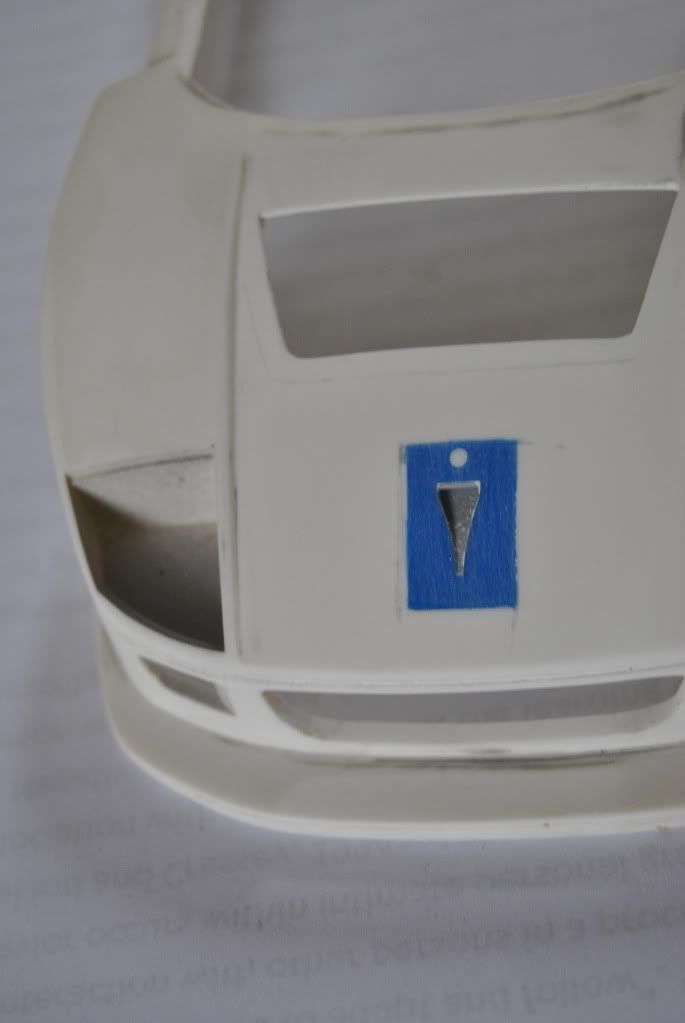  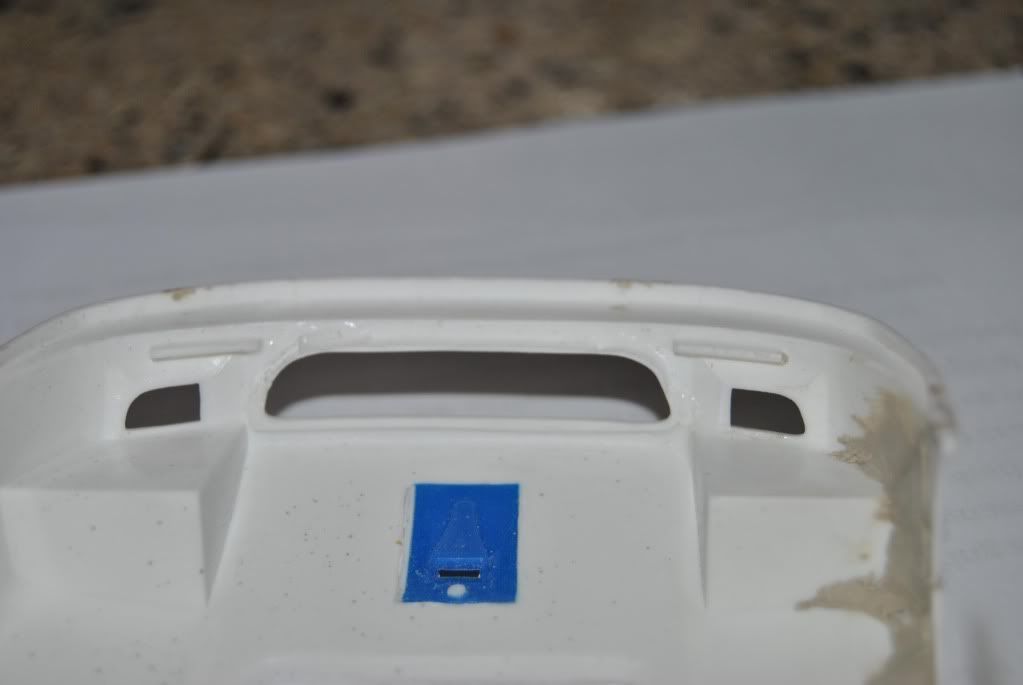 The next photo shows the differences between the nearly correct body of the Studio 27 GTE and the Fujimi body. Note the width of the roof as well as the width of the front intake (already opened wider here in the Fujimi body. Lastly I had to cut out 2mm of the fenders to flatten them, they were way too curvy! Here, the right hand side fender on the Fujimi body has been done. 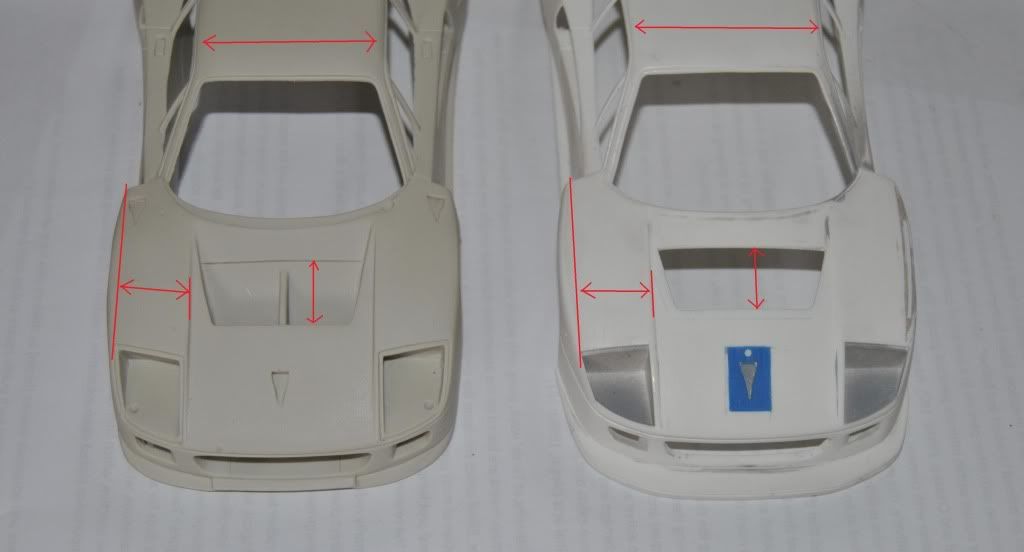 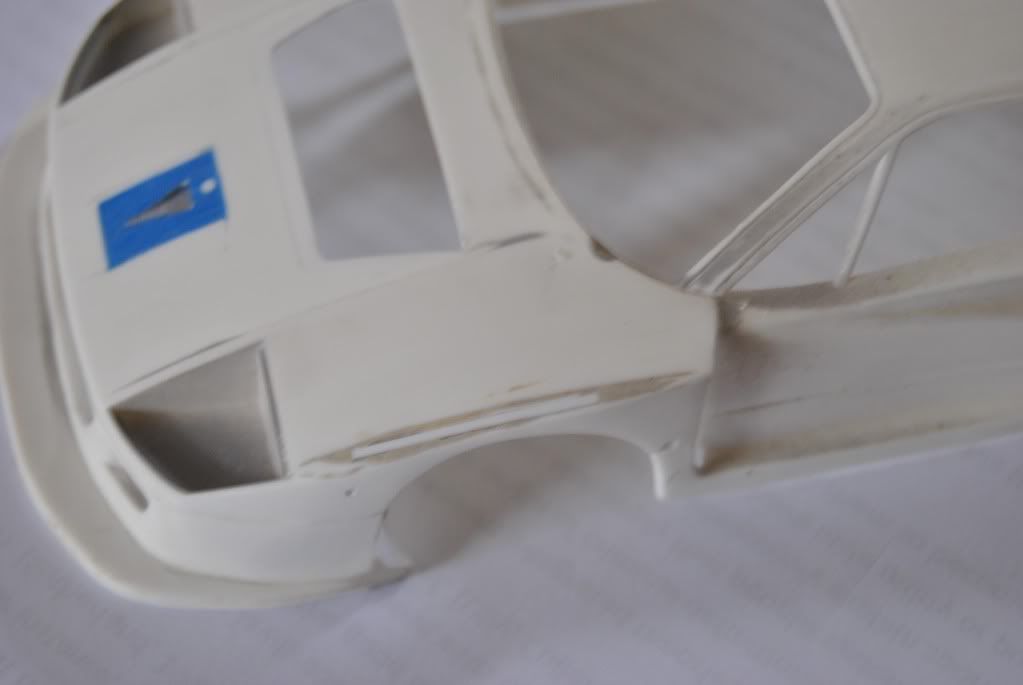 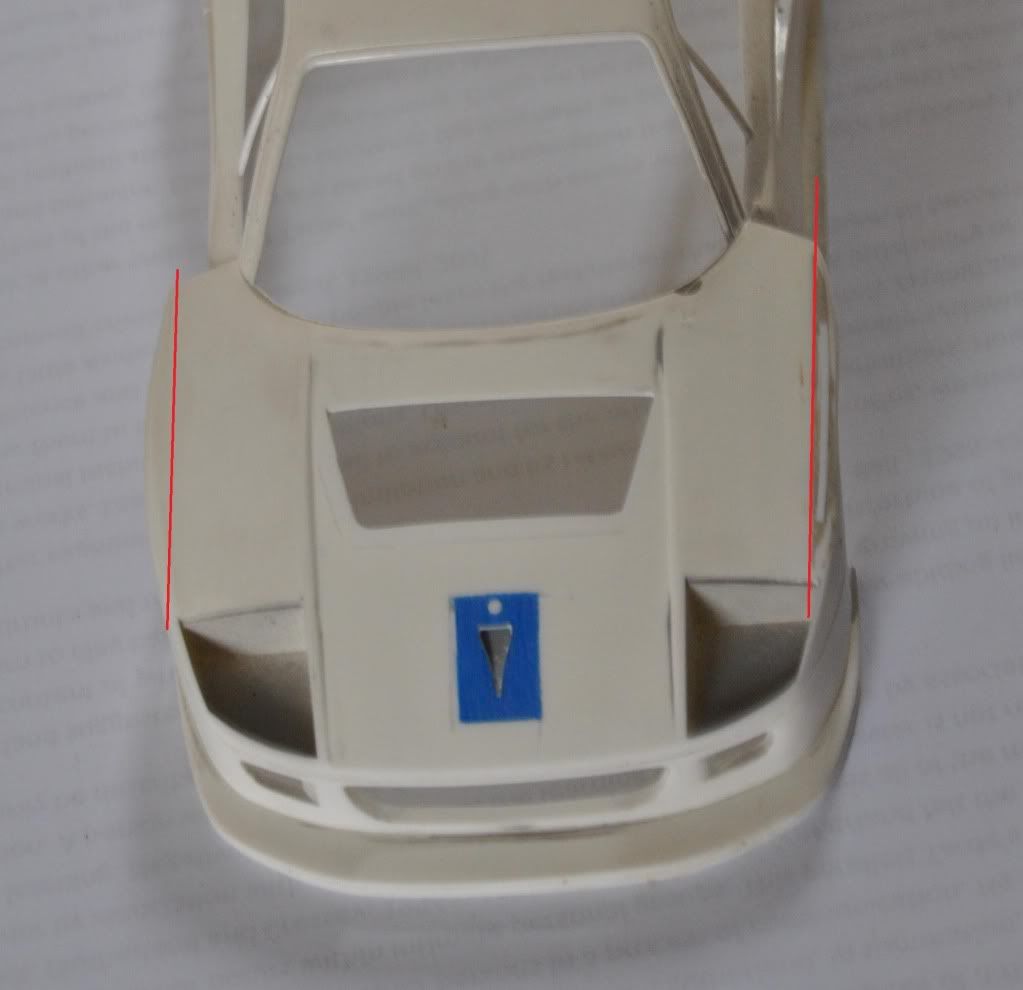 Next up was the shape of the front wheel arches, they were too straight, again compared to the Studio 27 body. This was corrected with plastic card. 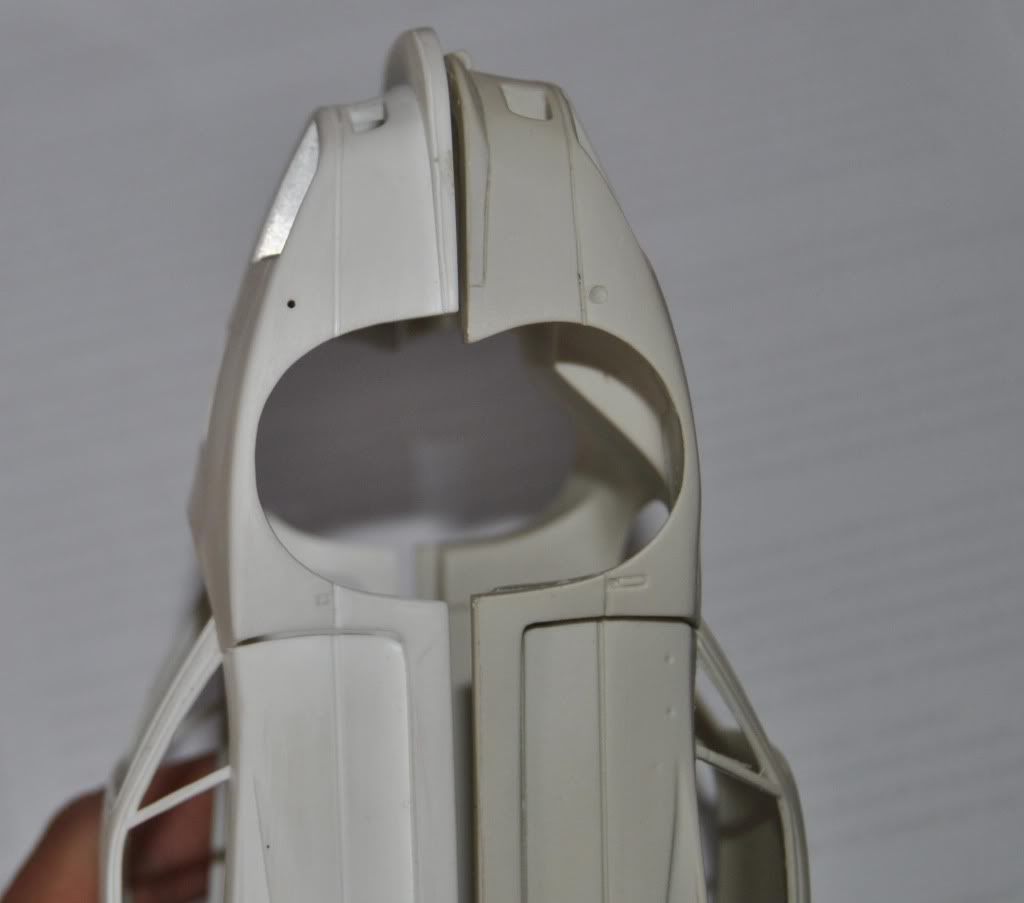  The vents around the body were all opened up 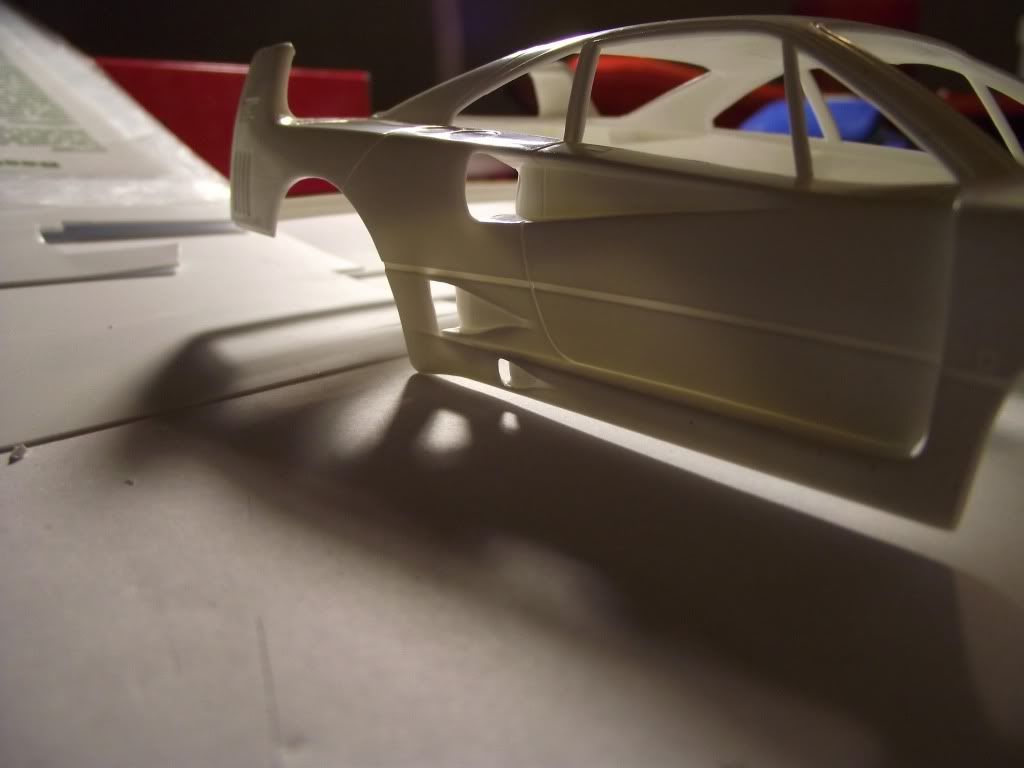 The back end of the Fujimi body is very accurate imo. There is still a lot of work to be done, primer to be sprayed and little mistakes to be fixed. The rear windows need to be reshaped to be accurate and most of the glass replaced by acetate sheet. Still a long way to go probably, but I can start smelling the thinners of the final paint job in the air! Thanks for looking as always, Regards, Francois
__________________
"You are never too old to have a happy childhood" |
|
|
|
|
| ||||||||||||||||||||||||||||||||||||||
|
POST REPLY TO THIS THREAD |
 |
|
|


