|
|
|

|
|
| Search | Car Forums | Gallery | Articles | Helper | AF 350Z | IgorSushko.com | Corporate |
|
| Latest | 0 Rplys |
|
|||||||
| WIP - Motorsports Post topics for any "Work In Process" motorsports vehicles in this sub-forum. |
 |
 Show Printable Version | Show Printable Version |  Email this Page | Email this Page |  Subscribe to this Thread
|
|
|
Thread Tools |
 01-20-2019, 11:05 AM
|
#1 | |
|
AF Enthusiast
Join Date: Mar 2009
Location: Madrid
Posts: 649
Thanks: 109
Thanked 68 Times in 67 Posts
|
Lancia Delta S4 Marlboro Beemax 1/24
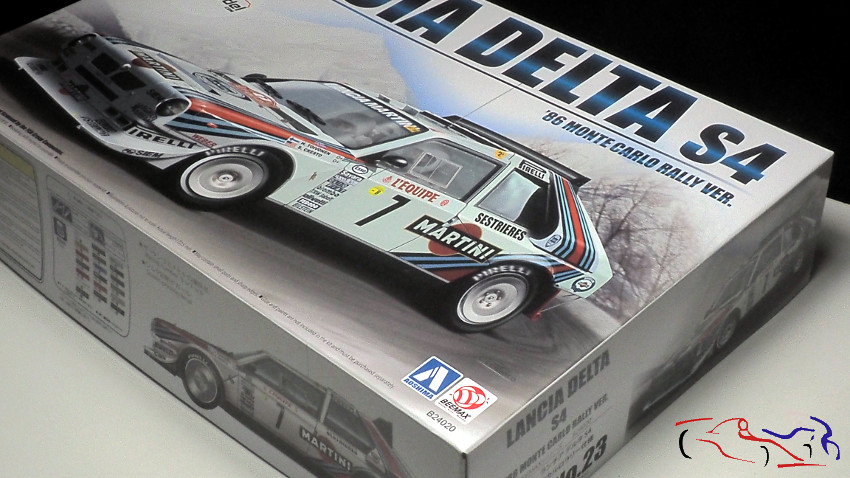
New entry with new project and with recently released kit: Lancia Delta S4 of the firm Beemax at scale 1/24. A very desired kit because it is an icon of the GrB, and because the kit only existed in resin manufacturing, not very accessible to all the modelers. Here is the box:
 But Im not going to do the Martini livery, Marlboro one will be the choice, car that led Juan Carlos Oñoro in the Spanish gravel rallye Championship in 1987, and he won it. Not to be confused with the car that ran the following two years with Gustavo Trelles, in the same championship. The car was the unit # 225 that Marku Alen piloted in 1986, which he won in the San Remo rally. Here you have a photo with the chosen livery: 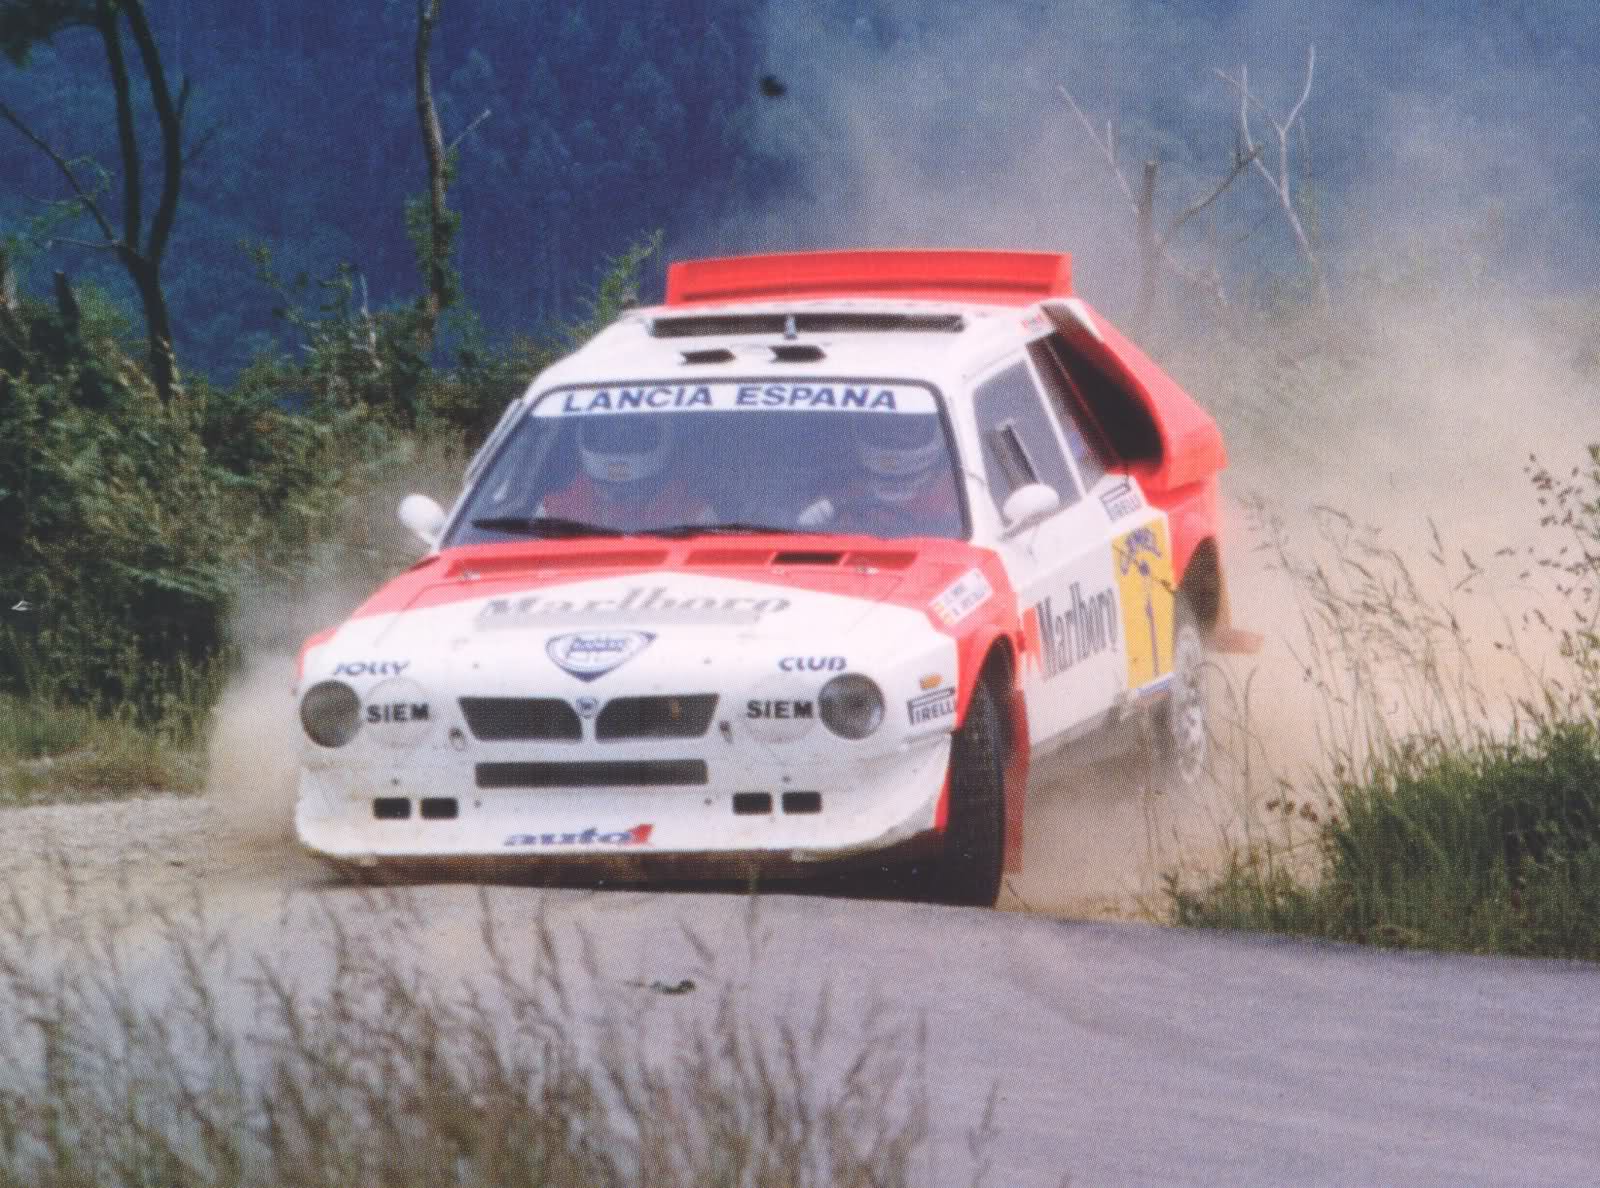 Being a novelty, I show you the staples that come in the box: 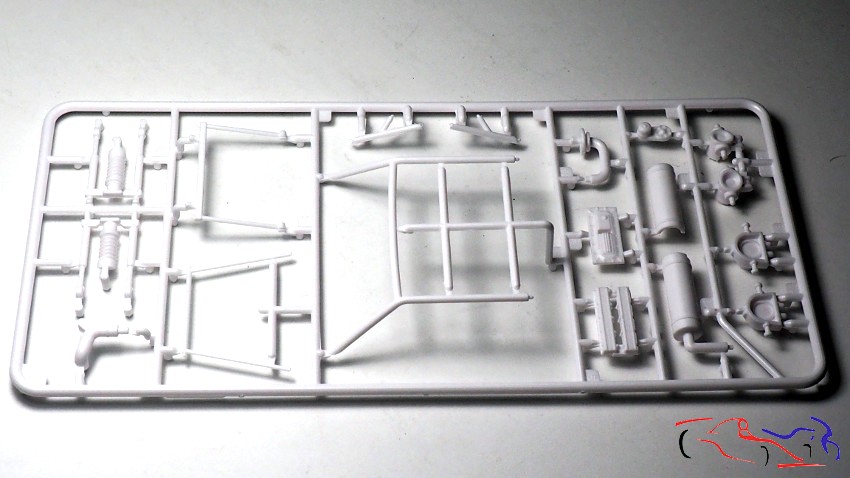 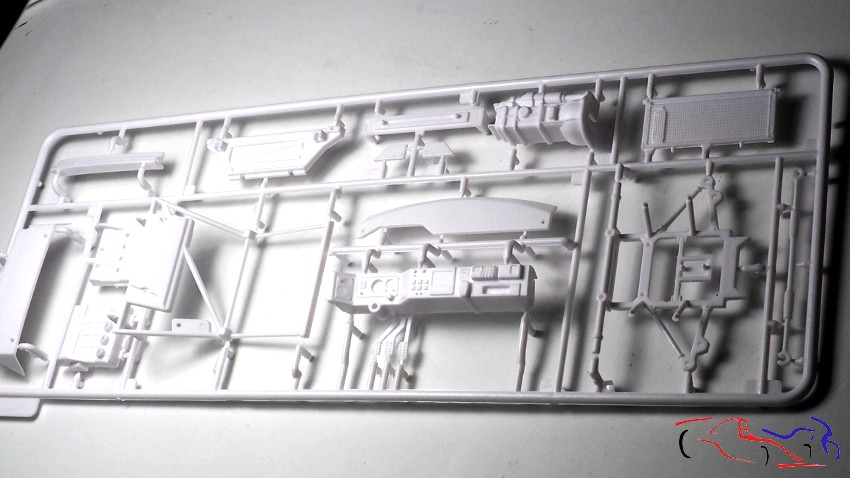 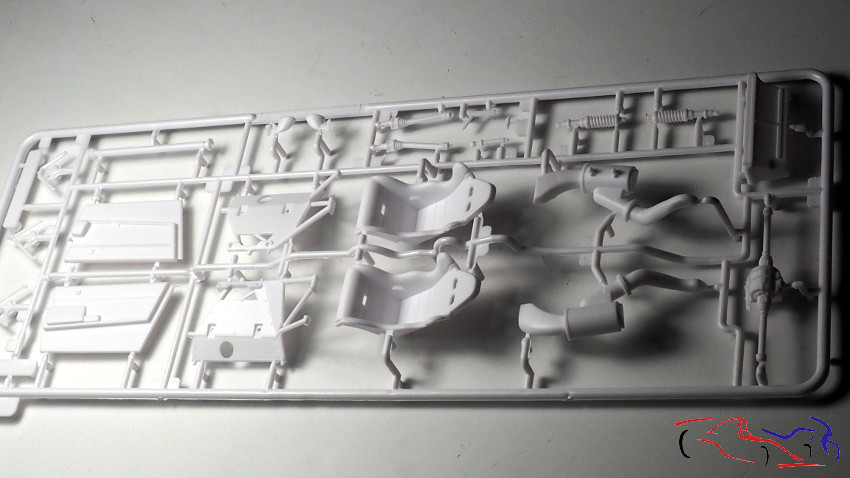 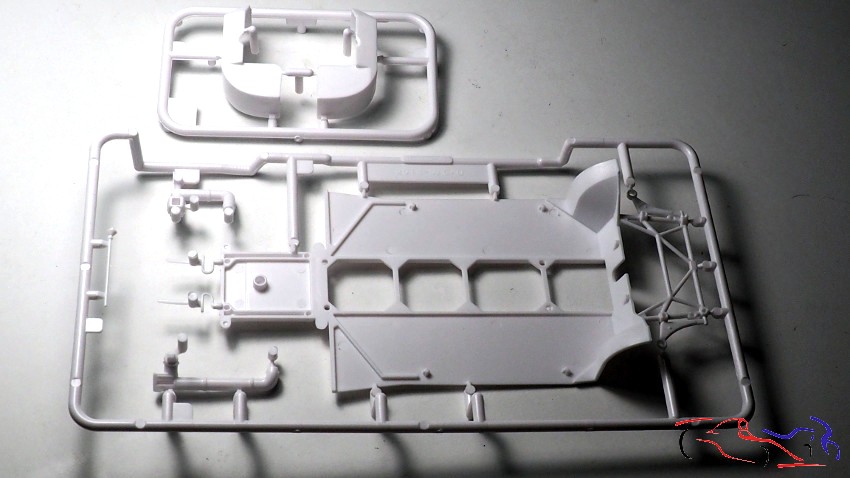 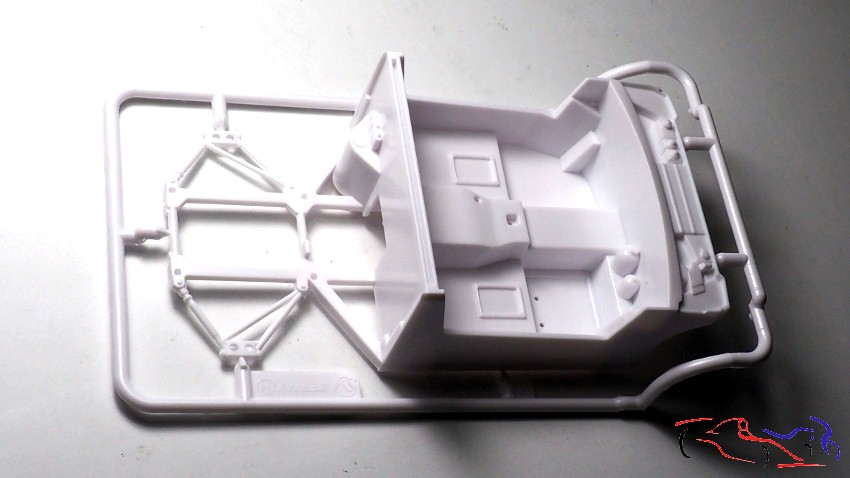 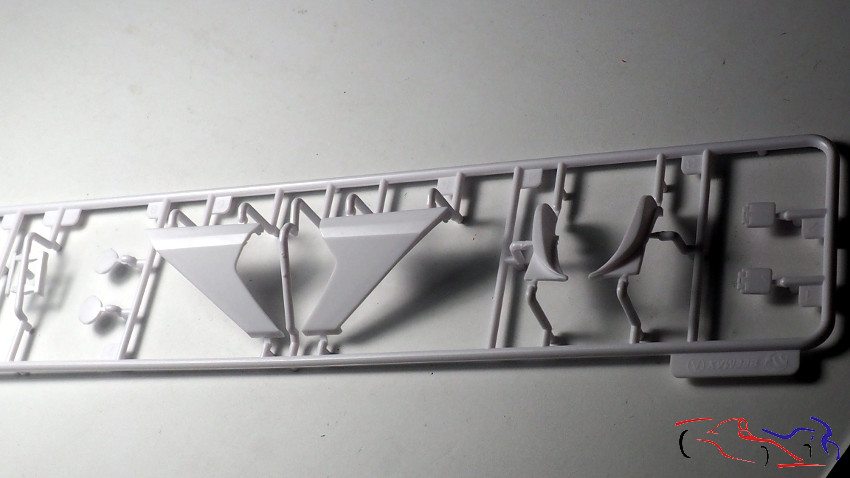 In the following picture, we can see the chrome staples, including the rear wheel rings: 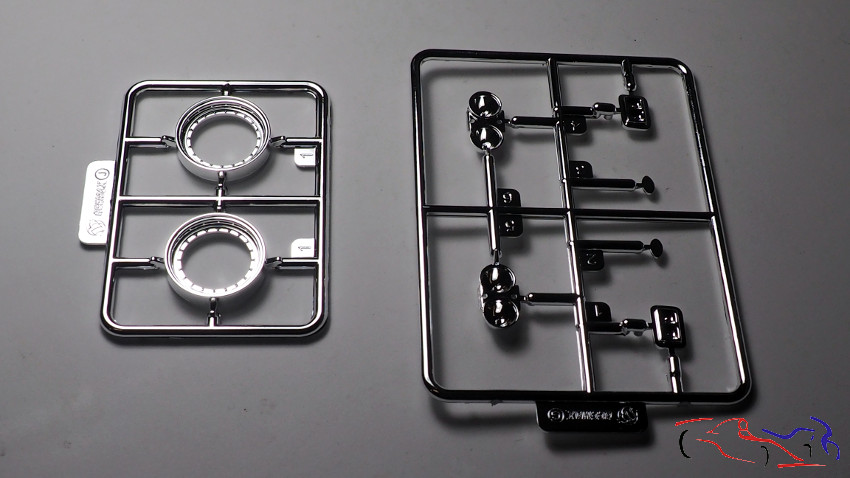 And of course, the tires, the skinny point of the kit since they do not remember much the ones used in the world rally championship: 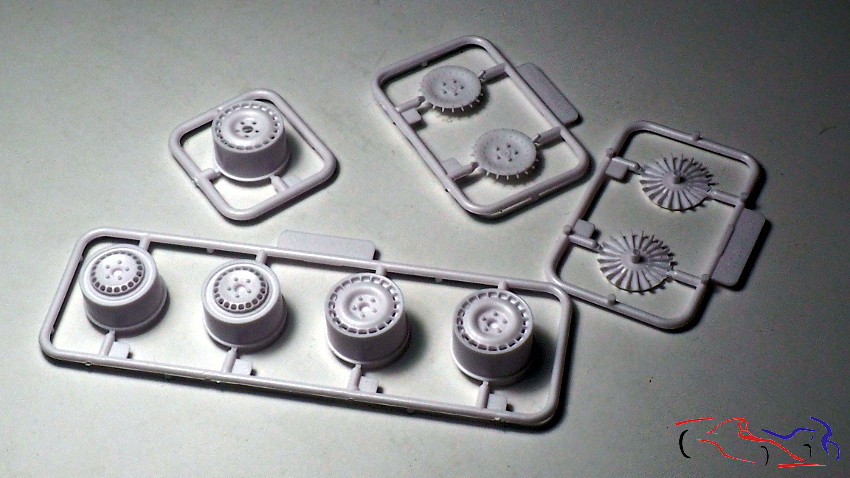 The tires, which curiously come with a layer of rubber on the inside, being logically from the mold. They can be removed without any problems: 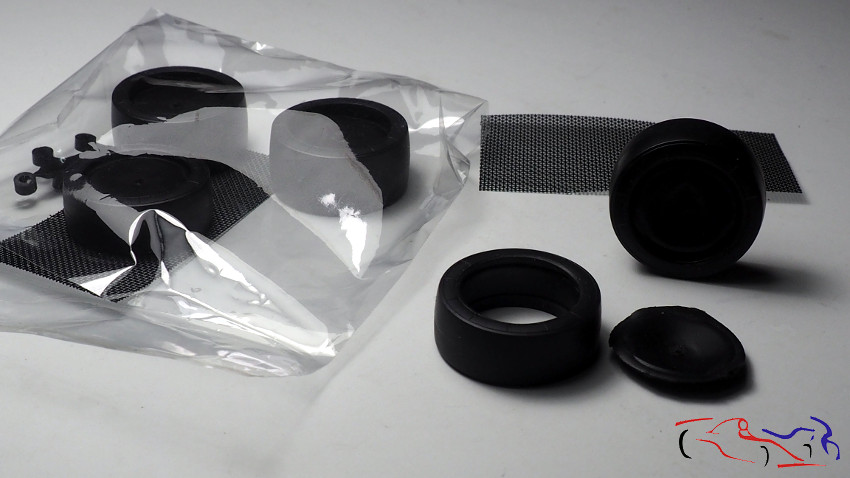 The crystals: they come in good detail 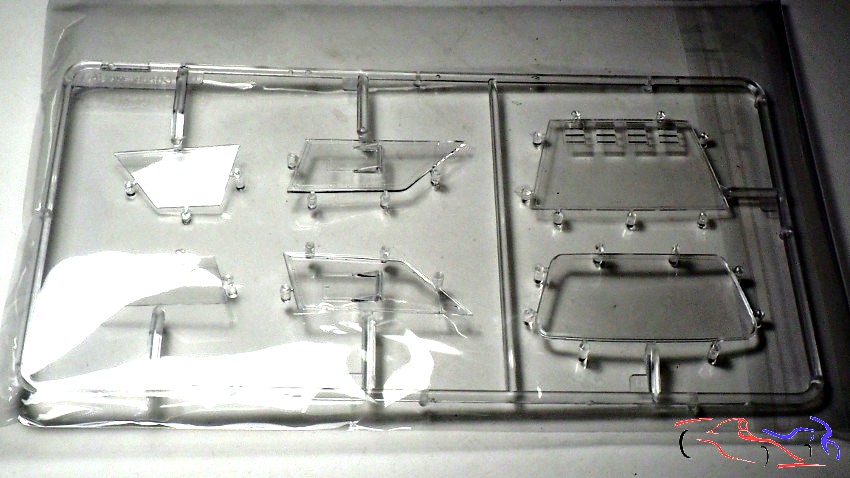 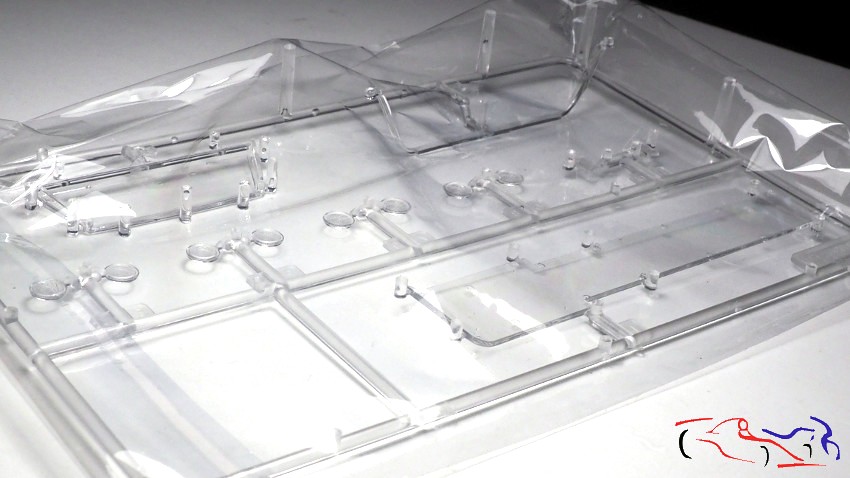 And the body parts. The kit has the possibility of having the front and the hood of the engine open, to be able to see its interior: 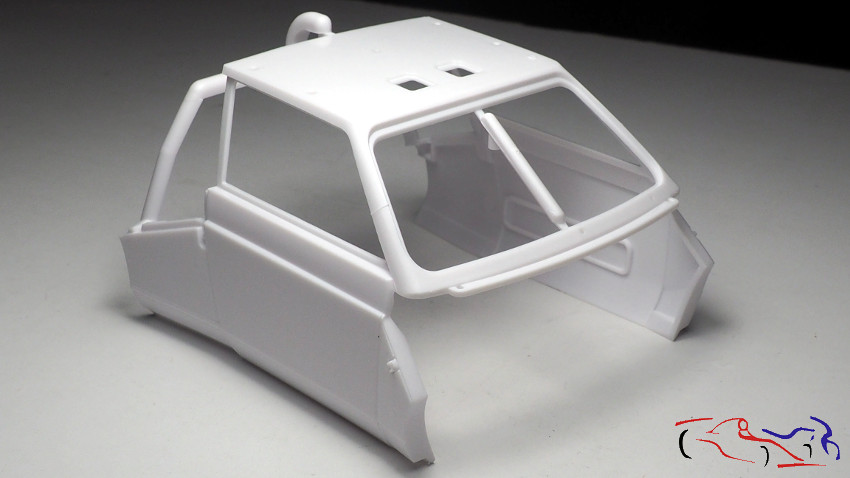 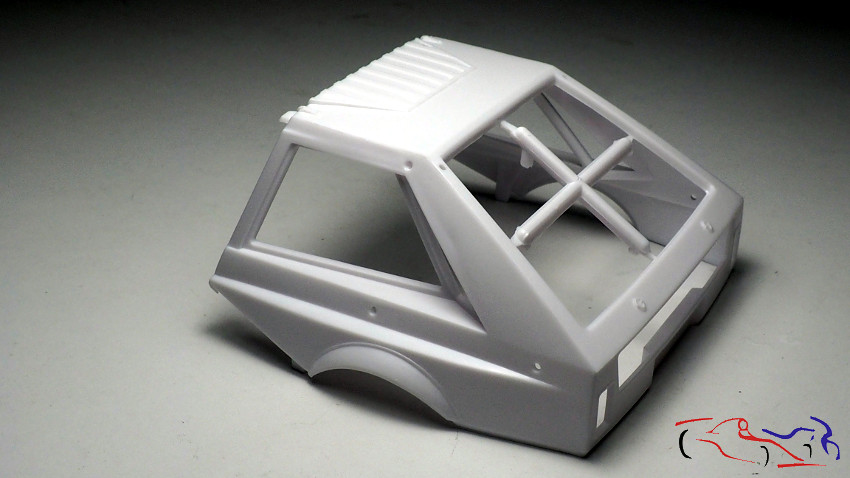 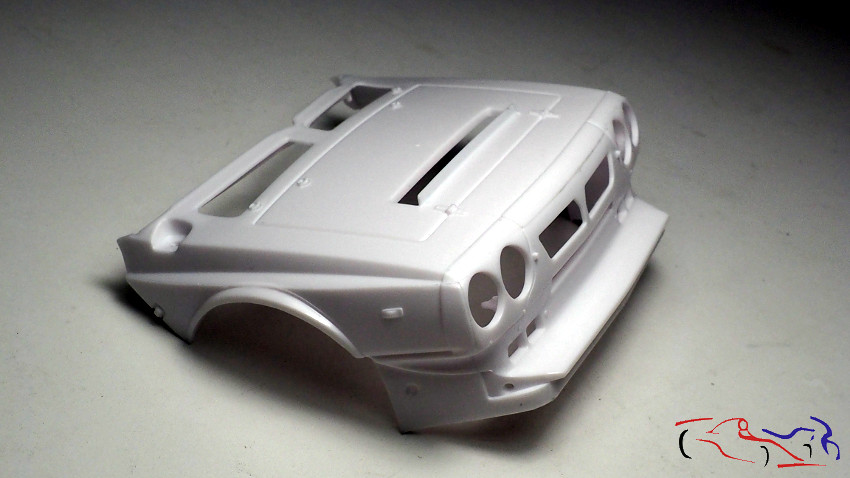 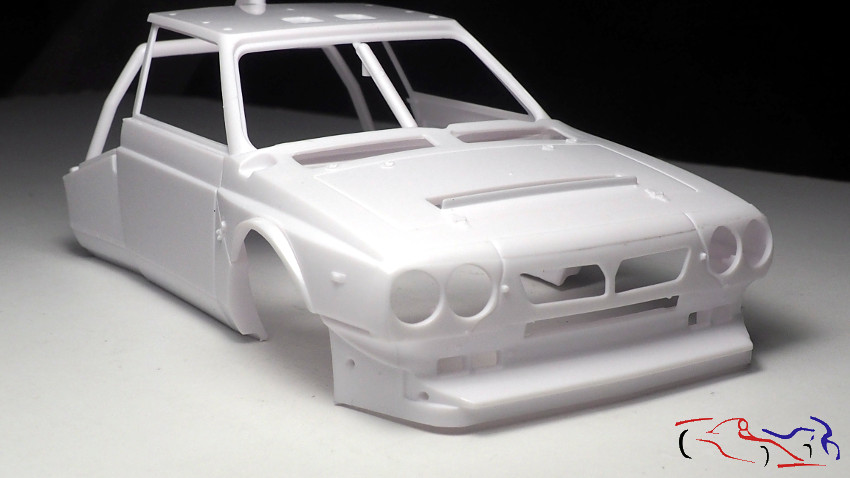 In itself, the pieces come very well, with enough detail that of course you can detail to increase it. It must also be said that they have some burr that we will have to eliminate. In the following photo, we see a pre-assembly of the bodywork where its good forms are seen: 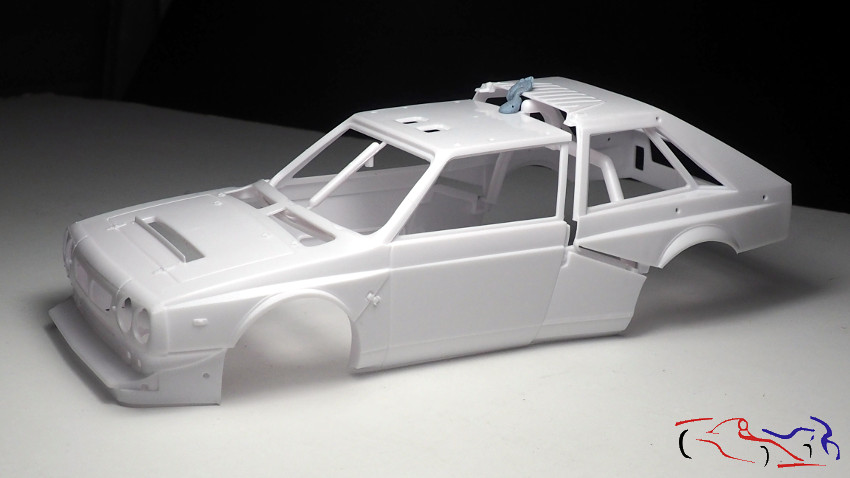 We go to the decals, with another sheet of those that are placed on the edge of the crystals, but that can be painted perfectly, so that the decay does not cancel the rivets of the crystals that comes with good detail: 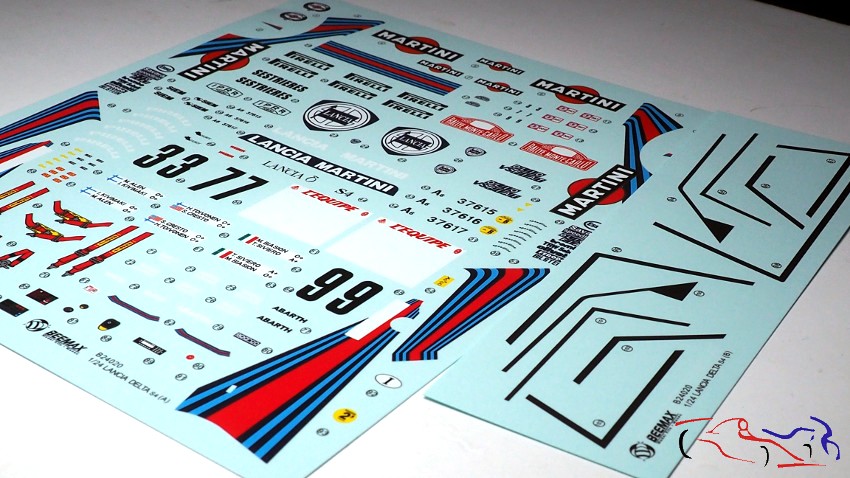 Also, the kit has a complementary bag, which is purchased separately, with photoetches and carbon and kevlar decals, fully recommended: 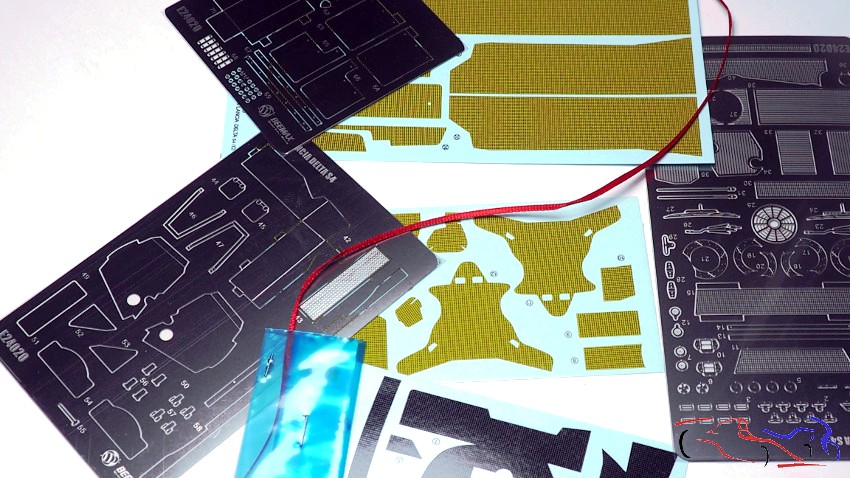 And now, I show you what I contribute to make this version: - Tires copy of Profil24 kit, made by our friend Fanalone, to whom I give my thanks! - Decals made by my order to Artecnodecals, who had them ready for the Profil24 kit, and which I will use in this one. 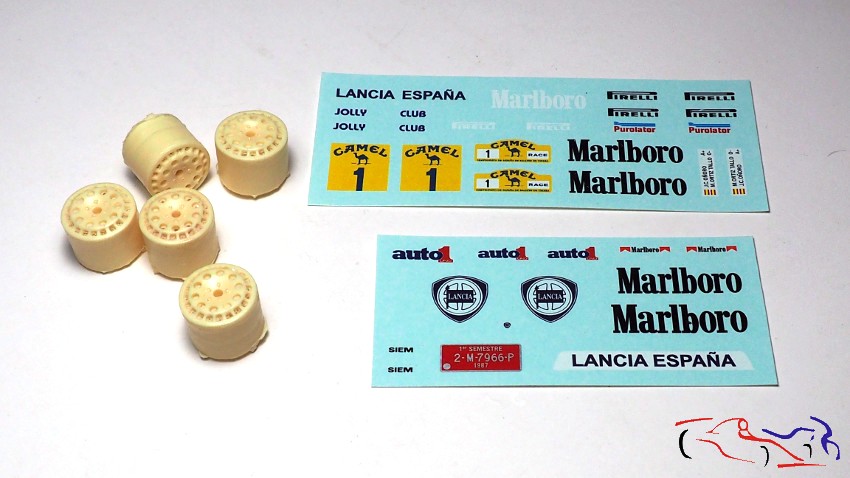 And starting, we take out all the parts that form part of the axles from the staples and thus, be able to test the new tires: 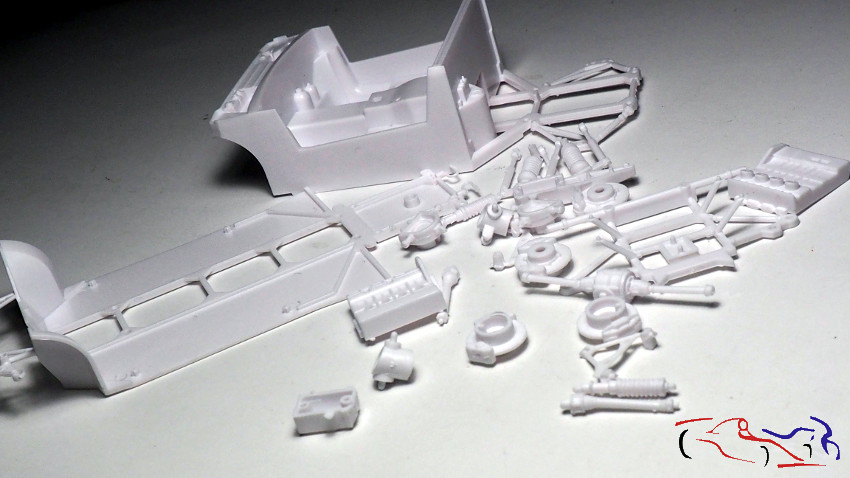 Here we see the pre-assembly of the front axle, including a Renaissance tire that had for the shopping test box. Well see what Ill use! 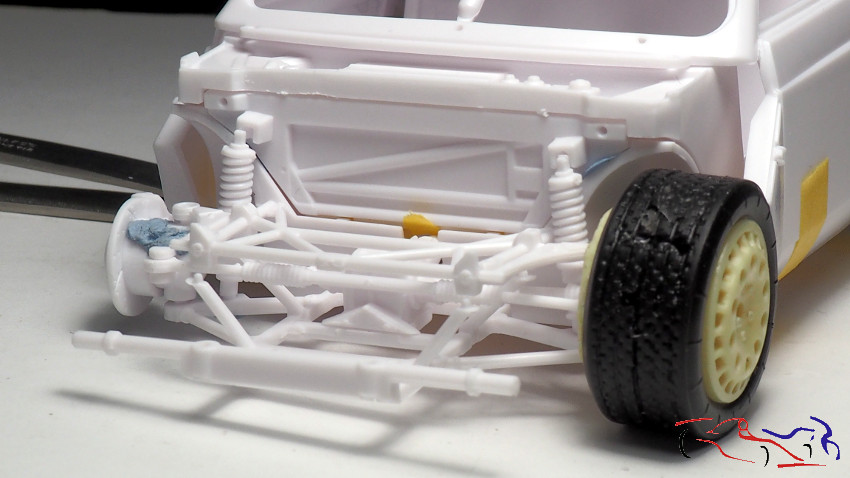 As you can see, the kit has good details: 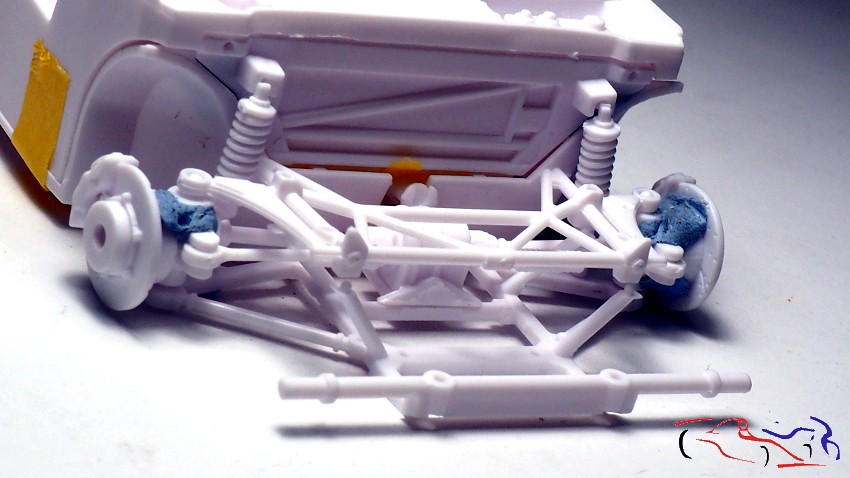 And here is the rear train: 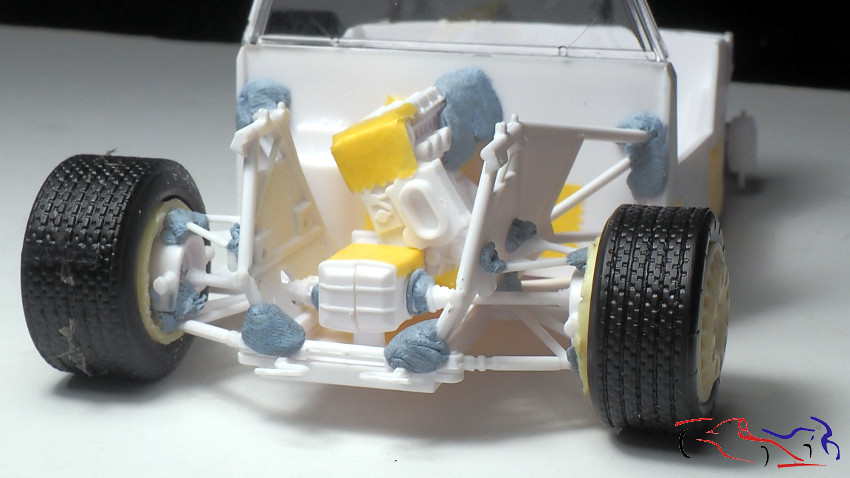 And when we add the body, the front part is pretty good: 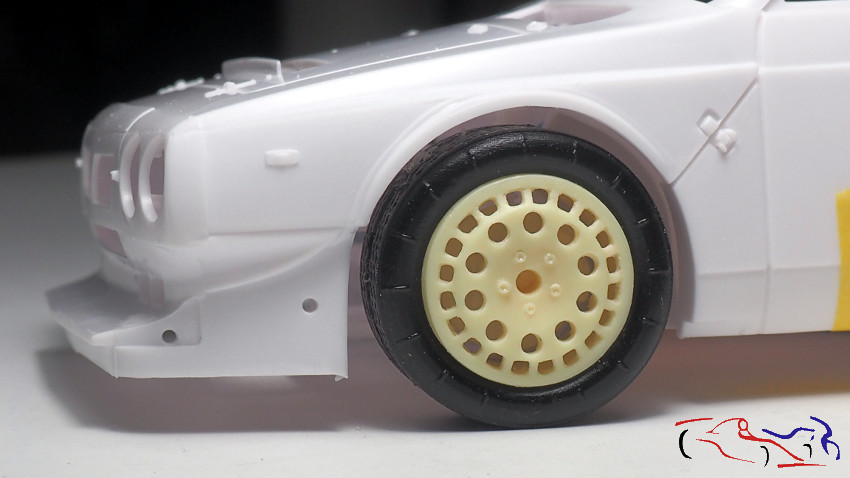 As for the rear part, the rubber should be narrower and more tucked in, as it is a car with ground specifications: 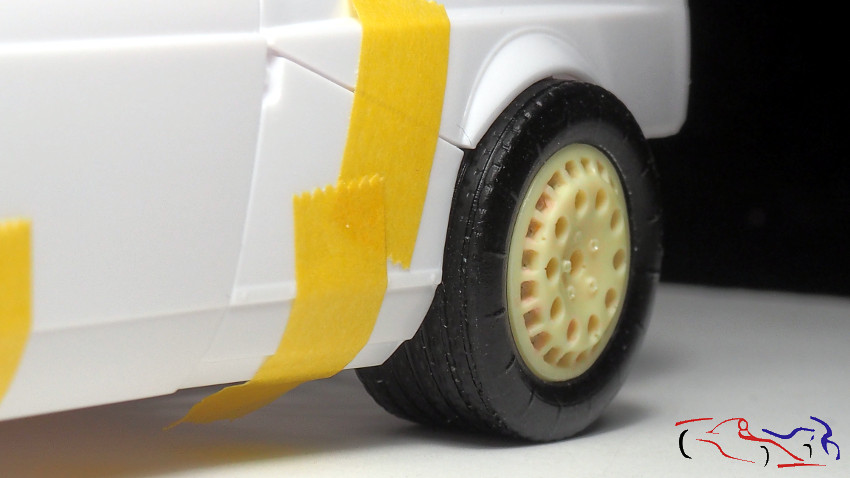 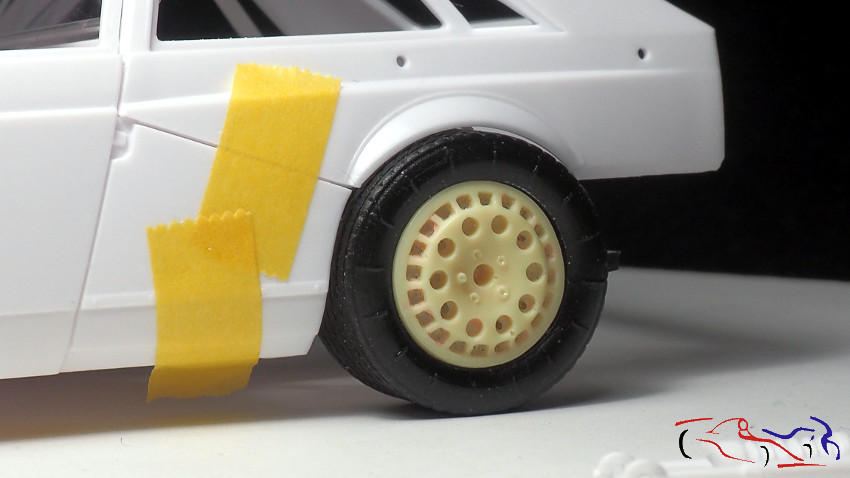 In the next photo, we see its general appearance, which convinces me, and the height of the car, as well as the tires, Ill leave it for later. The first test is valid! 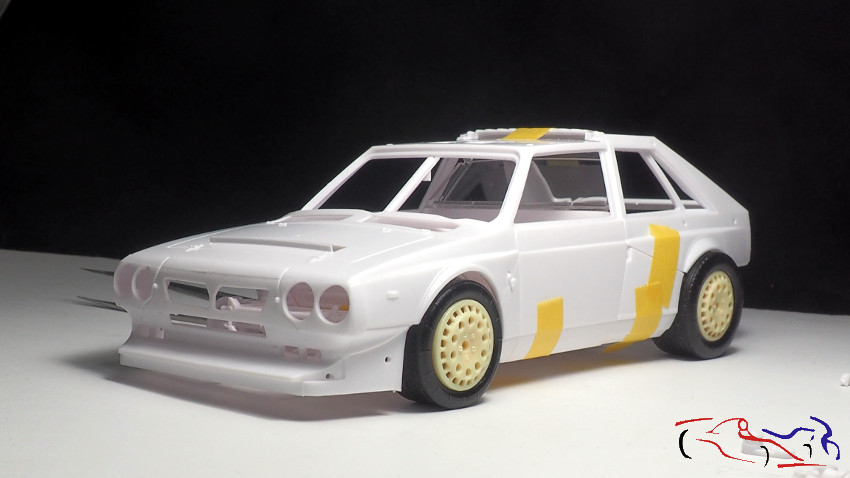 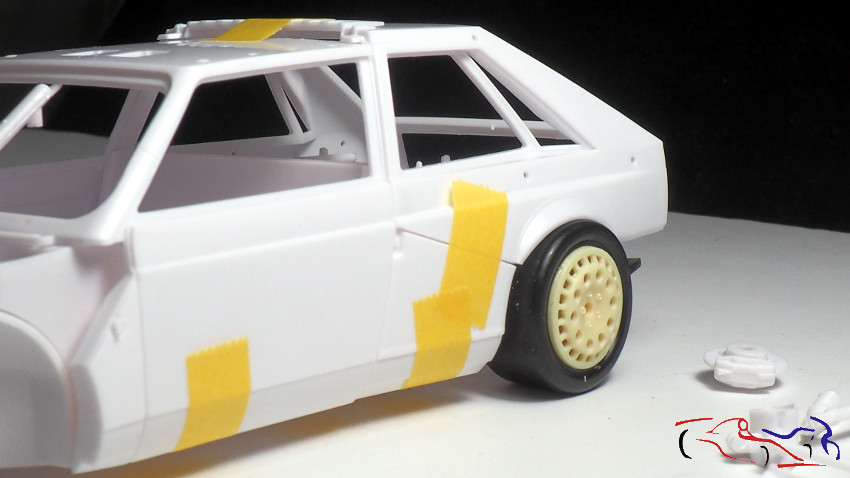 Thanks for viewing and commenting!!! |
|

|

|
|
01-21-2019, 06:28 AM
|
#2 | |
|
AF Regular

Join Date: Feb 2006
Location: Parla - Madrid
Posts: 194
Thanks: 37
Thanked 30 Times in 27 Posts
|
Re: Lancia Delta S4 Marlboro Beemax 1/24
Very interesting project!! Without any doubt, one to follow!!
|
|
|
|
|
| The Following User Says Thank You to Borjacho For This Useful Post: |
JesusM (01-21-2019)
|
|
02-16-2019, 01:06 PM
|
#3 | |
|
AF Enthusiast
Thread starter
Join Date: Mar 2009
Location: Madrid
Posts: 649
Thanks: 109
Thanked 68 Times in 67 Posts
|
Re: Lancia Delta S4 Marlboro Beemax 1/24
Desde que empecé este coche y puse el anterior post hasta ahora, he ido recogiendo información y comparándola con la maqueta. Y la verdad es que se pueden hacer muchas cosas!! Por ejemplo en la parte delantera. Una vez quitadas las marcas de molde, repasamos las líneas de panel, y añadimos las piezas que forman en faldón delantero, que pegamos con pegamento Tamiya y repasamos las uniones con el pegamento super líquido también de Tamiya. A su vez, hacemos los agujeros donde irán los remaches que pondremos más adelante.
Since I started this car and put the previous post until now, I have been collecting information and comparing it with the model. And the truth is that you can do many things! For example in the front. Once the mold marks were removed, I reviewed the panel lines, and added the pieces that form in the front skirt, that we glue with Tamiya glue and review the joints with the super liquid glue also Tamiya. At the same time, I make the holes for the rivets that I will put later. 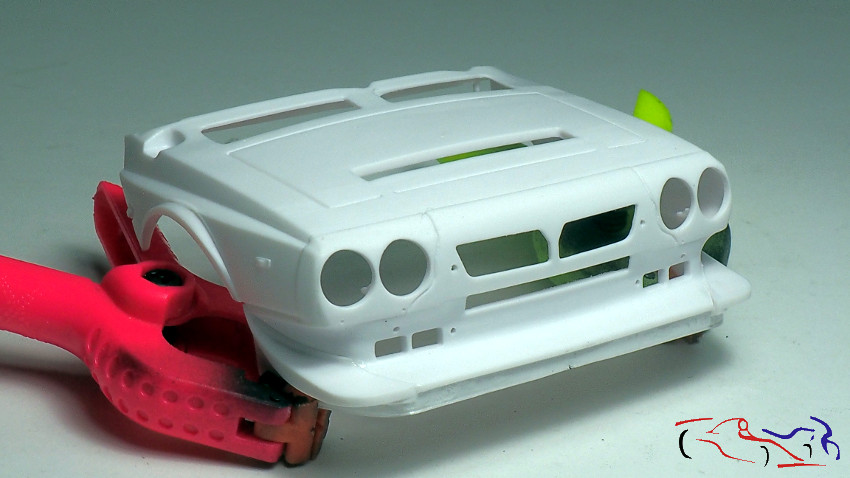 También, le quitamos la pletina de plástico que trae el kit justo delante de la abertura del capó, para sustituirla por una realizada en metal a medias entre un fotograbado y un trozo de lata de bebida: Also, we removed the plastic plate that brings the kit just in front of the opening of the hood, to replace it with one made in half metal between a gravure and a piece of beverage can: 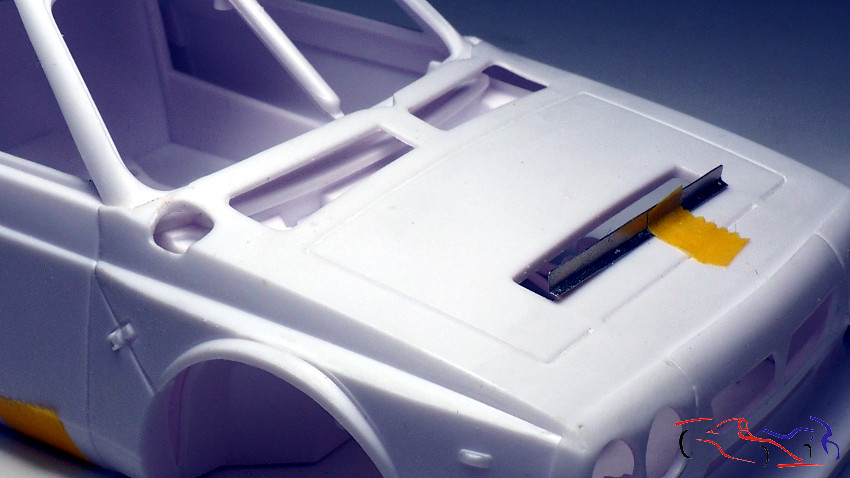 También practicamos el agujero de la entrada de combustible, que en el kit viene tapado. Lógicamente, haremos la entrada sobre el chasis más adelante. Observamos también, que hay que rebajar los bordes para asimilarlos al coche real. We also practice the hole in the fuel inlet, which is covered in the kit. Logically, we will make the entry on the chassis later. We also note that you have to lower the edges to assimilate them to the real car. 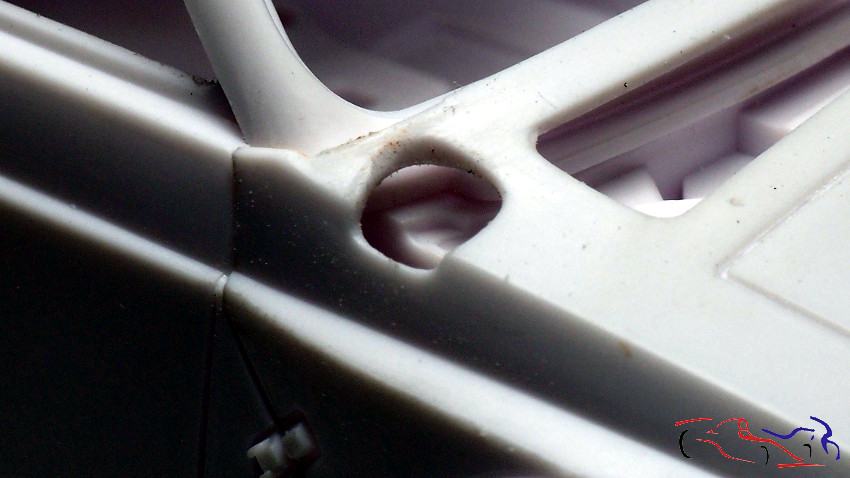 Pasamos al alerón trasero. Pegamos las piezas que lo forman y vemos que las laterales superiores son excesivamente gruesas y pasamos a modificarlas. Para ello usamos el metal de las tapas de los disketes, que son delgadas y a su vez, resistentes. Now we go with the rear wing. We paste the pieces that form it and we see that the superior laterals are excessively thick and we decide to change them. For this process, we use the metal of the covers of the disketes, which are thin and, in turn, resistant. 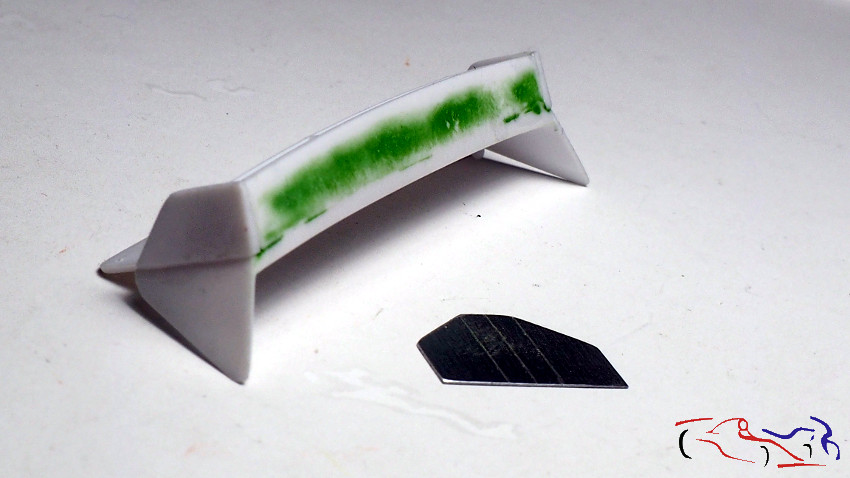 Aquí vemos el grosor de esas piezas. También vemos los agujeros de los remaches que ya están realizados Here we see the thickness of those pieces. We also see the rivet holes that are already made 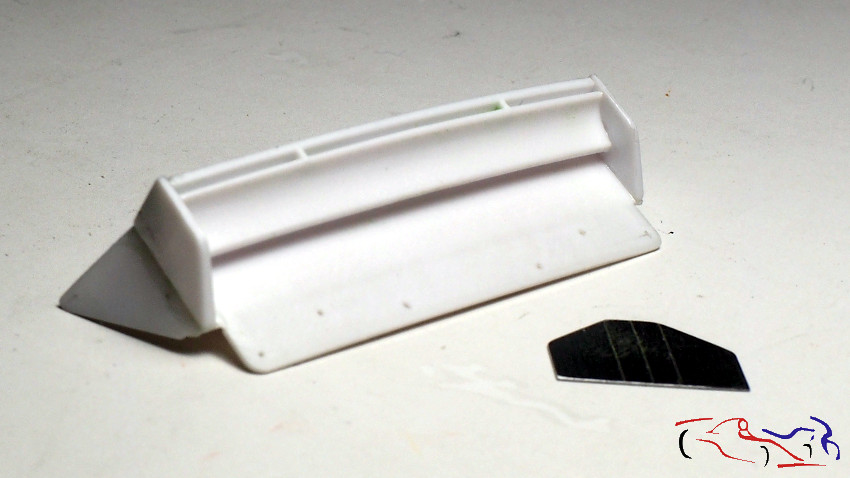 En la siguiente foto, vemos el lateral izquierdo (a la derecha en la foto) que ya está modificado y su referente del kit en el otro lado: In the following photo, we see the left side (on the right in the photo) that is already modified and its reference of the kit on the other side: 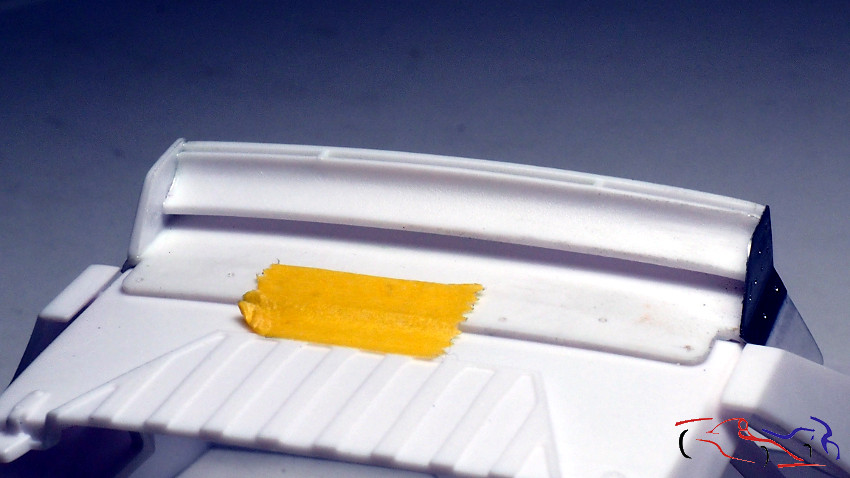 También le he practicado los agujeros de los remaches y fijaciones de los planos del alerón. I have also practiced the holes of the rivets and fixings of the planes of the spoiler. 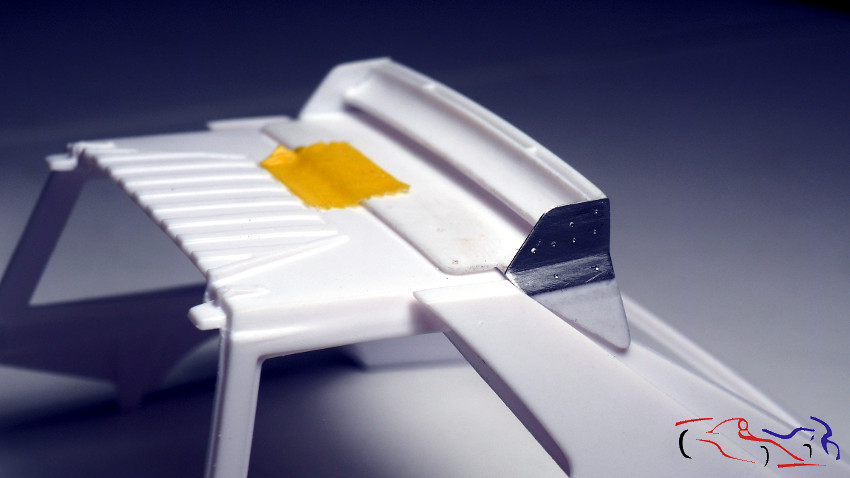 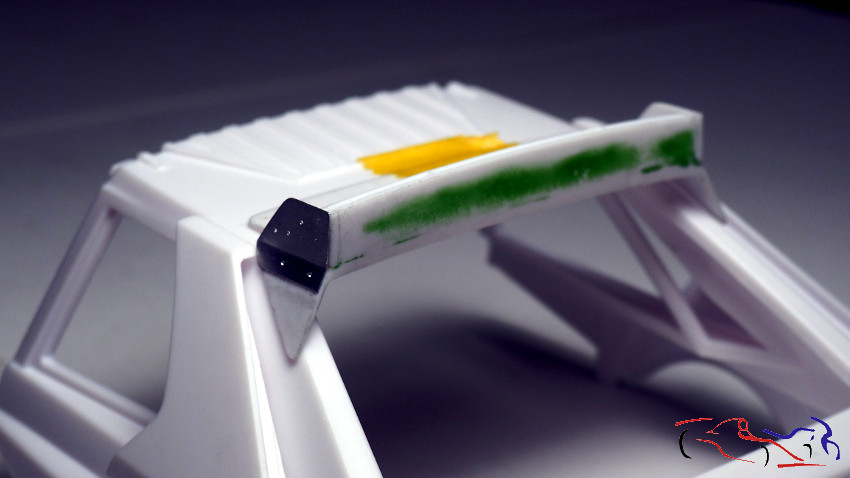 La diferencia es muy apreciable: The difference is very appreciable: 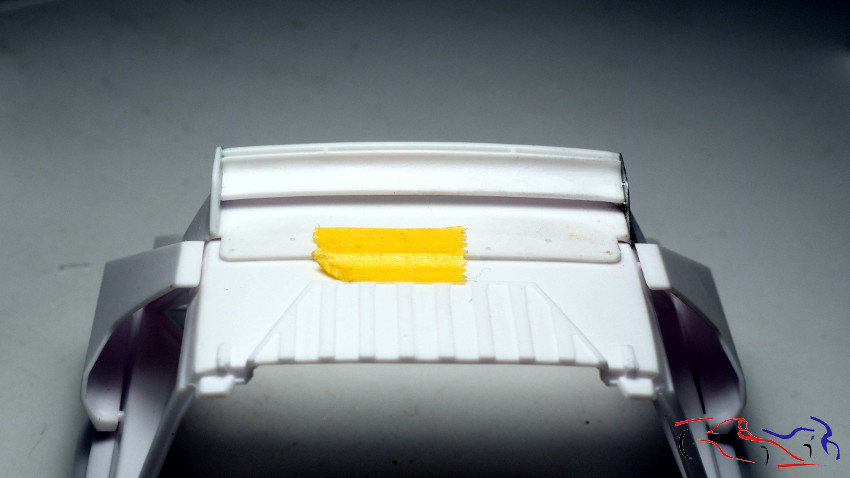 Pero como lo he hecho? Una vez fijado el lateral del kit, limo hasta que llega a la forma del alerón, haciendo éste más largo. Así, al pegar la chapa, queda en el borde del extremo. Si hubiéramos sustituido la pieza del extremo del kit, no hubiera estado en su lugar sino más adentro. But how I did it? Once fixed the side of the kit, silt until it reaches the shape of the spoiler, making it longer. In this way, when gluing the sheet, it remains on the edge of the end. If we had replaced the piece at the end of the kit, it would not have been in its place but inside. 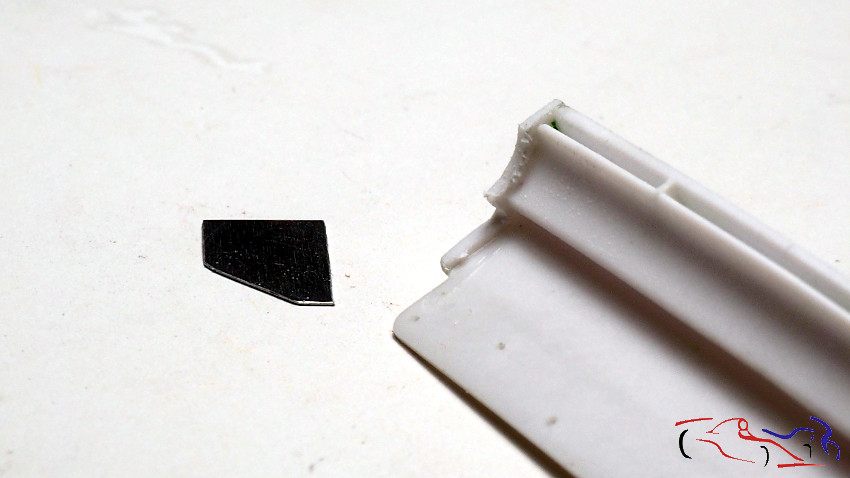 Y aquí el resultado de este trabajo. Realmente se ve mucho mejor!! And here the result of this work. It really looks much better !! 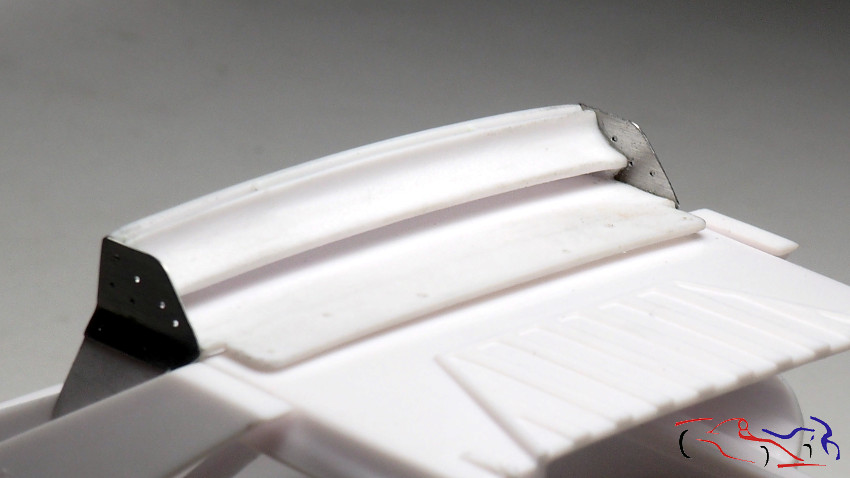 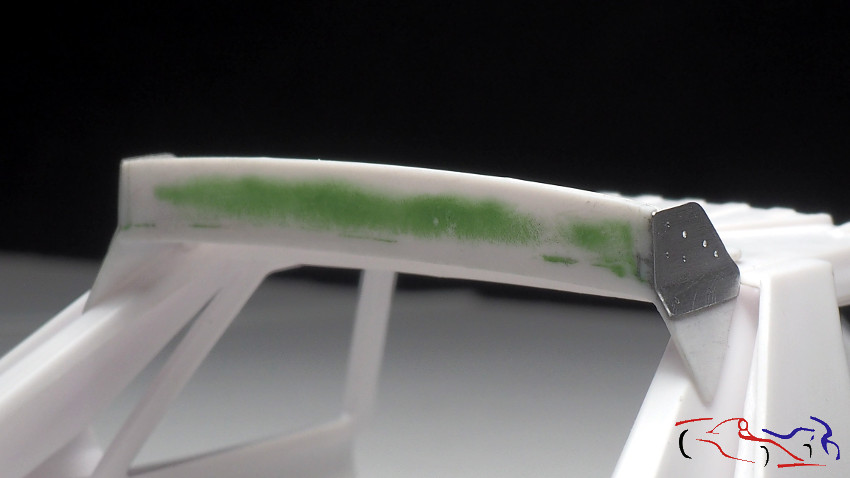 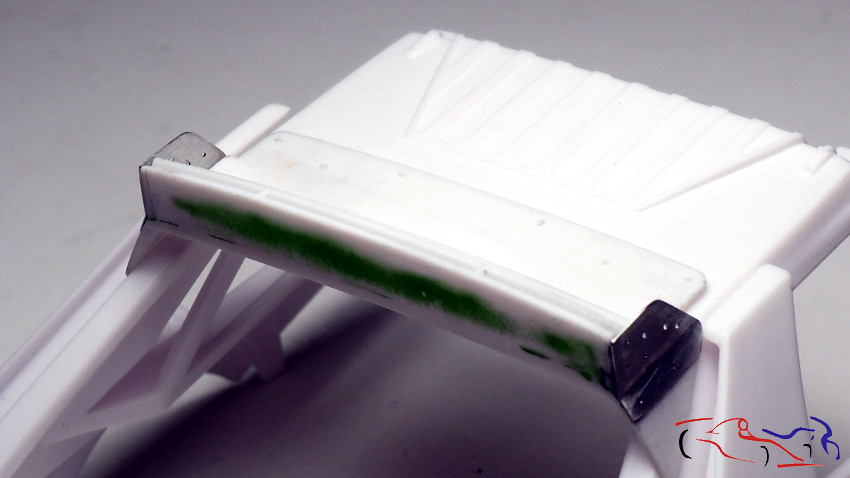 Pasamos al motor, y vemos esta pieza que es de donde salen las transmisiones traseras. La verdad, un poco pobre aunque cuando esté montada, poco se verá. We go to the engine, and we see this piece that is where the rear transmissions come from. The truth, a bit poor although when mounted, little will be seen.  Y la detallamos de cuerdo con fotos del modelo real, añadiendo tornillos y piezas de plástico. And we detail it according to photos of the real model, adding screws and plastic pieces. 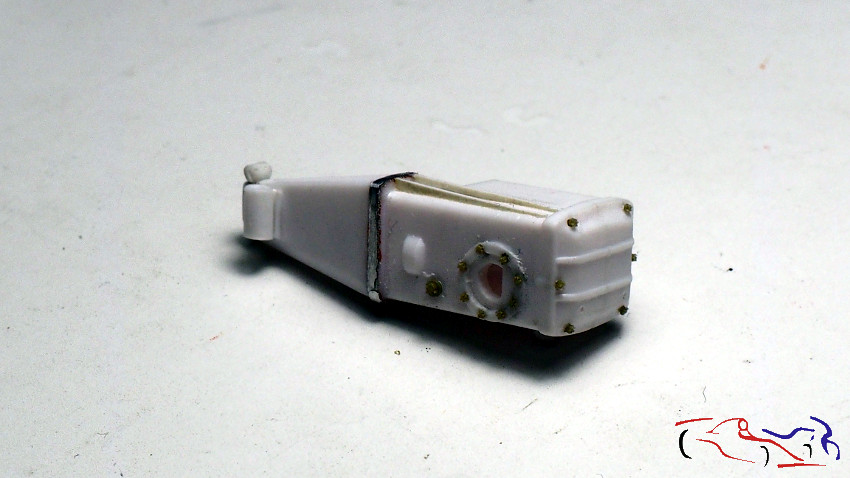 Destacar que no está terminada y falta poner masilla en las piezas añadidas a la izquierda de la fotografía. Note that it is not finished and it needs putty in the pieces added to the left of the photograph. 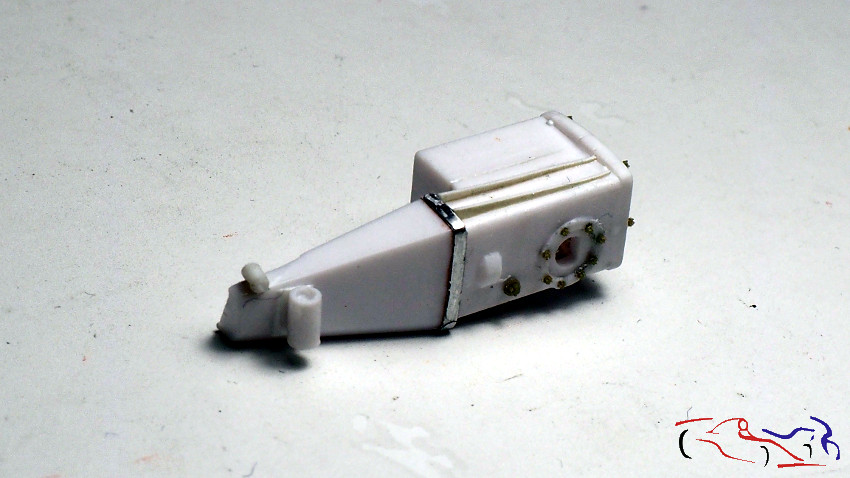 El tubo de escape se monta pegando las correspondientes piezas The exhaust pipe is assembled by gluing the corresponding parts 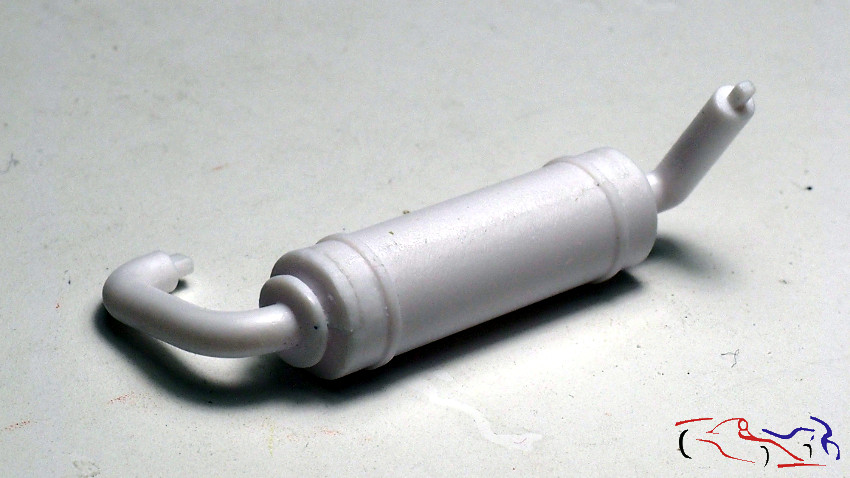 Y de primeras le eliminamos las dos tiras del molde, para poner láminas de metal más delgadas: And first of all we eliminated the two strips of the mold, to put thinner sheets of metal: 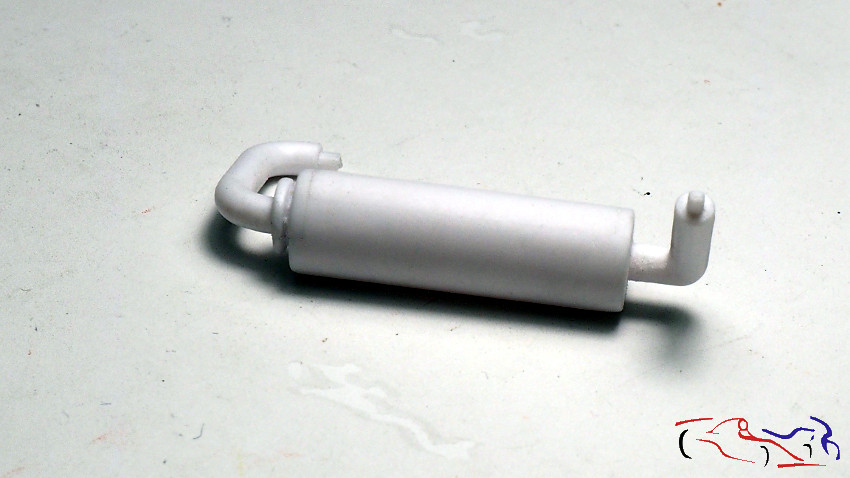 Esta es la toma de aire, que va en el capó trasero desde el techo y conduce el aire al turbo. Irá toda de carbono This is the air intake, which goes on the rear bonnet from the roof and conducts the air to the turbo. It will go all carbon fiber 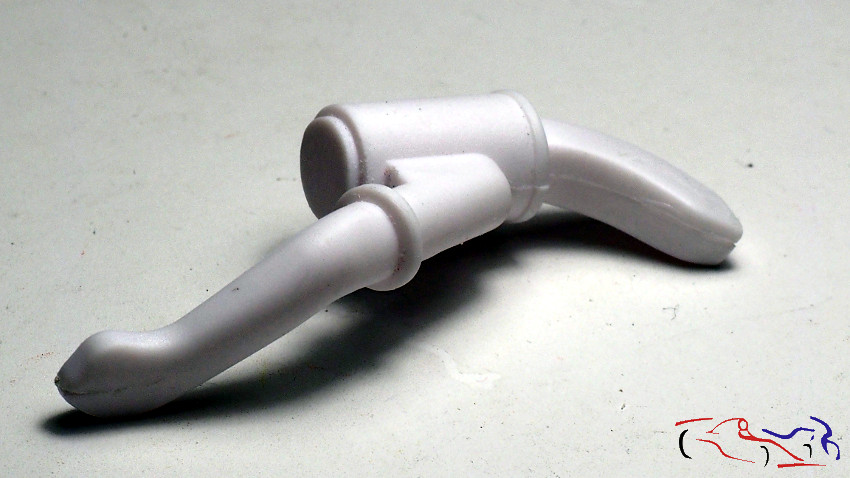 Y lo primero que le hacemos es una pletina en la unión. And the first thing we do is a plate in the union. 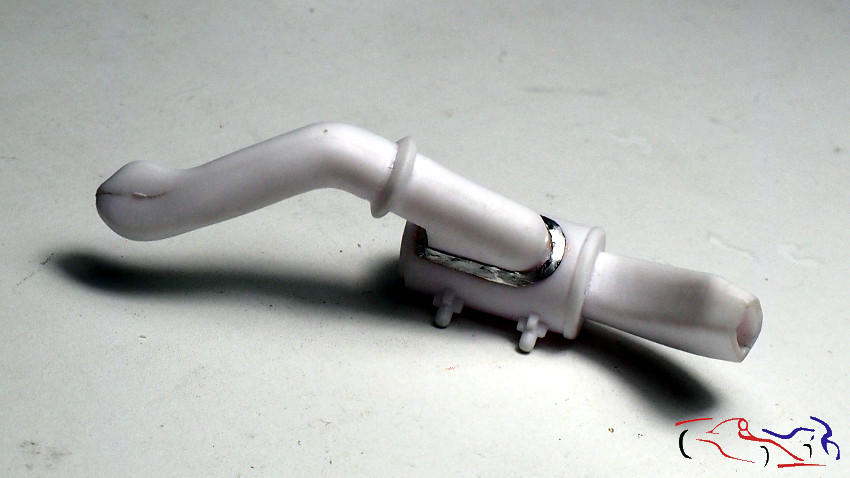 Pasamos al bloque motor. Lo primero es mover la salida de los escapes más arriba ya que es un pequeño fallo del kit. Los agujeros están hechos y les pongo encima una pletina de plasticard: We go to the engine block. The first thing is to move the exit of the escapes above because it is a small failure of the kit. The holes are made and I put a plasticard plate on them:  Para después, formar los agujeros, y añadir los tornillos correspondientes: To later, form the holes, and add the corresponding screws: 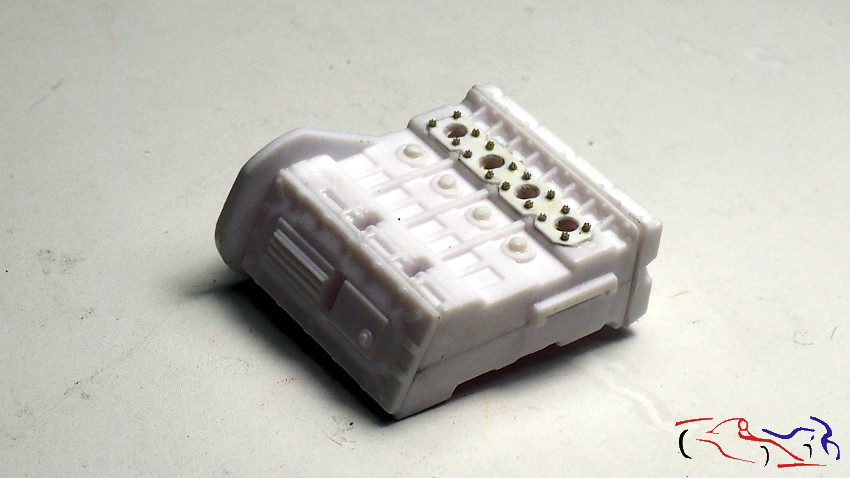 Espero poner pronto más avances! Gracias por ver y comentar! |
|
|
|
|
|
02-16-2019, 01:10 PM
|
#4 | |
|
ItaloSvensk

Join Date: Mar 2009
Location: Marstrand
Posts: 3,383
Thanks: 1,077
Thanked 296 Times in 270 Posts
|
Re: Lancia Delta S4 Marlboro Beemax 1/24
great livery. marlboro is one of the nicest ever for me.
__________________
Paolo - LoveGT40 Modelworks website www.alsoldatino.com my YT channel : https://www.youtube.com/channel/UCIp..._as=subscriber FB: https://www.facebook.com/alsoldatino |
|
|
|
|
| The Following User Says Thank You to lovegt40 For This Useful Post: |
JesusM (02-16-2019)
|
|
02-16-2019, 01:33 PM
|
#5 | ||
|
AF Enthusiast
Thread starter
Join Date: Mar 2009
Location: Madrid
Posts: 649
Thanks: 109
Thanked 68 Times in 67 Posts
|
Re: Lancia Delta S4 Marlboro Beemax 1/24
Quote:
|
||
|
|
|
|
02-24-2019, 04:54 AM
|
#6 | |
|
AF Regular

Join Date: Sep 2010
Location: Meerhout
Posts: 231
Thanks: 0
Thanked 25 Times in 25 Posts
|
Re: Lancia Delta S4 Marlboro Beemax 1/24
nice build
__________________
Do you think,I'm crazy |
|
|
|
|
| The Following 2 Users Say Thank You to racer1 For This Useful Post: |
JesusM (02-24-2019)
|
|
06-09-2019, 05:34 AM
|
#7 | |
|
AF Enthusiast
Thread starter
Join Date: Mar 2009
Location: Madrid
Posts: 649
Thanks: 109
Thanked 68 Times in 67 Posts
|
Re: Lancia Delta S4 Marlboro Beemax 1/24
Desde febrero no ponía ninguna actualización
.Vacaciones, Semana Santa, diversos puentes
..pero no he parado!! De hecho he tenido que dividir las fotos en dos procesos por la cantidad de tareas que he realizado. En esta primera, me dedico enteramente a la parte delantera del coche.
Aquí vemos la pieza base del cockpit, con la bandeja delantera, y donde se sitúa la entrada de gasolina a la derecha, que como va incluida en el capó, no aparece: Since February do not add any update . Holidays, Easter week, various long weekends .. but I have not stopped! In fact I had to divide all the photos in two posts by the amount of tasks I have done. In this first post, I dedicate myself entirely to the front of the car. Here we see the base part of the cockpit, with the front tray, and where the gasoline entrance is located to the right, which as it is included in the hood, does not appear: 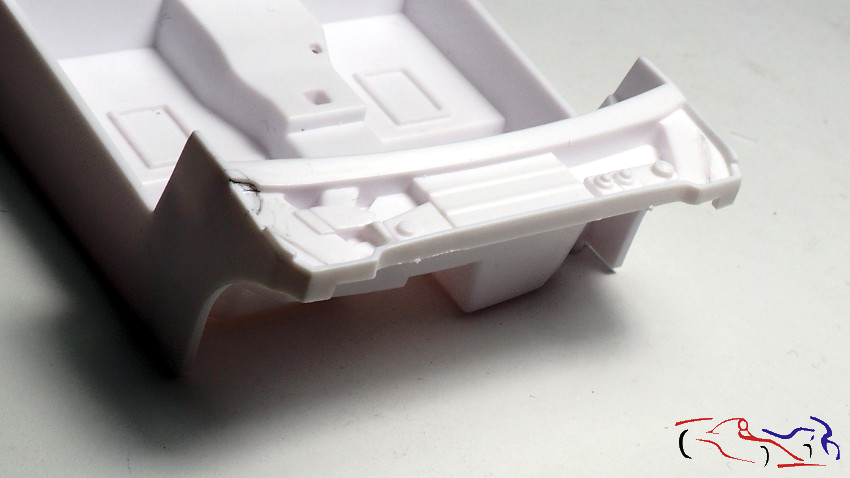 Por tanto, decido recortar esa bandeja en sus extremos, y las piezas de los pasos de rueda que van en el chasis. Para la entrada de la gasolina, realizo un agujero con el minitaladro: Therefore, I decide to cut that tray at its ends, and the pieces of the wheel arches that go in the chassis. For the entry of gasoline, I make a hole with the mini-drill: 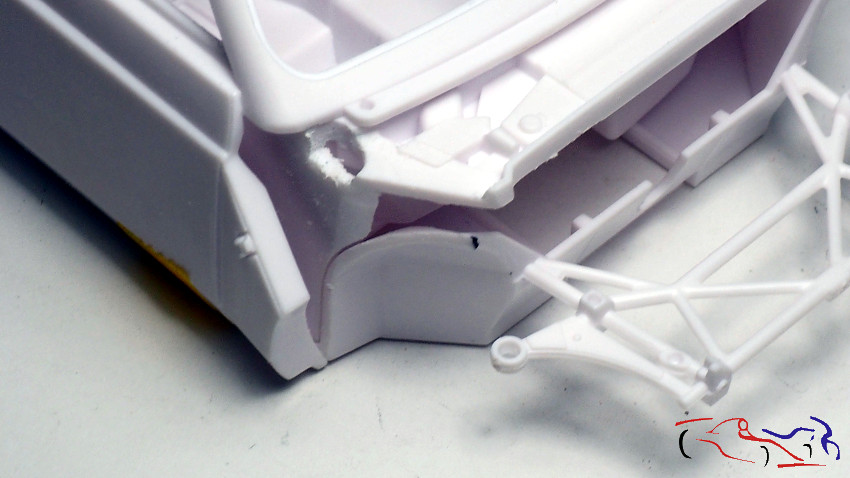 Si os fijáis, entre las piezas del chasis y el cockpit, y la carrocería, hay un hueco que no existe en verdad, con lo que vamos a taparlo, añadiendo plástico. Para ello ponemos cinta de enmascarar y perfilamos con un lápiz el borde interior de la carrocería donde vamos a ampliar: If you notice, between the parts of the chassis and the cockpit, and the body, there is a gap that does not really exist, so we are going to cover it, adding plastic. For this we put masking tape and outline the inside edge of the body with a pencil where we will expand: 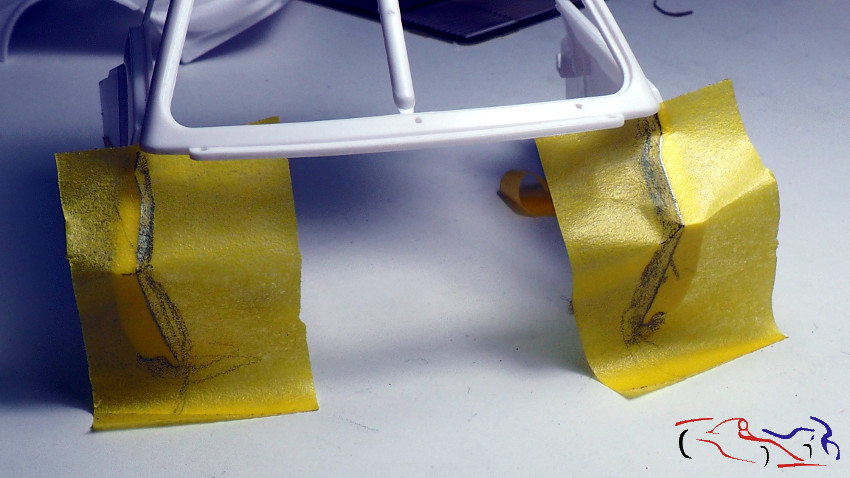 Esa cinta de enmascarar, la pegamos en plancha de plástico y cortamos con el cutter: We put that masking tape on a plastic plate and cut with the cutter: 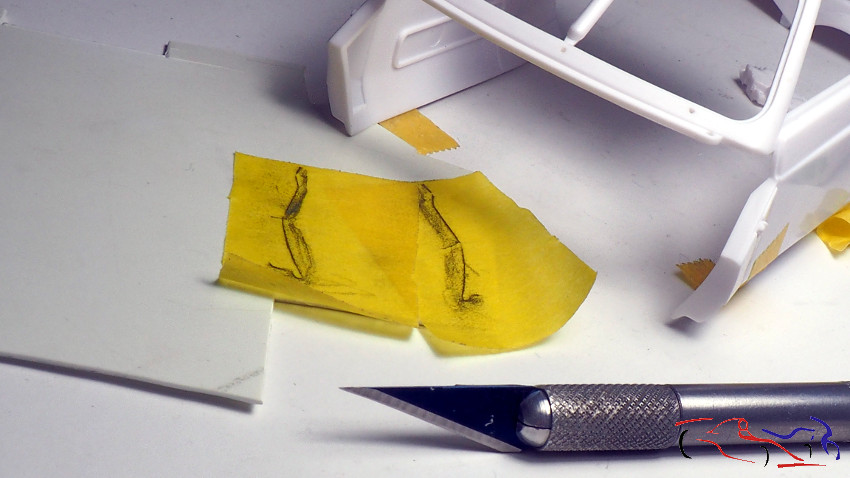 Y las piezas las añadimos a la carrocería. En la parte interior, igualamos las piezas una vez pegadas, con una lima, y le pongo un poco de cianocrilato para asegurarlas. And the pieces are added to the body. In the interior part, we match the pieces once they are stuck together, with a file, and I put a little cyanoacrylate on them to secure them. 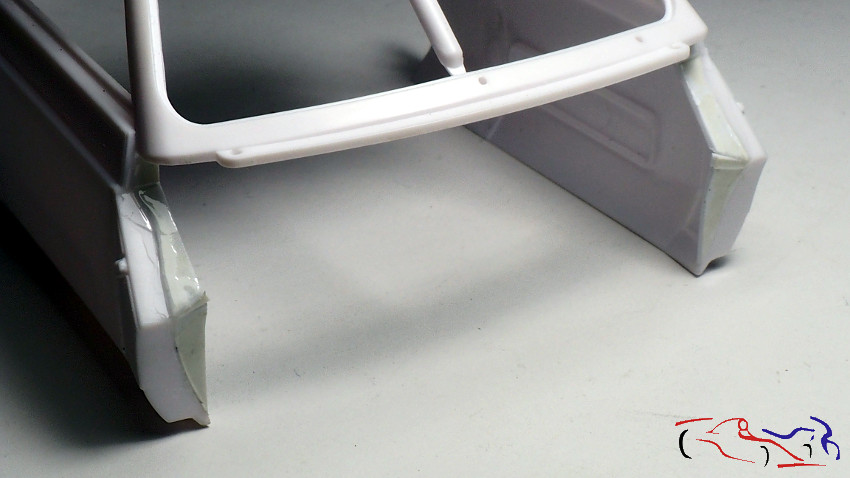 Después lijamos para igualar los planos: Then we sanding to match the planes: 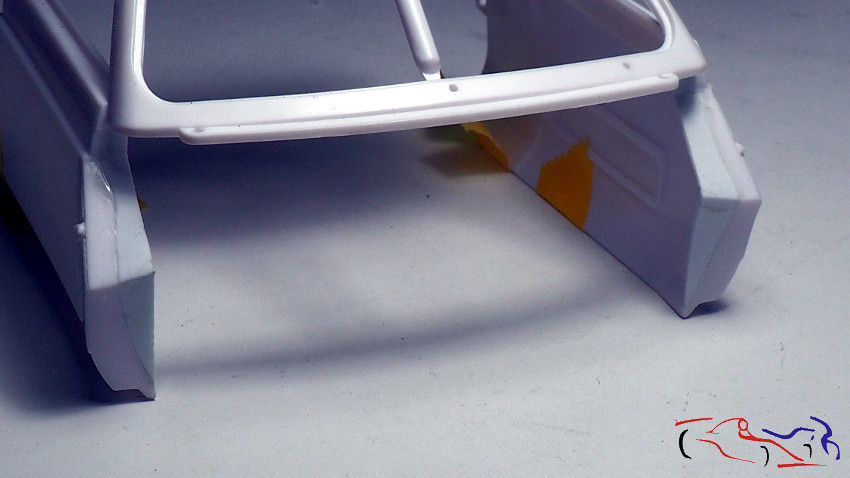 En este punto recortamos los dos huecos dela bandeja para que lo que pongamos tenga más sensación de realidad: At this point we cut the two holes of the tray so that what we put in has more sense of reality: 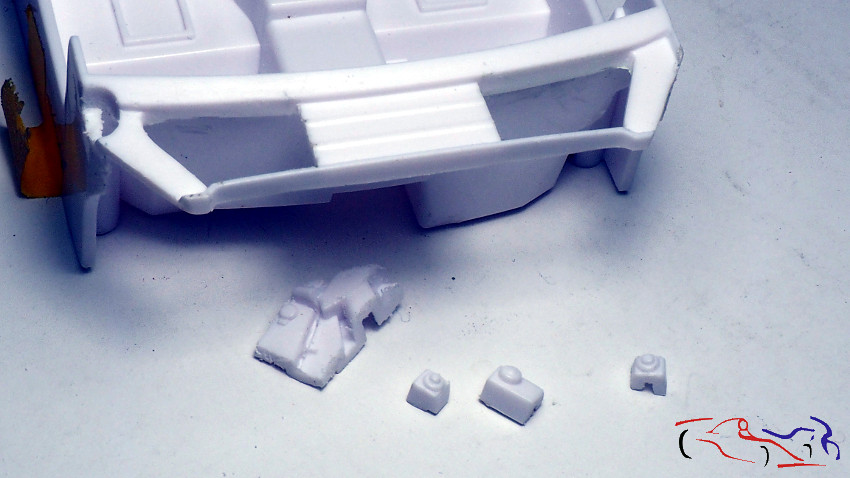 Vamos con la entrada de la gasolina, a la que recortamos la base y le ponemos un tubo de metal. Para ver su correcta posición, le pongo blue-tack por debajo para poder moverla: We go with the entrance of gasoline, to which we cut the base and we put a metal tube. To see its correct position, I put blue-tack underneath to be able to move it: 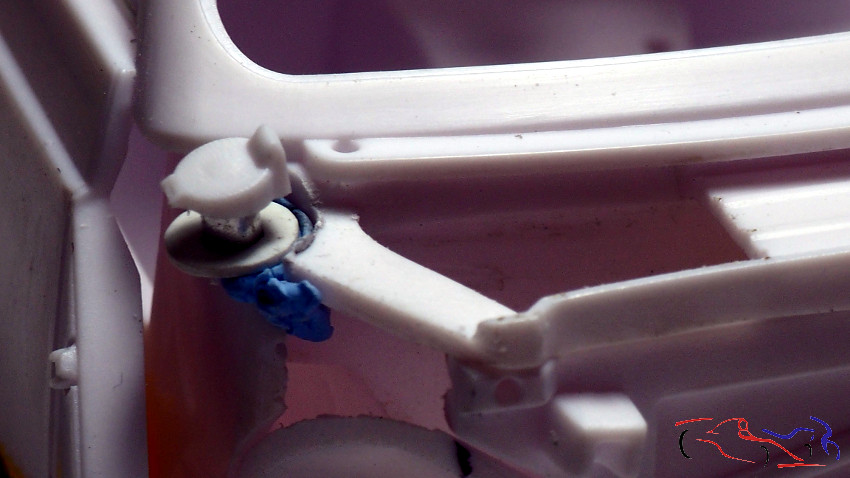 Ponemos el capo y la ajustamos gracias al blue-tack: We put the hood and adjust it thanks to the blue-tack: 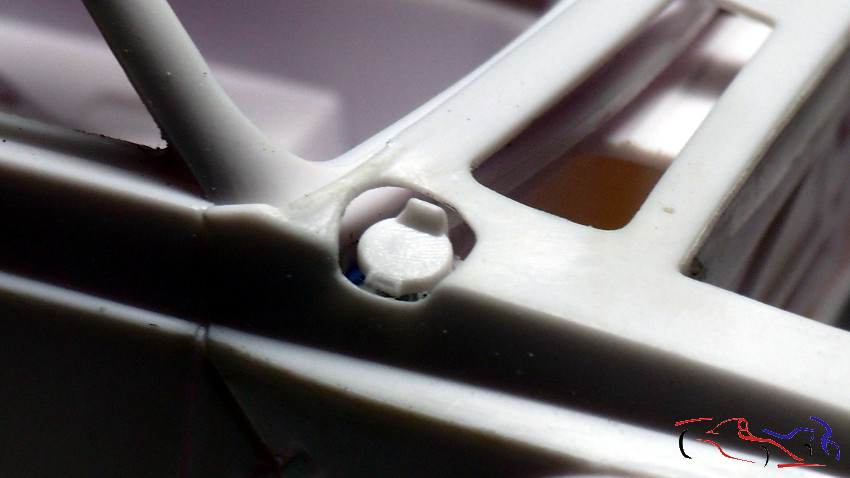 Una vez situado, empiezo a tapar todo lo que he abierto: Once located, I begin to cover everything I have opened: 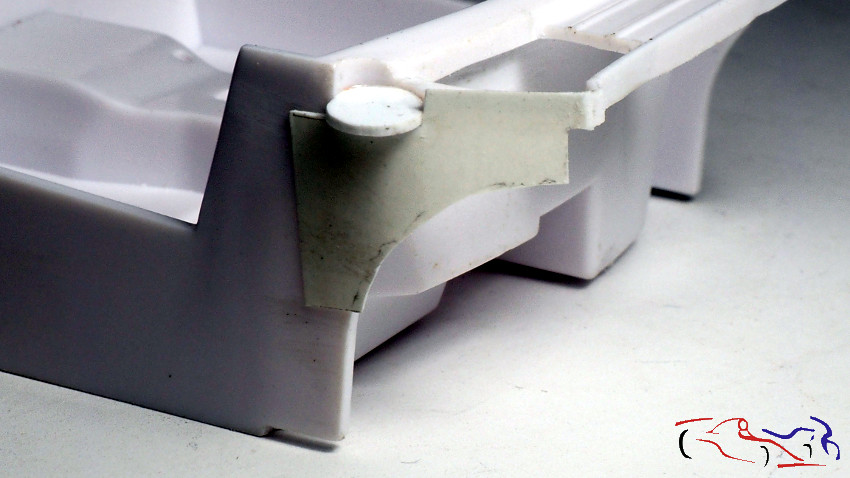 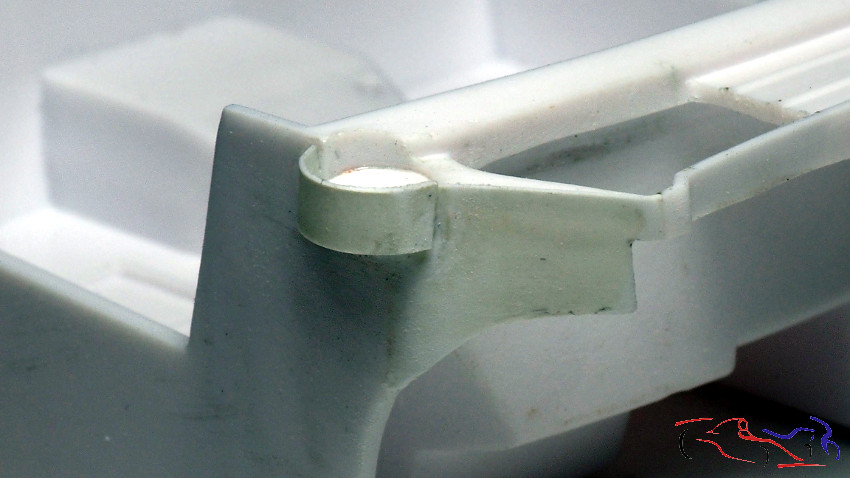 Vemos como queda todo encajado We see how everything is fitted 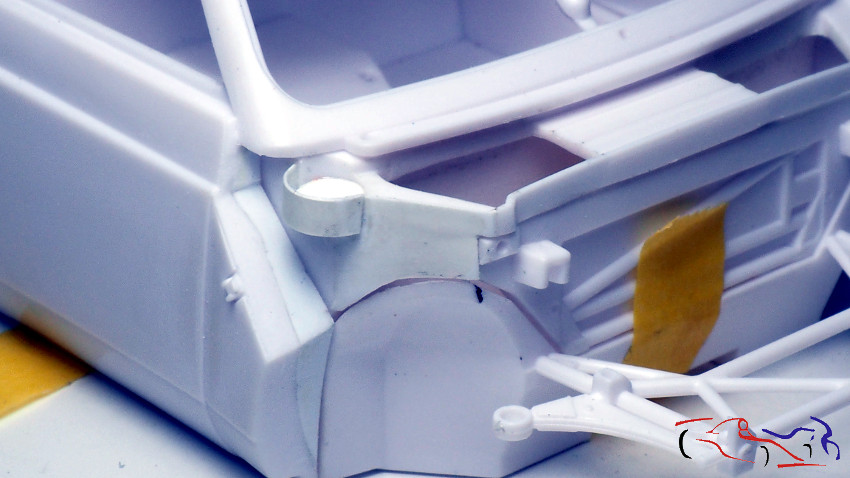 Ponemos una plancha por debajo de la bandeja y aplicamos putty: We put an piece of plastic under the tray and apply putty: 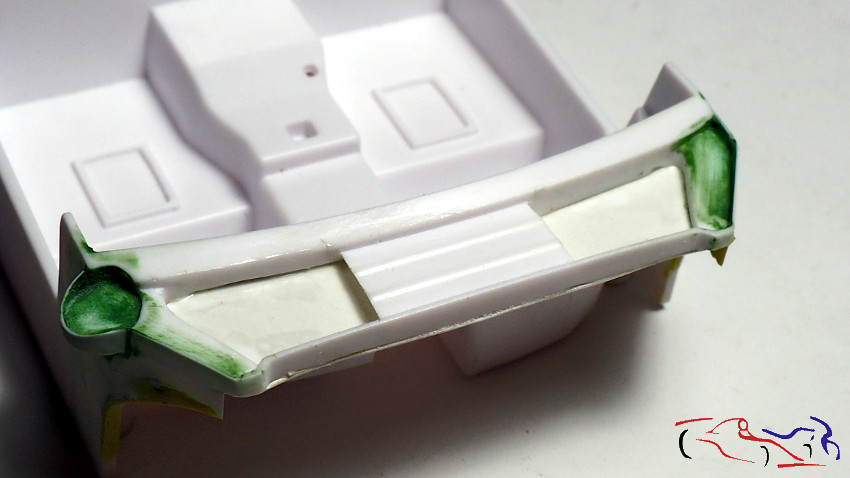 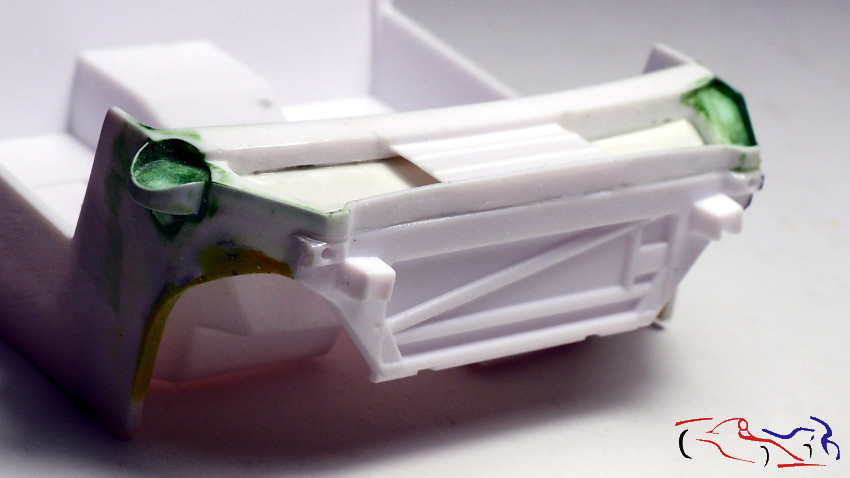 También aplicamos putty a las piezas que he añadido en la carrocería: We also apply putty to the parts that I have added in the body: 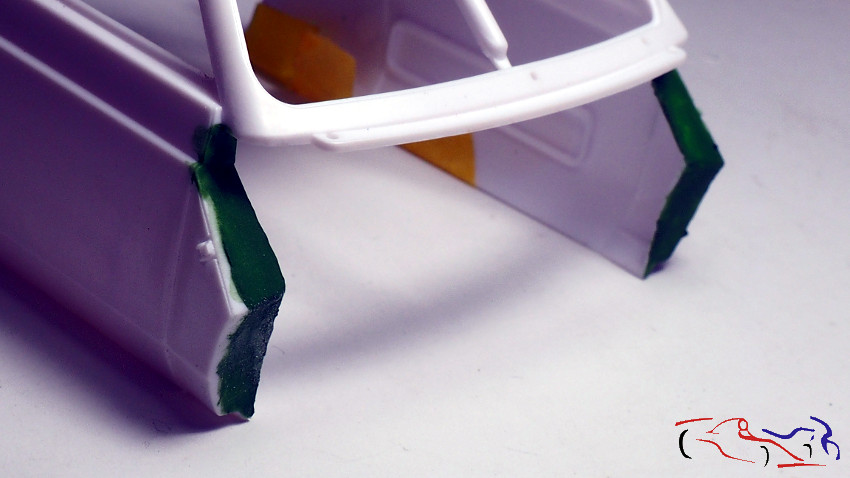 Falta todavía pero se ve mejor!! Its still missing but it looks better !! 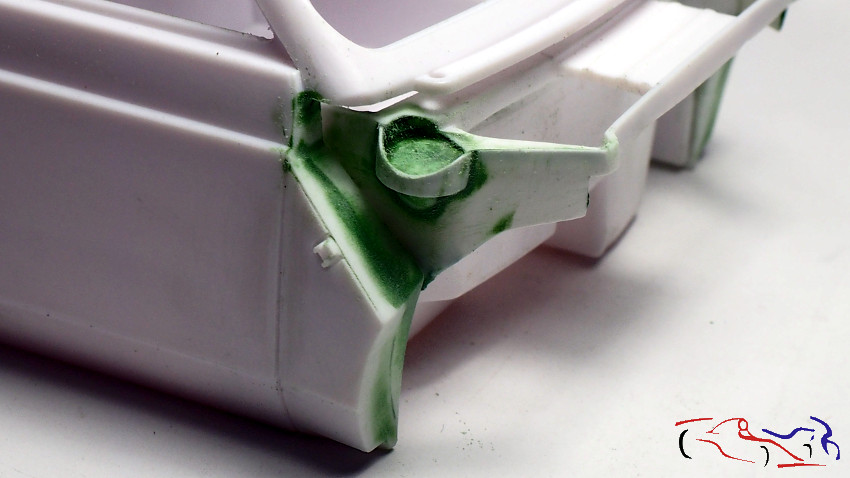 Pasamos al capó, y vamos a abrir la compuerta que tiene. Pero antes, hacemos una máscara para poder cortar la base donde irá apoyada la bandeja: We go to the hood, and we are going to open the hatch that it has. But first, we make a mask to cut the base where the tray will be supported:  Una vez hecha la máscara, recortamos esta trampilla pasando el panelador muchas veces por los paneles, hasta que se traspasa el plástico: Once the mask is made, we cut out this trapdoor, passing the paneler many times through the panels, until the plastic is transferred: 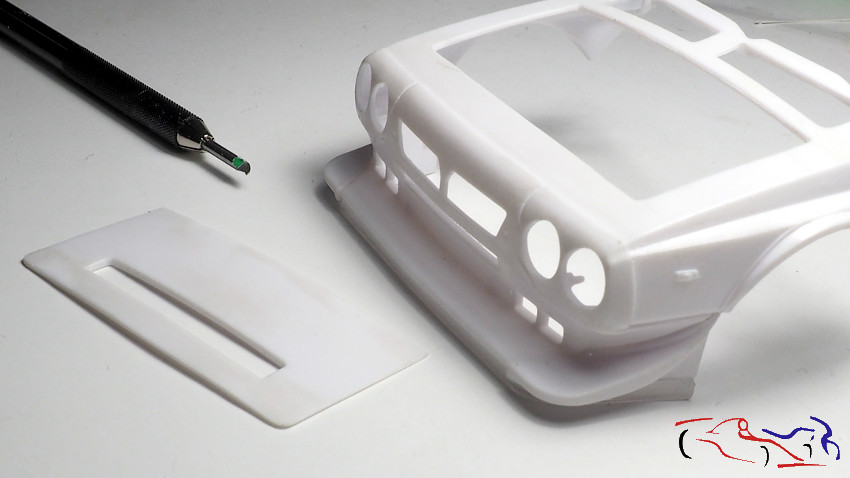 Pero hay que añadir en los bordes para que después encaje bien. Pego planchas de plástico perpendicularmente y después lijo hasta legar al borde: But you have to extend the edges in order to fits well. I stick plastic plates perpendicularly and then I sand up until the edge: 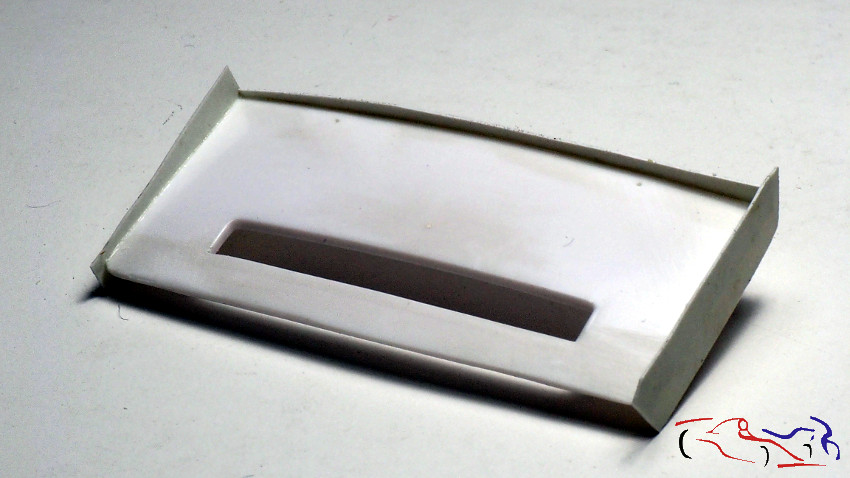 Y con la plantilla, corto la base And with the template, I cut the base 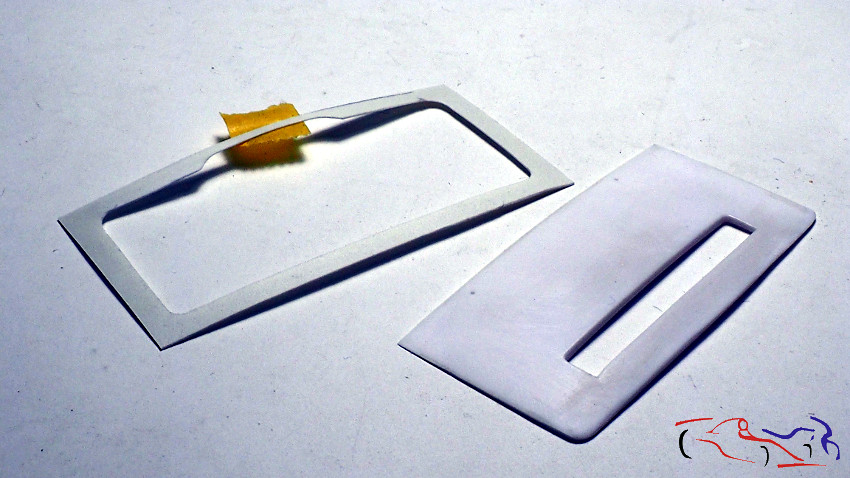 ..que va pegada en el interior del capo: ..which is stuck inside the hood: 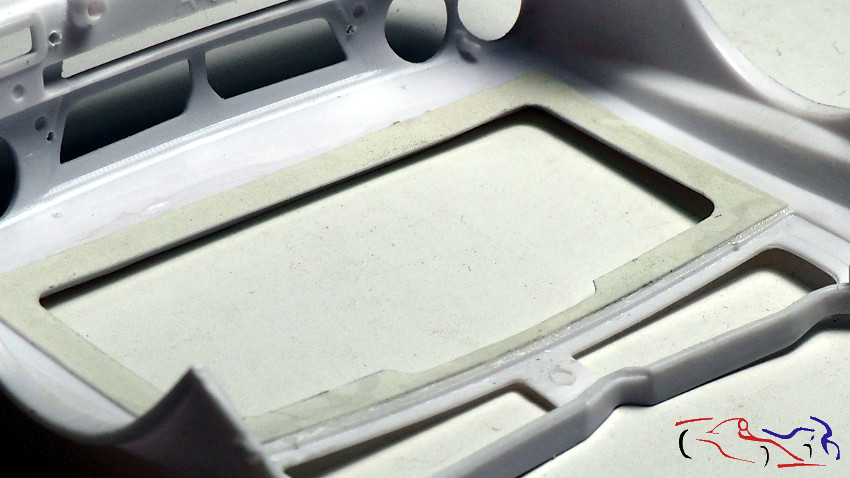 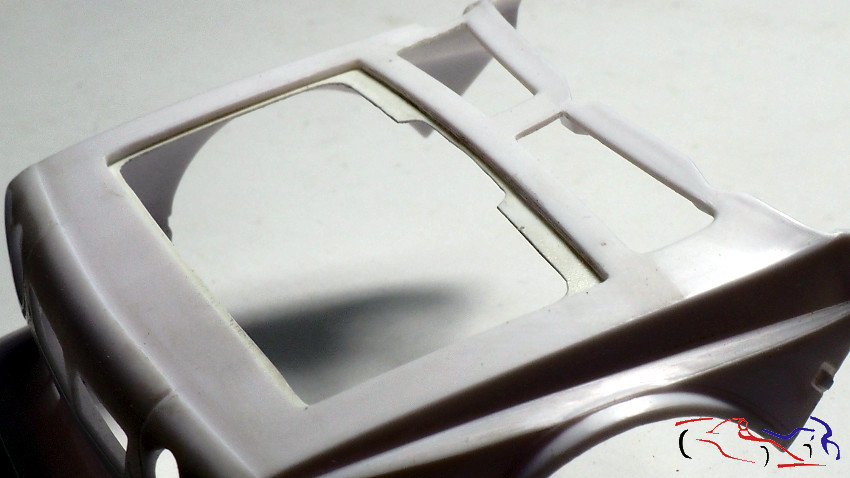 Y para el interior de la trampilla, cogemos tiras de media luna And for the inside of the trap door, we take half moon strips 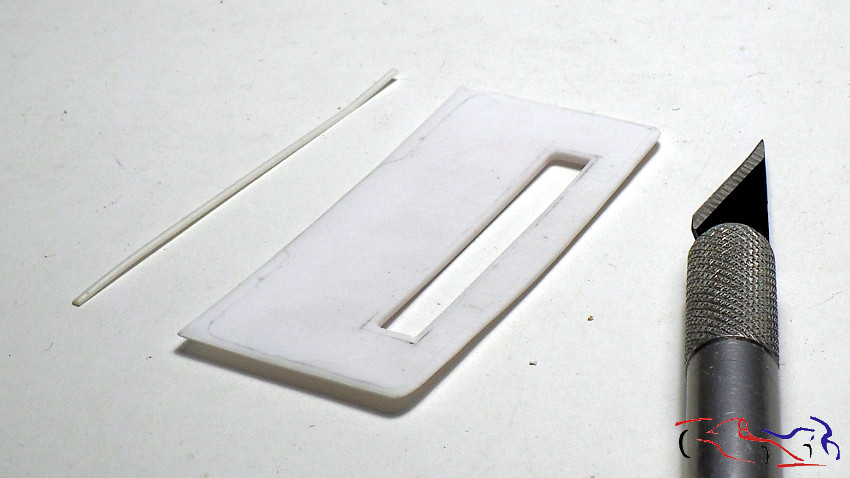 Y medimos y cortamos hasta rellenarla de acurdo con las fotos existentes: And we measure and cut to fill it according to the existing photos:  Otro cambio que voy a hacer es en la rejilla de la bandeja delante del parabrisas. He visto una foto que la tenía recortada para acceder más rápido a los botes de los líquidos que hay. Para eso marco el fotograbado con cinta de enmascarar Another change to make is in the rack of the tray in front of the windshield. I have seen a photo that had it cut out to access faster the cans of liquids there. For that I frame the photogravure with masking tape 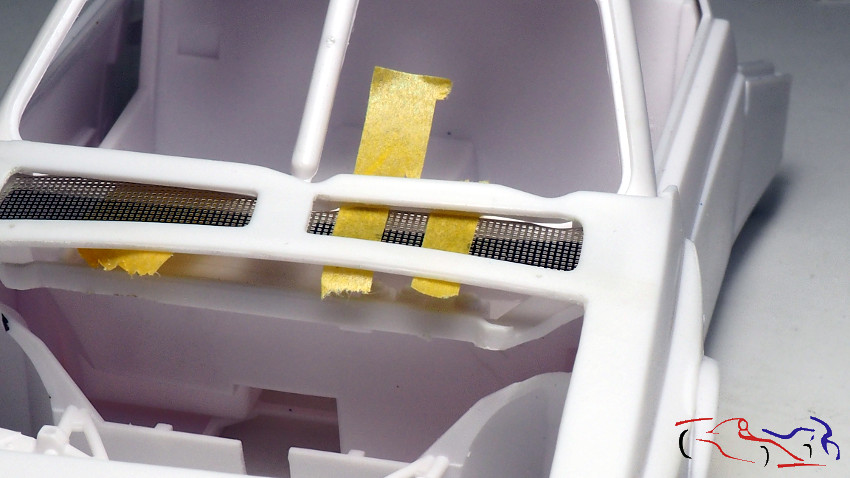 Y lo corto con el minitaladro. Después irán pintados de rojo Marlboro: And I cut it with the mini drill. Then they will be painted Marlboro red: 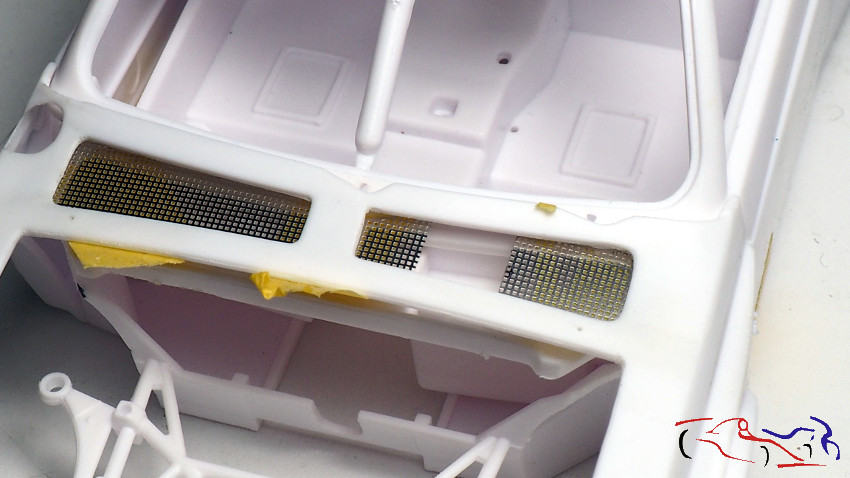 Otro punto que voy a añadir: los pasos de rueda del capo delantero. Para ello cojo un bote de plástico de yogur que tenga la medida correcta: Another point that I will add: the wheel arches of the front hood. For this, I take a plastic yoghurt pot that has the correct size:  Y lo corto la parte inferior y después por la mitad para hacer dos mitades. Las coloco para ver qué tal irán . And I cut the bottom and then in the middle to make two halves. I put them to see how they will go . 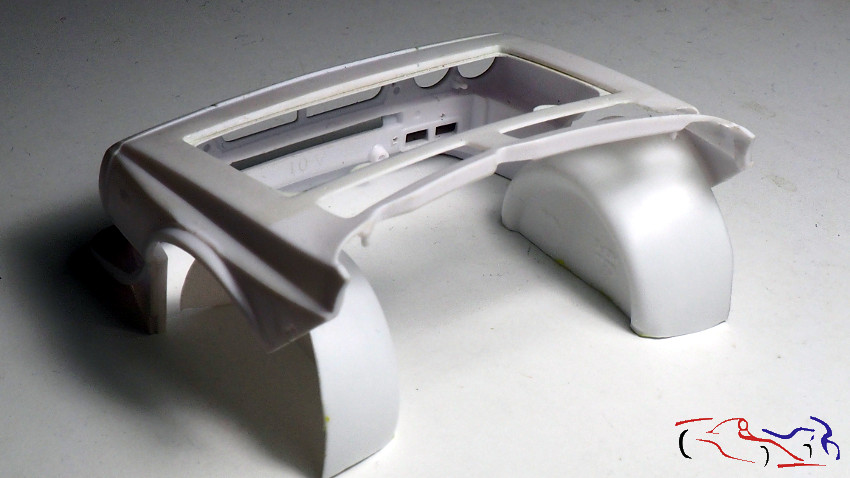 Pero eso lo dejo para más adelante!! Gracias por ver y comentar! But Ill leave that for later! Thanks for viewing and commenting! |
|
|
|
|
|
06-09-2019, 07:25 AM
|
#8 | |
|
AF Modelrater
 Join Date: Jul 2002
Location: Forks Township, Pennsylvania
Posts: 12,894
Thanks: 18
Thanked 63 Times in 56 Posts
|
Re: Lancia Delta S4 Marlboro Beemax 1/24
Excellent progress - your photos are very insightful on your process and seeing how you achieve your excellent models.
__________________
|
|
|
|
|
|
06-10-2019, 06:15 AM
|
#9 | ||
|
AF Enthusiast
Thread starter
Join Date: Mar 2009
Location: Madrid
Posts: 649
Thanks: 109
Thanked 68 Times in 67 Posts
|
Re: Lancia Delta S4 Marlboro Beemax 1/24
Quote:
|
||
|
|
|
|
06-18-2019, 12:20 PM
|
#10 | |
|
AF Enthusiast
Thread starter
Join Date: Mar 2009
Location: Madrid
Posts: 649
Thanks: 109
Thanked 68 Times in 67 Posts
|
Re: Lancia Delta S4 Marlboro Beemax 1/24
En esta entrada voy a mostrar parte de las piezas del transkit de KMP para este coche. Y empezamos por el conjunto de escapes del motor y el turbo. La diferencia es clara ya que el turbo del kit es muy diferente del real:
In this post I will show part of the KMP transkit parts for this car. And we started with the set of engine and turbo exhaust. The difference is clear since the turbo of the kit is very different from the real one: 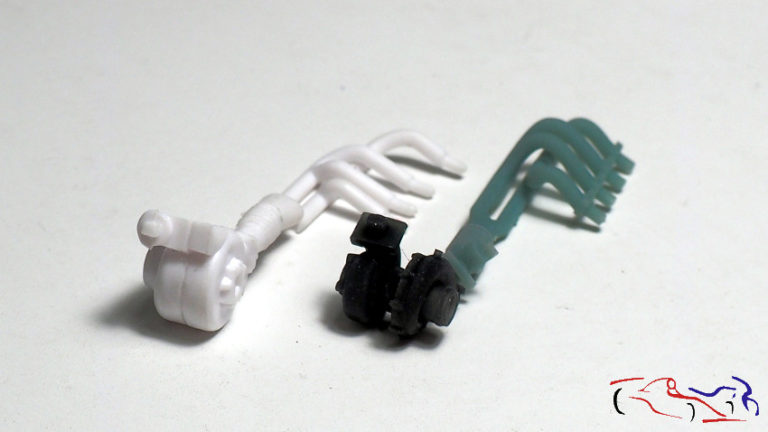 Pasamos al motor. En blanco, es el original con mis cambios, y encima, la pieza del TK que sustituye al del kit ya que las salidas del kit son erróneas. Como ya las hice yo, la pieza del TK la dejaré para un posible modelo futuro. We go to the engine. The original with my changes is the white one, and above, the part of the TK that replaces the kit since the outputs of the kit are wrong. As I did, the TK piece will be left for a possible future model. 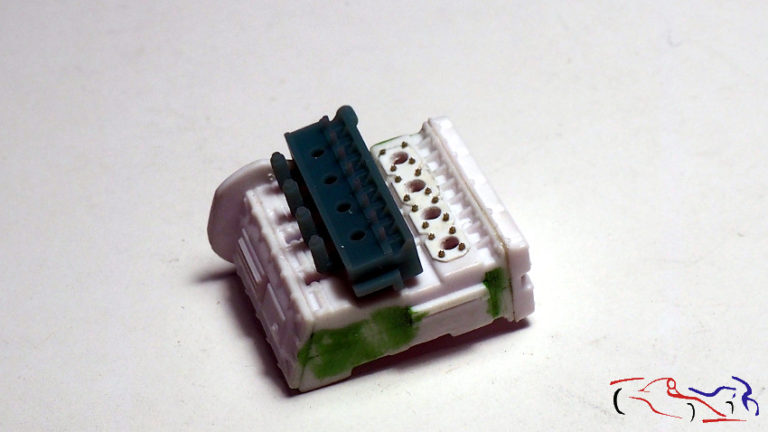 Los bujes de las ruedas del kit son para una versión de asfalto, y yo quiero hacer la versión de tierra. Por ello, además del TK general del coche , compré el TK de versión de tierra, con las llanta, neumáticos y los bujes. Se aprecia que la parte redonda está desplazada en las piezas negras del TK. The wheel hubs of the kit are for an asphalt version, and I want to make the ground version. Therefore, in addition to the general TK of the car, I bought the TK version of land, with rims, tires and bushings. It is appreciated that the round part is displaced in the black pieces of the TK. 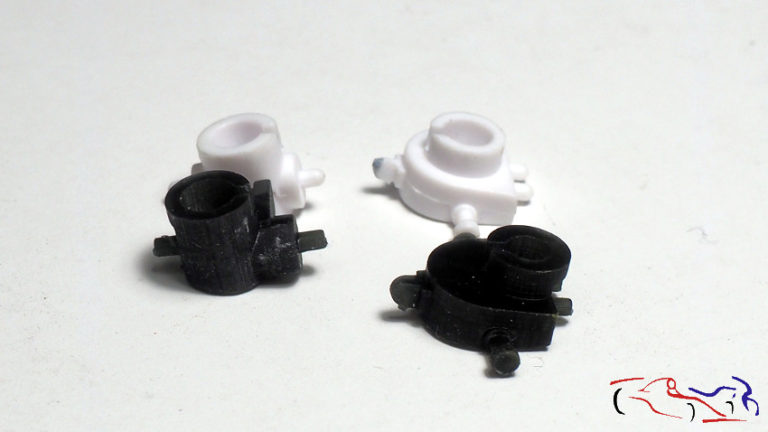 Aquí os presento la llantas y neumáticos de la versión de tierra: Here I present the tires and tires of the ground version: 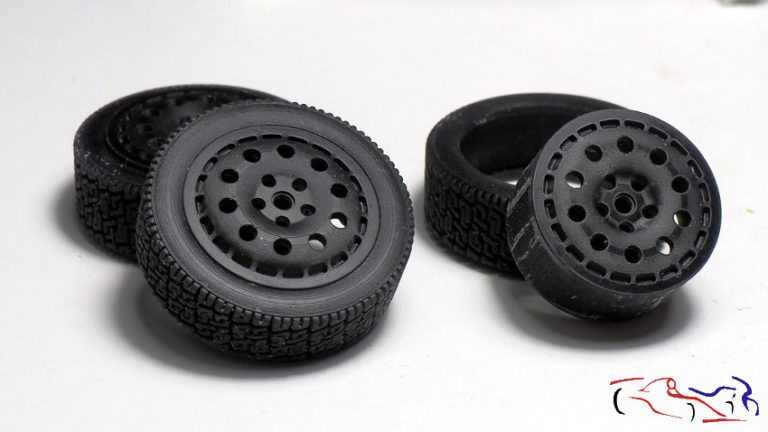 Otra pieza del TK general es la que va en el capo trasero y canaliza el aire de las entradas laterales a los radiadores del motor. Esta pieza hay que tratarla con masilla para eliminar las conexiones de la impresora 3D. Another piece of the general TK is the one that goes in the rear hood and channels the air from the side entrances to the radiators of the engine. This piece must be treated with putty to eliminate the connections of the 3D printer. 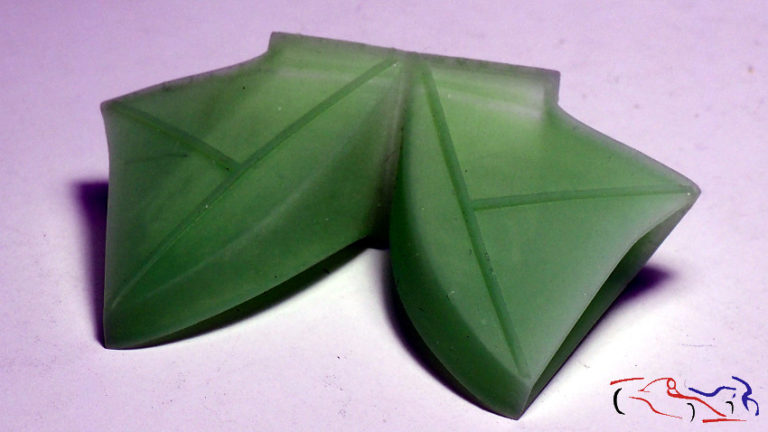 Más piezas del TK general . Ayudarán mucho al aspecto del S4: More pieces of the general TK . They will greatly help the appearance of the S4: 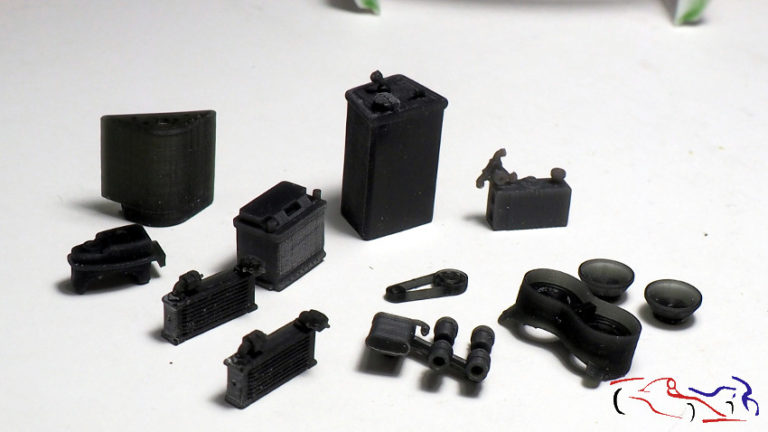 Aunque no es de este kit, os muestro las llantas de asfalto del 037: muy buen aspecto! Although it is not from this kit, I show you the 037 asphalt tires: very good appearance! 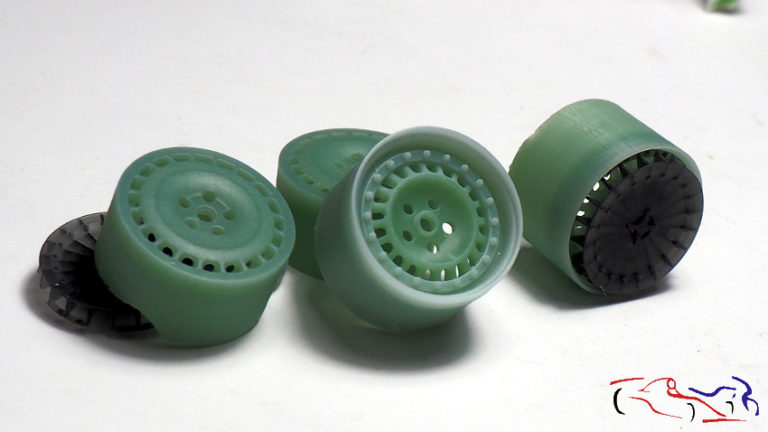 Seguimos con los cambios en el kit. El portón trasero se fija de una manera que no corresponde con el real. Lo modificaremos We continue with the changes in the kit. The tailgate is fixed in a way that does not correspond to the real one. We will modify it 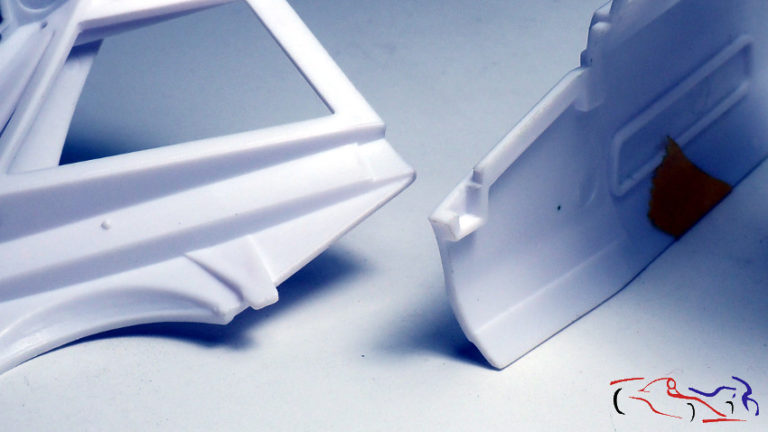 Más piezas en este caso imprimadas: el alerón, la entrada de aire al turbo y un radiador situado en el techo detrás del cockpit: Más piezas en este caso imprimadas: el alerón, la entrada de aire al turbo y un radiador situado en el techo detrás del cockpit: 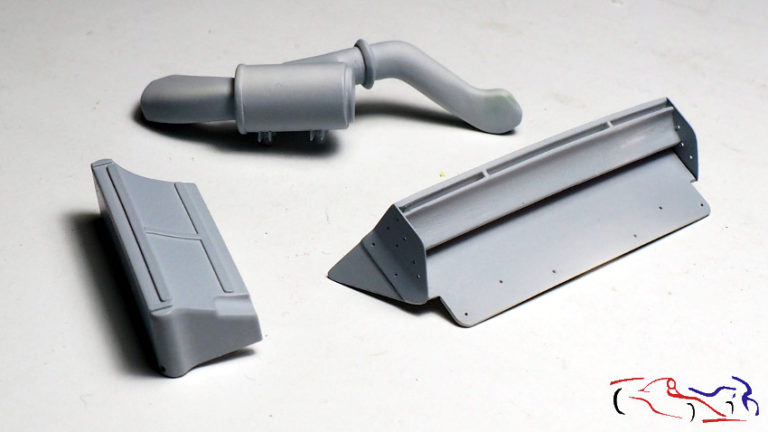 Aquí tenemos la pieza del filtro del aire que va al turbo, pintada de negro semi mate de Zero, a falta de poner las calcas caseras de carbono: Here we have the piece of the filter of the air that goes to the turbo, painted in black semi matt of Zero, in the absence of putting the homemade carbon decals:  Depósitos de líquidos a la derecha, y sus tapones a la izquierda: Deposits of liquids on the right, and their plugs on the left:  Amortiguadores delanteros para modificar Front shock absorbers to modify 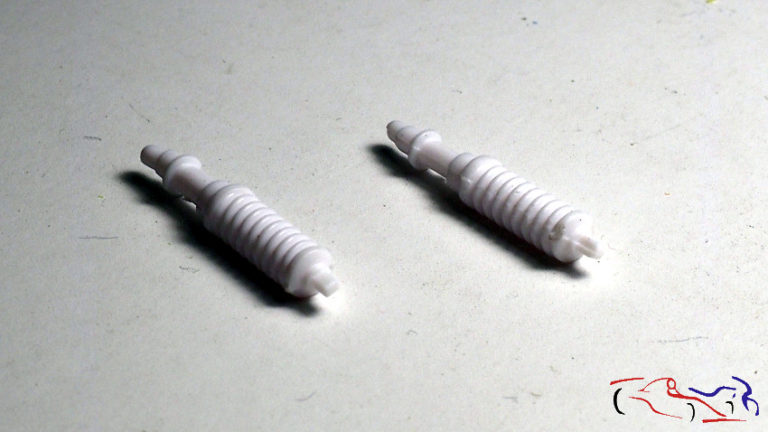 El radiador delantero con sus fotograbados: The front radiator with its photoetched parts: 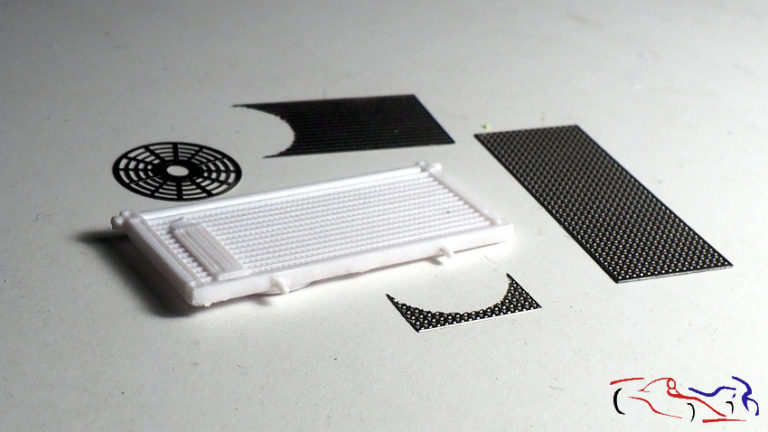 Si observáis, tiene un supuesto filtro en relieve, que elimino para poner el del TK. Lo quito con la Proxxon! If you observe, it has a supposed embossed filter, which I eliminate to put the one of the TK. I take it off with the Proxxon! 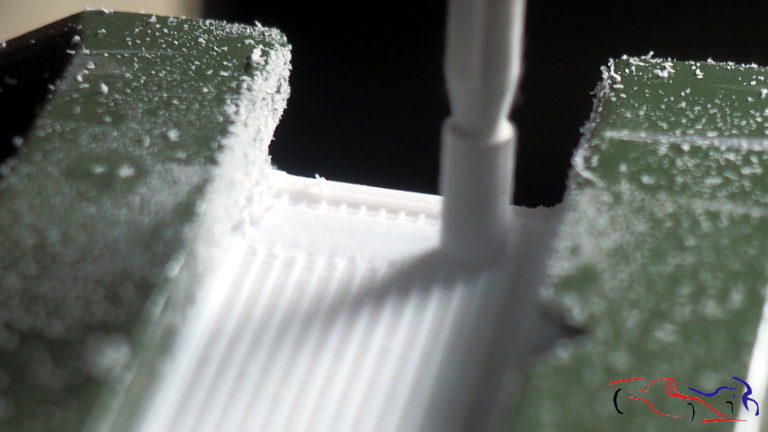 El radiador listo para imprimar: The radiator ready to prime: 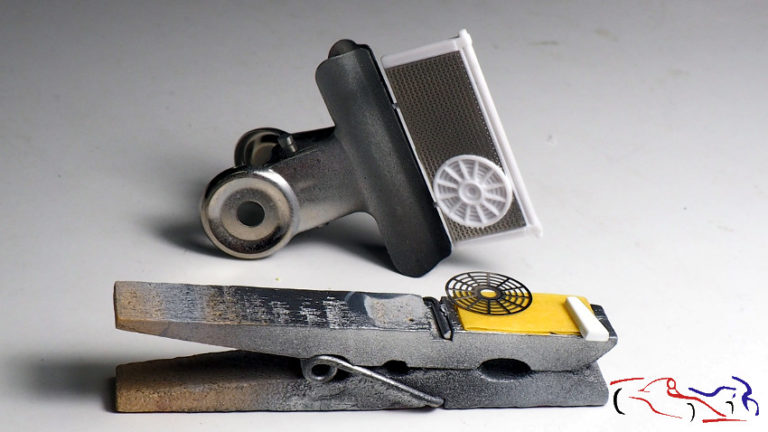 Las llantas imprimadas..,.. Primed tires .., .. 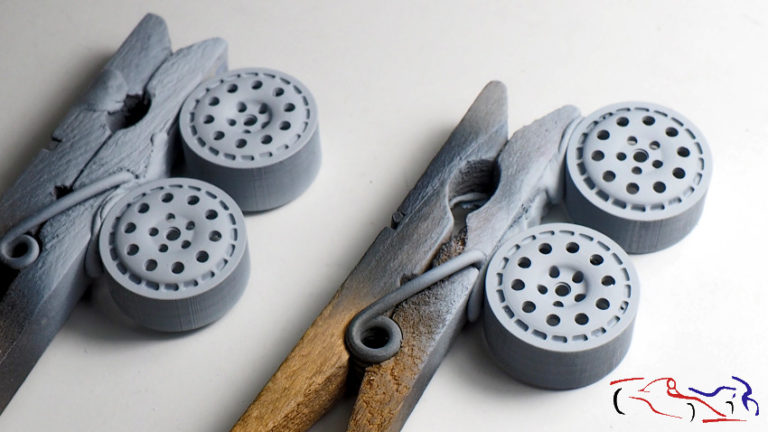 y pintadas de blanco, con sus piezas que forman los tornillos: and painted in white, with its parts that make up the screws: 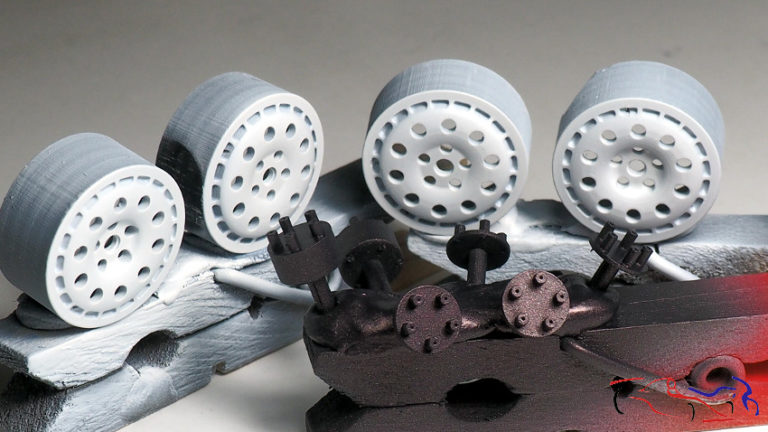 Frenos y bujes pintados de GunMetal y Aluminio de Zero: Brakes and bushings painted in GunMetal and Aluminum Zero: 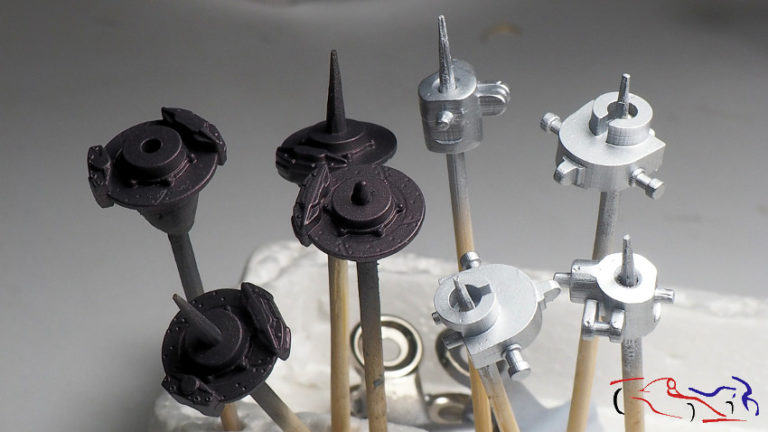 En el chasis, hay dos depósitos detrás del cockpit, pero el kit solo trae uno, y encima de este, una centralita. In the chassis, there are two tanks behind the cockpit, but the kit only brings one, and on top of this, a switchboard. 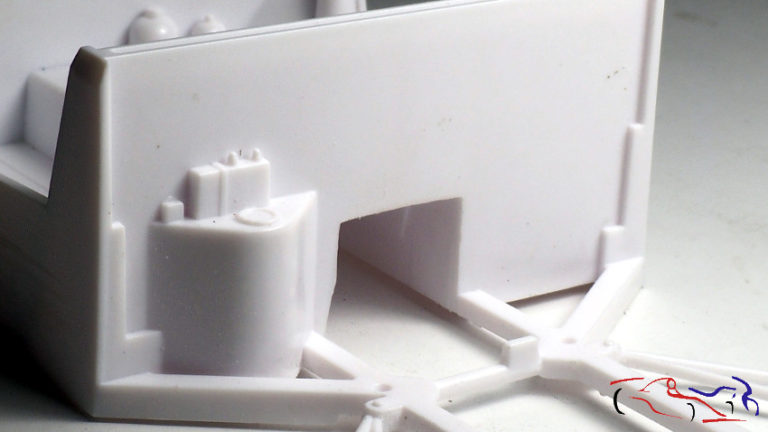 Eliminamos la centralita y ponemos el otro depósito que viene en el TK: We eliminate the switchboard and put the other deposit that comes in the TK: 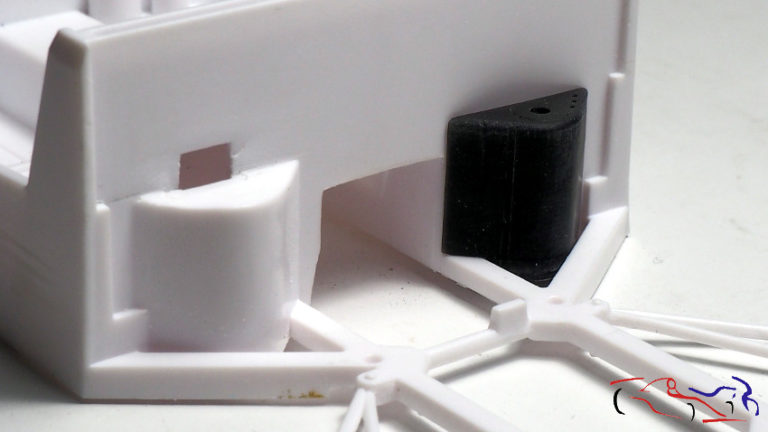 Para terminar, unos botes que vienen el el cockpit y que dejaré: To finish, some boats that come in the cockpit and that I will leave:  Y los asientos, listos para imprimar: And the seats, ready to primer:  Gracias por ver y comentar!! Thanks for viewing and commenting!! |
|
|
|
|
|
06-18-2019, 03:33 PM
|
#11 | |
|
AF Regular
Join Date: Oct 2011
Location: Kilmarnock, Scotland
Posts: 306
Thanks: 6
Thanked 37 Times in 35 Posts
|
Re: Lancia Delta S4 Marlboro Beemax 1/24
Great enhancements for a good base kit.
|
|
|
|
|
|
06-18-2019, 04:28 PM
|
#12 | |
|
AF Regular
Join Date: Aug 2011
Location: Torino
Posts: 390
Thanks: 175
Thanked 62 Times in 58 Posts
|
Re: Lancia Delta S4 Marlboro Beemax 1/24
Absolutely cool detailing work JesusM! Really nice work on the engine and chassis!
  |
|
|
|
|
|
06-19-2019, 03:04 AM
|
#13 | ||
|
AF Enthusiast
Thread starter
Join Date: Mar 2009
Location: Madrid
Posts: 649
Thanks: 109
Thanked 68 Times in 67 Posts
|
Re: Lancia Delta S4 Marlboro Beemax 1/24
Quote:
 |
||
|
|
|
|
06-19-2019, 03:05 AM
|
#14 | ||
|
AF Enthusiast
Thread starter
Join Date: Mar 2009
Location: Madrid
Posts: 649
Thanks: 109
Thanked 68 Times in 67 Posts
|
Re: Lancia Delta S4 Marlboro Beemax 1/24
Quote:
|
||
|
|
|
|
06-26-2019, 10:33 PM
|
#15 | |
|
AF Moderator

Join Date: Sep 2002
Location: Fort Worth, Texas
Posts: 3,246
Thanks: 31
Thanked 314 Times in 241 Posts
|
Re: Lancia Delta S4 Marlboro Beemax 1/24
Awesome work so far!
__________________
The client is not always right. - Enzo Ferrari ItalianHorses.net    
|
|
|
|
|
|
|
POST REPLY TO THIS THREAD |
 |
|
|


