

|
| Search | Car Forums | Gallery | Articles | Helper | AF 350Z | IgorSushko.com | Corporate |
|
| Latest | 0 Rplys |
|
|||||||
| WIP - Motorsports Post topics for any "Work In Process" motorsports vehicles in this sub-forum. |
 |
 Show Printable Version | Show Printable Version |  Email this Page | Email this Page |  Subscribe to this Thread
|
|
|
Thread Tools |
|
|
#676 | |
|
ItaloSvensk
Join Date: Mar 2009
Location: Marstrand
Posts: 3,383
Thanks: 1,077
Thanked 296 Times in 270 Posts
|
Re: 1/8 Porsche 935/78 'Moby Dick'
madonna benedetta...
__________________
Paolo - LoveGT40 Modelworks website www.alsoldatino.com my YT channel : https://www.youtube.com/channel/UCIp..._as=subscriber FB: https://www.facebook.com/alsoldatino |
|
|
|

|
|
|
#677 | |
|
AF Enthusiast
Join Date: May 2009
Location: Tucson, Arizona
Posts: 1,469
Thanks: 12
Thanked 126 Times in 120 Posts
|
Re: 1/8 Porsche 935/78 'Moby Dick'
Stunning SB just unbelievably stunning.
I don't think anyone that has followed any of your builds has dropped out You bring modeling to a whole new level Cheers John |
|
|
|

|
|
|
#678 | |
|
AF Enthusiast
Join Date: Nov 2004
Location: San Diego, California
Posts: 833
Thanks: 2
Thanked 6 Times in 6 Posts
|
Re: 1/8 Porsche 935/78 'Moby Dick'
__________________

|
|
|
|

|
|
|
#679 | |
|
AF Regular
Join Date: Jul 2004
Location: Lodz
Posts: 183
Thanks: 24
Thanked 15 Times in 14 Posts
|
Re: 1/8 Porsche 935/78 'Moby Dick'
Amazing skills. And such a pleasure to watch =)
|
|
|
|

|
|
|
#680 | |
|
AF Enthusiast
Thread starter
Join Date: Nov 2008
Location: Norwich
Posts: 649
Thanks: 21
Thanked 111 Times in 87 Posts
|
Re: 1/8 Porsche 935/78 'Moby Dick'
Apologies in advance that this update is short on photos - I tried to upload five to Photobucket last night, of which one arrived. Tried to send the other four tonight, and still just the one gets through. Temporary problem, or a sign of things to come? Maybe I'll have to find a plan B for my photos earlier than I thought...
Anyway, the two photos that did manage to upload themselves are proof of what I've been up to for the last few weeks. Here's the rear suspension fitted in place: 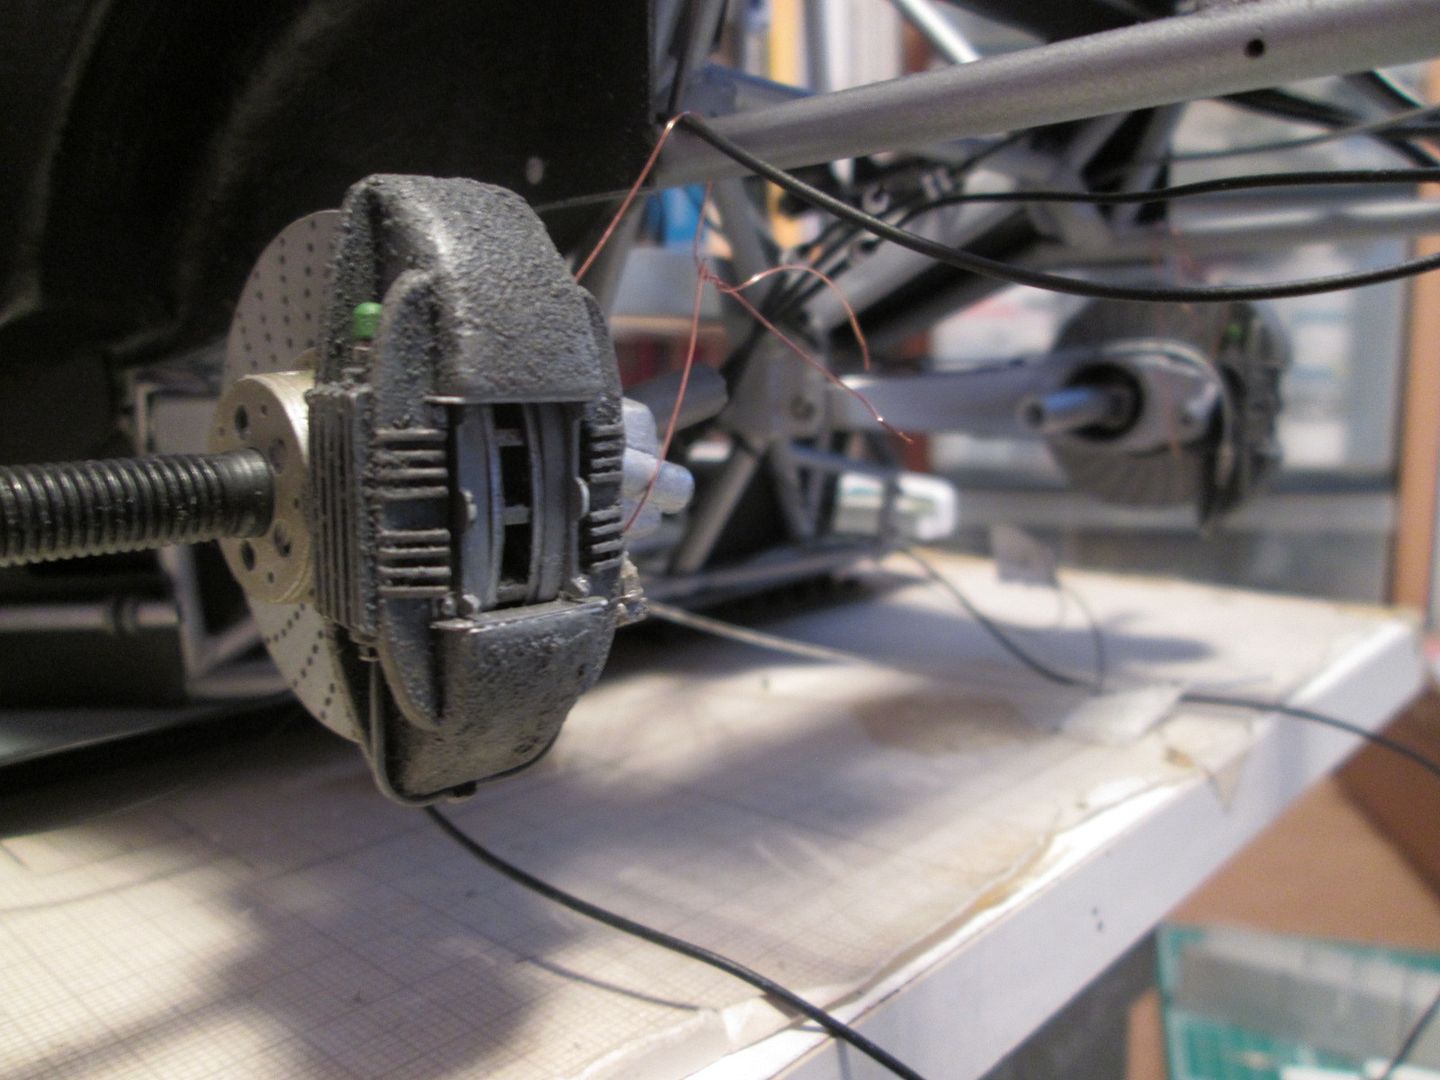 All four brake calipers have been painted, detailed and are now glued to their respective uprights. I gave each caliper a basecoat of Citadel 'Astrogranite' textured paint, rather than going for a smooth finish. The discs were given a light drybrush with various metalllics to try to move away from the plain airbrush base-coat. The brake pads were painted and fitted into place, with small retaining plates added either side of the opening. The only things missing are the retainer spring-clips - I need to spend some time on these when I can concentrate! I made a bunch of brakeline fittings from small styrene hex-strip, etc, and added these to the calipers as required, plus the connecting pipes around the underside. The little green dust-caps on the bleed-screws add a bit of colour in amongst the grey, silver and black. Each wishbone / trailing arm is attached to the chassis with two pins, and is held temporarily at ride-height by wire. The brakelines run over the top of each arm to the calipers, and there is a small flexible section which still has to be connected to the fittings on the chassis. Both driveshafts have been painted and assembled - the outer section of each has been glued into the rear hubs, and the inner sections (with donuts) will be fitted when the gearbox is installed. The rear anti-roll bar cannot be fitted until after the gearbox is in! The rear dampers have been painted and assembled with Rijk's springs: 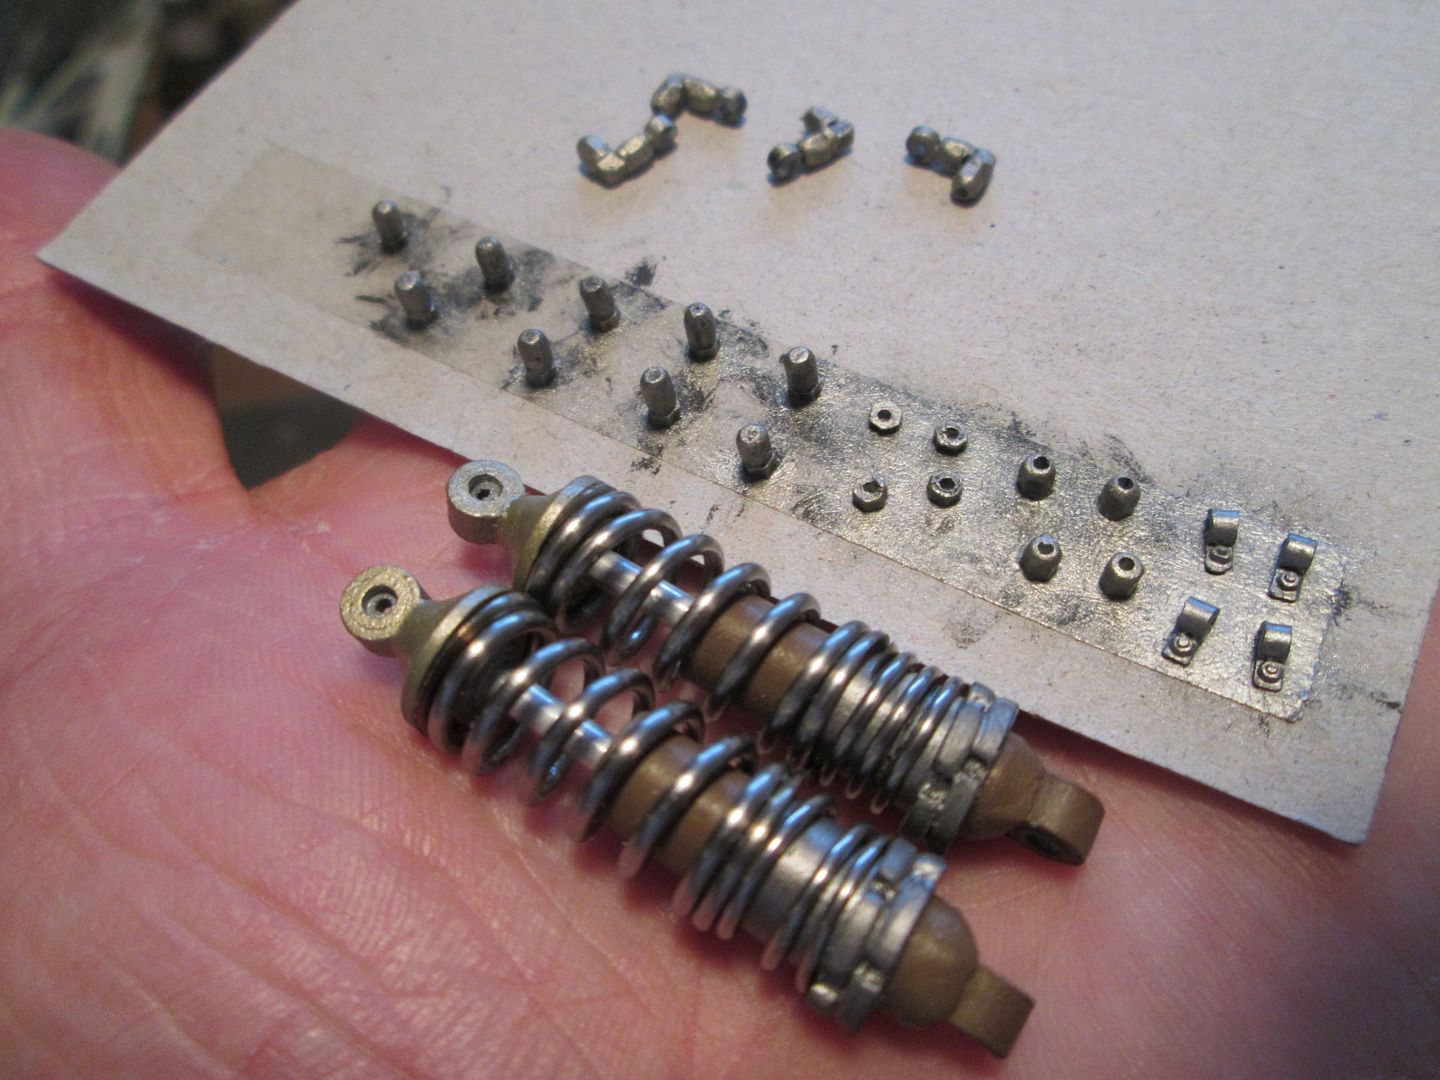 You can also see all the little caliper fittings during painting - so much easier to stick them to a piece of double-sided tape, rather than trying to hold them with tweezers! I just need to do a few final checks, and then the dampers will probably be fitted during this week - it'll be difficult to get them in once the engine is in the way. The front hubs and calipers have also been assembled, so they will probably be on the car soon. The cooling ducts need to be painted, but I'm also a little concerned about getting the flexible trunking through the suspension. I'm sure I checked all that whilst making the parts, but that was a couple of years ago! So, the progress continues. Although there's still plenty of jobs I can be doing on the chassis as it is, I'm also aware that in a couple of months the weather will have improved and I can get some more spraying done. I need to get the bodywork finished during the summer, or it'll drag on into 2019. I know there's no deadline on this, but it would be appropriate to have it finished during the 935-78's 40th birthday year. Once I've got the four sets of suspension fitted, I think I'll return to preparing the rest of the bodywork for painting... If the other photos decide to arrive in my Photobucket account, I'll post them later in the week. SB |
|
|
|

|
|
|
#681 | |
|
AF Newbie
Join Date: Dec 2006
Location: Melbourne
Posts: 54
Thanks: 2
Thanked 0 Times in 0 Posts
|
Re: 1/8 Porsche 935/78 'Moby Dick'
Fantastic craftsmanship. I am constantly amazed at your dedication to these detailed builds which go on for years. I struggle to keep my enthusiasm for a few months before wandering off to do something else. Thank you for sharing so much of yourself. Your builds are inspirational.
Dan |
|
|
|

|
|
|
#682 | |
|
AF Enthusiast
Thread starter
Join Date: Nov 2008
Location: Norwich
Posts: 649
Thanks: 21
Thanked 111 Times in 87 Posts
|
Re: 1/8 Porsche 935/78 'Moby Dick'
Thanks, Dan. Yes, the question of how to maintain enthusiasm! It's difficult, as I never set out to spend five years or more on this project - it just happened to work out that way. For this one, once I'd found the photos of the Freisinger rebuild I knew I really wanted to build this car - I could imagine how it was going to look, I was sure that I had (just) enough detail photos to do it justice, and the background to how the car was designed was very interesting. Yes, the lack of official chassis plans has certainly been a factor in how long it's taking, but will also make the end result so much more satisfying.
Perhaps it's the variety of jobs required that help to keep me going. Most of the time, if I feel one particular thing is becoming a struggle, I can spend a few days (or weeks) working on something completely different. if I lose enthusiasm for fiddling around with wiring, I can spend some time working on some painting, or something for the bodywork, or assembling the suspension, or whatever. It's now at the stage where there isn't actually too much left to physically make, so the range of tasks is starting to come down. The end is starting to come into sight, though, so that provides a new source of encouragement... So, on to tonight's update. PB is definitely starting to annoy me - more fun trying to get photos to upload today, but better success than last time. First up, here's a shot of the rear trailing arms that should have been in the last update: 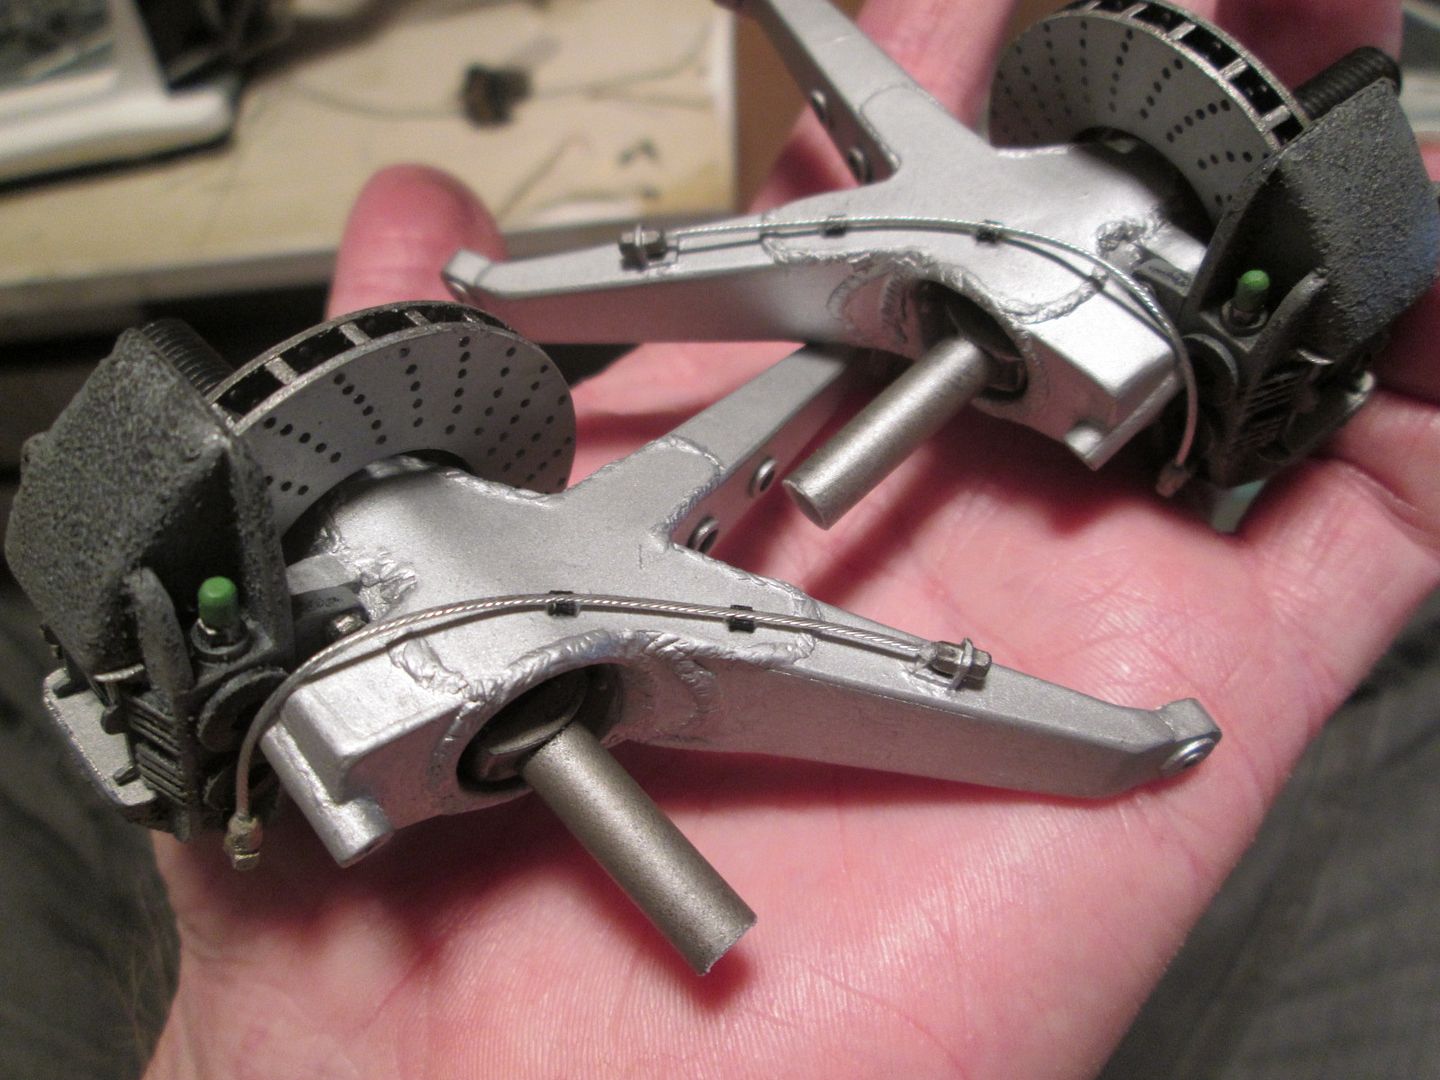 I've been trying a few dummy-runs to get a feel for how awkward it's going to be when I eventually commit to installing the engine and gearbox. I am not looking forward to it! To help matters, I've trimmed the driveshafts slightly and made sure that if I fit the inner sections to the gearbox first, I can wriggle them onto the outers: 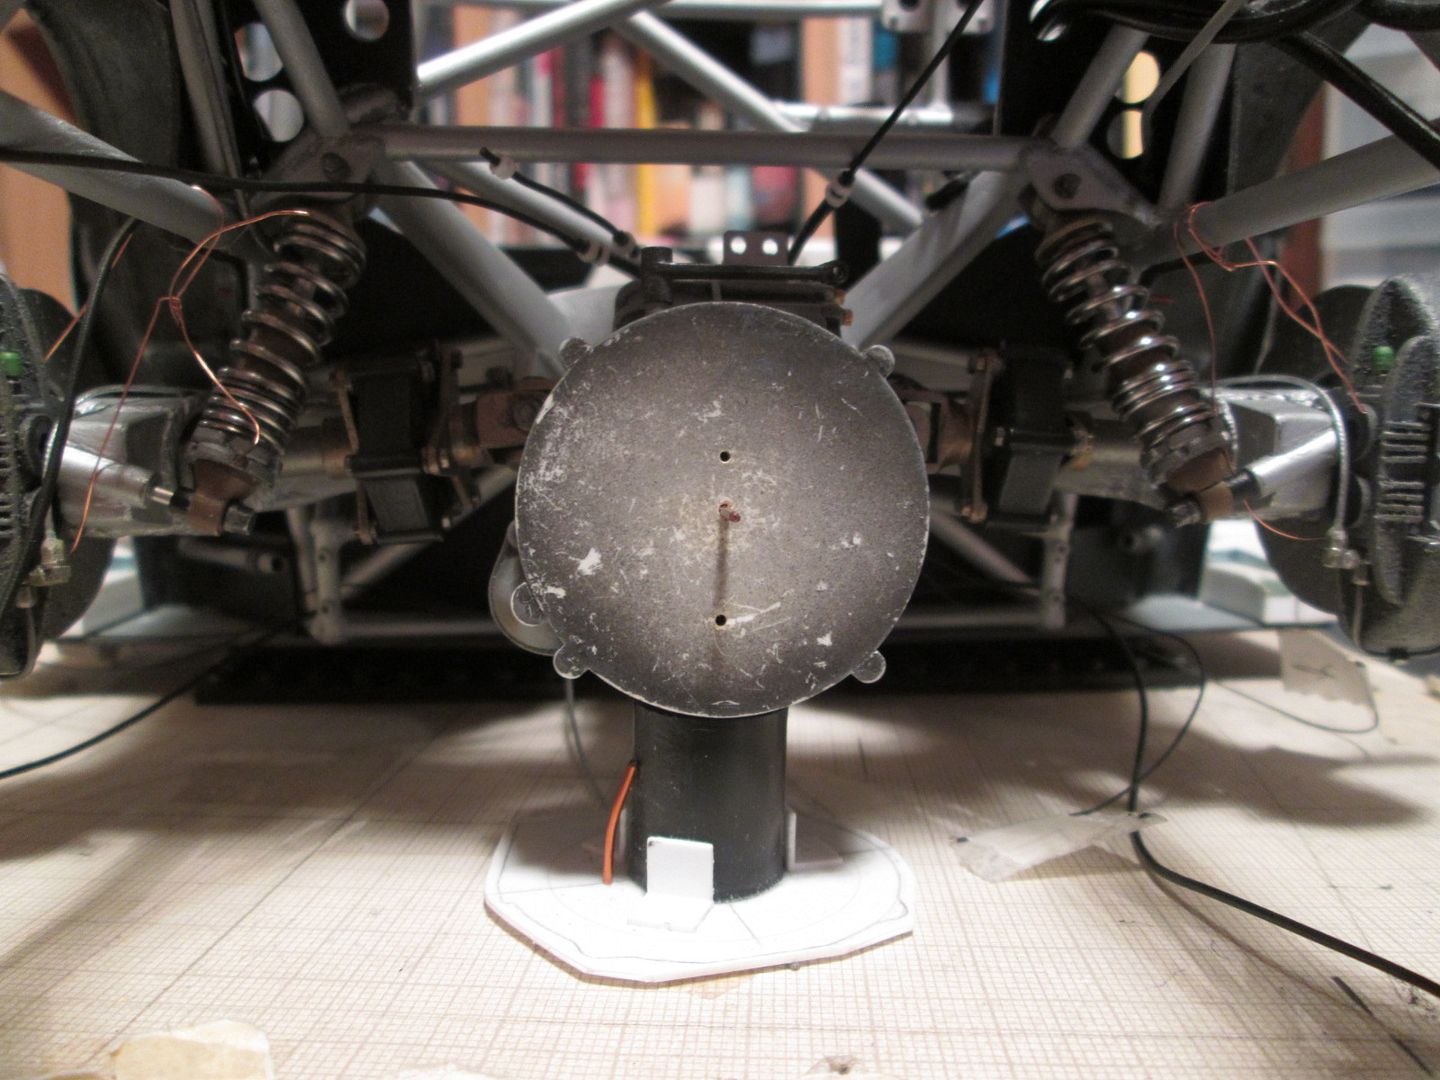 As much as I would love to fit the gearbox separately to the engine, I just can't. There's no way of getting it in the right position without the engine, and I won't be able to get a bomb-proof connection between the two sections if I'm trying to wrestle them together in the car. Another carry-over from last week, here's one of the front corners fitted to the car, complete with brake aeroquip and roll-bar droplink: 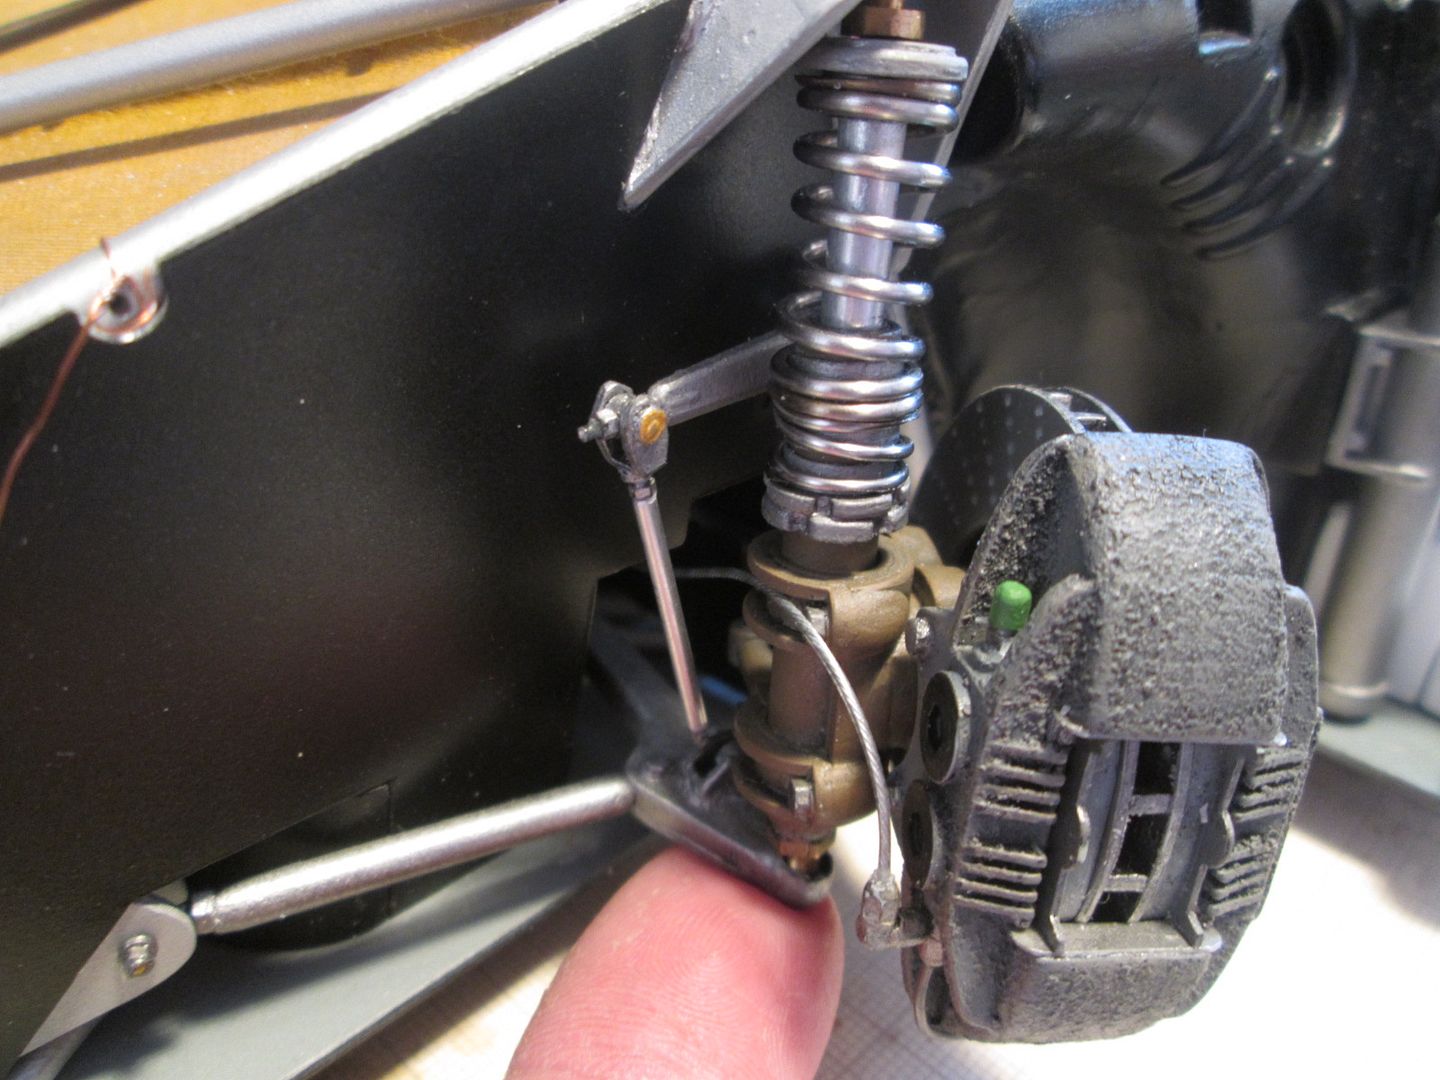 Now for some new stuff. I've spent a lot of time recently getting the side water pipes together, so the coolers can be fitted. I did a final assembly of all the sections, greenstuffed the joints, smoothed it all down, sprayed with primer, then painted the top coat....then decided that they would look better with some insulating cloth covering. This makes sense, as they would be putting a fair bit of heat into the cockpit, just behind the driver. So, after going to all the trouble to paint them, I then spent a happy afternoon wrapping and gluing thin strips of fibreglass cloth around them: 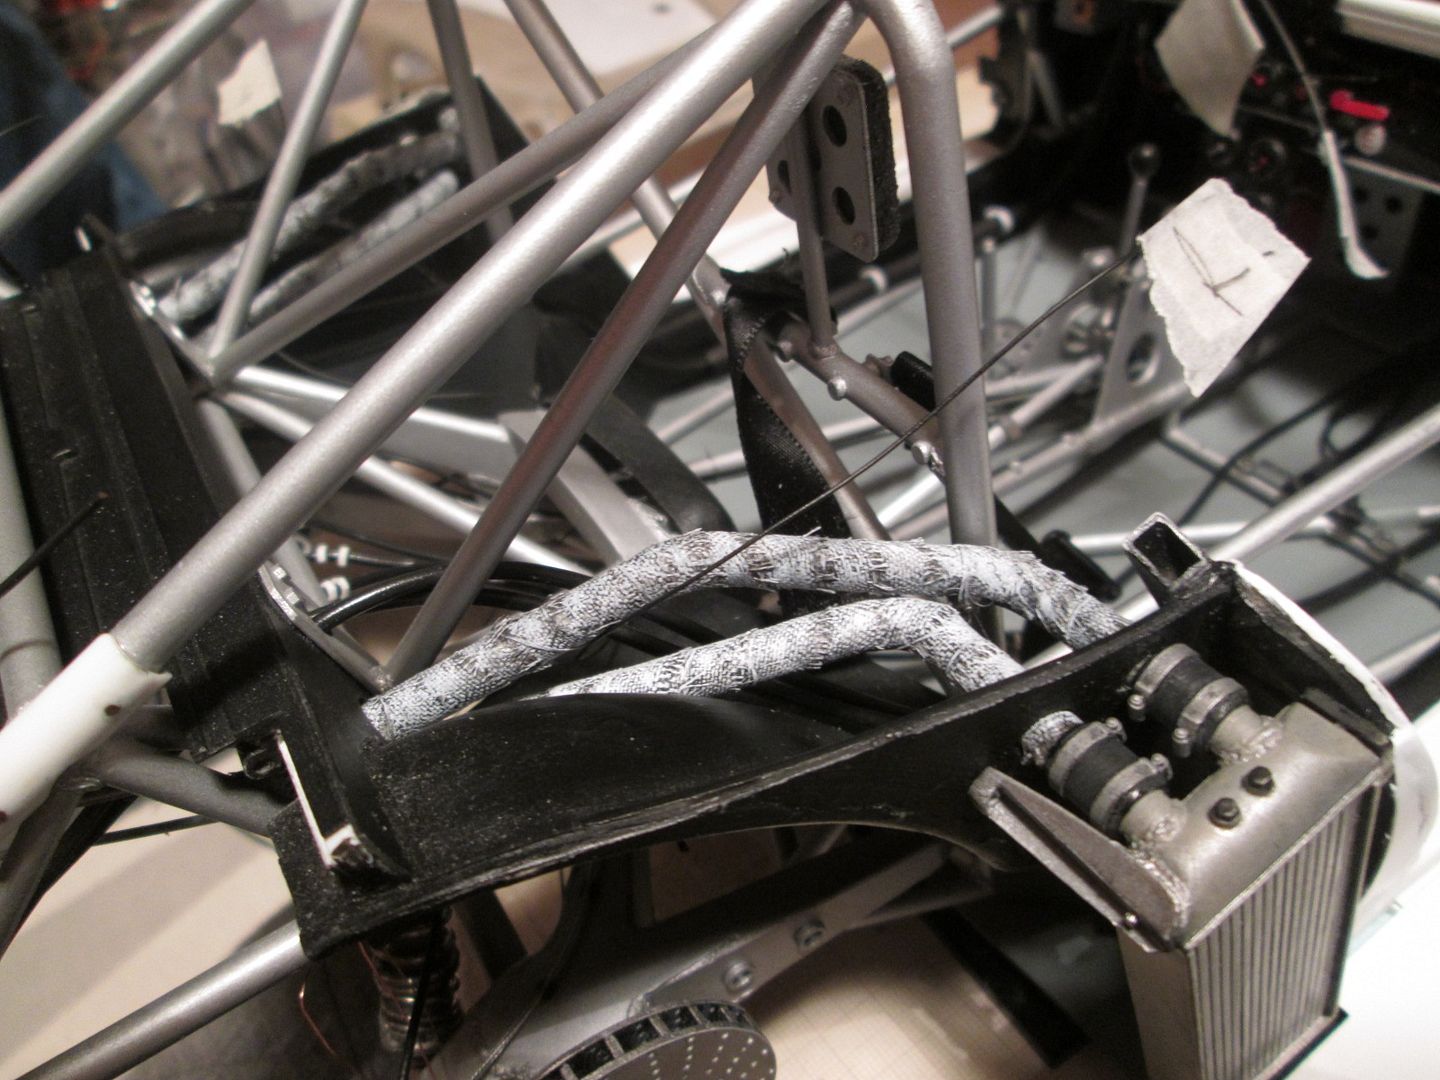 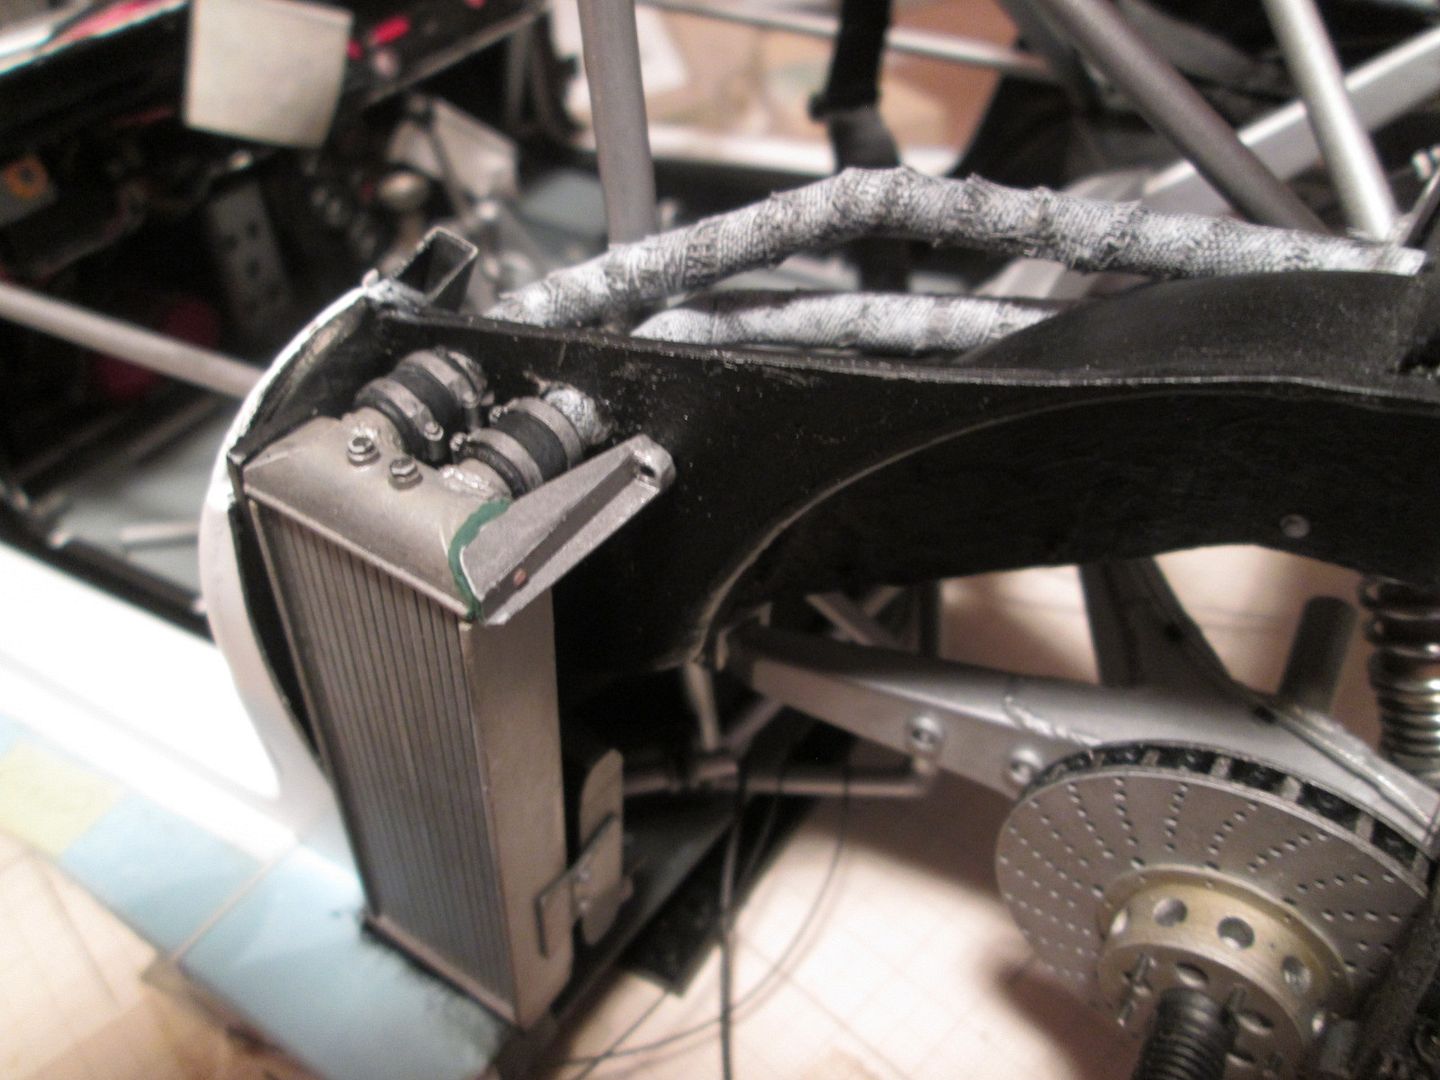 They're a little bit 'hairy', but don't forget that when the roof section is on they won't be anything like as visible as they are here. I'm pleased with the results, though - it's another new texture in the cockpit. The two radiators have been glued in place - pinned into the sill at the bottom, and another pin through the bracket at the top of the doorframe. I've added the extra supporting stay to the rear of each rad, and you can see where I've put some liquid greenstuff around the joint where it's 'welded' on. The left-hand rad has also had the small gearbox oil-cooler fitted to it - easier to do this before it went on the car. The joints between the main pipes and the top of each radiator are nicely camouflaged by the hose connector pieces. With the recent snow in the UK (yeah, I know - it's nothing compared to other places, but everything still grinds to a halt, etc...) I've had some bonus modelling time! One of the jobs I've been tackling has been the two wing mirrors - nothing too complicated, but not a shape that lends itself to styrene box-section: 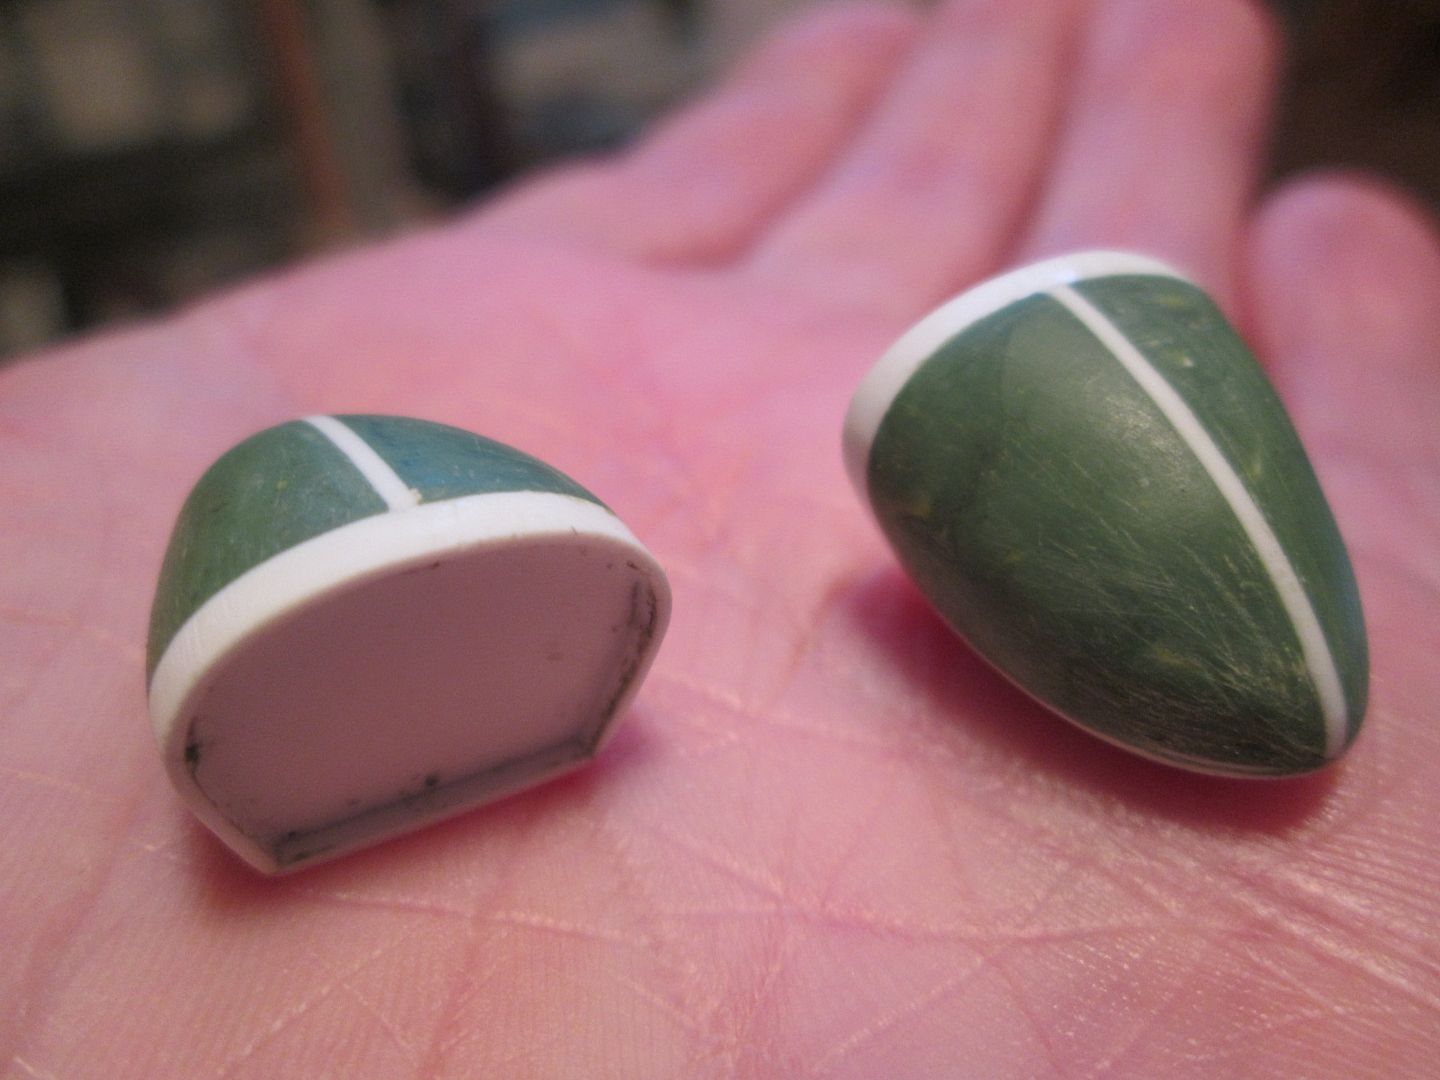 I started with the shape of the mirror-glass, then added a length of 0.5mm x 2mm strip around the edge to create the recess - a baseplate of 0.5mm styrene closes the end off. A vertical spine was added to define the shape of the top surface, and I then filled either side of this with small sections of 1/8" box. Of course, this was one of the photos that didn't make it to PB today, for some reason. I added plenty of greenstuff, smoothed it down with emery cloth, file, etc, and they're now almost ready for a coat of primer. I've got some thin self-adhesive chrome sheet that will be cut to shape to make the actual mirrors, but this will have to wait until I can do some spray-painting. Given that 95% of the snow we've had here has now gone, hopefully it won't be too long before I can get the airbrush out again...it is spring, after all! Have a good week, SB |
|
|
|

|
|
|
#683 | |
|
AF Newbie
Join Date: Oct 2002
Posts: 65
Thanks: 7
Thanked 4 Times in 4 Posts
|
Re: 1/8 Porsche 935/78 'Moby Dick'
I have to ask: at what point did you say to yourself "huh, it would have been easier to build a full sized replica..."
|
|
|
|

|
|
|
#684 | |
|
AF Enthusiast
Thread starter
Join Date: Nov 2008
Location: Norwich
Posts: 649
Thanks: 21
Thanked 111 Times in 87 Posts
|
Re: 1/8 Porsche 935/78 'Moby Dick'
Big Pat: I say that to myself on a very regular basis! Every time I struggle to fit something that I can't quite get access to. Every time I do something that would be so easy in real life, but becomes awkward even in 1:8. Every time something small pings out of my tweezers and disappears. Still, it could be worse - I could be building in 1:43!
The first photo tonight is a fine example of the above problem. Knowing that the engine and gearbox will have to be fitted eventually, I spent some time adding more wiring and details to the engine bay. The coil is in, a little relay box, the connectors for the rear tail-lights (hidden from view), a connector for the wiring from the alternator, etc. Needless to say, it all took longer than expected - but easier to do it now than once the engine is in! 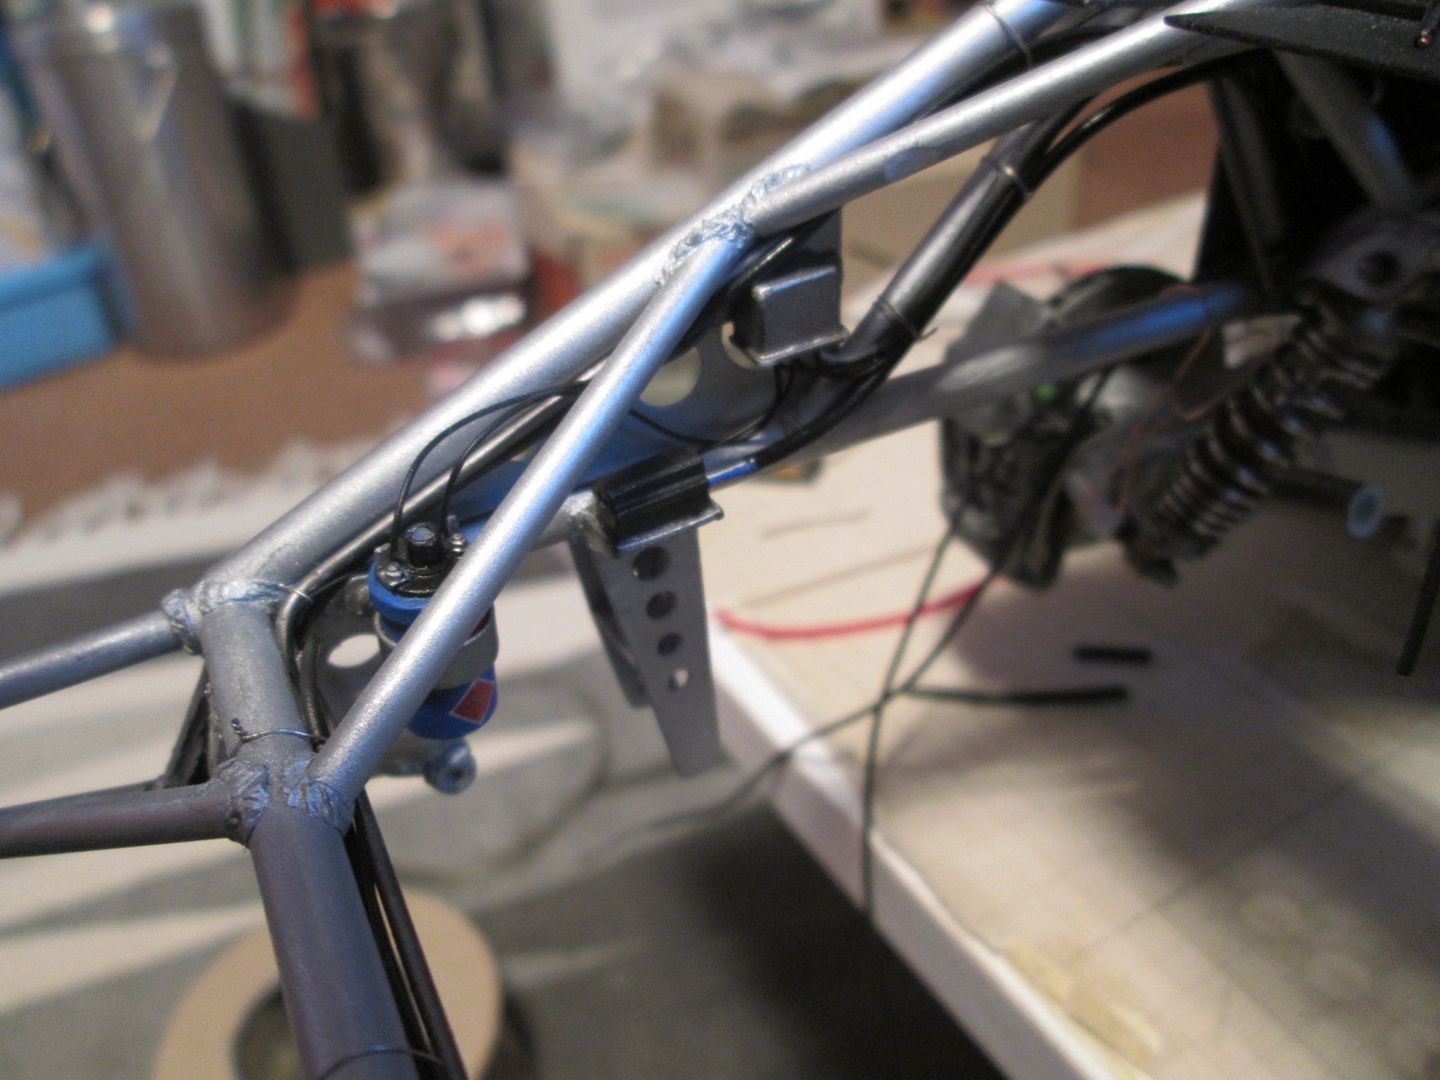 So, my current target is to have a spraying session during the Easter break, and I've been spending the last couple of weeks trying to get some bodywork prepared. I'm going to paint the outer door skins and the two rear wing / wheelarch extensions, so these have been filled and rubbed-down. The final detail to add on the rear wings was to cut the two rows of slots - rather than measuring and marking fourteen slots on each panel, I made a simple template from strip styrene. Then it was a time-consuming job of drilling a hole at the end of each slot, cutting across, then filing away the groove: 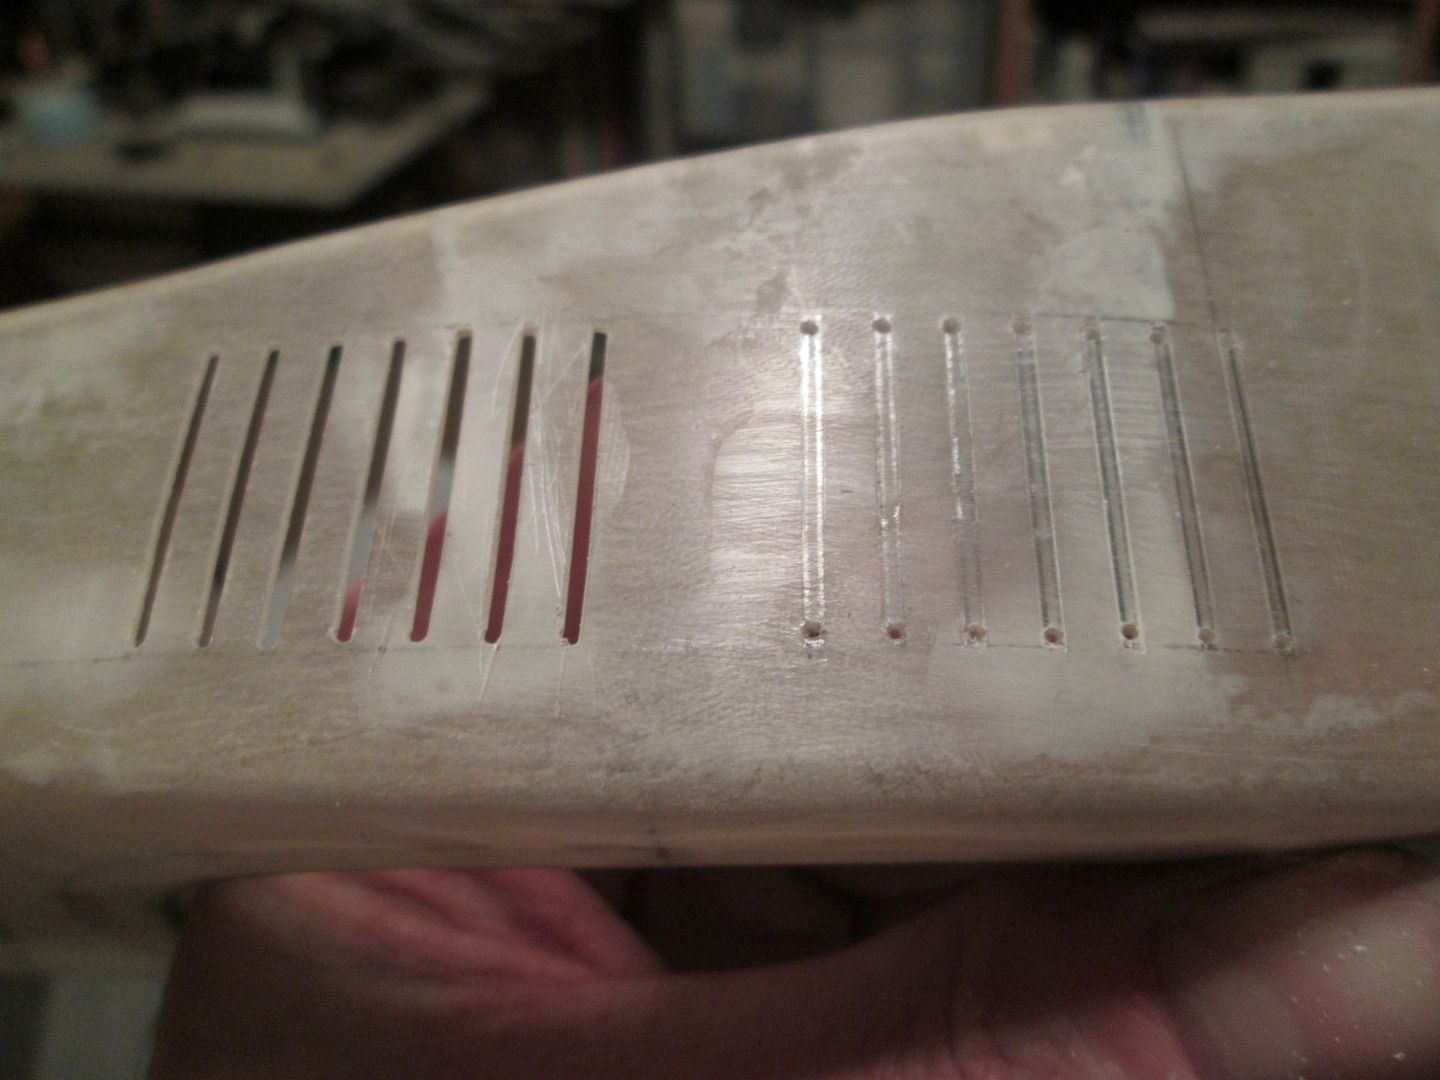 I reckon each slot took about half an hour to cut! I started last Saturday afternoon whilst watching the IMSA Sebring 12h, continued Sunday afternoon watching the Goodwood Members Meeting (anyone else see the factory Moby Dick doing demo laps? Fantastic!), and finished the last one on Wednesday... 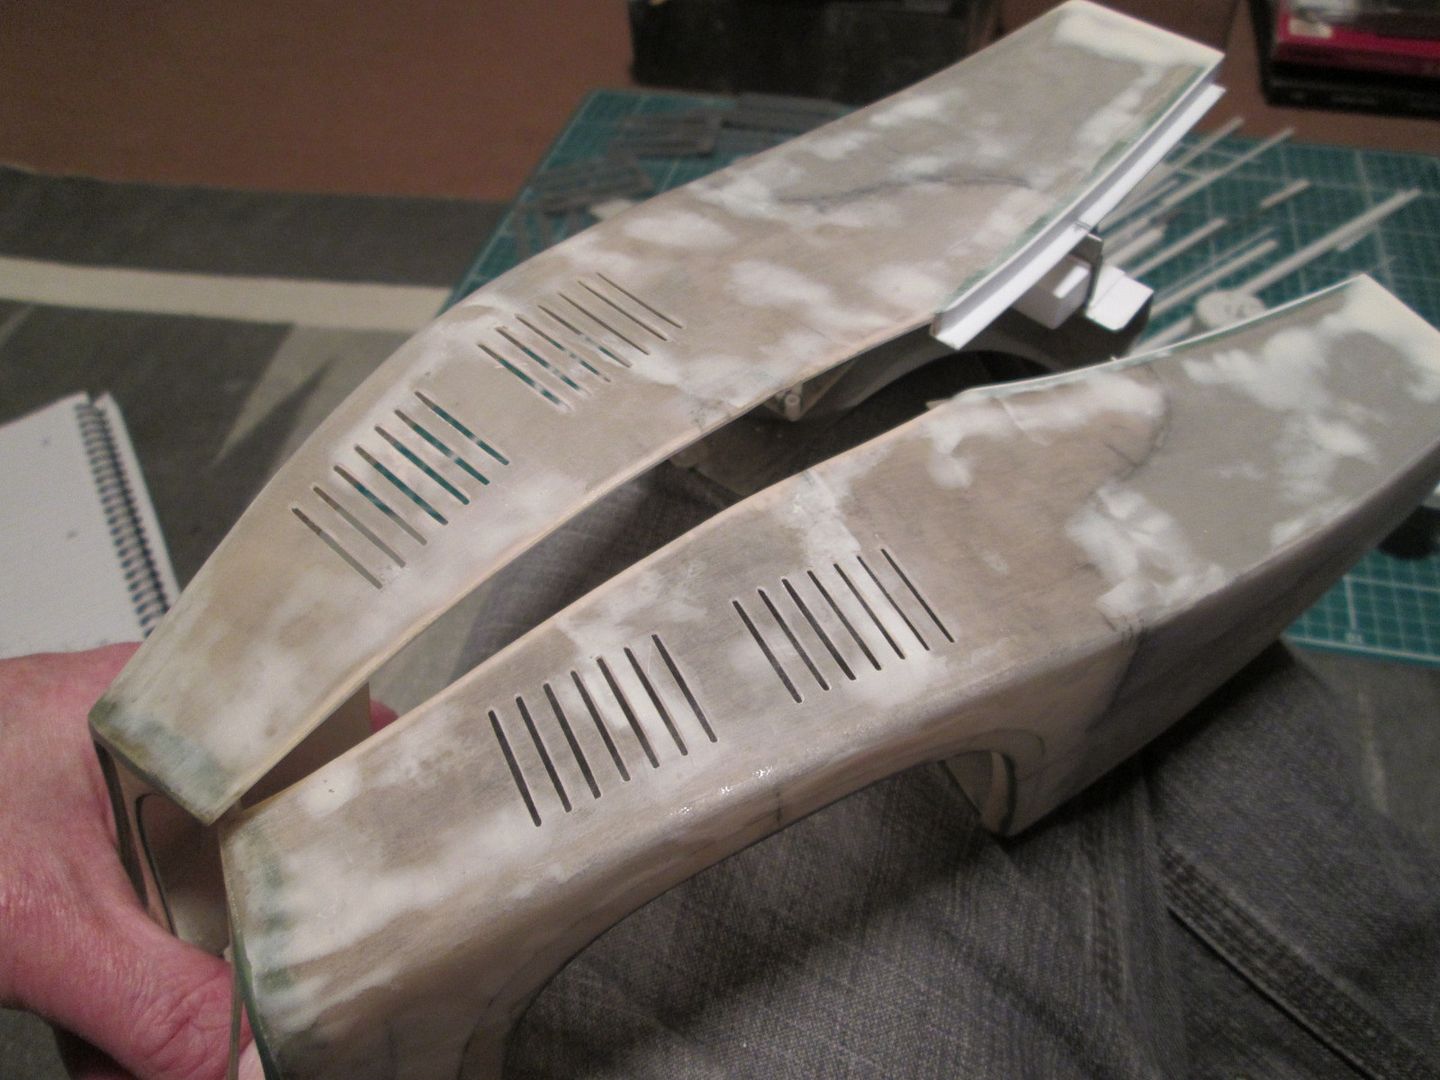 The plan for this weekend is to get some primer on the parts, rub them down, try to correct the worst faults, and generally put myself in a good position for Easter. So far, so good - here's the bits after an initial coat of Tamiya white primer: 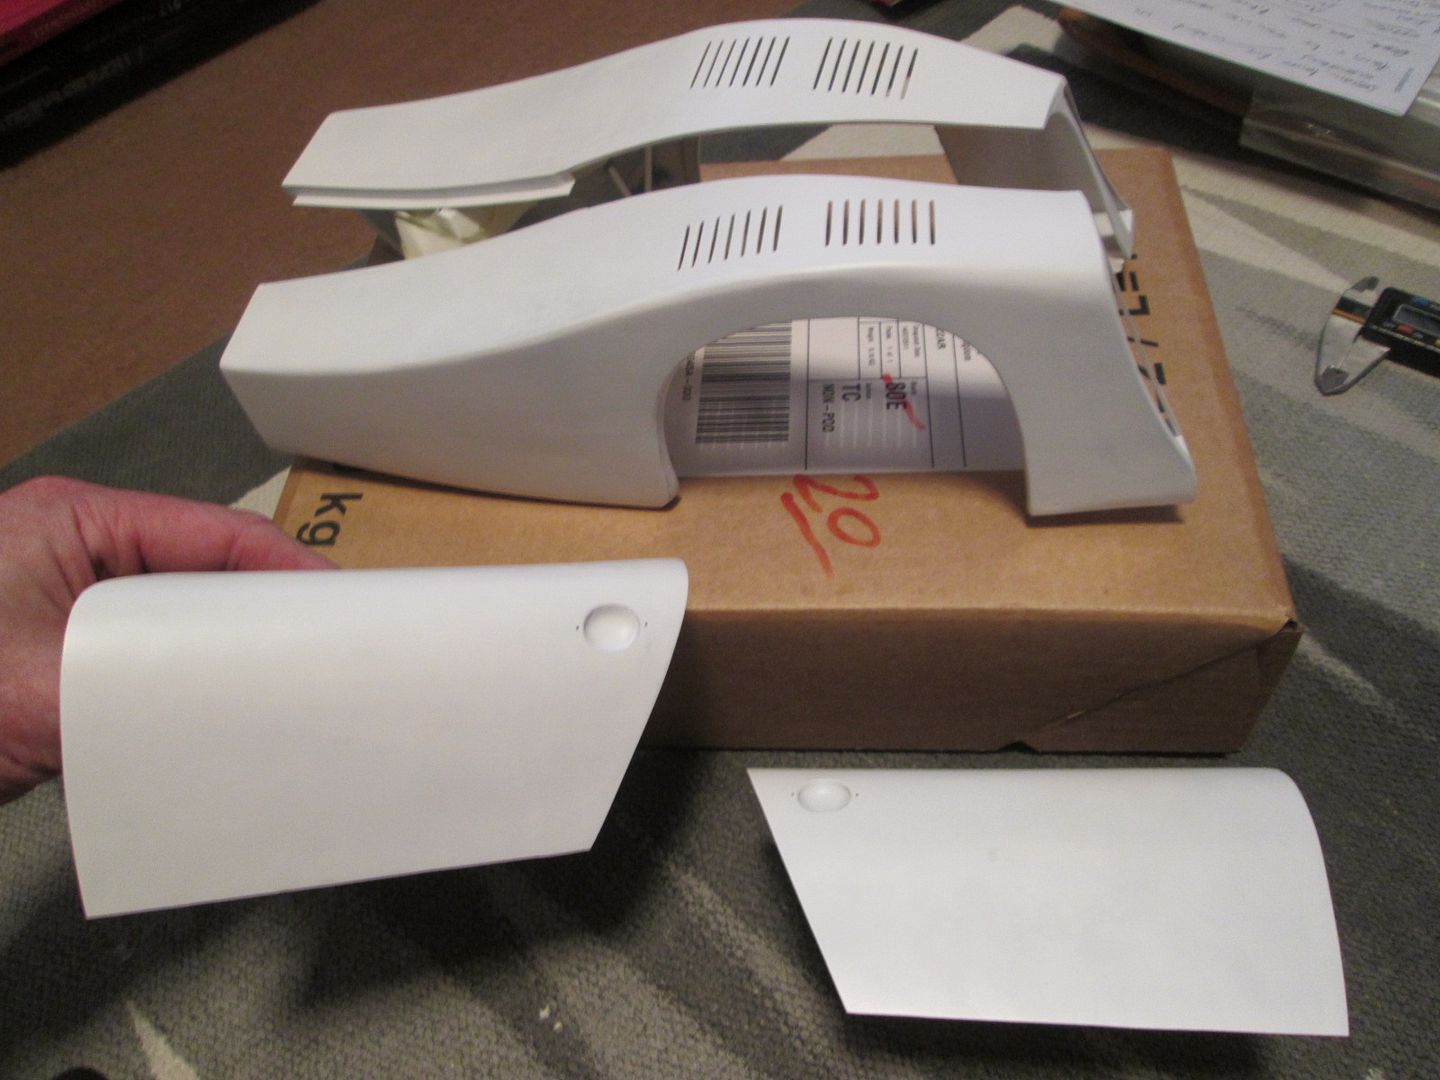 The doors have come out pretty well - A little bit of filler required along the top edge, but otherwise okay. The rear wings were not quite as good, but many of the faults have responded to some 1200 wet/dry and some effort. I've got some filler drying off now, and I'll smooth this off tomorrow before another coat of primer. In addition to these parts, I've also sprayed a test-piece of flat fibreglass which I'll use to trial the Martini stripes. I've got some Tamiya X-7 Red, X-14 Sky Blue, and X-3 Royal Blue to experiment with - I'm hoping I'll be able to use them un-mixed, but we'll see. I'll try cutting a slot through the stripe after painting, too, as this may be an option for the louvres on the nose section. I'm now fighting the temptation to drop the roof on, add the rear wings and nose, and see the white whale looking a little more...white! More next time. SB |
|
|
|

|
| The Following User Says Thank You to ScratchBuilt For This Useful Post: |
Ferraristo (04-17-2018)
|
|
|
#685 | |
|
AF Enthusiast
Join Date: Nov 2004
Location: San Diego, California
Posts: 833
Thanks: 2
Thanked 6 Times in 6 Posts
|
Re: 1/8 Porsche 935/78 'Moby Dick'
Yeeeessssssss!! Paaaaaiiiinnnnntttt!!
__________________

|
|
|
|

|
|
|
#686 | |
|
AF Enthusiast
Thread starter
Join Date: Nov 2008
Location: Norwich
Posts: 649
Thanks: 21
Thanked 111 Times in 87 Posts
|
Re: 1/8 Porsche 935/78 'Moby Dick'
Yup, paint! "About bl**dy time", I hear you all say...
Unfortunately, the paintwork isn't the main focus of this update. It is progressing nicely, but doesn't look massively different to the photo from the previous post! I reckon one final coat of white and it will be there, and I'm going to be spraying my test piece with Martini colours this week, so there will be more on this next time. For now, here's a photo from last week after I gave in to temptation: 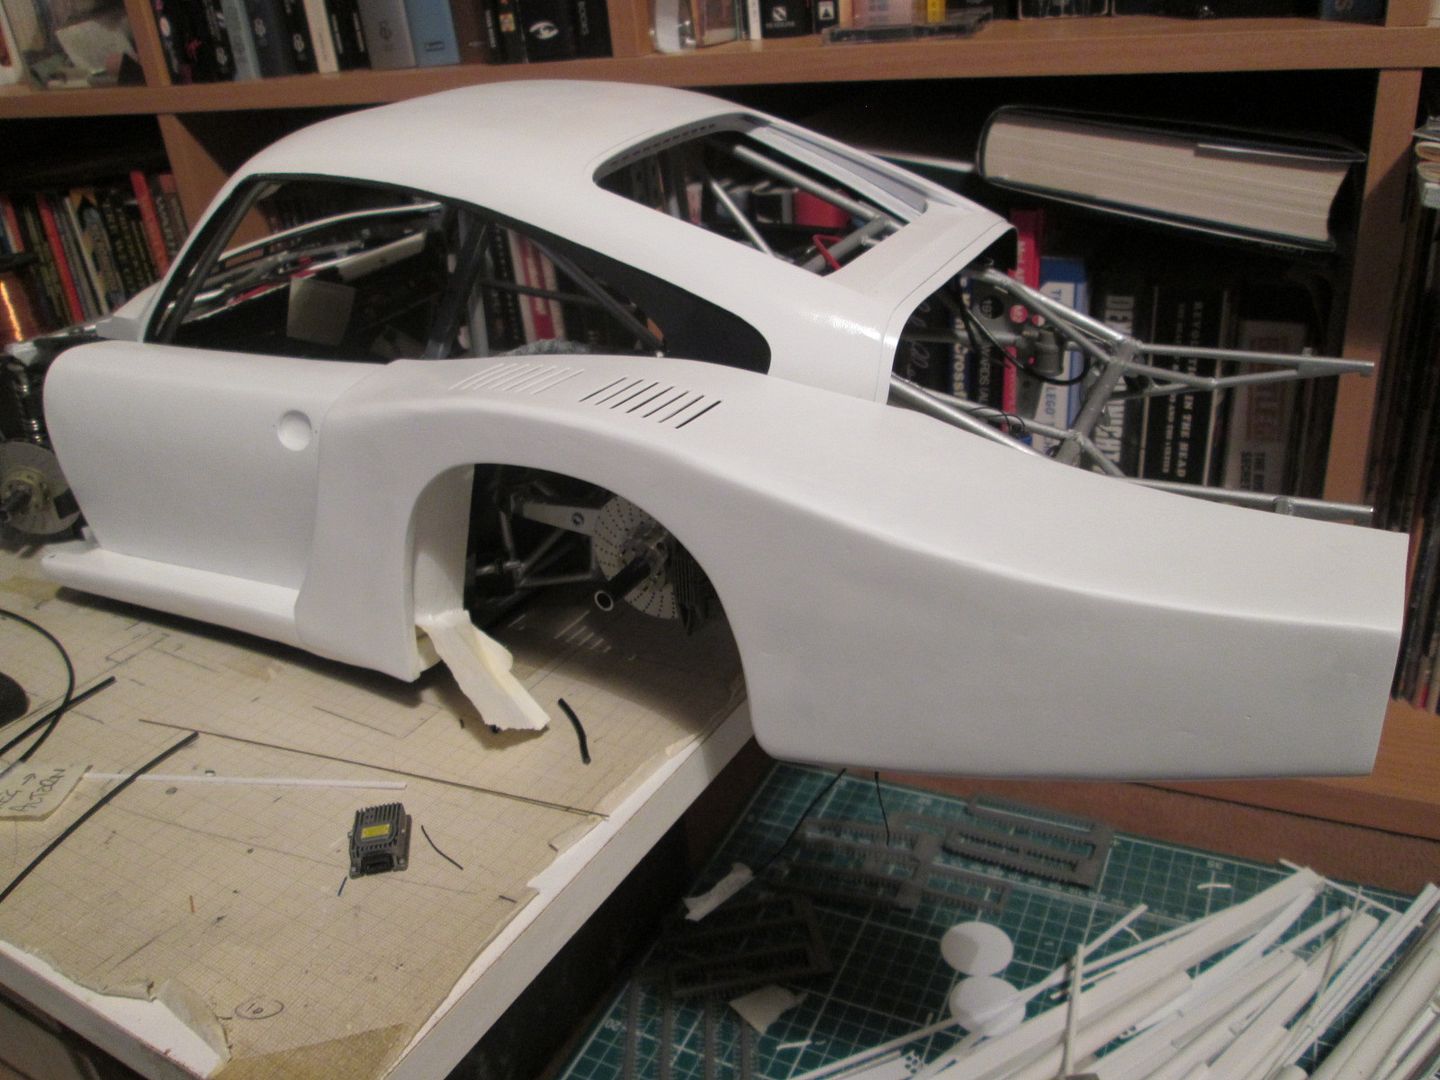 The big push recently has been getting the wheel rims sorted out. Just before the Easter weekend I spent a couple of evenings building up the outer rim edges with various layers of 0.4 and 0.5mm strip - so much easier than trying cut thin hoops from sheet with the compass cutter. After this I started the job of cutting and fitting a total of 72 fins to the aerodynamic wheel covers: 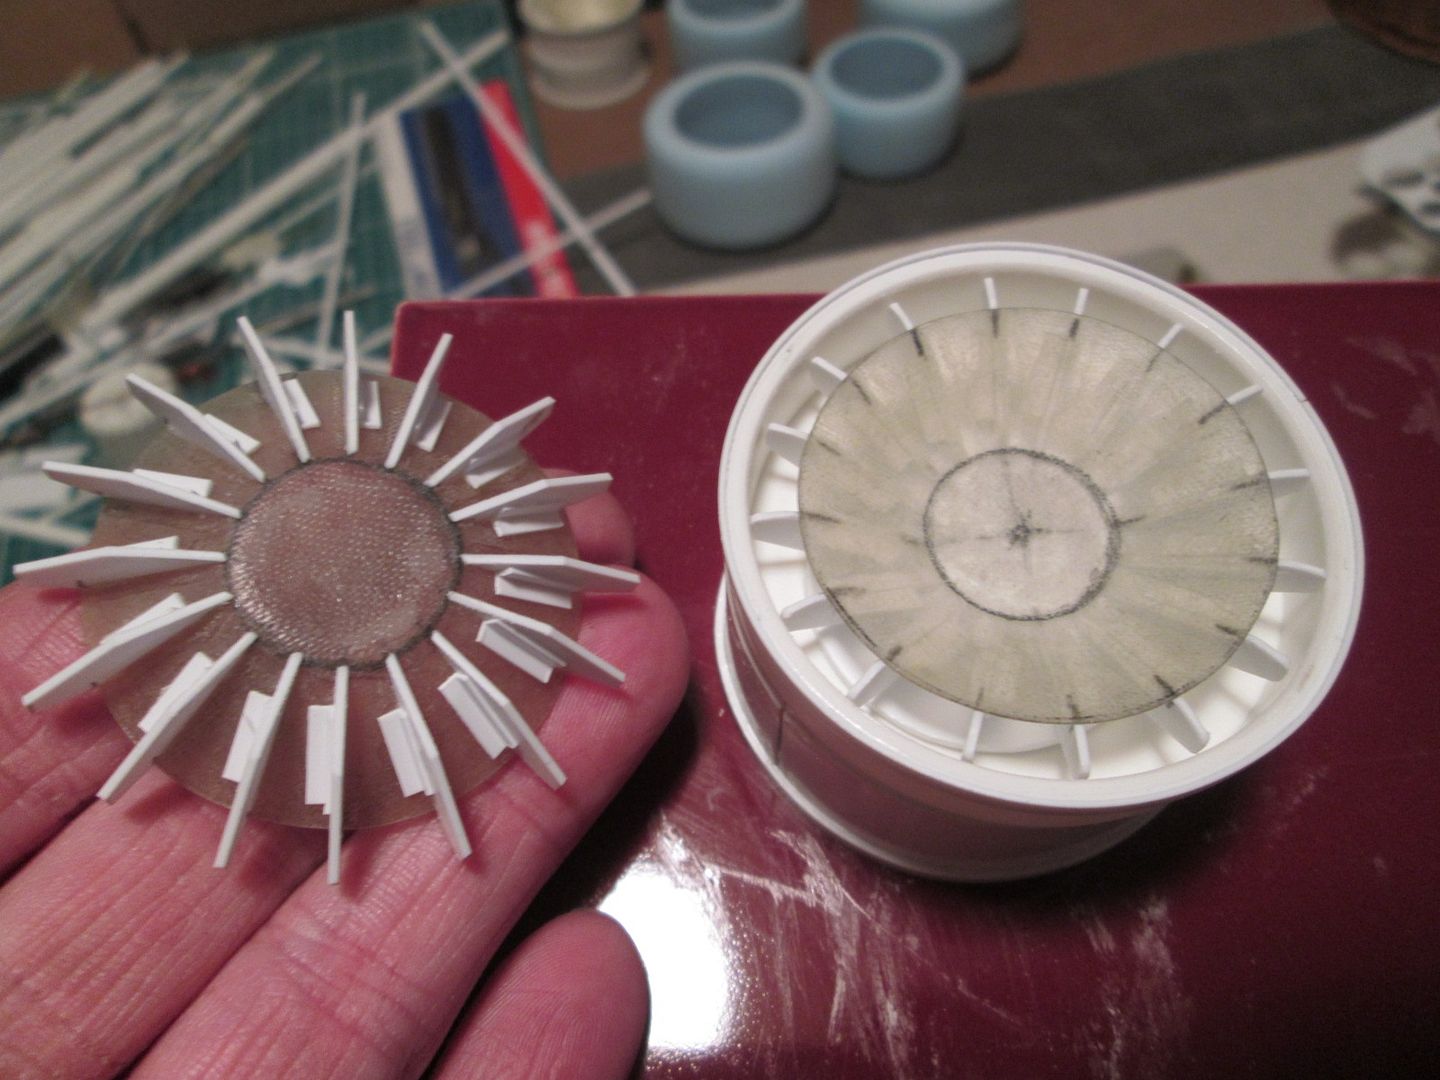 This is one of the fronts with 16 fins. The fins were cut from 0.75mm strip, using a template piece to make life easier. The small lengths of 2mm angle were added for reinforcement, and some final fettling was required to get a suitable fit into the wheelrim. The rears were much the same, except with 20 fins per side (a slightly different shape, of course). 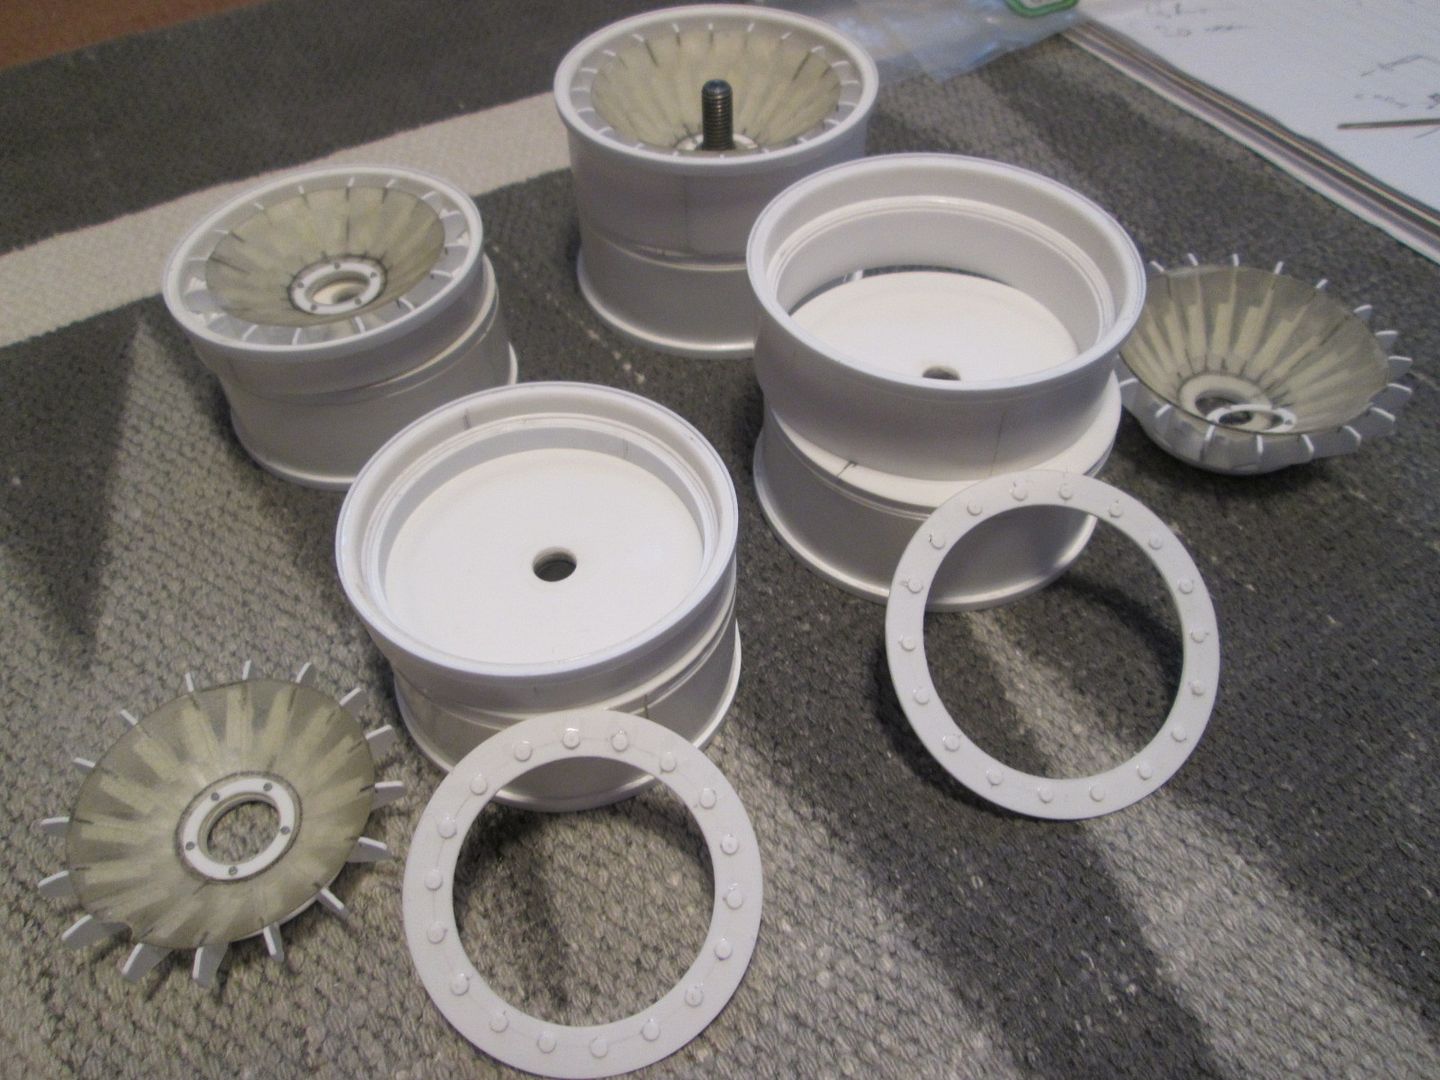 I adjusted the height of the cover within the wheel by fitting a couple of styrene discs beneath, allowing the wheelnut to be recessed into it. Each one also has a small ring with nut-detailing which will be glued in place after final painting. You can also see where I've added more strip around the inside of the rims to get a more realistic cross-section. Here's a detail shot - the tyre valves were added last night: 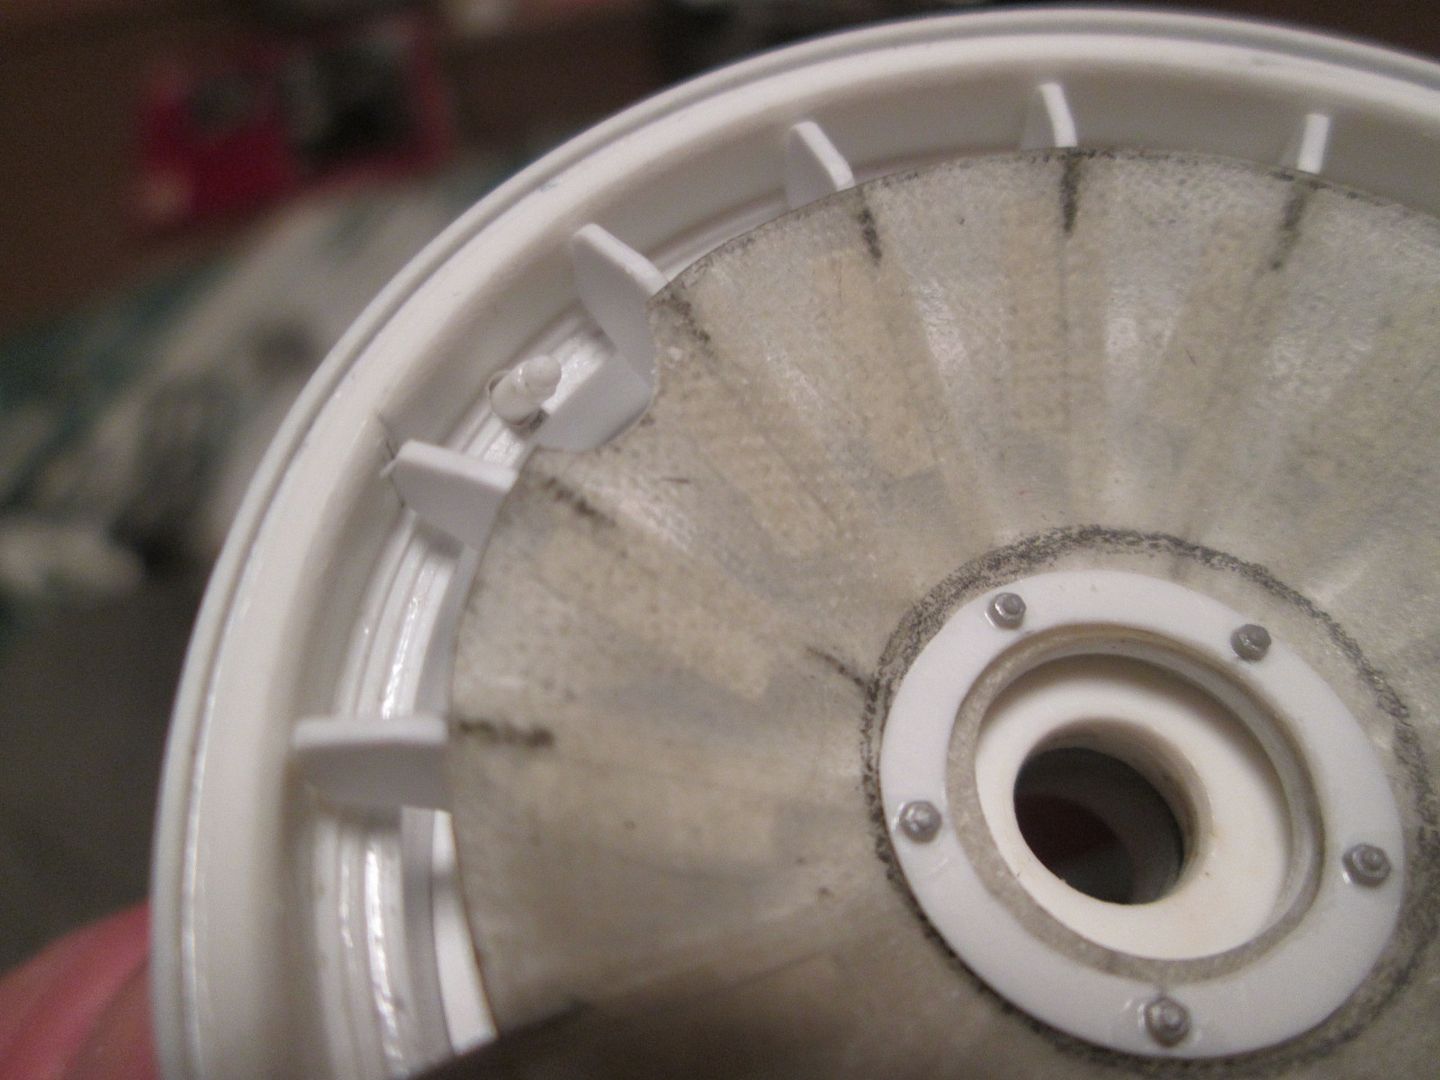 This final photo is me just adding more detail which will barely be seen. The inner rings with the 2mm discs mirror the similar detailing on the inside of the rims, although the wheel covers will do a good job of hiding it all from view. Another styrene strip or two covers the join. 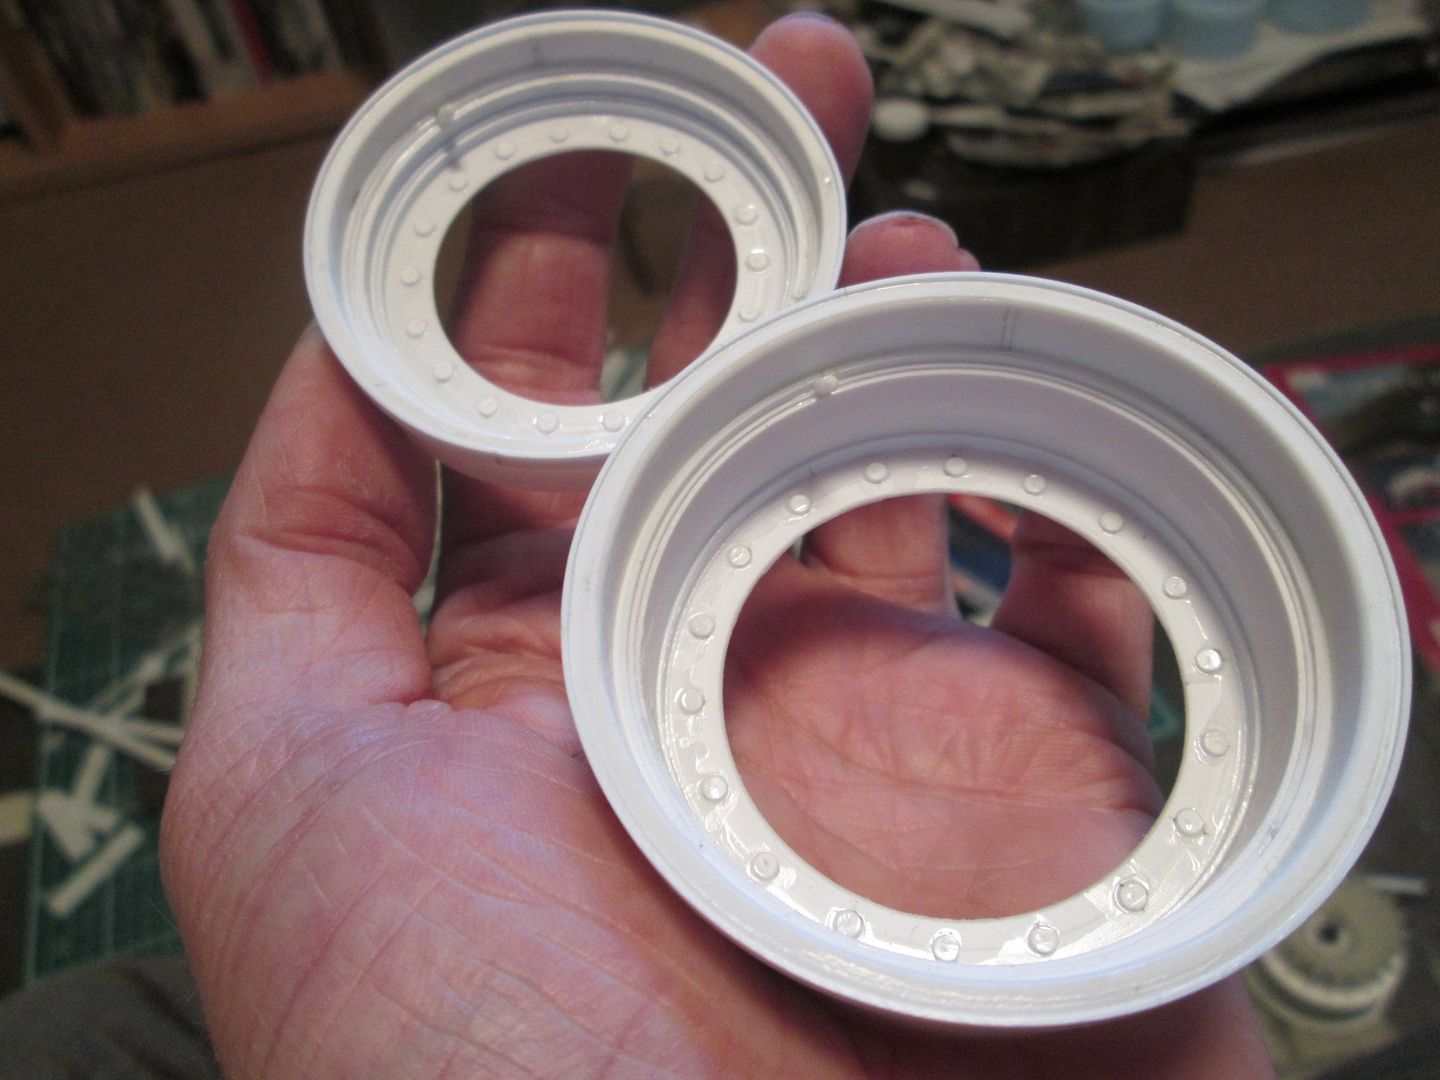 So, all four rims are now ready for painting and final assembly. I also need to re-make the tyres but that's a job I'm tempted to leave until I can get all the bodywork onto the car, just in case of final adjustments to the sizes. What's next? Finish the white exterior spraying of the door skins and rear wing panels. Finish the mirrors. Paint some Martini test-stripes. Start adding some filler to the main nose section and front door extension panels. Paint the wheel covers? Start looking for more logos to use for decals, etc...or try scanning the 1:24 Tamiya sheet... Still lots to be done...but getting there! SB |
|
|
|

|
| The Following User Says Thank You to ScratchBuilt For This Useful Post: |
Ferraristo (04-17-2018)
|
|
|
#687 | |
|
AF Enthusiast
Join Date: Nov 2004
Location: San Diego, California
Posts: 833
Thanks: 2
Thanked 6 Times in 6 Posts
|
Re: 1/8 Porsche 935/78 'Moby Dick'
Seeing the body in color and partially assembled was so gratifying hahahaha I feel complete. Good way to start the work week :thumbup:
__________________

|
|
|
|

|
|
|
#688 | |
|
AF Newbie
Join Date: Jul 2009
Location: Bologna
Posts: 66
Thanks: 0
Thanked 5 Times in 5 Posts
|
Re: 1/8 Porsche 935/78 'Moby Dick'
  |
|
|
|

|
|
|
#689 | |
|
AF Enthusiast
Thread starter
Join Date: Nov 2008
Location: Norwich
Posts: 649
Thanks: 21
Thanked 111 Times in 87 Posts
|
Re: 1/8 Porsche 935/78 'Moby Dick'
Hello again,
Various bits and pieces in this update, so apologies if I bounce around from one thing to another. First up, here's the piece of plain fibreglass I sprayed as a test for the Martini colours: 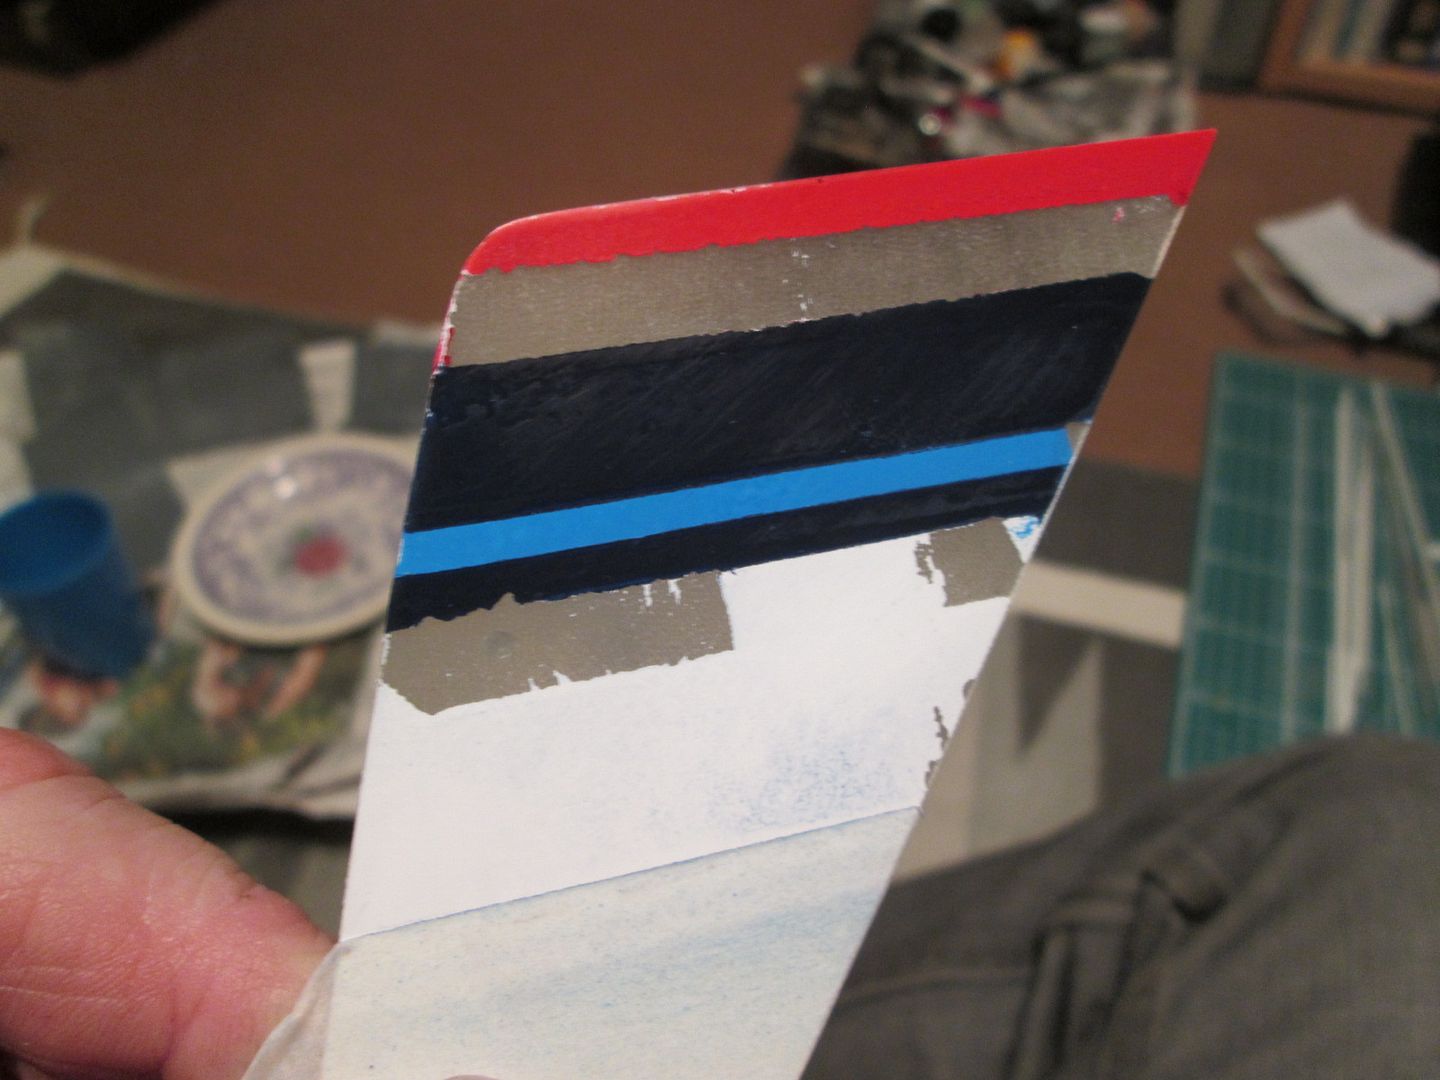 The colours I've used here are Tamiya X-3 Royal Blue, X-14 Sky Blue, and X-7 Red, over an X-2 White base. I'm quite happy with the colours themselves, but the obvious problem is that there should be white where there is now just fibreglass! I'll have to do more tests to check if it's the vinyl masking tape being too sticky, or whether the problem was masking it up too soon after applying the white base-coat. Either way, it's made me very nervous about how this is going to work out... On a more positive note, however, here's a section of the 1:24 Tamiya decal sheet scanned and expanded to 1:8 scale: 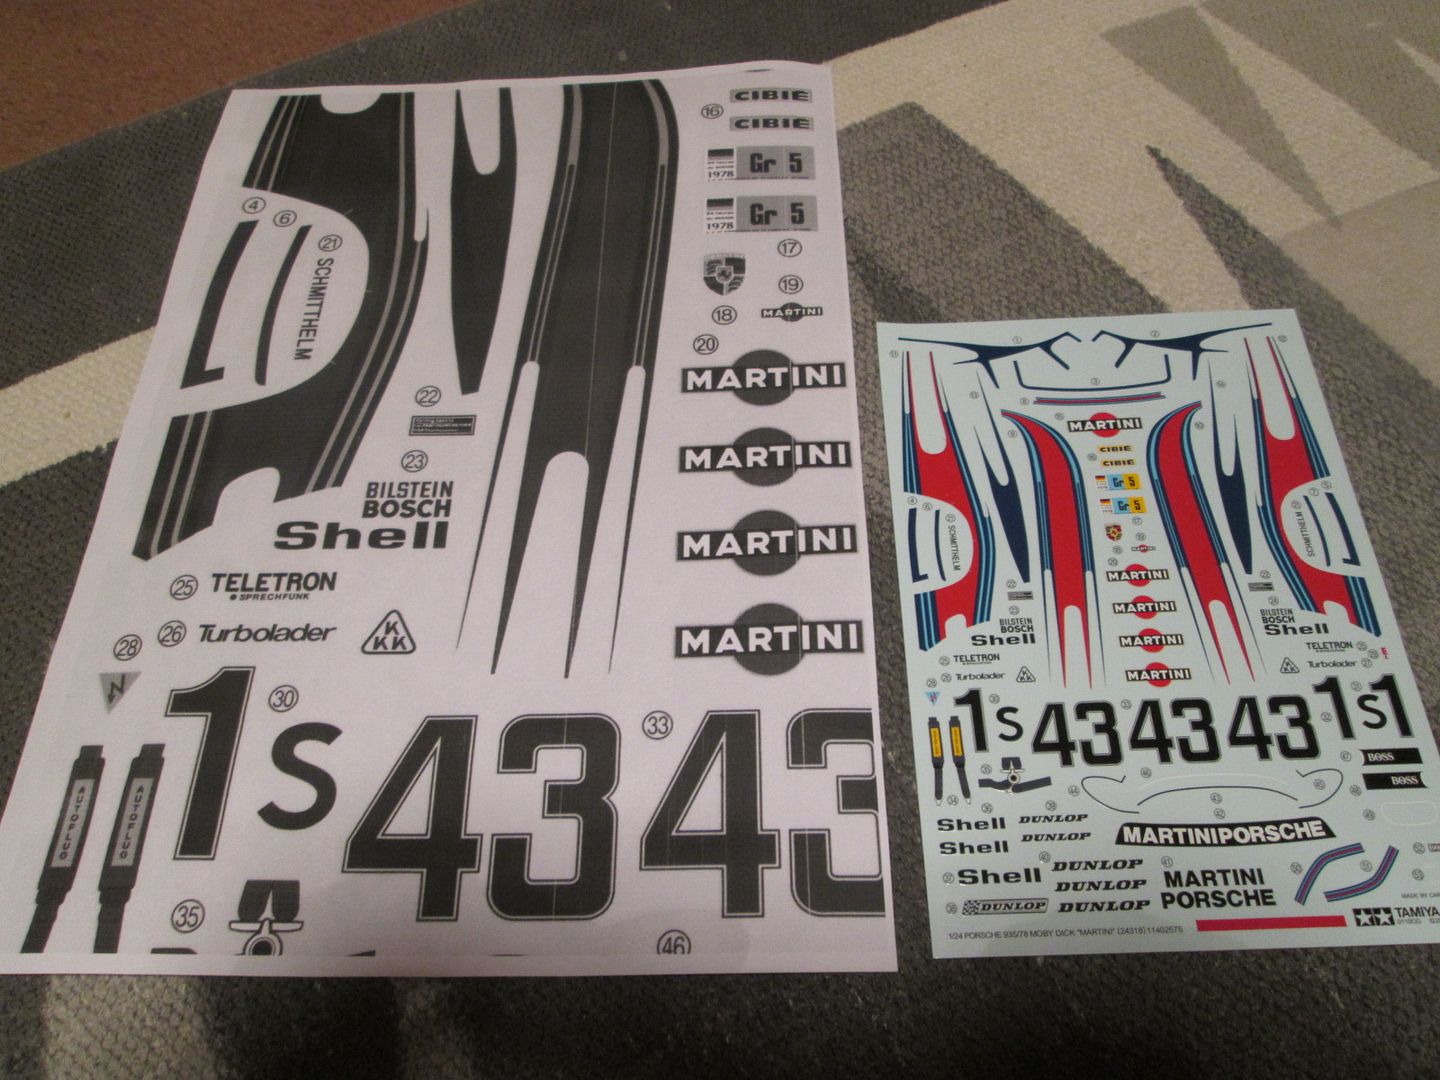 Although I won't be able to use the Martini stripes on my model, the various logos, etc, will be perfect once I've printed them onto decal film. Elsewhere, I spent a lot of time working on the main nose section bodywork with filler and wet/dry paper before giving it a light coat of Tamiya white primer: 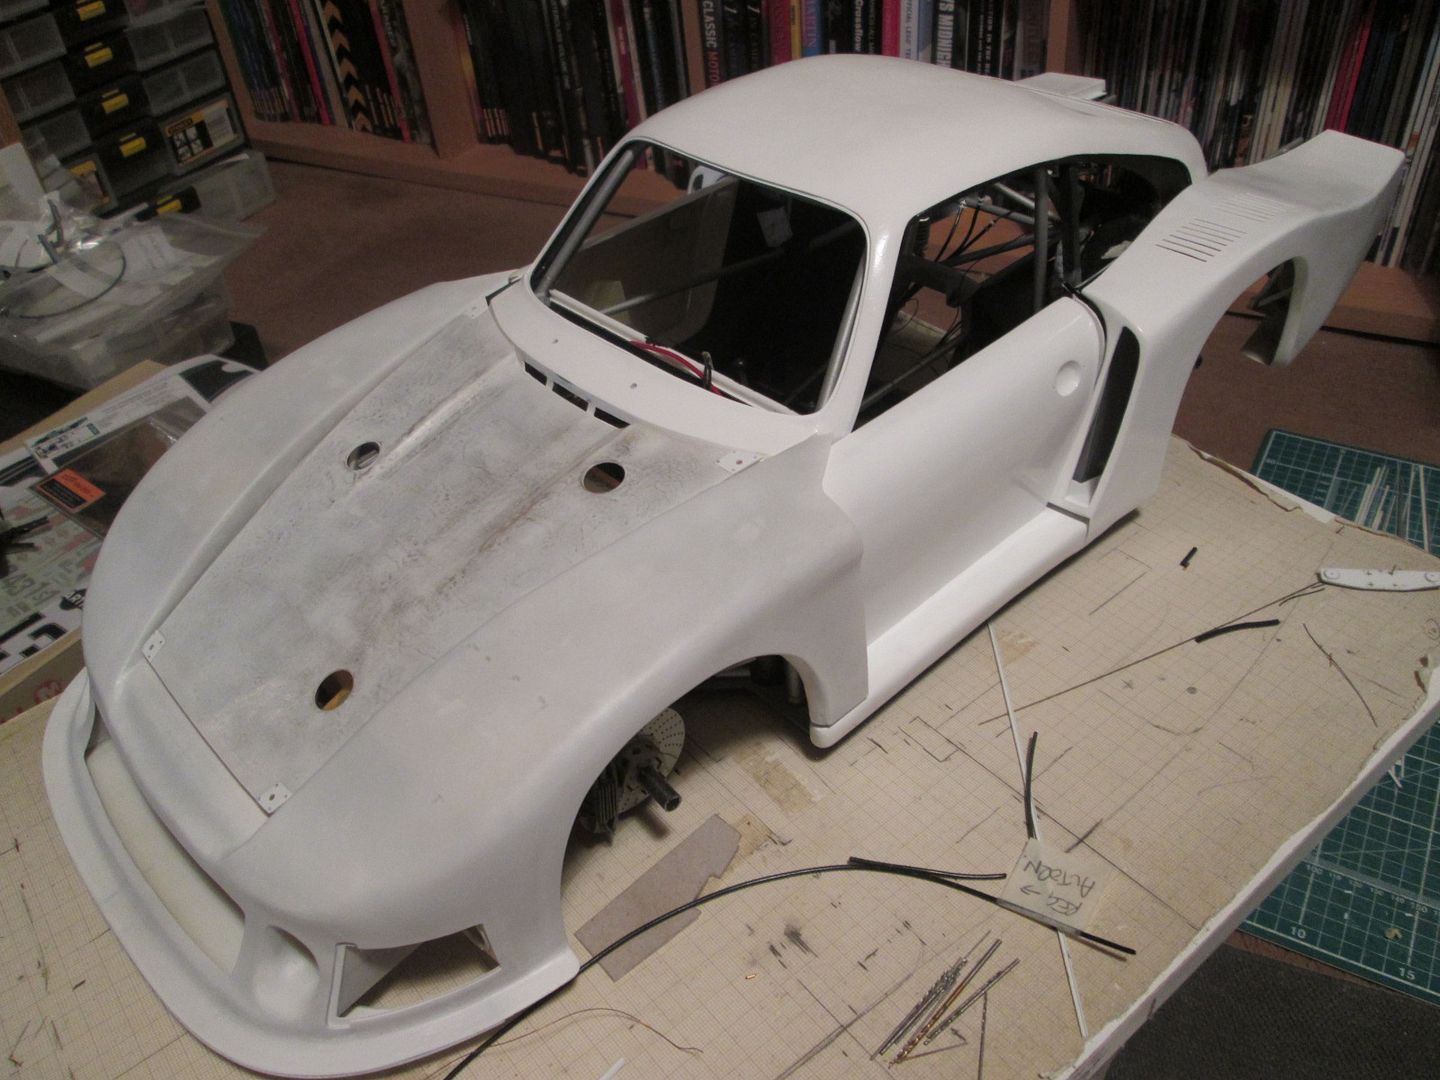 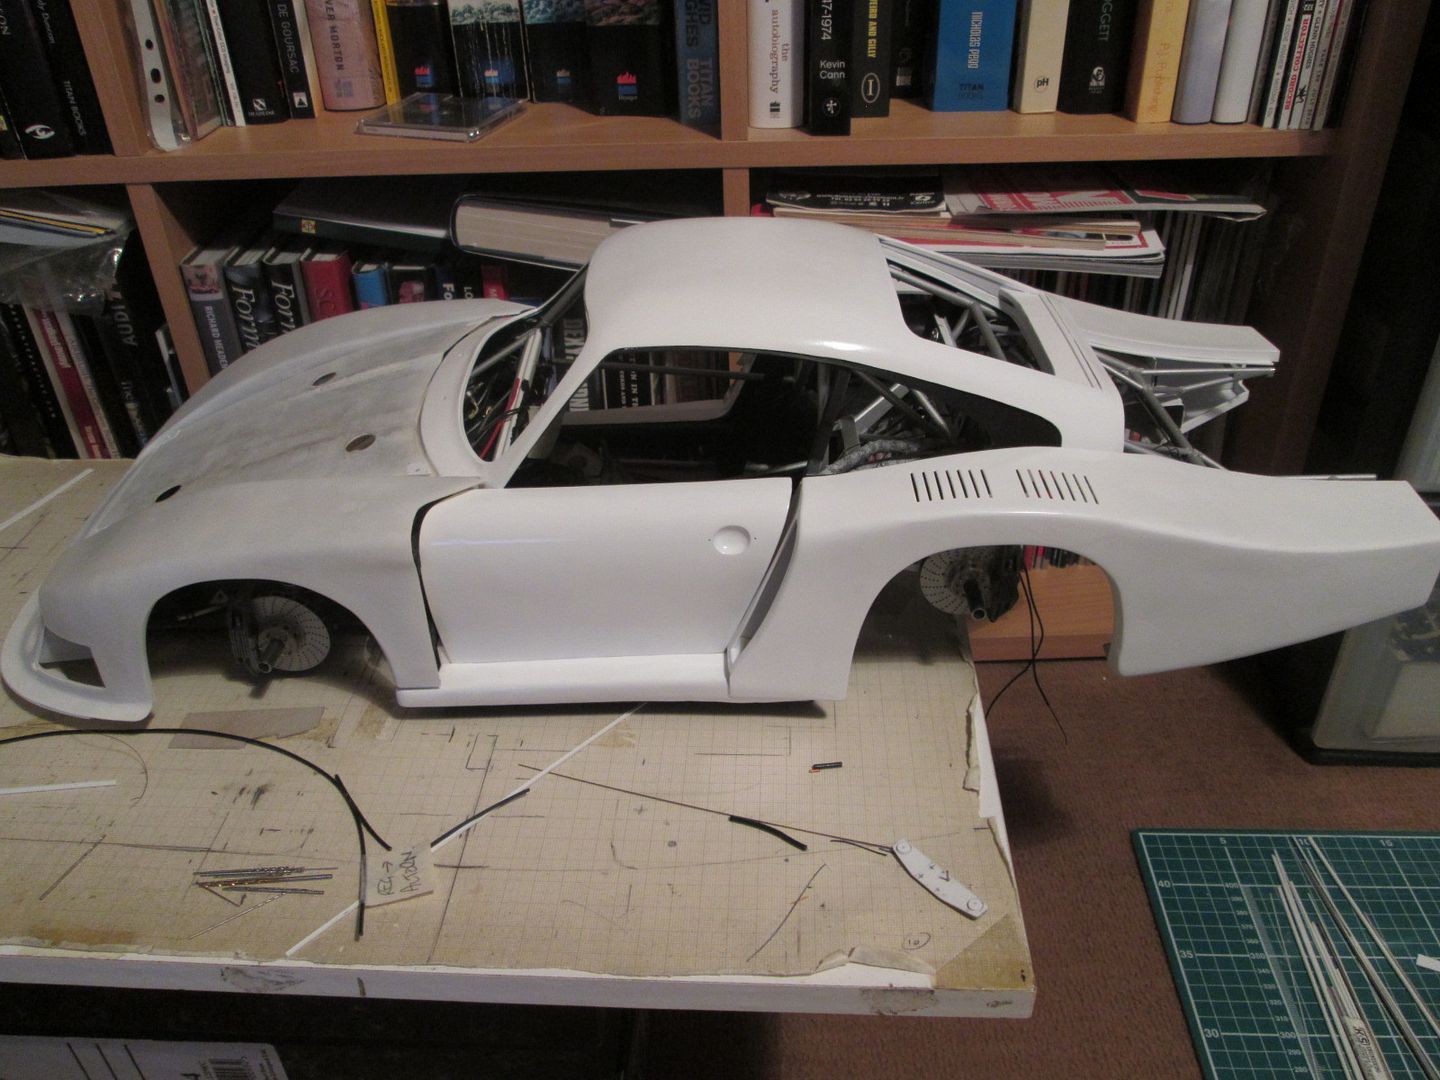 There's a handful of small faults which need to be addressed before further painting, but nothing major. I've made another template for the louvres but will probably wait until the Martini stripe issue is sorted out before deciding when to cut them. The bonnet panel will be sprayed at the same time. Most of the last week or so has been spent working on getting the engine ready for fitting. There's so much going on in the back of this car, but access will be difficult once the drivetrain is in place. The starter motor has had some small wiring details added, and the main cabling back to the battery has been fitted: 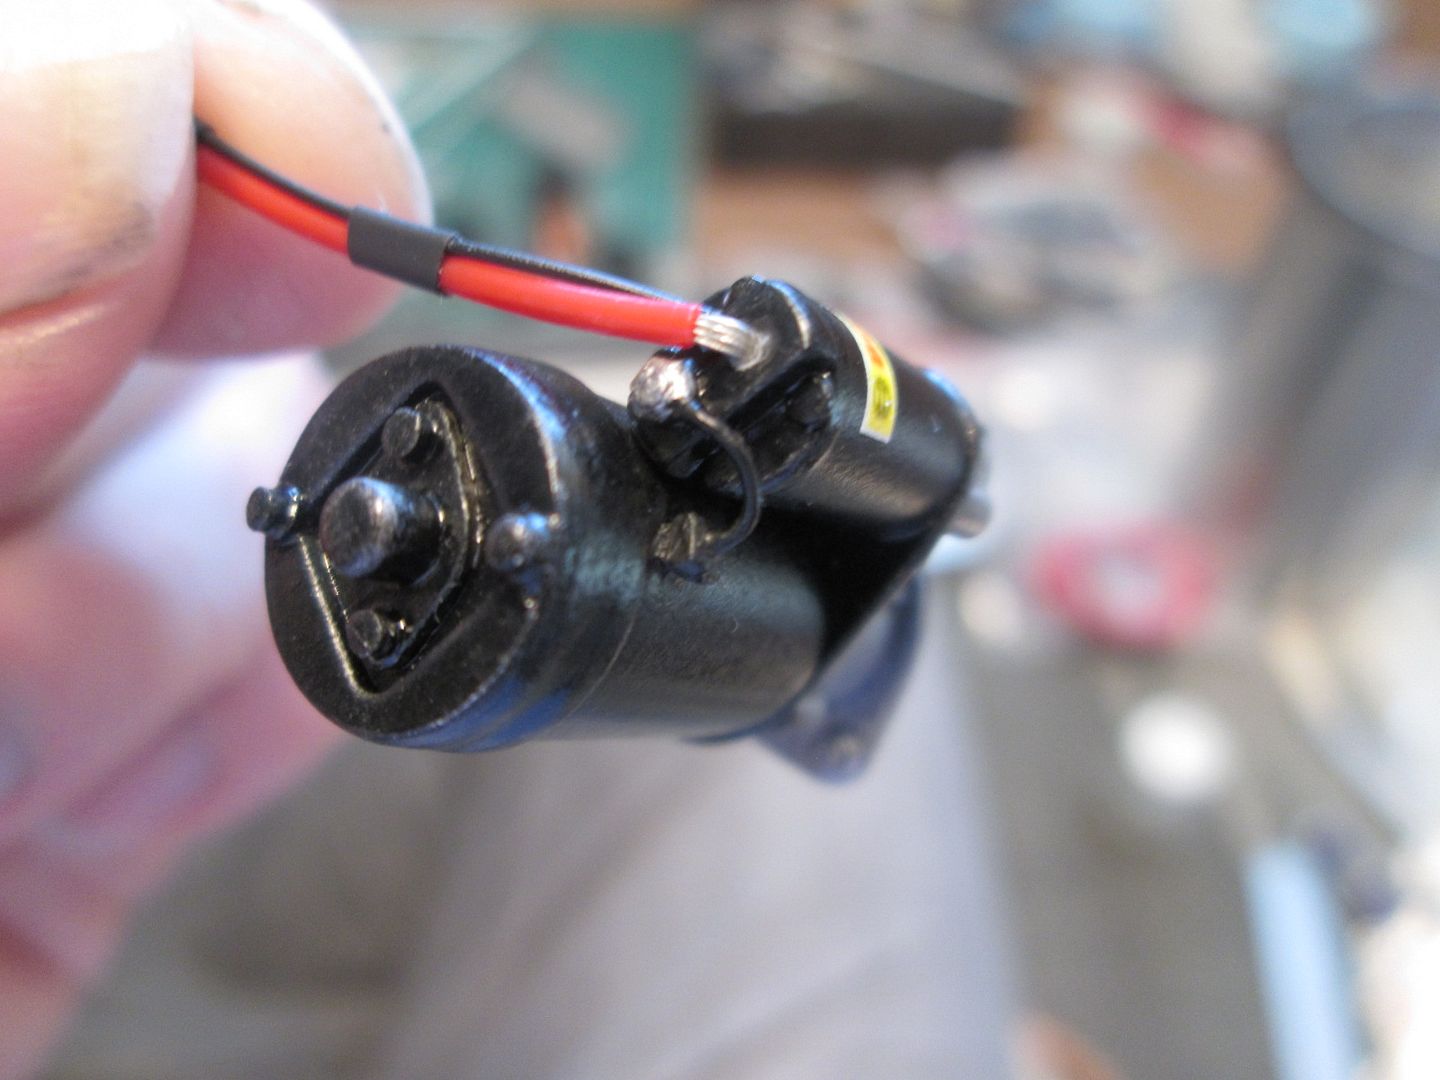 The wiring has been passed through the rear firewall panel and the starter is now effectively fitted to the chassis - it should be easier to now fit the starter to the gearbox, rather than trying to route the cabling through the car later. The control cables were another potential problem area. I decided to fit everything to the main mounting point on top of the gearbox, connect the cables to the throttle mechanism and clutch lever, then all I have to do once the drivetrain is fitted is to plug the front sections of the cables to the back sections: 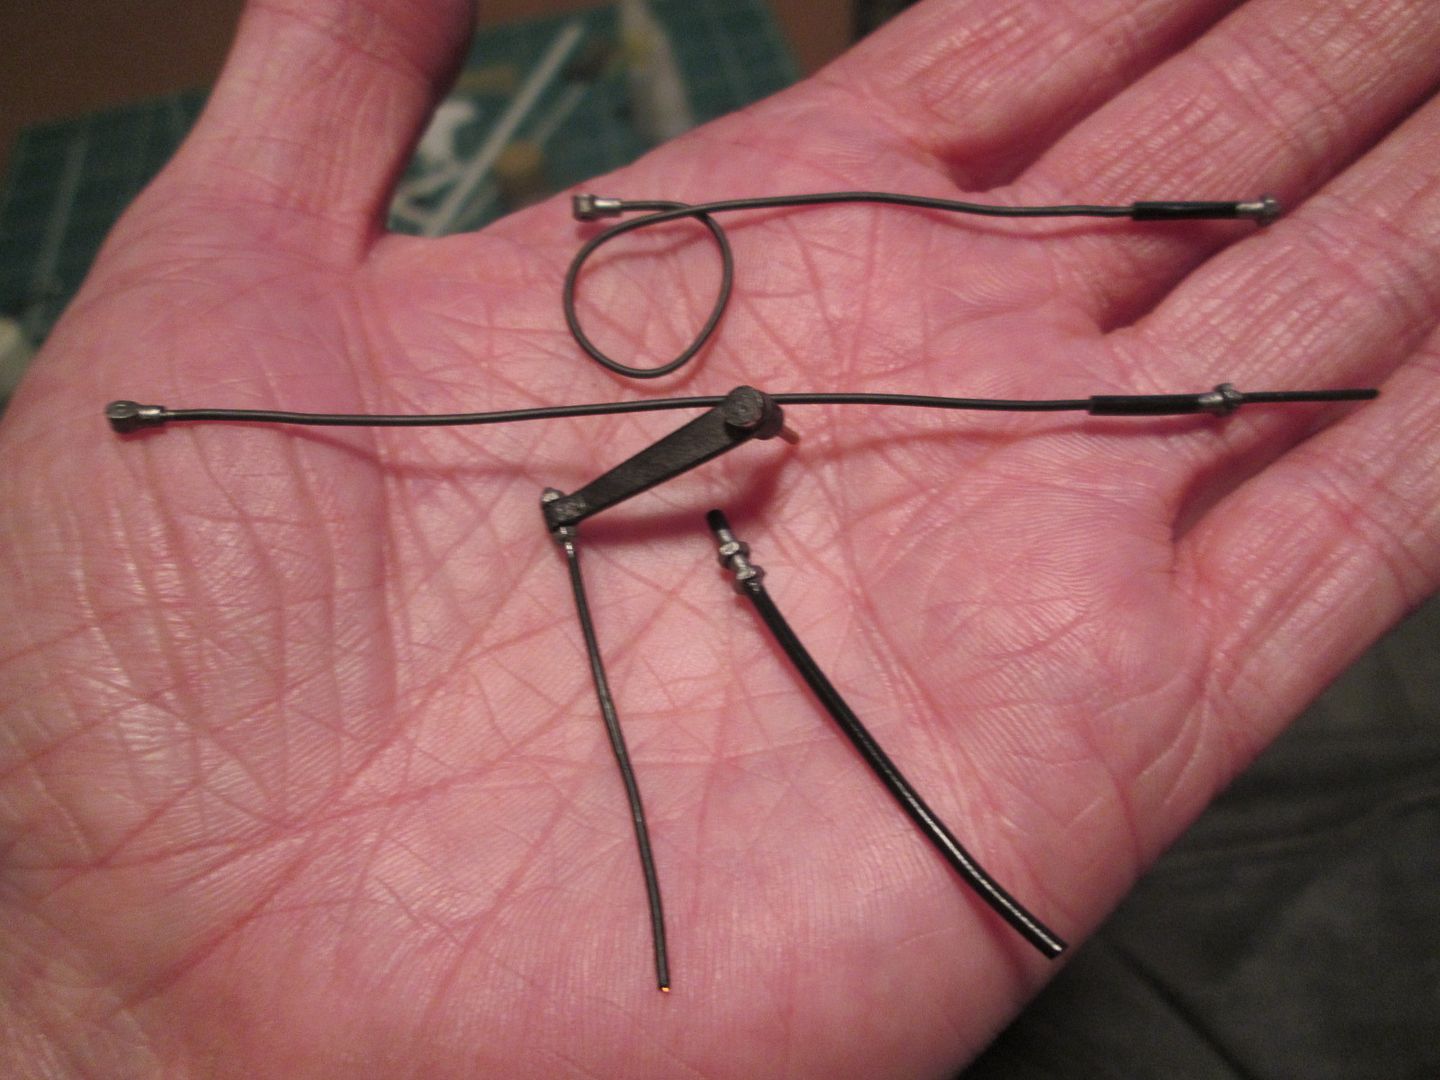 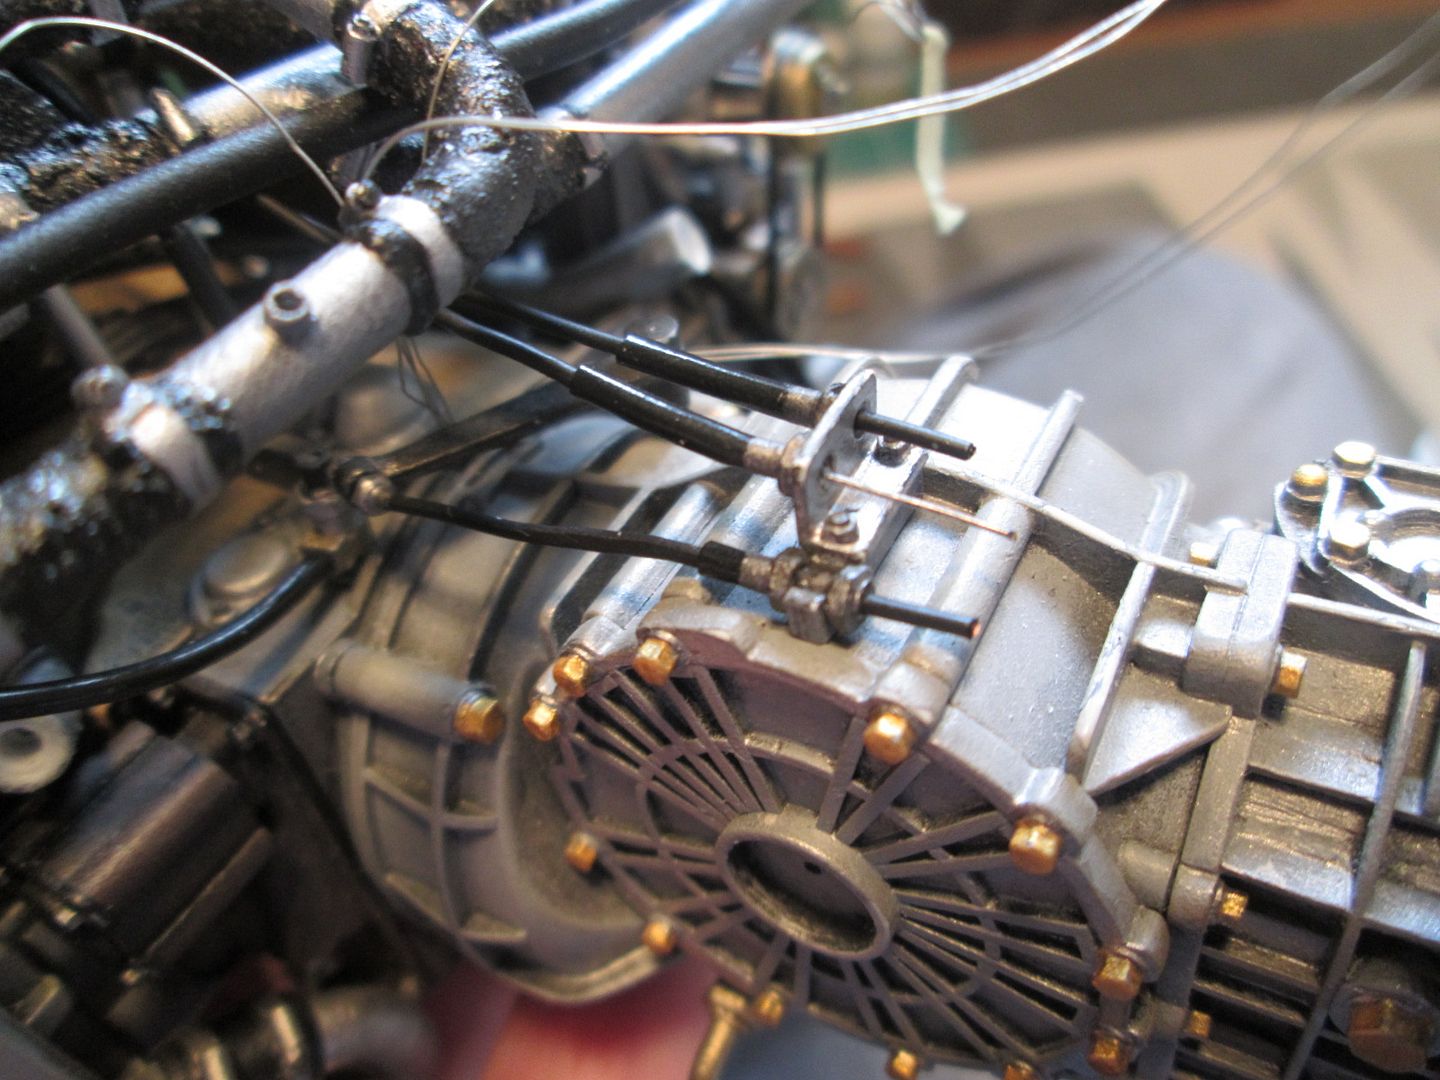 Access to the top of the gearbox shouldn't be too bad, so this approach should save me a lot of trouble later on. The rest of the time has been spent on the engine and gearbox itself. Before gluing the two halves together I looped three lengths of thin wire around a pin and running up through a channel in the spacer plate: 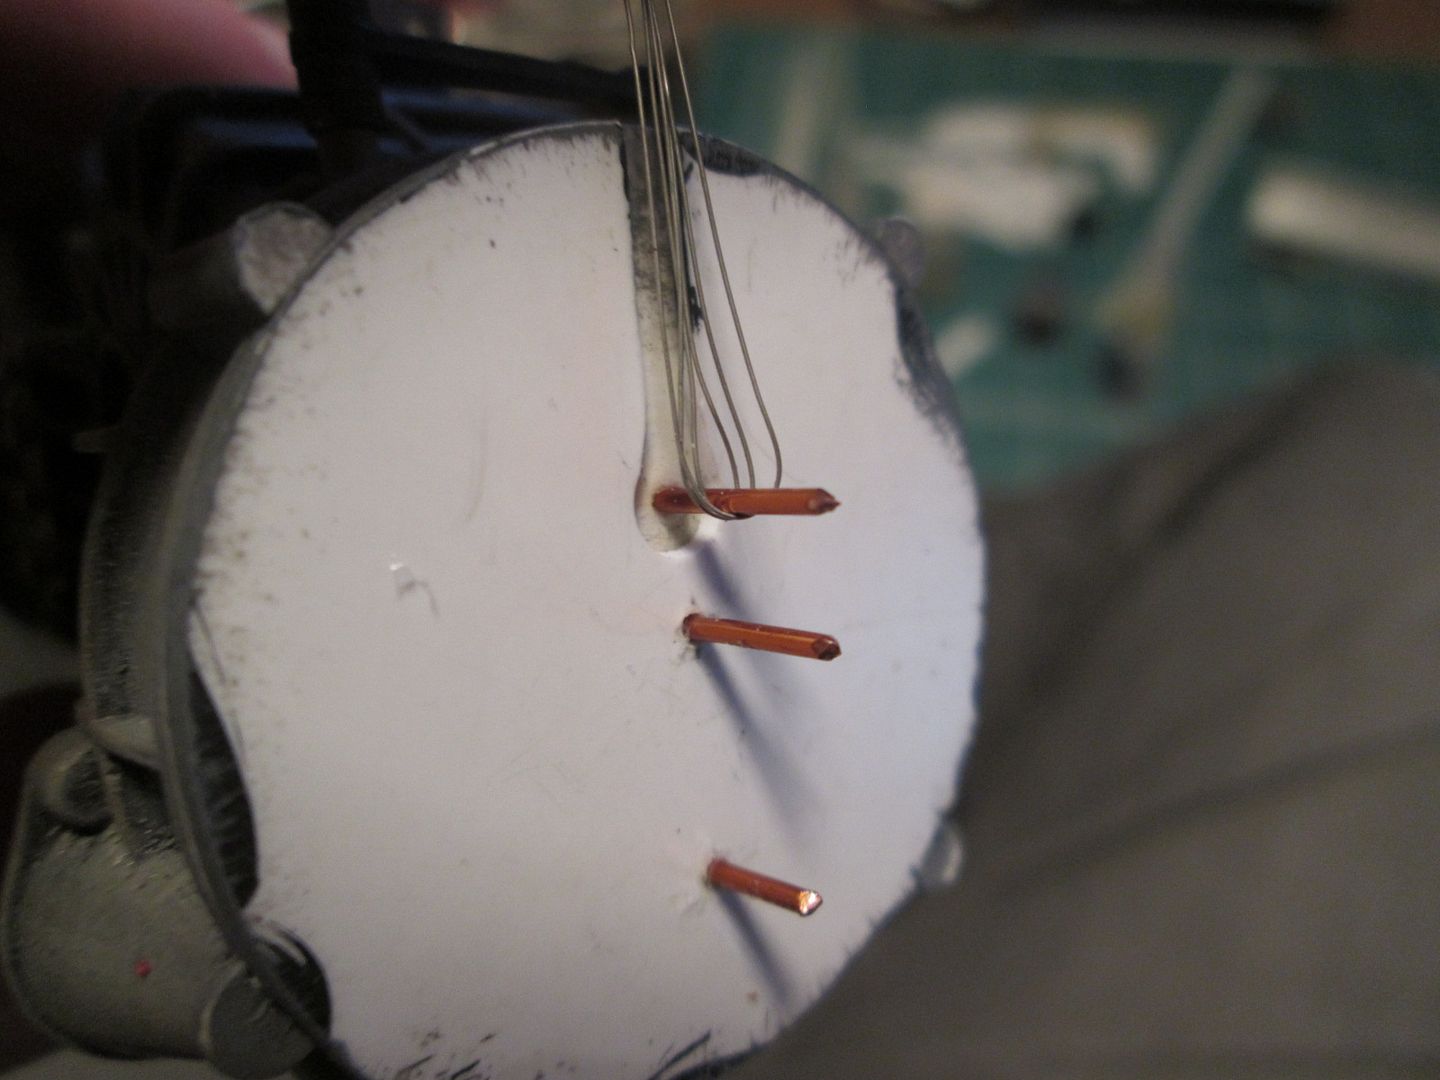 I plan to use these wires as extra support, but still don't quite know where I'll be able to connect them! I've attached the main oil pipes to the engine and trimmed the hoses to length, and finished the detailing around the fittings. The lines to the gearbox oil cooler have been trimmed and fitted, so now just need to be plugged in place on the 'box. Assembly of the twin turbos is well underway - everything you see in this photo is now glued in place: 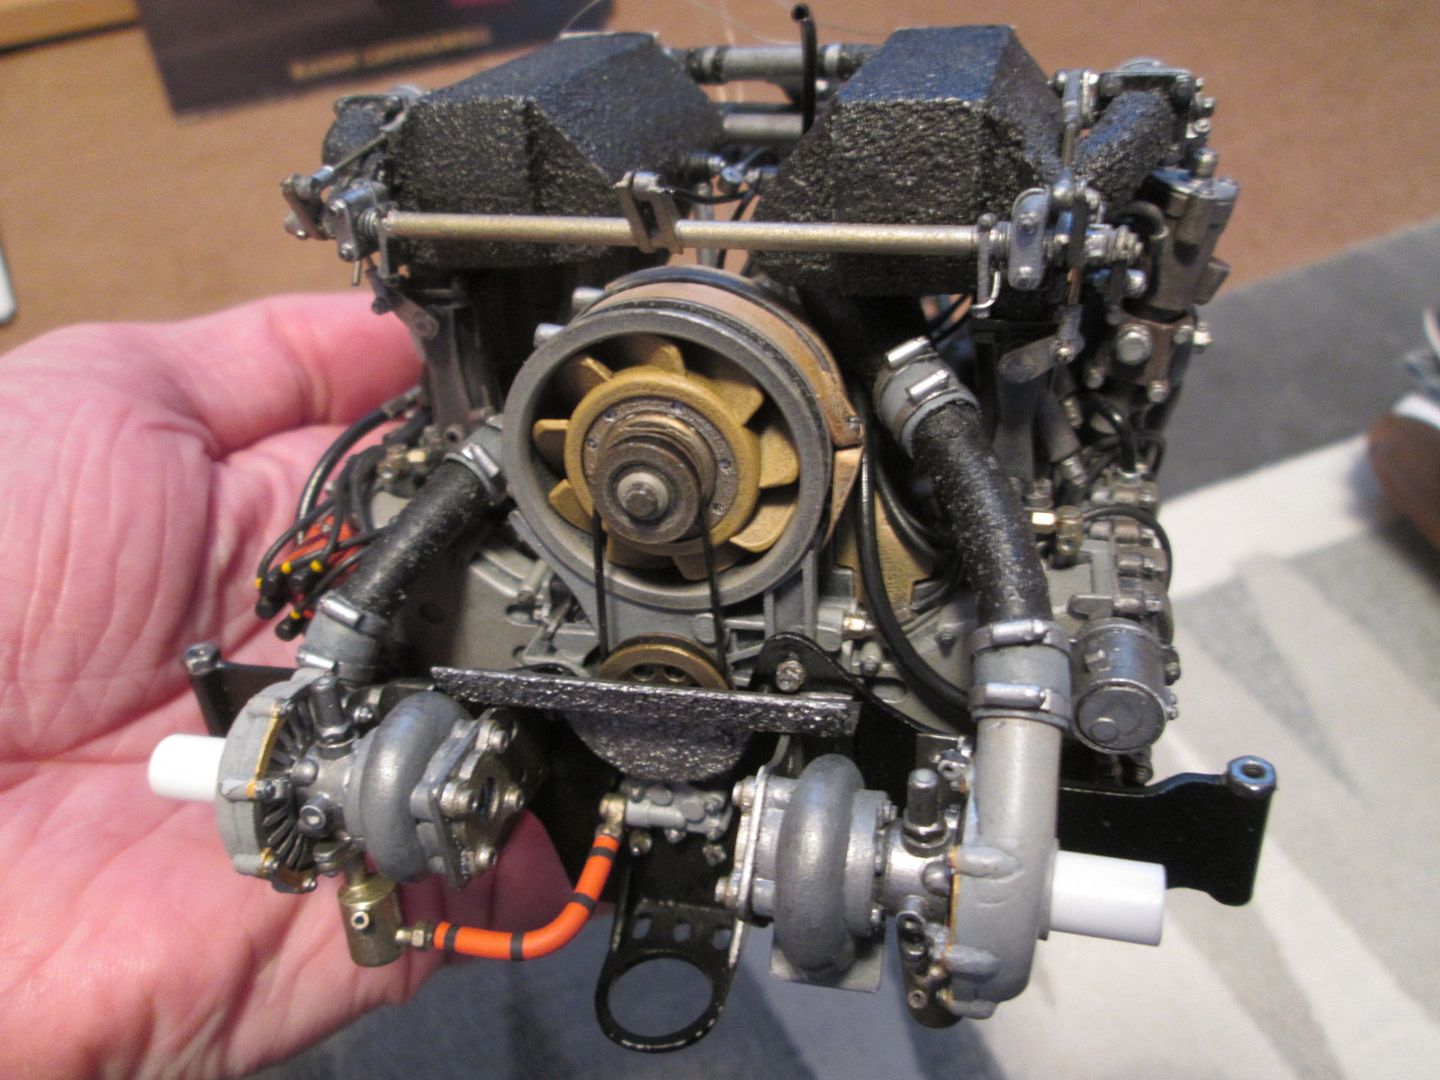 Note the drive belt for the cooling fan, the little oil pump at the bottom which connects to the turbos via the orange pipes, and the protective cover around the base of the drive pulley. The main support plate has been pinned and glued to the engine, and the large hoses between the turbos and the inlet manifolds have done a good job of stiffening it all up. There's a few more bits to add (alternator, exhaust primaries, turbo oil lines, pop-off valves, etc), but it's quite possible that I might be fitting this into the chassis at the weekend... It's all coming together! SB |
|
|
|

|
|
|
#690 | |
|
AF Enthusiast
Join Date: Sep 2011
Location: Redwood City, California
Posts: 651
Thanks: 0
Thanked 39 Times in 39 Posts
|
Re: 1/8 Porsche 935/78 'Moby Dick'
Wow, this is just too fantastic! It is really getting there!
Admit it; you know you've been thinking about what to do next...  As far as the Tamiya white X-2 peeling; have you tried the Tamiya low tack masking tape? It's expensive, but seemed to work for me, and I also used X-2 on a number of Porsches. If you're printing the enlarged 1/8th decals, how come you can't use the stripes? I notice your enlarged copy isn't color (mock up?), but surely that would cause a problem for the logos too? Not understanding... If you could successfully print and use those stripes at 1/8, what a headache that would eliminate... Keep the updates coming! ianc |
|
|
|

|
| ||||||||||||||||||||||||||||||||||||||
 |
POST REPLY TO THIS THREAD |
 |
|
|