|
|
|

|
|
| Search | Car Forums | Gallery | Articles | Helper | AF 350Z | IgorSushko.com | Corporate |
|
| Latest | 0 Rplys |
|
|||||||
 |
 Show Printable Version | Show Printable Version |  Email this Page | Email this Page |  Subscribe to this Thread
|
|
|
Thread Tools |
 06-16-2009, 07:46 PM
|
#61 | |
|
AF Regular
Join Date: Aug 2004
Location: Burke, Virginia
Posts: 102
Thanks: 1
Thanked 1 Time in 1 Post
|
Re: Replacing intake gasket...
The Delco part number for the two o-rings needed for the fuel rail inlet and outlet (where the pressure regulator plugs into the fuel rail) is 217-461. Price ranges form $15 to $30 depending on where you shop, and may be a special order item.
It also goes by GM part number 17113034. |
|

|

|
|
07-20-2009, 03:18 PM
|
#62 | |
|
AF Enthusiast
 Join Date: Feb 2009
Location: Columbus, Ohio
Posts: 529
Thanks: 0
Thanked 2 Times in 2 Posts
|
Re: Replacing intake gasket...
I'm about to do the LIM gasket job on a relative's car. Can anyone run down the revised torque specs applicable to the '03 3400 in a Pont. Grand Am. I will get a book for the bolt torquing sequence but I was wanting the latest torque specs for the upper intake, LIM and rocker arms for '03 3400.
|
|
|
|
|
|
07-22-2009, 05:07 AM
|
#63 | |
|
AF Newbie
Join Date: Jul 2009
Location: HSV, Alabama
Posts: 3
Thanks: 0
Thanked 0 Times in 0 Posts
|
Re: Replacing intake gasket...
Found this forum and what a help!!!!
 Of course I had already started and now need help. From everything I've read I'm not in to much trouble yet. I've got the upper plenum removed. Alternater off, power steering off , coil packs off. Was Looking to remove the valve covers next and cannot get to the lower bolt on the passenger side. The bracket that holds the alternater, and the belt tensioner is in the way and I'm trying to remove it. I've removed 3 or 4 bolts with 15mm socket and does anybody know where they are all at???? I removed 1 from the back and 2 or 3 from the front....does one of the head bolts also hold it??? Of course I had already started and now need help. From everything I've read I'm not in to much trouble yet. I've got the upper plenum removed. Alternater off, power steering off , coil packs off. Was Looking to remove the valve covers next and cannot get to the lower bolt on the passenger side. The bracket that holds the alternater, and the belt tensioner is in the way and I'm trying to remove it. I've removed 3 or 4 bolts with 15mm socket and does anybody know where they are all at???? I removed 1 from the back and 2 or 3 from the front....does one of the head bolts also hold it??? |
|
|
|
|
|
07-22-2009, 09:29 AM
|
#64 | |
|
AF Newbie
Join Date: Jul 2009
Location: HSV, Alabama
Posts: 3
Thanks: 0
Thanked 0 Times in 0 Posts
|
Re: Replacing intake gasket...
1999 Olds Cutlass 3100
This is the bracket; 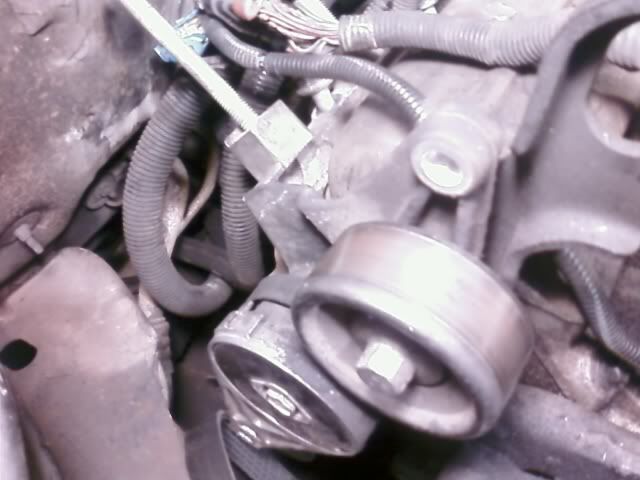 here's the one in the back I have out.  then the two in the front side 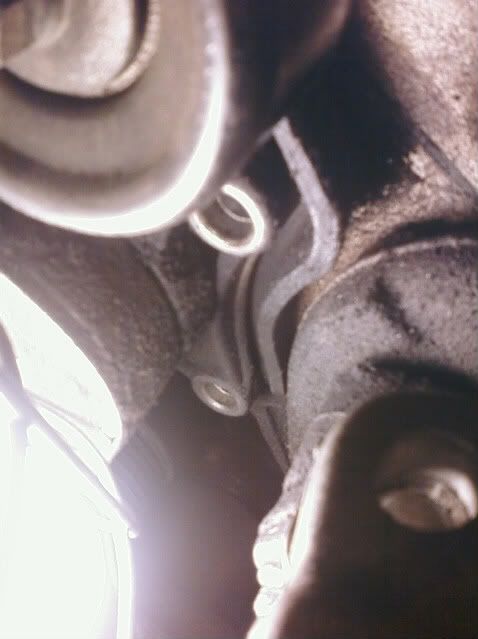 |
|
|
|
|
|
07-22-2009, 02:14 PM
|
#65 | ||
|
AF Enthusiast
Join Date: Feb 2009
Location: Columbus, Ohio
Posts: 529
Thanks: 0
Thanked 2 Times in 2 Posts
|
Re: Replacing intake gasket...
Quote:
I think you have to take tensioner bolt out. I just complete the job on the Pontiac and that was my second car I've done this job on, and both times I unbolted the tensioner. the idler above the tensioner does not have to be unbolted though. |
||
|
|
|
|
07-23-2009, 05:33 AM
|
#66 | |
|
AF Newbie
Join Date: Jul 2009
Location: HSV, Alabama
Posts: 3
Thanks: 0
Thanked 0 Times in 0 Posts
|
Re: Replacing intake gasket...
 That was it!!! Thanks.!! That was it!!! Thanks.!! |
|
|
|
|
|
09-08-2009, 12:22 PM
|
#67 | |
|
AF Regular
Join Date: Oct 2008
Location: NYC, New York
Posts: 129
Thanks: 1
Thanked 0 Times in 0 Posts
|
Re: Replacing intake gasket...
Hi guys... any idea how must this job would cost if is done by a mechanic?
|
|
|
|
|
|
09-22-2009, 11:26 AM
|
#68 | |
|
AF Regular
Join Date: Aug 2004
Location: Burke, Virginia
Posts: 102
Thanks: 1
Thanked 1 Time in 1 Post
|
Re: Replacing intake gasket...
Typical shop cost is probably about $800-$1000, maybe more depending on where you are.
For DIY, the minimum recommended parts needed would be under $75, not counting any routine replacements you decide to do at the same time (e.g., belt, plugs, plug wires, t-stat, etc.). |
|
|
|
|
|
11-04-2009, 12:21 AM
|
#69 | |
|
AF Newbie
Join Date: Nov 2009
Location: columbus, Ohio
Posts: 7
Thanks: 0
Thanked 0 Times in 0 Posts
|
Hello all. I am finishing up my 1998 lumina 3.1L lower and upper gasket set. I purchased the fel-pro kit at advance auto with all the needed gaskets. Also got new injector orings, fuel line orings, thermostat, upper lower hoses, heater core quick disconnect and so on....
I have enjoyed the project and appreciate the help I got from this site. Our mechanic quoted $1673.00 for the job. He recommended that I junk the car. This is my sons car by the way.The car had other issues like #2 and #4 fuel injector bad. Cam sensor cracked and defective. #3 and #4 spark plug wires open. So I have invested $330 so far and I am ready to start her up. BUT I found a broken vacuum port on the upper aluminum manifold front drivers side near the pcv. Now this port is sheared clean off. I was saddened as the excitement of the completion and start up slowly sank like a tropical sunset.  Does anyone have a fix for this port that they can share other than get a new upper manifold from the salvage yard. I'm so close but yet so far away. Thanks Rick |
|
|
|
|
|
11-04-2009, 07:07 AM
|
#70 | |
|
AF Regular
Join Date: Aug 2004
Location: Burke, Virginia
Posts: 102
Thanks: 1
Thanked 1 Time in 1 Post
|
Re: Replacing intake gasket...
Getting JY upper manifold might be the longest lasting, quickest, and most reliable fix, and it would keep it stock and would be my first choice. But there are alternatives, such as maybe drill out, thread, and install a nipple where the port was, or maybe try some (well, more likely a lot for strength) high temp epoxy to reattach the broken piece, or variations there-on.
|
|
|
|
|
|
11-19-2009, 10:46 PM
|
#71 | |
|
AF Regular
Join Date: Feb 2004
Location: Farmington, Missouri
Posts: 481
Thanks: 0
Thanked 14 Times in 14 Posts
|
Re: Replacing intake gasket...
I don't know if you guys have seen this tool or not, but I was a GM tech and it is the difference between making awesome flat rate on intake gaskets, or not, it makes tourqing those pain in the butt corner bolts a breeze. Far as I know it is only from snap on, mine is chrome and 12 point, but same idea. It is 3/8 drive, but the extension and socket are 1/4 drive physical size. It has a ball swivel, so unrestricted movement to a whole lot of degrees.
I don't know how to post the pic, but cut and paste this link to see snap ons picture of a power one (black finish), but same principal as mine. There is also a tool to compress the rocker arms, it is a lever that fits the arms. If the valve covers aren't leaking, don't take em off, slip this tool in and take the p rods off without taking the valve cover off. Turns a 5.5 hour intake gasket job into 3 hours or less if you have air tools too heres the first tool http://buy1.snapon.com/catalog/item_...9400/59356.JPG heres the second, its the short one, they make one about 10 inches longer, but I see no need for it, they are easy to compress with it, and it has a spot for a ratchet for extra leverage too. http://buy1.snapon.com/catalog/item....re&dir=catalog
__________________
10 hours away from John Deere master certified also master certified ASE tech. Exp. in both. Went to school for cars, wound up staying with Deere dealer for a while, so schooling there too. Also couple years exp in GM and some GM training Gave up wrenching for "Greener Pastures" Current job: RN 2010 Silverado Z71 5.3L 65xxx Wife's 2007 Suburban 1500 LTZ 5.3L 102xxx |
|
|
|
|
|
11-20-2009, 02:08 AM
|
#72 | |||
|
AF Enthusiast
Join Date: Feb 2009
Location: Columbus, Ohio
Posts: 529
Thanks: 0
Thanked 2 Times in 2 Posts
|
Re: Replacing intake gasket...
Quote:
Quote:
|
|||
|
|
|
|
11-24-2009, 07:46 PM
|
#73 | |
|
AF Newbie
Join Date: Nov 2009
Location: Madison, Wisconsin
Posts: 4
Thanks: 0
Thanked 0 Times in 0 Posts
|
Re: Replacing intake gasket...
So, what's the final verdict on the gasket kits? The new Modified GM design, Felpro, Dorman (they even include the bolts and only cost $49.00), the thicker aftermarket ones ($91.00), some other? Which is best and won't re-fail. I'm just about to start this job and feeling apprehensive. Thanks for a great thread of info. -Andy
|
|
|
|
|
|
11-24-2009, 09:17 PM
|
#74 | ||
|
AF Regular
Join Date: Feb 2004
Location: Farmington, Missouri
Posts: 481
Thanks: 0
Thanked 14 Times in 14 Posts
|
Re: Replacing intake gasket...
Quote:
The felpro had the inserts before gm, they are good gaskets too. I don't know about dorman, I have not used their intake gaskets, but have used other dorman parts and am satisfied with the product. I replaced the hole upper intake plenum on a 4.6 mustang engine, they are prone to crack out, they are plastic, and the old design had plastic coolant runners, they now have aluminum, anyway, it was good, had the intake, and the new style mounts for the upper accessories, it was good quality, but I would guess that their parts are foreignif you care, probably felpro too for that matter. The UTMOST important thing to do is tourqe with the revised specs, the gm gaskets have a papers with em saying to. Over tourqe on the hardware is why they fail in the first place, it cracks the plastic and it goes from there.
__________________
10 hours away from John Deere master certified also master certified ASE tech. Exp. in both. Went to school for cars, wound up staying with Deere dealer for a while, so schooling there too. Also couple years exp in GM and some GM training Gave up wrenching for "Greener Pastures" Current job: RN 2010 Silverado Z71 5.3L 65xxx Wife's 2007 Suburban 1500 LTZ 5.3L 102xxx |
||
|
|
|
|
11-24-2009, 10:11 PM
|
#75 | |
|
AF Newbie
Join Date: Nov 2009
Location: Madison, Wisconsin
Posts: 4
Thanks: 0
Thanked 0 Times in 0 Posts
|
Re: Replacing intake gasket...
Thanks for the advice jyount. That last part, about breaking the plastic, is one reason I'm leaning toward the Dorman set. I read these are made of metal. Yeah, I hate buying all that foreign garbage too. They are just killing us, economically. I'm a little pee'd off at G.M. for this problem in the first place, so I probably won't go with their set. Probably Felpro or Dorman set.
Have you used that tool you mentioned for removing the pushrods, without removing the back valve cover? Will the valve cover gasket re-seal with this technique? It sure looks like a tempting time-saver. |
|
|
|
|
|
|
POST REPLY TO THIS THREAD |
 |
| Thread Tools | |
|
|


