|
|
|

|
|
| Search | Car Forums | Gallery | Articles | Helper | AF 350Z | IgorSushko.com | Corporate |
|
| Latest | 0 Rplys |
|
|||||||
| WIP - Motorsports Post topics for any "Work In Process" motorsports vehicles in this sub-forum. |
 |
 Show Printable Version | Show Printable Version |  Email this Page | Email this Page |  Subscribe to this Thread
|
|
|
Thread Tools |
 08-14-2019, 11:05 AM
|
#31 | ||
|
AF Enthusiast
Thread starter
Join Date: Mar 2009
Location: Madrid
Posts: 649
Thanks: 109
Thanked 68 Times in 67 Posts
|
Re: Lancia Delta S4 Marlboro Beemax 1/24
Quote:
|
||

|

|
|
10-03-2019, 11:18 AM
|
#32 | |
|
AF Enthusiast
Thread starter
Join Date: Mar 2009
Location: Madrid
Posts: 649
Thanks: 109
Thanked 68 Times in 67 Posts
|
Re: Lancia Delta S4 Marlboro Beemax 1/24
Hola a todos de nuevo. Sigo trabajando en el Delta S4 con muchos detalles extras, ya que el kit lo agradece!. Y esta es una de las últimas imágenes hechas para ver como quedan los asientos:
Hi again, everybody. I’m still working on the Delta S4 with many extra details, since the kit allows you! And this is one of the last images made to see how the seats look: 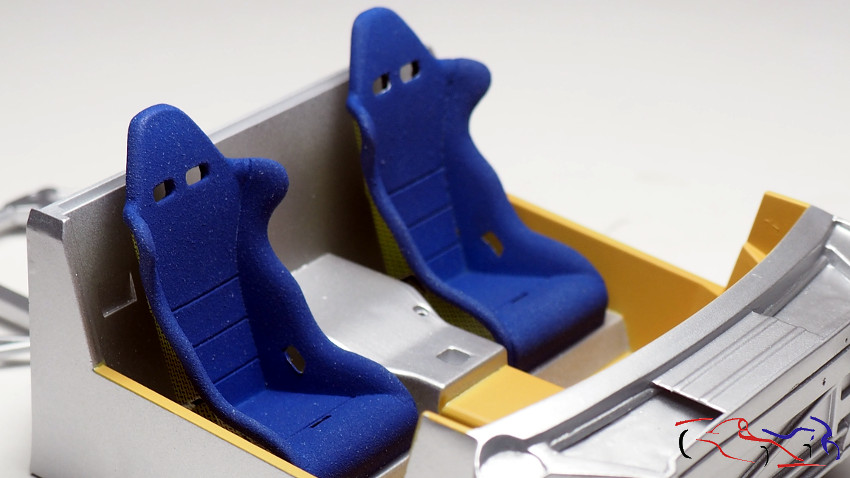 Y vamos con ellos: viendo los test de la pinturas texturizadas de Zero en colores rojo y azul, decidí aplicar un color base para que cubriese mejor. Y así lo hice: aquí tenéis la capa base…. And we go with them: seeing the tests of Zero’s textured paints in red and blue colors, I decided to apply a base color to cover it better. And so I did it: here you have the base layer … 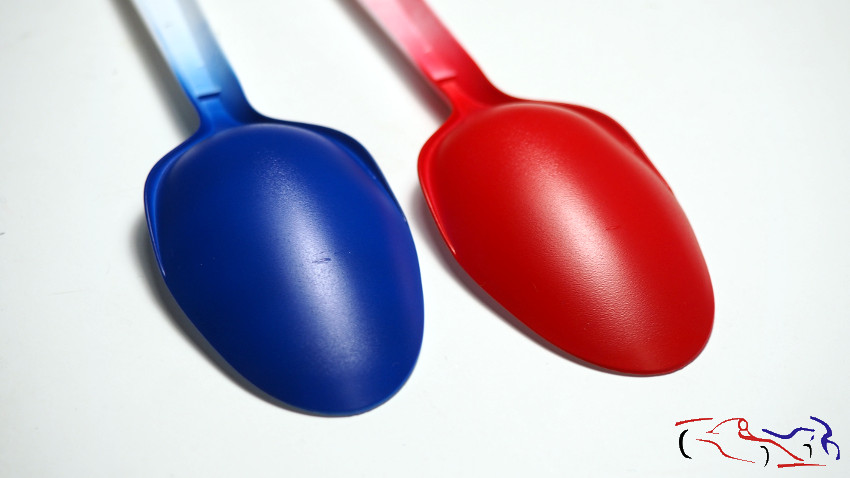 …y aquí con la pintura texturizada. Ahora si que puedo pintar lso asientos!! … and here with textured paint. Now I can paint the seats! 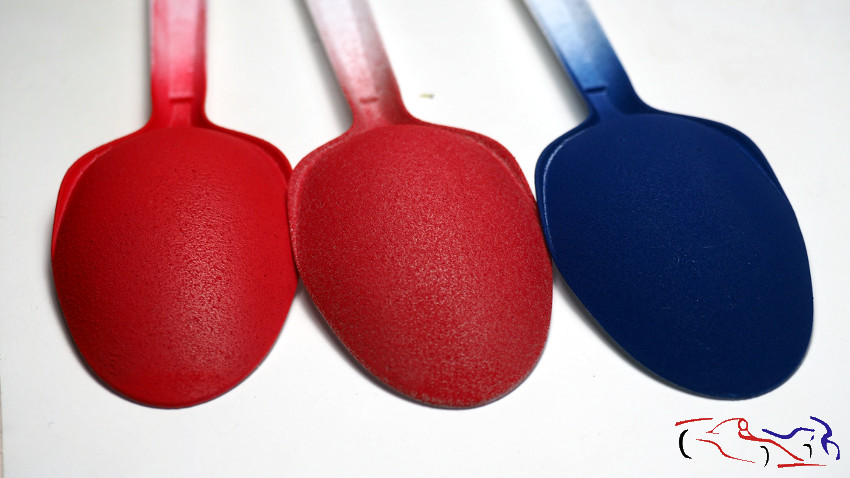 Para ello, aplico masking de Micro sobre el kevlar de los asientos.. To do this, I apply Micro masking on the seat kevlar .. 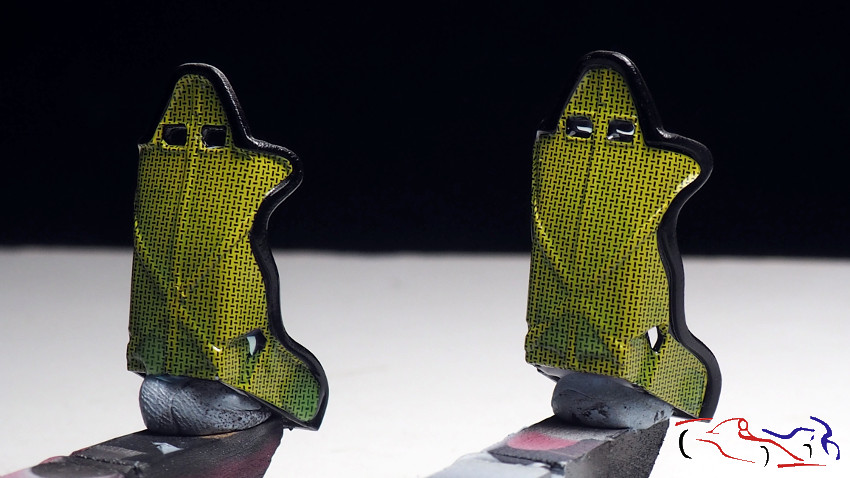 Pintamos la base azul… We paint the blue base … 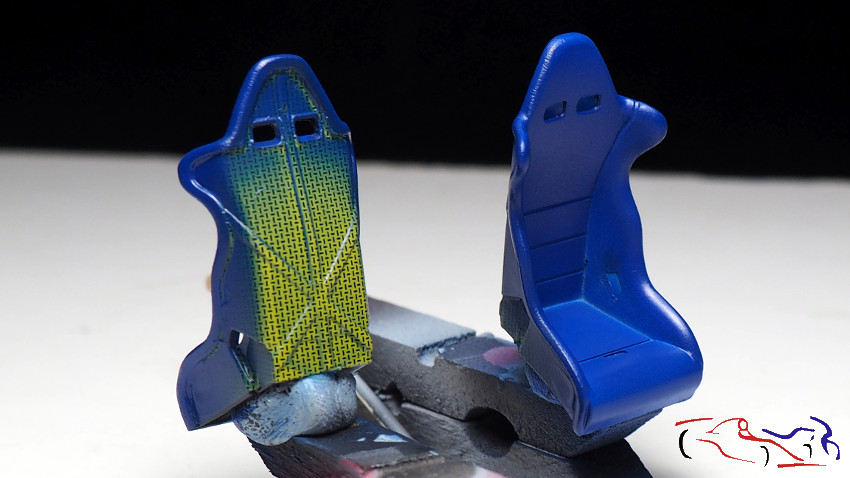 Y aquí la pintura texturizada con boquilla de 0,6 en el aerógrafo… And here it is with the textured paint with 0.6 nozzle on the airbrush … 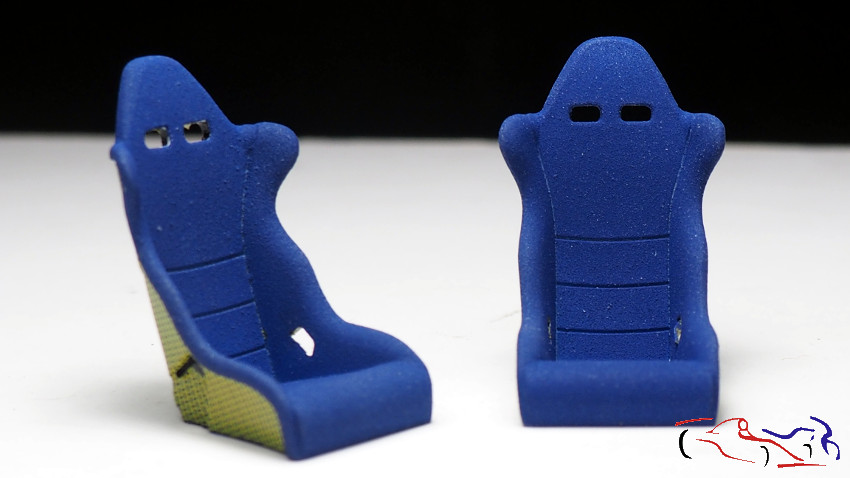 Aquí vemos como queda en el cockpit!! Here we see how it looks in the cockpit! 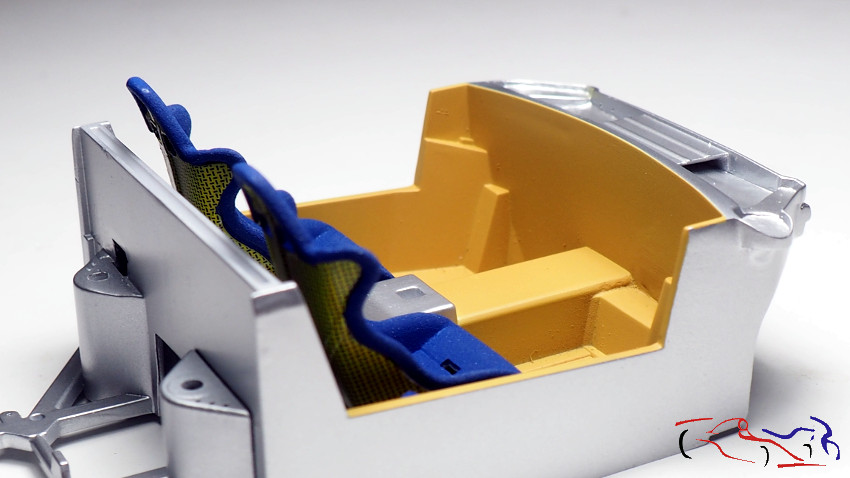 Y para darle un poco más de profundidad o desgaste, aplico pincel seco con azul claro. Vemos la diferencia en el asiento de la izquierda: And to give it a little more depth or wear, I apply dry brush with light blue. We see the difference in the left seat: 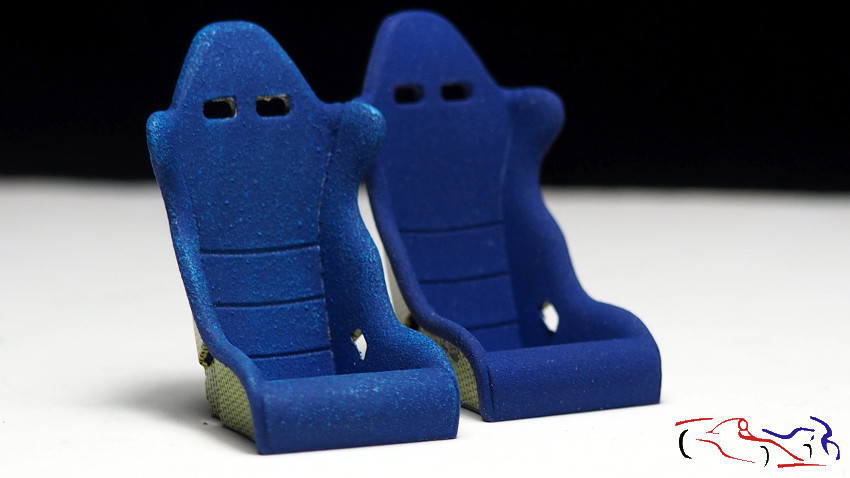 Pasamos a otra pieza que he aplicado pintura texturizada, pero en este caso de color negro: son las piezas donde van alojadas las ruedas traseras, pero que van fijadas al portón trasero: We move to another piece that I have also applied textured paint, but in this case of black color: they are the pieces where the rear wheels are housed, but they are fixed to the tailgate: 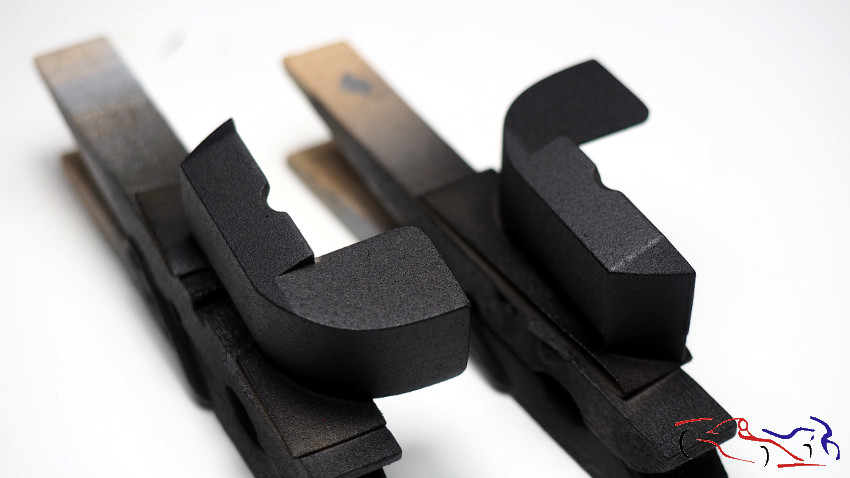 Y de aquí, por proximidad, nos vamos con la transmisión. Es una pieza que teoricamente no se verá por tener el carter tapado por una calva de kevlar. Pero ya que lo voy a detallar un poco, eliminaré parte de esa calca y al ser transparente la pieza, se verá. Una vez pintada la pieza con Metal Aluminium de Zero, le doy unos lavados con humo para añadir profundidad. Además, le añado dos piezas de cobre, un redondo y un angulo. Ahí es donde iría la base de la palanca de cambios: And from here, by proximity, we move with the transmission. It is a piece that theoretically will not be seen having the carter covered by a bald kevlar. But since I’m going to detail it a bit, I will remove part of that decal and we will look it being transparent the piece. Once the piece is painted with Zero Aluminum Metal, I give it some smoke washes to add depth. In addition, I add two pieces of copper, a round and an angle. That’s where the base of the gearshift would go: 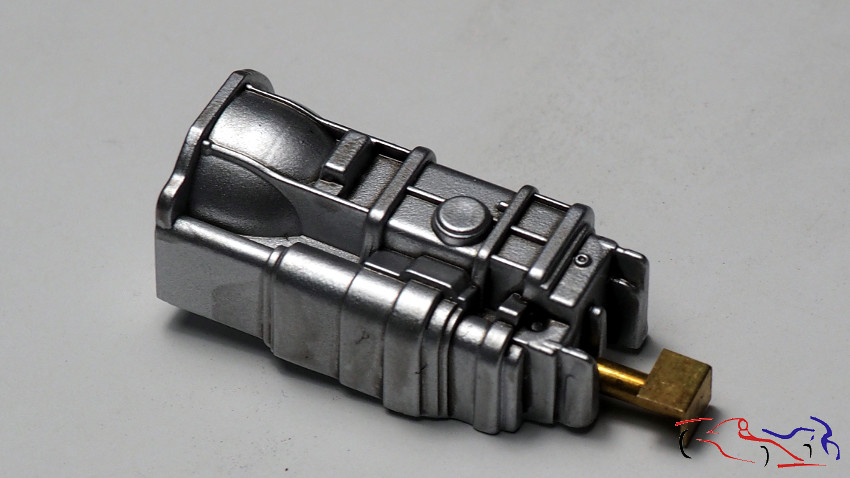 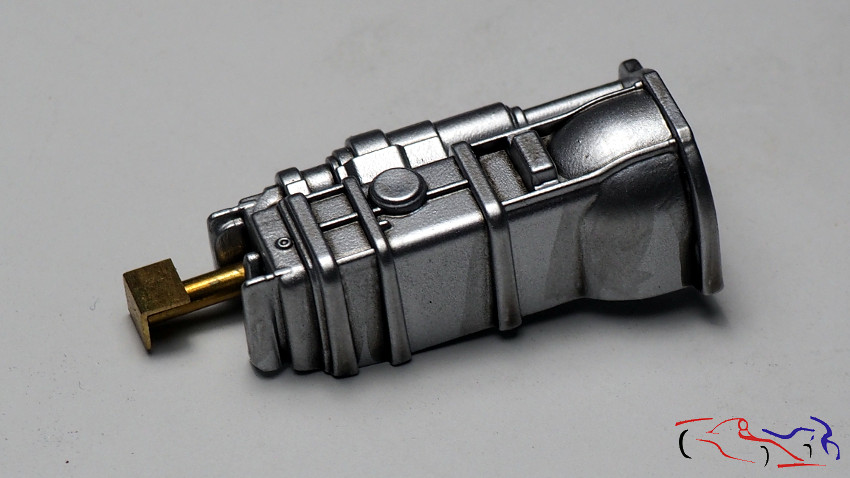 A su vez, le añado dos latiguillos con us conectores en rojo y azul, dos tuberías que son los conductos del aceite del motor al radiador delantero. y que pasan por ese lugar: In turn, I add two hoses with us connectors in red and blue, two pipes that are the conduits of the engine oil to the front radiator. and that pass through that place: 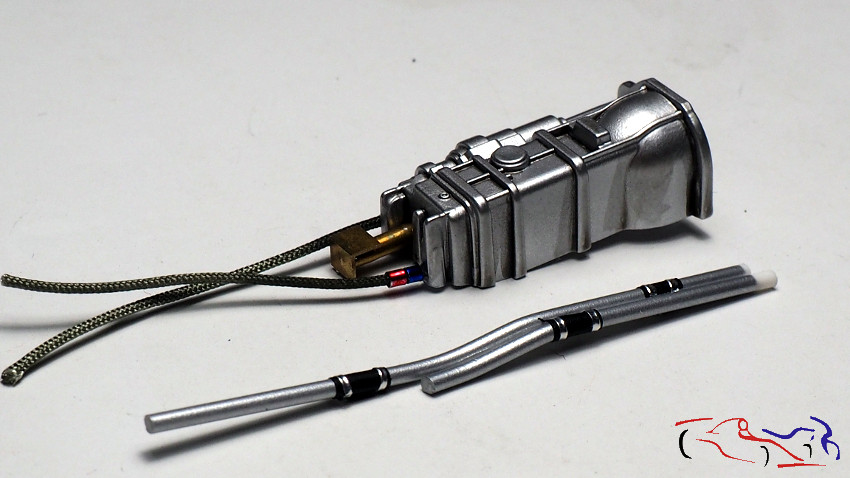 Si lo colocamos en su lugar, este sería su aspecto: If we put it in its place, this would be its appearance: 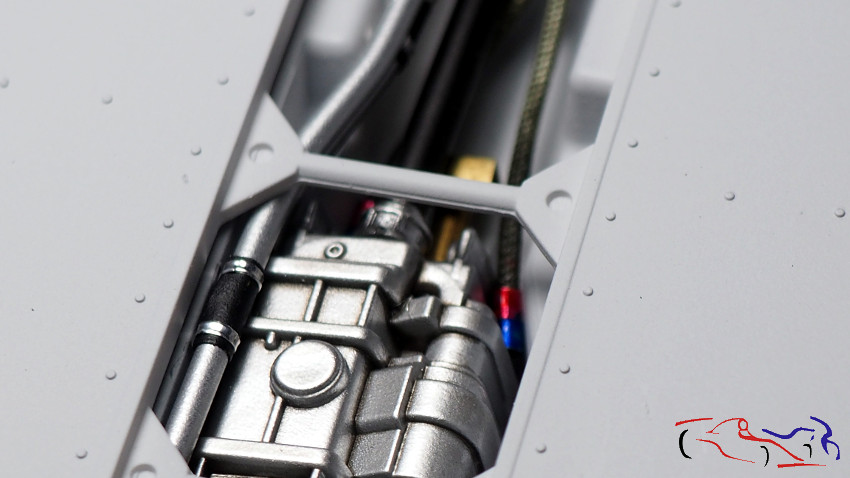 Podemos ver también la barra negra de transmisión en el medio: We can also see the black transmission bar in the middle: 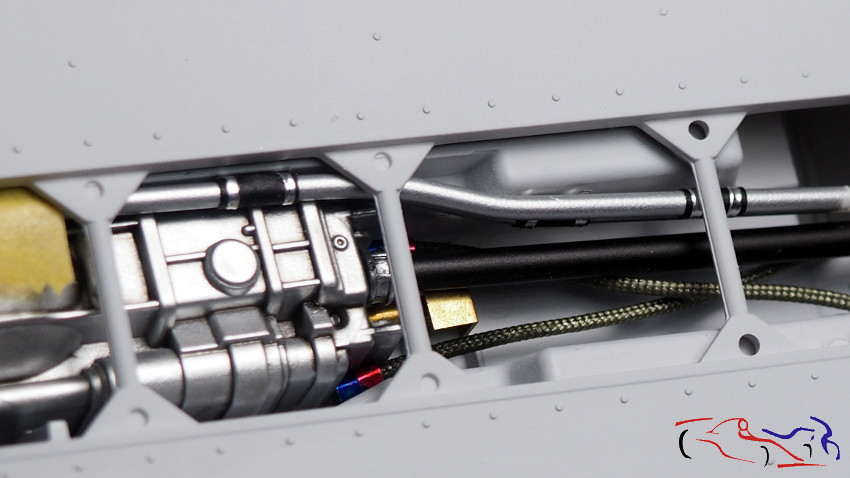 Finalmente, sombreamos la zona con colores Alclad sobre el Aluminio: Finally, we shade the area with Alclad colors on Aluminum: 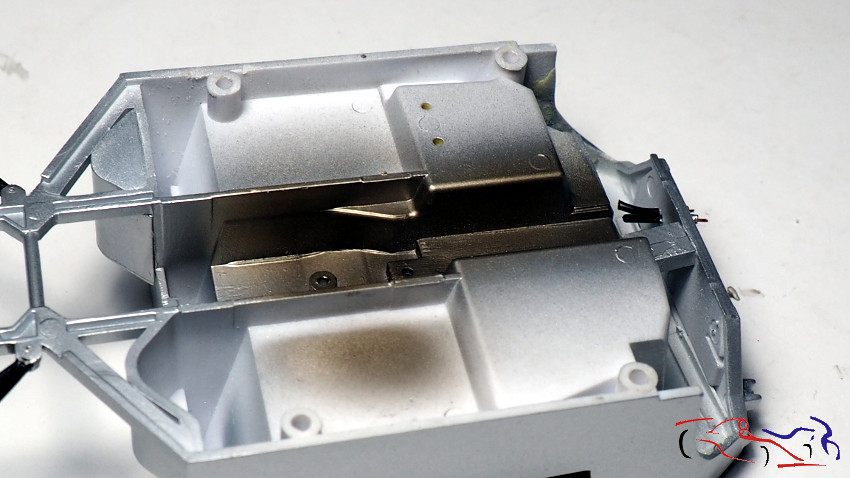 Ahora le vamos a dar la vuelta a esta pieza del habitáculo: Now we are going to turn this piece of the cabin around:  La imprimamos con Gravity junto con la base del coche: We prime it with Gravity along with the base of the car: 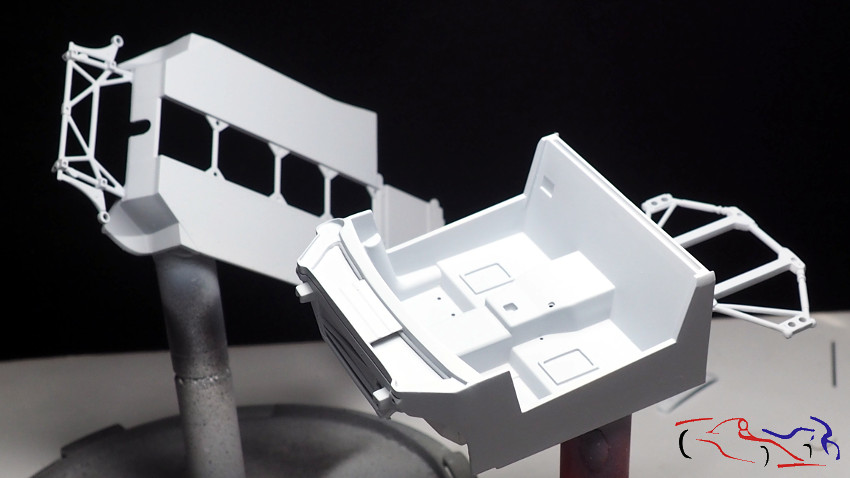 Y las pintamos con Metal Aluminium de Zero: And we paint them with Zero Aluminum Metal: 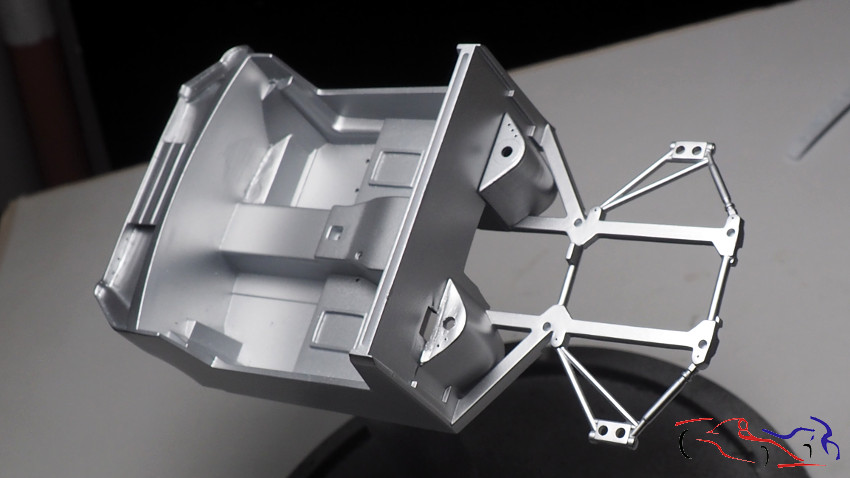 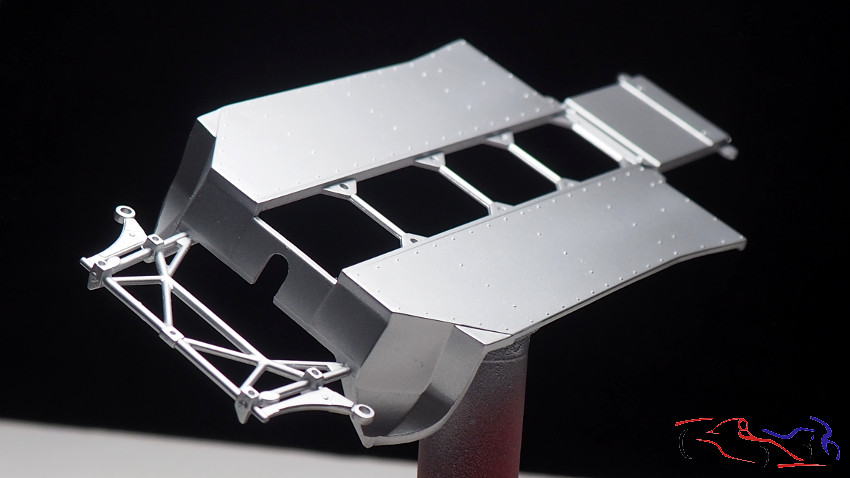 Si juntamos las dos piezas, este es su aspecto en su parte inferior: If we put the two pieces together, this is their appearance at the bottom: 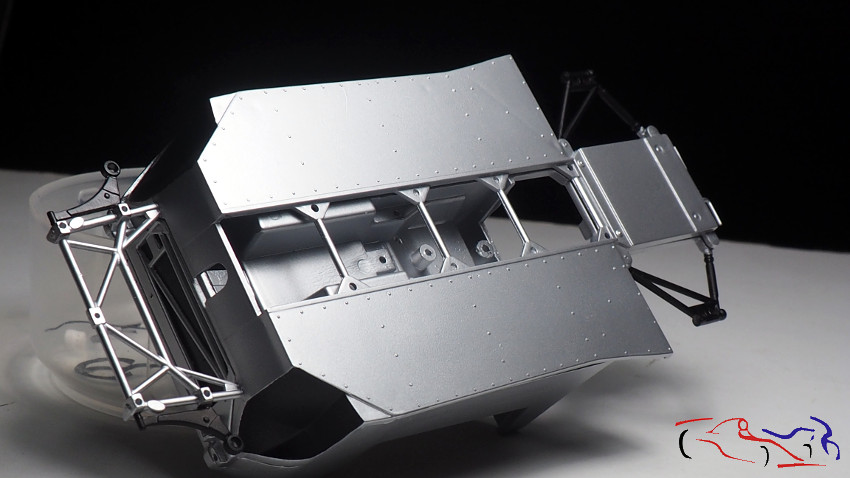 Como vamos a aplicar Kevlar en todo el cockpit, le damos una base con el color de Zero, habiendo enmascarado el resto: As we are going to apply Kevlar throughout the cockpit, we give it a base with the color of Zero, having masked the rest: 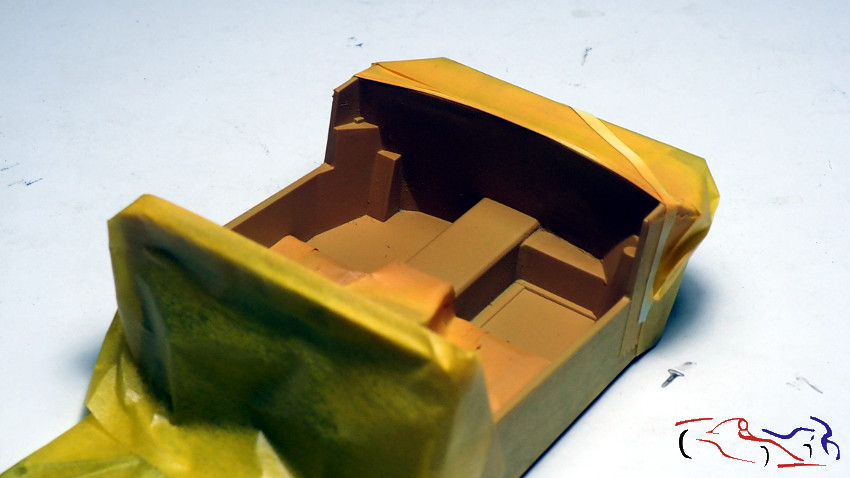 Y aquí el resultado: And this is the result: 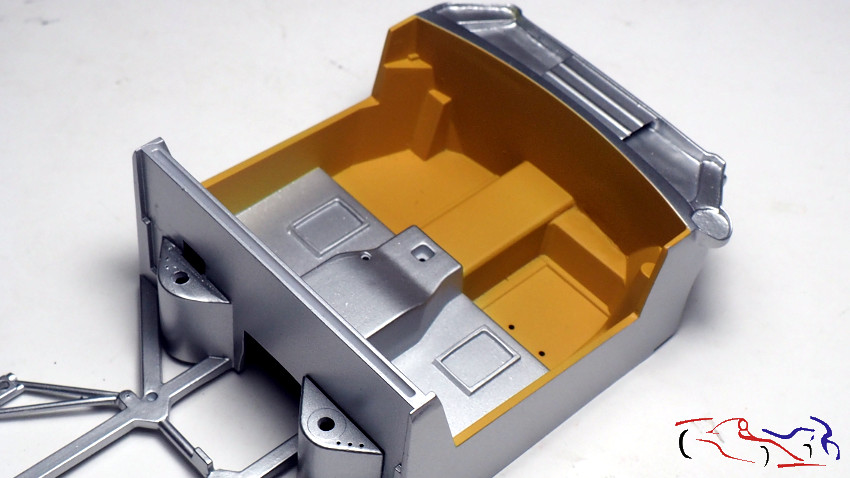 Pintamos también, los triángulos de la suspensión trasera de negro semi mate de Zero, habiendo enmascarado todo previamente. En la foto, aparecen las piezas del cockpit y chasis superpuestas: We also painted, the triangles of the rear suspension of semi-matt black from Zero, having masked everything previously. In the photo, the superimposed cockpit and chassis parts appear: 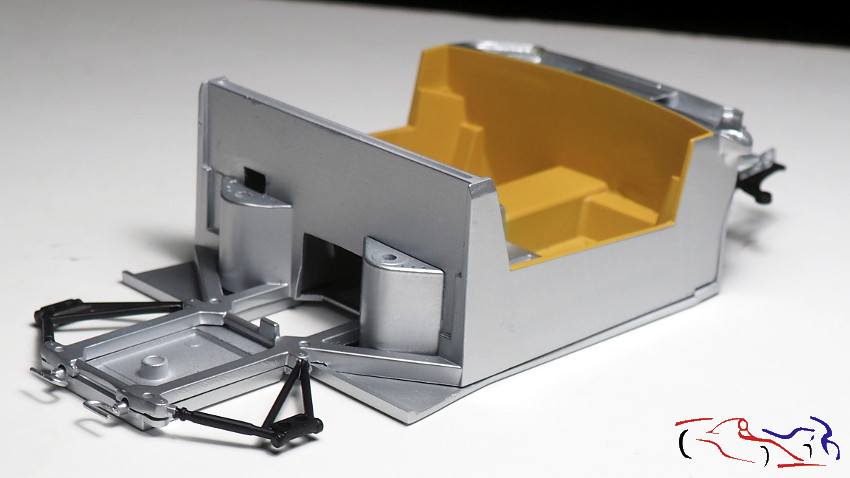 En la siguiente foto, vemos la parte delantera de ambas piezas, con el fondo negro del frontal pintado con semi mate de Zero, habiendo enmascarado las piezas metálicas. In the following photo, we see the front of both pieces, with the black background of the front painted with semi-matt from Zero, having masked the metal parts. 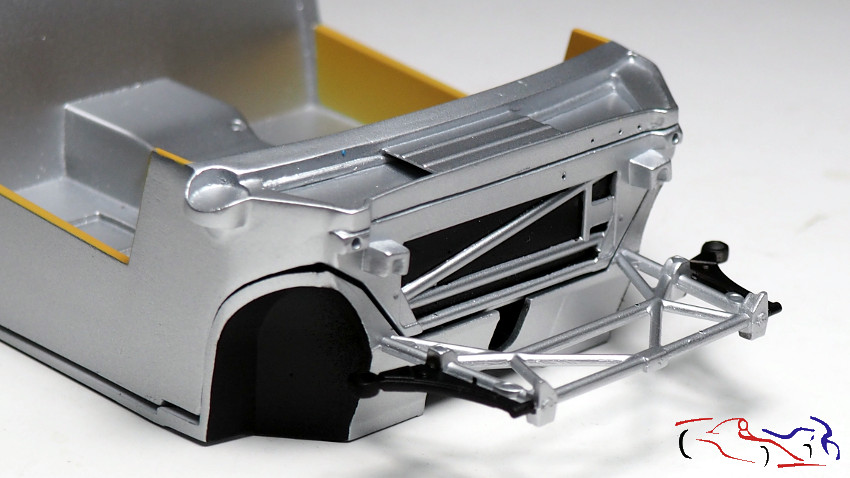 Y pasamos al proceso de creación de las calcas de Kevlar. Primero vamos poniendo cinta de enmascarar y las cortamos directamente con el cutter. Observamos el corte ya realizado en la base izquierda de la cinta: And we move on to the process of creating the Kevlar decals. First we put masking tape and cut them directly with the cutter. We observe the cut already made on the left base of the tape: 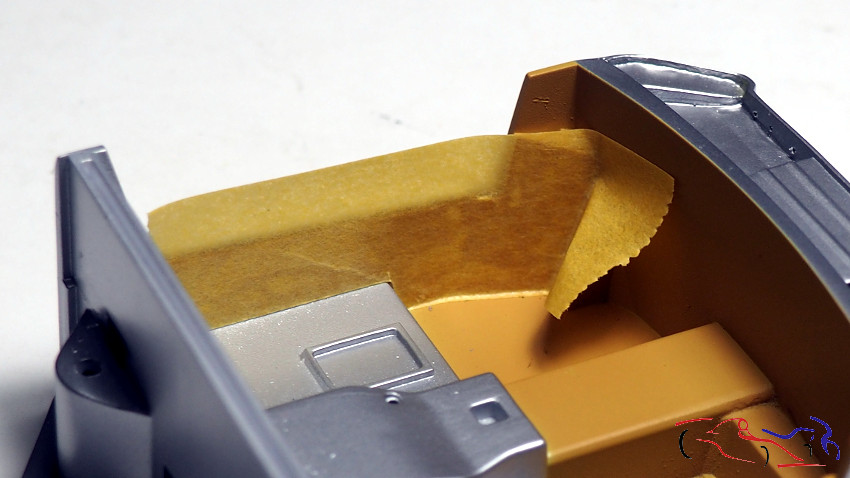 …y las ponemos en la hoja de calcas, listas para cortarse y aplicar: … and we put them on the decal sheet, ready to cut and apply: 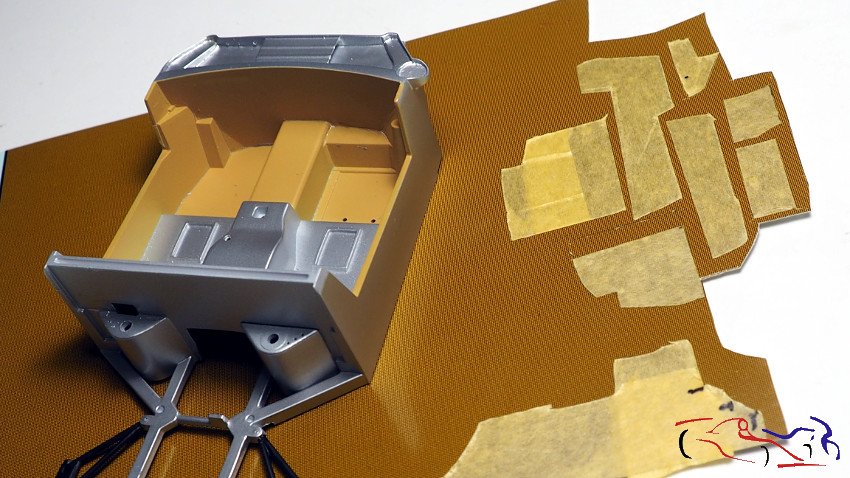 Este es el resultado. Comentar que he recortado las calcas un poco más grandes para que solapen unas con otras, tal y como ocurre en realidad: This is the result. I can say that I have cut the decals a little bigger so that they overlap with each other, just as it actually happens: 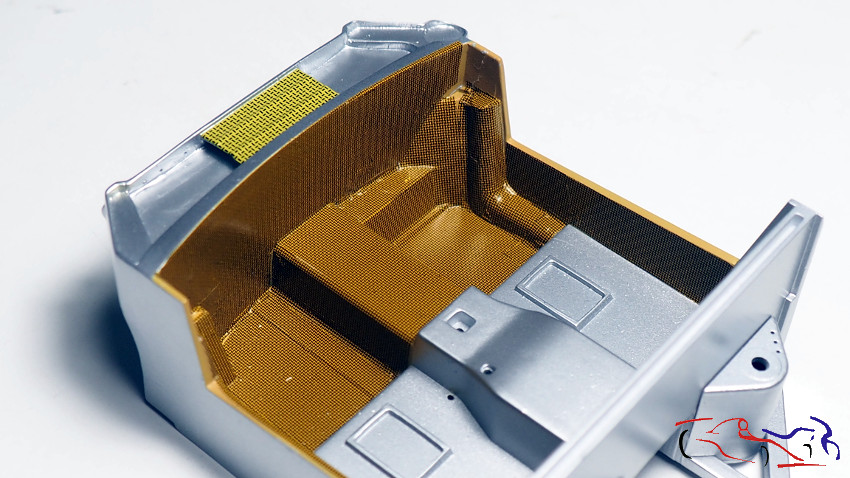 Notad la calca original del kit más amarilla…que más adelante sustituiré! Notice the original decal of the yellowest kit … which I will replace later! 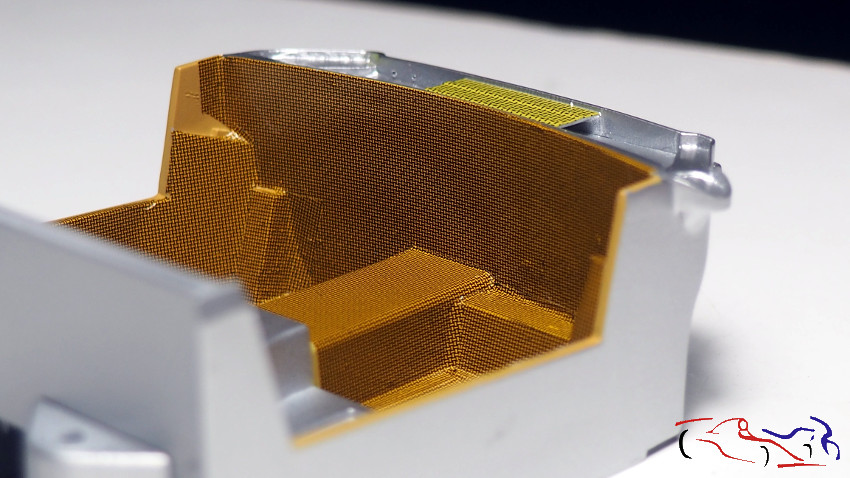 Seguimos con esta pieza. Vemos que las fotos no llevan una cronología exacta, y es debido a que las he colocado en diferente orden para explicar procesos más o menos completos. Por eso, vemos en la siguiente que no hay ninguna calca de Kevlar puesta, ya que estaba con pruebas del radiador delantero. En la foto vemos las piezas base del kit sobre las que detallaremos: We continue with this piece. We see that the photos do not have an exact chronology, and it is because I have placed them in different order to explain more or less, the complete processes. Therefore, we see in the following that there is no Kevlar decal on, since I was with tests of the front radiator. In the photo we see the base pieces of the kit on which we will detail:  En el anterior post, dejamos los tubos del radiador pintados con Metal Aluminium de Zero. Ahora véis la pieza con las juntas hechas con cinta de enmascarar pintadas de negro semimate, y sus fijaciones, con cinta autoadhesiva metálica: In the previous post, we left the radiator tubes painted with Zero Aluminum Metal. Now you see the piece with the joints made with masking tape painted in semi-black, and its fixings, with metallic self-adhesive tape: 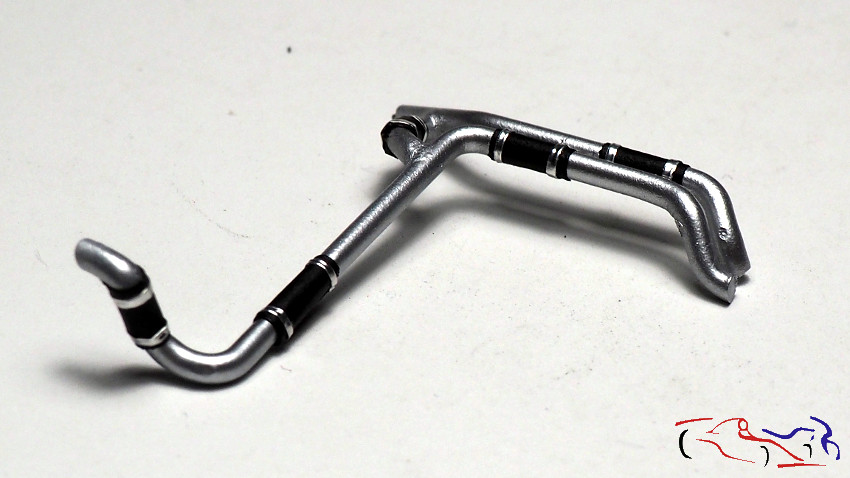 Y la pegamos al radiador. Vemos también un filtro con sus correspondiente latiguillos trenzados y un par de cables, uno del ventilador y otro de una sonda del tubo de refrigeración: And we stick it to the radiator. We also see a filter with its corresponding braided hoses and a pair of cables, one from the fan and one from a cooling tube probe: 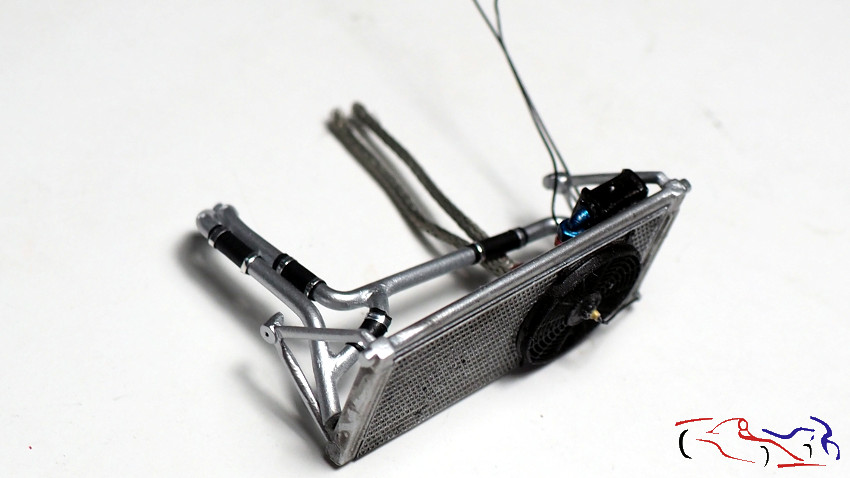 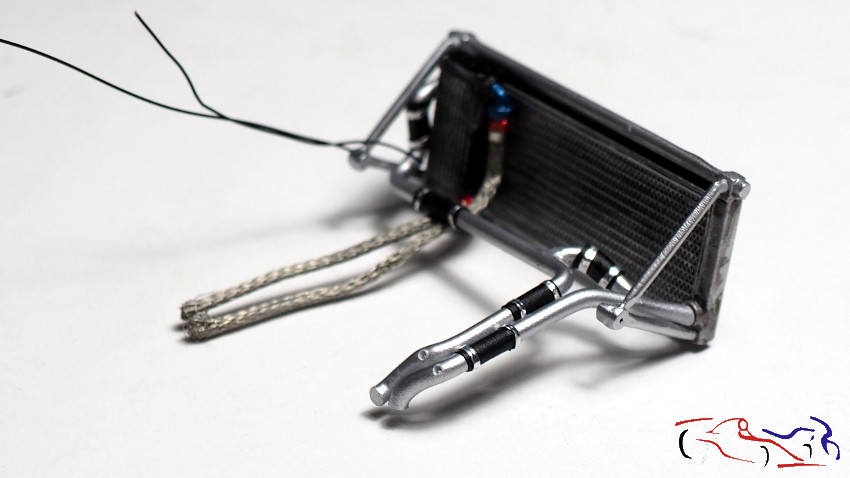  Volvemos al cokpit, y vamos a simular la manta térmica que hay colocada para proteger a los pilotos. Empezamos con la parte superior que hay entre los backets, siendo el proceso similar al de las calcas de Kevlar, pero en este caso pintamos ya que hay espacio: We return to the cokpit, and we will simulate the thermal blanket that is placed to protect the pilots. We start with the upper part between the backets, the process being similar to that of Kevlar decals, but in this case we paint since there is space: 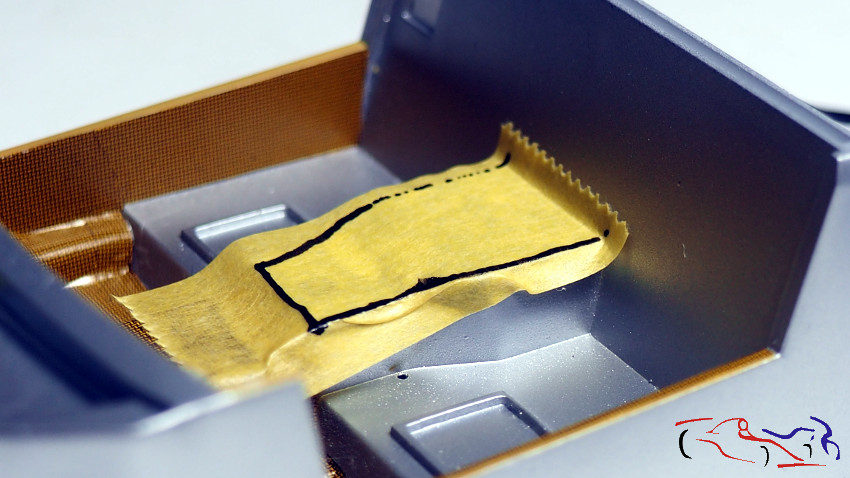 Lo pasamos a una vitola (cápsula) que traen las botellas de vino, que es un material ductil y maleable, fácil de cortar: We pass it to a capsule brought by the wine bottles, which is a ductile and malleable material, easy to cut:  Lo cortamos con el cutter y separamos la máscara: We cut it with the cutter and separate the mask: 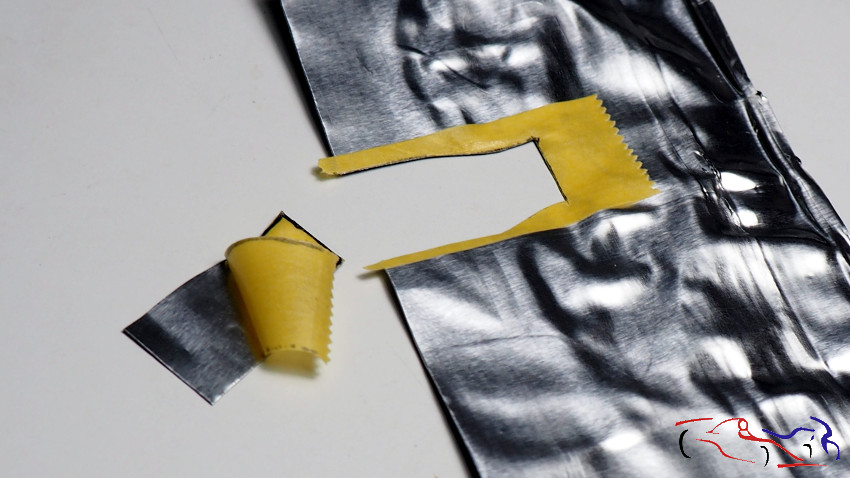 Aquí se ve la pieza superpuesta en su sitio con las costuras hechas con la parte de detrás del cutter, y con el añadido de la palanca de cambios: Here you see the piece superimposed in place with the seams made with the back of the cutter, and with the addition of the gearshift: 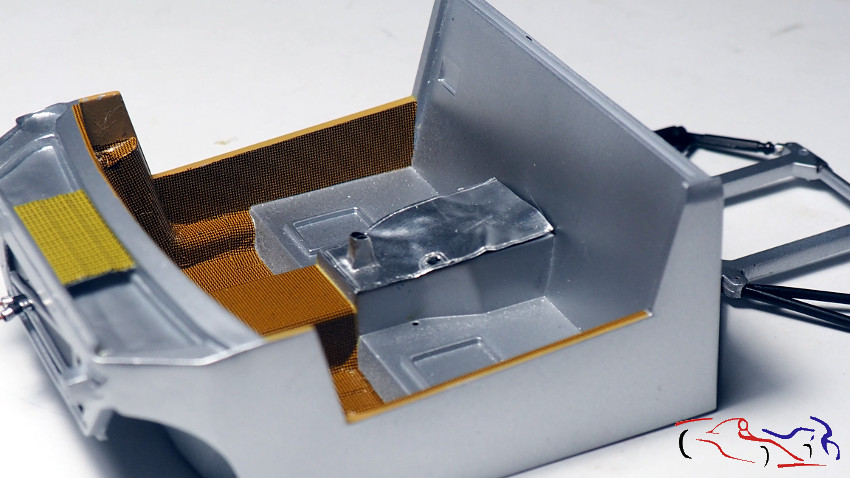 Hacemos lo mismo con la trasera del cockpit, dejando las partes de abajo más largas para que solape. We do the same with the back of the cockpit, leaving the lower parts longer so that it overlaps. 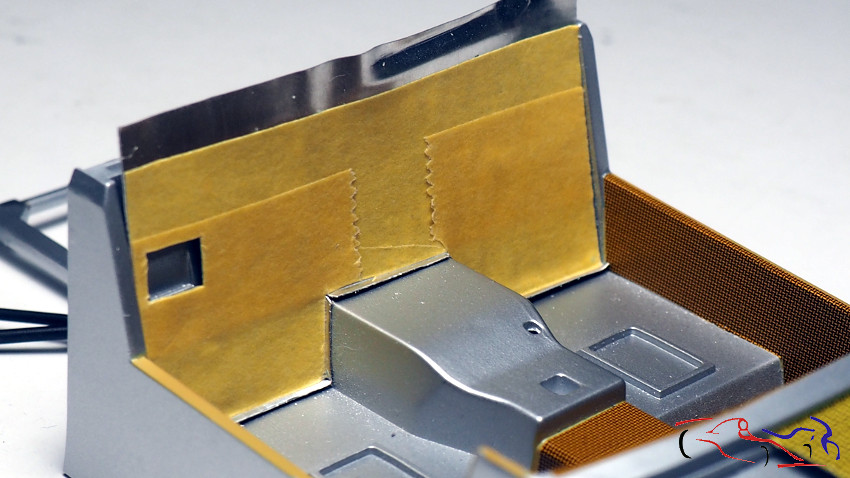 Aquí vemos todas las piezas: Here we see all the pieces: 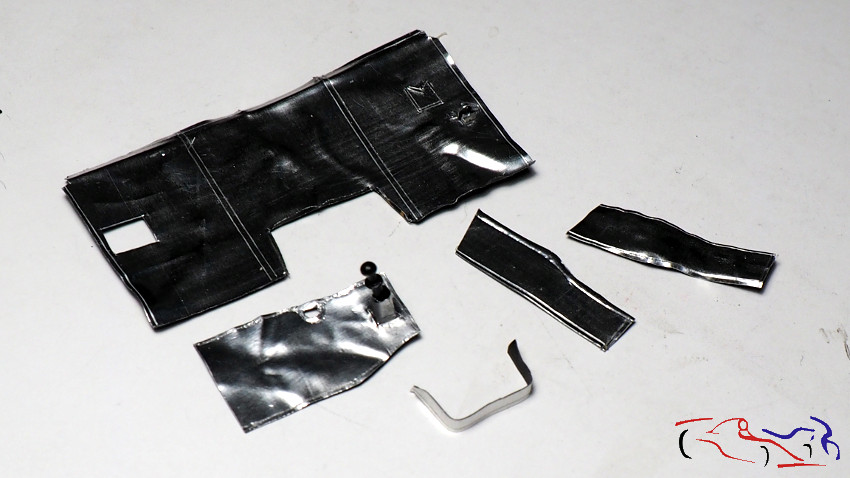 Por último, he aplicado la misma calca de Kevlar a la parte delantera, eliminando la que traia el kit de origen: Finally, I applied the same Kevlar decal to the front, eliminating the one that the original kit brought: 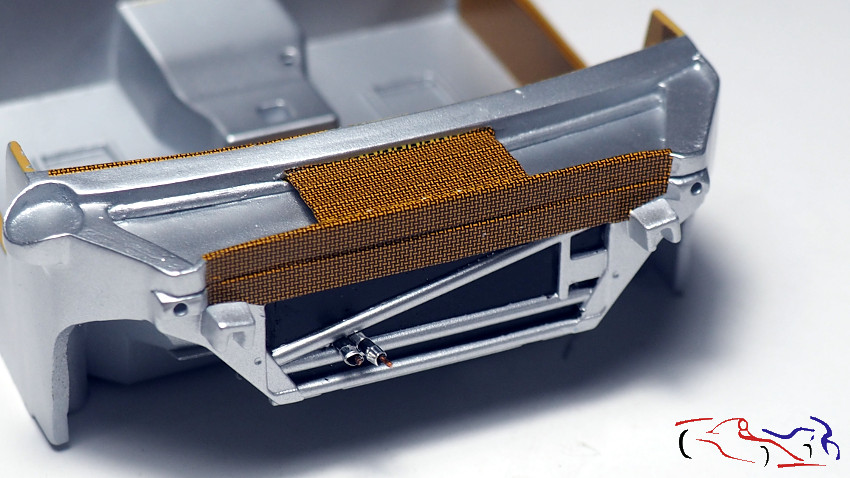 Esto es todo por ahora, gracias por ver y comentar!! This is all for now, thanks for watching and commenting! Last edited by JesusM; 10-03-2019 at 01:13 PM. |
|
|
|
|
|
10-03-2019, 12:51 PM
|
#33 | |
|
AF Regular

Join Date: Sep 2010
Location: Meerhout
Posts: 231
Thanks: 0
Thanked 25 Times in 25 Posts
|
Re: Lancia Delta S4 Marlboro Beemax 1/24
very nice,congrats
__________________
Do you think,I'm crazy |
|
|
|
|
| The Following User Says Thank You to racer1 For This Useful Post: |
JesusM (10-04-2019)
|
|
10-04-2019, 07:38 AM
|
#34 | |
|
AF Enthusiast

Join Date: Dec 2004
Location: Germany
Posts: 3,431
Thanks: 28
Thanked 79 Times in 73 Posts
|
Re: Lancia Delta S4 Marlboro Beemax 1/24
really cool, I follow you ;-)
__________________
Micha       
|
|
|
|
|
|
10-04-2019, 10:47 AM
|
#35 | ||
|
AF Enthusiast
Thread starter
Join Date: Mar 2009
Location: Madrid
Posts: 649
Thanks: 109
Thanked 68 Times in 67 Posts
|
Re: Lancia Delta S4 Marlboro Beemax 1/24
Quote:
|
||
|
|
|
|
10-04-2019, 10:47 AM
|
#36 | ||
|
AF Enthusiast
Thread starter
Join Date: Mar 2009
Location: Madrid
Posts: 649
Thanks: 109
Thanked 68 Times in 67 Posts
|
Re: Lancia Delta S4 Marlboro Beemax 1/24
Quote:
|
||
|
|
|
|
10-05-2019, 06:50 PM
|
#38 | |
|
AF Enthusiast

Join Date: May 2005
Location: Canberra
Posts: 604
Thanks: 0
Thanked 39 Times in 38 Posts
|
Re: Lancia Delta S4 Marlboro Beemax 1/24
Awesome. Would love to see how you would go with the 1/12 kit.
|
|
|
|
|
|
10-06-2019, 08:24 AM
|
#39 | |
|
AF Newbie
Join Date: Jun 2004
Location: Auburn, New York
Posts: 97
Thanks: 2
Thanked 5 Times in 5 Posts
|
Re: Lancia Delta S4 Marlboro Beemax 1/24
Wow, very impressive! Love the step by step process you do. Can you show a bit more of the mill you use and how you hold the parts down?
|
|
|
|
|
|
10-06-2019, 10:12 AM
|
#40 | ||
|
AF Enthusiast
Thread starter
Join Date: Mar 2009
Location: Madrid
Posts: 649
Thanks: 109
Thanked 68 Times in 67 Posts
|
Re: Lancia Delta S4 Marlboro Beemax 1/24
Quote:
|
||
|
|
|
|
10-06-2019, 10:16 AM
|
#41 | ||
|
AF Enthusiast
Thread starter
Join Date: Mar 2009
Location: Madrid
Posts: 649
Thanks: 109
Thanked 68 Times in 67 Posts
|
Re: Lancia Delta S4 Marlboro Beemax 1/24
Quote:
|
||
|
|
|
|
10-06-2019, 10:17 AM
|
#42 | ||
|
AF Enthusiast
Thread starter
Join Date: Mar 2009
Location: Madrid
Posts: 649
Thanks: 109
Thanked 68 Times in 67 Posts
|
Re: Lancia Delta S4 Marlboro Beemax 1/24
Quote:
|
||
|
|
|
|
10-06-2019, 02:06 PM
|
#43 | ||
|
AF Enthusiast
Thread starter
Join Date: Mar 2009
Location: Madrid
Posts: 649
Thanks: 109
Thanked 68 Times in 67 Posts
|
Re: Lancia Delta S4 Marlboro Beemax 1/24
Quote:
https://www.proxxon.com/us/micromot/37110.php |
||
|
|
|
|
11-09-2019, 12:40 PM
|
#44 | |
|
AF Enthusiast
Thread starter
Join Date: Mar 2009
Location: Madrid
Posts: 649
Thanks: 109
Thanked 68 Times in 67 Posts
|
Re: Lancia Delta S4 Marlboro Beemax 1/24
Continuamos con el Lancia Delta S4.
Después de ver fotos del compartimento del motor, he visto que la parte trasera del cortafuegos es de color negro satinado en lugar de aluminio. Para ello enmascaro y pinto con negro satinado de Zero. We continue with the Lancia Delta S4. After seeing pictures of the real engine compartment, I have seen that the back of the firewal was satin black instead of aluminum. To do this, I masked and painted with satin black from Zero. 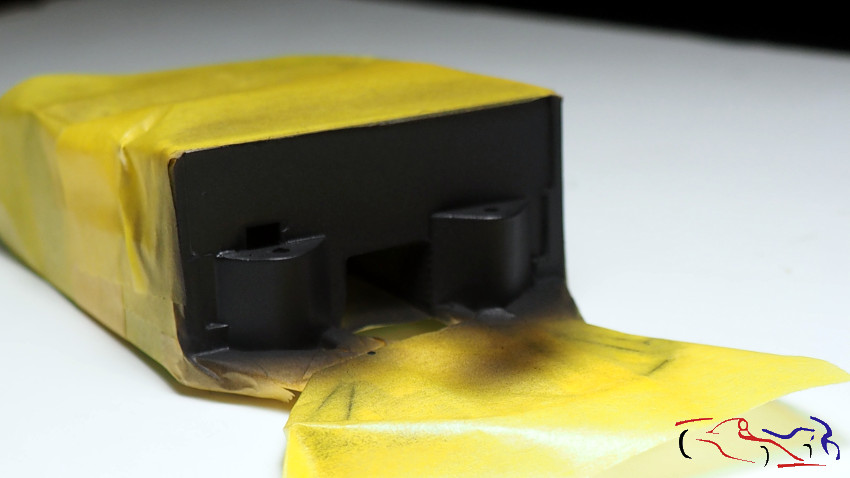 Aquí tenemos el resultado: Here we have the result: 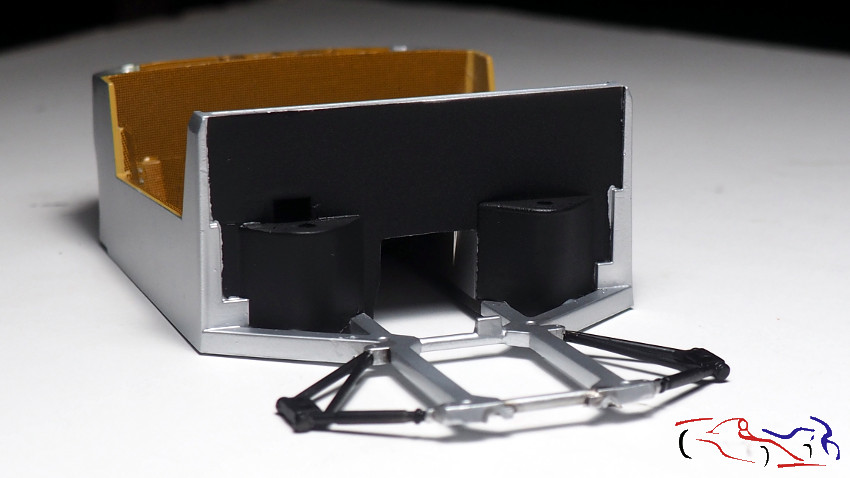 A continuación, corto un trozo de capsula de botella de vino, lo pego y le añado unos remaches. A su vez, coloco la pieza de la estructura tubular para adapar el depósito de KMP: Next, I cut a piece of wine bottle capsule, glue it and add some rivets. At the same time, I placed the piece of the tubular structure to adapt the KMP tank: 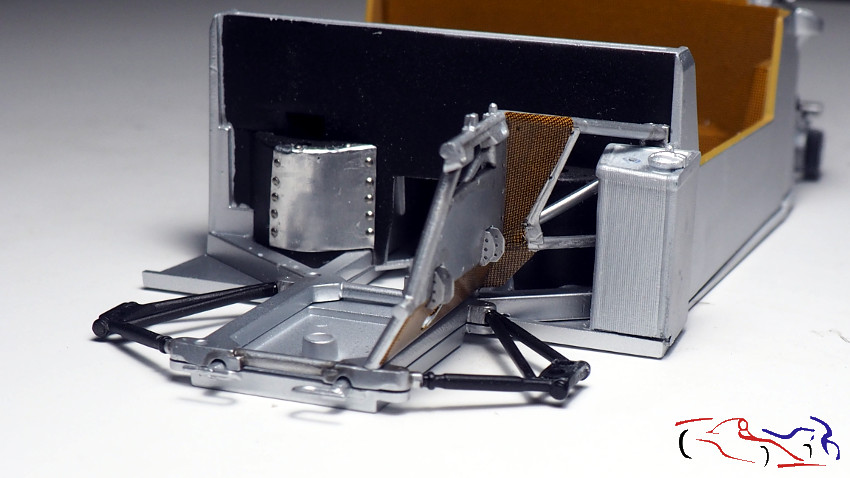 Aquí vemos todo lo que he tenido que modificar el depósito para que entre en el lugar correspondiente: Here we see everything I had to modify the deposit to enter it in the corresponding place: 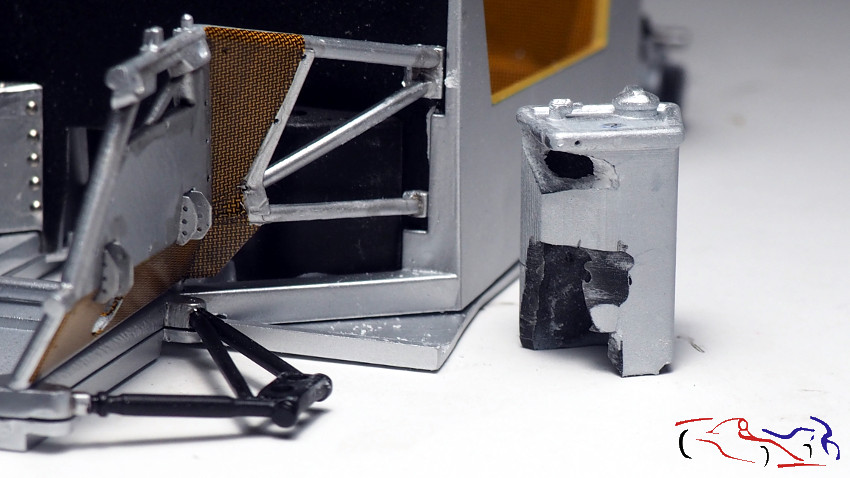 Pasamos a otra pieza que casi no se ve, ya que está detrás del asiento del copiloto. Después de pintarlas, le hice unos agujeros en su parte superior para introducir los coreespondientes tubos. Le puse también una cinta pintada de negro hecha de cápsula de botellas de vino. Después, le di unos lavados de color humo acrilico de Tamiya: We move on to another piece that can hardly be seen, since it is behind the passenger seat. After painting them, I made some holes in its upper part to introduce the core tubes. I also put a black-painted ribbon made from a bottle of wine capsule. Afterwards, I gave Tamiya acrylic smoke colored washings: 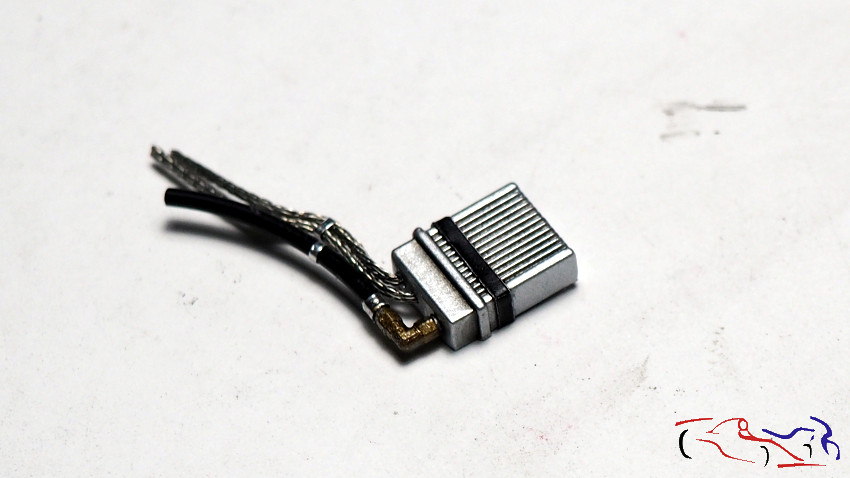 Pasamos al filtro del aire. Anteriormente, lo había dejado con la calca, aunque en esta foto no tenía puesta la parte del final: We pass to the air filter. Previously, I had left it with the decal, although in this photo I did not have the end part on:  Como había que apagar esos tonos de la calca, use humo muy diluido, aplicándolo en capas finas hasta dejarlo en el tono que deseaba: As I had to turn off those tones of the decal, I use very diluted smoke, applying it in thin layers until leaving it in the tone you wanted: 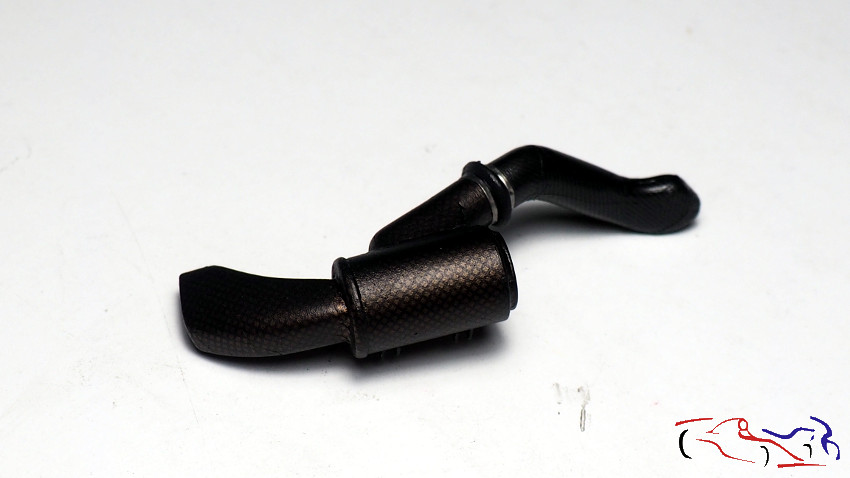 También, le añadí las fijaciones de ambos tubos hechas con metal autoadhesivo: Also, I added the fixings of both tubes made with self-adhesive metal: 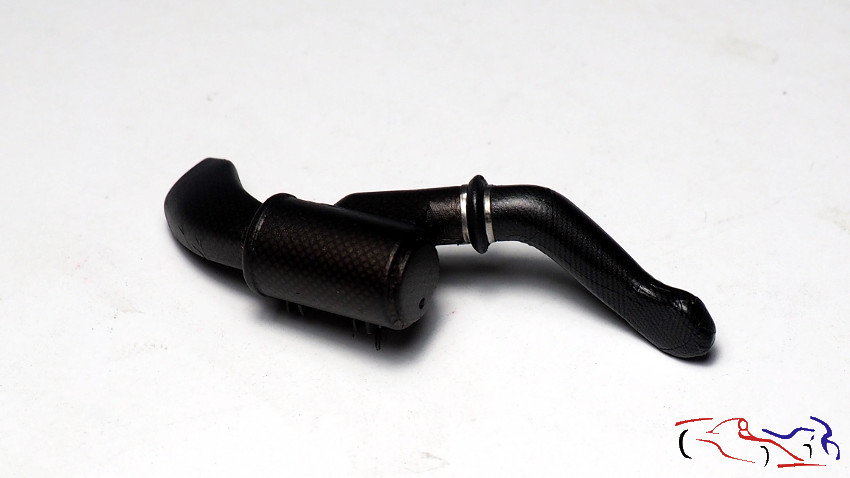 Pasamos ahora a una parte importante de mis modificaciones: las fijaciones para mantener el capot delantero y el portón trasero cerrados. Además, de las bisagras de este último. Empezamos por el capó. Mantendré las piezas originales del kit en lo referente a la fijación y giro del mismo. Eliminaré las fijaciones que utilizaba el kit delante del parabrisas y para sutituirlos, usaré imanes de 1×1 mm que irán en los laterales. Para insertarlos, añado unas piezas de Evergreen en cada lateral del capó: We now turn to an important part of my modifications: the fixings to keep the front hood and the tailgate closed. In addition, the hinges of the latter. We start with the hood. I will keep the original parts of the kit in relation to the fixation and rotation of it. I will remove the fixings that the kit used in front of the windshield and to replace them, I will use 1×1 mm magnets that will go on the sides. To insert them, I add some pieces of Evergreen on each side of the hood: 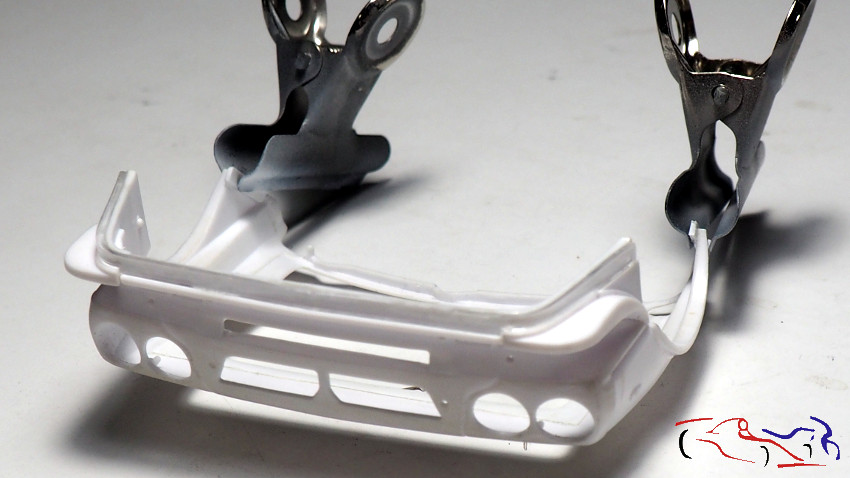 Aquí veis dichas piezas, más grandes para poder adaptarlas a la carroceria. Here you see these larger pieces to adapt them to the body. 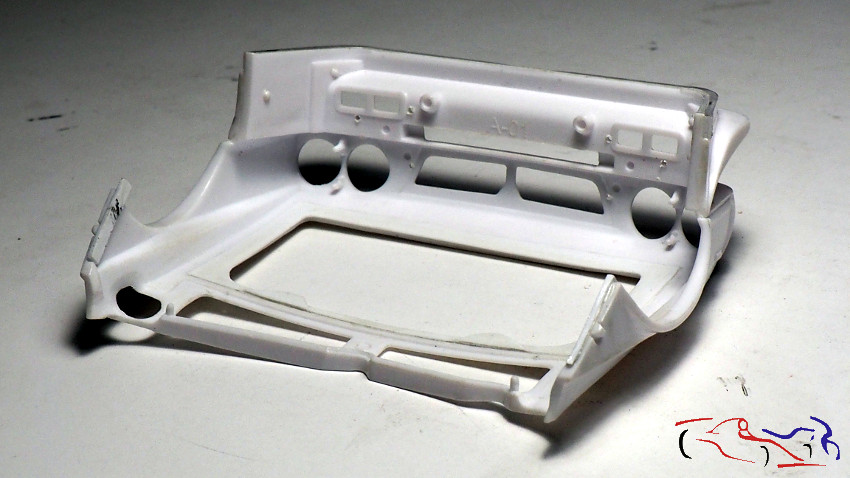 En esta foto, vemos la pieza blanca con los dos agujeros donde se fija el capot, que voy a eliminar. También vemos los laterales añadidos donde incrutaremos los imanes: In this photo, we see the white piece with the two holes where the hood is fixed, which I will remove. We also see the added sides where we will embed the magnets: 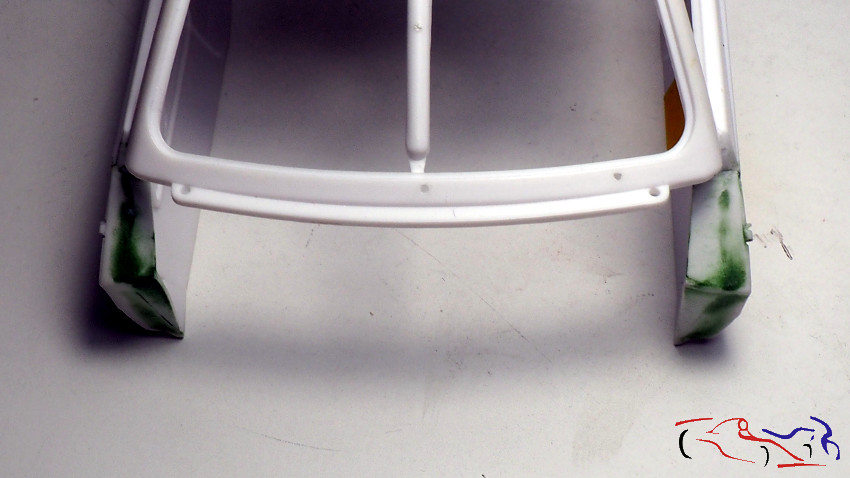 En esta foto vemos los dos puntos en los que se fija el capót a la carrocería, y que eliminaré. In this photo we see the two points where the bonnet is fixed to the body, and that I will eliminate. 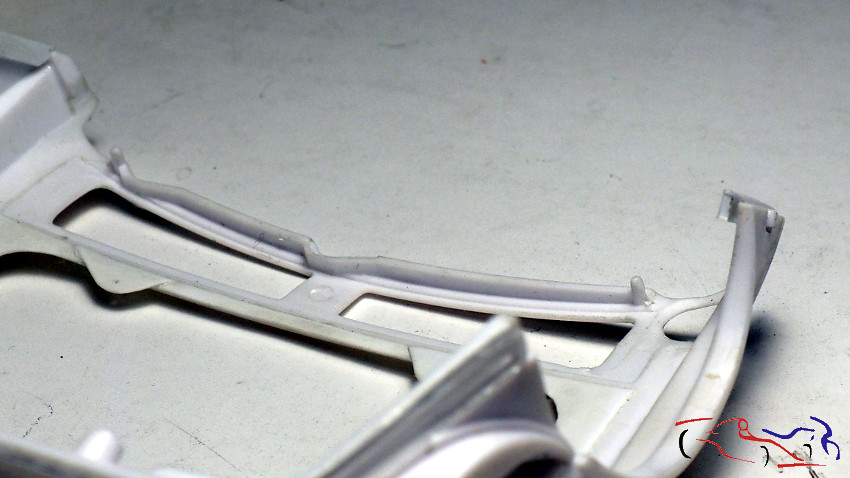 En la siguiente foto vemos el capo a la izquierda y la carrocería a la derecha, amabas piezas con los correspondientes imanes incrustrados. In the next photo we see the bonnet on the left and the body on the right, you loved pieces with the corresponding embedded magnets. 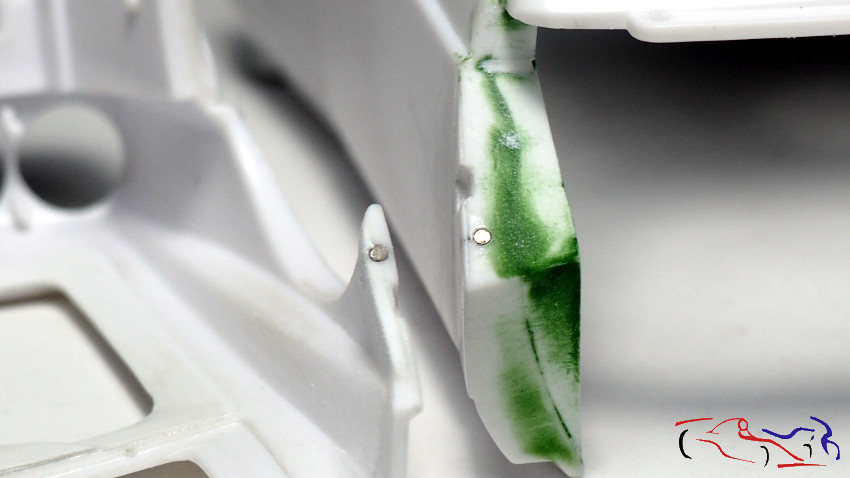 Otra foto de la carrocería con los imanes. Another photo of the body with the magnets. 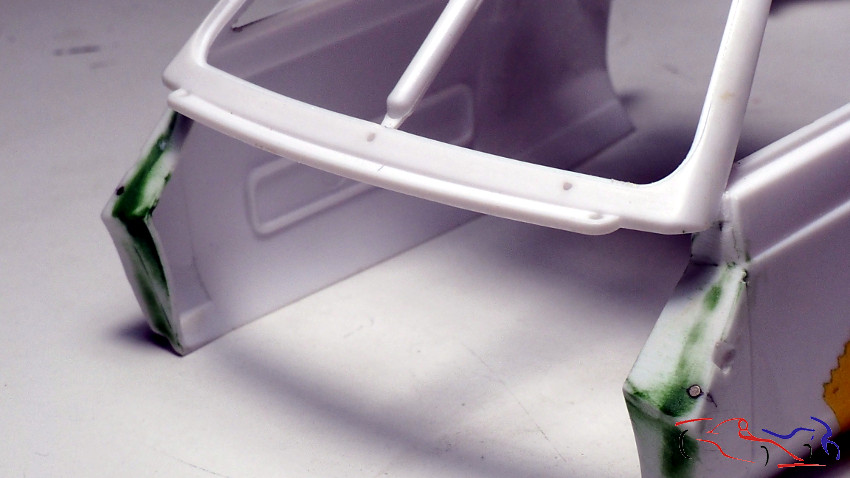 Pasamos al porton trasero. Añado una pletinas en los laterales para aumentar el espacio donde incrustar el imán y asemejarlo al coche real. We pass to the tailgate. I add a strips on the sides to increase the space where to embed the magnet and resemble it to the real car. 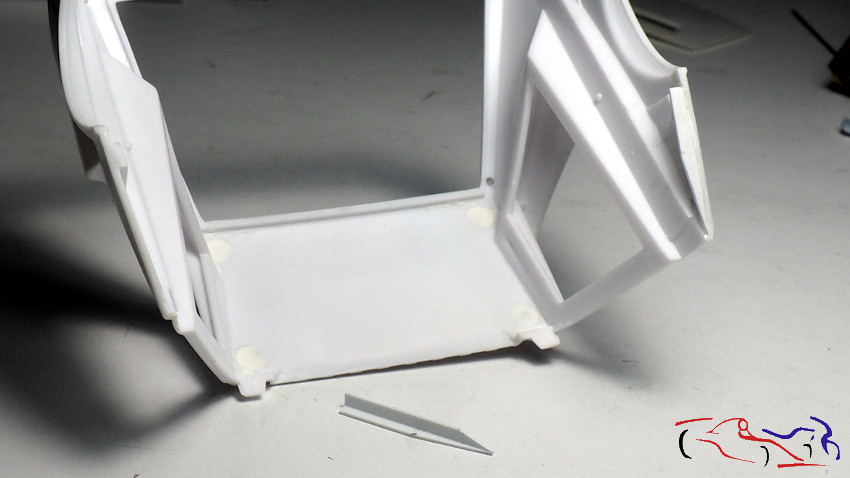 A su vez, en la carrocería, añadimos otras pletinas de plástico donde poner los imanes. In turn, in the body, we add other plastic plates where to put the magnets. 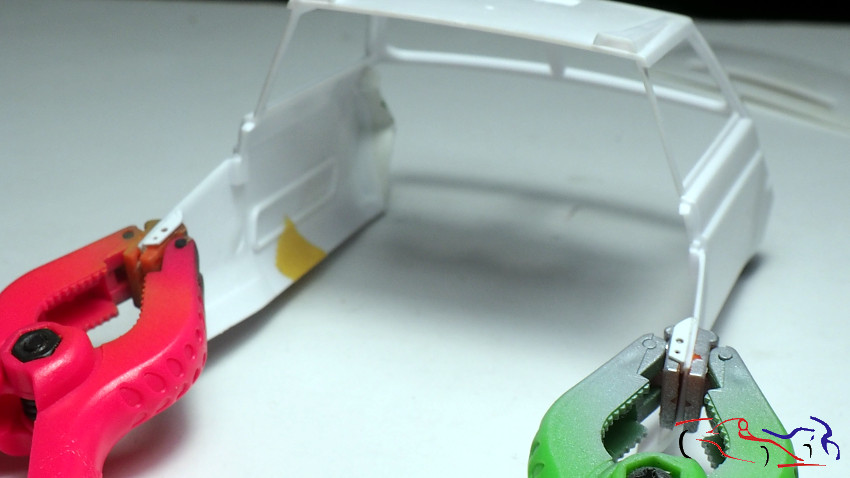 Vemos un lado de la carrocería en detalle We see one side of the body in detail  Ahora vemos las pletinas de la parte del portón, con los imanes y el putty verde dado para tapar las grietas. Now we see the plates of the gate part, with the magnets and the green putty given to cover the cracks. 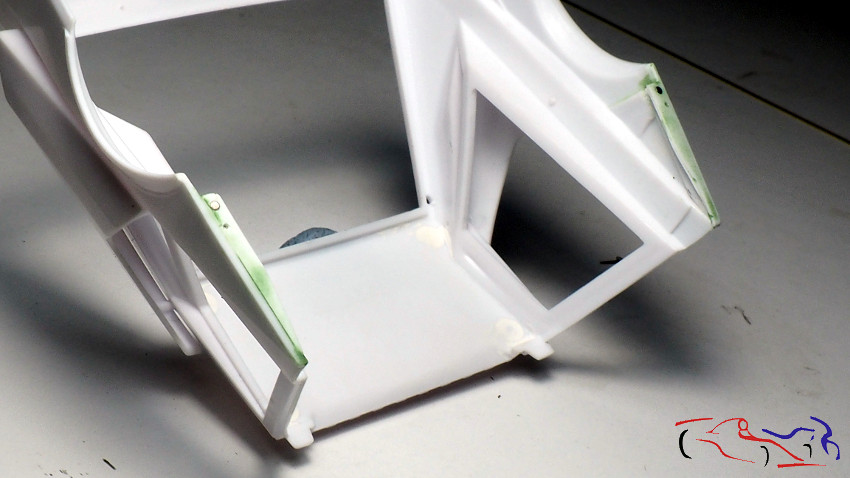 Y aquí las modificaciones traseras de la carrocería. And here the rear modifications of the body. 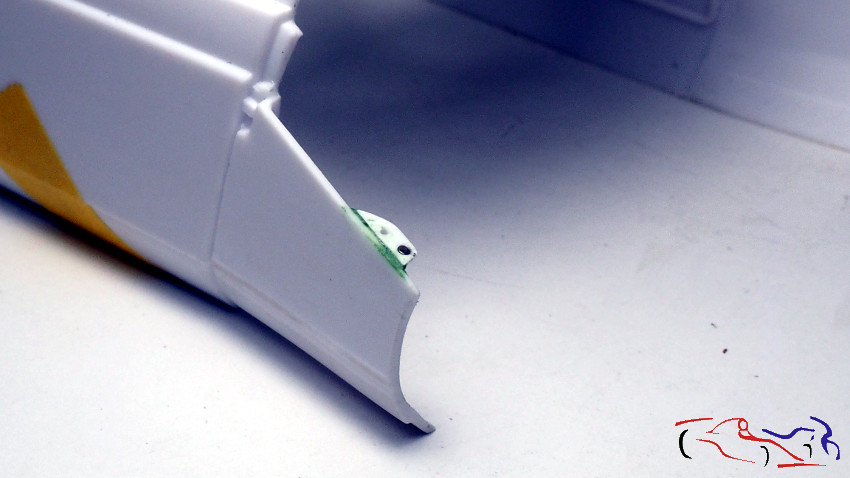 Pasamos a las bisagras. Vamos a hacer una pieza fijada a la carrocería, con un tubo sobre el que se ponga y pivote la pieza del portón. Para hacer esta pieza, necesitaba un tubo partido por la mitad que uniré a una pletina. Para ese tubo, cojo uno de latón y le hago una ranura con el minitaladro. We pass to the hinges. We are going to make a piece fixed to the body, with a tube on which the gate piece is placed and pivoted. To make this piece, I needed a split pipe in half that I will attach to a plate. For that tube, I take one of brass and make a slot with the mini drill. 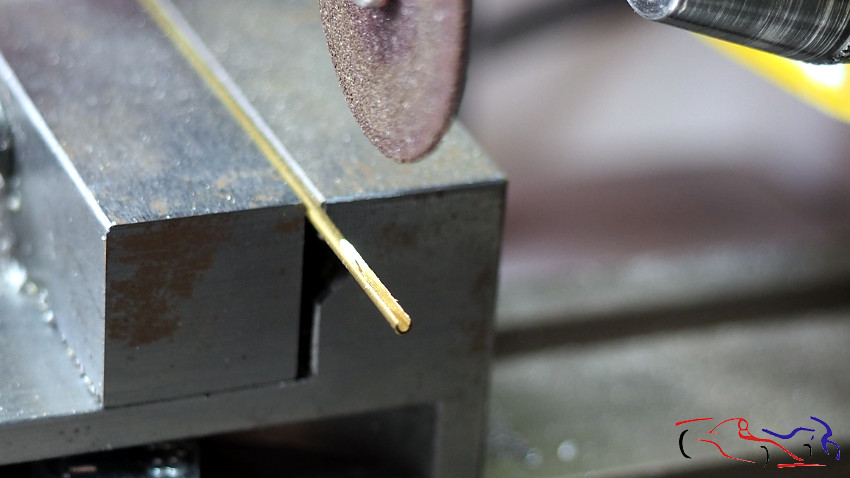 Una vez hecha la ranura, sueldo unas pletinas de un resto de fotograbado de Tameo. Sueldo dos pletinas para hacer las de lso dos lados. Luego las corto y afino con el mintaladro. Once the groove is made, I pay some plates of a rest of Tameo photogravure. I pay two plates to make two sides. Then I cut and refine them with the mini drill.  Una vez afinadas, aquí os las muestro sobre una varilla para que se vea el resultado. Once tuned, here I show you on a rod to see the result. 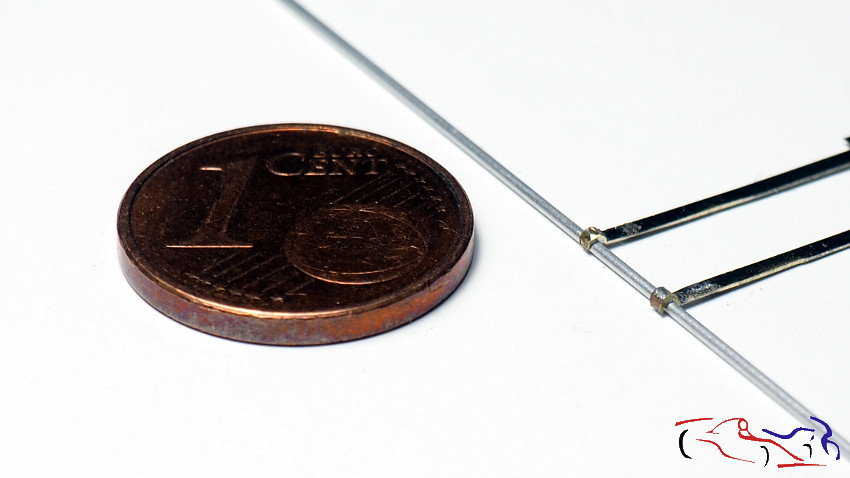 Para ver el resultado, elimino las bisagras de plástico del portón. Aquí se ve la diferencia entre una original y la que estoy modificando. Así mismo, en el kit, el portón se apoyaba sobre la carrocería con dos pivotes, los cuales se elimarán. To see the result, I remove the plastic hinges from the gate. Here you can see the difference between an original and the one I am modifying. Also, in the kit, the gate rested on the body with two pivots, which will be removed. 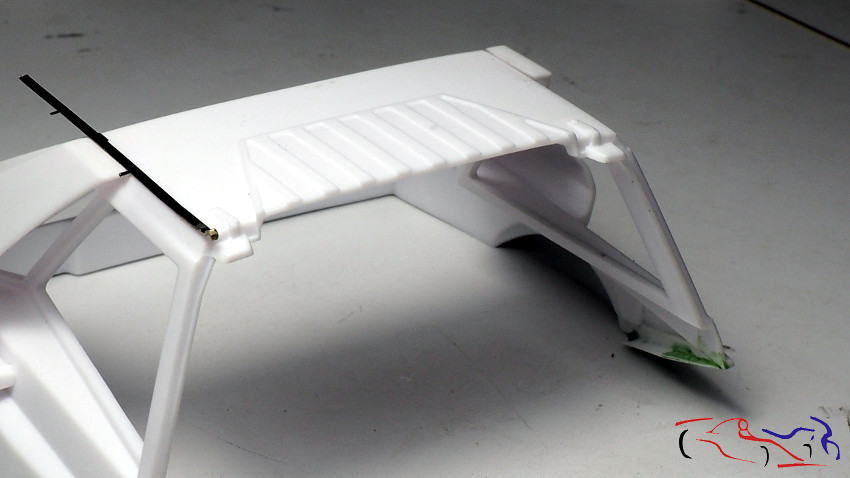 Vamos a hacer ahora, las piezas que irán en la carrocería. Usamos otro tubo de cobre al que soldaremos dos pletinas de cobre, con el ancho de los tubos que corté anteriormente, tal y como se ve en la foto. We are going to do now, the pieces that will go in the body. We use another copper tube to which we will weld two copper plates, with the width of the tubes that I cut previously, as seen in the photo.  En esta foto, vemos las piezas laterales soldadas al tubo, y a un trozo de latón para darle dureza a la pieza. In this photo, we see the side pieces welded to the tube, and a piece of brass to give hardness to the piece. 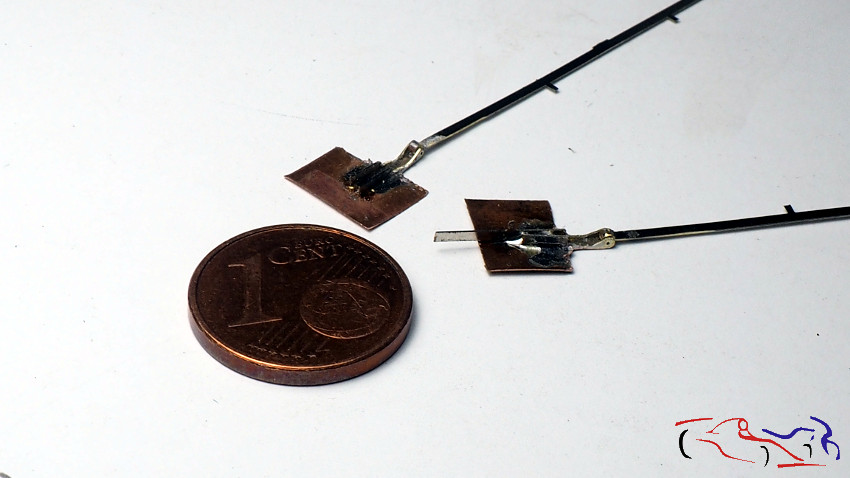 Si vemos donde irá esa pieza, podemos comprobar que tendremos que hacer un agujero para que se asiente bien. If we see where that piece will go, we can verify that we will have to make a hole so that it sits well. 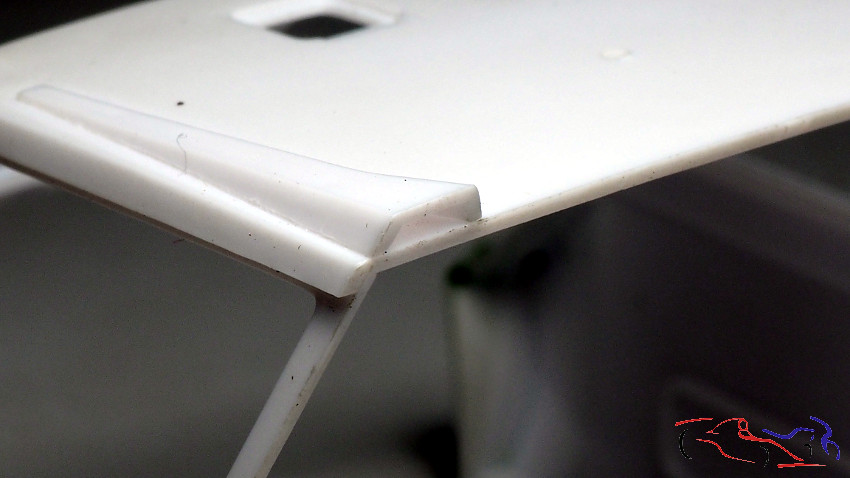 Una vez hecho ese recorte, apoyamos la pieza realizada sin eliminar el sobrante, para ver el resultado. Once that cut is done, we support the piece made without removing the excess, to see the result. 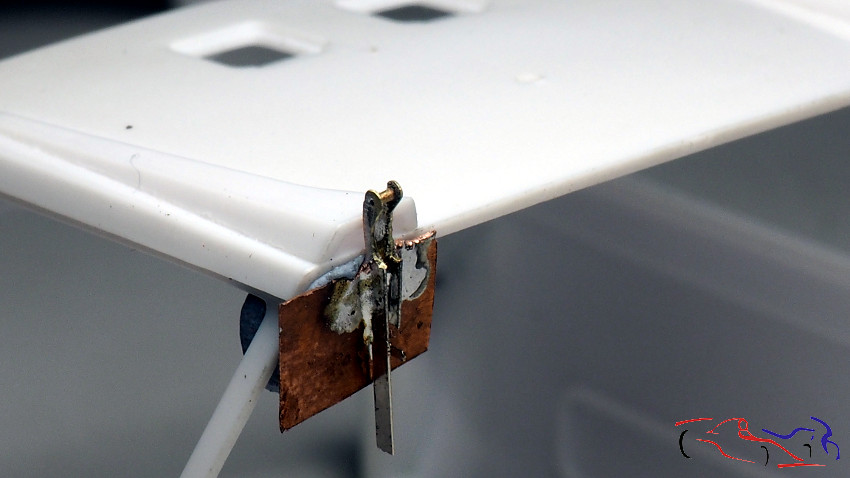 Y aquí vemos como quedará la bisagra. Una vez fijas ambas piezas, el portón se apoyará y girará para mantenerse abierto. And here we see how the hinge will look. Once both pieces are fixed, the gate will rest and turn to keep open. 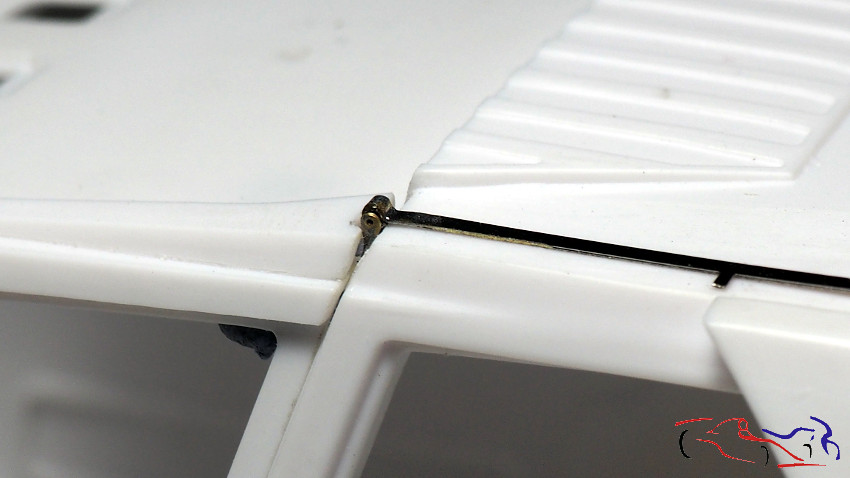 Gracias por ver y comentar! Thanks for viewing and commenting! |
|
|
|
|
|
11-09-2019, 12:54 PM
|
#45 | |
|
AF Regular
Join Date: Sep 2010
Location: Meerhout
Posts: 231
Thanks: 0
Thanked 25 Times in 25 Posts
|
Re: Lancia Delta S4 Marlboro Beemax 1/24
very nice
__________________
Do you think,I'm crazy |
|
|
|
|
| The Following User Says Thank You to racer1 For This Useful Post: |
JesusM (11-09-2019)
|
|
|
POST REPLY TO THIS THREAD |
 |
|
|


