|
|
|

|
|
| Search | Car Forums | Gallery | Articles | Helper | AF 350Z | IgorSushko.com | Corporate |
|
| Latest | 0 Rplys |
|
|||||||
| WIP - Street Post topics for any "Works In Progress" street vehicles projects in this sub-forum. |
 |
 Show Printable Version | Show Printable Version |  Email this Page | Email this Page |  Subscribe to this Thread
|
|
|
Thread Tools |
 08-15-2020, 08:53 AM
|
#16 | |
|
AF Regular
Thread starter
Join Date: Feb 2009
Location: Moscow, Russia
Posts: 294
Thanks: 5
Thanked 14 Times in 14 Posts
|
Re: Ironhide TopKick C4500
Hi Gents!
I have a holiday today. stratos75 have made wheels for this project! 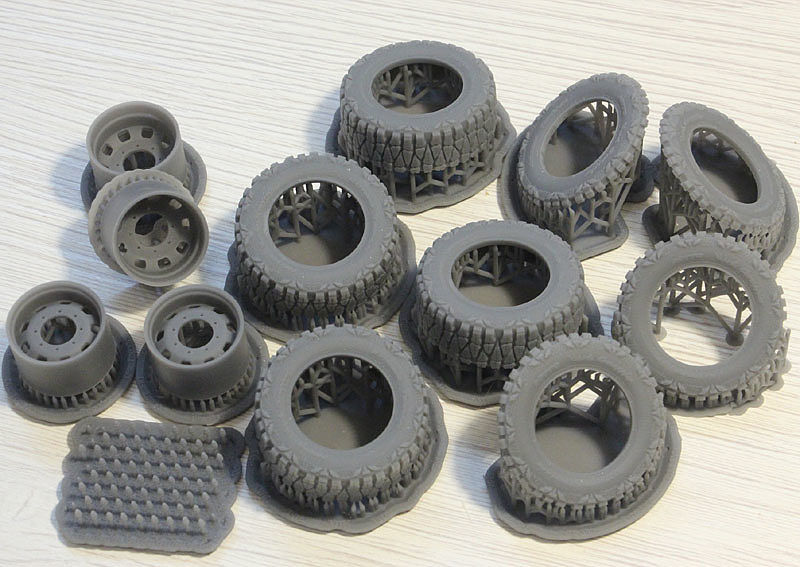 Many thanks to Michael Petrenko! Enjoy the pictures! 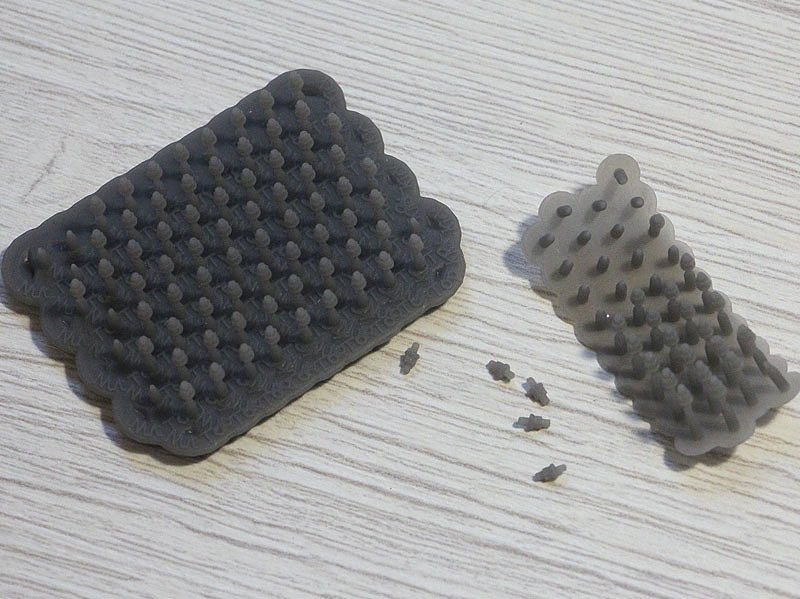 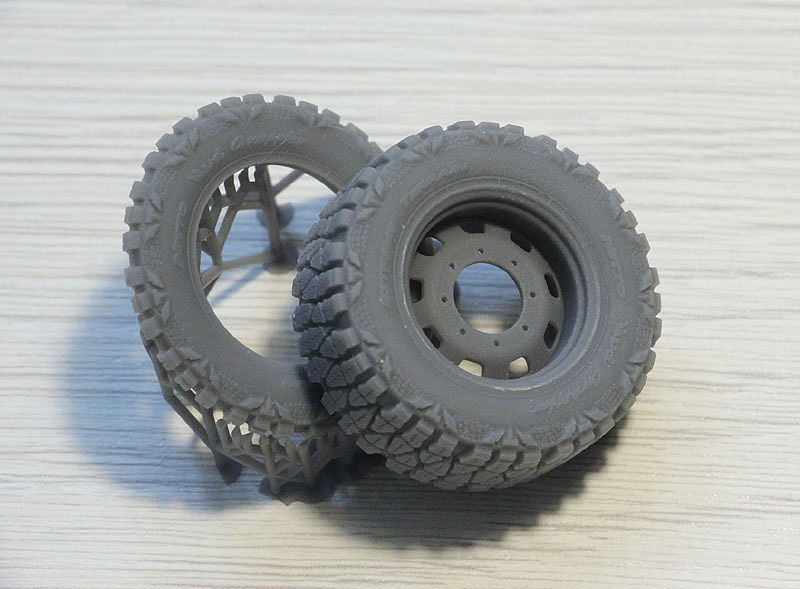  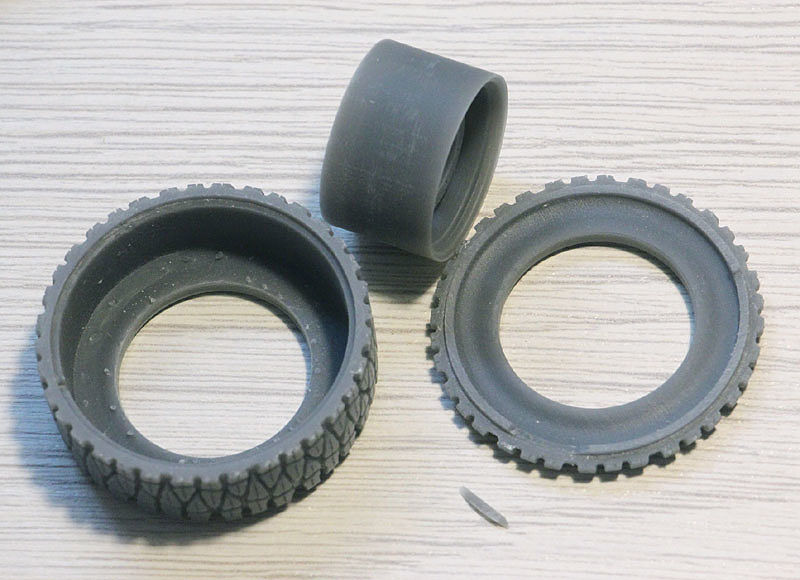 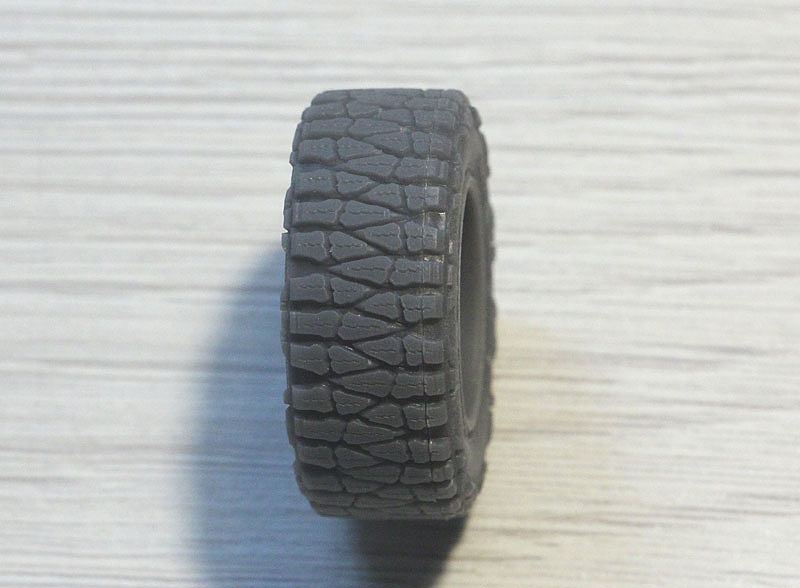 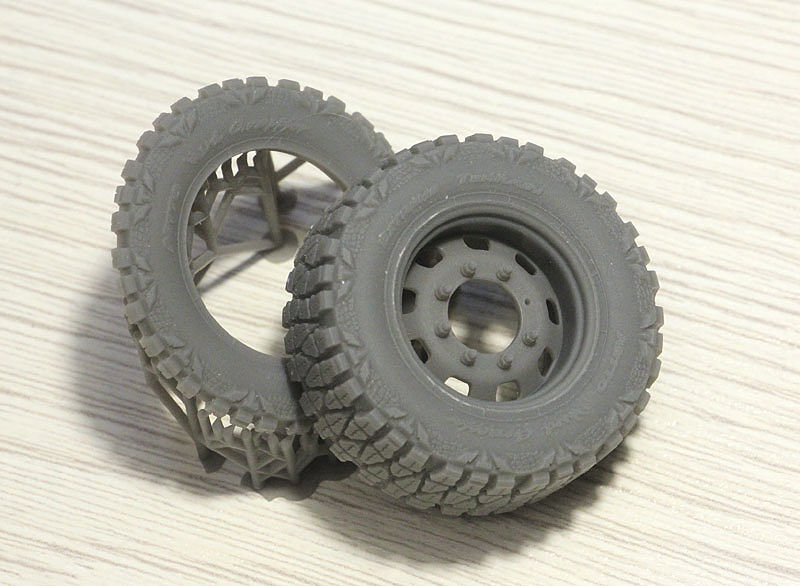
__________________
 "Precious and fragile things Needs special handling.." "Precious and fragile things Needs special handling.."
Last edited by Serioga; 01-01-2023 at 02:55 PM. |
|

|

|
|
03-11-2021, 02:13 PM
|
#17 | |
|
AF Regular
Thread starter
Join Date: Feb 2009
Location: Moscow, Russia
Posts: 294
Thanks: 5
Thanked 14 Times in 14 Posts
|
Re: Ironhide TopKick C4500
Thank you, Francis!
Hello, colleagues! It's time to start a cab. As I came to assemble a 1999 Silverado on a nearby topic, and Silverado & TopKick have the same bed, it is better to take measurements*from Silverado bed, when it not glued to frame. And before that it's better to make cab. Armed with PDF-files 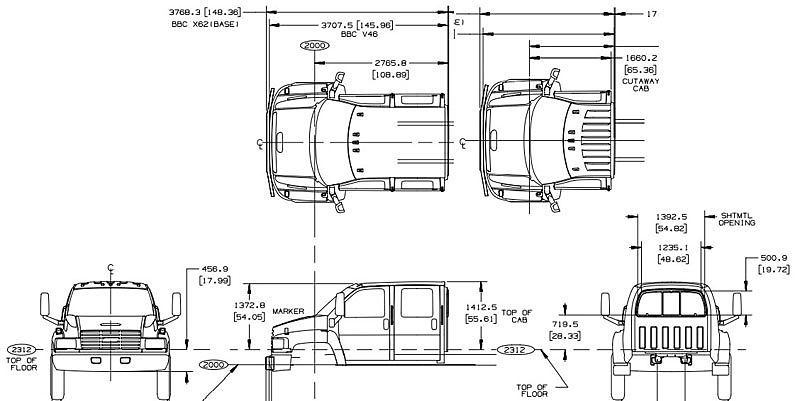 Cab have rounded sides... 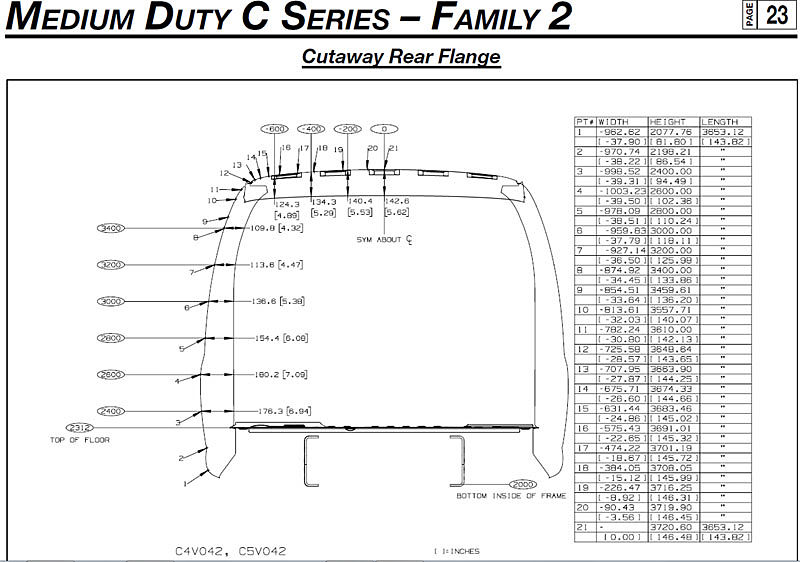 ...so I desided to cut them from vent tube 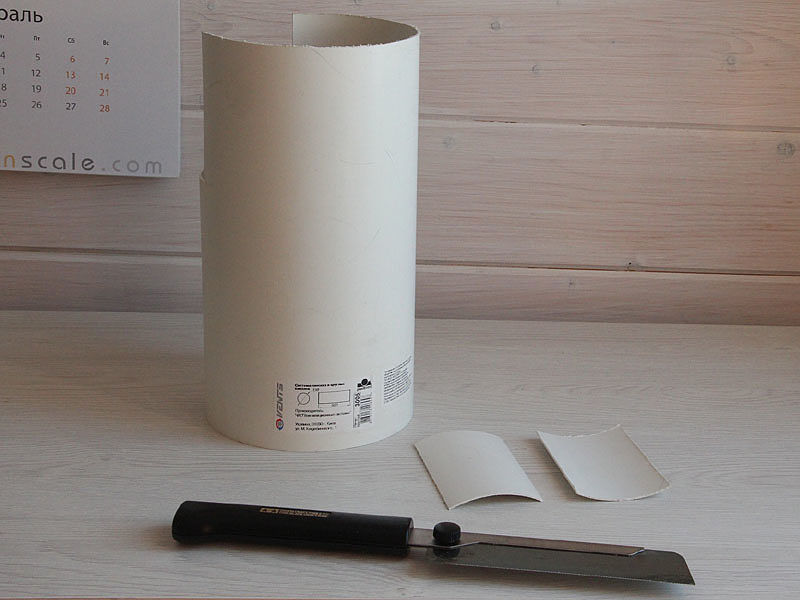 Printed drawings and glued on 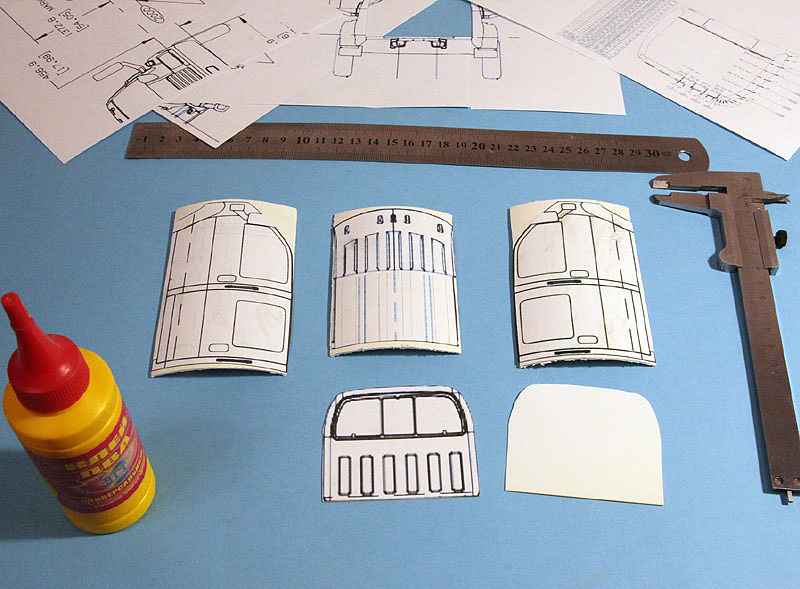 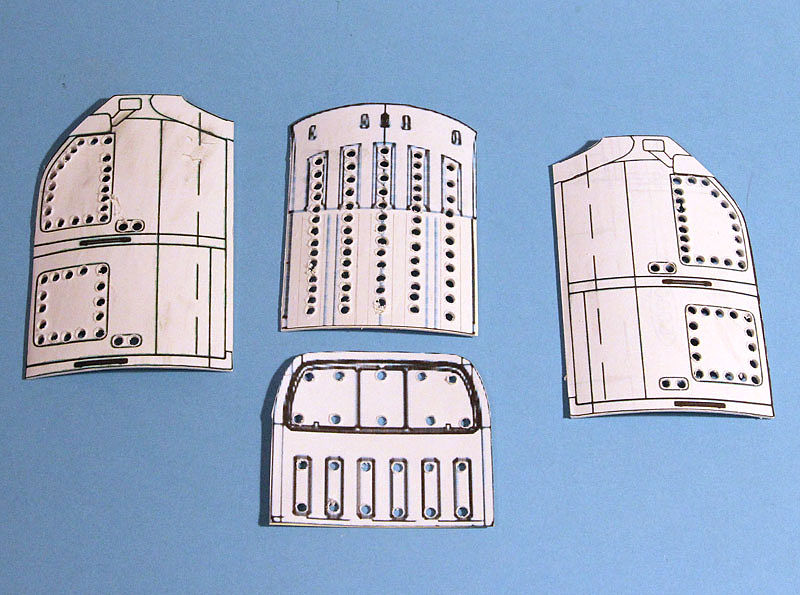 Back wall has difficult* shape. It has a step outwards to increase cab space 2,5 inch more. So I divided this element to 3 pieces. The first one, which is reflecting the back contour of a cab I cut from styrene. It was mistake. 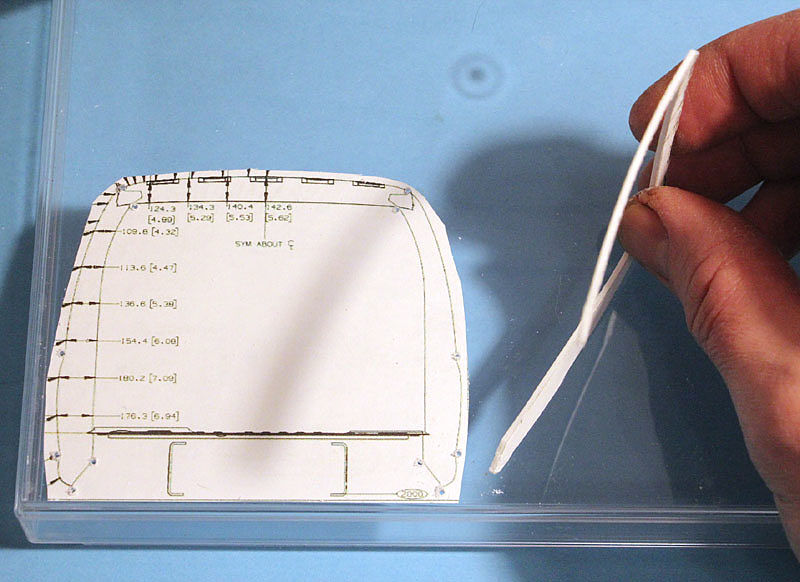 It don't keep*flat shape. *Next I tried transparent plastic* from candy box. 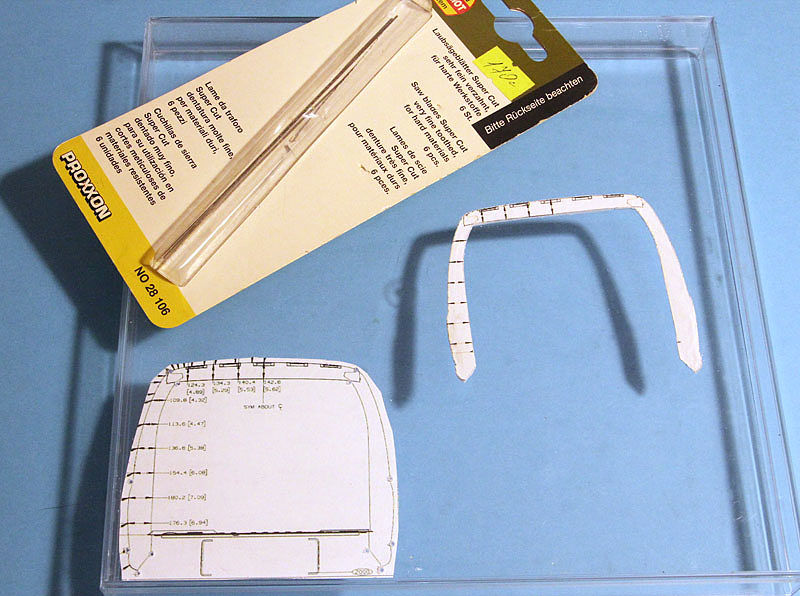 Here is how* looks pattern. 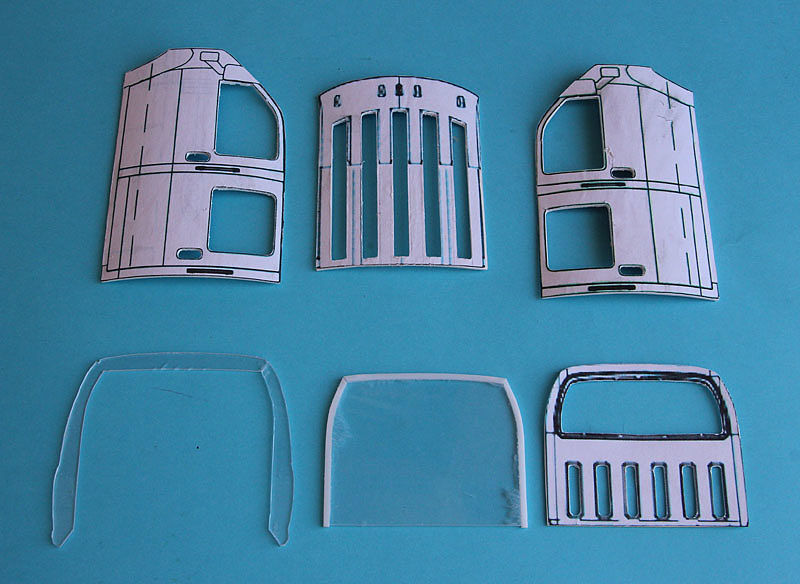 Cutouts are not ready jet Sandwiched back wall. 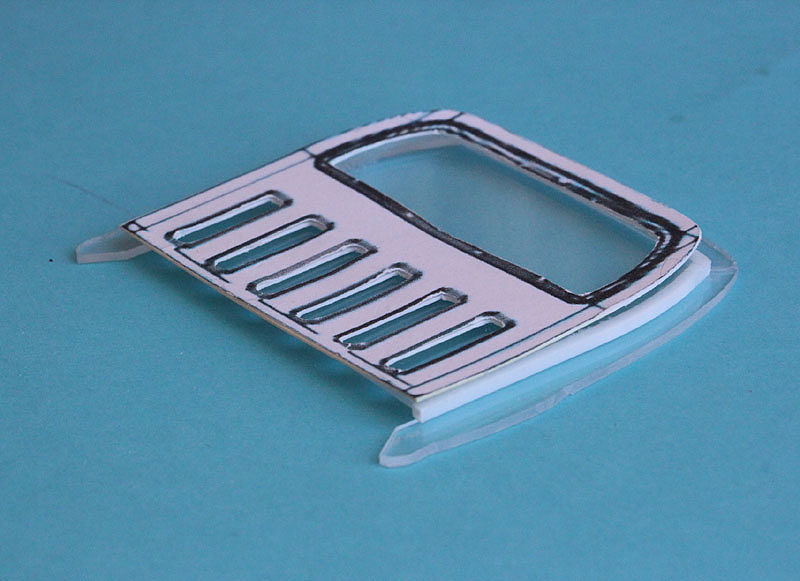 By the way, does anyone have a picture of 2000 TopKick's firewall? The only photo I could find was this 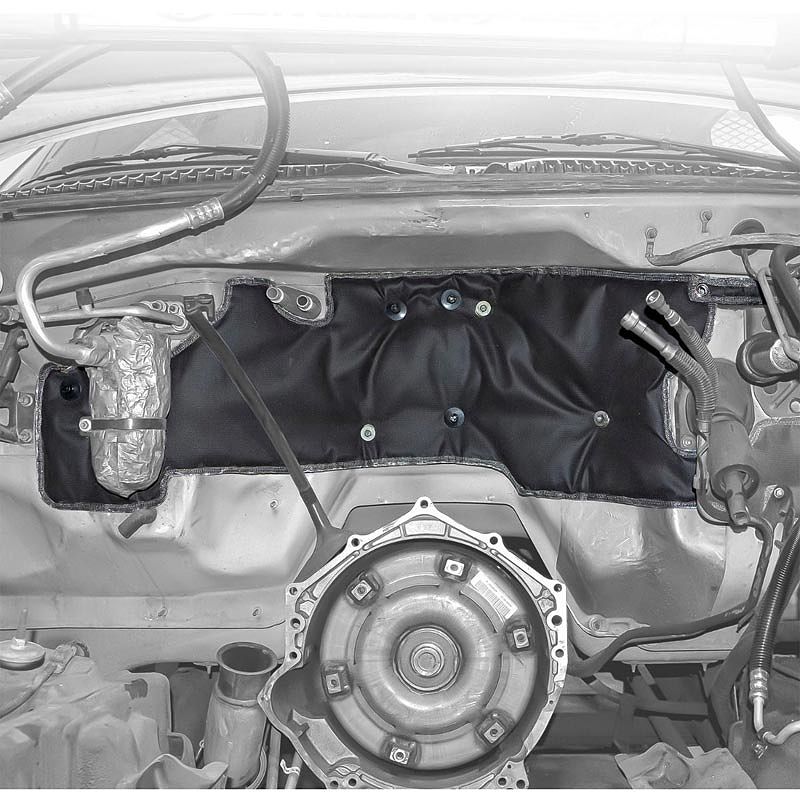 ...but I'm afraid it's 1990 TopKick.
__________________
"Precious and fragile things Needs special handling.."
|
|
|
|
|
|
08-03-2021, 03:30 PM
|
#18 | |
|
AF Regular
Thread starter
Join Date: Feb 2009
Location: Moscow, Russia
Posts: 294
Thanks: 5
Thanked 14 Times in 14 Posts
|
Re: Ironhide TopKick C4500
"Hi, Gents!" (c)
Have found some time to scratch more plastic. Here is roof*sandwich* 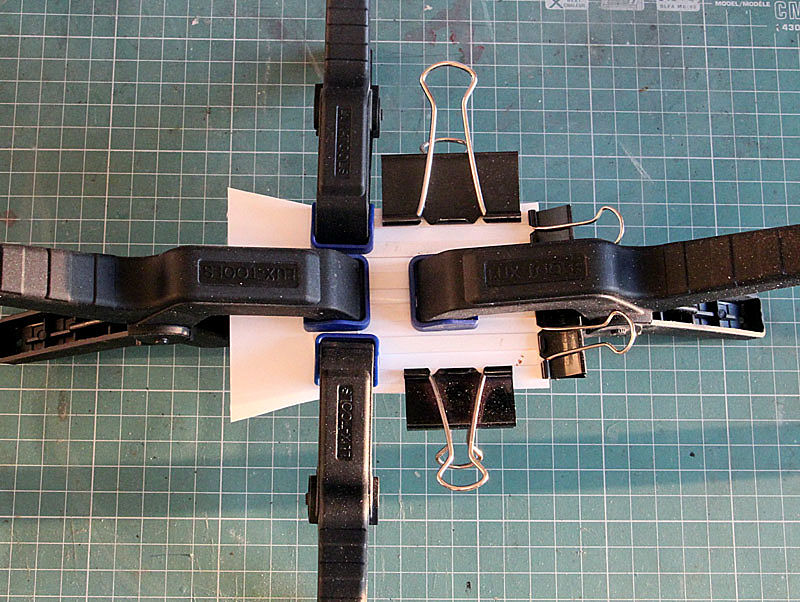 .. and back wall 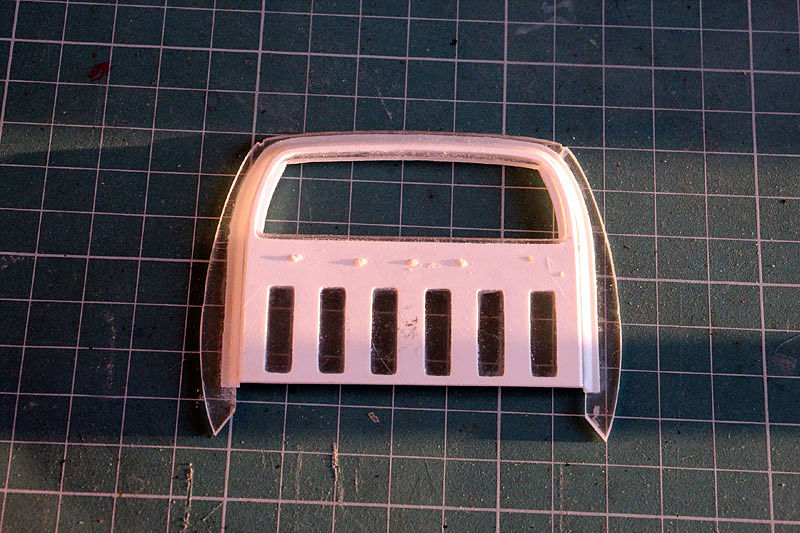 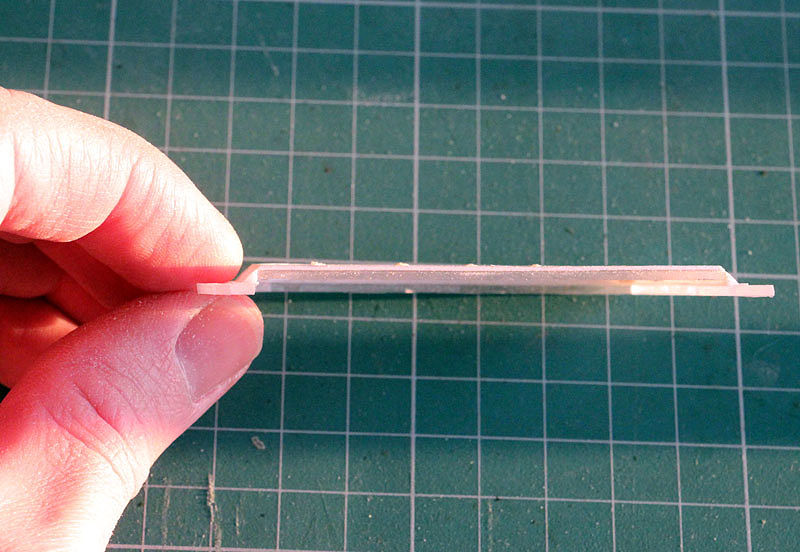 And moving forward I've found difficulties: the roof**bends forward just behind the stamping and because it curves in two planes, I had to make a cutout 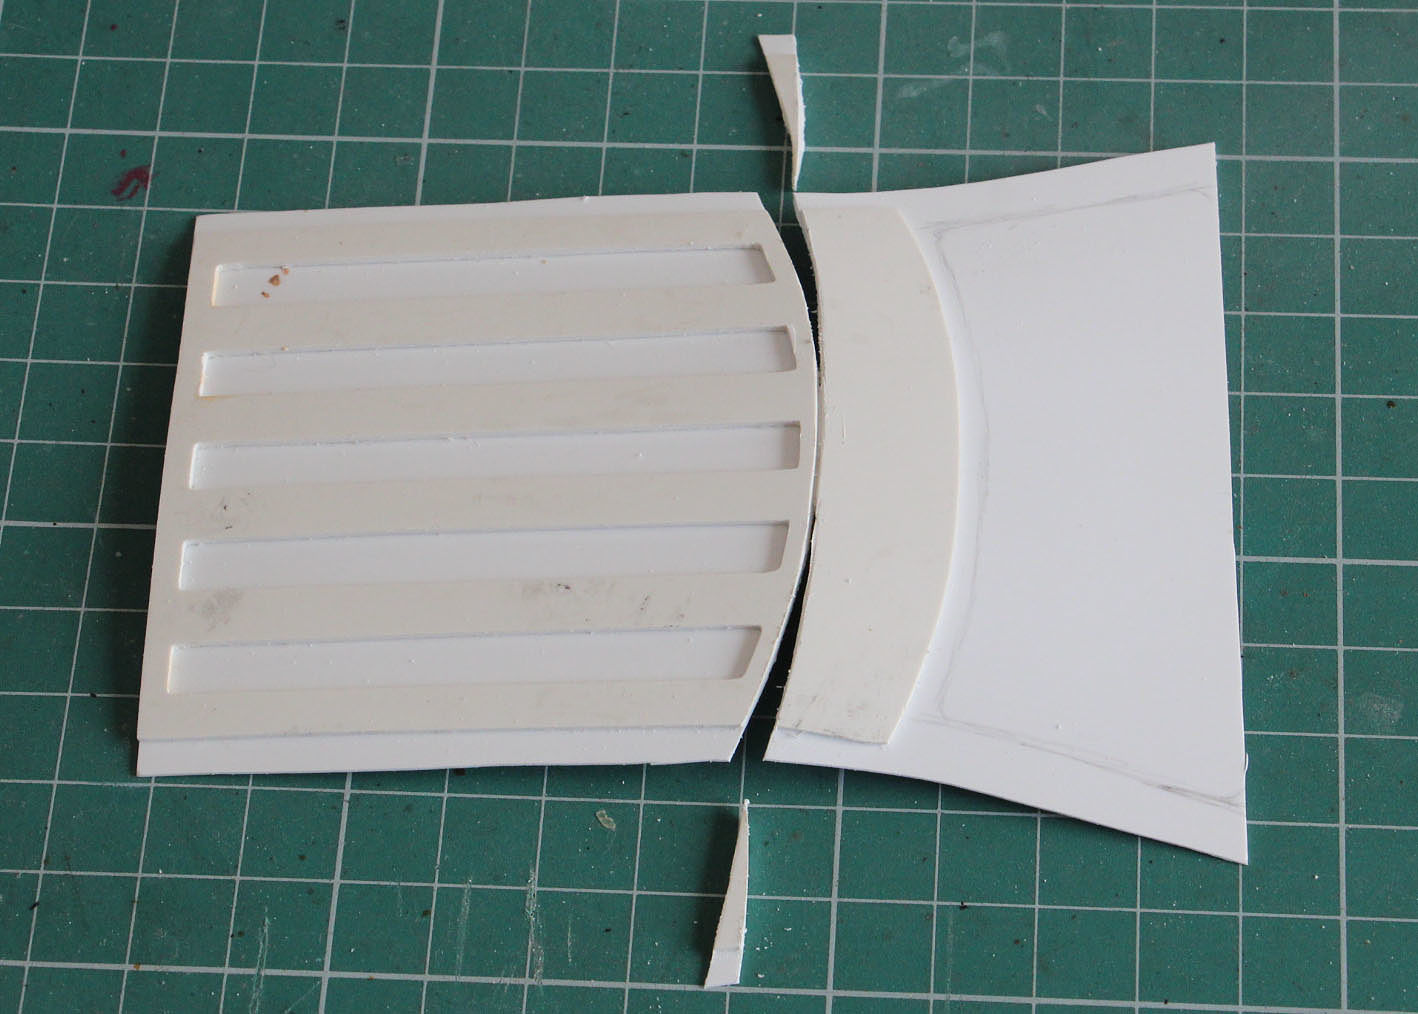 But this solve the probleme partly.* 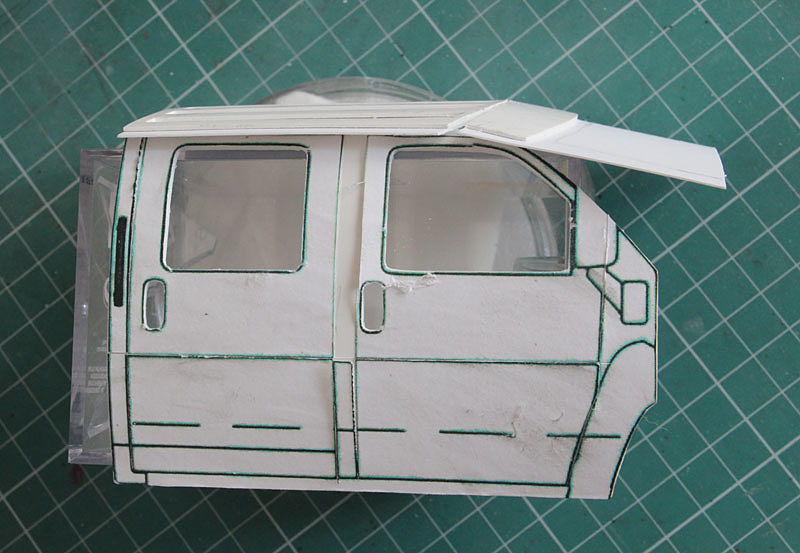 Roof bending should be smooth and have bigger angle. So I inserted 1mm square rod between layers.* 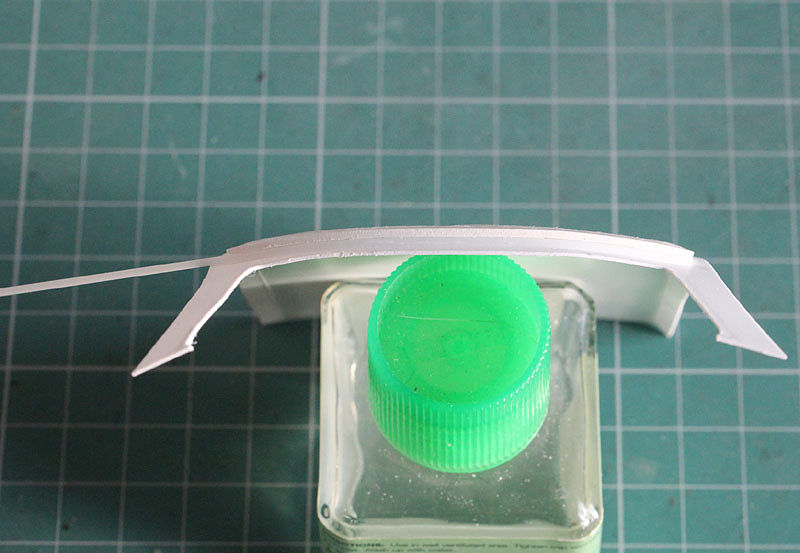 different view 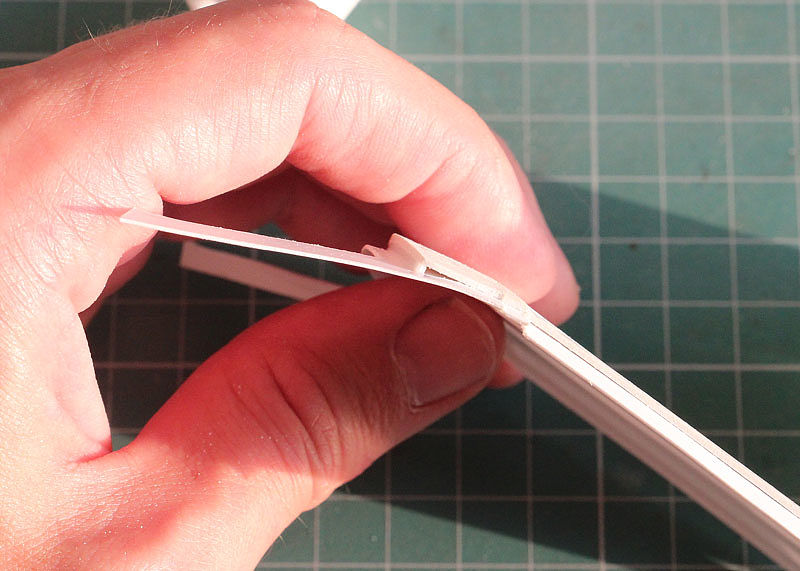 Also right* stand was accidently cut in process (marked by arrow) and glued back/*  * *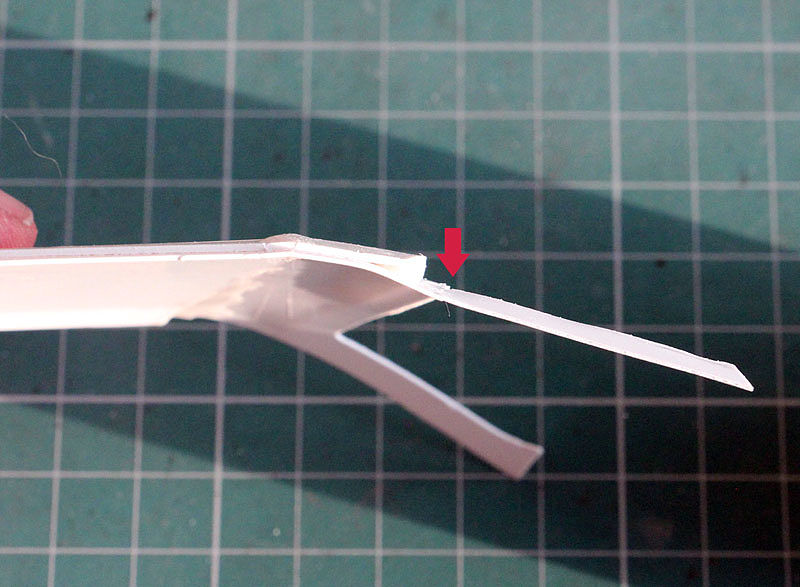 Final stage so far, but* stands should be bended more.  I pulled myself together and made a slipway 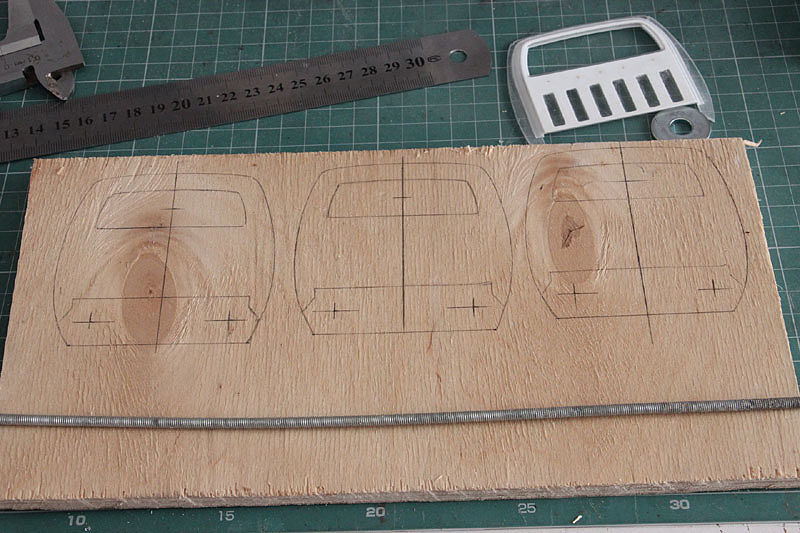 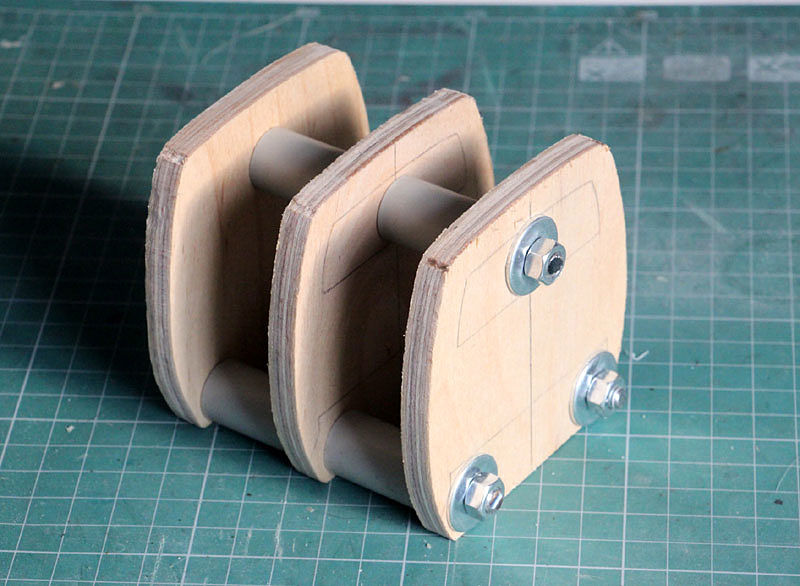 Further upgrade 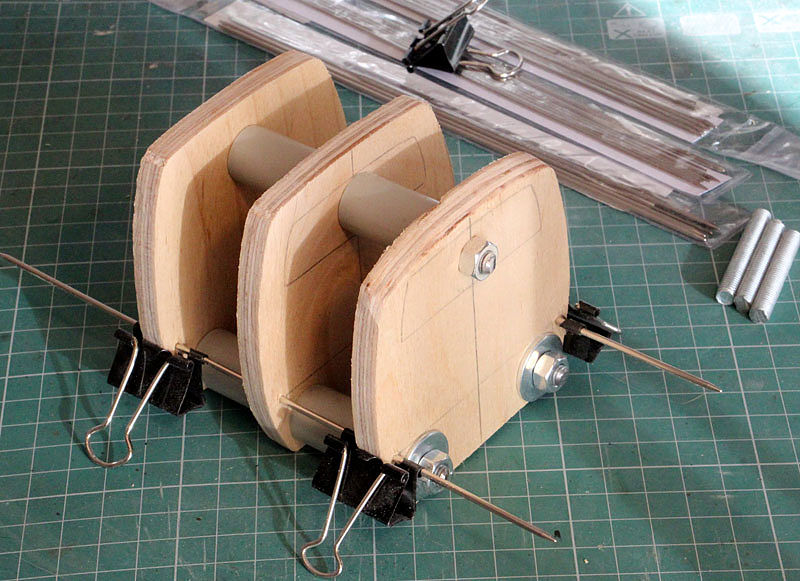  Well, fitting 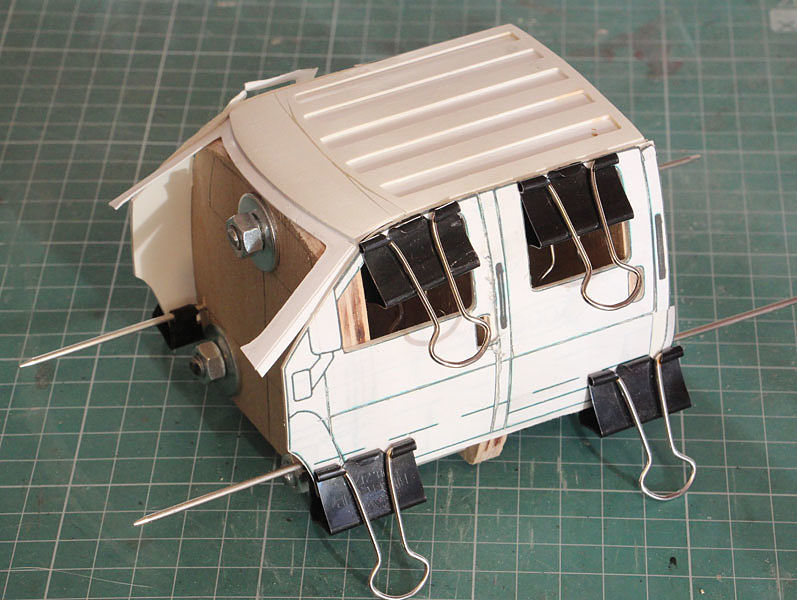 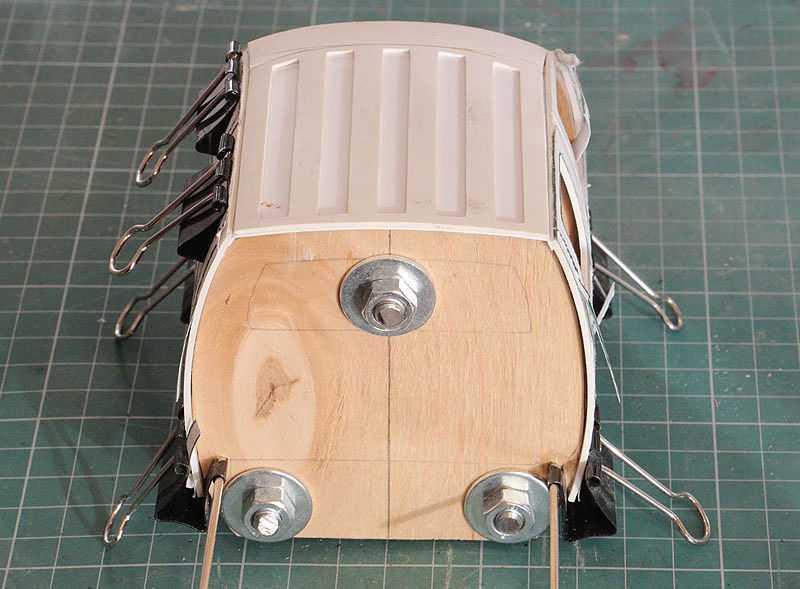 Thank you* for viewing!
__________________
"Precious and fragile things Needs special handling.."
|
|
|
|
|
|
08-31-2021, 09:02 PM
|
#19 | |
|
AF Moderator
 
Join Date: Sep 2002
Location: Fort Worth, Texas
Posts: 3,246
Thanks: 31
Thanked 314 Times in 241 Posts
|
Re: Ironhide TopKick C4500
Wow! That is some scratchbuilding!
Very cool.
__________________
The client is not always right. - Enzo Ferrari ItalianHorses.net    
|
|
|
|
|
|
11-23-2021, 10:08 AM
|
#20 | |
|
AF Regular
Thread starter
Join Date: Feb 2009
Location: Moscow, Russia
Posts: 294
Thanks: 5
Thanked 14 Times in 14 Posts
|
Re: Ironhide TopKick C4500
Thank you, Alex!
Let's continue! I decided that it is easier to process panels individually than together. The stiffness is greater. I sanded off the excess*plastic on the roof. 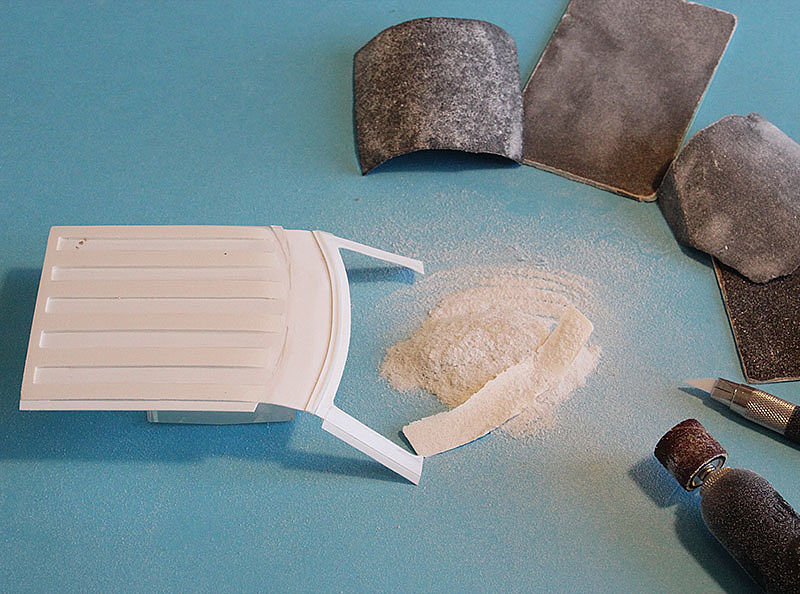 The front side of the roof had to be lifted with putty. 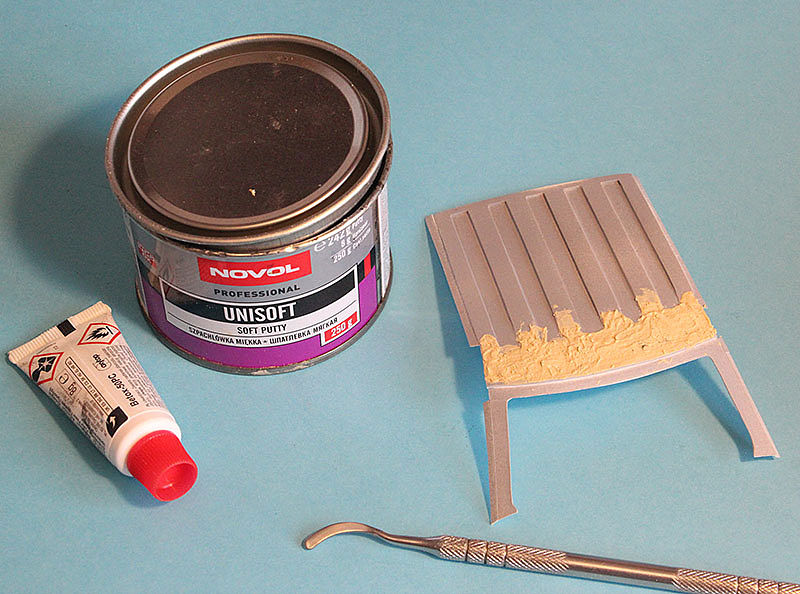 I'm slowly processing it, but this is not the final yet  I took care of the sidewalls. I started making stamping lines. The upper one: 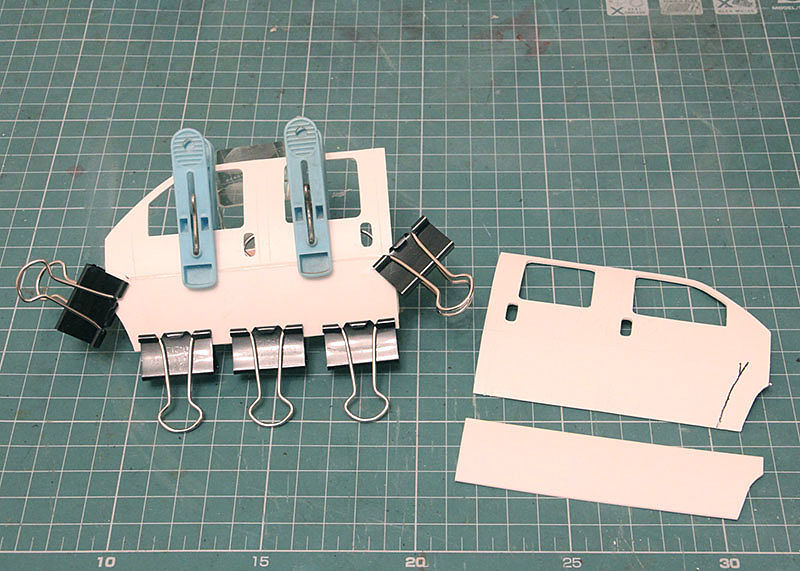 ... bottom one 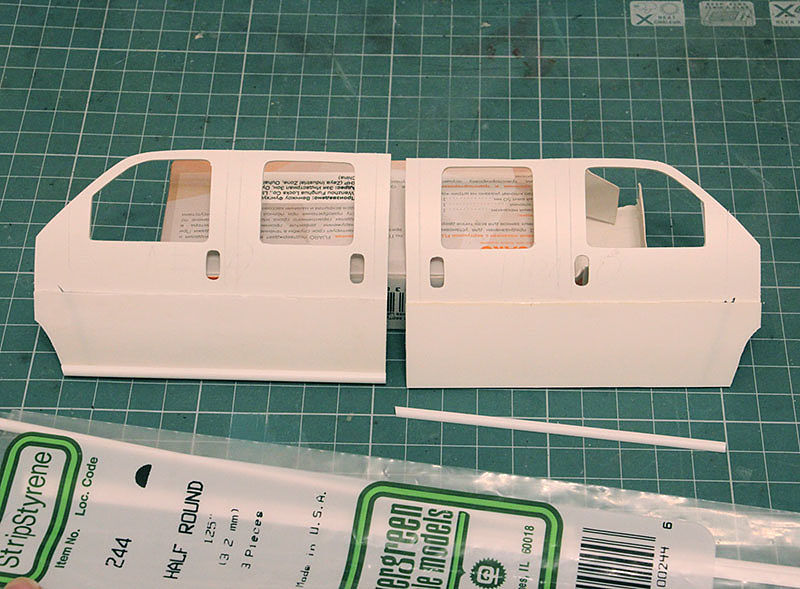 So - it 's clearer 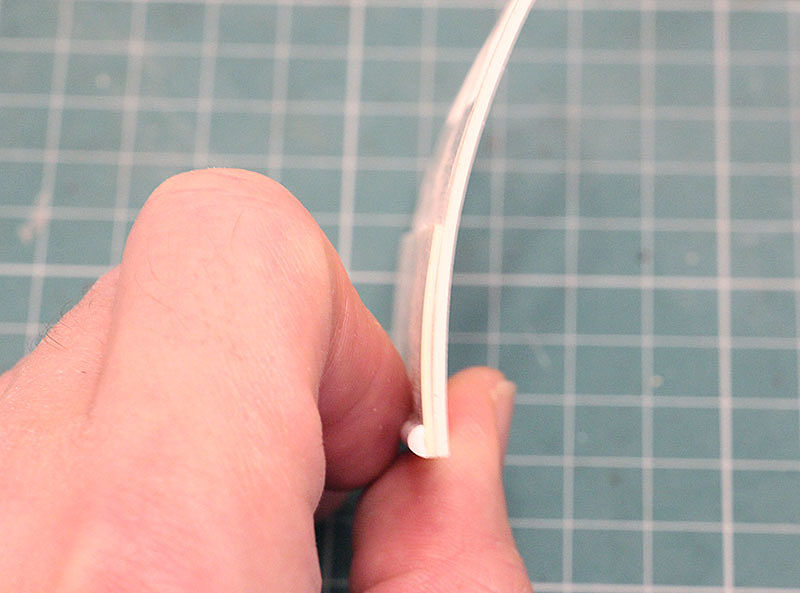 Next - putty in the right places, but first - are masks   Then the most dreary thing for me: putty, sanding, putty, sanding*...* Thank you for watching!
__________________
"Precious and fragile things Needs special handling.."
|
|
|
|
|
|
03-19-2022, 11:14 AM
|
#21 | |
|
AF Regular
Thread starter
Join Date: Feb 2009
Location: Moscow, Russia
Posts: 294
Thanks: 5
Thanked 14 Times in 14 Posts
|
Re: Ironhide TopKick C4500
Hello, Friends!
There is nothing to show about plastic today, but I will show the first modest experience in 3D modeling. Front hub 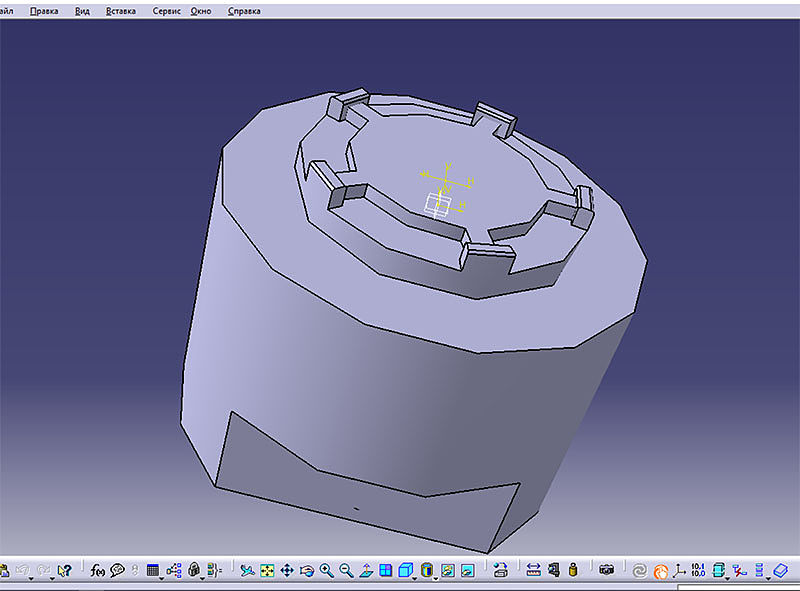 Many thanks to Mikhail aka Stratos75! He has drawed the cap. 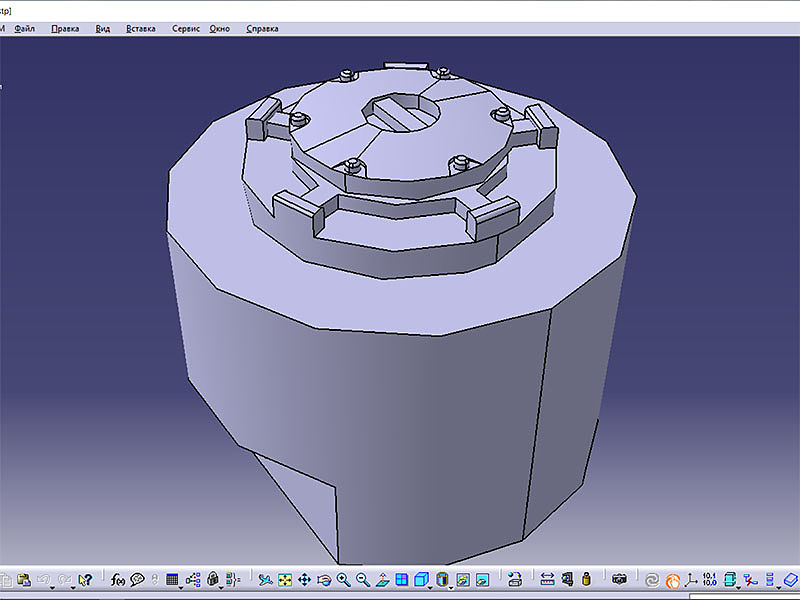 It was already faster with the rear hub 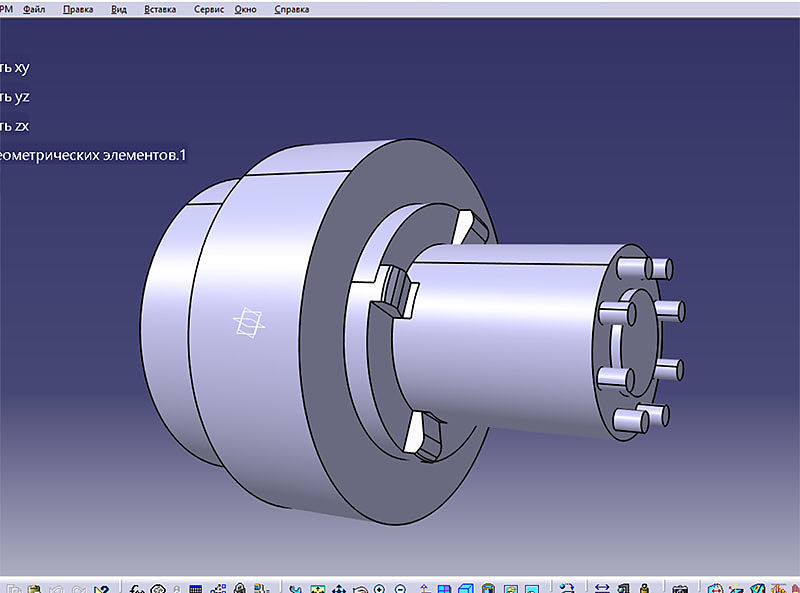 I'm slowly getting into progress. I should learn a little more and to may print out something more serious :dance:
__________________
"Precious and fragile things Needs special handling.."
Last edited by Serioga; 03-31-2022 at 04:41 AM. |
|
|
|
|
|
03-19-2022, 09:54 PM
|
#22 | |
|
AF Enthusiast

Join Date: Jun 2005
Location: Red Lake, Ontario
Posts: 2,519
Thanks: 3
Thanked 28 Times in 28 Posts

|
Re: Ironhide TopKick C4500
Wow, this is incredible and fun. Keep the great work.
__________________
  
|
|
|
|
|
|
03-29-2022, 11:01 AM
|
#23 | |
|
AF Regular
Thread starter
Join Date: Feb 2009
Location: Moscow, Russia
Posts: 294
Thanks: 5
Thanked 14 Times in 14 Posts
|
Re: Ironhide TopKick C4500
Hello, Friends!
It's time to upgrade. I have sanded trim lines in the draft version  Yes, I noticed that gutters run along the upper edges of the roof... 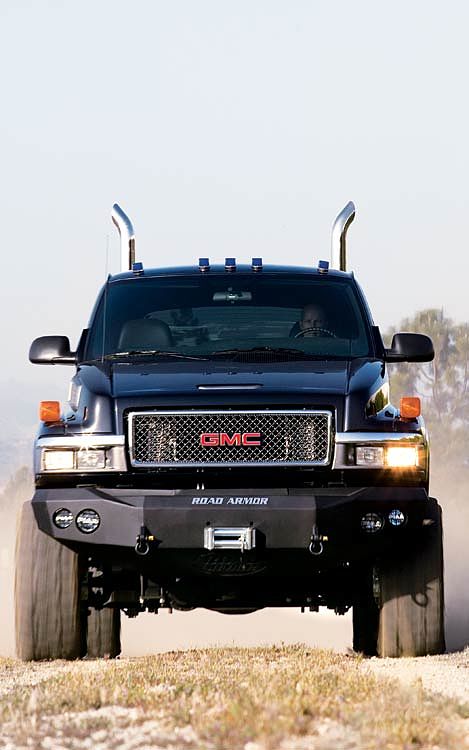 ...decided to reproduce them. Cut "skis" out of brass  Something like this they could look like:  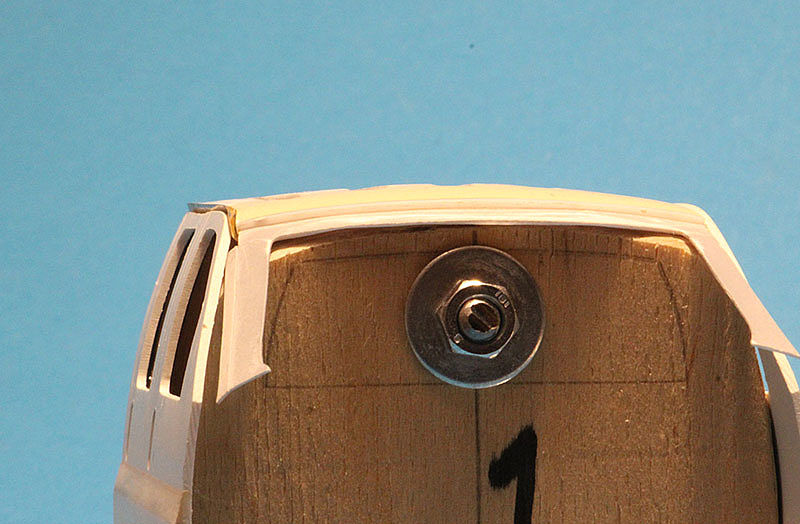 And here's the reason for the break: 5 or 6 times I glued the side panels. I was never able to glue them perfectly, and even squeeze a piece of brass between the roof and the sidewall *** 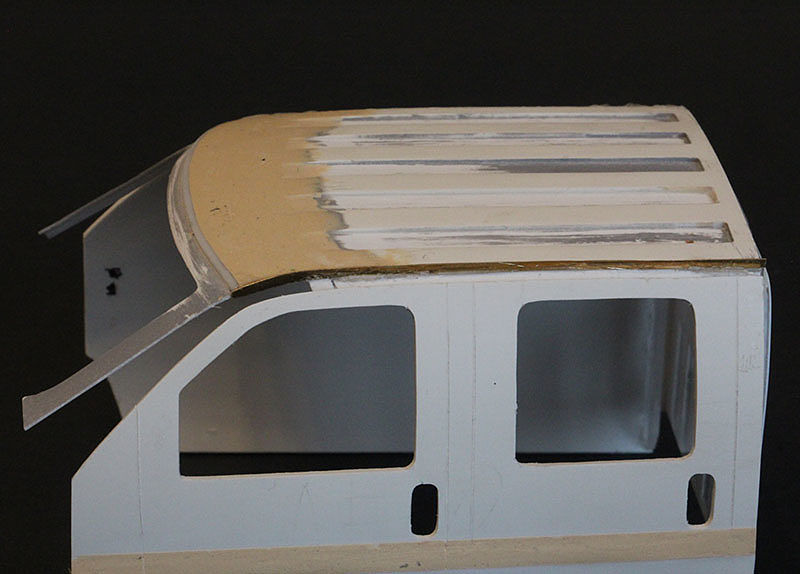 In general, "skiing" has been postponed for now. Then I'll stick it on...from Evergreen. I took care of the front axle. The donor Ford has a narrower track than the GMC. Front axle*with rotary fists is about 64mm, and you need about 75. 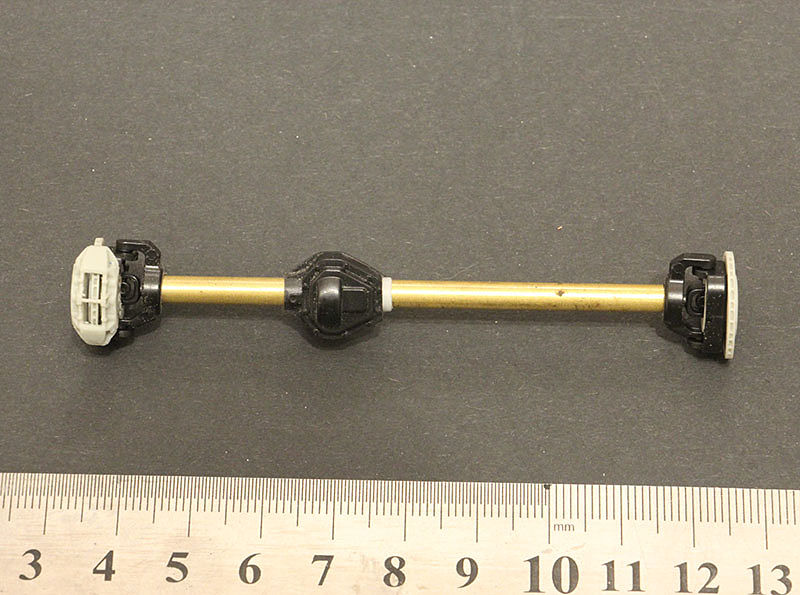 I cut off the plastic axles from the differencial, replaced them with brass. It's harder.  Drilling the differential was difficult. One half inside is a pipe, but of a smaller diameter than necessary. 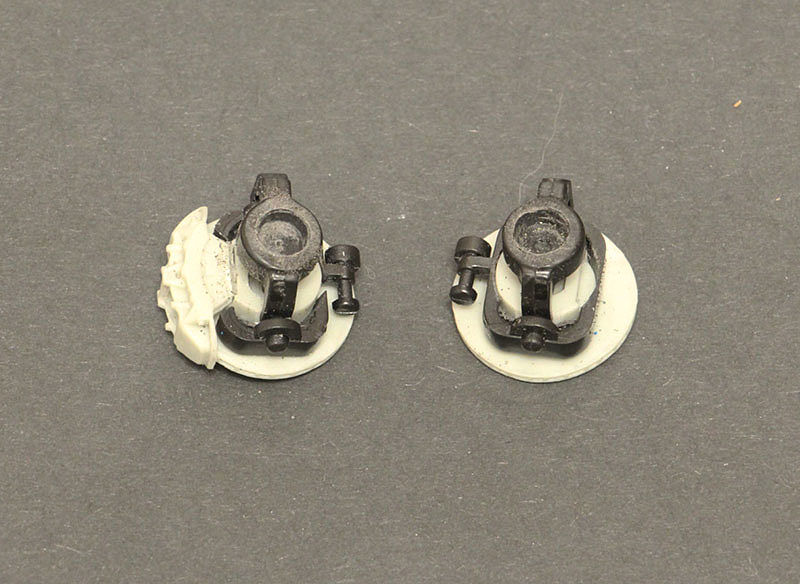 The rotary knuckles also had to be drilled to accept the brass pipe. First with drills, and then, at the edges, with an end mill. Yes, the reciprocal parts of the fists were also drilled and cut to accept the brakes. The right one hasn't been cut yet 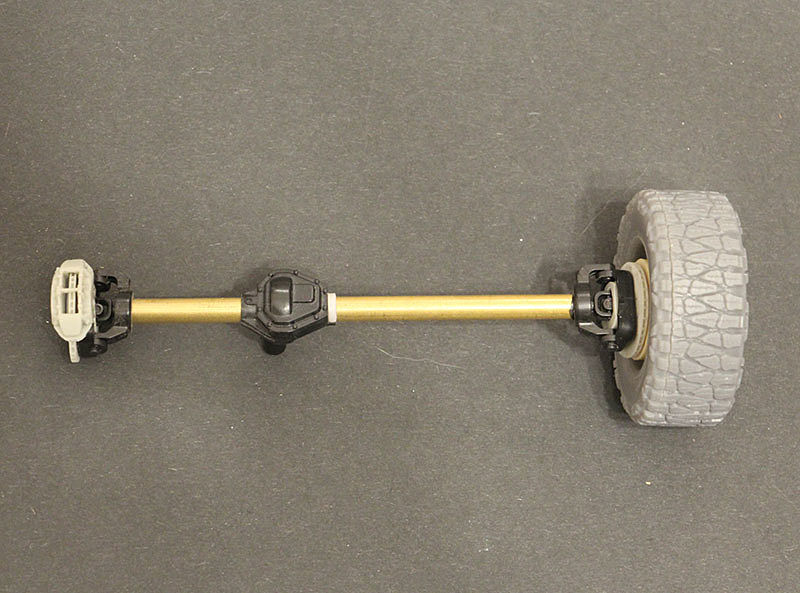 I tried on the wheel on the cargo hub. There was a reason I start learning 3D. I have showed the result last time. 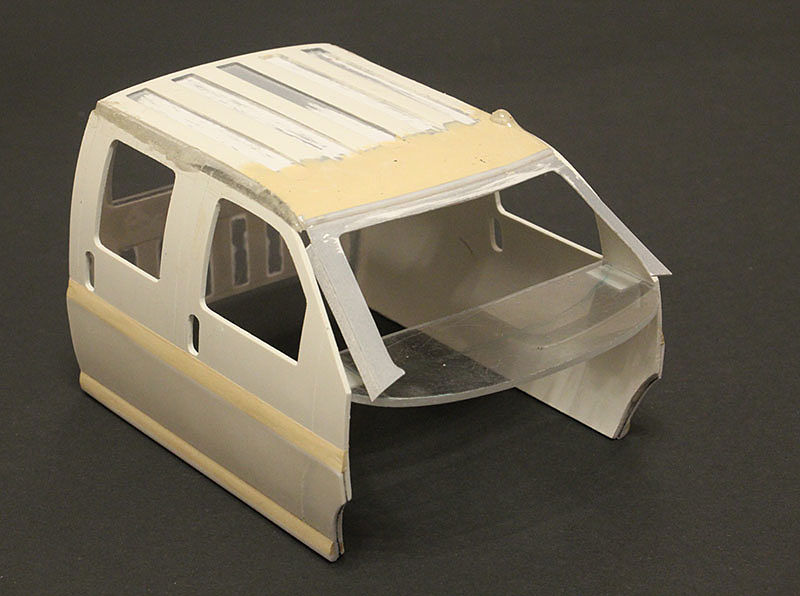 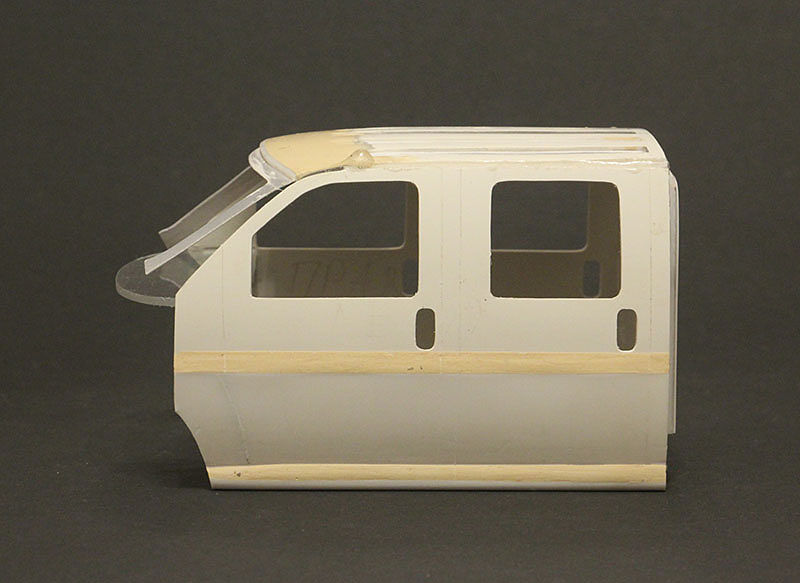 The front of the cabin lacks rigidity. Pasted sheet plastic for now 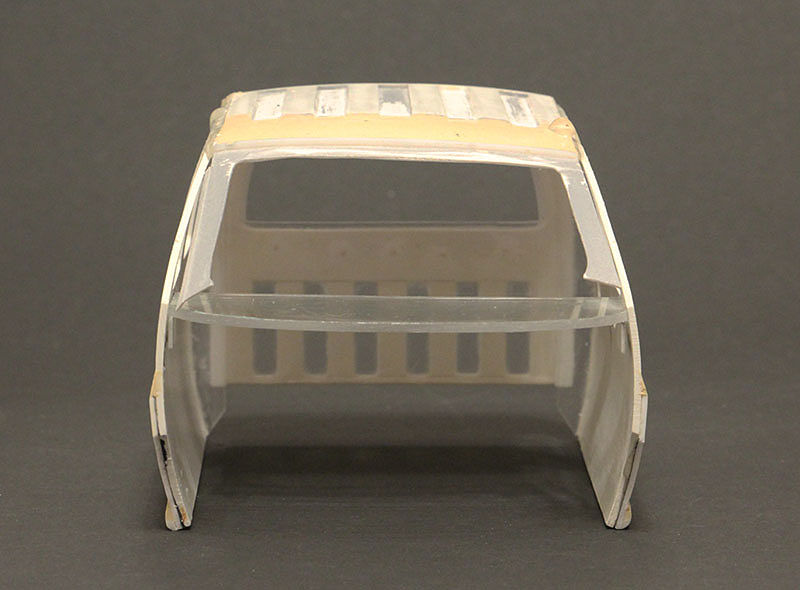 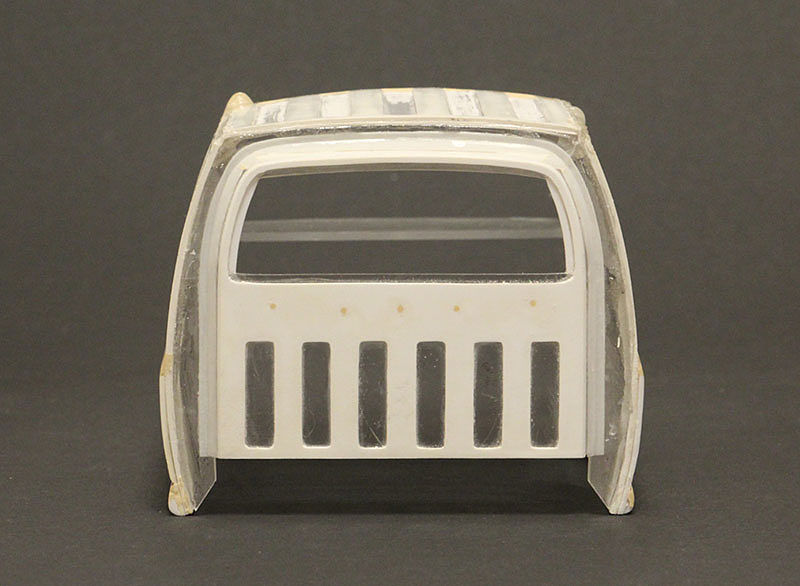 Only in the photo I saw that the front of the roof on the left is lower than on the right. I'll have to re-glue it again** Enjoy watching!*
__________________
"Precious and fragile things Needs special handling.."
|
|
|
|
|
|
11-29-2022, 01:50 PM
|
#24 | |
|
AF Regular
Thread starter
Join Date: Feb 2009
Location: Moscow, Russia
Posts: 294
Thanks: 5
Thanked 14 Times in 14 Posts
|
Re: Ironhide TopKick C4500
How d'you!
There is nothing to show about plastic today, but I will show the first modest experience in 3D modeling. Front hub Many thanks to Mikhail aka Stratos75! He has drawed the cap. It was already faster with the rear hub I'm slowly getting into progress. I should learn a little more and to may print out something more serious* :dance: 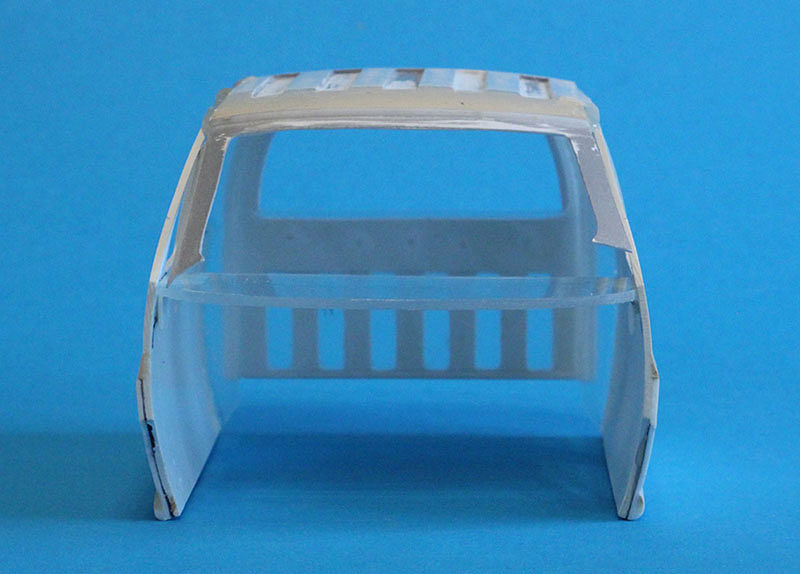 Re-glued the front left upper corner. It became even. It's time to make the fire wall. I have finally found a picture of the most "stripped" front wall of a cab  Started from styrene: 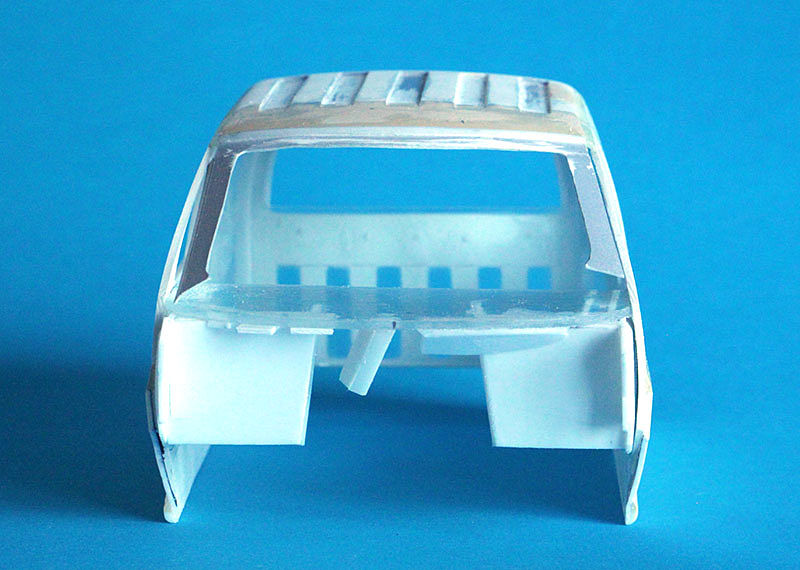 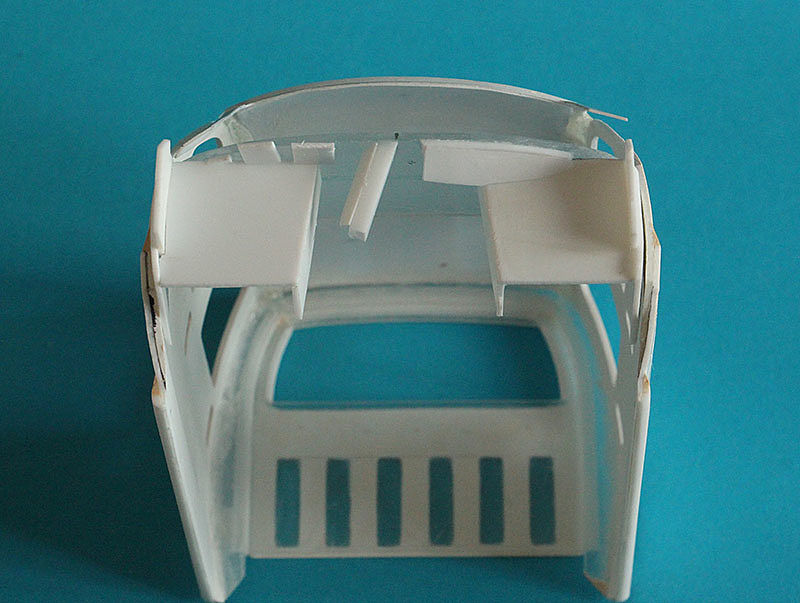 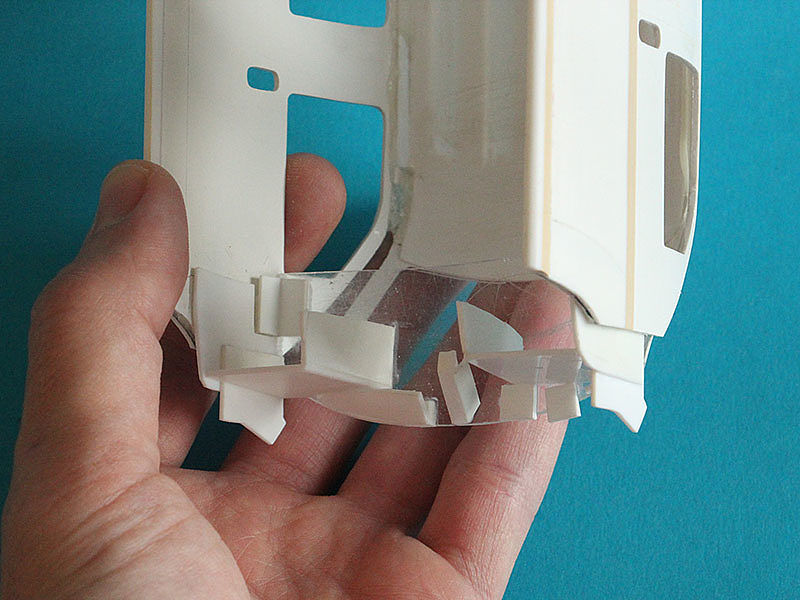 Next - putty 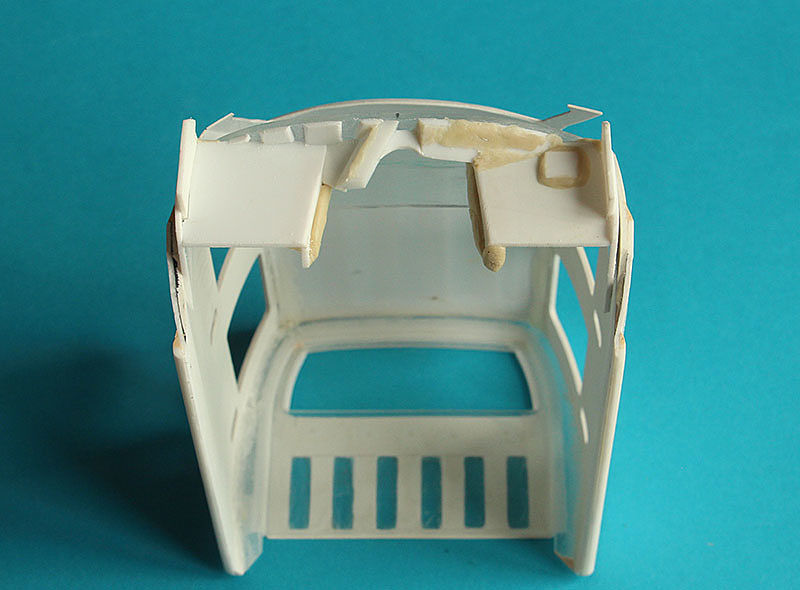 The floor is made of "candy" plastic 1.5 mm  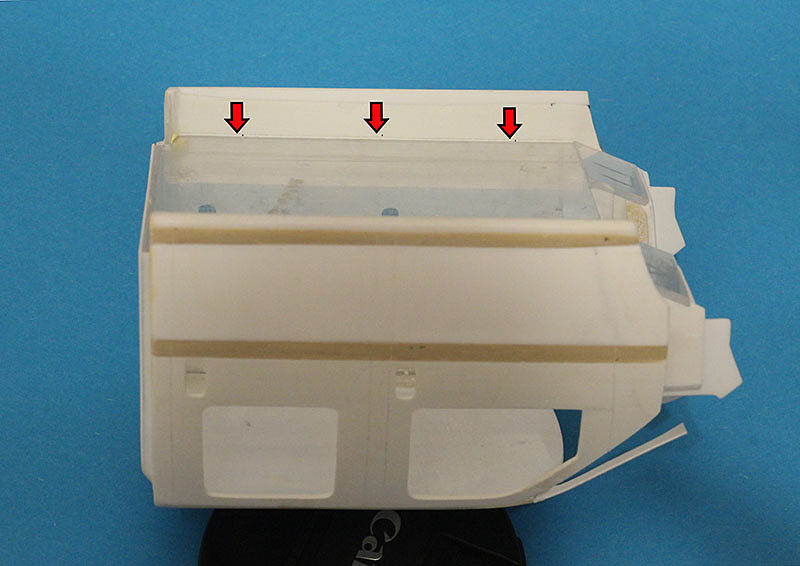 It will be further developed (however, like everything else) 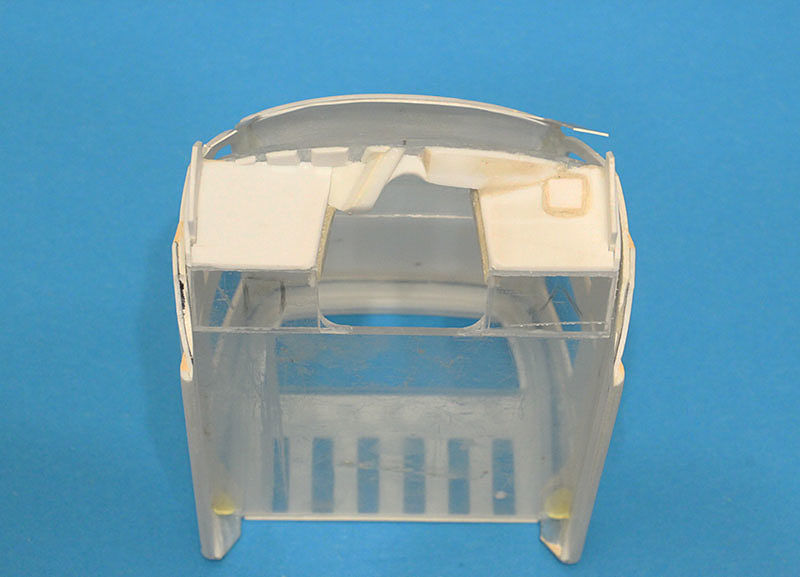 Molded a plastic pad under the wipers. It's still an intermediate option. 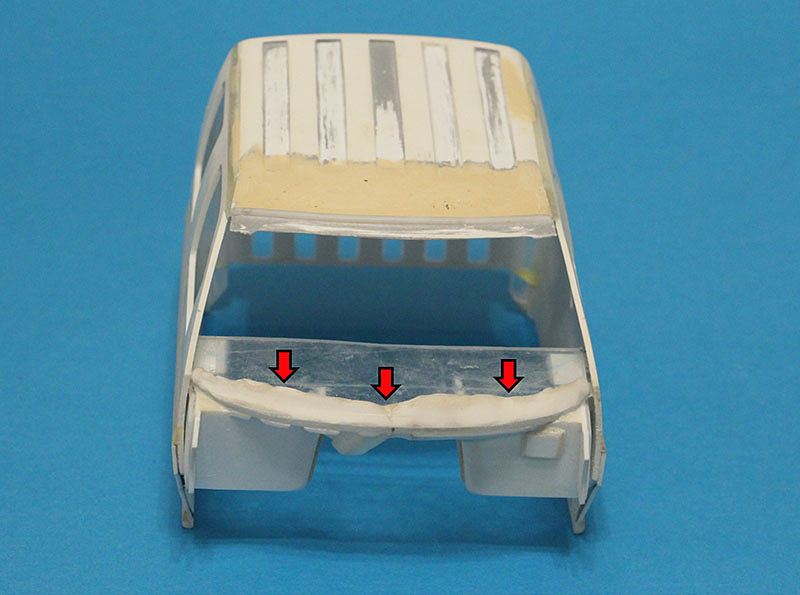 And I tried on a long-prepared etching 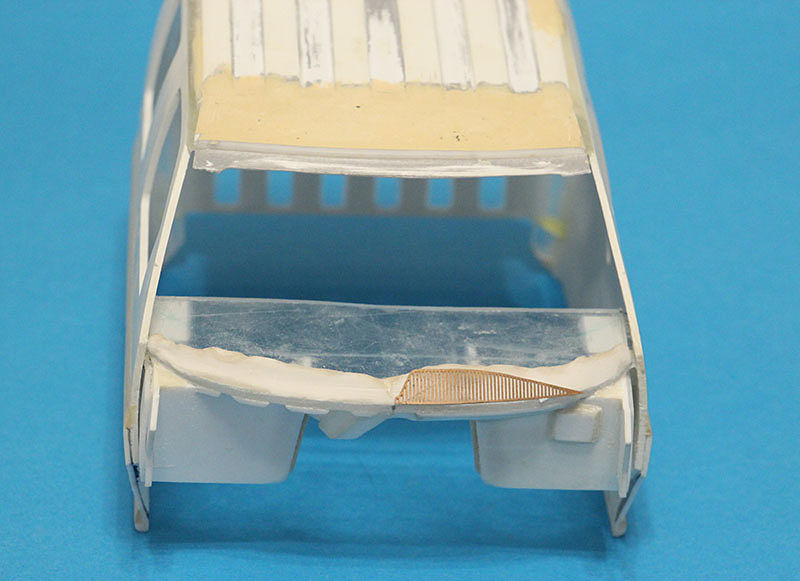 __________________________________________________ __________ The working season is over and finally I can get in modeling, my precious! I remembered that there is such a project where it's time to put something on wheels. I started with axels. Shortened both about 10 millimeters. 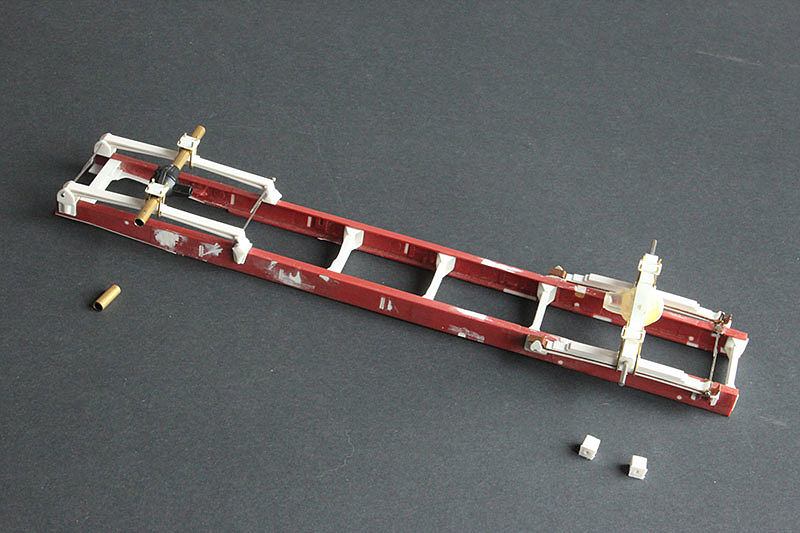 From knitting needles bought earlier, I cut the spindles. The rear one is longer. The rear hubs and brake discs will sit on it. 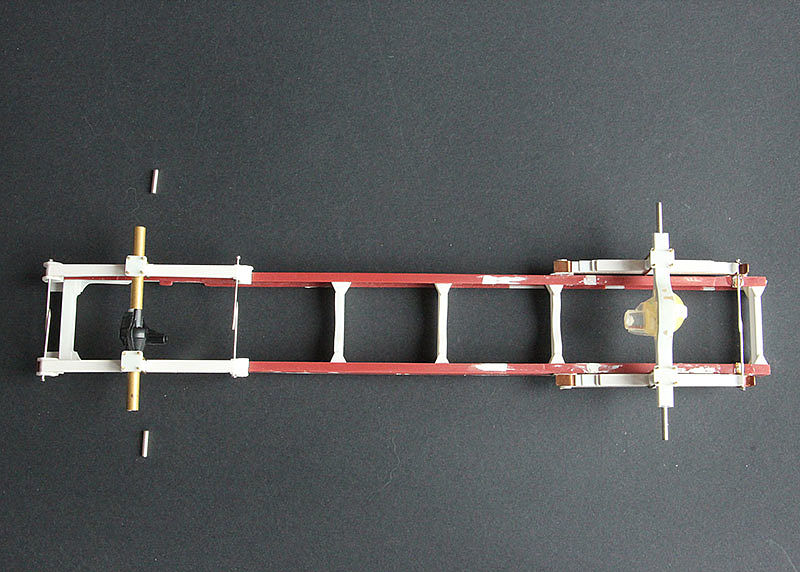 And the front ones are very short. Actually, only the hubs and disks fit on them. Here, by the way, is the proof.  The holes in the brake discs from Plamoz (and, accordingly, in the hubs) are about 2.3 mm, and there were no such spokes in the arsenal. It is obvious that the brakes with wheels will stagger  However, with the help of adhesive tape, you can glue anything! In this case - electrical tape. One layer was enough.  I made new steering rods. Ford's one were too large and in wrong place for GMC. 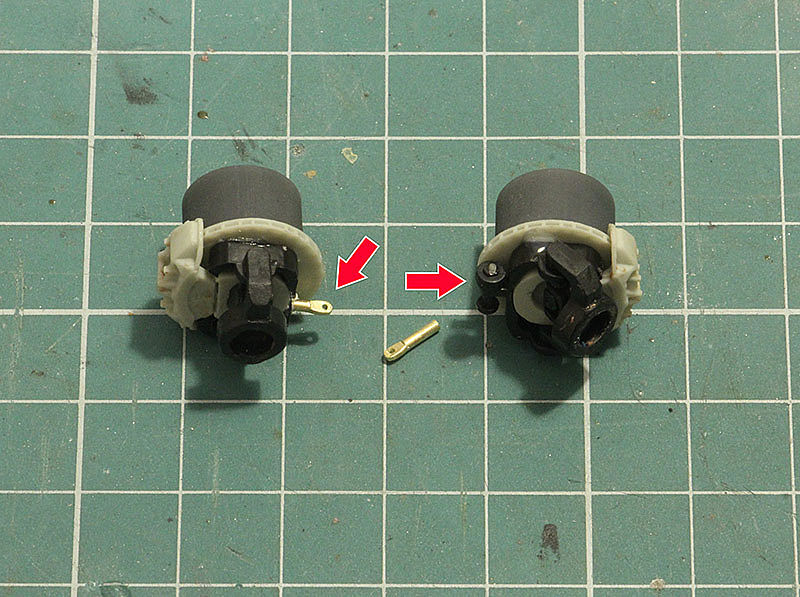 Finally - test fitting! 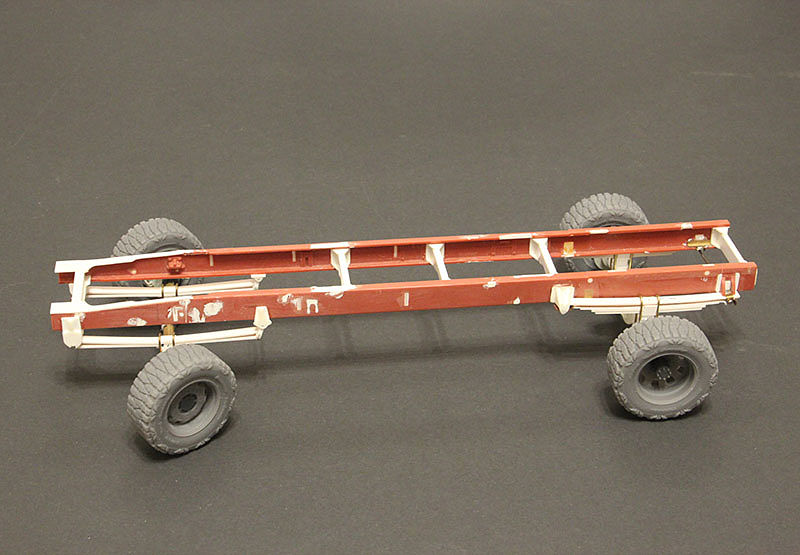  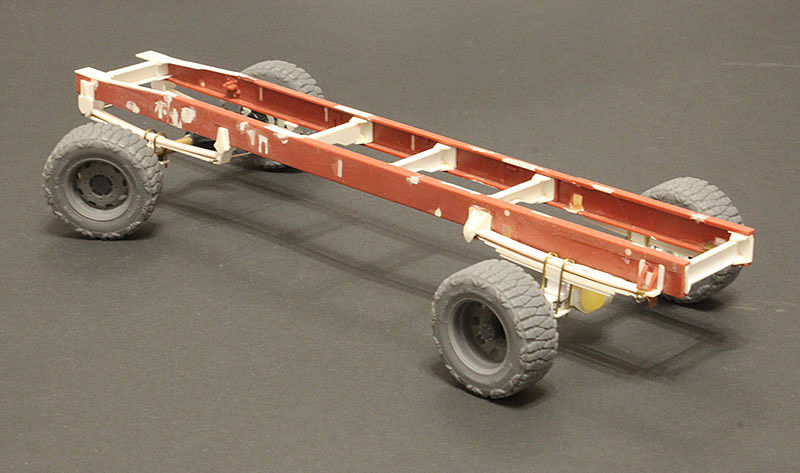 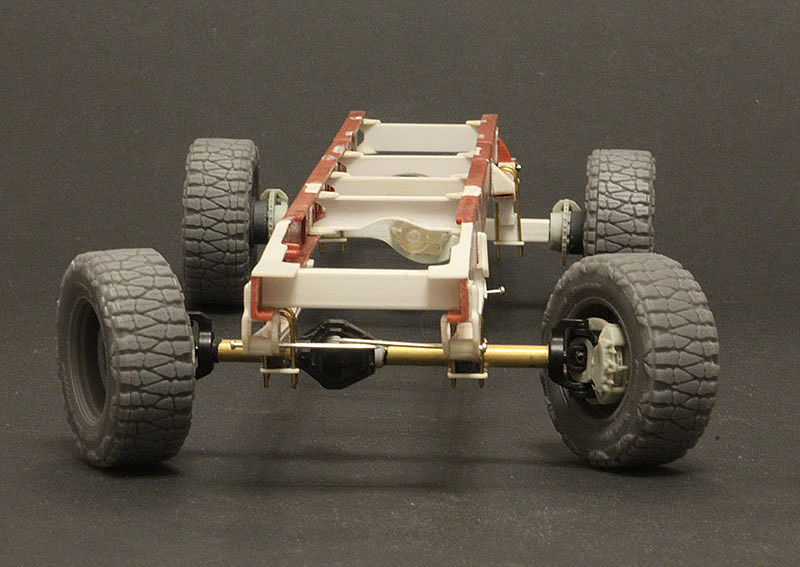 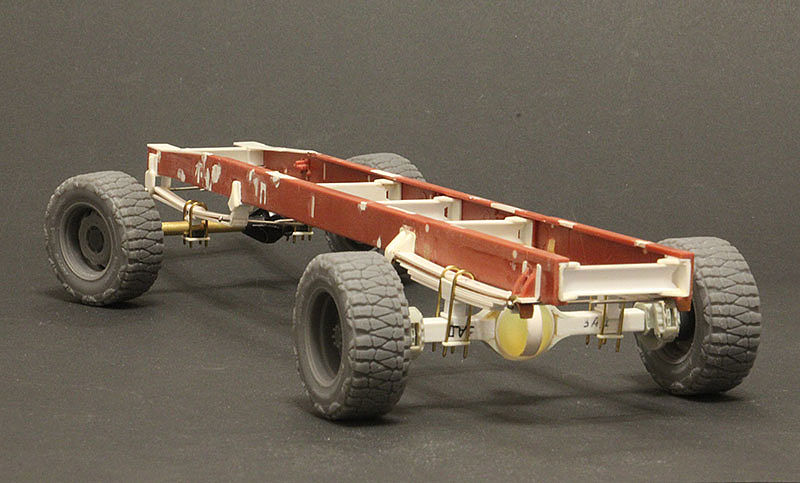 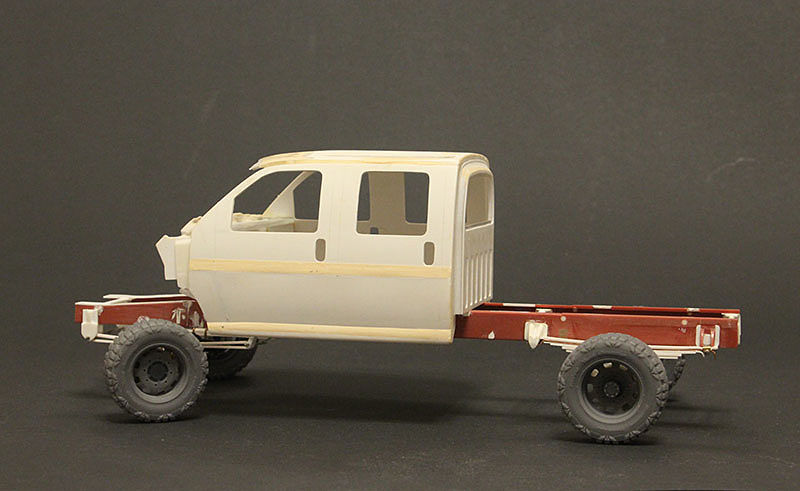 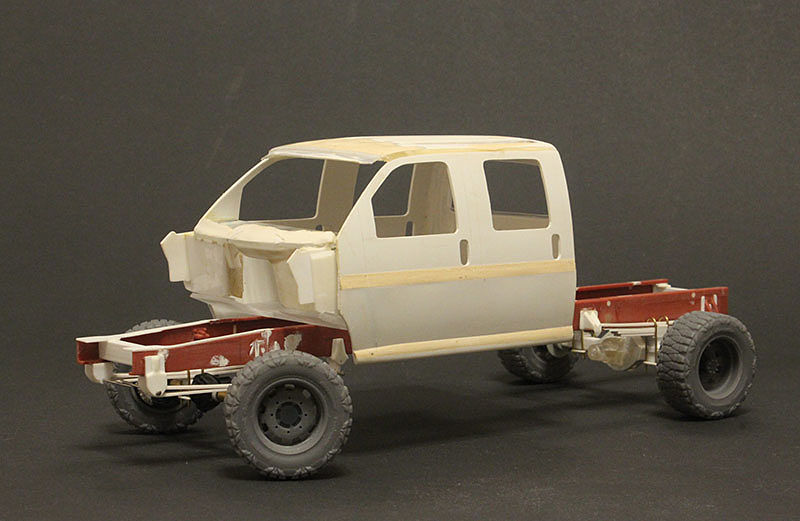 Enjoy watching! Feedback is welcome! :bye:
__________________
"Precious and fragile things Needs special handling.."
|
|
|
|
|
|
11-30-2022, 08:24 AM
|
#25 | |
|
AF Regular
Thread starter
Join Date: Feb 2009
Location: Moscow, Russia
Posts: 294
Thanks: 5
Thanked 14 Times in 14 Posts
|
Re: Ironhide TopKick C4500
Greetings!
To catch up to yesterday: I soldered and put a steering link, and also made a blank cover over the clutch. It will also be necessary to process the edges . 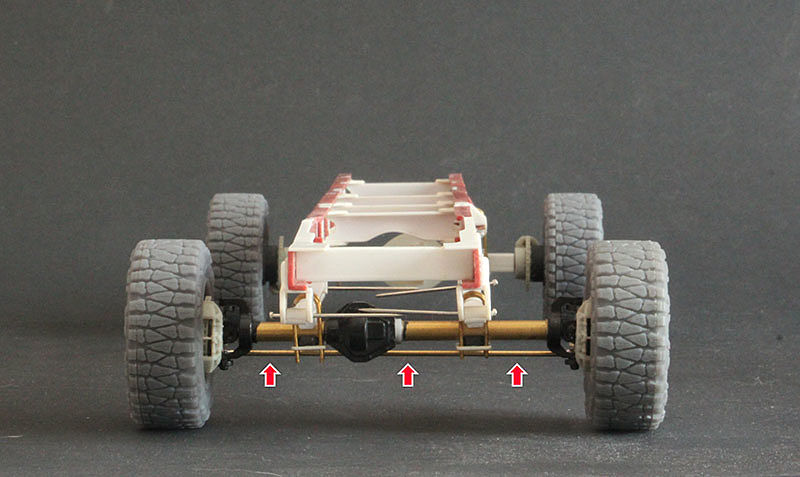 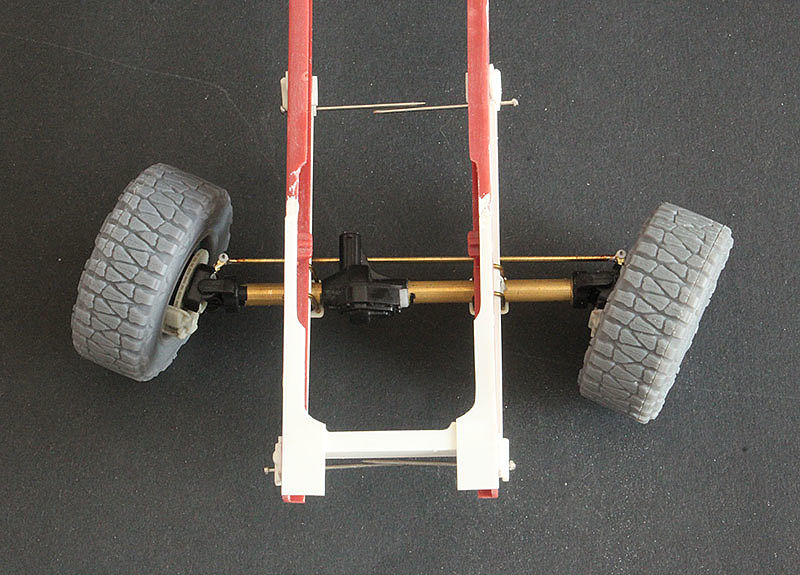 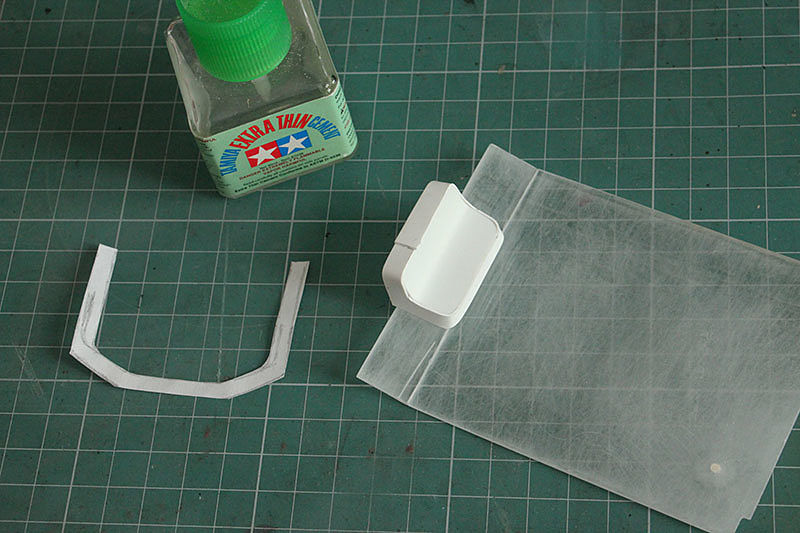
__________________
"Precious and fragile things Needs special handling.."
|
|
|
|
|
| The Following User Says Thank You to Serioga For This Useful Post: |
mrgixxer (12-01-2022)
|
|
12-01-2022, 04:24 AM
|
#26 | |
|
AF Regular
Join Date: Feb 2005
Location: Kaatsheuvel
Posts: 221
Thanks: 26
Thanked 45 Times in 40 Posts
|
Re: Ironhide TopKick C4500
Ahhh very cool that you are continuing on this. Great scratch work in general.
|
|
|
|
|
|
12-02-2022, 05:38 AM
|
#27 | |
|
Loser

Join Date: Aug 2007
Location: Moscow
Posts: 1,170
Thanks: 110
Thanked 248 Times in 195 Posts
|
Re: Ironhide TopKick C4500
Looks good on the wheels. Please, don't stop.
__________________
Best regards, Mikhail   
|
|
|
|
|
|
12-11-2022, 10:36 AM
|
#28 | |
|
AF Regular
Thread starter
Join Date: Feb 2009
Location: Moscow, Russia
Posts: 294
Thanks: 5
Thanked 14 Times in 14 Posts
|
Re: Ironhide TopKick C4500
Hello, dear colleagues!
There is no progress on model itself, BUT the work from the workbench smoothly migrated to the computer. I tried my hand at a more complex element (for me) than the hubs 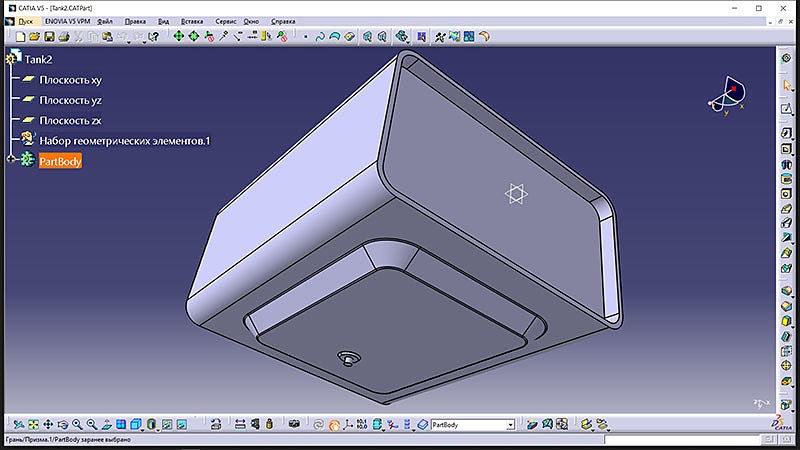 I did it according this photo: 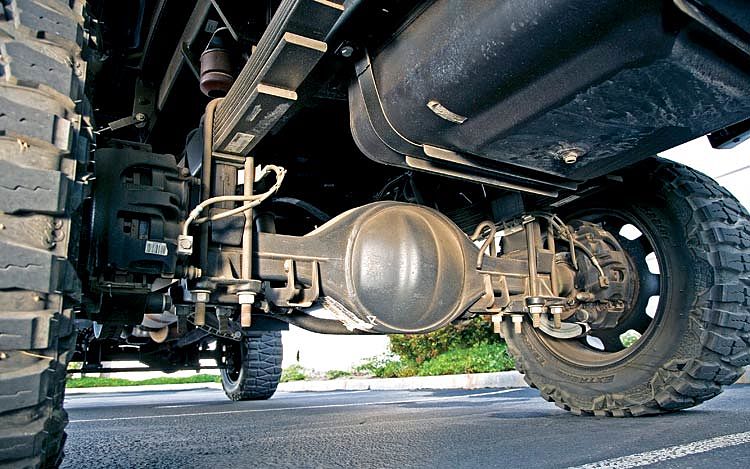 Mikhail helped me to discover this one That's what I got: 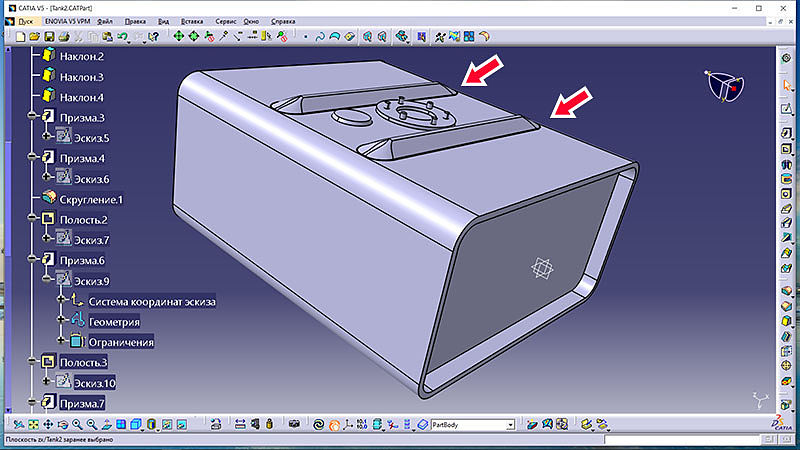 These stiffeners were my headache for some time.
__________________
"Precious and fragile things Needs special handling.."
|
|
|
|
|
|
12-14-2022, 01:05 PM
|
#29 | |
|
AF Newbie
Join Date: Jun 2011
Location: Budapest
Posts: 2
Thanks: 1
Thanked 0 Times in 0 Posts
|
Re: Ironhide TopKick C4500
Incredible work!
I hope, it won't be released right after you finished it! |
|
|
|
|
|
12-17-2022, 10:50 AM
|
#30 | ||
|
Loser
Join Date: Aug 2007
Location: Moscow
Posts: 1,170
Thanks: 110
Thanked 248 Times in 195 Posts
|
Re: Ironhide TopKick C4500
Quote:
 Nice progress. 
__________________
Best regards, Mikhail
|
||
|
|
|
|
|
POST REPLY TO THIS THREAD |
 |
|
|


