|
|
|

|
|
| Search | Car Forums | Gallery | Articles | Helper | AF 350Z | IgorSushko.com | Corporate |
|
| Latest | 0 Rplys |
|
|||||||
| WIP - Street Post topics for any "Works In Progress" street vehicles projects in this sub-forum. |
 |
 Show Printable Version | Show Printable Version |  Email this Page | Email this Page |  Subscribe to this Thread
|
|
|
Thread Tools |
 10-28-2022, 04:15 AM
|
#16 | |
|
AF Regular
Join Date: Feb 2005
Location: Kaatsheuvel
Posts: 221
Thanks: 26
Thanked 45 Times in 40 Posts
|
Re: Ferrari GTC4 Lusso Alpha (1/24)
Well it is becoming a stunning model. I'm a sucker for yellow cars anyway
 |
|

|

|
|
11-02-2022, 01:44 PM
|
#17 | ||
|
AF Enthusiast
Thread starter
Join Date: Mar 2009
Location: Madrid
Posts: 649
Thanks: 109
Thanked 68 Times in 67 Posts
|
Re: Ferrari GTC4 Lusso Alpha (1/24)
Quote:
|
||
|
|
|
|
11-16-2022, 03:00 AM
|
#18 | |
|
AF Enthusiast
Thread starter
Join Date: Mar 2009
Location: Madrid
Posts: 649
Thanks: 109
Thanked 68 Times in 67 Posts
|
Re: Ferrari GTC4 Lusso Alpha (1/24)
Continuamos con el Ferrari Lusso. Lo dejamos lacado con este buen aspecto:
We continue with the Ferrari Lusso. We leave it lacquered looking like this: 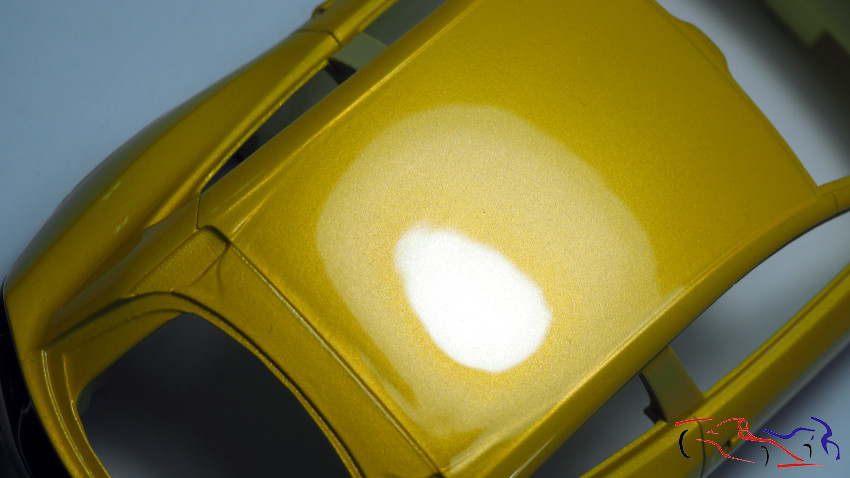 Pero aparecieron don pelos en el capó, y tuve que lijar porque eran muy profundos But there were a lot of hairs on the bonnet, and I had to sand them down because they were so deep . 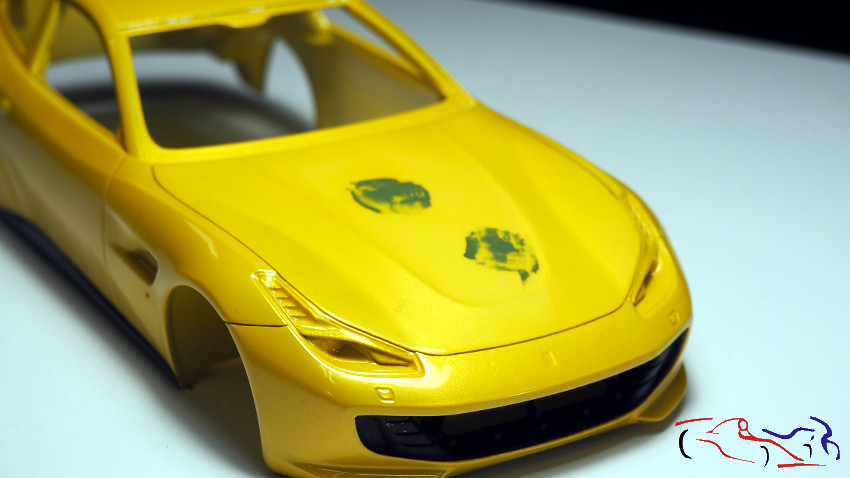 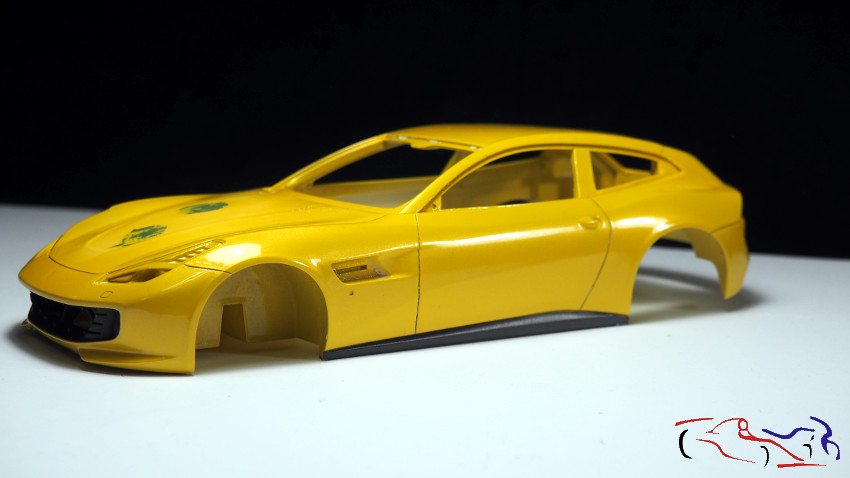 Después tuve proteger toda la carrocería excepto el capó para poder trabajar mejor sin estropear el resto. Pero hubo que enmasillar, lijar, imprimar .pero el problema se iba haciendo más grande. Incluso pinté de nuevo para ver qué tal quedaba, pero . Then I had to protect all the bodywork except the bonnet to be able to work better without damaging the rest. But I had to putty, sand, prime .but the problem was getting bigger and bigger. I even repainted it to see how it looked, but . 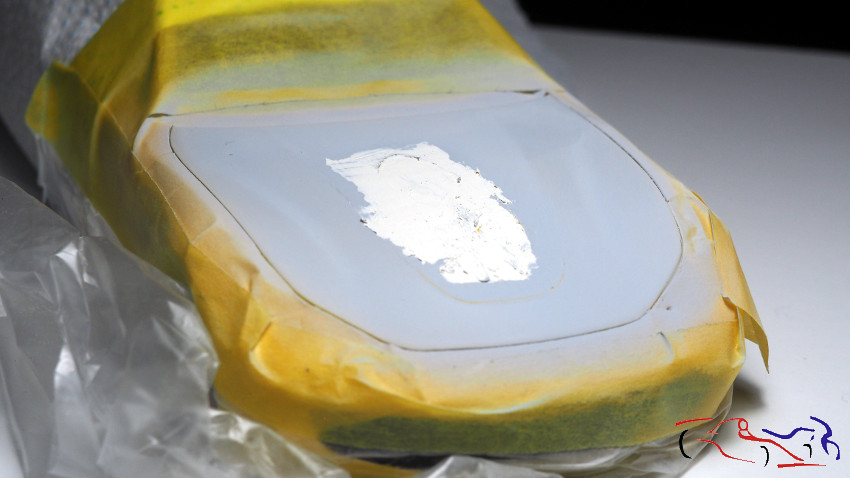 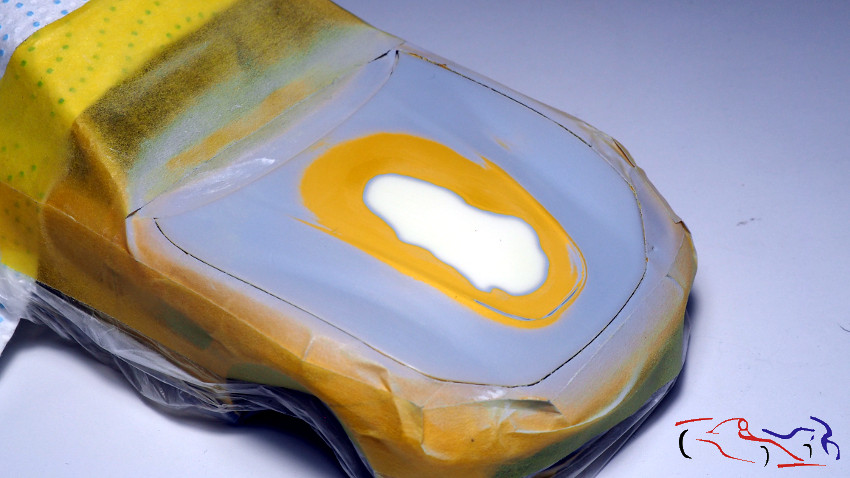 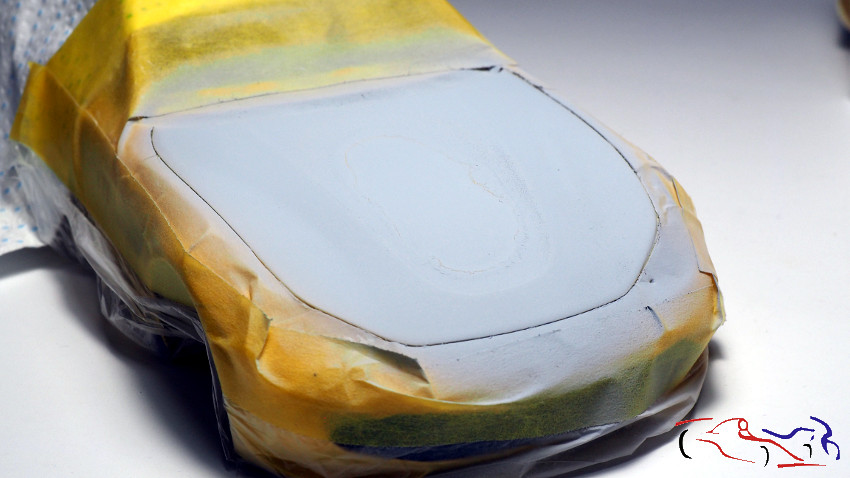 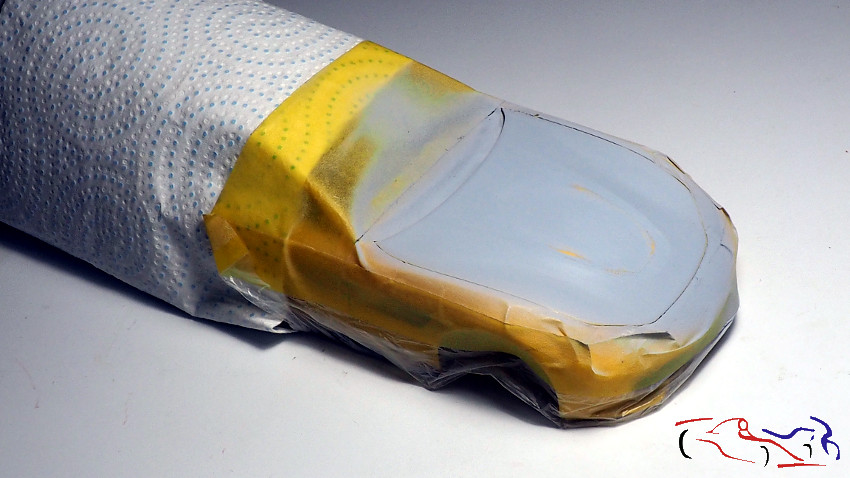 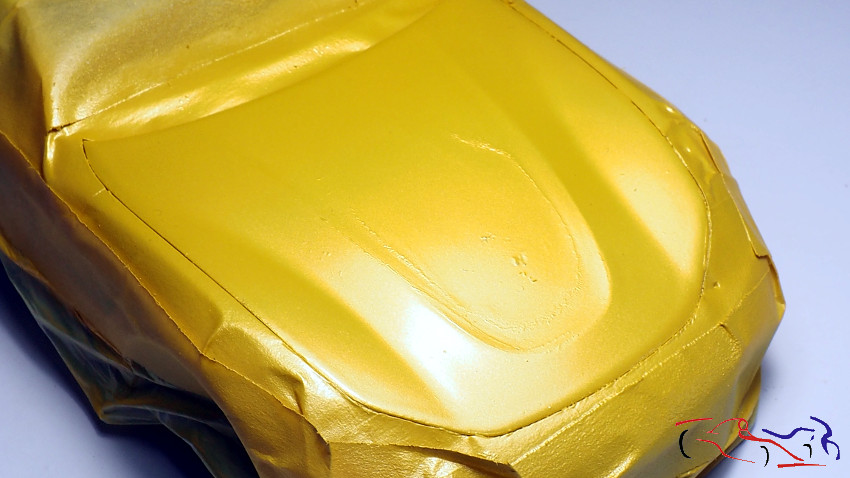 al final, antes de crear un avión Ferrari, me decidí a empezar de nuevo, metiendo la carrocería en líquido de frenos!!! in the end, before creating a Ferrari aircraft, I decided to start all over again, dipping the bodywork in brake fluid!!!! 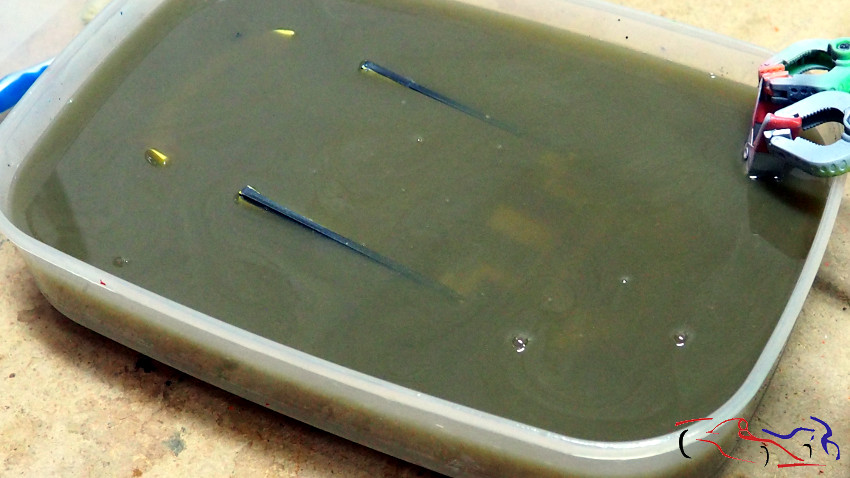 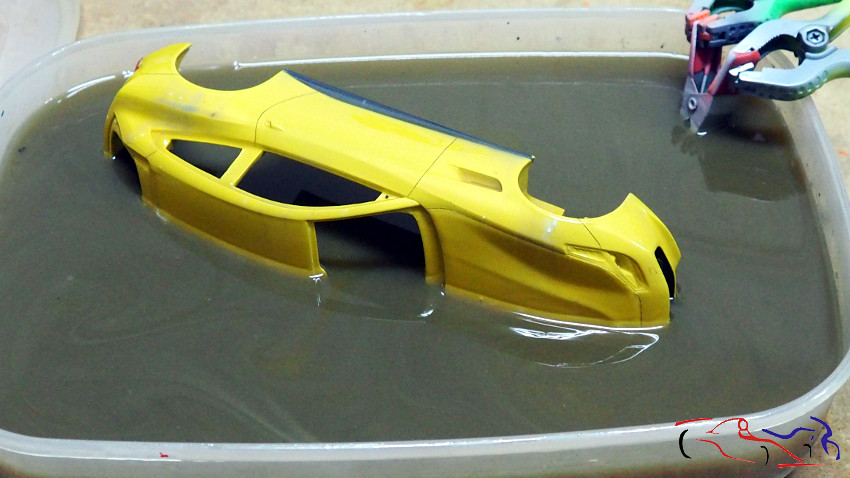 Estuvo unos días, y después se pudo quitar bien: It was there for a few days, and then it was well removed: 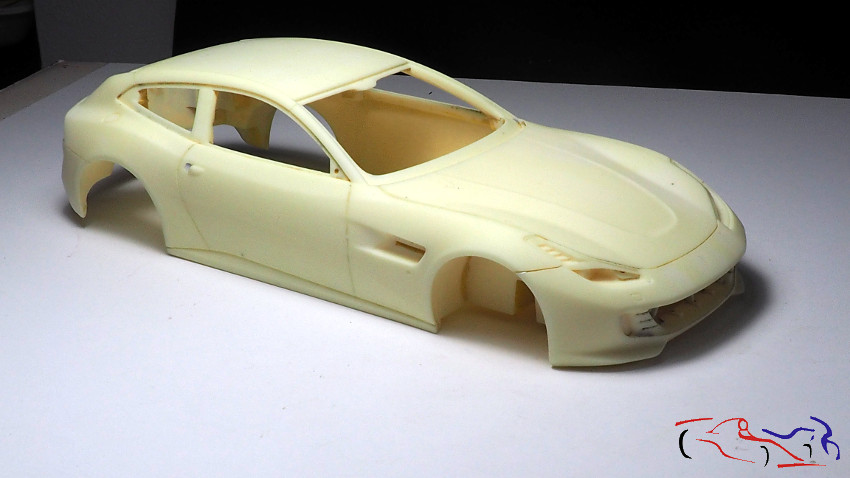 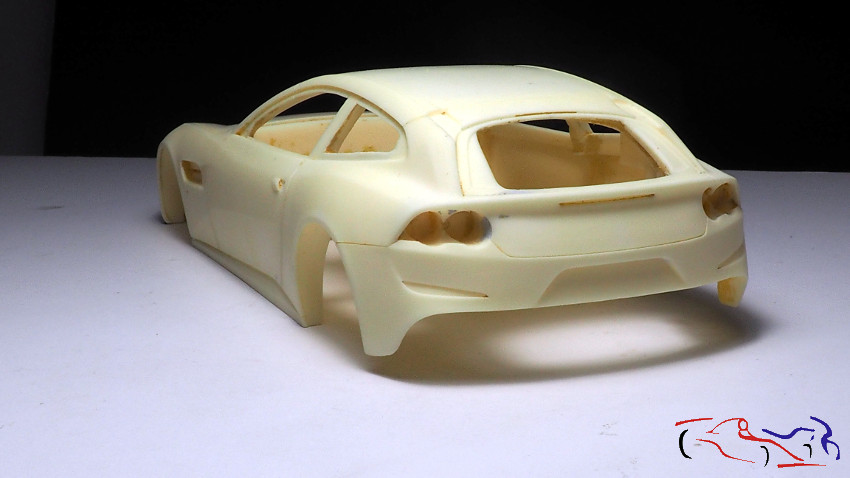  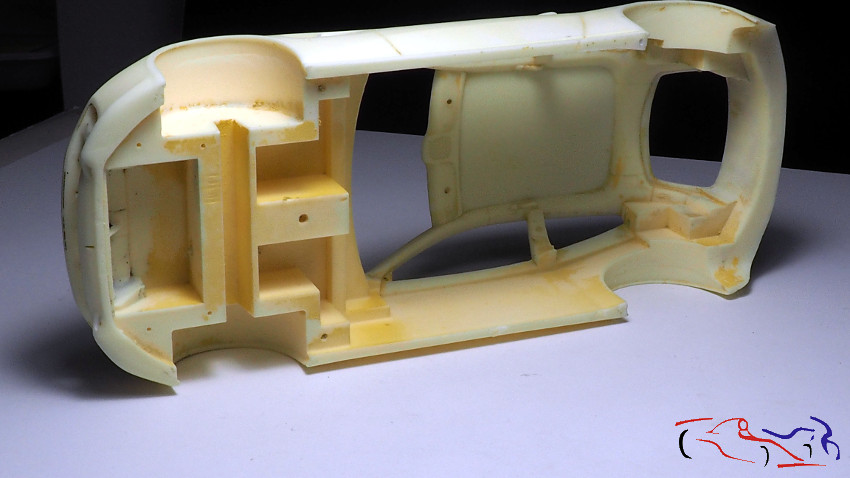 Cuando estuvo seco, repasé las líneas e imprimí con spray blanco de Tamiya: When it was dry, I went over the lines and primed with Tamiya white spray: 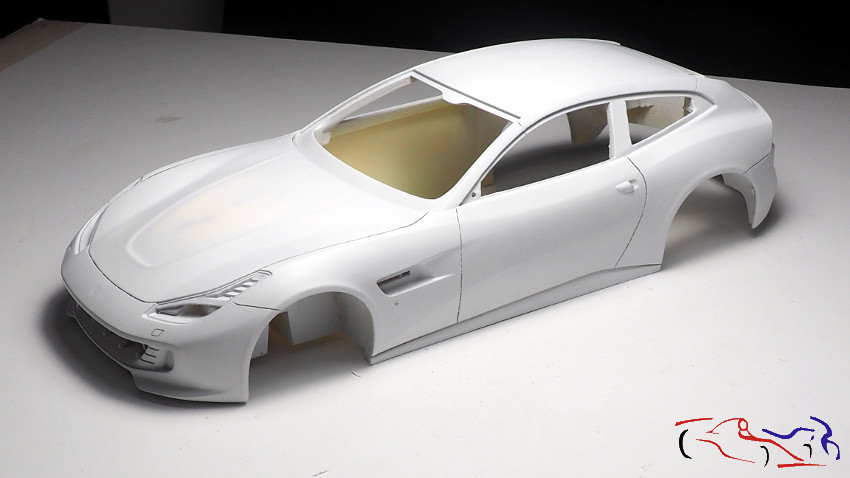 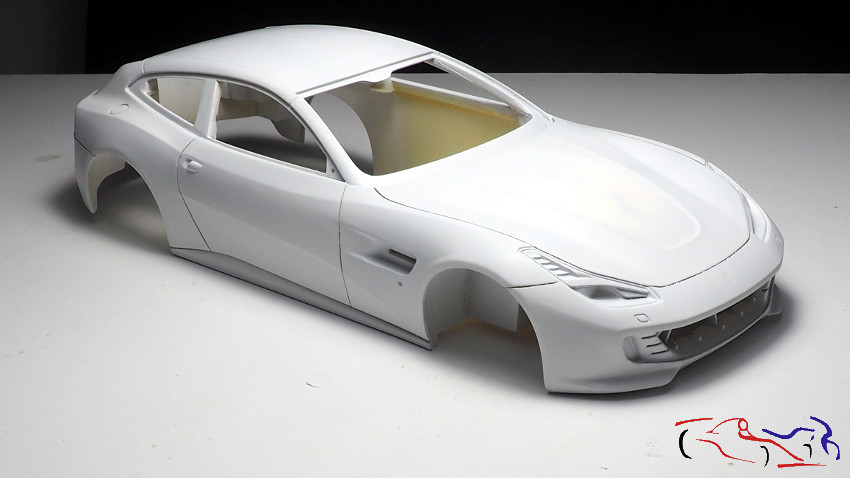 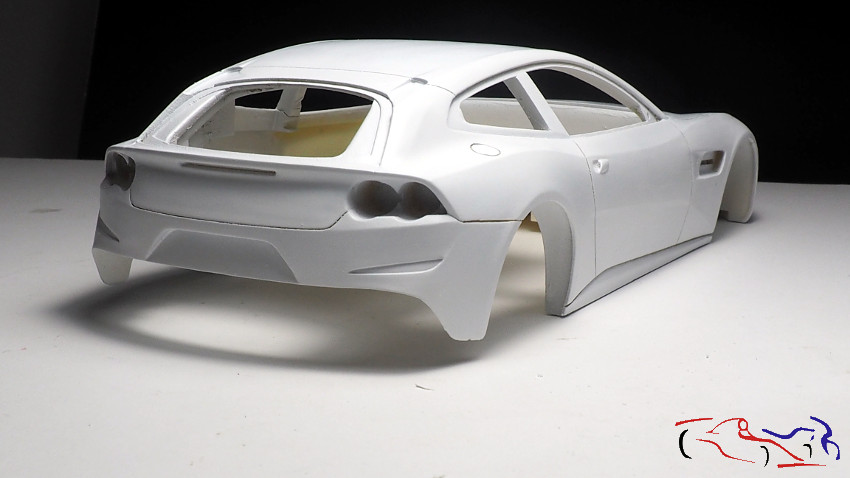 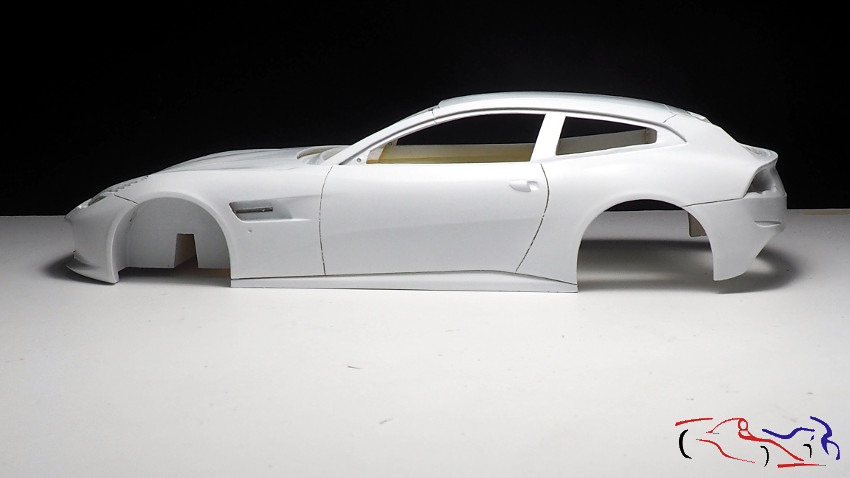 Y después, cambié la pintura, y utilicé tres capas de Giallio Modena de Zero Paints: And then, I changed the paint, and used three coats of Giallio Modena from Zero Paints: 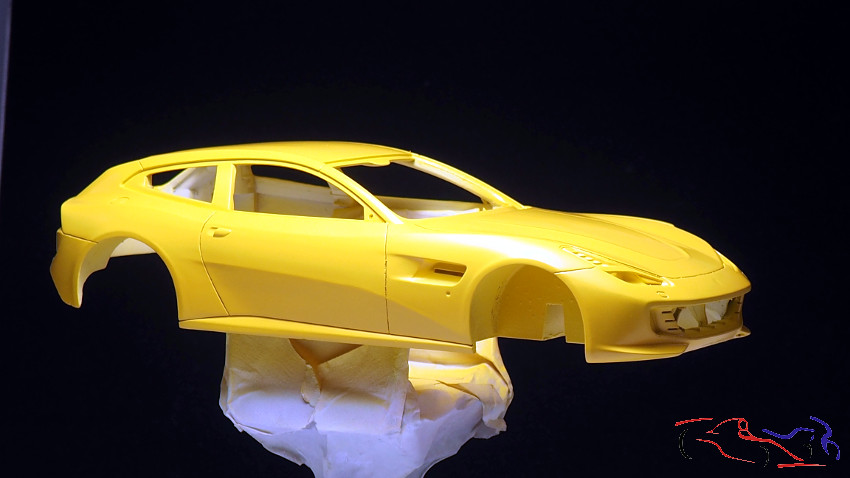  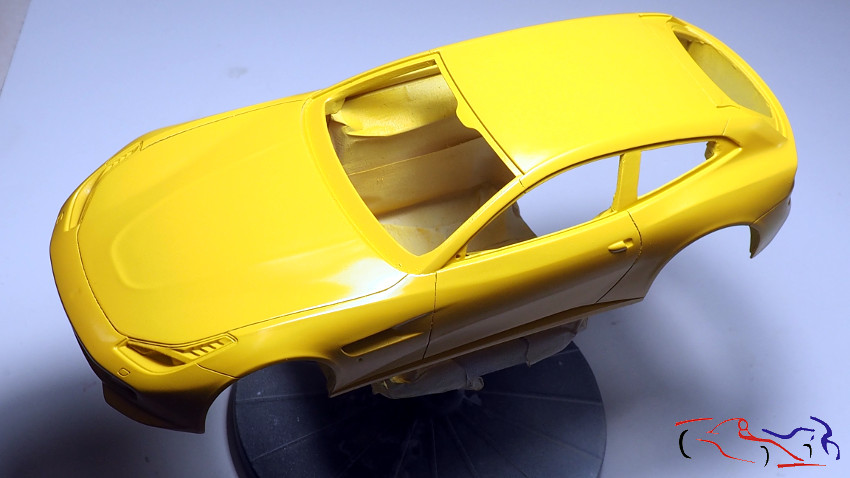 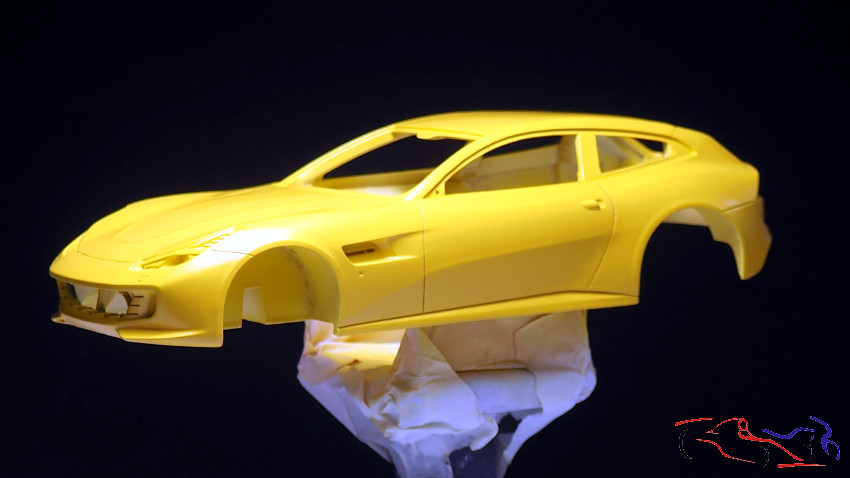 Al mismo tiempo que metía la carrocería en la piscina de liquido de frenos, también sumergí todo el interior, para eliminar la pintura negra, ya que decidí pintar el interior con la pintura Focus de interiores: At the same time as I dipped the bodywork into the brake fluid pool, I also dipped the whole interior, to remove the black paint, as I decided to paint the interior with Focus interior paint: 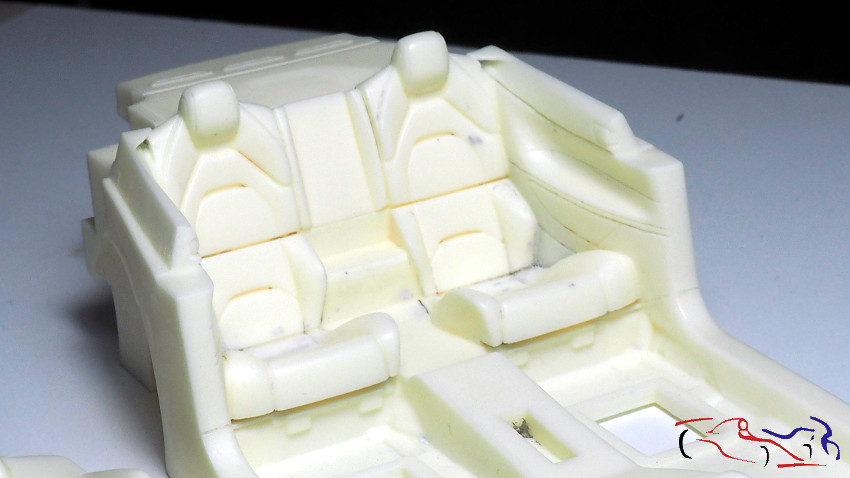 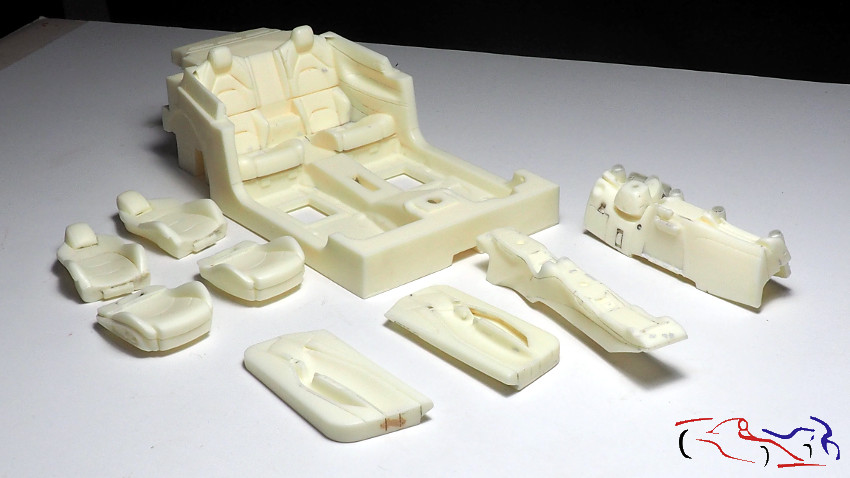 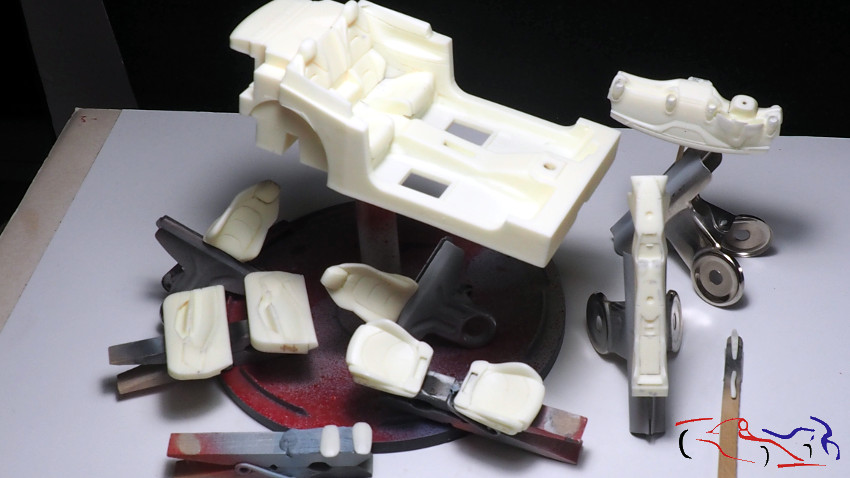 Y el primer paso fue imprimar con el color oscuro de Gravity: And the first step was to prime with the dark Gravity colour: 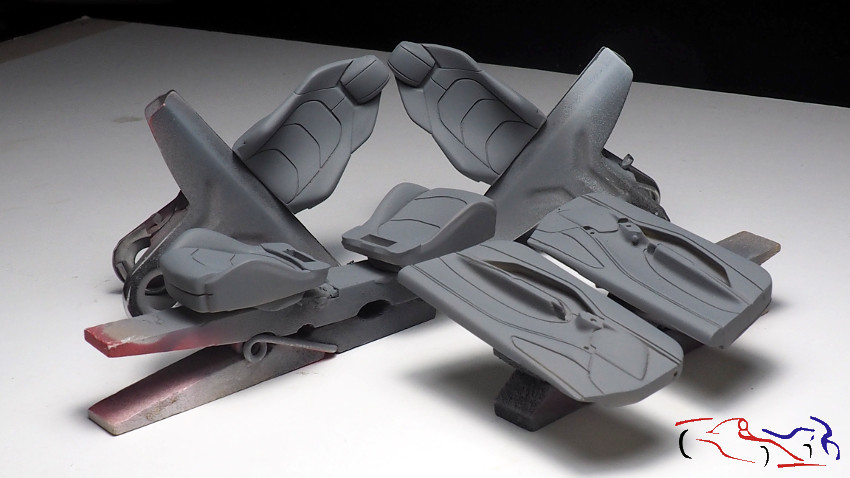 En la siguiente entrada, veréis como se pinta con estas nuevas pinturas!. Gracias por ver y comentar! In the next post, you will see how to paint with these new paints! Thanks for watching and commenting! |
|
|
|
|
| The Following 2 Users Say Thank You to JesusM For This Useful Post: |
fafnir (11-17-2022)
|
|
12-12-2022, 10:40 AM
|
#19 | |
|
AF Enthusiast
Thread starter
Join Date: Mar 2009
Location: Madrid
Posts: 649
Thanks: 109
Thanked 68 Times in 67 Posts
|
Re: Ferrari GTC4 Lusso Alpha (1/24)
Vamos ahora con la pintura Blanco Fantasma de Gravity Spain, con la que voy a pintar el interior. Estas pinturas llamadas Focus, consisten en 3 tonalidades que se aplican en fases. Primero se aplican las luces, después las sombras, y para terminar, la tonalidad que une las anteriores, dando el color deseado:
Lets go now with the Gravity Spain Phantom White paint, with which Im going to paint the interior. These paints, called Focus, consist of 3 shades that are applied in phases. First the lights are applied, then the shadows, and finally, the tone that joins the previous ones, giving the desired colour: 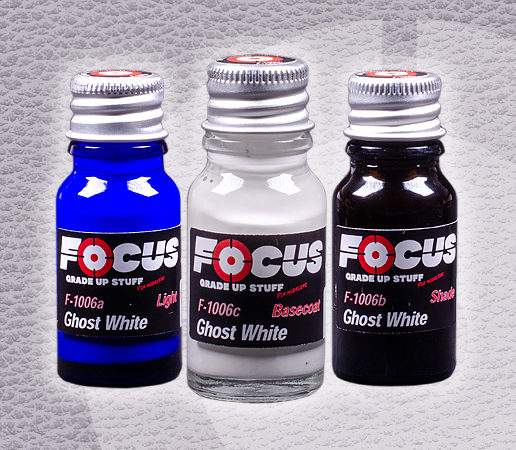 Se aplica con el aerógrafo, a muy baja presión y muy cerca con una boquilla de 0,15 o 0,2. Y empezamos con las luces, que daremos en las partes de las piezas que sobresalen más: It is applied with the airbrush, at very low pressure and very close with a 0.15 or 0.2 nozzle. And we start with the lights, which we will apply on the parts of the pieces that protrude the most: 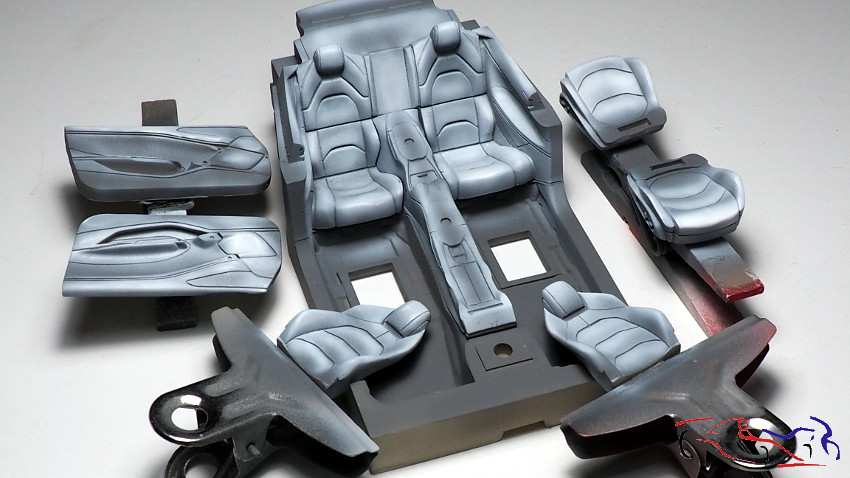 Después pasamos a las sombras, incidiendo en las ranuras o partes profundas de las piezas: Then we move on to the shadows, focusing on the grooves or deep parts of the pieces: 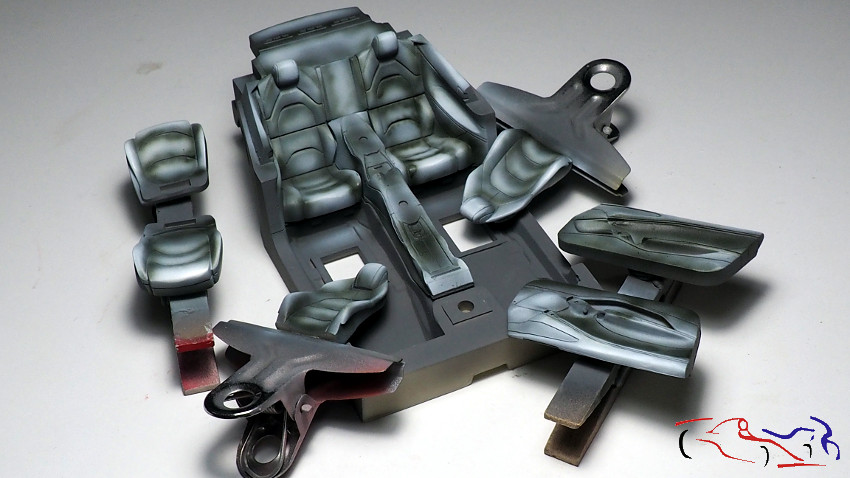 Para terminar con el tono final, del color blanco en este caso, que se aplica para fundir los tonos previos. Por supuesto, dependiendo de la luz aplicada, se notarán más o menos los distintos tonos de luces y sombras: To finish with the final tone, white in this case, which is applied to blend the previous tones. Of course, depending on the light applied, the different shades of light and shadow will be more or less noticeable: 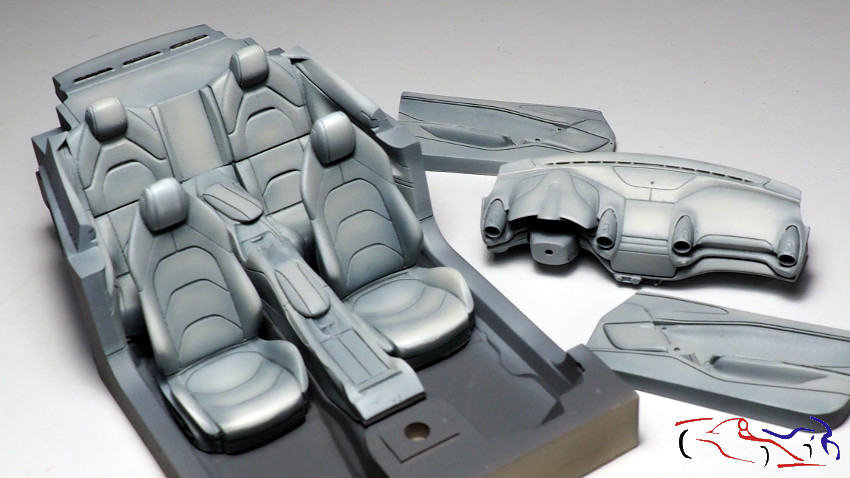  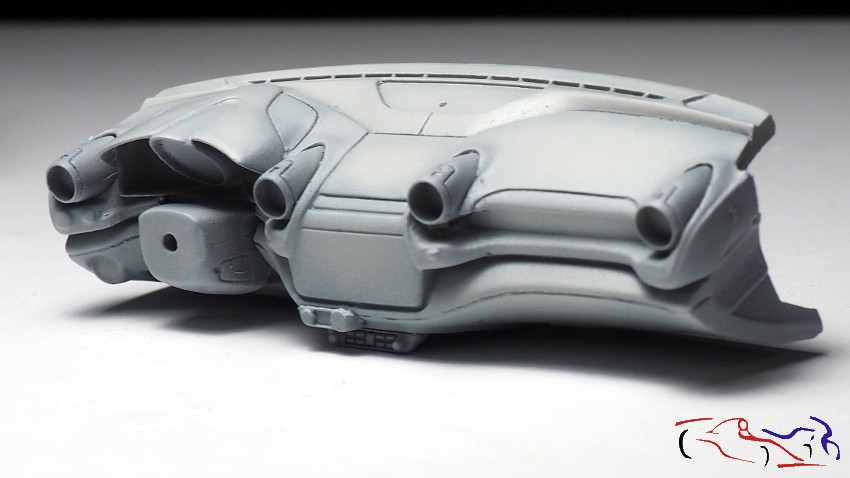 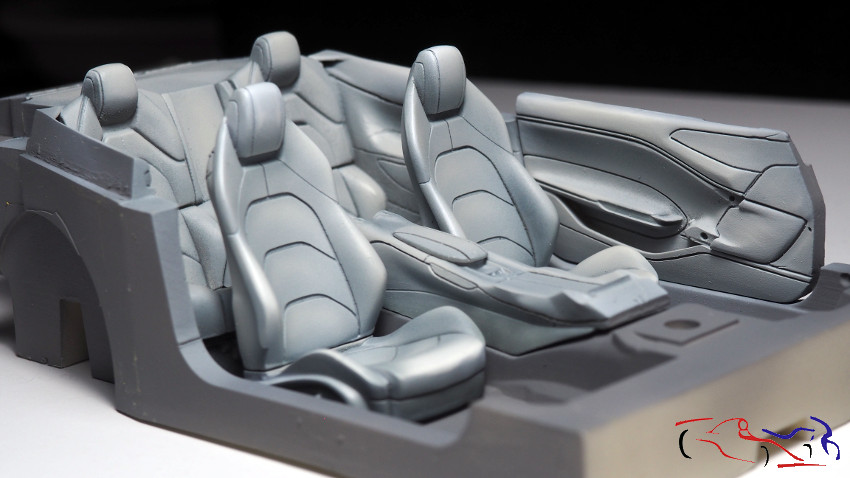 El siguiente paso es enmascarar para pintar las partes negras con el negro moqueta de la misma marca: The next step is to mask to paint the black parts with the black carpet of the same brand: 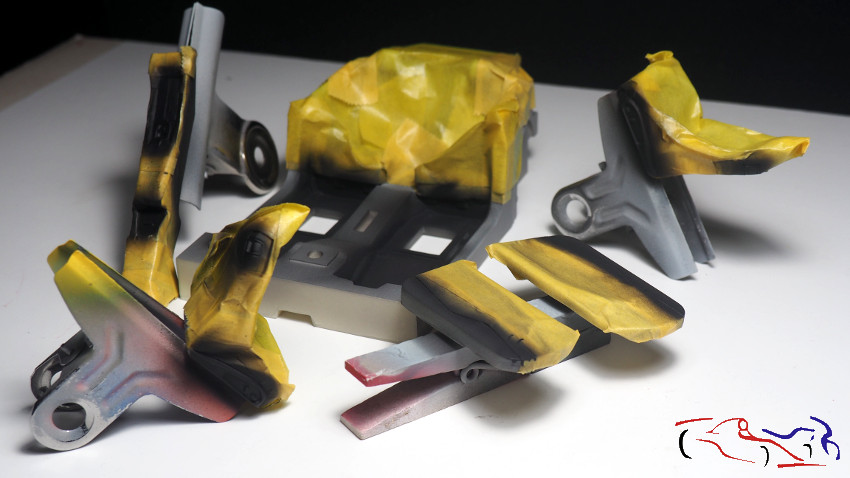  Aprovechamos también, para pintar de negro semimate otras piezas y fotograbados: We also took the opportunity to paint other pieces and photoetched parts in semi-matt black: 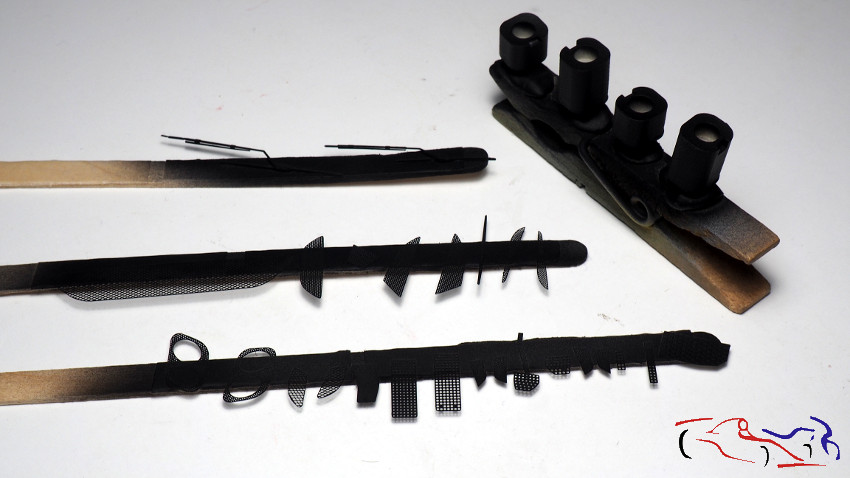 Gracias por ver y comentar! Thanks for viewing and commenting! |
|
|
|
|
| The Following 2 Users Say Thank You to JesusM For This Useful Post: |
fafnir (12-12-2022)
|
|
01-05-2023, 07:54 AM
|
#20 | |
|
AF Enthusiast
Thread starter
Join Date: Mar 2009
Location: Madrid
Posts: 649
Thanks: 109
Thanked 68 Times in 67 Posts
|
Re: Ferrari GTC4 Lusso Alpha (1/24)
Continuamos con el Ferrari, y este será la última antes de las fotos finales. Dejamos la carrocería a falta de lacar, proceso que hice con la nueva laca de Number5, que me gustó mucho. La proporción del fabicante dice que es 2:1, y yo le puse cinco gotas de disolvente, porque me gusta la laca más líquida. Dos capas muy finas y una húmeda, separadas por 5 minutos de espera. Y el resultado es éste!! Decir que no me hará falta pulir porque la laca estiró muy bien!! Aquí las fotos:
We continue with the Ferrari, and this will be the last post before the final photos. We left the bodywork to be lacquered, a process I did with the new Number5 lacquer, which I liked a lot. The manufacturers ratio says 2:1, and I put five drops of thinner, because I like the lacquer more liquid. Two very thin coats and one wet coat, separated by 5 minutes between them. And the result is this! I will not need to polish because the lacquer stretched very well!!! Here are the photos: 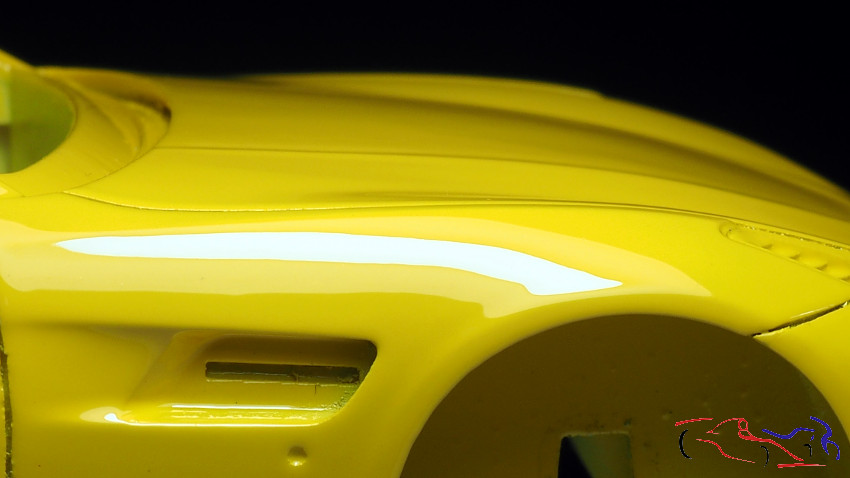 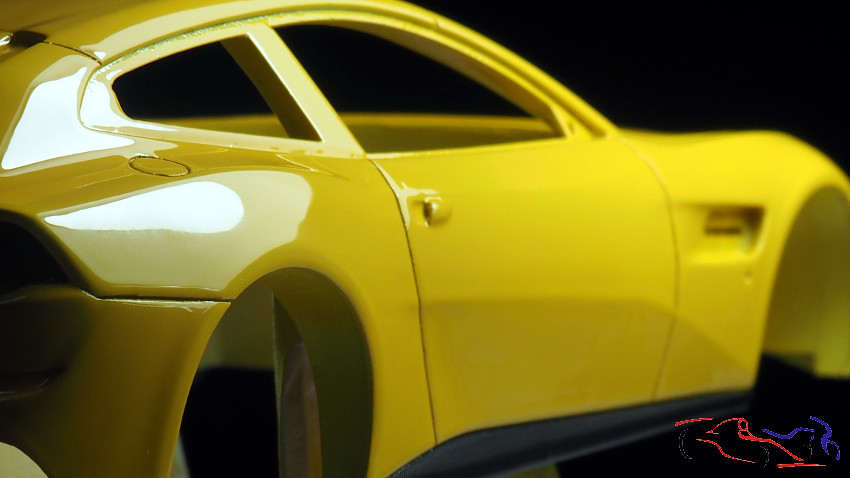 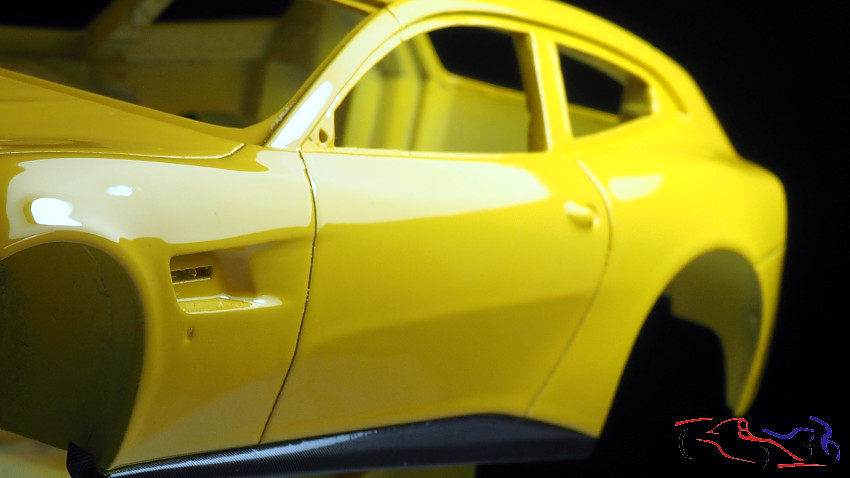 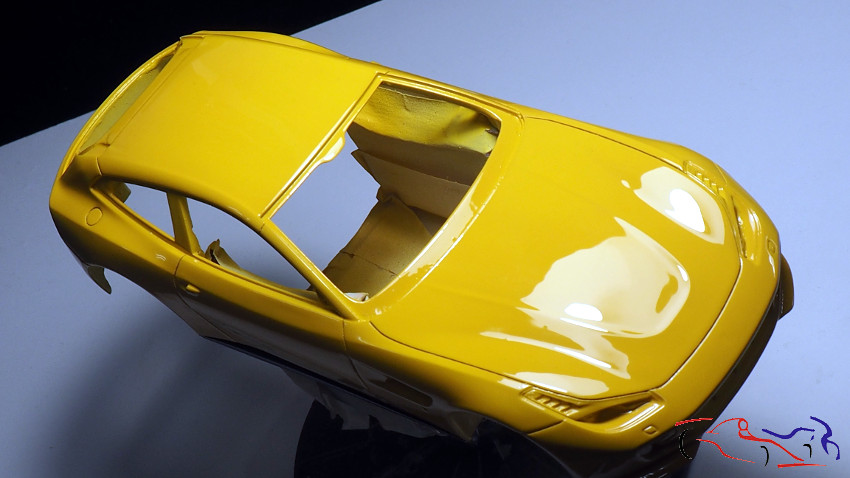 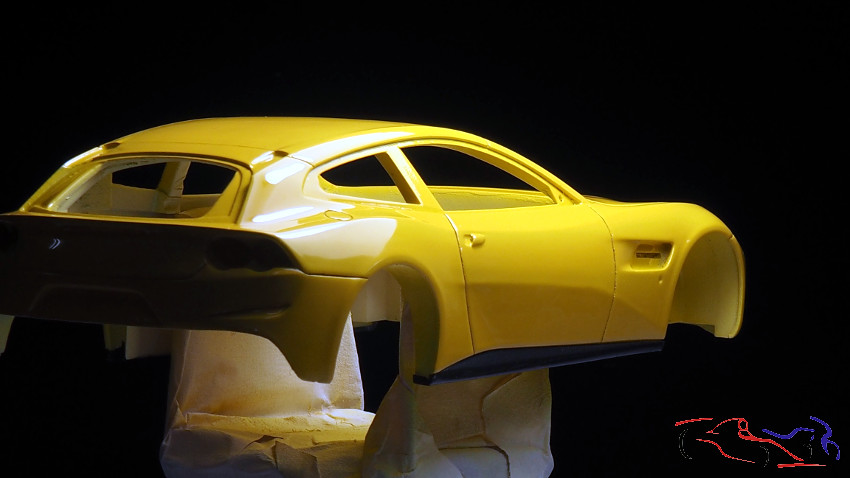 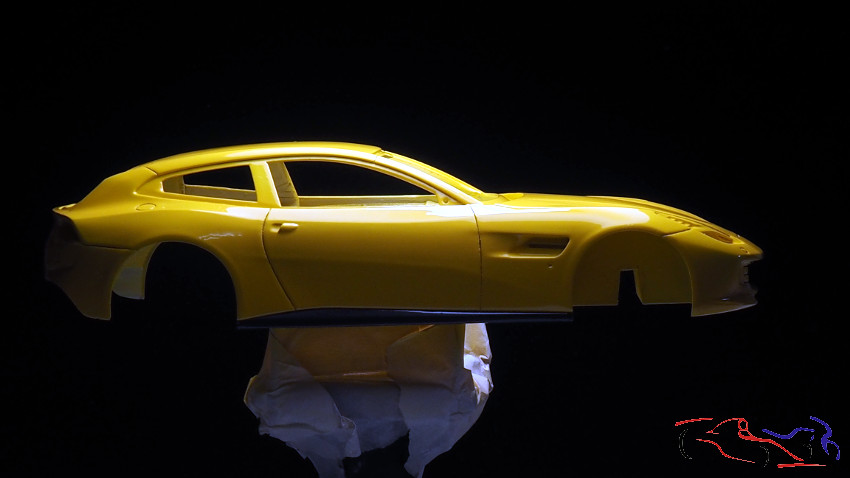 Una vez seca, el siguiente paso sería el poner fibra de carbono en las taloneras. Para eso, con cinta de enmascarar, corté con un cutter bien afilado, cogí la parte de la talonera y la traspasé a la hoja de calca. La otra parte, la guardé para usarla más adelante. La calca la puse sin más problemas con los porductos micro y con el secador de pelo: Once it was dry, the next step was to put carbon fibre on the heel pads. For this, using masking tape, I cut with a very sharp cutter, took the part of the heel cup and transferred it to the decal sheet. I kept the other part for later use. I put the decal on without any further problems with the Micro products and the hairdryer: 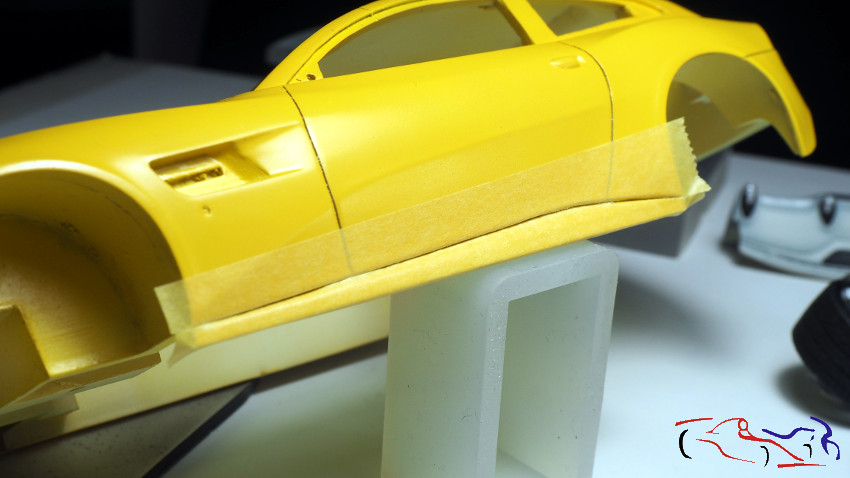  Una vez seca, cogí la otra parte de la máscara, la de la carrocería, y la volví a poner. Y a aprtirde ésta, más mascara para tapar la carrocería y dejar la talonera lista para barnizar en semimate, ya que todas la piezas de fibra van así terminadas. Once dry, I took the other part of the mask, the one for the bodywork, and put it back on. And after that, more masking to cover the complete bodywork and leave the heel panel ready to varnish in semi-matt, as all the fibre parts are finished in this way. 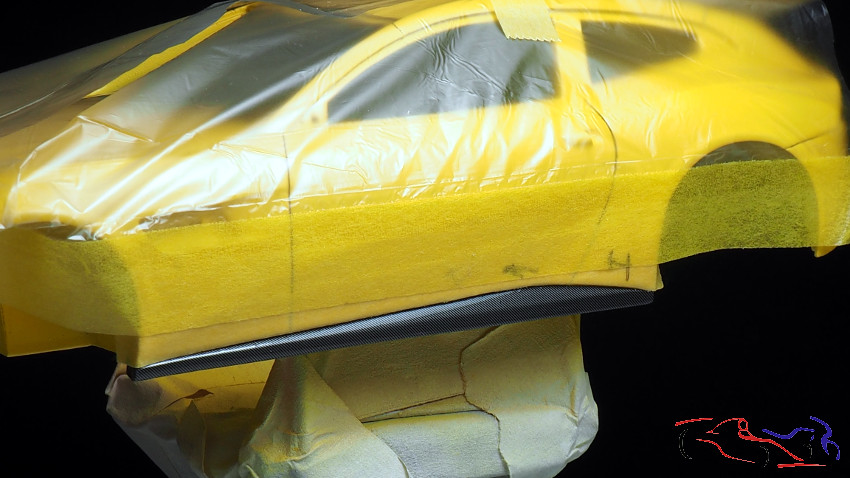 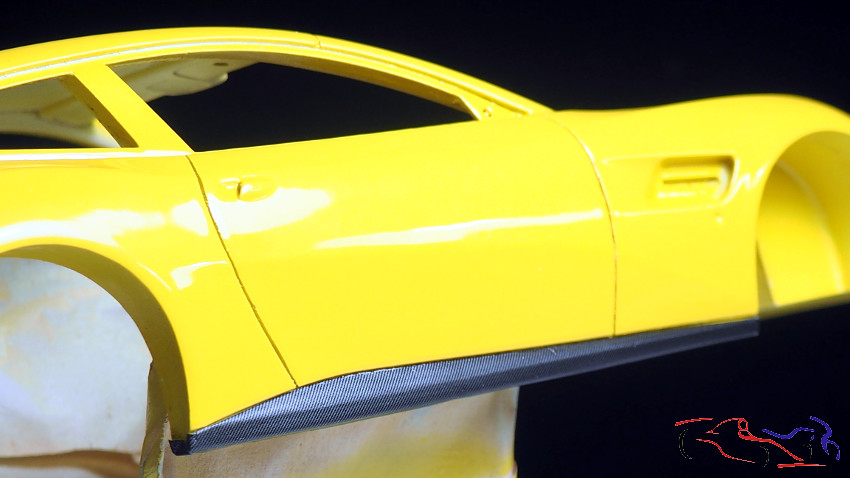 Y también teminé el interior, añadiendo las calas y fotograbados, tanto en el salpicadero como en el resto de piezas: I also finished the interior, adding the coves and photoetched parts, both on the dashboard and the rest of the parts: 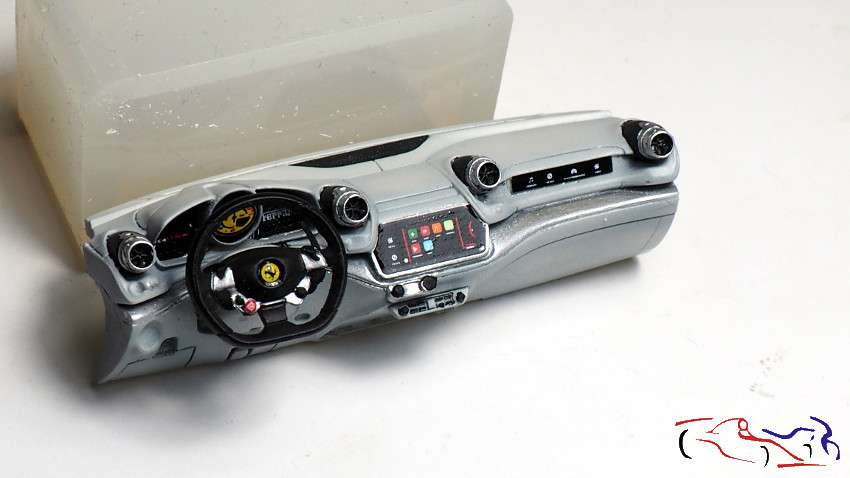 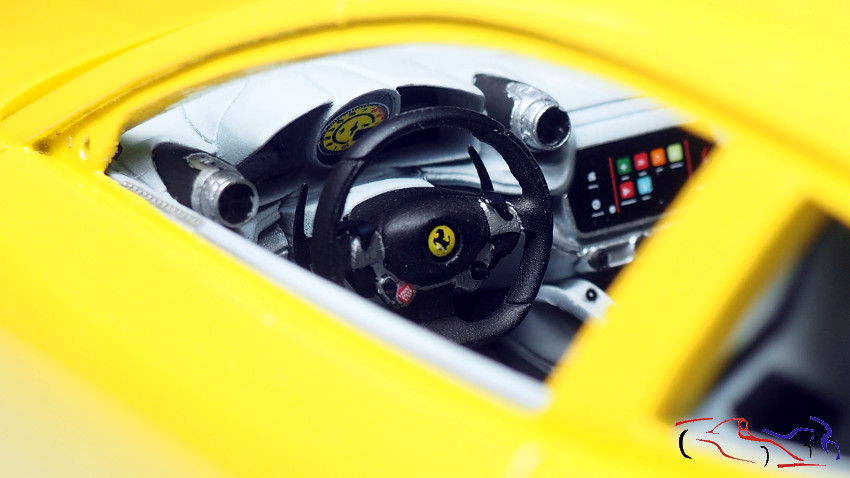 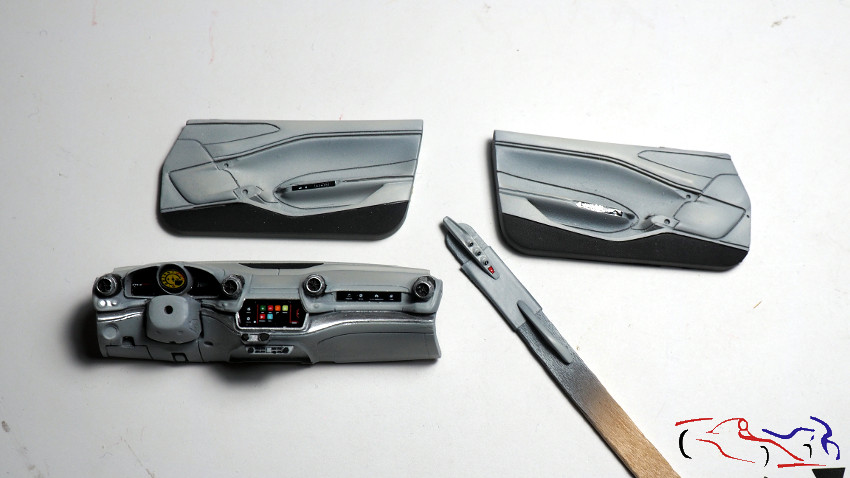 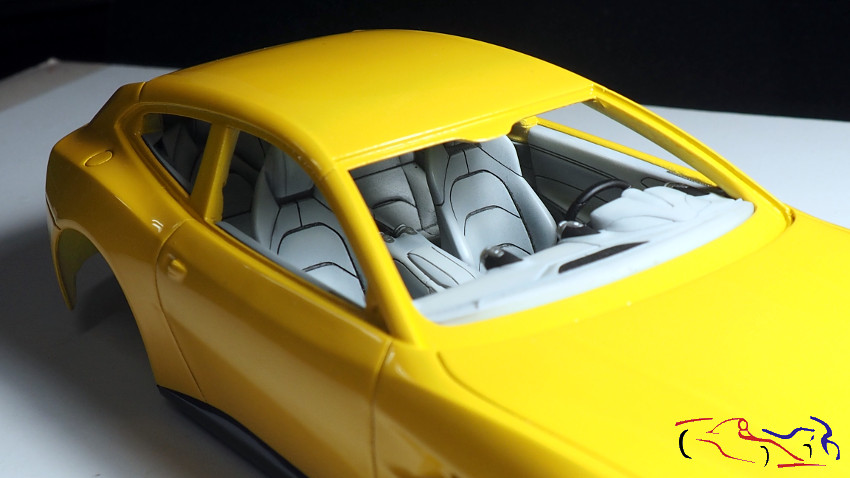 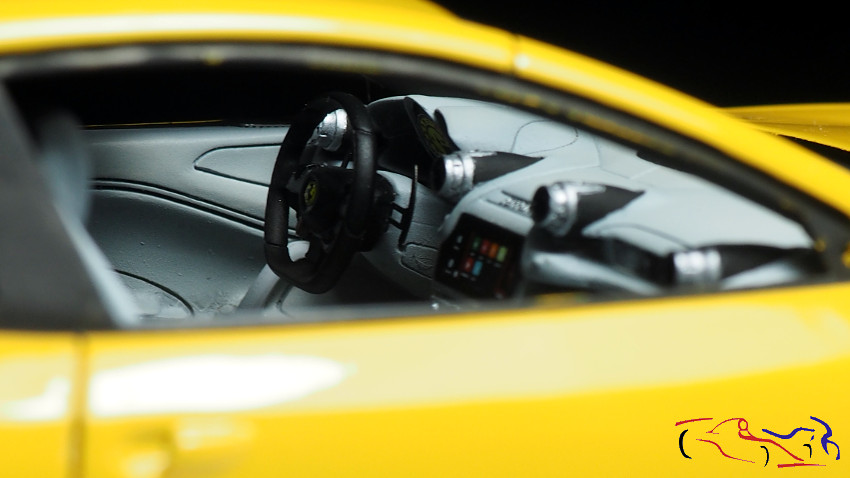 A la hora de terminar los emblemas de Ferrari, y una vez pegadas las calcas, les puse con un palillo, unas gotas de resina UV, que endurecí con una lámpara, siendo el resultado fantástico. Decir que los emblemas van sobre un fotograbado e irán colocados eln los laterales y en el frontal. When finishing the Ferrari emblems, and once the decals were glued, I put with a toothpick, a few drops of UV resin, which I hardened with a lamp, and the result was fantastic. The emblems are on a photoetched parts and will be placed on the sides and on the front. 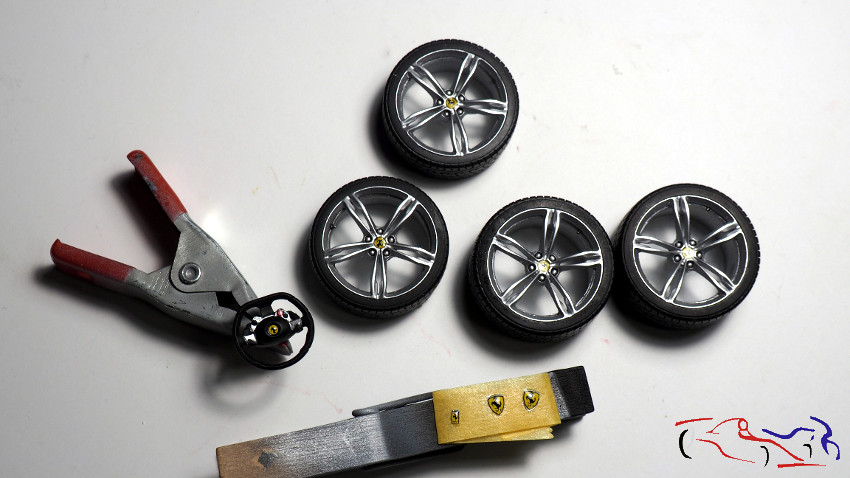 Más cosas: a los faros transparentes traseros, les di color con el rotulador rojo, siendo el acabado muy bueno! Other things: the transparent rear lights were coloured with the red marker and the finish was very good! 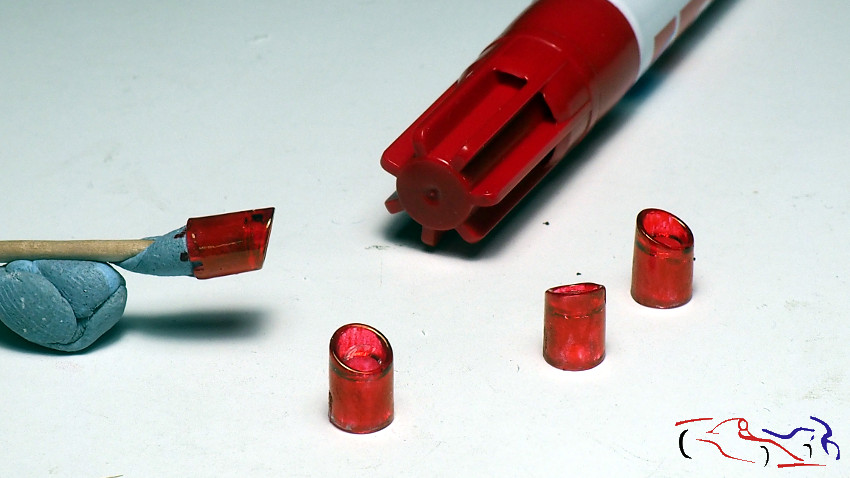 Las siguientes fotos muestran la carrocería con las partes negras ya pintadas, a la que voy pegando las piezas que había preparado anteriormente. Destacar en los bajos, el agujero central para fijar la maqueta a la base (internamente tiene una tuerca pegada): The following pictures show the bodywork with the black parts already painted, to which Im gluing the pieces I had previously prepared. The underbody has a central hole to fix the model to the base (internally it has a glued nut): 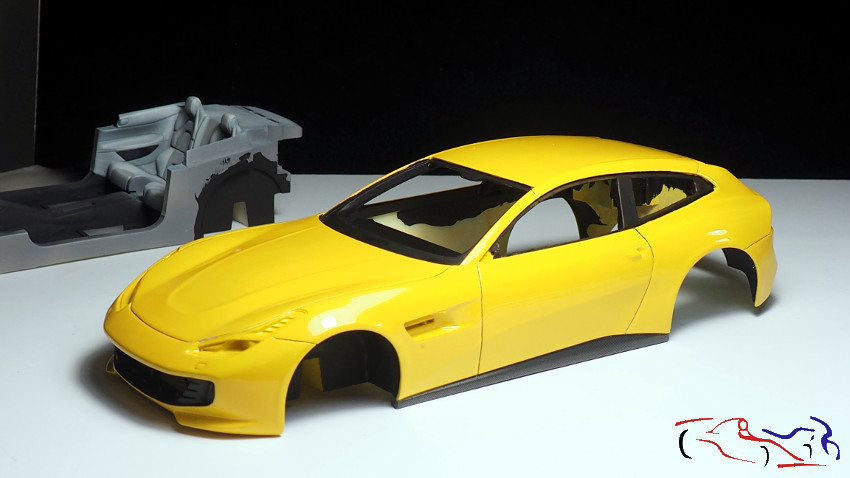 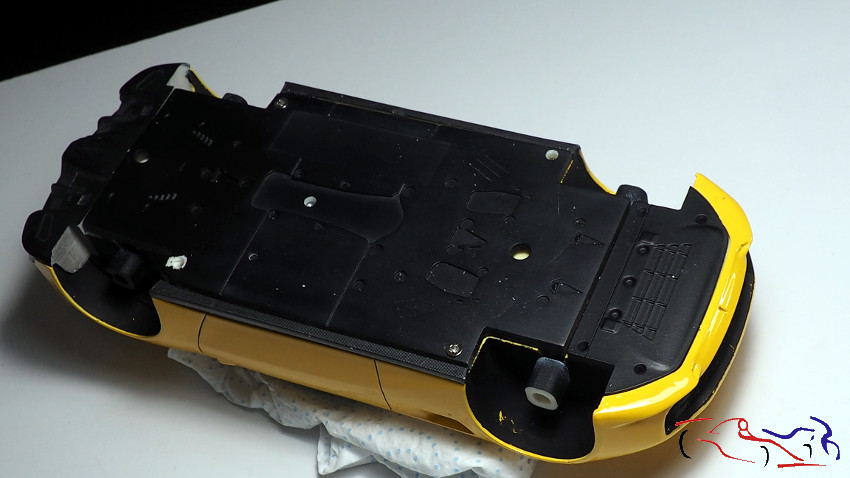 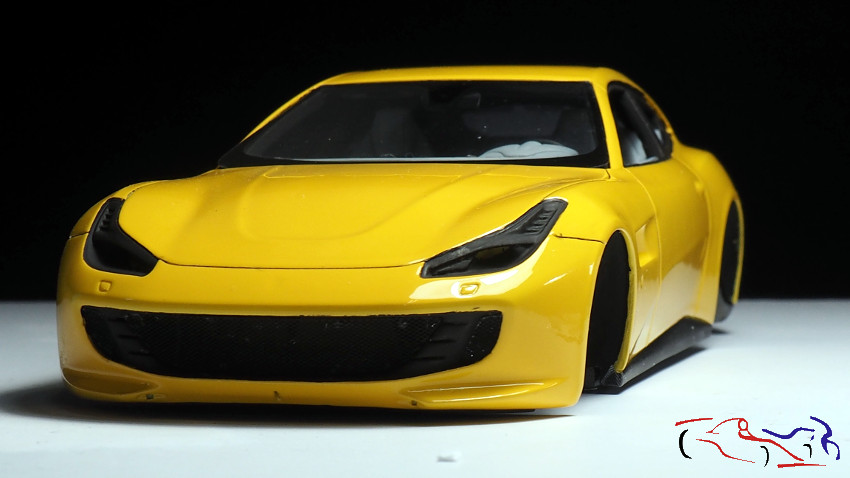 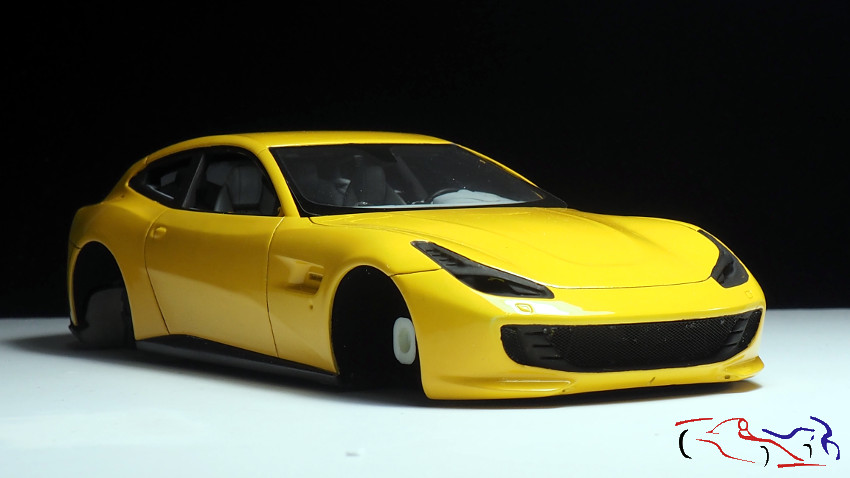 . los cristales que son de acetado, con dos laminas en ambas caras que se eliminan para dejarlos limpios . the glass panes are made of acetate, with two films on both sides that are removed to leave them clean. 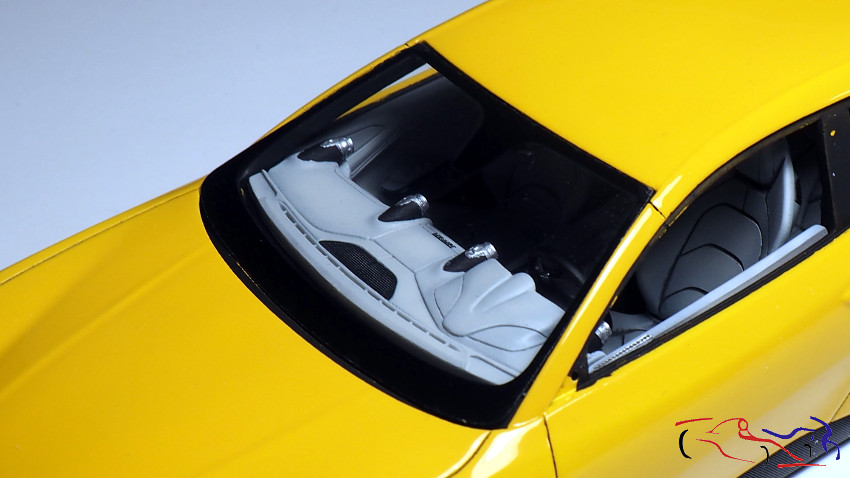 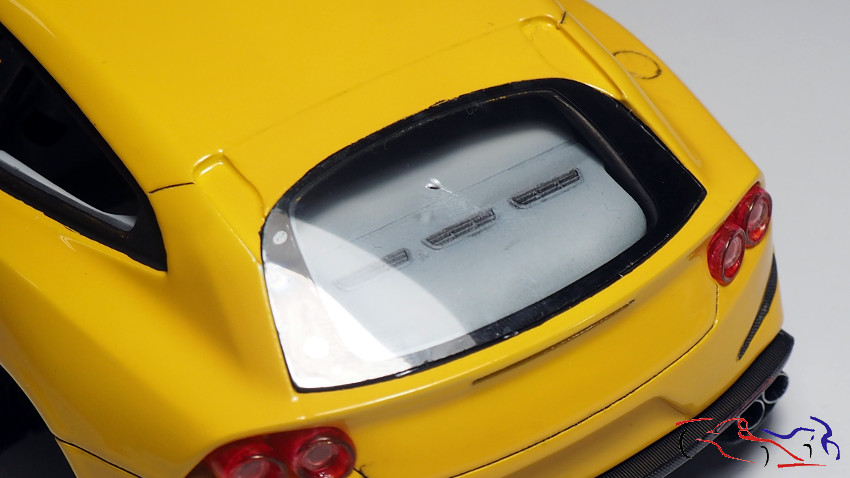 También colocamos el faldón trasero, y la rejilla delantera, con sus correspondientes caballinos; We also fitted the rear apron and the front grille, with their corresponding caballinos 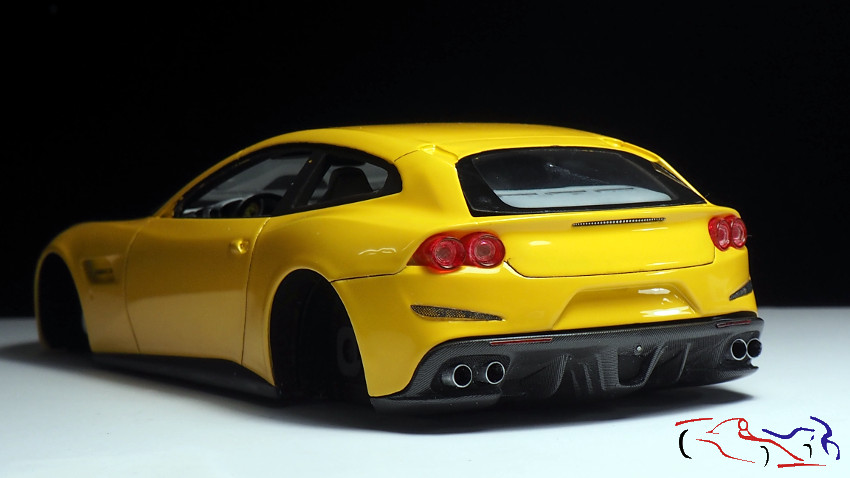 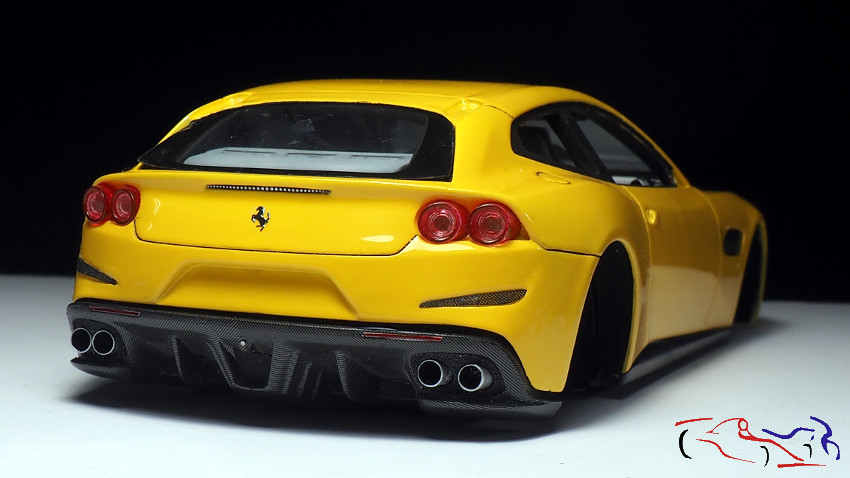 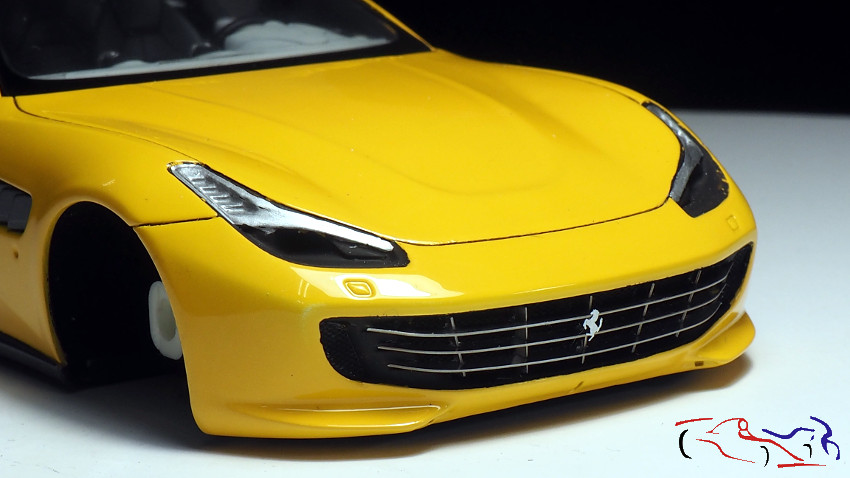 Y todo listo para poner las ruedas, que las pondré con pegamento epoxy de dos componentes: And everything is ready to put the wheels on, which I will put on with two-component epoxy glue: 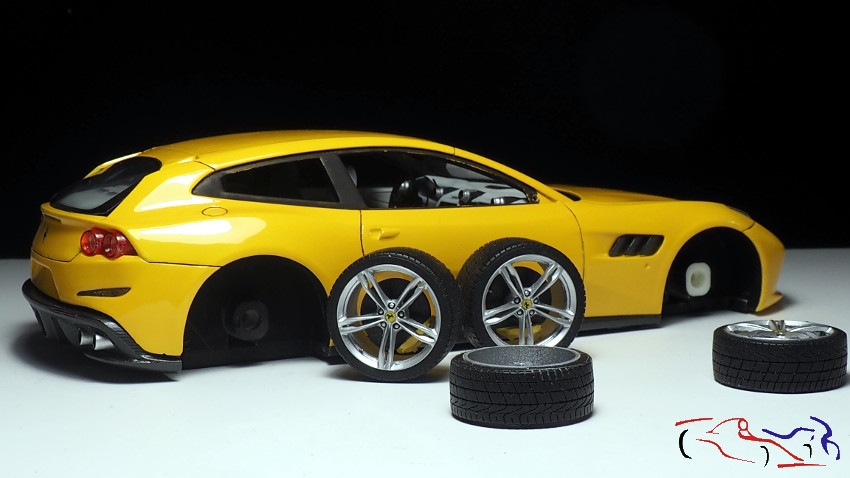 Y ya, casi terminado, a falta de los emblemas, algunos fotograbados, limpiaparabrisas . And now, almost finished, with the emblems, some photo-etched parts, windscreen wipers, etc. . 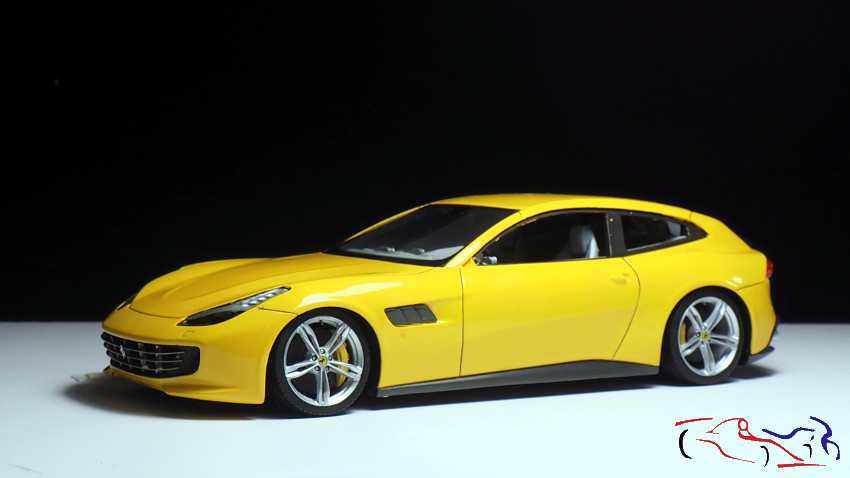 Y lo próximo será la maqueta terminada con sus fotos finales!! Gracias por ver y comentar! And next will be the finished model with its final photos!!! Thanks for watching and commenting! |
|
|
|
|
|
01-06-2023, 04:50 PM
|
#21 | ||
|
AF Newbie
Join Date: Dec 2022
Location: sidney
Posts: 1
Thanks: 0
Thanked 2 Times in 2 Posts
|
Re: Ferrari GTC4 Lusso Alpha (1/24)
Quote:
|
||
|
|
|
| The Following 2 Users Say Thank You to CodyAlvarado For This Useful Post: |
JesusM (01-09-2023)
|
|
|
POST REPLY TO THIS THREAD |
 |
|
|


