|
|
|

|
|
| Search | Car Forums | Gallery | Articles | Helper | AF 350Z | IgorSushko.com | Corporate |
|
| Latest | 0 Rplys |
|
|||||||
 |
 Show Printable Version | Show Printable Version |  Email this Page | Email this Page |  Subscribe to this Thread
|
|
|
Thread Tools |
 03-16-2008, 12:12 AM
|
#1 | ||
|
AF Moderator
 Join Date: Jan 2005
Location: El Paso, Texas
Posts: 18,017
Thanks: 30
Thanked 53 Times in 41 Posts
|
DHP PCM Module Install for '99 and Up Alero and Grand Am (56K Warning)
DHP v1.0 PCM Module Installation Procedure
Note: Example shown was done on a 2002 Alero GL2 with 3400 V6 engine. The procedure for a Grand Am is similar. Total of 9 pics (800X600).  Pic #1: Stock PCM on right, DHP PCM on left 1) Remove battery negative cable. Use a 8mm socket with 1/4" drive ratchet. 2) The PCM module is located under the driver's side of the dashboard so start by removing the plastic kick panel. A single push pin fastener holds it on and a nut on the stud holding the cover to the firewall. See Pic #2 below. 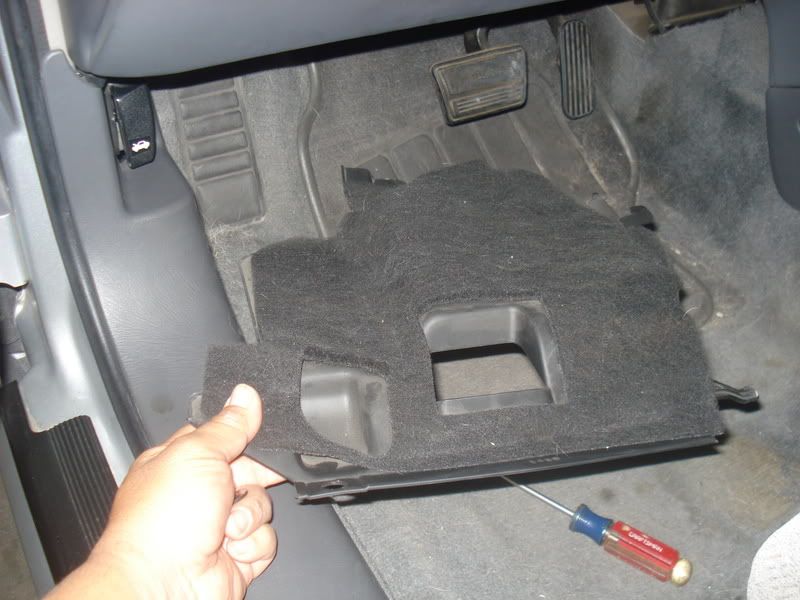 Pic #2 3) With kick panel removed this is the PCM module with the two 80 pin connector cables. Blue left, Clear right. Pic #3.  Pic #3 4) With 7mm socket and 1/4" drive handle or ratchet loosen the retaining bolts holding both 80 pin connectors. As you loosen carefully pull down on each connector until off. Also, remove the small white electrical connector. See Pic #4 below. 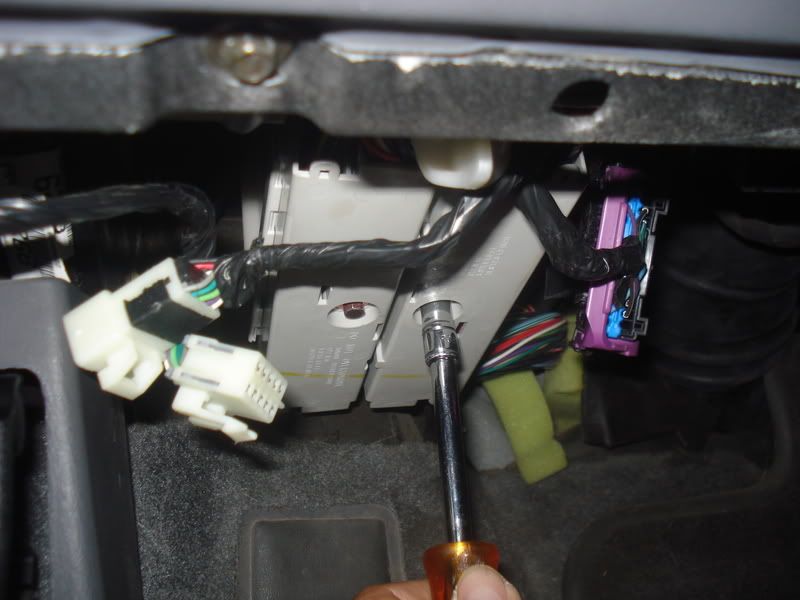 Pic #4 5) Once electrical connectors are removed set aside the wiring harness to the right which will facilitate removal of the PCM module. See Pic #5. 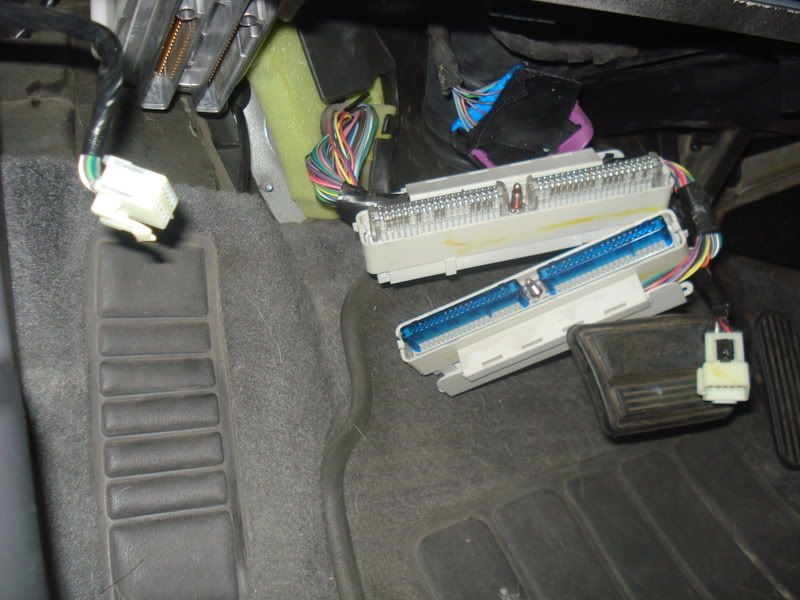 Pic #5 6) Next move the plastic lever to the right and PCM module will start dropping down from the plastic enclosure. See Pic #6. 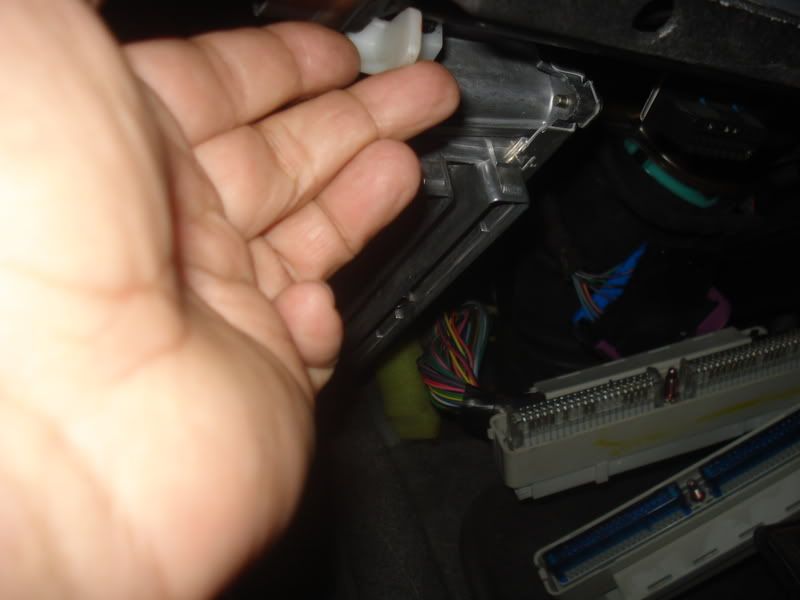 Pic #6 7) Then firmly grasp PCM module and pull down as shown in Pic #7. It may hang up on the carpeting at the rear towards the firewall but just push down on the carpeting as you pull down.  Pic #7 8) This how it looks with the PCM module removed. See Pic #8. 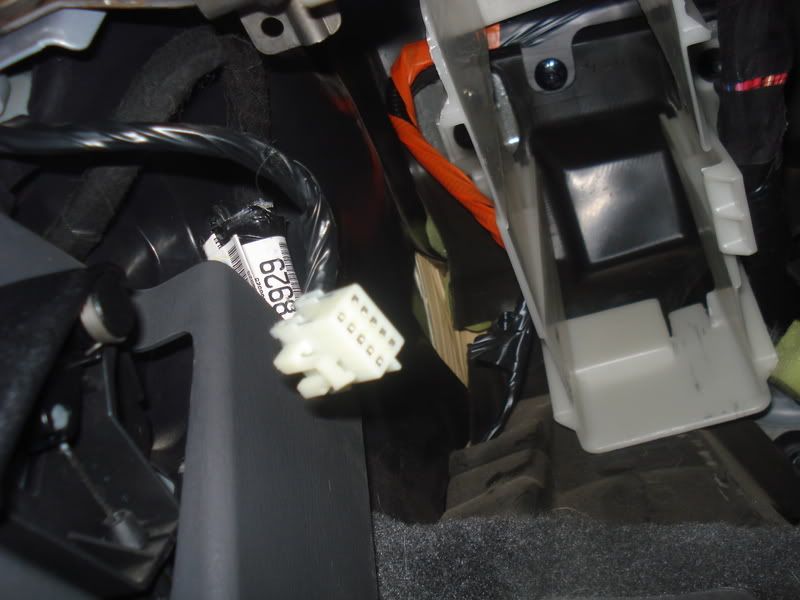 Pic #8 9) Install your new DHP PCM module. Installation is reverse of removal. Notes: When installing the two 80 pin electrical connectors be careful and do not touch any pins or break the connectors. As you tighten push connectors up carefully with the palm of one hand. Do not over torque the retaining bolts. Don't forget the smaller white electrical connector. 10) Reconnect battery negative cable. 11) Start engine and Key Relearn. A key relearn will be required. You will get a Passlock Security light flashing or steady on at the IP. See Pic #9. Take the ignition key to engine start and then release back to on/run. Do not take it to off. Leave the key in the ignition for up to 15 minutes. Wait until the Security light extinguishes at which time you can start the engine. Now take the key to off and then start. Engine should fire right up. If the above doesn't work the first time then repeat at least two more times. 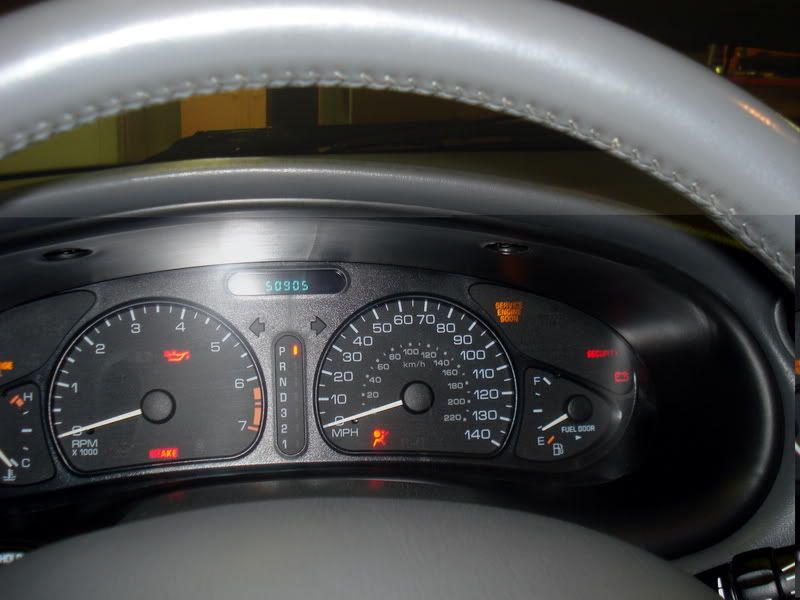 Pic #9 12) DHP recommends getting a crank variation learn (case learn) done at a GM dealer. I found this was not necessary. There was no SES/CEL light or any DTCs like P0336. A case learn will prevent false misfires from occurring so it is highly recommended regardless. 13) Enjoy the newly found performance. Also, note that it is highly recommended to use 91 octane premium unleaded gasoline or better for the best performance gains. Also, thoroughly test operation and make sure there are no driveability problems. 14) The DHP PCM is available at PFYC.com. See link below. Click here Quote:
__________________
'08 Pontiac Grand Prix GXP (Dark Slate Metallic) - LS4 5.3L V8 '02 Oldsmobile Alero GL2 - LA1 3400 V6 '99 Buick Regal LS - L36 Series II 3800 V6 '03 Honda CR250R MX - 2 Stroke 250cc '97 Pontiac Grand Prix GTP - L67 Series II 3800 V6 Supercharged (Sold) Timeslip 08/12/06 AF Community Guidelines |
||

|
|
|
POST REPLY TO THIS THREAD |
 |
| Thread Tools | |
|
|

