|
|
|

|
|
| Search | Car Forums | Gallery | Articles | Helper | AF 350Z | IgorSushko.com | Corporate |
|
| Latest | 0 Rplys |
|
|||||||
| WIP - Motorsports Post topics for any "Work In Process" motorsports vehicles in this sub-forum. |
 |
 Show Printable Version | Show Printable Version |  Email this Page | Email this Page |  Subscribe to this Thread
|
|
|
Thread Tools |
 01-02-2021, 06:42 AM
|
#91 | |
|
AF Newbie
Join Date: Oct 2020
Location: Netherlands
Posts: 57
Thanks: 7
Thanked 8 Times in 7 Posts
|
Re: 1/8 Porsche 956
Nice update SB.
I like the way u shape your parts and they are a good referece for my own build too. U are using a lot of green stuff to smoothen edges and to close gaps, for my previous 1:24 builds i only used grey putty but when i see how great the greenstuff works on your model i will order it too. Which kind of greenstuff do u use? For the two inlet trumpets i can help u with some reference pics. They are from a 1984 Porsche 956 Canon which was stripped down. The site they are on is unavailable but the pictures will show up on google. (The site is from : customers.dtperformanceltd.co.uk) This picture is from the bottom taken, on the left the turbo with the inlet trumpet:  Next one is from the side, u can see the trumpet is going from round tube into square tube.  And the last picture is from the inlet duct in the door:  I hope these pics will help u. Greetz Peter
__________________
Thx for watching,  Greetz Peter Greetz Peter
|
|

|

|
| The Following User Says Thank You to Midnight Creep For This Useful Post: |
ScratchBuilt (01-02-2021)
|
|
01-02-2021, 04:42 PM
|
#92 | |
|
AF Enthusiast
Thread starter
Join Date: Nov 2008
Location: Norwich
Posts: 649
Thanks: 21
Thanked 111 Times in 87 Posts
|
Re: 1/8 Porsche 956
Excellent photos, Peter - thank you! I hadn't seen those before, but they're very useful - you don't see many photos from under the car in any of the books! The trumpet with integrated duct is interesting and might be a mod from the factory version. The Freisinger photos I've been using of the rebuild of chassis 956-113 have a separate trumpet and duct, and that's how MFH have done it, too. These photos also confirm my suspicion that the only solid mounting for the turbo assembly is the plate at the back of the sideframe, plus the pipe connection to the intercooler above.
The Greenstuff I use has traditionally been the Games Workshop version, but I'm now using some from The Army Painter. I haven't been into the shops to buy any modelling supplies since last March, so I've been finding what I need online instead. I also have some Mr Hobby white putty which I'll use depending on the situation, but greenstuff tends to be my first choice. The two main drawbacks (in my opinion) are the time it takes the greenstuff to go properly hard, and that it doesn't always 'key' to a surface - you'll notice that I often use styrene offcuts or bits of strip and angle to give the greenstuff something to lock on to. Much appreciated. SB |
|
|
|
|
| The Following User Says Thank You to ScratchBuilt For This Useful Post: |
Midnight Creep (01-02-2021)
|
|
01-04-2021, 03:25 AM
|
#93 | |
|
Blarg! Wort Wort Wort!
Join Date: Mar 2006
Location: Quezon City
Posts: 2,120
Thanks: 64
Thanked 101 Times in 100 Posts
|
Re: 1/8 Porsche 956
what a way to start the new year! love the update

__________________
olly olly oxen free |
|
|
|
|
|
02-22-2021, 02:10 PM
|
#94 | |
|
AF Enthusiast
Thread starter
Join Date: Nov 2008
Location: Norwich
Posts: 649
Thanks: 21
Thanked 111 Times in 87 Posts
|
Re: 1/8 Porsche 956
Hello!
My plan for the start of 2021 has been to continue with some of the main engine components - I haven't really done anything directly engine-related since I made the two blocks back in early 2019. My original intention was to actually make some of the components for the second engine at the same time, but as it has turned out, the parts for the 956 have taken long enough! What I've realised over these last few weeks is that I didn't take enough measurements of the parts made for the 935 engine, so I've had to re-calculate a lot of these. This has not necessarily been a bad thing, but it does add to the time. So, for January and February I've put the chassis and turbo bits to one side and have been focussing on the camboxes, cam drives, head components, and the cooling fan. Here's what I'd done by the end of January: 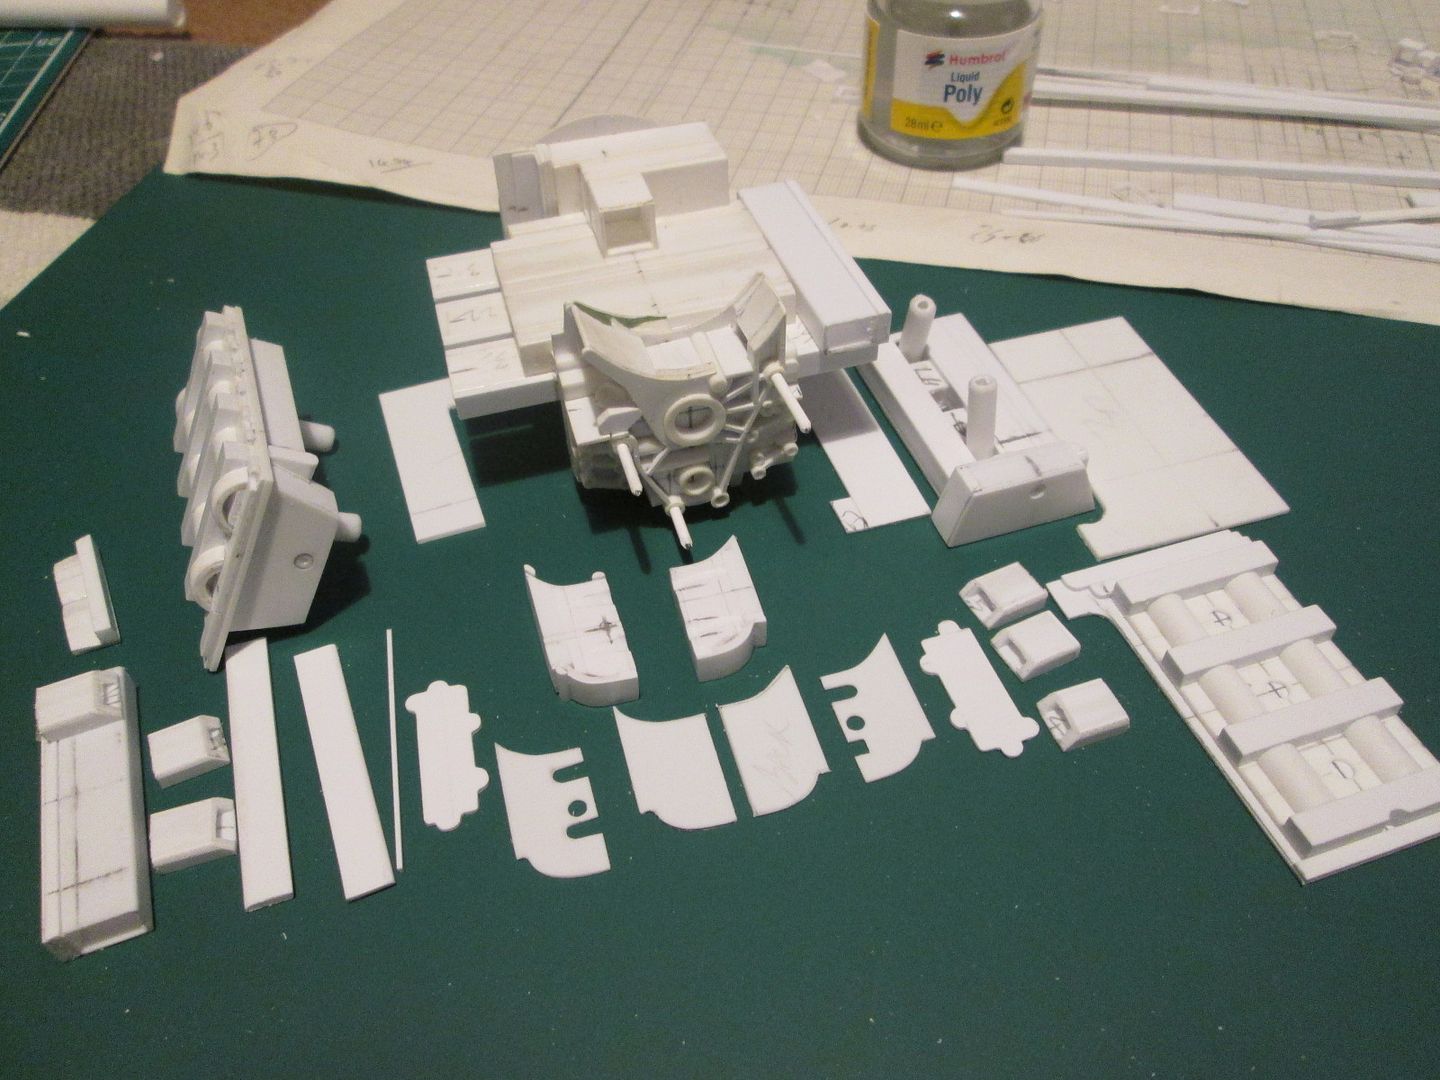 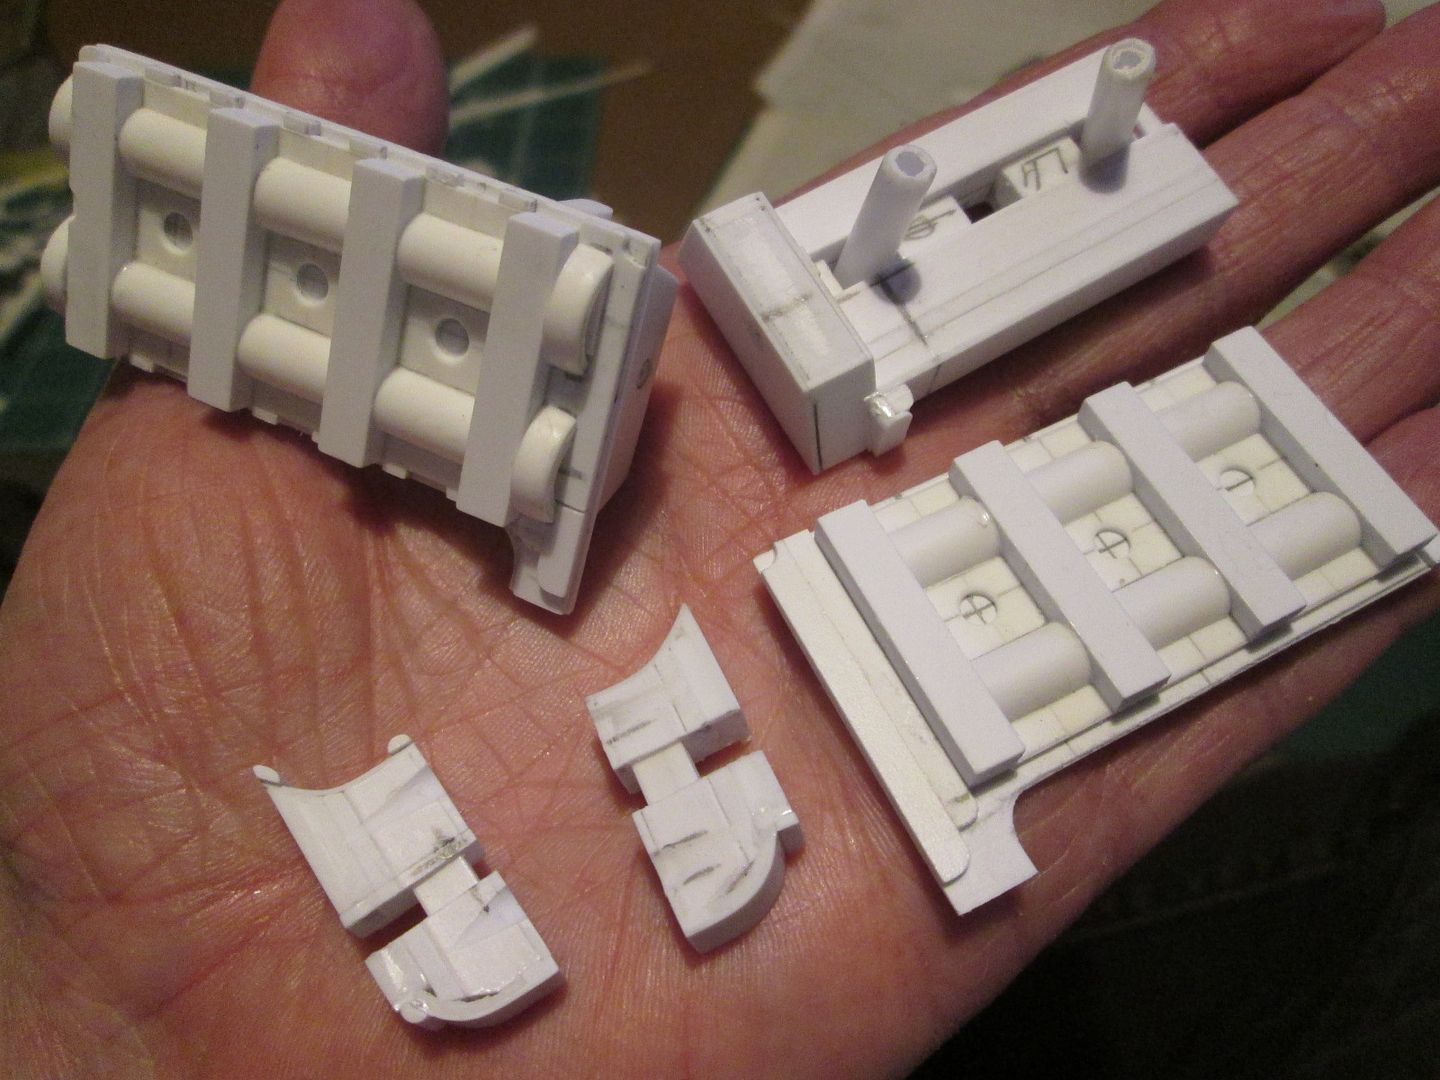 This was all constructed in a similar way to what I'd done with the 935, but with some minor alterations and (hopefully) improvements. I'm still trying to leave the sections unglued from each other for as long as I can, but I'm sure things will start to be fitted together soon enough when I'm happy it won't cause problems further on. Two areas I've tried to improve have been the detailing on each end of the camboxes. On the 935 a lot of this was cut from thin sheet, but for the 956 I've used more strip and sections of tube:  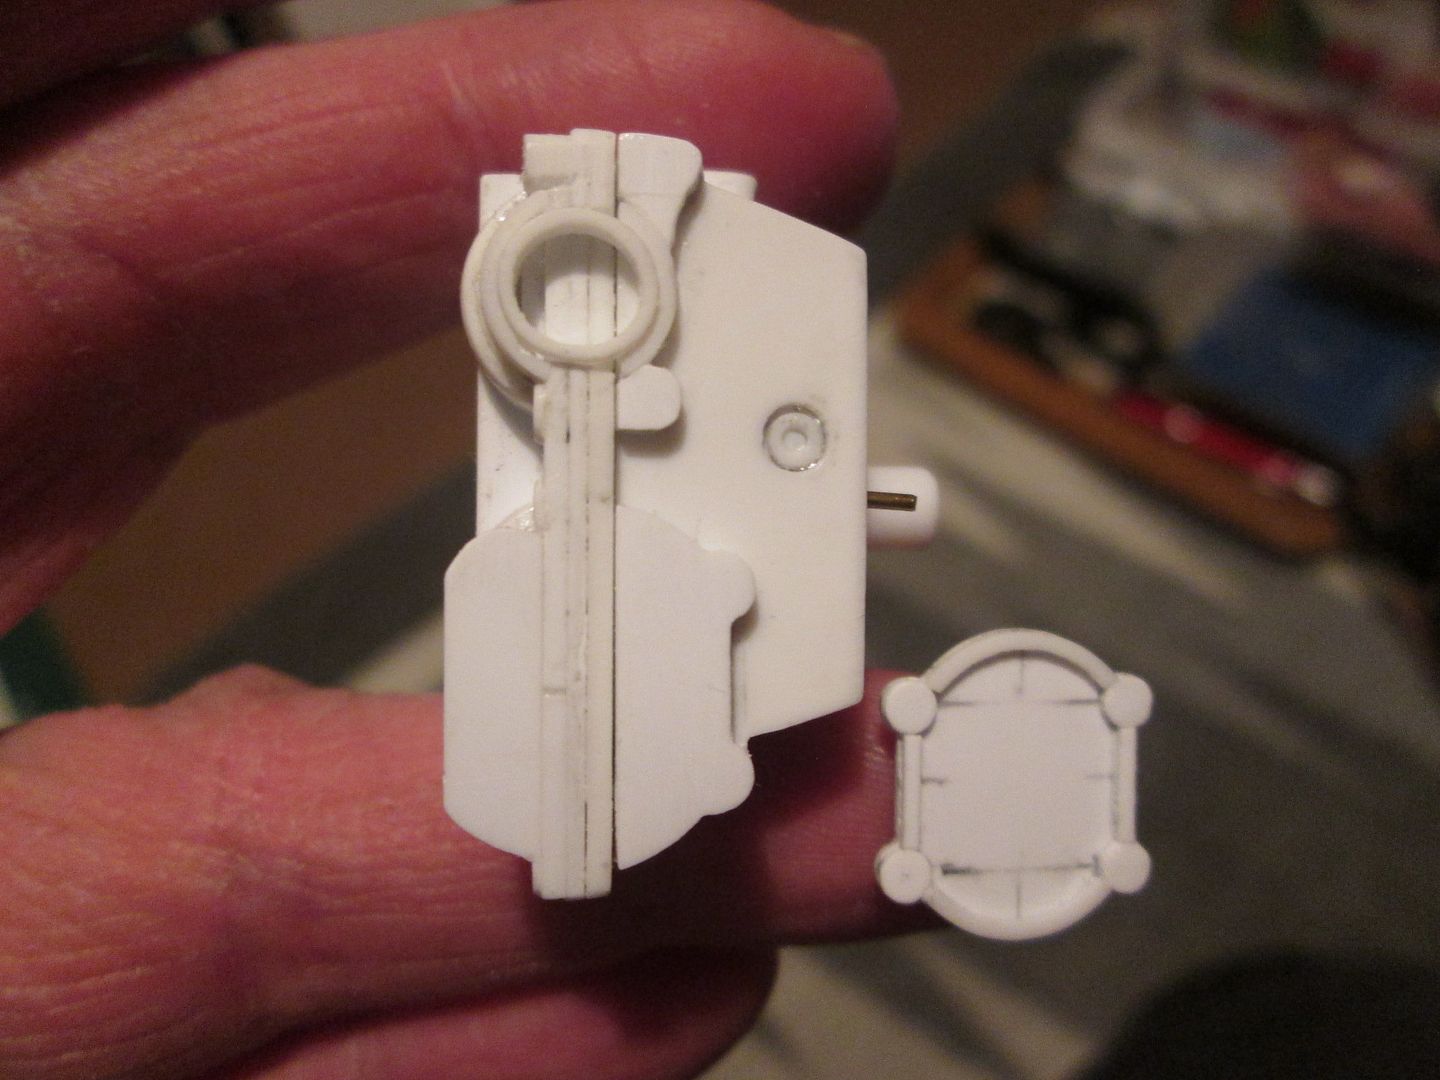 Again, this still needs more work but it's coming along nicely. I've made the two baseplates for the cambox oilpumps, so I'll probably finish these later this week. During the last week I've been tackling the cooling fan. The outer housing was made from three layers of 0.4mm styrene wrapped around a former, and the back end has been left long to be trimmed to shape when the fibreglass shroud is added. Thin strip has been added around the outside to create the ridges, and bushes positioned as mounts for the alternator bracket: 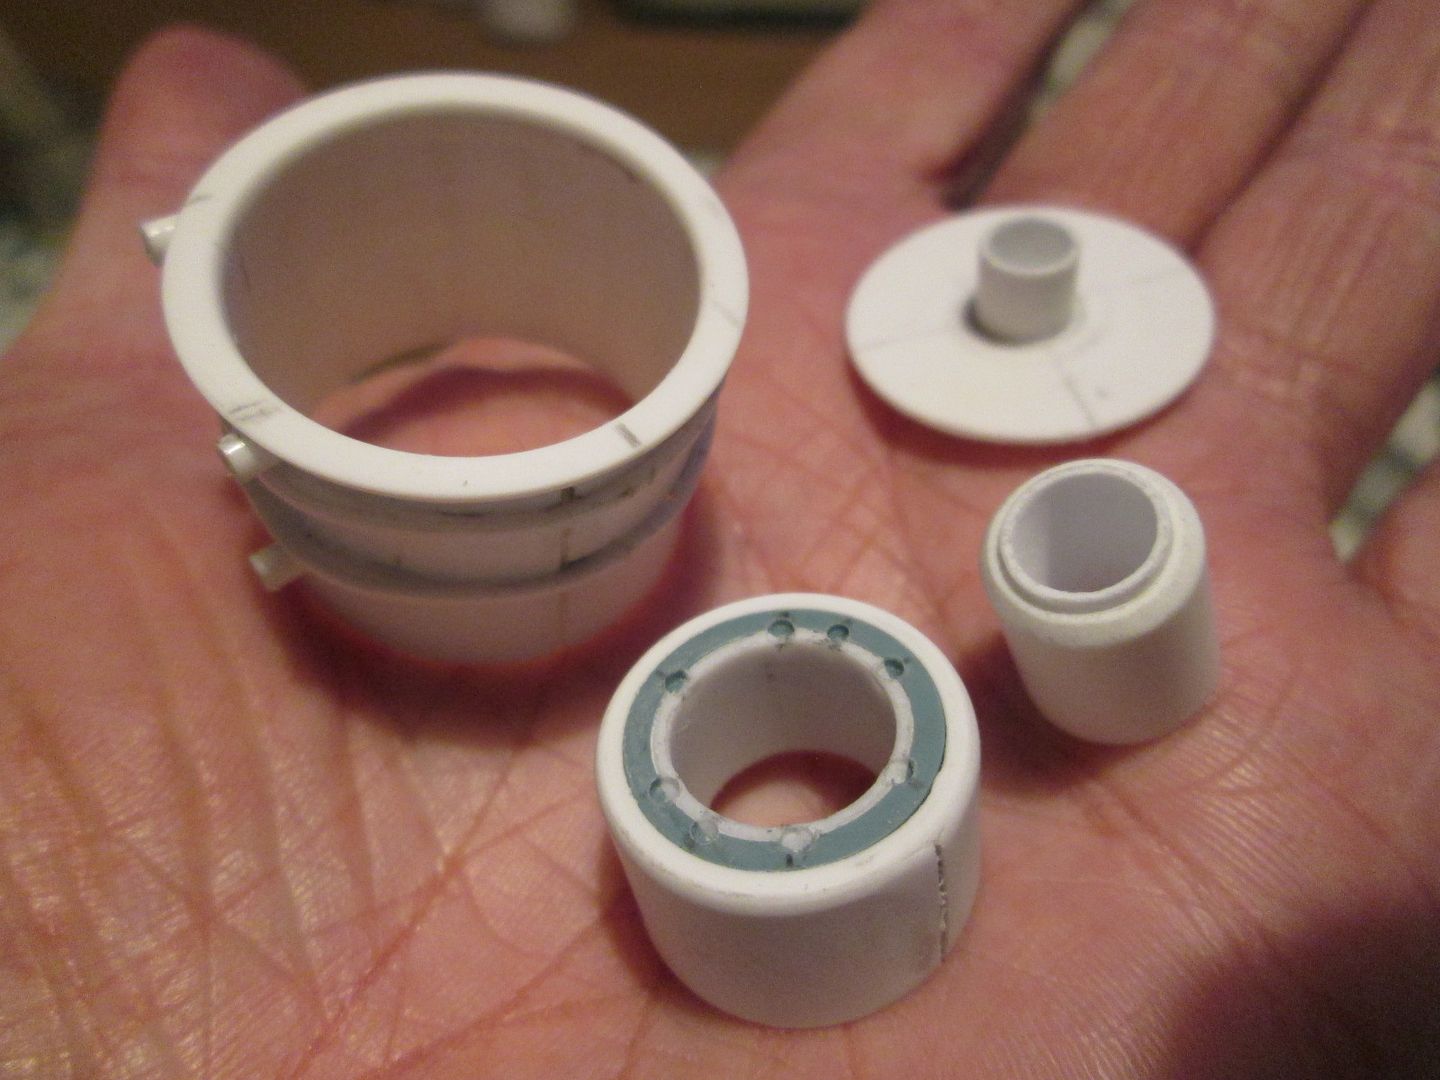 In the foreground is the start of the centre hub of the fan itself - a sandwich of styrene tube, green till-roll tube, and more layers of thin styrene wrap. The nine fan blades are cut from 1mm sheet, glued to the hub, and there's now an extra ring around the base in support:  I left the blades slightly oversize on the diameter, and used my emery-cloth block to sand them back to size to fit into the outer housing. The central pulleys for the fan and alternator drive were simply made up from styrene discs and short sections of tube: 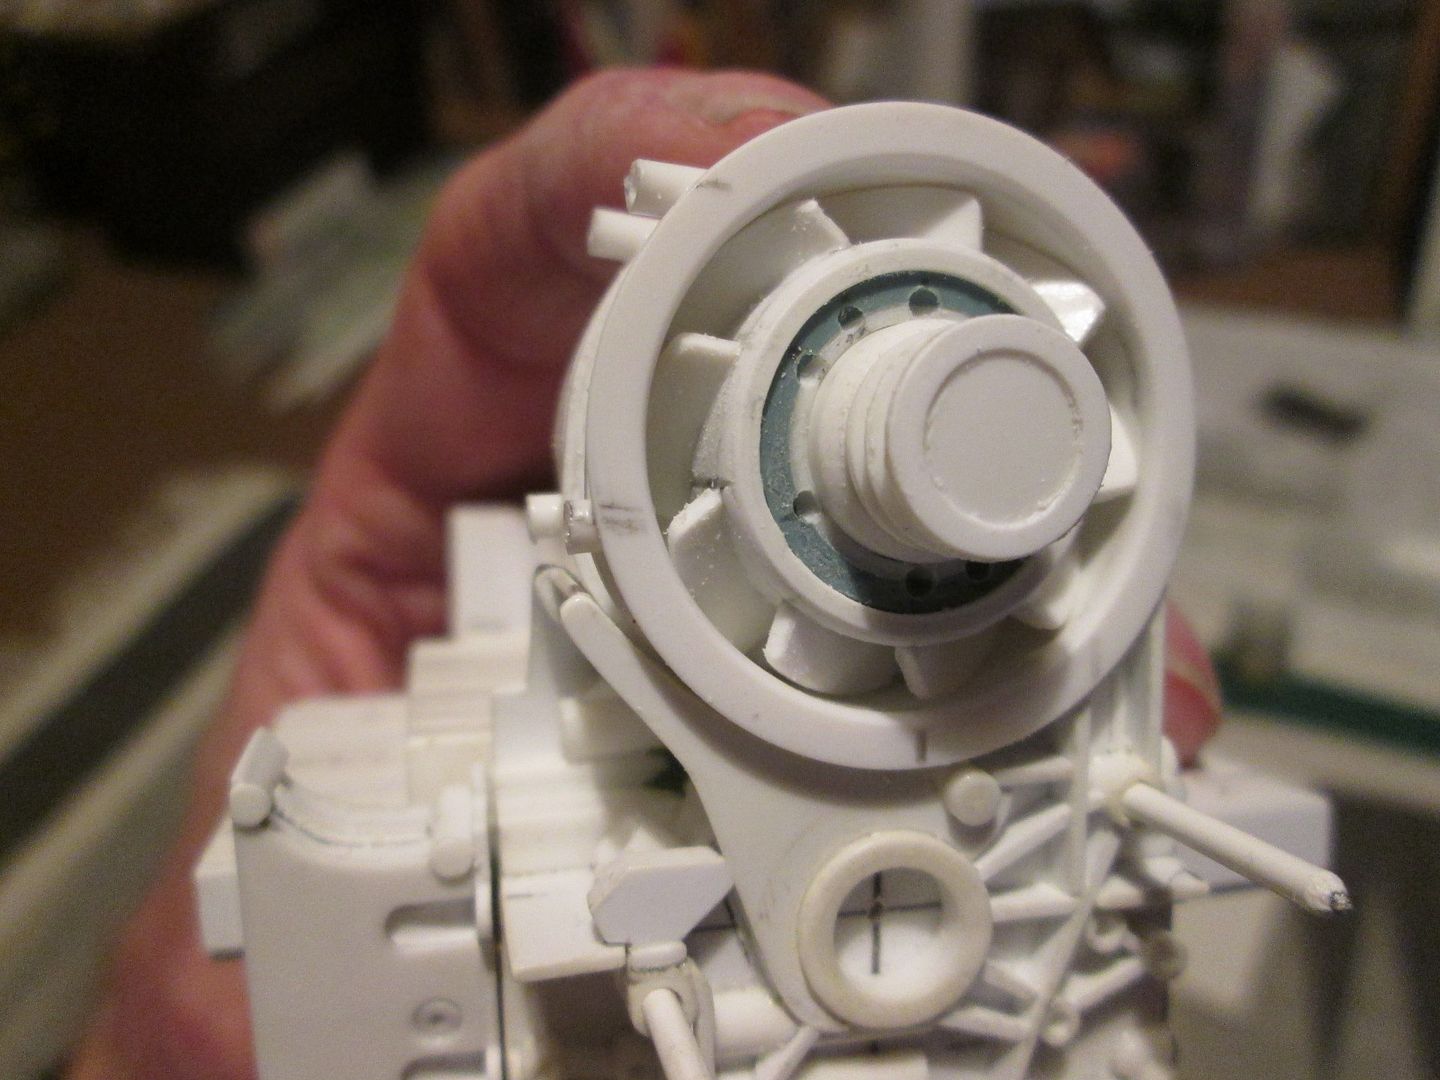 There's lots of adjustment built into these parts - once I get the alternator made and sort out the other pulleys I can start refining the positioning of all these parts. Of course, once the engine is fitted into the chassis a lot of this detail will be completely hidden from view - there's a section of ducting which snakes down from the roof and feeds air to the fan - but it'll look correct while it's being built, and I still need to have the drivebelts coming out in the right place. It's easier to make the fan as it should be, than try to redesign it in a simpler way knowing it'll be hidden! So, that's where I am now. I'll probably spend the rest of this week exclusively on the engine, and once we're into March I'm going to start looking at some moulds for more fibreglass. Assuming the weather improves as it should, it would be great to be able to start laying up some more bodywork parts in April... Have a good week, SB |
|
|
|
|
|
02-26-2021, 10:35 AM
|
#95 | |
|
AF Newbie
Join Date: Oct 2020
Location: Netherlands
Posts: 57
Thanks: 7
Thanked 8 Times in 7 Posts
|
Re: 1/8 Porsche 956
Great work SB.
Its nice too see how u build up your engine and its so different from the one i am building. It also seems to me that scale 1:8 is pretty much larger than 1:10. How long and wide is your engine (just to compare) Keep up the good work, looking for the next update.
__________________
Thx for watching, Greetz Peter
|
|
|
|
|
|
03-01-2021, 02:12 PM
|
#96 | |
|
AF Enthusiast
Thread starter
Join Date: Nov 2008
Location: Norwich
Posts: 649
Thanks: 21
Thanked 111 Times in 87 Posts
|
Re: 1/8 Porsche 956
Hello Peter,
There's something about 1:8 that I like, but it's purely by chance that I started building in this scale. When I made my first scratch-built Formula Ford chassis 20 years ago, most of the tubes were 1" diameter in real-life, I had some 1/8" box and tube available, so it was an obvious choice. With each project I've tried to add more detail and complexity, and I wouldn't want to go any smaller - so kudos to you for your 1/10 project! Basic measurements for the 956 engine in 1:8 scale: Overall width (at present) approx 99.5mm. Block length approx 65mm. Cam cover length approx 58mm. Cylinder bore spacing approx 14.6mm. Cooling fan diameter 25.5mm. How's that? Should have some more bits to update next week - currently making the alternator, have made the two oilpumps for the front of the cam covers, and will try to do a few more small engine-related bits and pieces before tackling the next batch of fibreglass moulds. SB |
|
|
|
|
| The Following User Says Thank You to ScratchBuilt For This Useful Post: |
Midnight Creep (03-01-2021)
|
|
03-01-2021, 08:09 PM
|
#97 | |
|
AF Moderator
 
Join Date: Sep 2002
Location: Fort Worth, Texas
Posts: 3,246
Thanks: 31
Thanked 314 Times in 241 Posts
|
Re: 1/8 Porsche 956
Wow, never cease to amaze me. Terrific update.
__________________
The client is not always right. - Enzo Ferrari ItalianHorses.net    
|
|
|
|
|
|
03-22-2021, 03:39 PM
|
#98 | |
|
AF Enthusiast
Thread starter
Join Date: Nov 2008
Location: Norwich
Posts: 649
Thanks: 21
Thanked 111 Times in 87 Posts
|
Re: 1/8 Porsche 956
Hello again,
Bit of a mix tonight - continuing with parts already in progress, and the start of something new... Following on from last time, having made the fan shroud and cooling fan it seemed a good idea to start making the alternator too. First step was to make the pressed fan rotor: 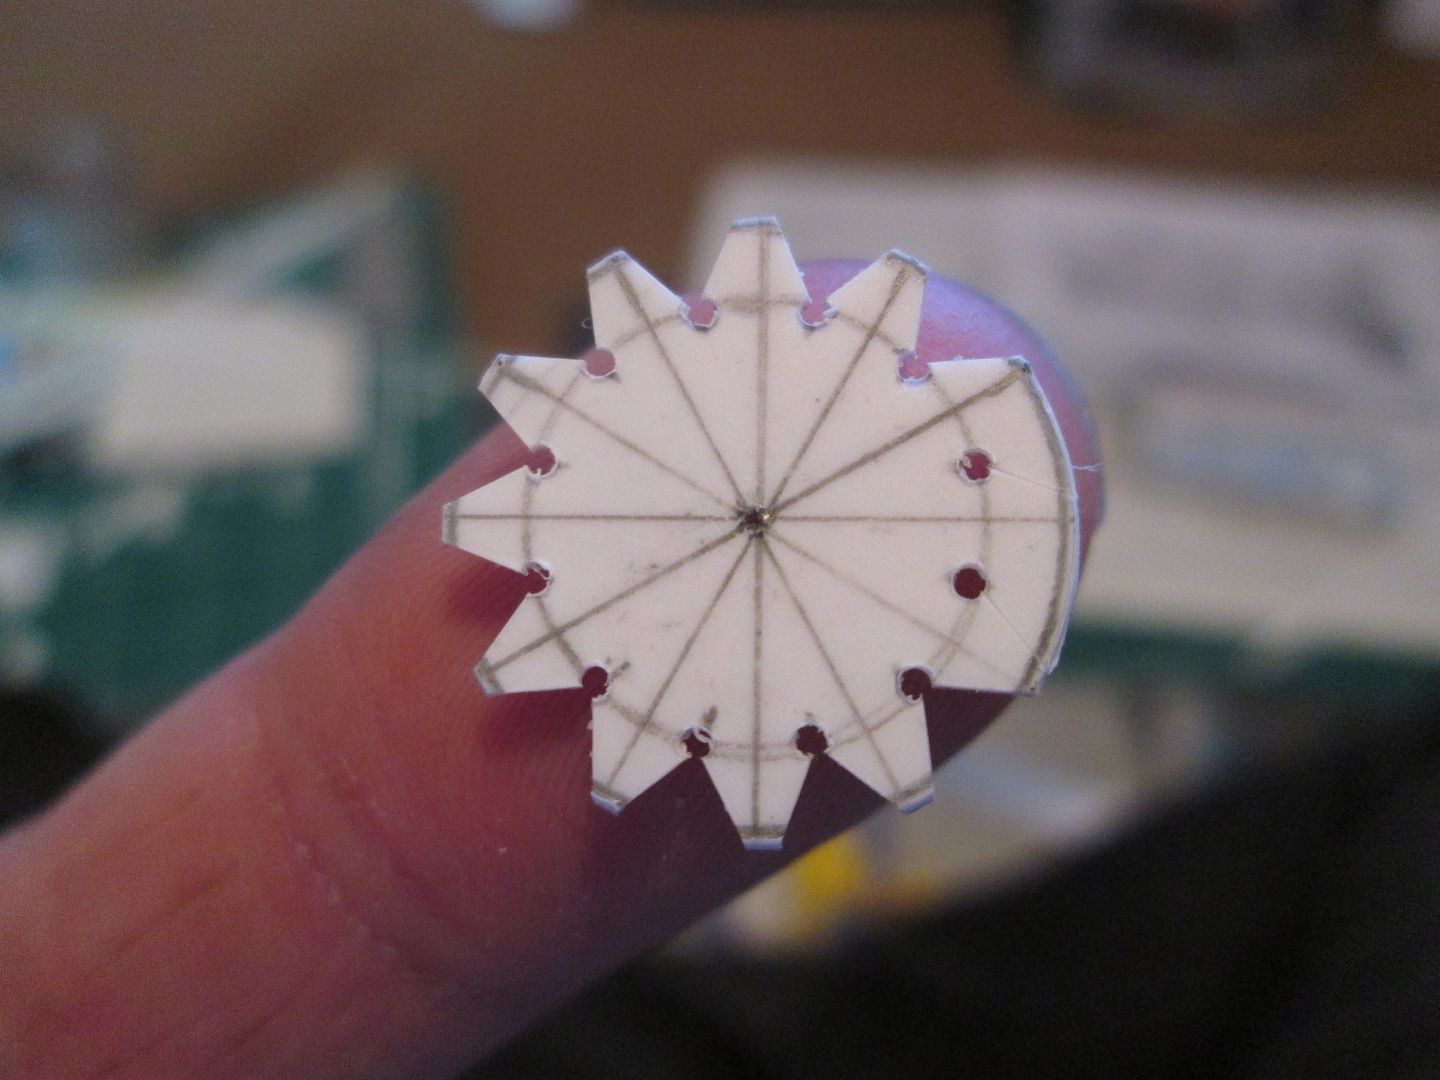 ..and then to add the mounting section at the front of the alternator: 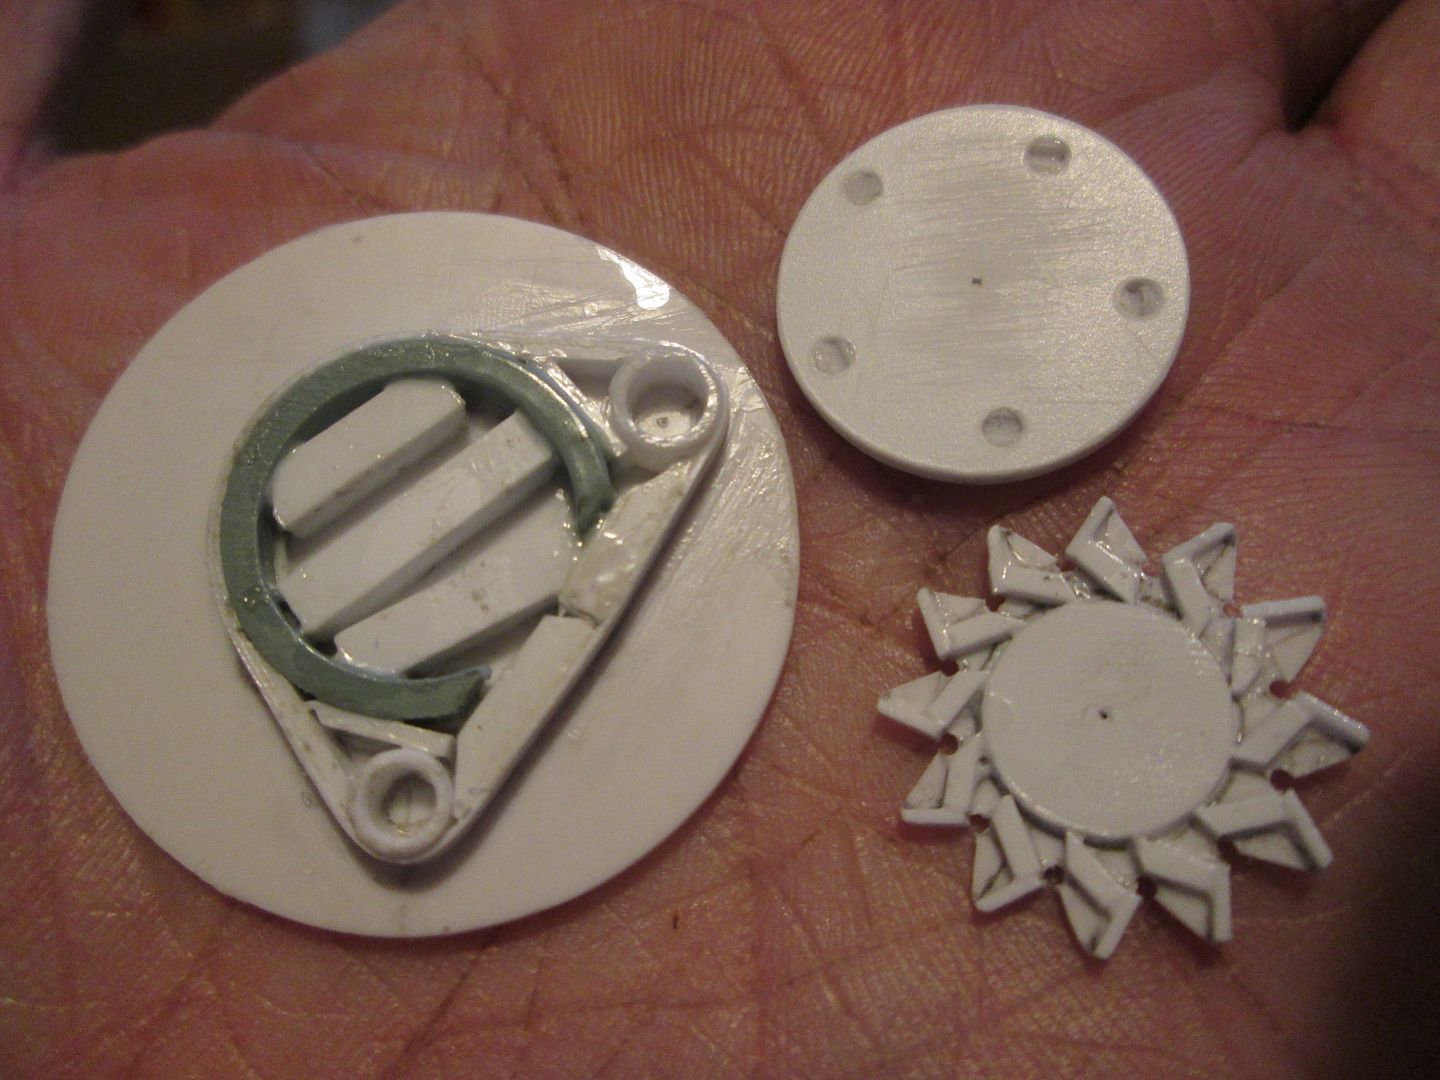 This is all very much as per the 935 build, with a few tweaks. The 935 version had three mounting lugs, but many photos of the 956 show it with a 2-lug body, so that's what I've made here. The fan rotor has small pieces of 0.5mm strip added on the back face to create the effect of the folded ends on the real thing. Then, with the drive pulley attached (the other pulley is the main cooling fan driver): 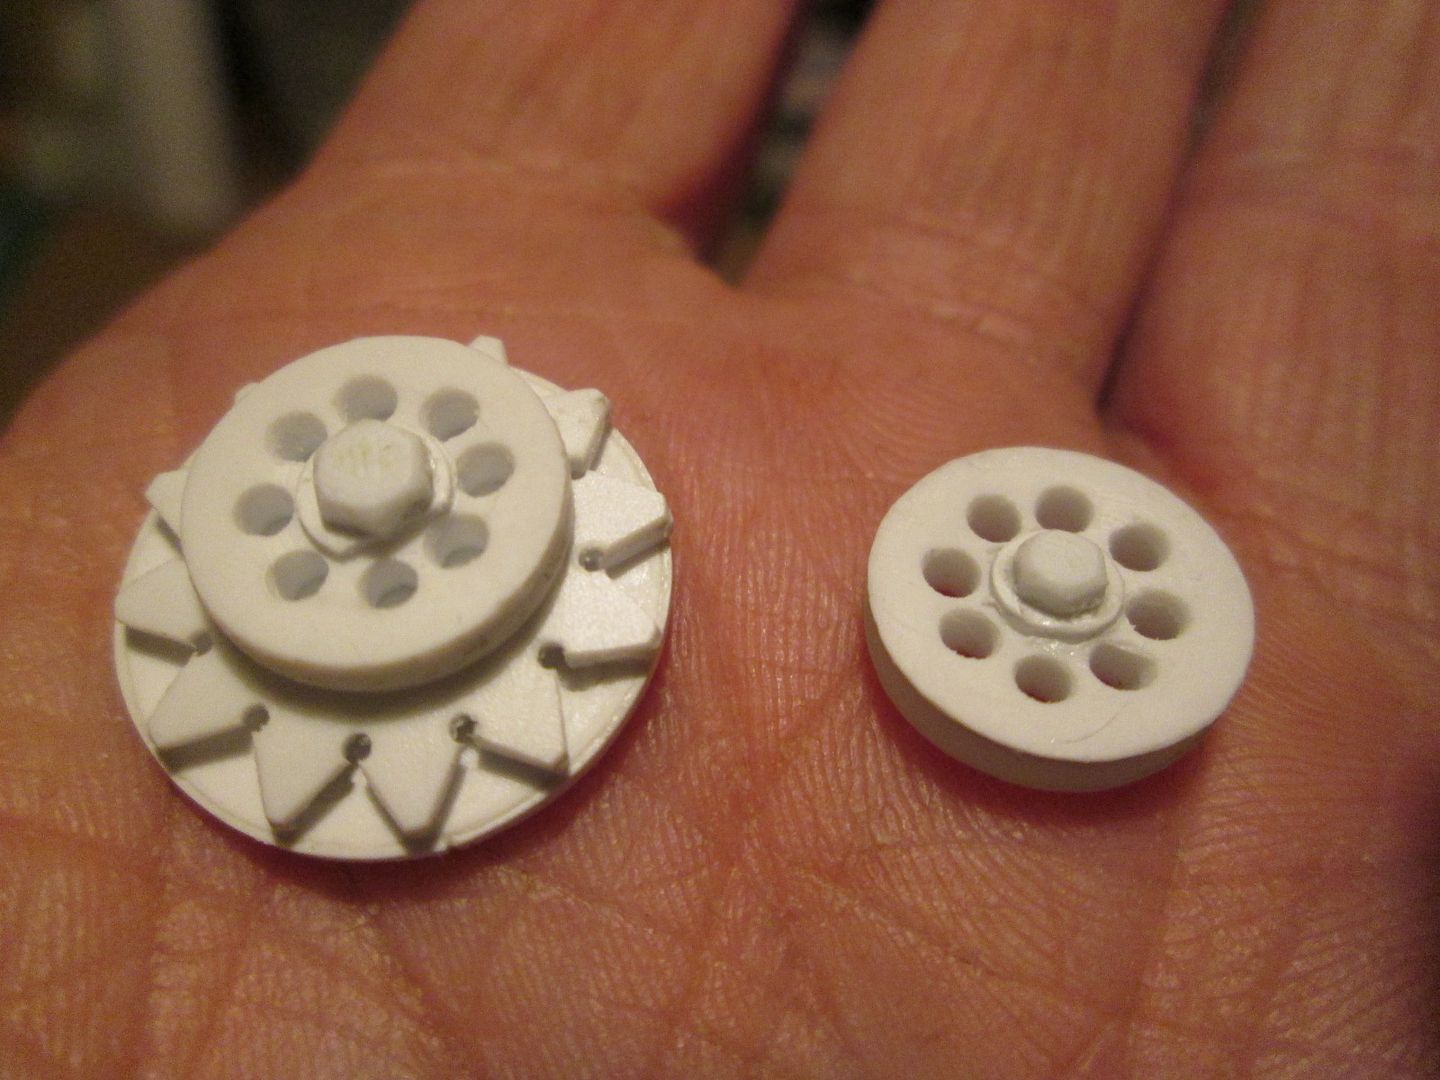 The main body of the alternator was made separately, using a section of till-roll tube as a core, then adding the mounting tube, and wrapping the whole lot in sheet styrene. The cooling slots in the back cover allow a tiny view inside, so I've added some made-up detailing to the interior:  Mounting brackets have been made from strip, channel and pieces cut from 1/8" box, and pin onto the main fan shroud. A short stay rod will eventually connect the two together at the bottom. 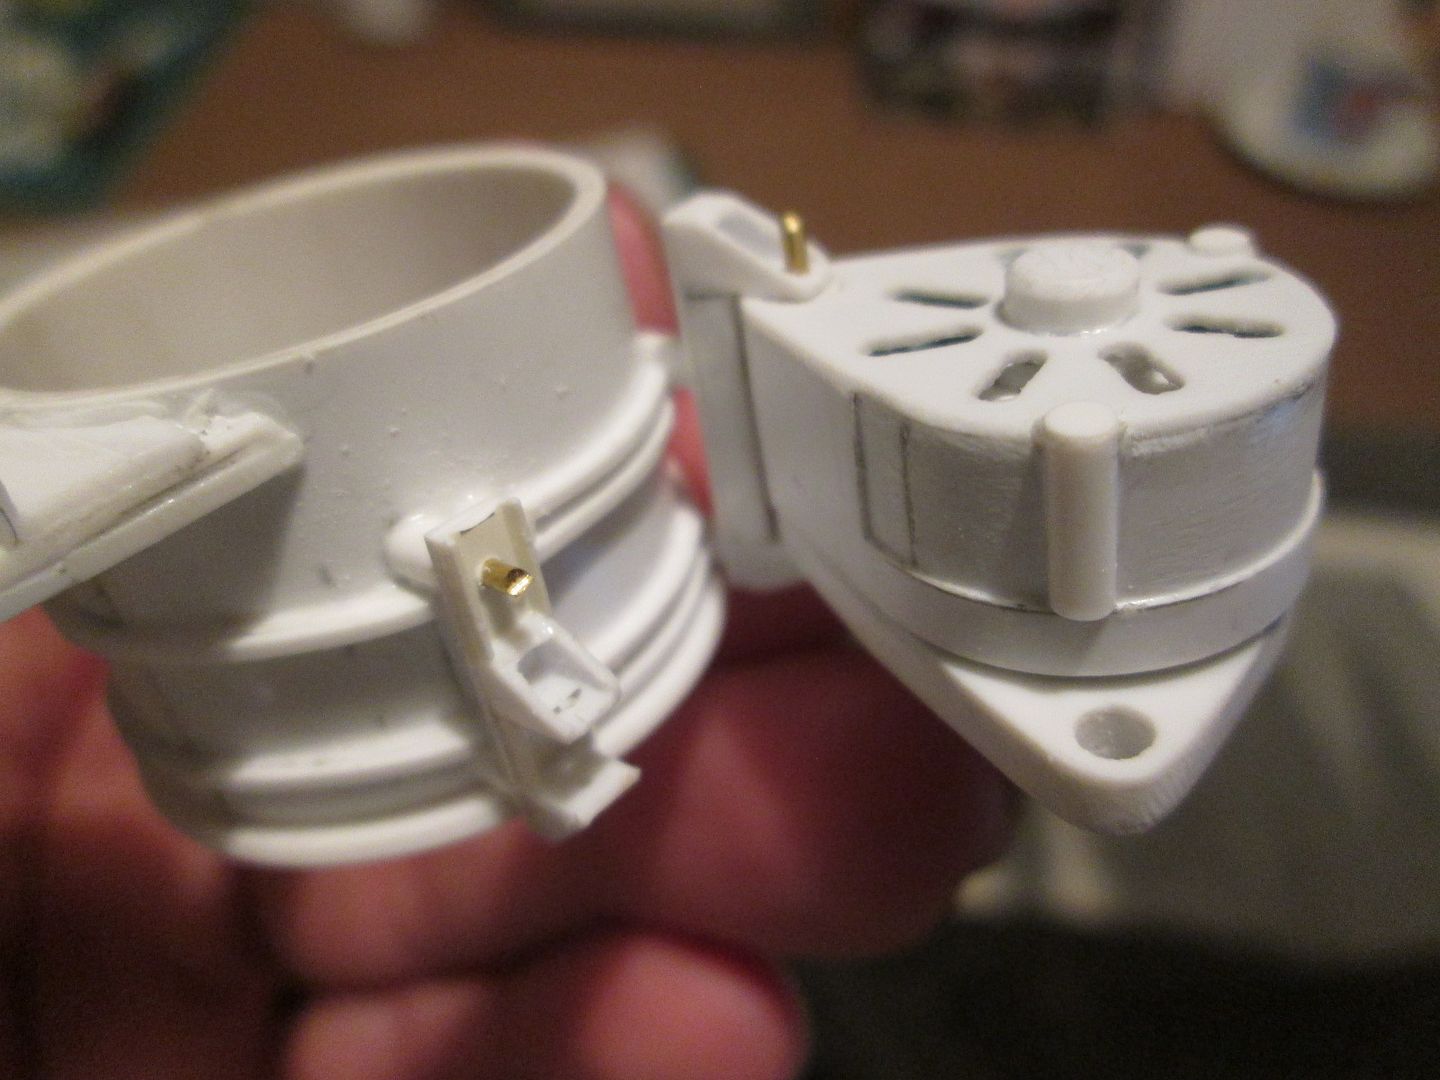 Amongst all this I made a start on the water and oil pumps which will fit onto the front and rear ends of the lower cam-boxes:  The greenstuff on the water pumps needs a final shaping and fettling, and I still need to make the inner sections which include the pipe taking the water out (or bringing the water in, as the case may be). Having said a while ago that I wanted to start thinking about bodywork once into March, it was time to put that plan into action! I decided that rather than trying cut and hot-wire the full shape in one piece, I would split it in two - create the lower section (nose, tail, doors) as one shape, then make the cockpit 'bubble' as a second. So, after spending some time checking the profile against my original chassis drawings, etc, and then making templates from thick draughting film, this was the starting point: 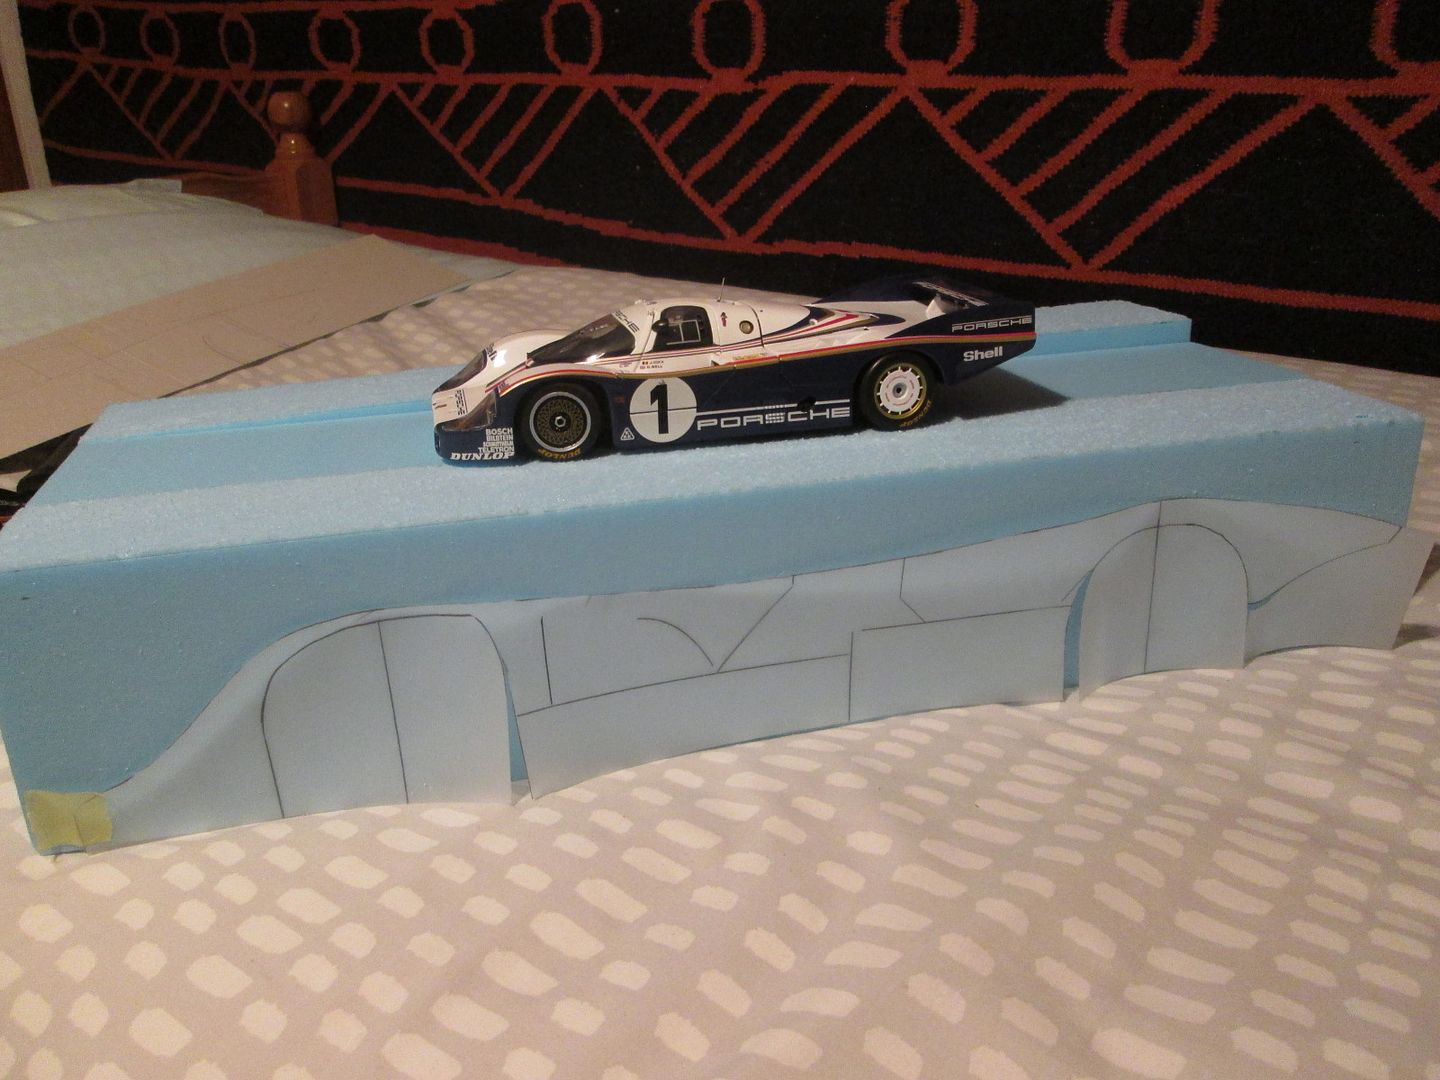 That's a 1:18 long-tail 956 sitting on top, for scale. The foam block is five pieces - two outer pieces measuring 75mm x 110mm, a large centre block measuring 100mm x 75mm, and two small pieces 100mm x 35mm underneath. It didn't need to be 110mm tall, but I've added a 20mm margin so that when I lay-up the fibreglass I can go beyond the trim-line - particularly around the nose area. Most of the sides of the car will be made from separate moulded and flat-sheet piece (I made the main lower side pieces last summer), so my initial concern was to get the profile of the top surface. I transferred the template from draughting film to cardboard, taped these to the 75mm outer blocks, then rough-cut and hot-wired the profile: 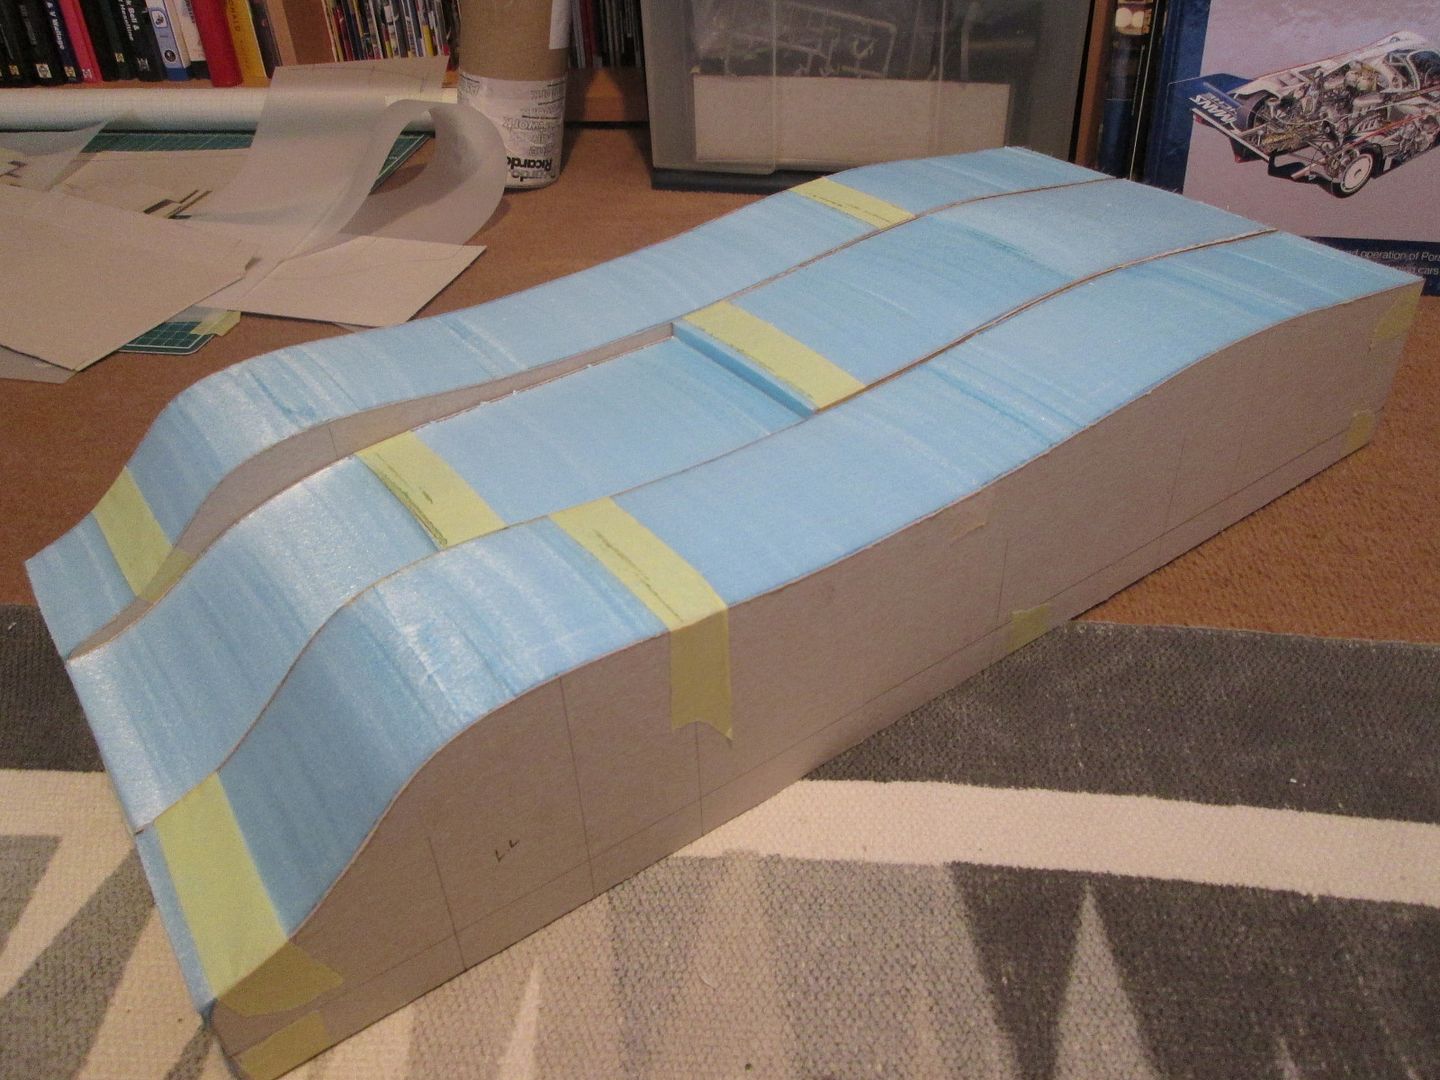 The profile of the centre block is different at the front end, but the same at the back, so new patterns were made for this. The only significant shaping in the plan view was to round-off the two front corners around the headlight area, so more templates and patterns required: 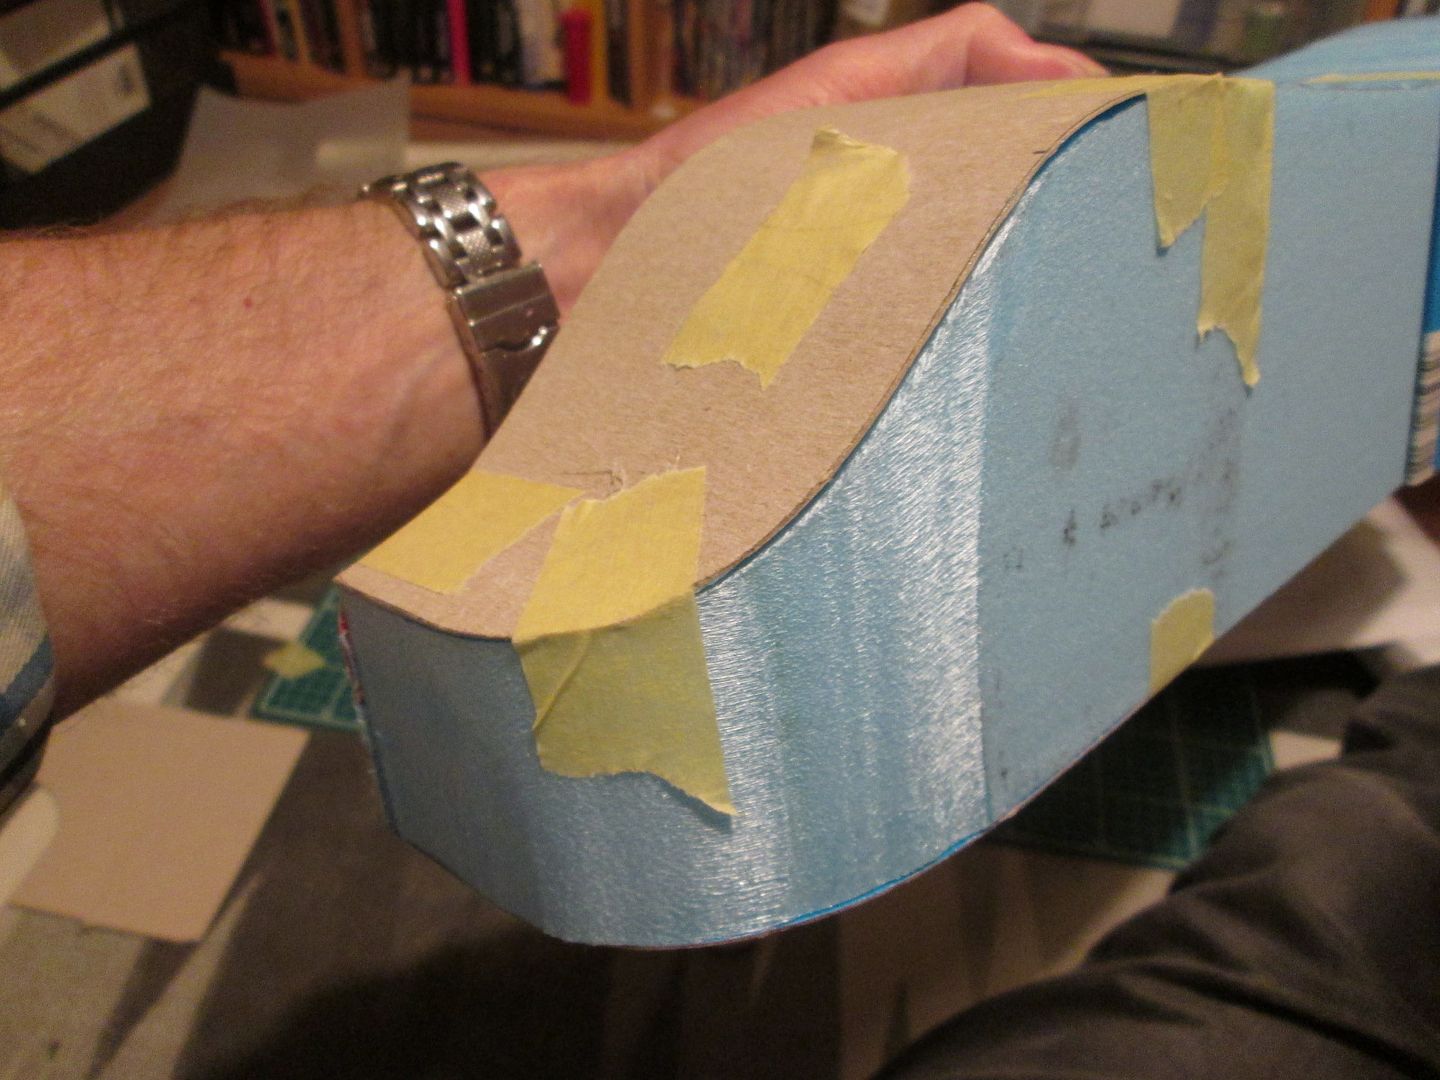 ...and now it's looking a bit like a 956! 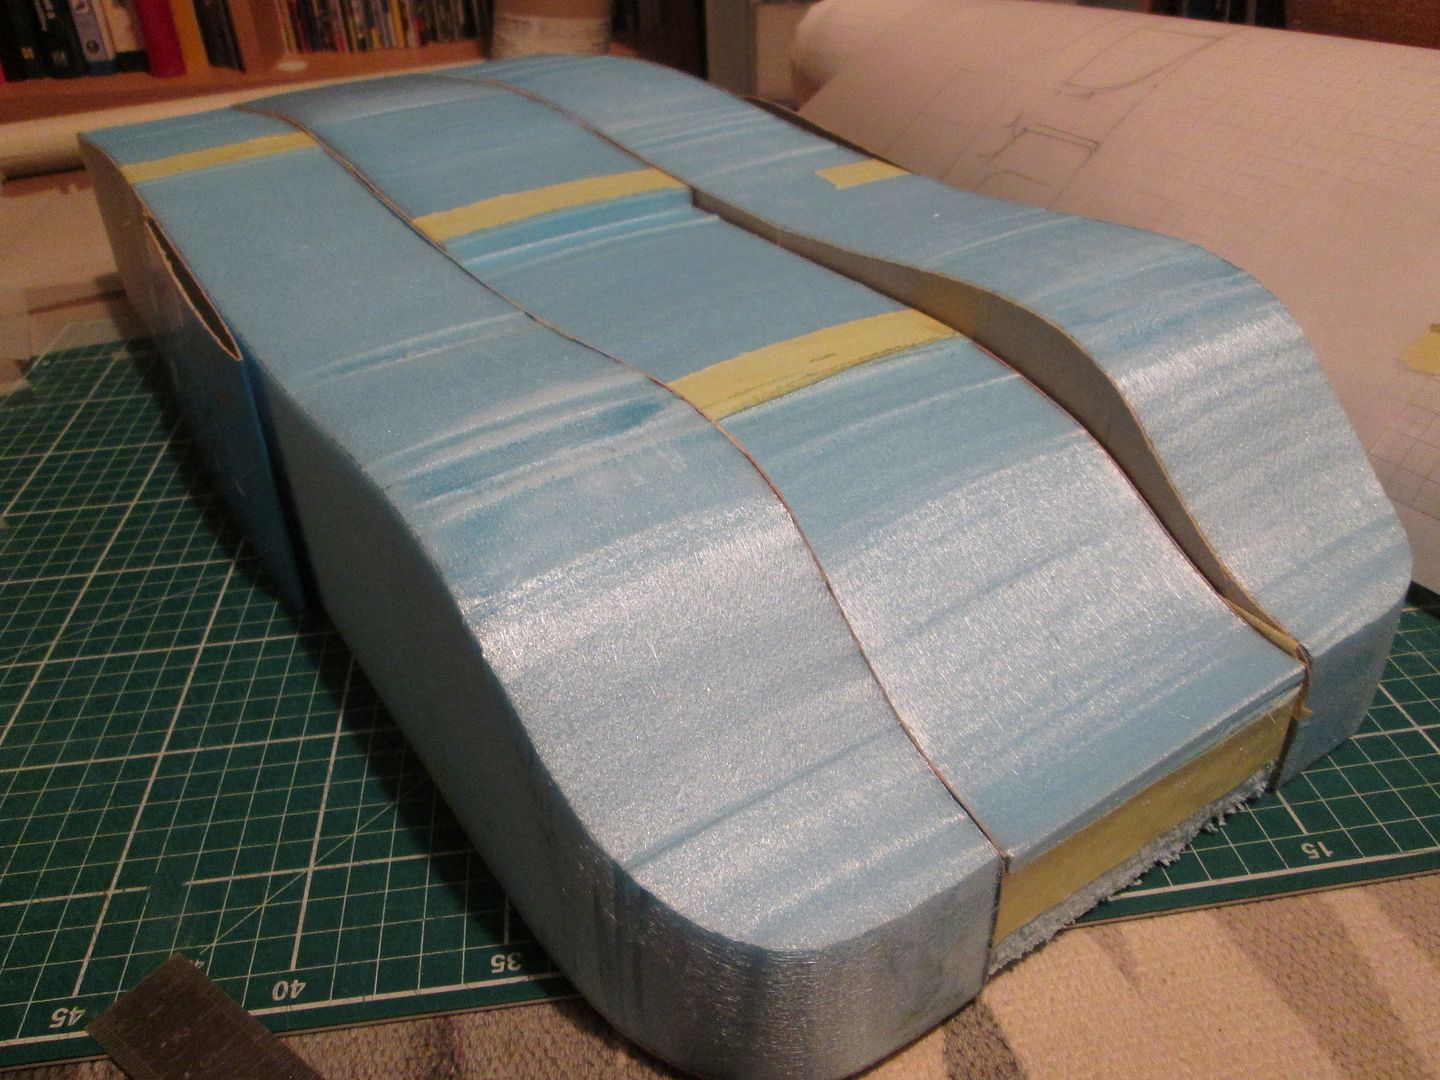 Next step - make a block to shape into the cockpit bubble:  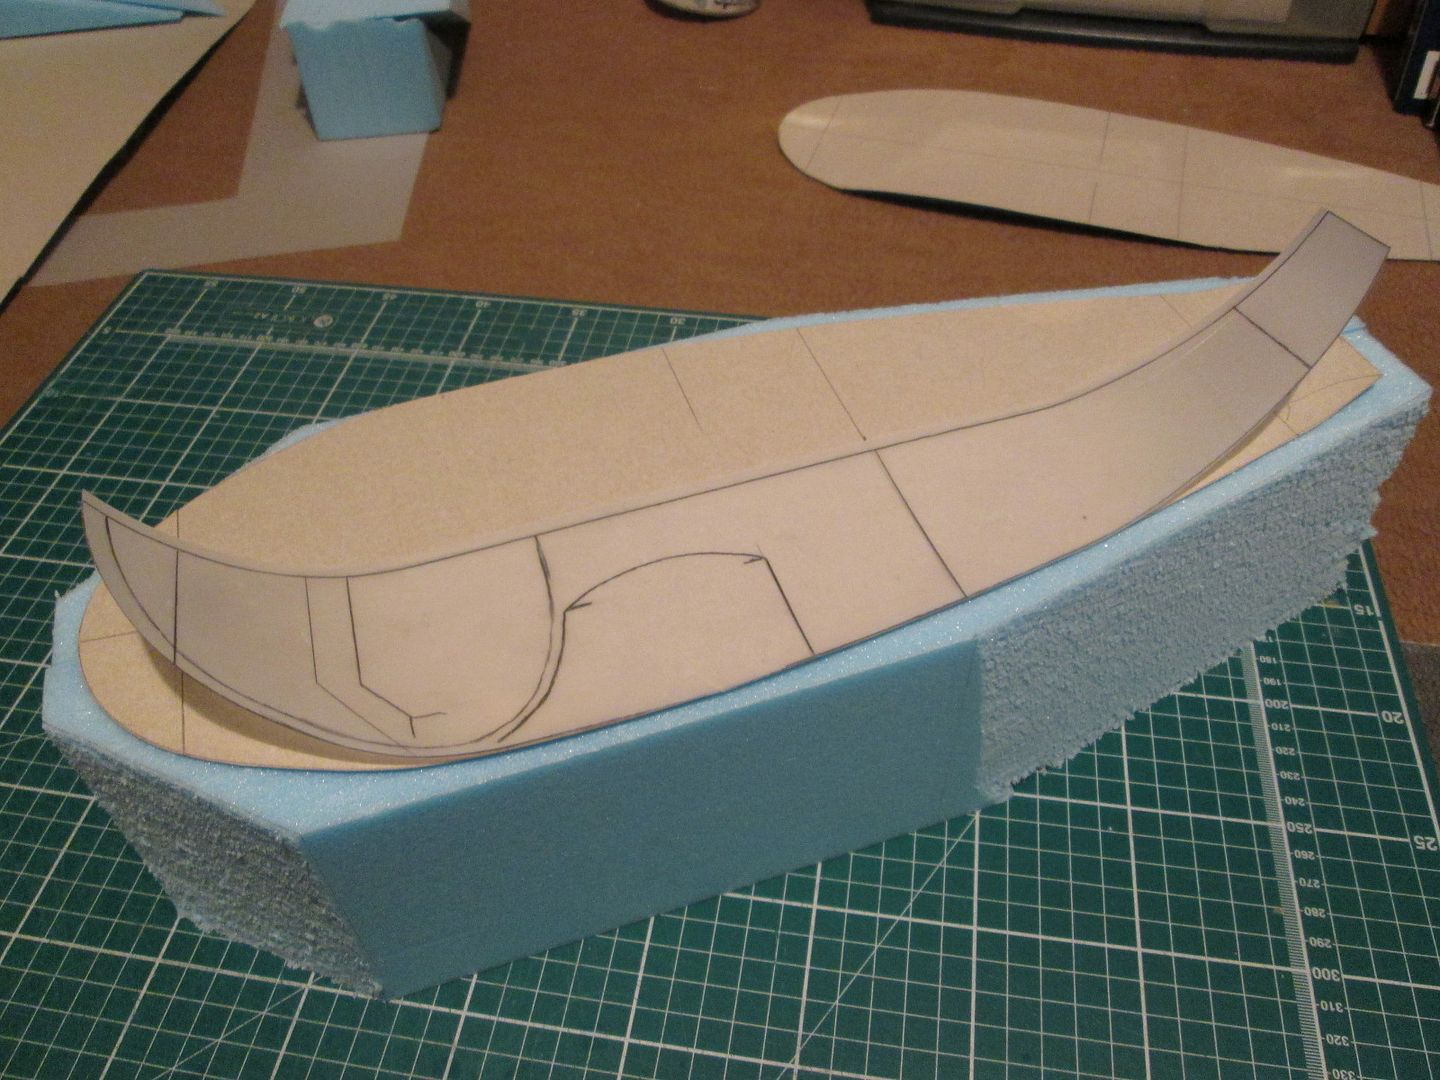 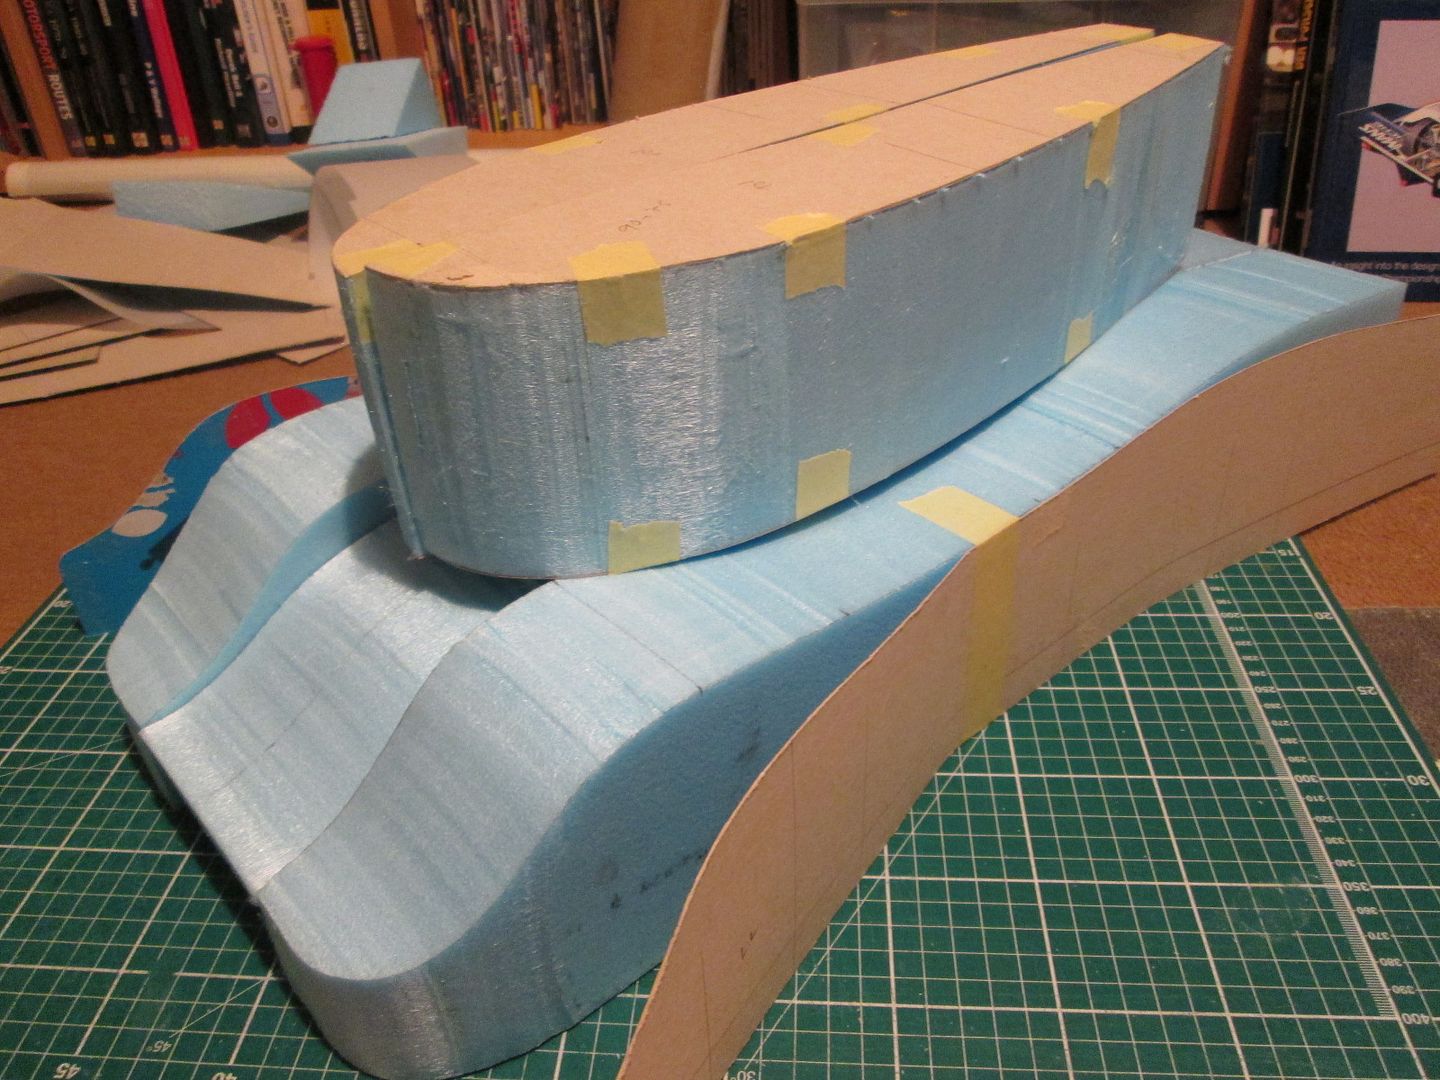 Ah! I have accidentally created a new hybrid vehicle - unseen for years, this will now become a 956 / Tropfenwagen! This centre section is currently 100mm tall - my plan is to sink this into the main body, so that when the outer door area is cut away I will still have the inner surface available to mould onto. It'll make sense later, I promise. A lot of what you see here will be cut away - as it's made from two halves I can still put a template on the centreline to get the true profile then make new templates to shape the other side. As always, it still needs a lot of work before I can start laying-up the fibreglass, but it's a good start. I want to try to make this mould with some undercuts added around the wheel-arches, and maybe some of the duct details, but that runs the risk of problems removing the finished panel later. There's more shaping required under the nose, where the air is channeled into the underfloor are, but this will probably have to be laid-up as a separate mould. At this point I've made the decision to model the 956 as the short tail / high-downforce version - it's what's shown on the official drawings I've been working from, and to be honest I think the taller tail looks better (more aggressive, maybe?). I still haven't thought about which livery it's going to have - that's still a decision for a (much) later date. So, that's where I am as we approach the end of March. I can easily see the next couple of weeks being spent working on the foam blocks, and then maybe start laying-up after Easter (or even later). There's a lot of shaping to be done on the cockpit, and more around the inner edges of the front wheels leading into the door ducts, plus all the filler-work required when I've finished cutting the foam. The timescale doesn't really matter - if I can get the main body sections moulded by the end of this summer, I'll be happy. It'll give me plenty to work with during the autumn and winter months... Have a good week, SB |
|
|
|
|
|
04-06-2021, 02:27 PM
|
#99 | |
|
AF Enthusiast
Thread starter
Join Date: Nov 2008
Location: Norwich
Posts: 649
Thanks: 21
Thanked 111 Times in 87 Posts
|
Re: 1/8 Porsche 956
It's too cold to be out in the garage sanding foam tonight, so I thought I would update the thread. Hello again!
So, the next step was to cut the side elevation of the centre cockpit section, then to sink this into the two outer side pieces: 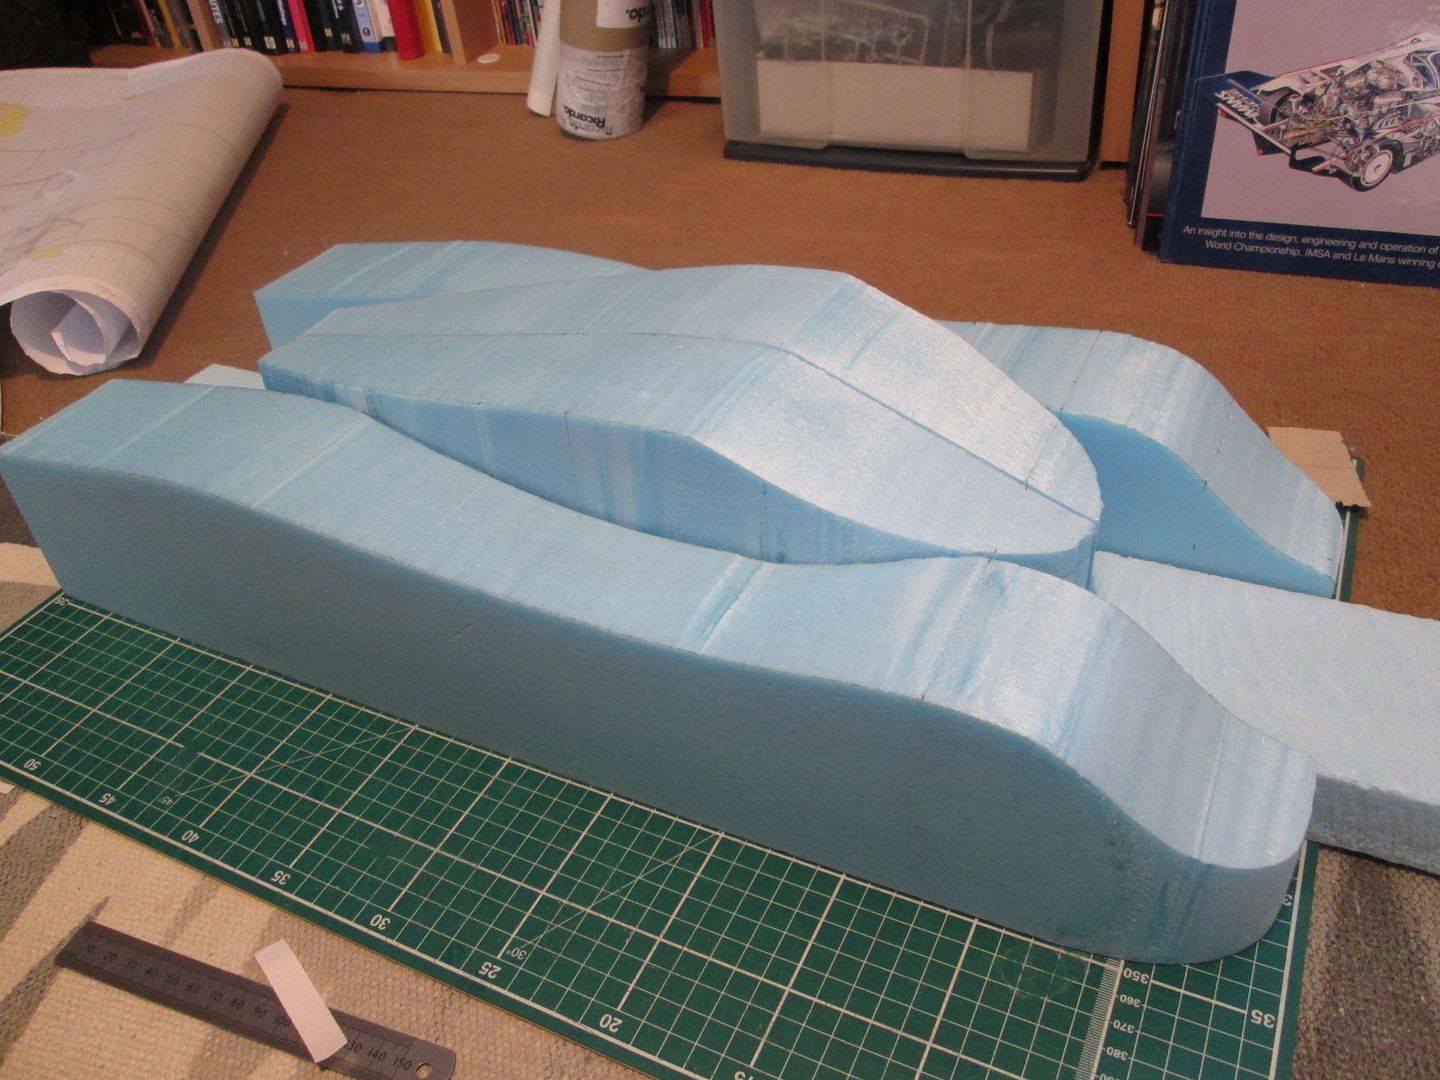 I won't be able to mould the doors in a single piece, so the next step was to cut the main inlet for the side radiators and create the rear slope of the front wheelarch: 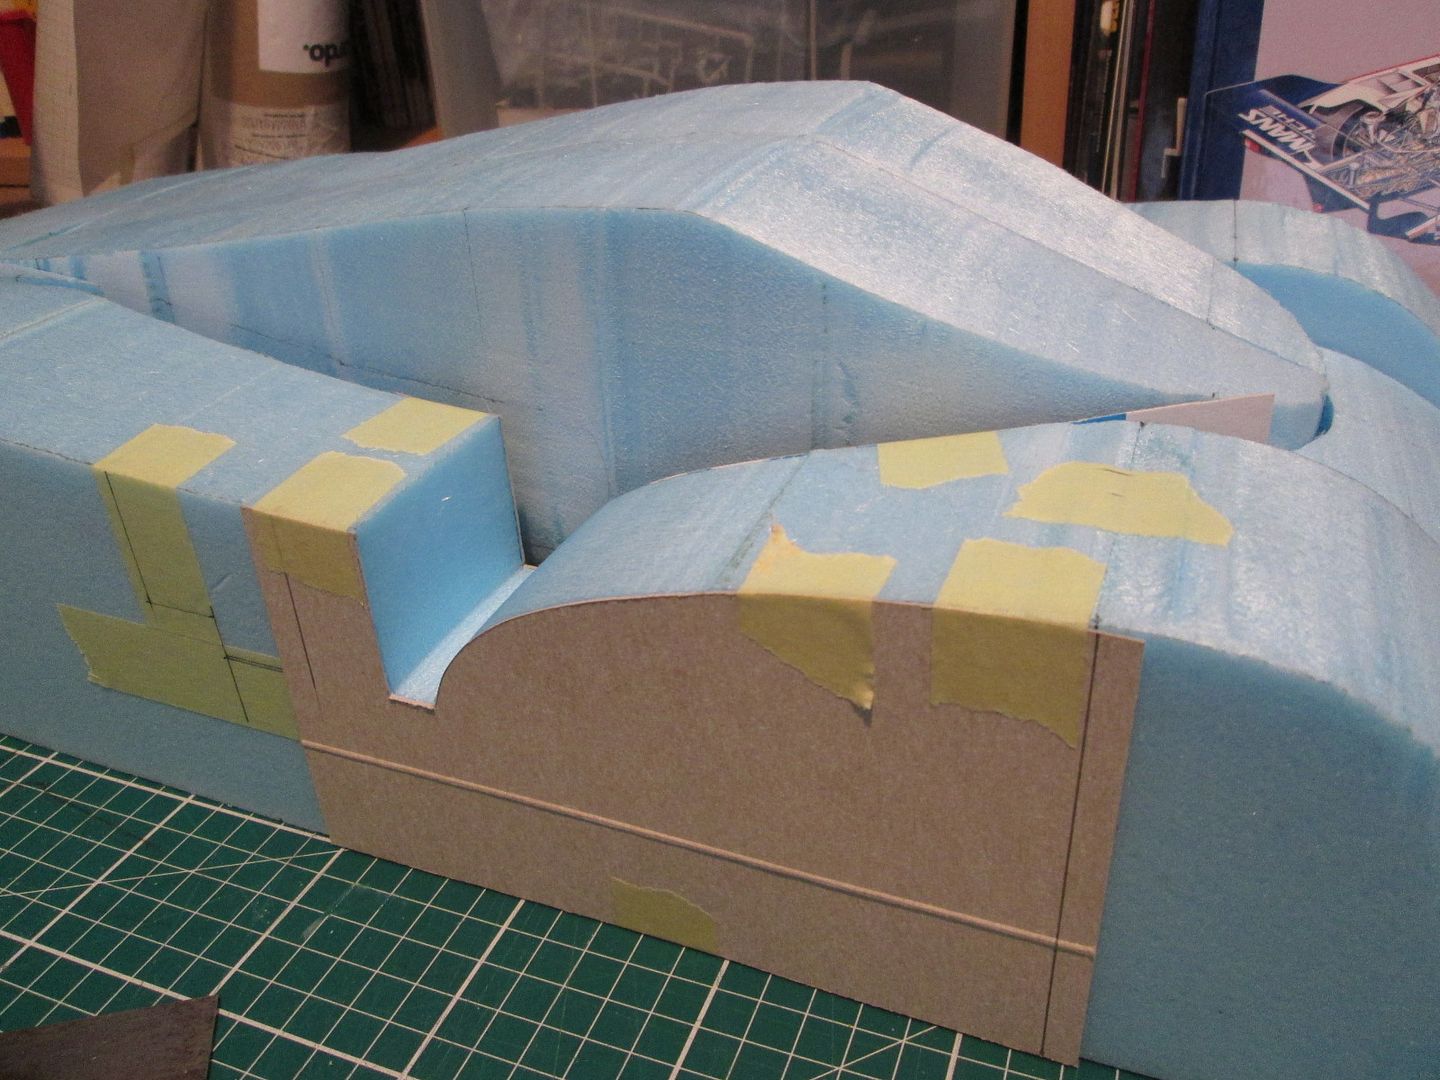 The centre section of the nose slope has to extend onto the two outer foam pieces, and needs to be developed into a channel either side of the cockpit. So, I used my small mill-cutter and pillar drill to machine away the outer blocks by about 12mm: 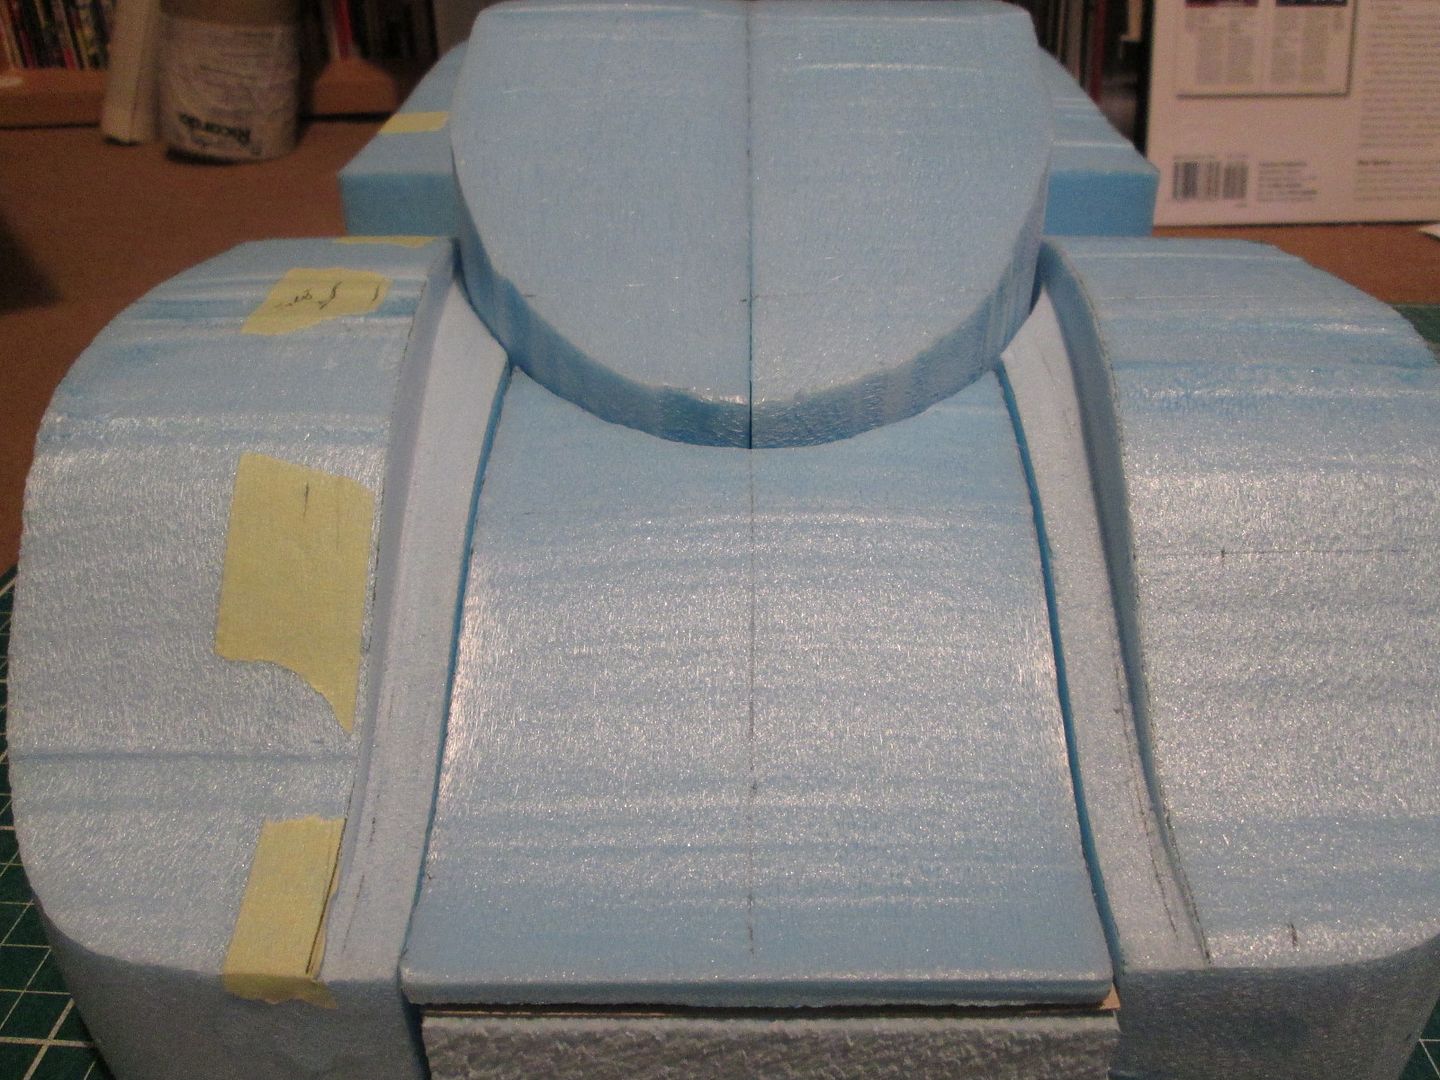 At this stage the cockpit section is still too blocky to start hand-shaping, so I used templates again to start taking the bulk off the top corners: 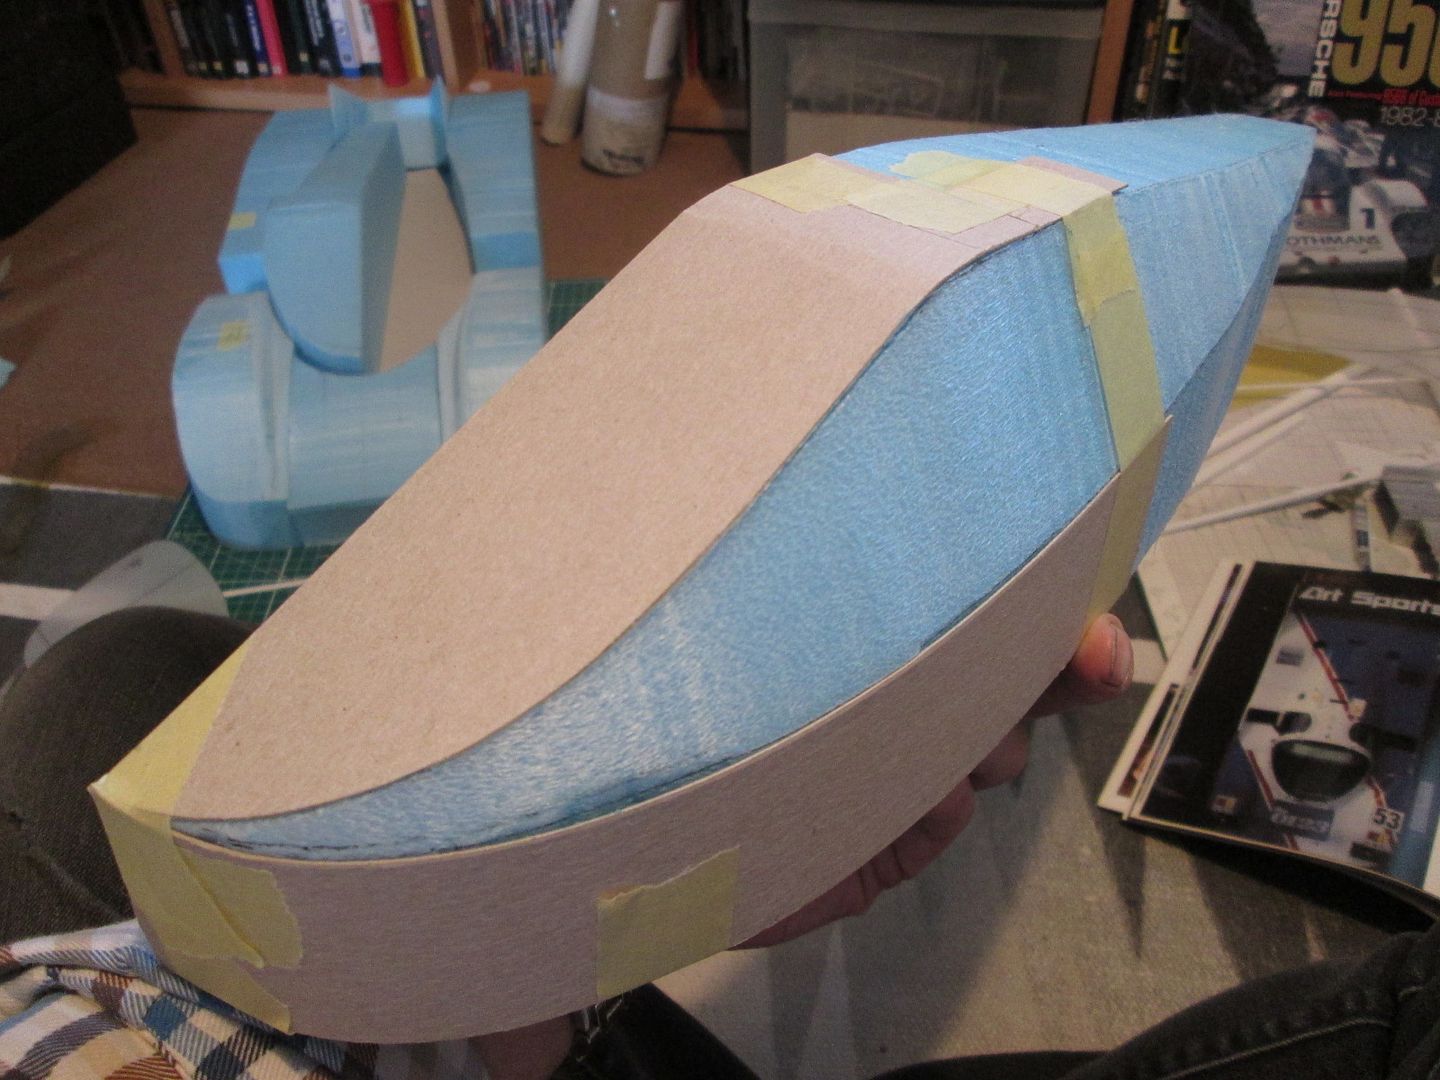 ...and the result:  This is the point where I start thinking "I want to lay some fibreglass on this!". Even without much hand-smoothing it's looking better with every cut. The step at the base of the windscreen area is intentional, not a mistake. There is a small air inlet here, and the screen surround curves down to the main nose section profile. So, I now had to cut two small pieces with two different curved surfaces on the top and bottom, and a third curve on the back edge: 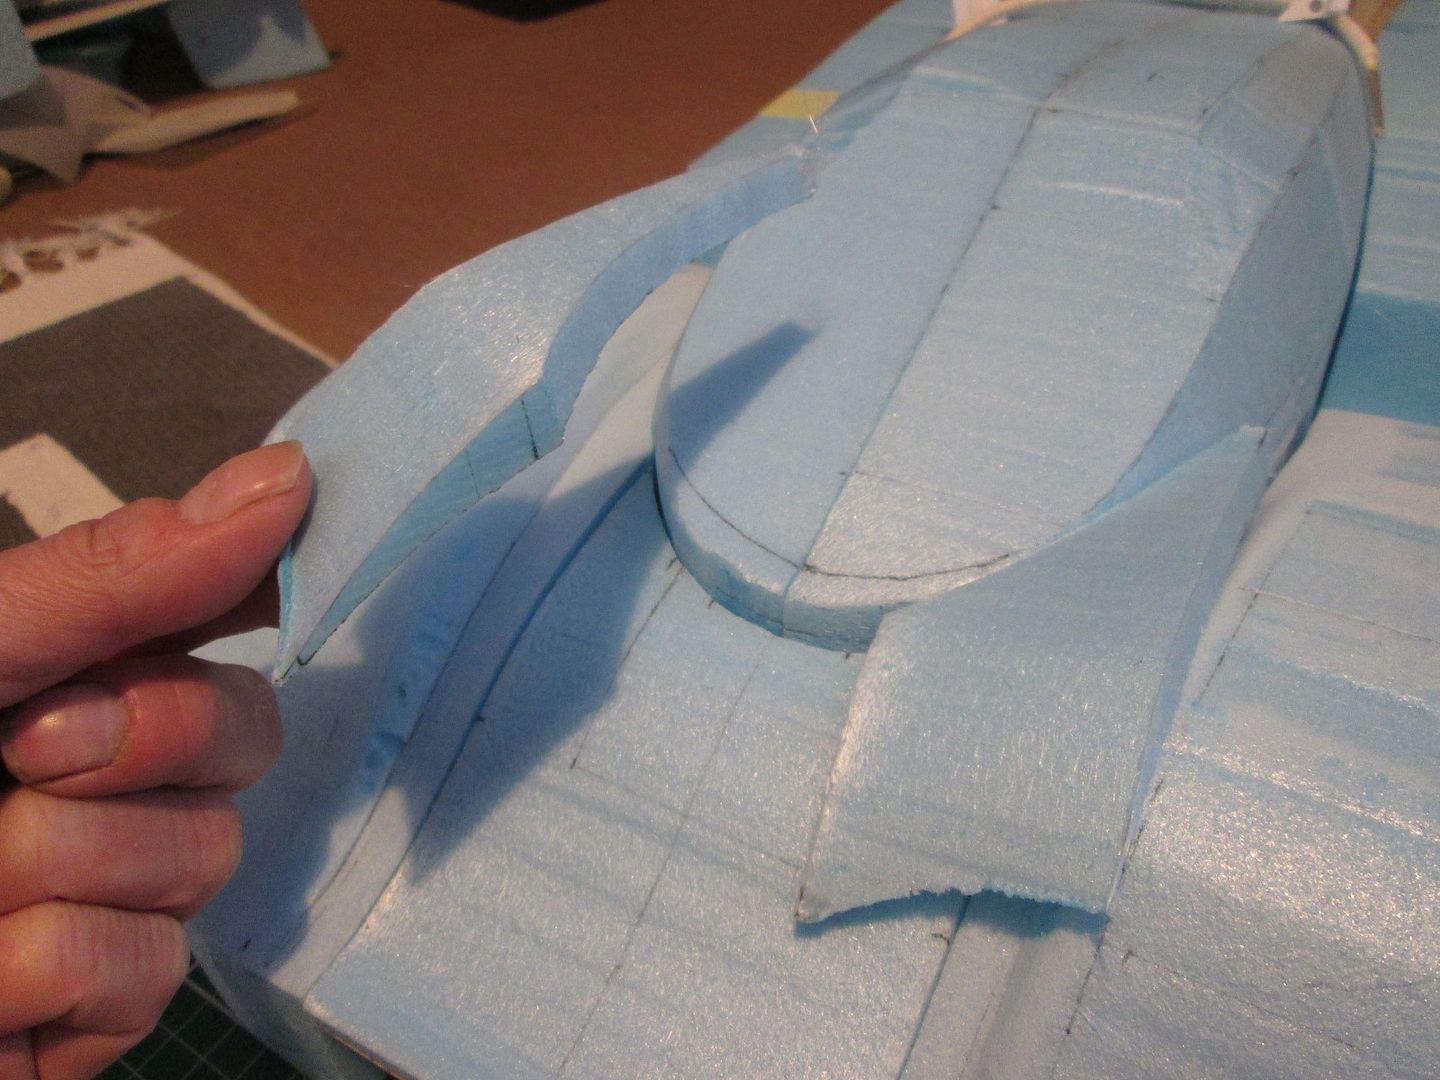 Just getting these two pieces to this stage took nearly two hours of head-scratching, template-making, and some careful hot-wire cutting. I knew at this point that the channels either side of the cockpit were too narrow, so you can see below that I've milled more out, and have started hand-sanding the inner edges. The windscreen base pieces have been cut at an angle, and will be sanded to final shape from here: 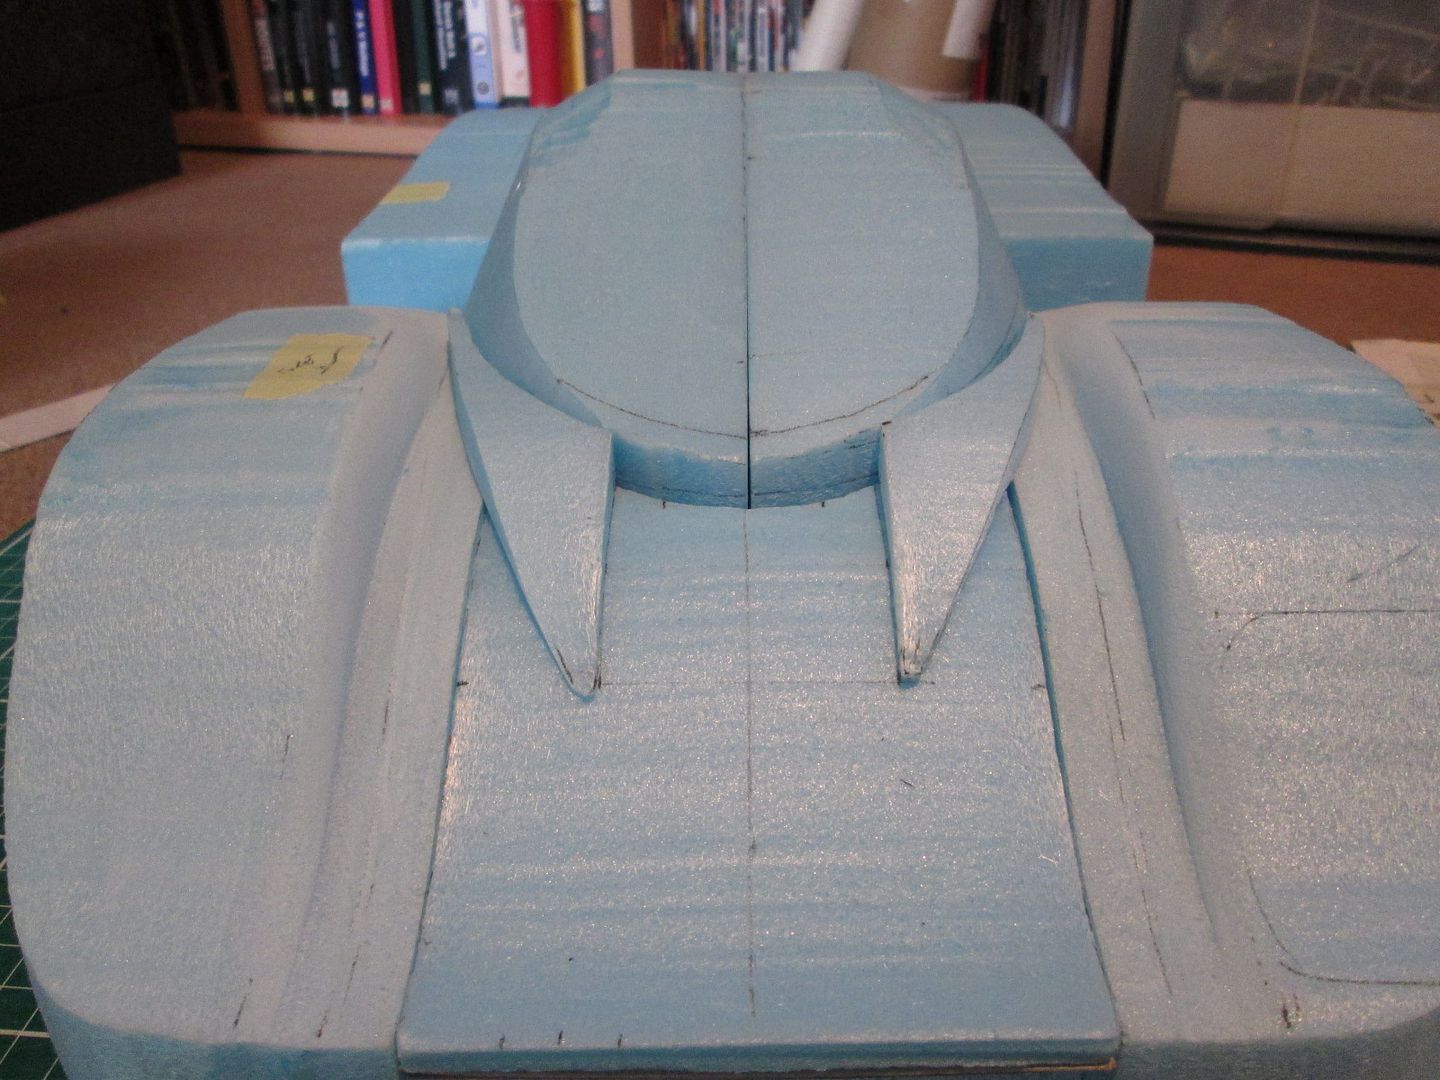 I wasn't looking forward to shaping the cockpit section, but so far it's going okay. I marked out the basic features to give me some guidelines, and will gradually refine the shape. The rear section over the engine isn't too difficult, but I need to be careful with the windscreen area - I need to keep the screen curving about a single axis, rather than ending up with a 'bubble' canopy. I'm not actually going to mould the screen itself - that'll just be a piece of clear plastic cut to shape - but I need to be sure it'll fit into the surround properly. 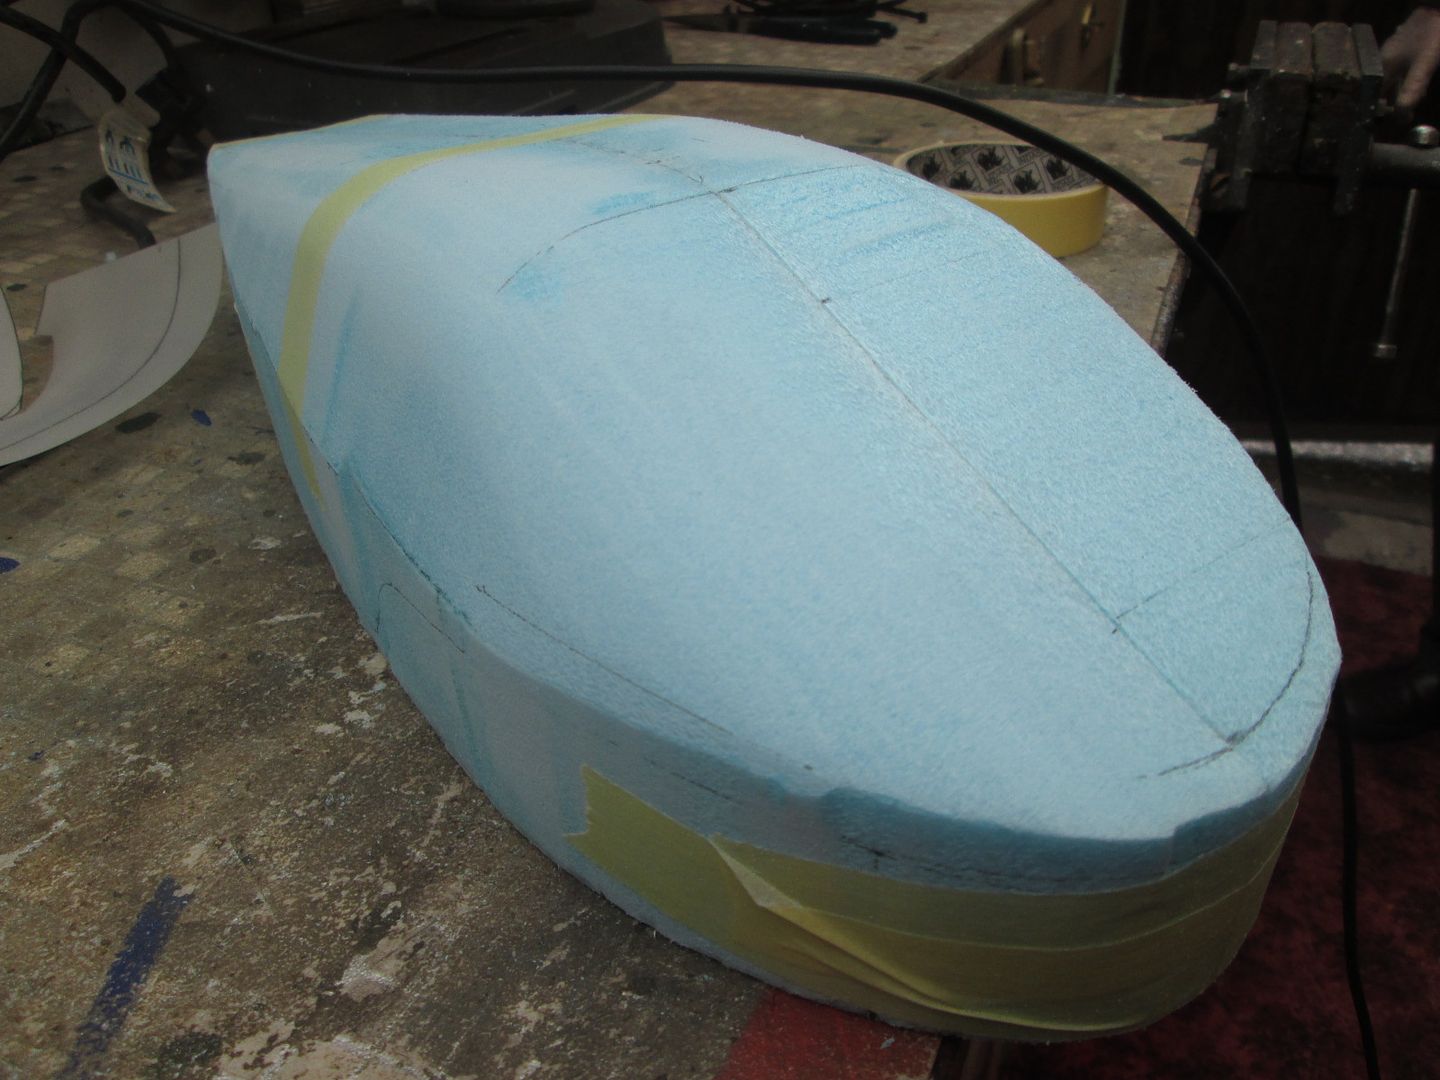 In these last two photos you can see the result of the last couple of weeks' work. Now I've got the cockpit approaching a final shape I've re-applied the guidelines for the doors, screen surround, etc, to help with the next stage of shaping. The screen area still falls away in places, so I need to do more work here. I've done some sanding on the two air inlet pieces and eventually these will be fitted in place and filler used to smooth out the joints. I haven't done much work on the main upper surfaces of the body yet - this will mainly be some filler and rounding-off of the outer corners. 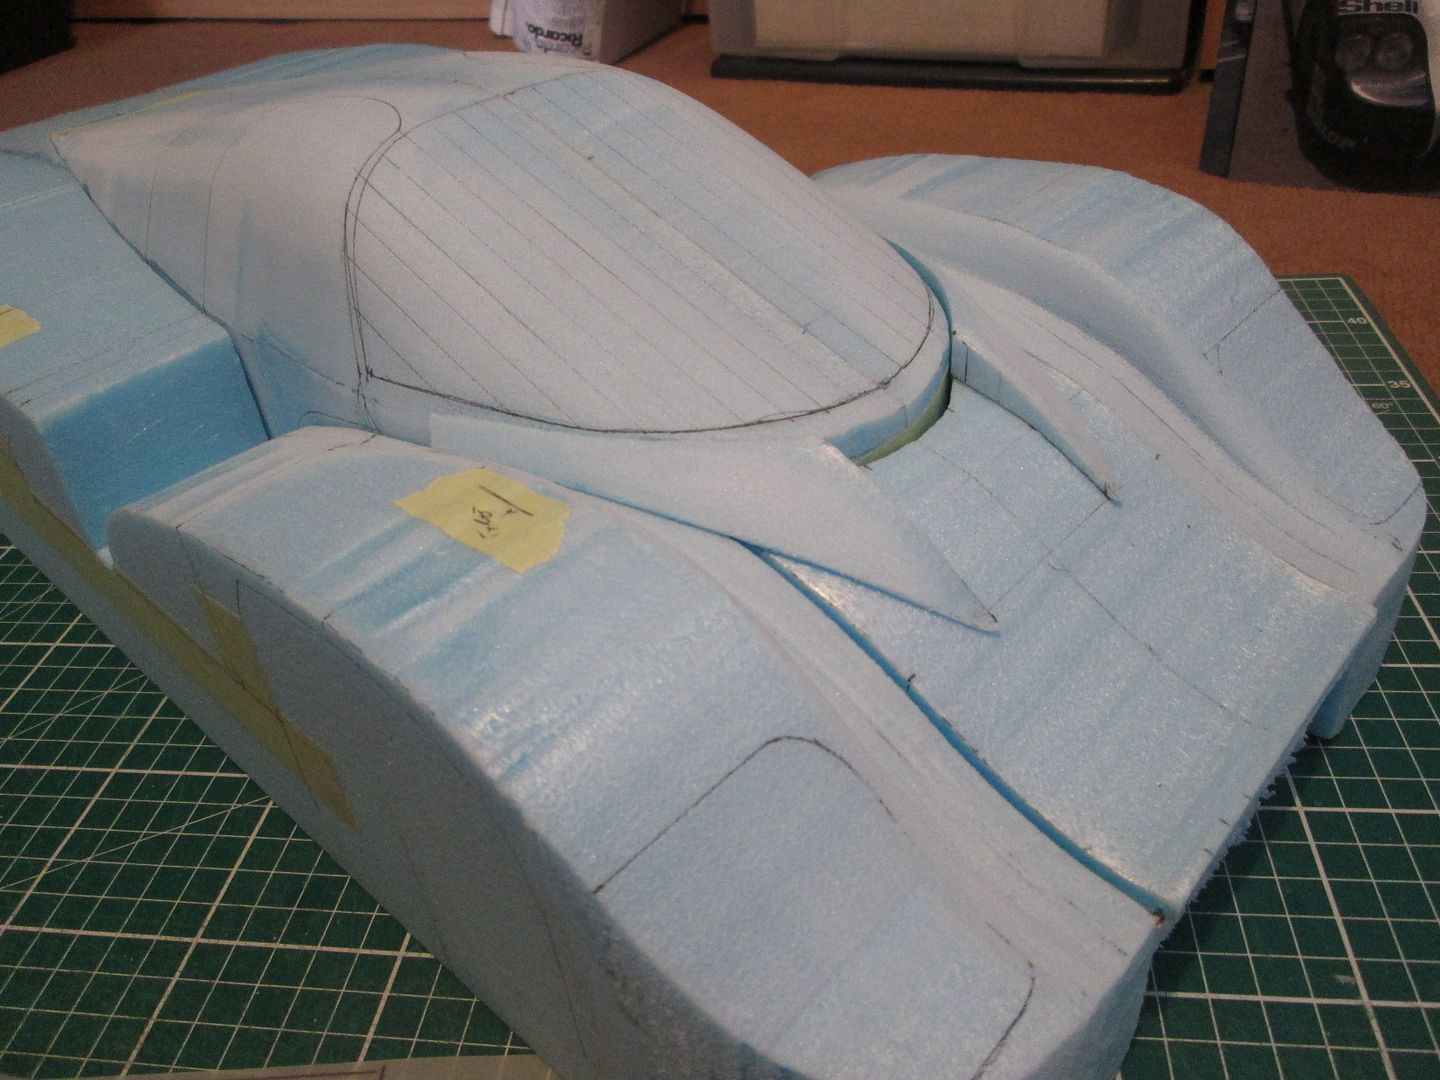 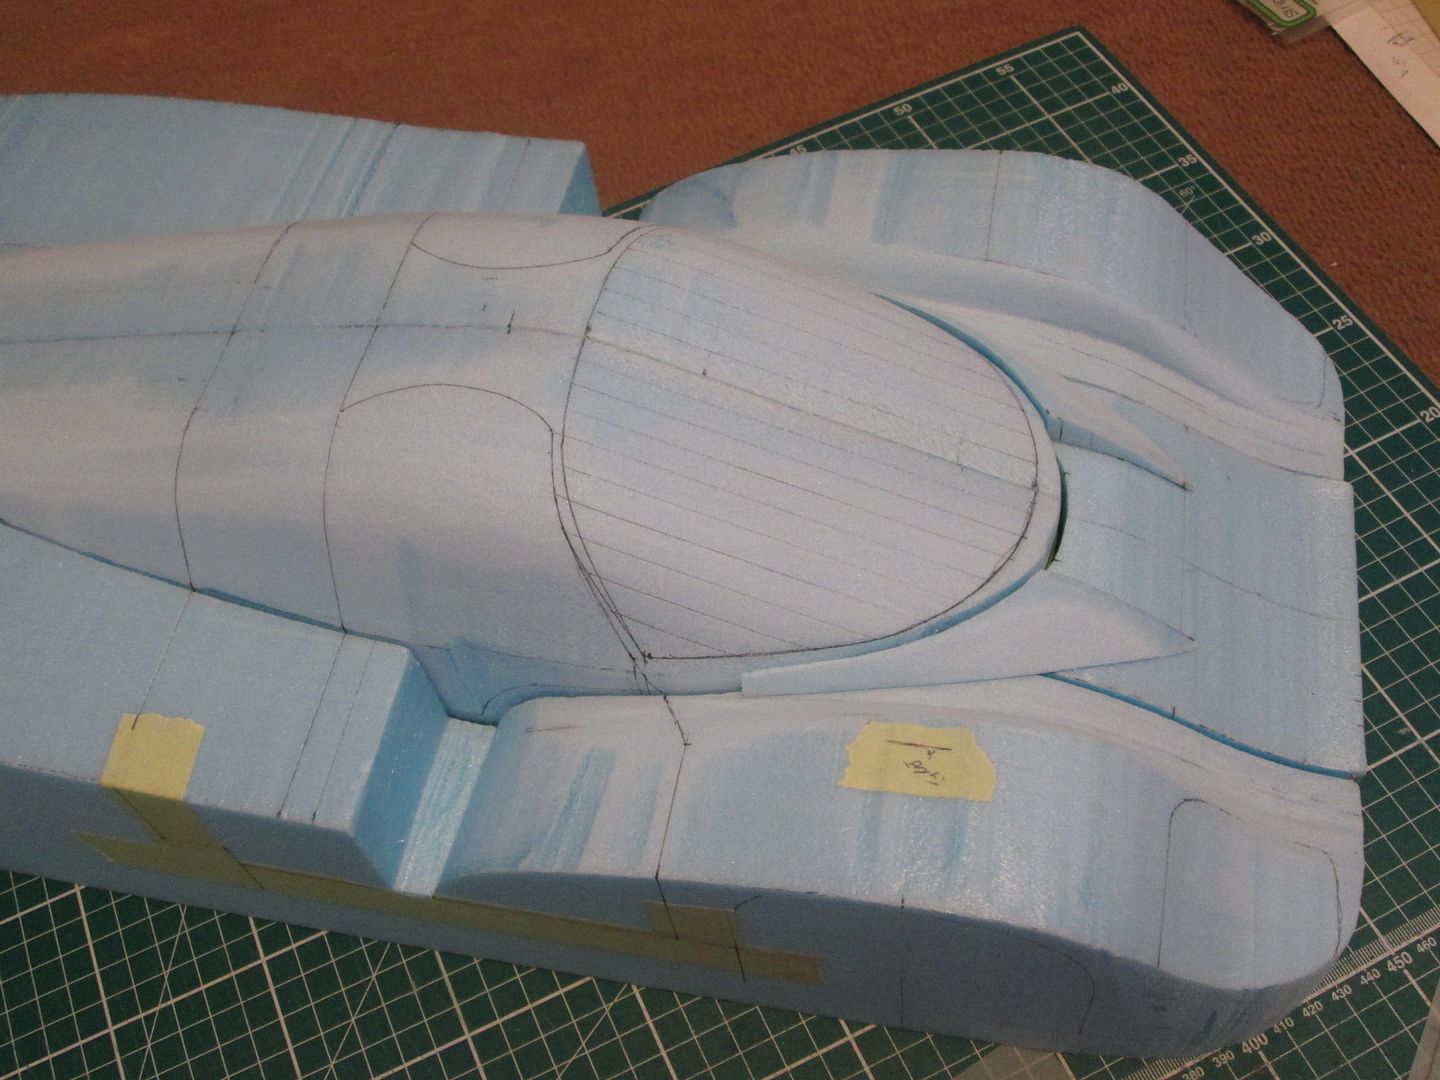 ...and that's what I've been doing since the last update. Clearly there's plenty more to do, but all the time spent on it now should be rewarded when it's laid-up in fibreglass. That's assuming it actually fits over the chassis, of course! I'm doing everything I can to keep my measurements consistent and maintain alignment, but it's inevitable that the small errors will begin to add up. Hopefully it'll clear all the hardpoints already made (roll-cage, rad support frames, etc) and I'll be able to work around everything else. More next time! SB |
|
|
|
|
| The Following User Says Thank You to ScratchBuilt For This Useful Post: |
Petersm99 (04-23-2021)
|
|
04-07-2021, 07:52 AM
|
#100 | |
|
AF Enthusiast
Join Date: Jun 2006
Location: west bend, Wisconsin
Posts: 580
Thanks: 12
Thanked 72 Times in 67 Posts
|
Re: 1/8 Porsche 956
WOW! Very cool to see how this is starting to take shape! Amazing work so far!
Mike |
|
|
|
|
|
05-18-2021, 02:25 PM
|
#101 | |
|
AF Enthusiast
Thread starter
Join Date: Nov 2008
Location: Norwich
Posts: 649
Thanks: 21
Thanked 111 Times in 87 Posts
|
Re: 1/8 Porsche 956
It's taken a little while longer than expected, but hello again!
At the end of the last update the main body pattern was nearly ready to assemble, so before I glued all the sections together I opened up the insides of the main rad ducts in the doors: 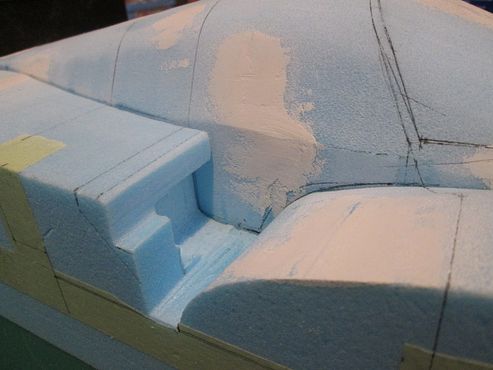 This should allow me to get more fibreglass into the vertical section of the door panels, but it could also make the lay-up process a little harder! Time will tell. After gluing the sections together I could start filling the gaps and smoothing things over - this took a lot longer than I thought, but should yield results later. I used 'Fine Surface' Polyfilla rather than a modelling filler; it isn't necessary to get an absolutely smooth surface as the Vaseline I use as a release agent will do the job. However I still had to build up the transition from the curve of the main cockpit section to the horizontal flanks of the lower body, around the front of the windscreen, and the inside edges where the front wheelarches meet the 'bonnet' area.  So, after all this I was ready to start adding some fibreglass. At the end of April I began by laying up the centre cockpit section - this would give me a good starting point, and an early indication of whether the body would fit on the chassis. As before, I used 'Aeropoxy' resin and hardener; I used the same mix of cloth for all the parts - two initial layers of the thinnest 0.6oz cloth, then three layers of 1.0oz. This produces a final panel about 0.6mm thick, which is probably as thin as I would want to go - more on this later. So, here's the cockpit section on the mould: 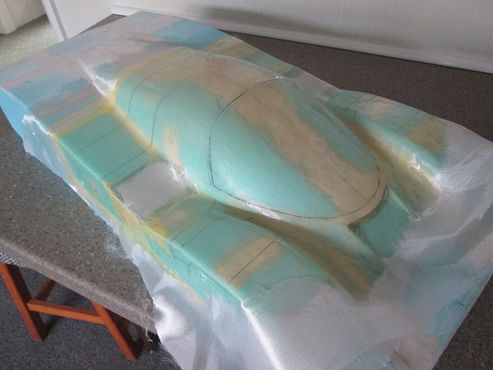 ...and after a clean up in the sink, and a rough trim of the edges: 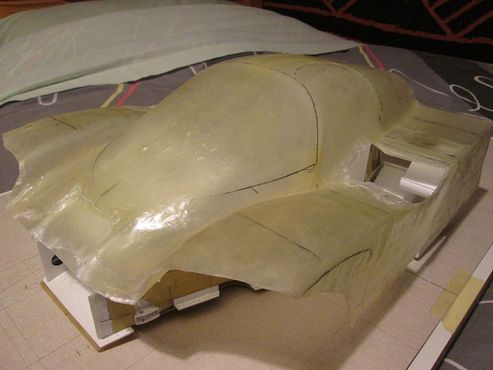 A lot of this will be trimmed away in time, but there's enough here to help with getting the panel positioned correctly, and a bit extra in case I need to adjust the panel shutlines. Next job, repeat the process with the nose and engine cover sections:  These could both be laid-up at the same time, so that helped to speed things up. I mixed up a first pot of resin to do the nose, used what was left to start on the tail, then switched to a second pot to complete the layer. I get about twenty minutes to use the resin mix before it starts going off in the pot! On a simple panel this plenty of time, but when you're trying to work the cloth around the curves of the nose, into the corners, etc, it can become a problem. The last panels to be made (for now) were the nose under-section, and the two doors: 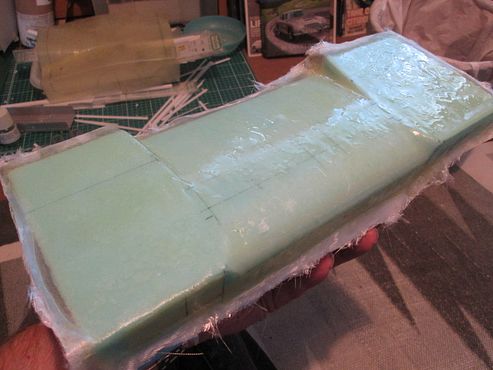 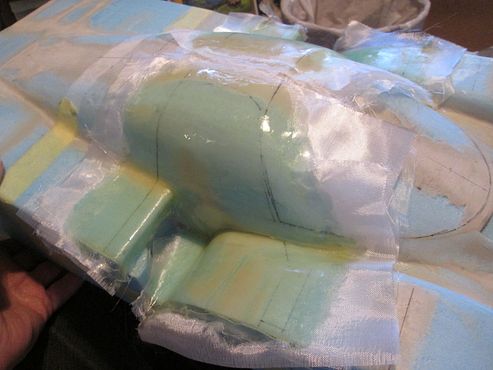 Again, these were all laid-up together with the same layers as above. With all the panels I spent time rubbing down the high spots and lumps after the second layer of cloth - they'll still need work now they're off the mould, but maybe not so much! The doors will require another section to close off the outer edge, but this is a job for another time - it wasn't possible (for me) to mould this all in one piece. I tried to rotate the cloth layers to improve the stiffness of each panel, but this has been more successful on some parts than others. The tail and nose undersection are a little flexible, but that's also due to them having fairly simple shapes. A layer of the thickest 2.3oz cloth would work wonders, but would also have been very difficult to lay-up without creating voids in the shape, so it's a trade-off I'm happy to make. All of the panels will eventually have other bits of fibreglass glued into them (ducts, etc), or wire frames (around the doors, etc), so this flexibility should slowly be reduced. So, as of last night I now have all the main body panels laid up in fibreglass, rough-trimmed, panel gaps marked, and ready to start being fitted on the chassis. I'll start with the centre section first, then work outwards. Early indications are that I'll have to make some adjustments to the front hoop of the rollcage, but the rear hoop is looking good. This is not unexpected - the chances of all this falling together without any errors creeping in would be pretty small... I'll post another update when I've had a chance to start putting this all together! All the best, SB |
|
|
|
|
|
05-18-2021, 04:51 PM
|
#102 | |
|
AF Newbie
Join Date: Oct 2020
Location: Netherlands
Posts: 57
Thanks: 7
Thanked 8 Times in 7 Posts
|
Re: 1/8 Porsche 956
Nice work SB,
I can see u have done this several times before and the result looks very good. Question: what tool do u use to smoothen the fibre cloths when the resin is still wet? Looking forward to see the whole package together.
__________________
Thx for watching, Greetz Peter
|
|
|
|
|
|
05-19-2021, 02:27 PM
|
#103 | |
|
AF Enthusiast
Thread starter
Join Date: Nov 2008
Location: Norwich
Posts: 649
Thanks: 21
Thanked 111 Times in 87 Posts
|
Re: 1/8 Porsche 956
Hi Peter,
It's the early stages, but I'm optimistic that the panels will clean up okay. I had some problems with filler cracking when I was making the 935/78, so I've been trying to get a relatively smooth lay-up from the start, rather than relying on adding lots of filler later on. I use a small brush, about 1/2" wide, to apply the resin and press the cloth into place. I really should use a small roller, but the brush works perfectly well. The first layer is always a bit hit-and-miss as I'm applying the resin onto the Vaseline release agent, and that's when I get the worst of the lumps and bumps in the surface. After the second layer I start rubbing down, and things soon improve. Using thicker cloth would probably help, but would be harder to keep in place when there's lots of changes of direction... SB |
|
|
|
|
| The Following User Says Thank You to ScratchBuilt For This Useful Post: |
Midnight Creep (05-19-2021)
|
|
06-22-2021, 03:32 PM
|
#104 | |
|
AF Enthusiast
Thread starter
Join Date: Nov 2008
Location: Norwich
Posts: 649
Thanks: 21
Thanked 111 Times in 87 Posts
|
Re: 1/8 Porsche 956
Wow - I didn't realise it was a month since the last update. It's been a busy few weeks at work recently, and it doesn't seem possible that in 'normal' times Le Mans would have been and gone by now. I've been trying to get various things on the 956 to a common point, but I seem to be having one good evening's modelling, then two non-productive ones! I always like to feel that I'm making progress with my builds, and it's frustrating to not have much to show for a week's work sometimes.
So, what's new? The first bodywork section to be rough-trimmed and offered up to the tub was the main cockpit section - there wasn't much point in working with the nose and tail until I could control where they would be sitting: 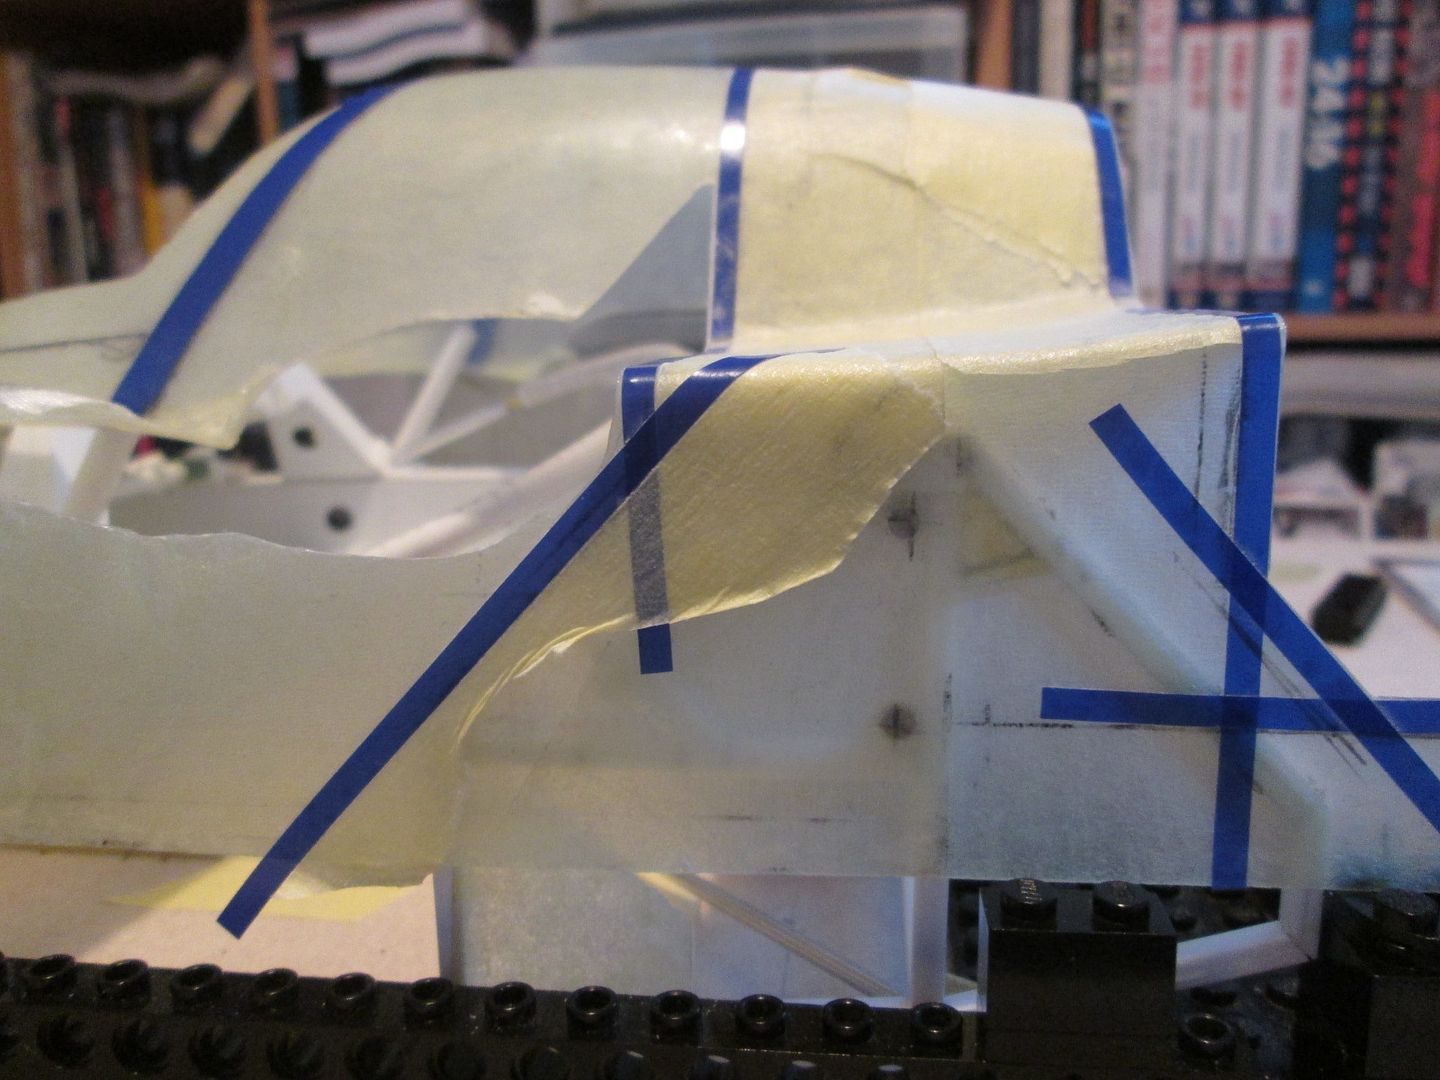 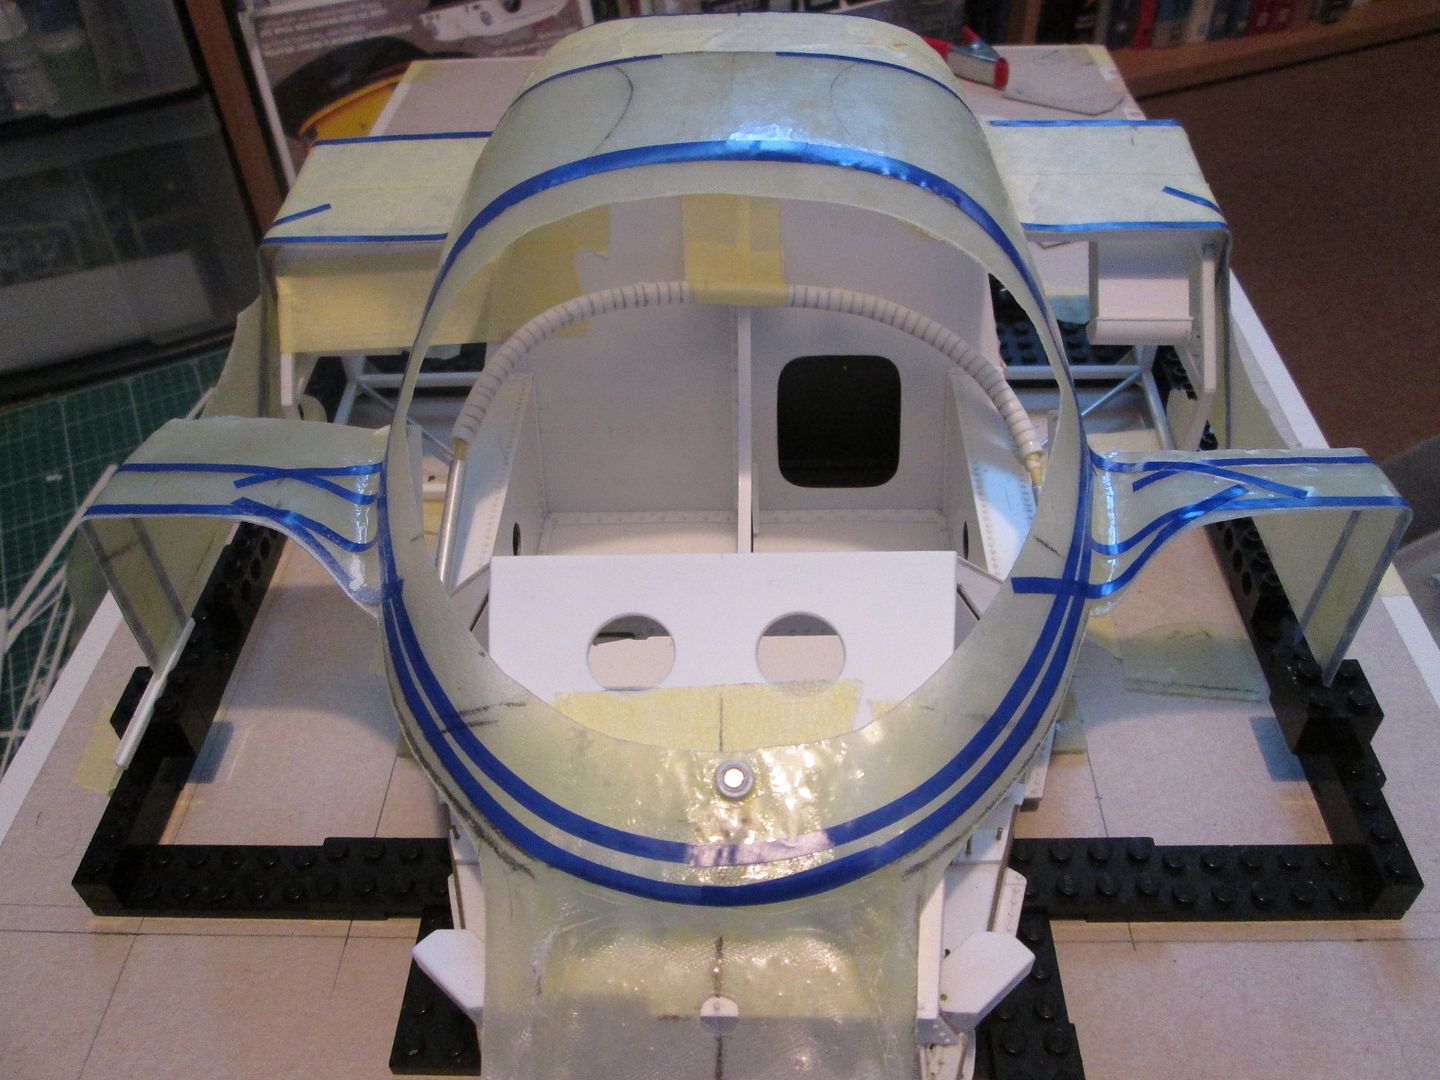 I used the 3mm vinyl masking tape to mark up the basic panel lines, and trimmed away various sections where necessary to allow access to the tub below, etc. I fitted two pairs of 3mm magnets into the radiator support frames each side and these give me a solid easily-repeatable location for the bodywork without having to drill holes, fit pins, etc. Another pair of magnets on the windscreen surround control the front end - in time I'll have to re-position these as they're currently where the windscreen will be! Before positioning the lower sidepod panels I felt it was necessary to add a couple of support frames either side of the tub. On the real 956 this area is largely empty (the battery usually lives on the right, and various electrical components in the left) and covered by inner panels. As I'm a little concerned about how robust the undertray / sidepod structure will be, it makes sense to use this space to get more strength into the model - especially as it won't be seen when finished. So, after getting creative with some large box-section: 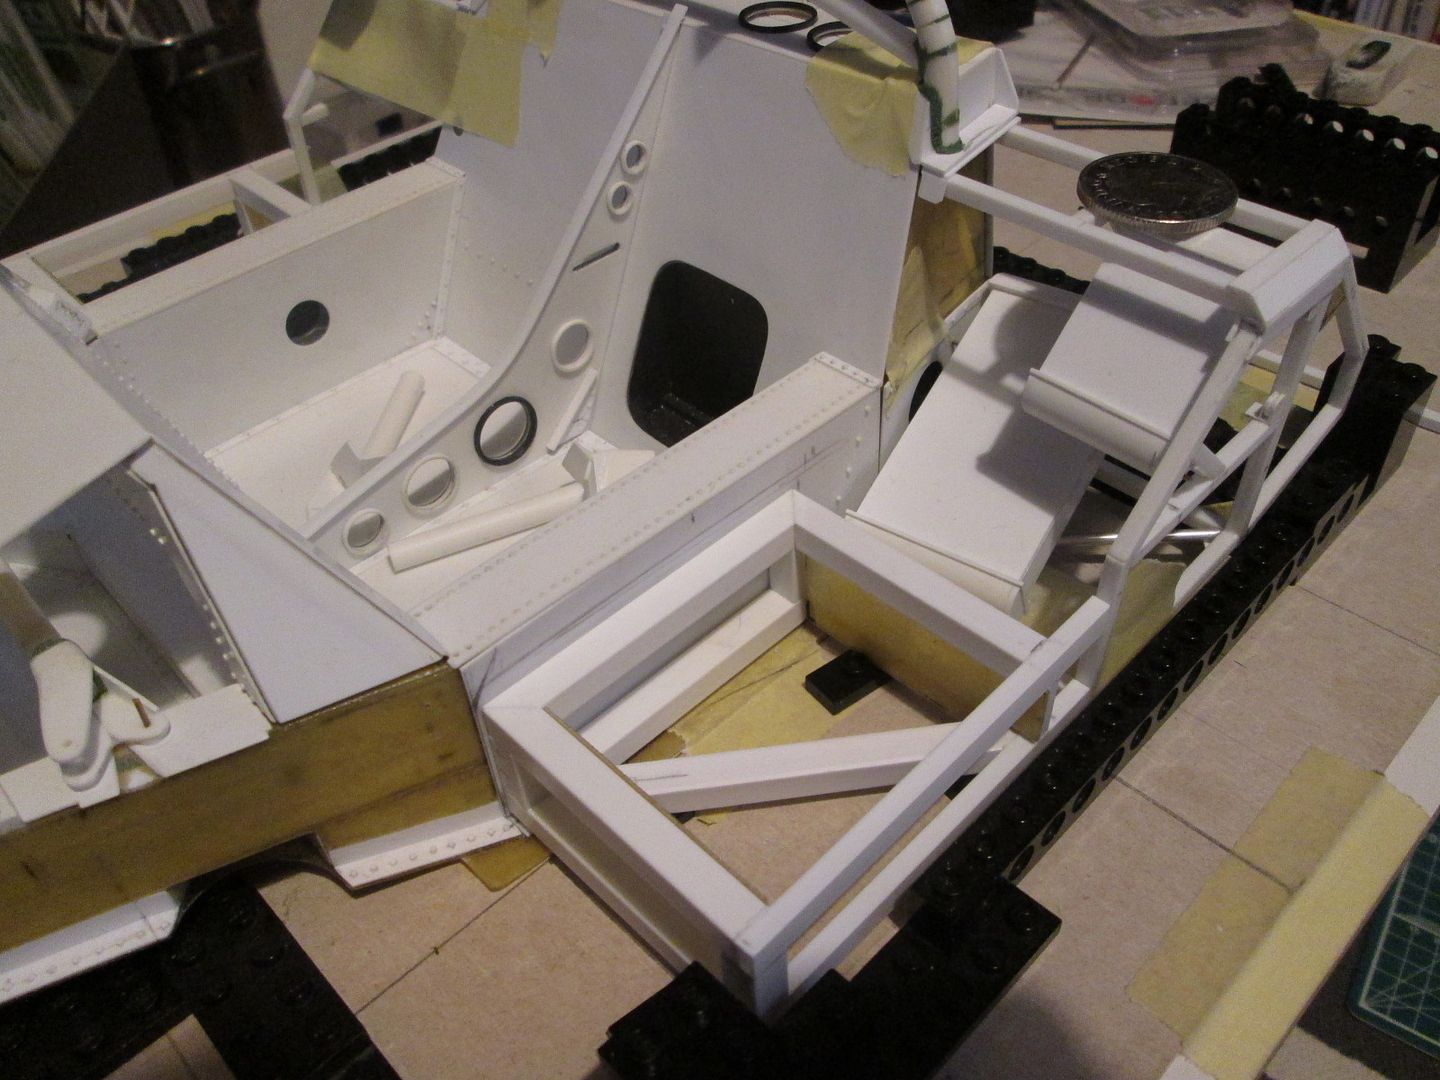 You'll see in a later photo where I've drilled through the frame to pin it into the side of the tub. They're also pinned down into the floor panel, so that when the model is lifted up they're really solid. In addition, these extra frames will be tied-in to the radiator supports with a couple of 1mm thick styrene plates. 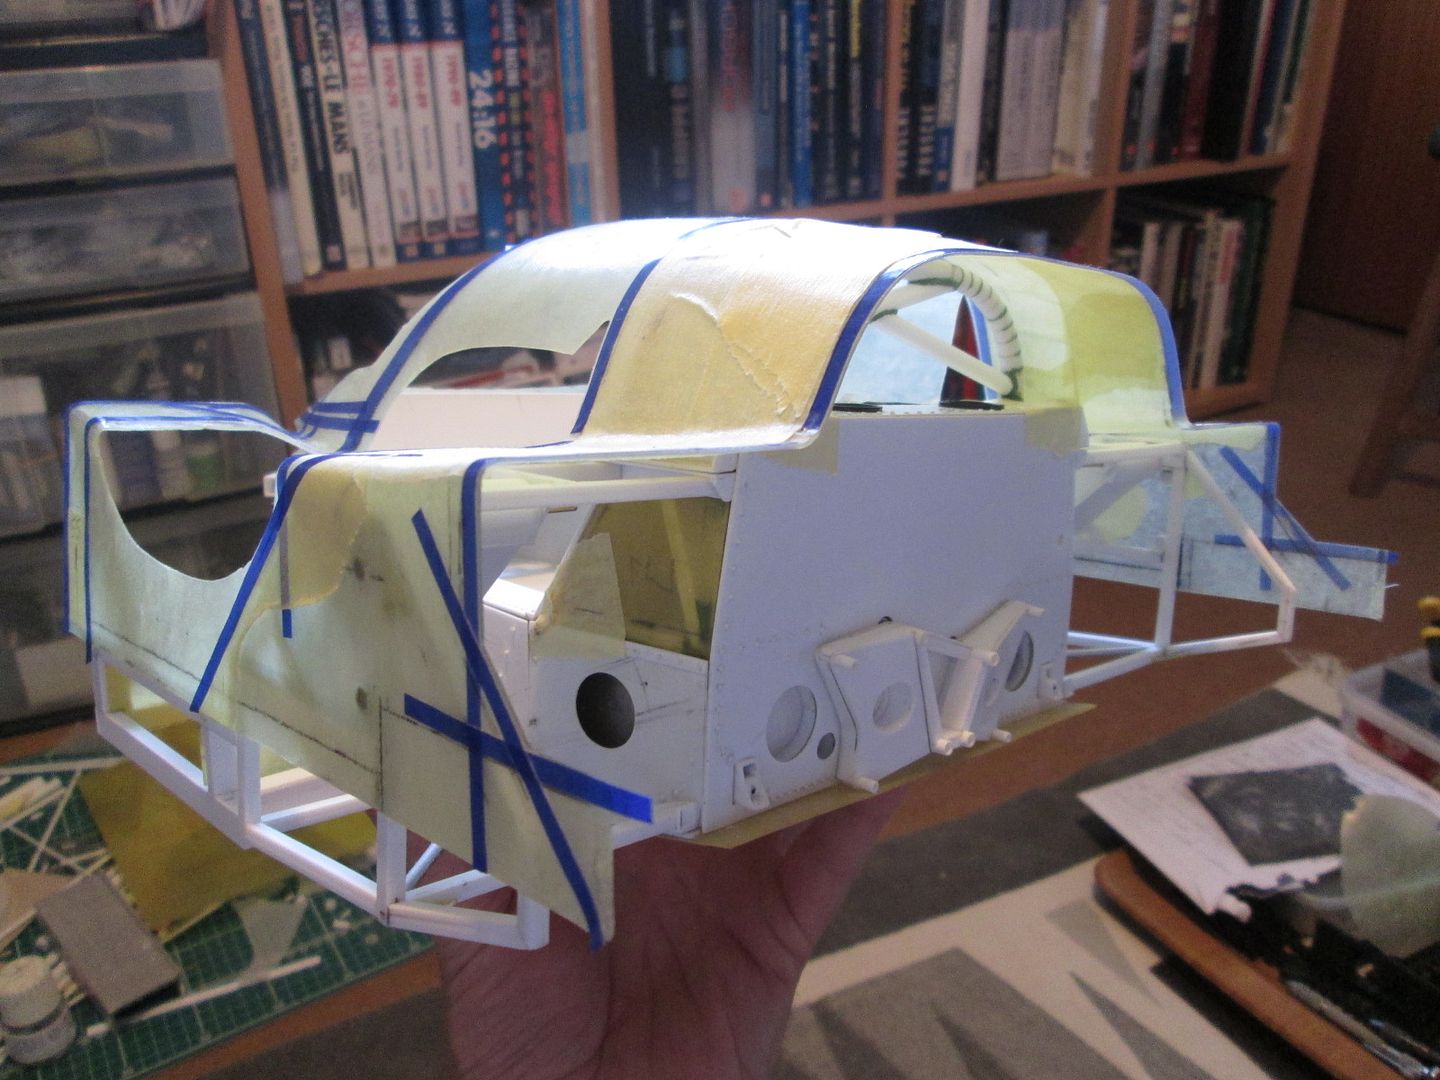 So, the next step was to start fine-trimming the lower edge of the main cockpit to match up with the top edge of the lower sidepods. On the real 956 the rearmost sections of the side panels are separate pieces, but I'm leaving them as a single piece for strength. I'm not worried about the rear wheelarch for now - I'd rather get the suspension finalised first, then work out where the wheel will be! 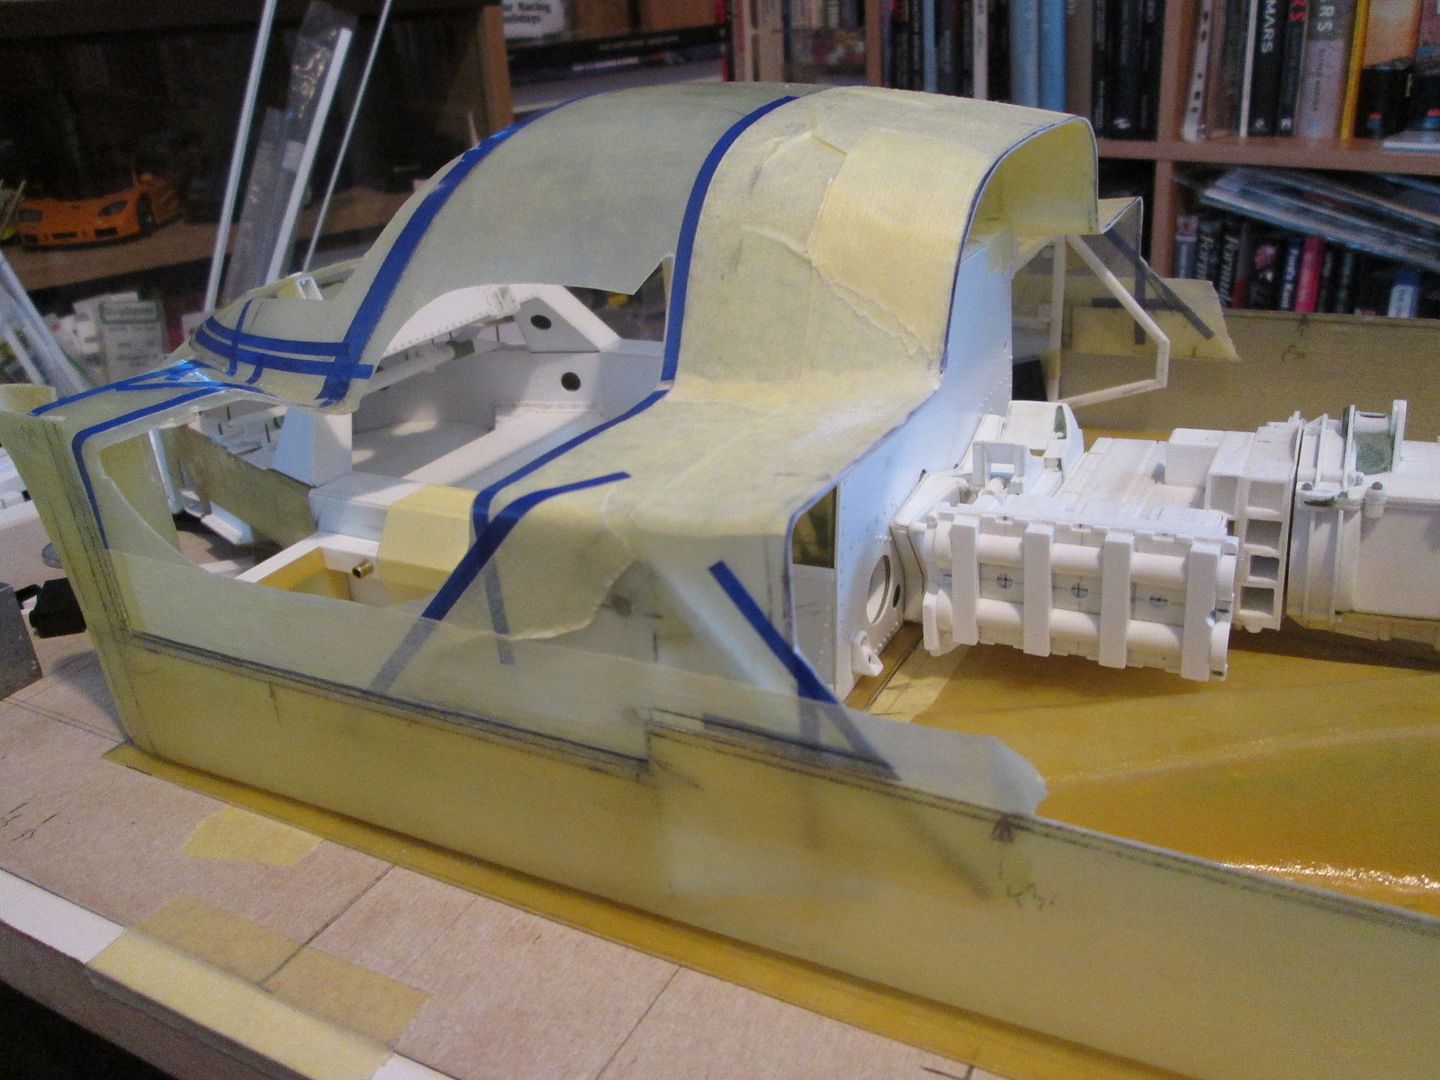 It's not obvious from this photo, but by this point I've also trimmed out a large hole in the undertray panel which matches the shape of the floor of the tub. The line of masking tape under the front of the engine is the split. I was toying with the idea of just sitting the tub on top of the undertray (leaving the undertray as strong as possible) but (A) this would leave the tub sitting too high, (B) it would make it harder to fit and remove the undertray during the build, and (C) it just didn't seem right! As it is now, I can slide the undertray into position around the tub, without having to disturb anything. The next few photos are out of sequence time-wise, but you'll see why. At the moment the front horizontal surfaces of the main cockpit section are still attached to the verticals, but at some point I'll have to trim these back to get the nose fitting properly. With this in mind I've made some cardboard panels to fit underneath which give me easy control of the height of the wheelarch. This will also give me a starting point for the wheelarch closing panels - I spent some time on these at the weekend, but didn't progress very far (very frustrating). 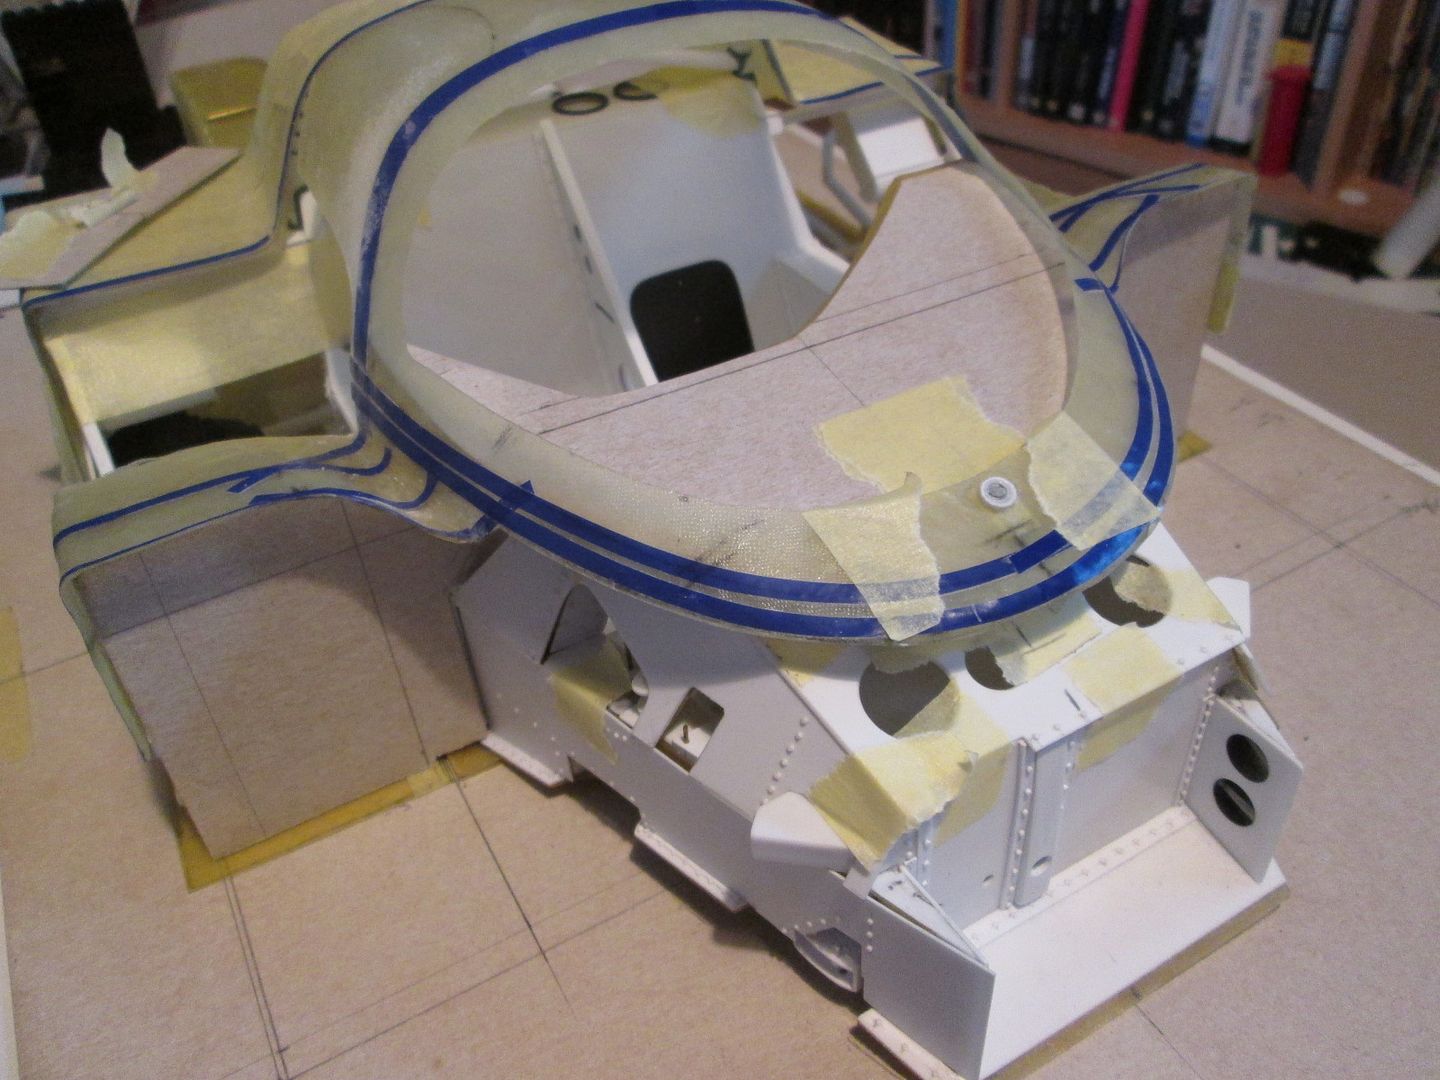 In this photo you can also see where I've trimmed back the front edge of the windscreen surround to allow the nose to be fitted. I've also started working on getting the dashboard panel into the right place, now that I've got an idea of where the edges of the door-shuts will be. 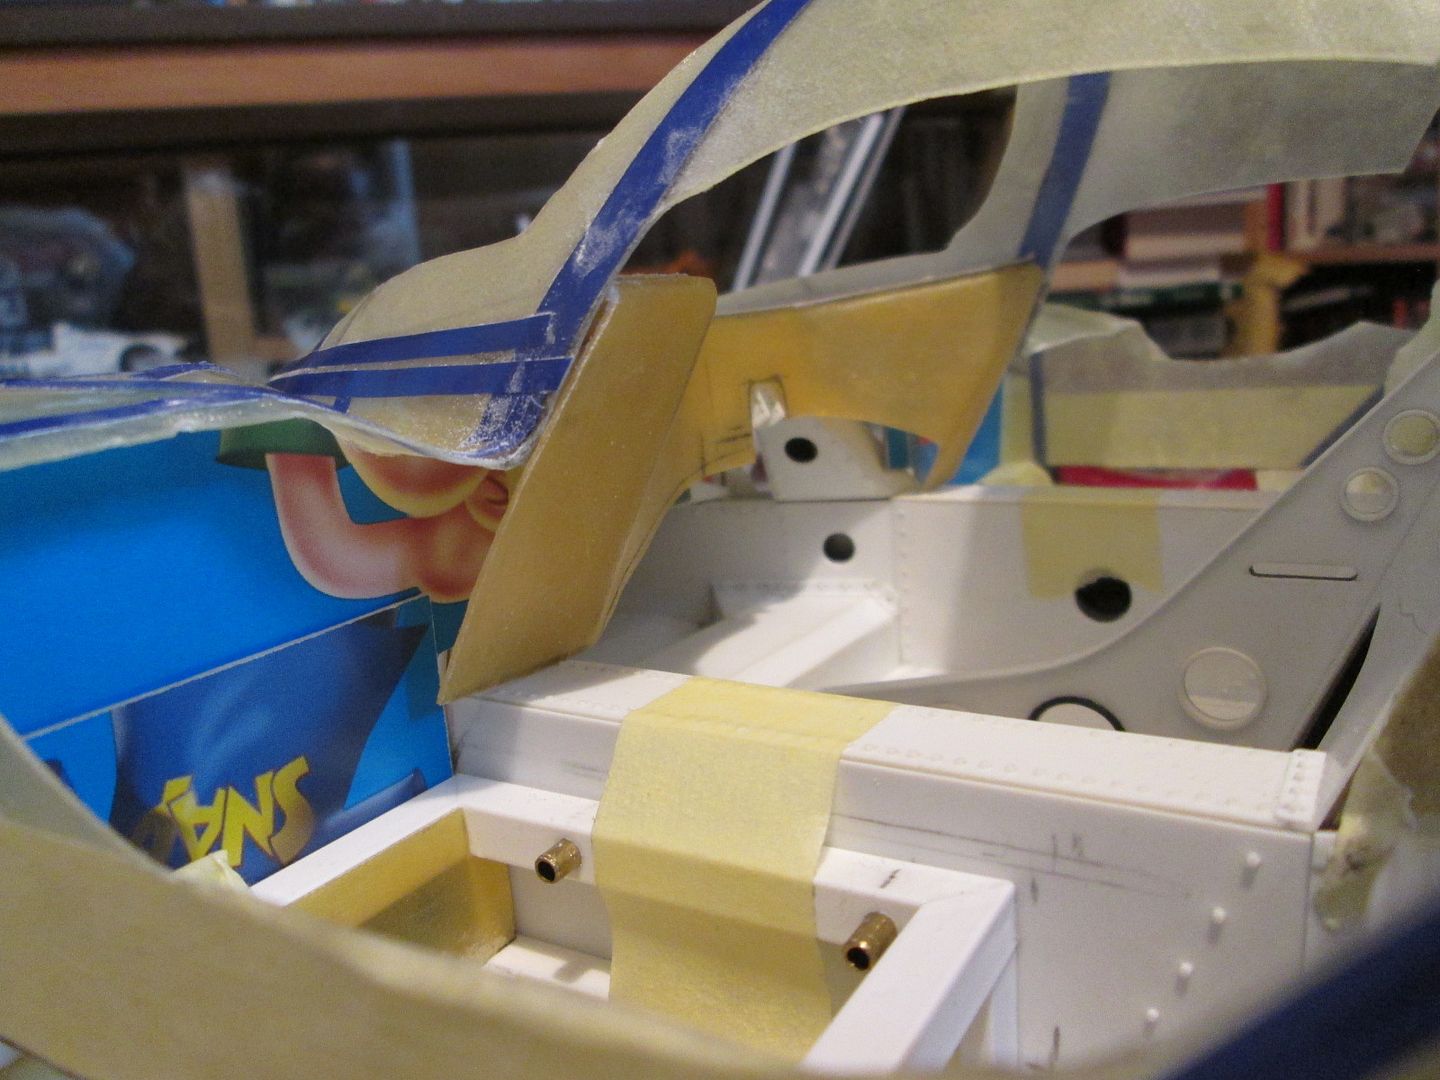 One thing that has become obvious after test-fitting the cockpit bodywork is that I'll have to re-work the main windscreen roll-hoop section. The mounting plates onto the tub are okay, but the hoop itself is a fraction too wide, and the angle is slightly wrong - it needs to be adjusted to line up better with the back edge of the screen surround. It was probably a bit optimistic to expect it to be right first time - all the small errors start to stack up - but it's not a disaster. The last few photos tonight give me confidence that this project will work out! I've trimmed the nose a little, and trimmed the engine cover a little...and put it all together: 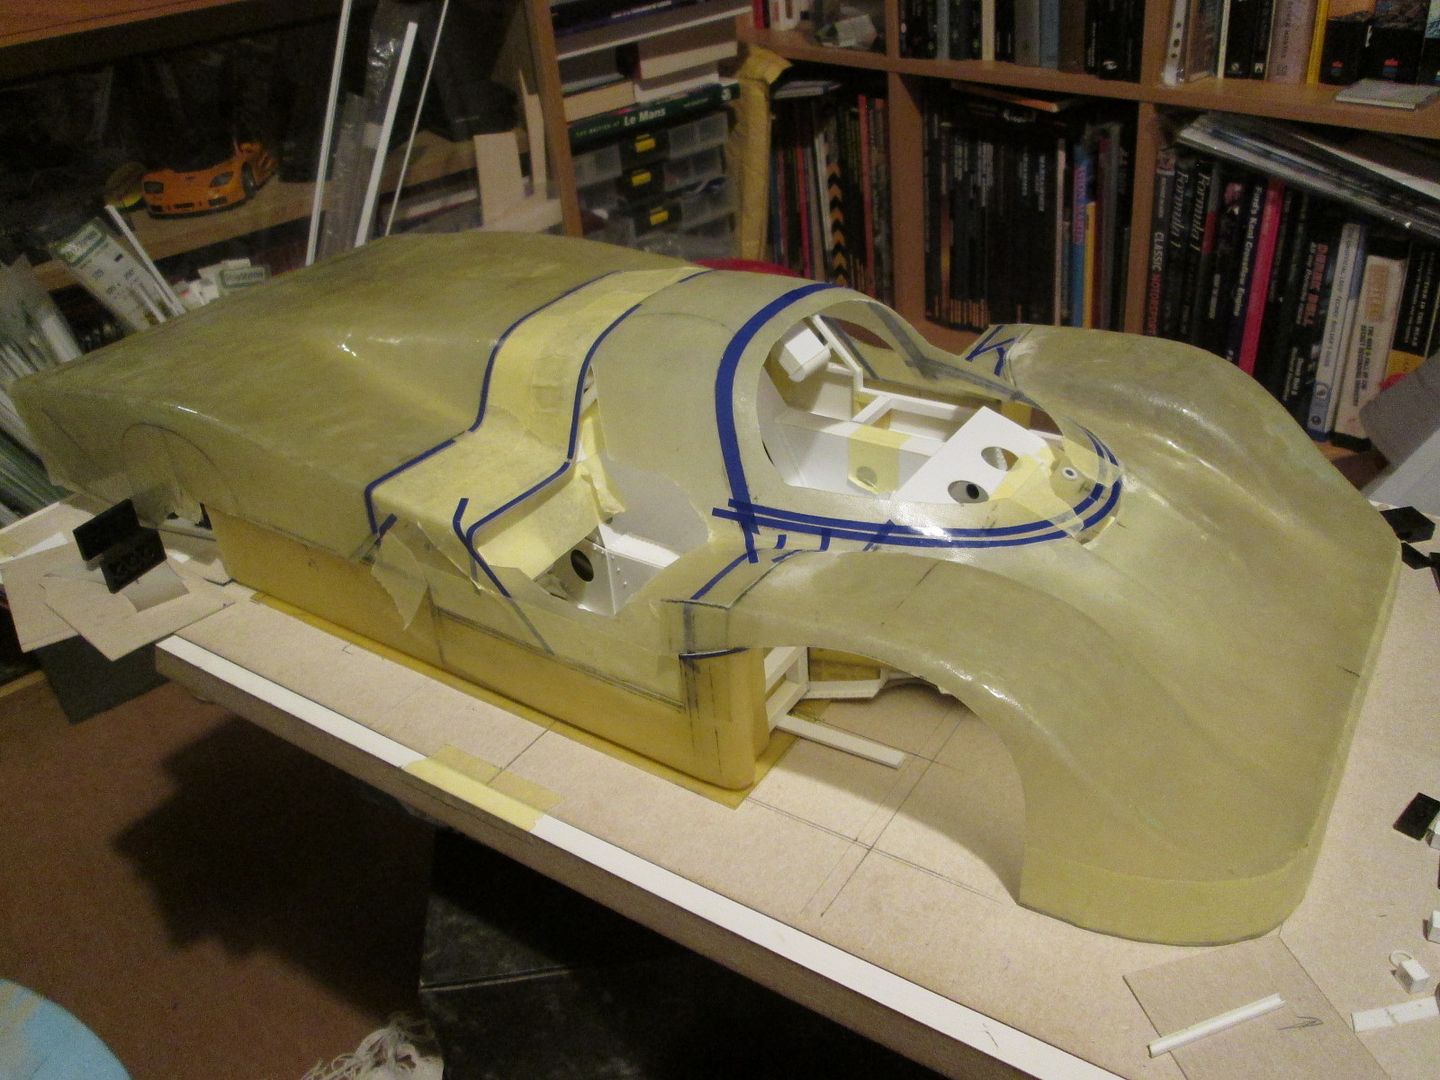  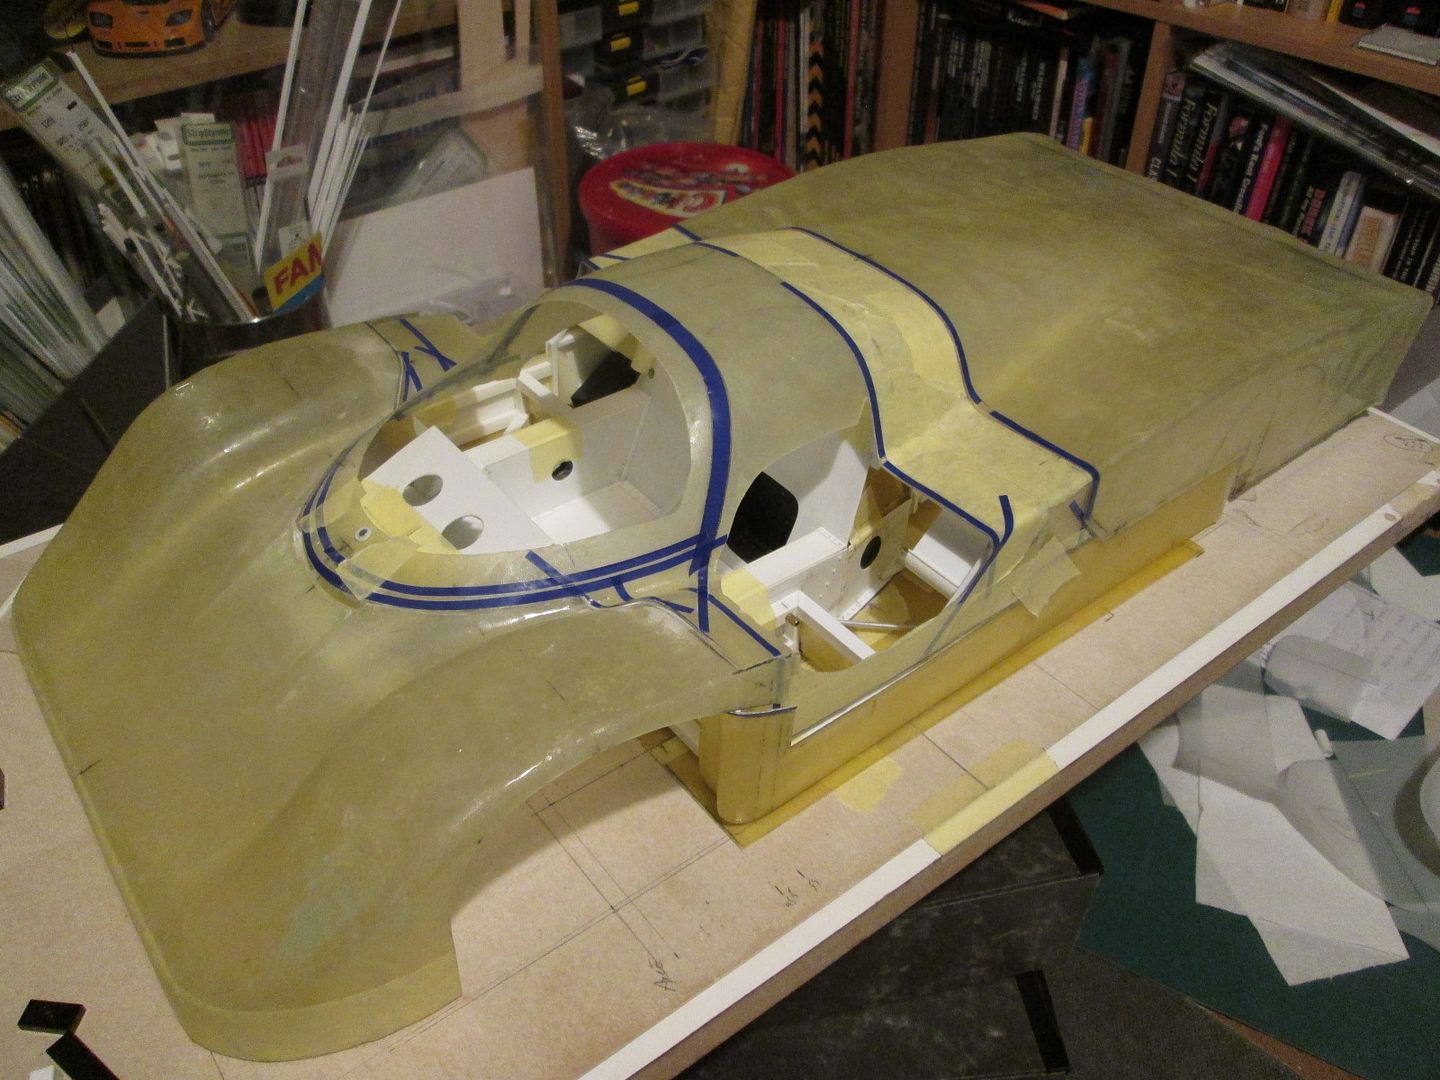 The only problem now is that I can't test-fit the doors until I've got the cockpit section located properly, and reinforced. With all the trimming I've done it's currently got the structural rigidity of a wet sock! That's all for tonight. Hopefully the next update won't be quite so long to arrive... SB |
|
|
|
|
| The Following User Says Thank You to ScratchBuilt For This Useful Post: |
Petersm99 (07-29-2021)
|
|
06-23-2021, 07:40 AM
|
#105 | |
|
AF Enthusiast
Join Date: Jun 2006
Location: west bend, Wisconsin
Posts: 580
Thanks: 12
Thanked 72 Times in 67 Posts
|
Re: 1/8 Porsche 956
Amazing, simply amazing!
Mike |
|
|
|
|
|
|
POST REPLY TO THIS THREAD |
 |
| Thread Tools | |
|
|

