|
|
|

|
|
| Search | Car Forums | Gallery | Articles | Helper | AF 350Z | IgorSushko.com | Corporate |
|
| Latest | 0 Rplys |
|
|||||||
| WIP - Motorsports Post topics for any "Work In Process" motorsports vehicles in this sub-forum. |
 |
 Show Printable Version | Show Printable Version |  Email this Page | Email this Page |  Subscribe to this Thread
|
|
|
Thread Tools |
 02-20-2020, 01:11 AM
|
#1 | |
|
AF Enthusiast
Join Date: Mar 2009
Location: Madrid
Posts: 649
Thanks: 109
Thanked 68 Times in 67 Posts
|
Ferrari 857 S Renissance (1/43)
Mientras sigo con el Delta S4, necesito hacer algo rápido y acabarlo para que ayude a seguir con las modificaciones del Lancia. Y para ello cojo este kit, escala 1/43 de la marca Renaissance: el Ferrari 857 S.
Y como siempre, os muestro como está el proceso, ya pintado de rojo!! While I continue with the Delta S4, I need to do something fast and finish it to help keep up with the modifications of the Lancia. And for this I take this kit, 1/43 scale of the Renaissance brand: the Ferrari 857 S. And as always, I show you how the process is, already painted red! 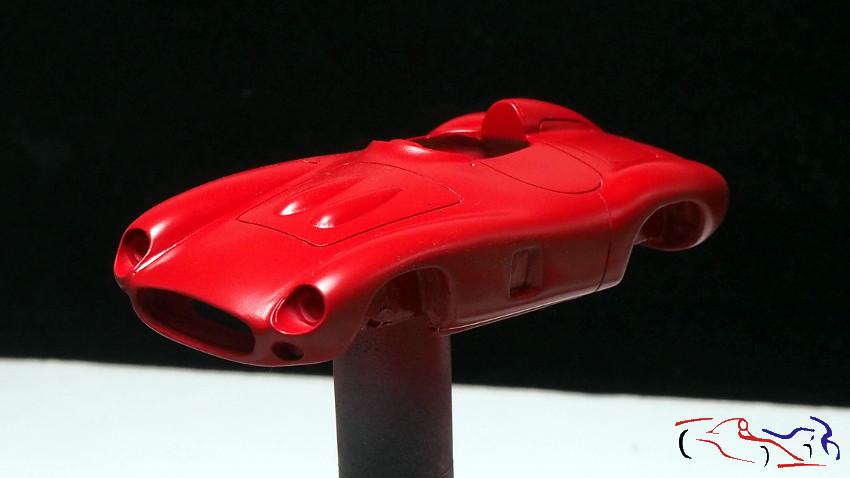 Pero vamos para atras a explicar lo que contiene el kit y lo que he realizado. Empezamos por la carrocería, en resina sin ningún poro, como corresponde a Renaissance. Solo hay que profundizar los paneles, limar la rebabas y una lijada fina a toda la carrocería. But we go back to explain what the kit contains and what I have done. We start with the body, in resin without any pores, as corresponds to Renaissance. You just have to deepen the panels, file the burrs and a fine sanding to the entire body. 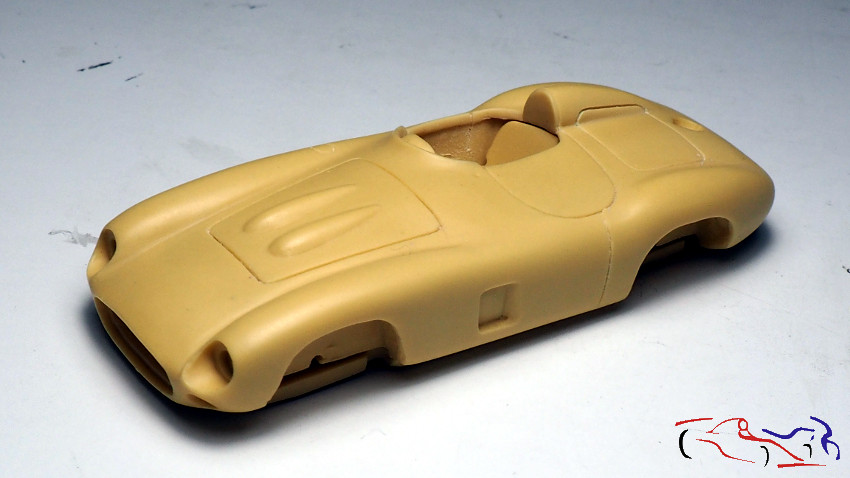 Otra vista de la carrocería junto al chasis… Decir que otro punto que rebajé fue el borde de la carrocería en el habitáculo. Ese lo hice con el minitaladro. Another view of the body next to the chassis … To say that another point that I lowered was the edge of the body in the cabin. I did that with the mini drill. 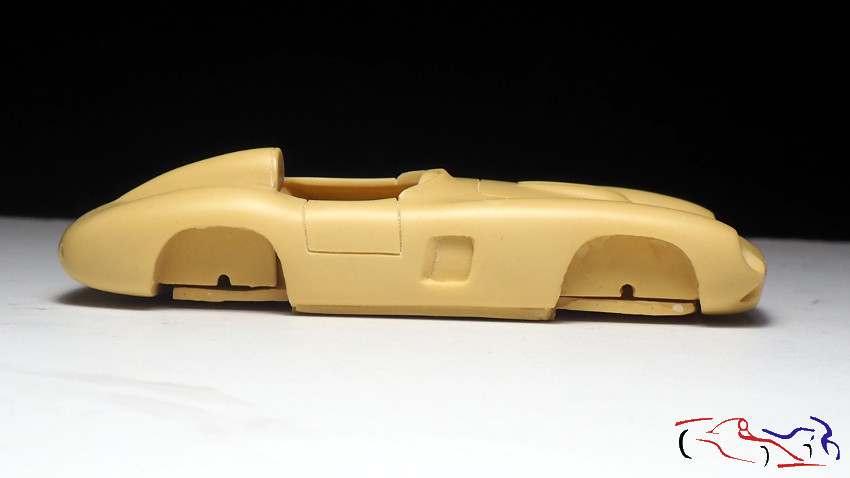 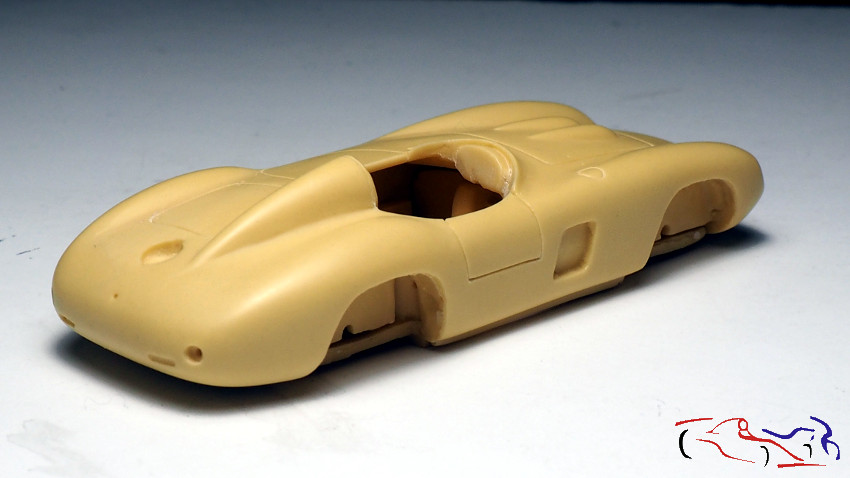 En la siguiente foto, vemos el encaje del chasis, que es incorrecto, y que he enderezado un poco metiéndolo en agua caliente, y después doblándolo mientras se pueda. In the following photo, we see the chassis fit, which is incorrect, and that I have straightened a little by putting it in hot water, and then bending it while I can. 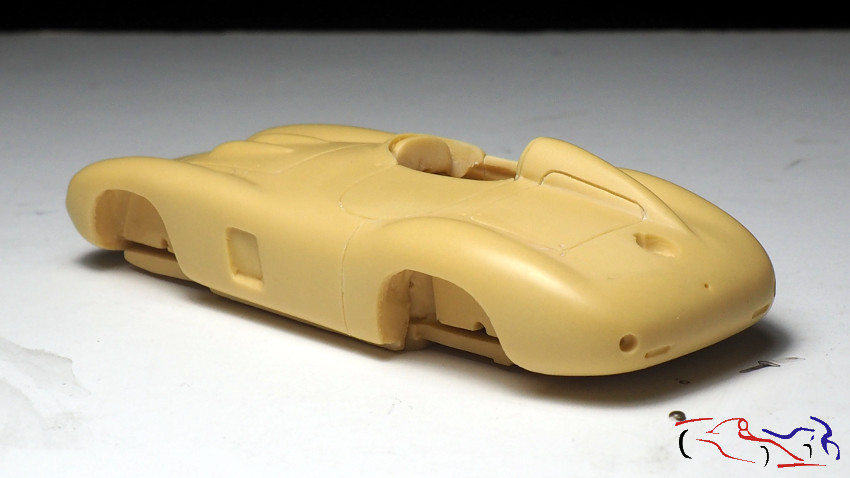 Y ahora, la carrocería junto al chasis: And now, the body next to the chassis: 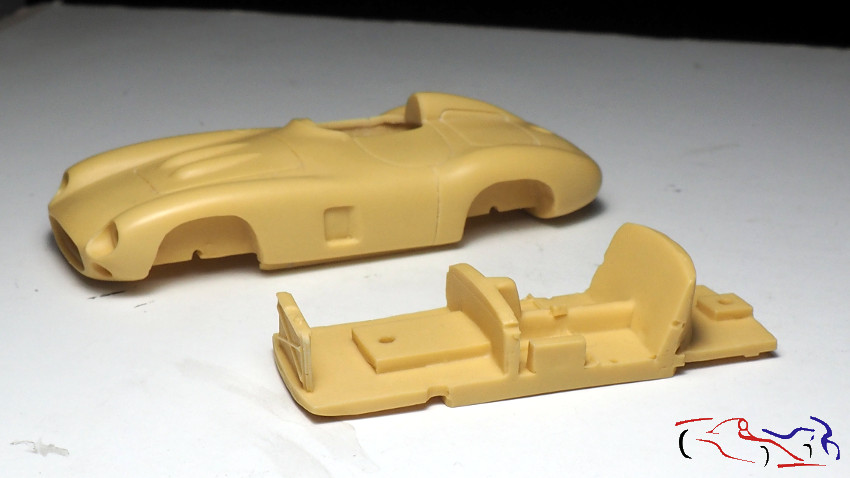 Esta vista del chasis nos muestra el interior que no es nada fino, pero con la pintura y los pocos detalles que tenga, realzarán el mismo: This view of the chassis shows us the interior that is not fine at all, but with the paint and the few details it has, they will enhance it: 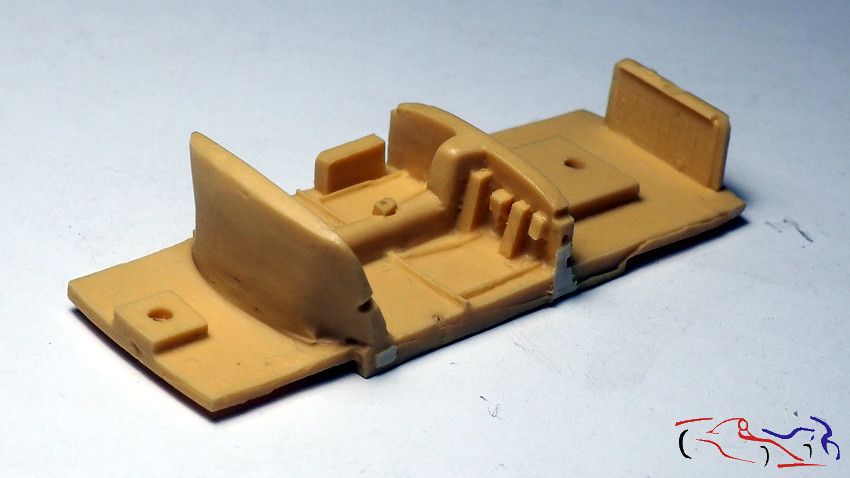 En cuanto a las piezas, vemos que aparte de los asientos y ruedas, están los faros, volante y unas piezas de resina correspondientes a los tubos de escape y a la barras del chasis que se verán pegados a la puerta del piloto. Estas piezas las reharé desde cero. As for the pieces, we see that apart from the seats and wheels, there are the headlights, steering wheel and some resin parts corresponding to the exhaust pipes and the chassis bars that will be glued to the pilot’s door. I will remake these pieces from scratch. 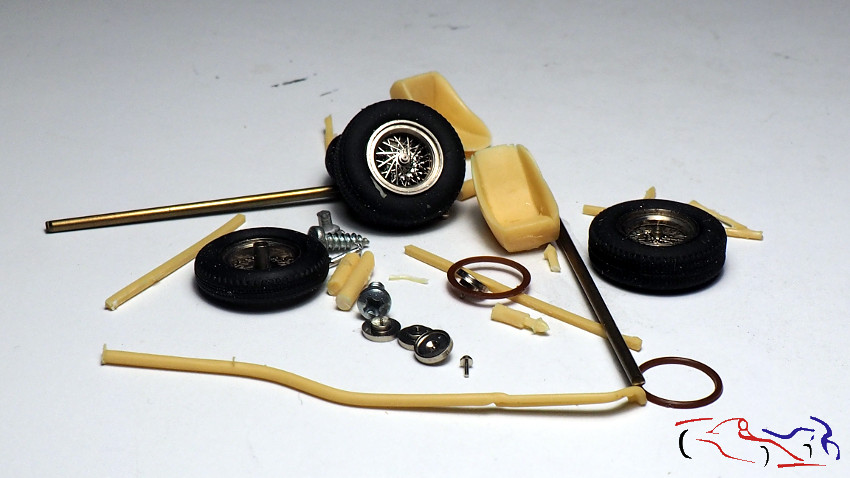 Pasamos a los fotograbados. Son lo suficientes para mejorar el kit: We turn to photogravures. They are enough to improve the kit: 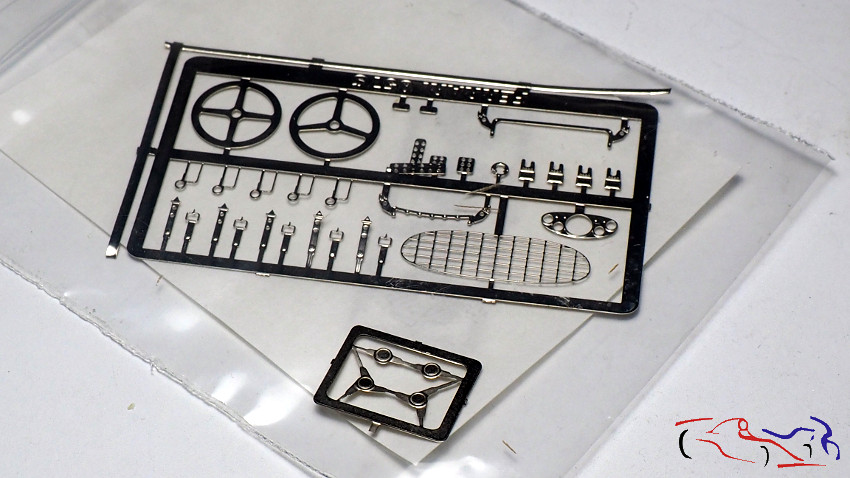 Ahora vamos a por el cristal y faros. Un detalle del fabricante que ponga dos unidades por si alguno se rompe!! Now let’s go for the glass and headlights. A detail of the manufacturer that puts two units in case any breaks! 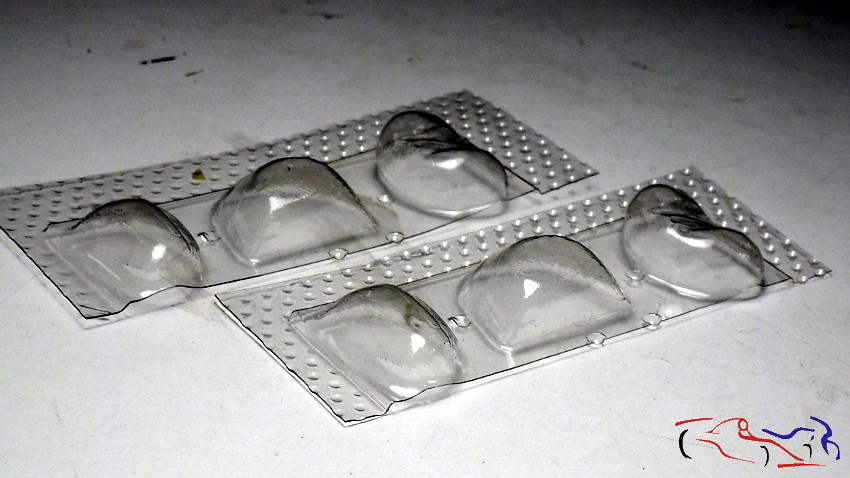 Las calcas están en buen estado, teniendo la linea amarilla por si se quiere hacer la versión con el frontal en ese mismo color. Yo voy a usar la versión pintada completamente de rojo. The decals are in good condition, having the yellow line in case you want to make the version with the front in that same color. I am going to use the red painted version. 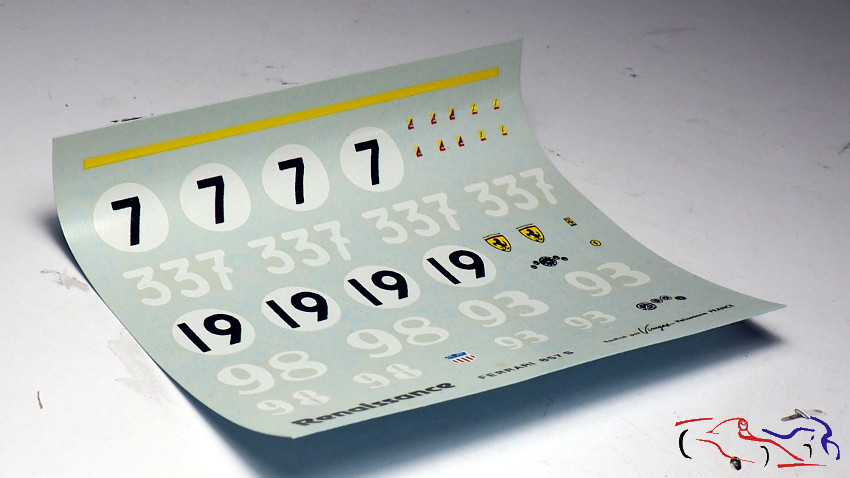 Y lo primero que hacemos es cortar los ejes, para ver como queda el coche con las ruedas. Y parece que está bien!! And the first thing we do is cut the axles, to see how the car looks with the wheels. And it seems fine! 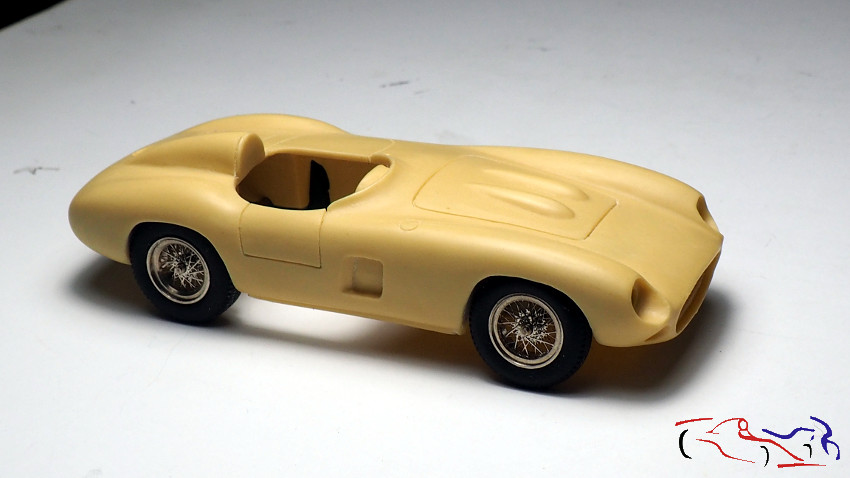 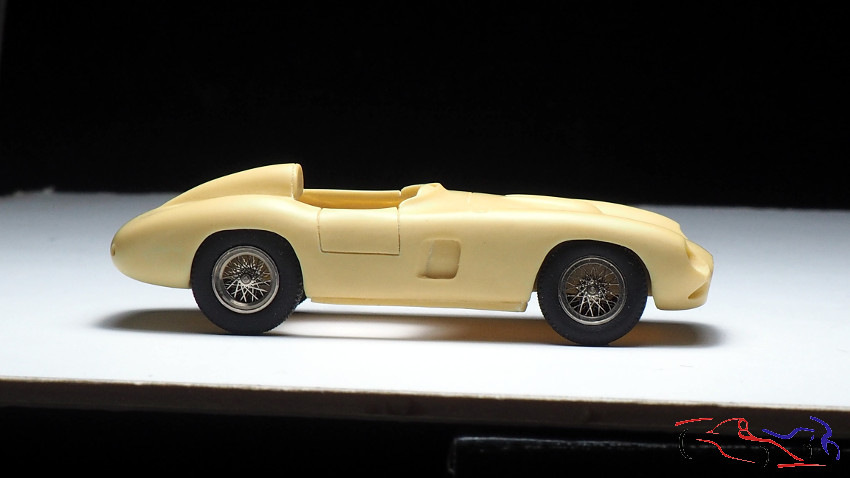 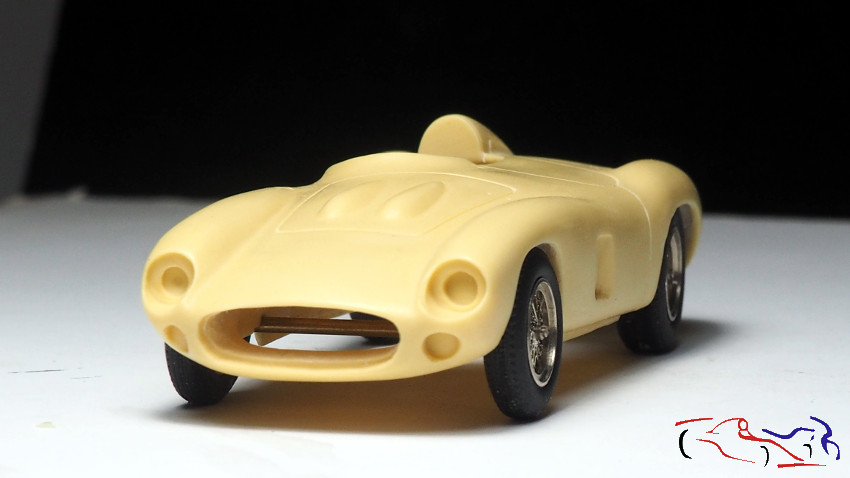 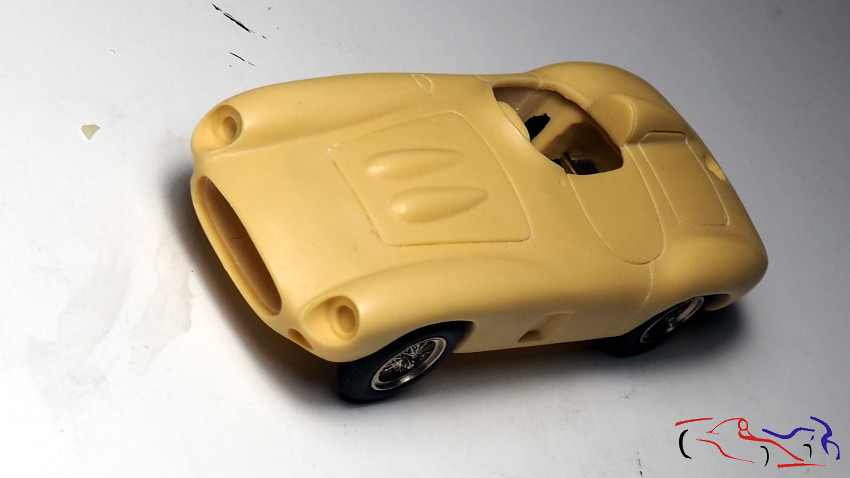 Ya puestos en tarea con la carrocería, vemos que los bordes interiores del habitáculo están ya reducidos, así como las rebabas, lineas de paneles y lijado completo. Already put into task with the body, we see that the interior edges of the cabin are already reduced, as well as burrs, panel lines and complete sanding. 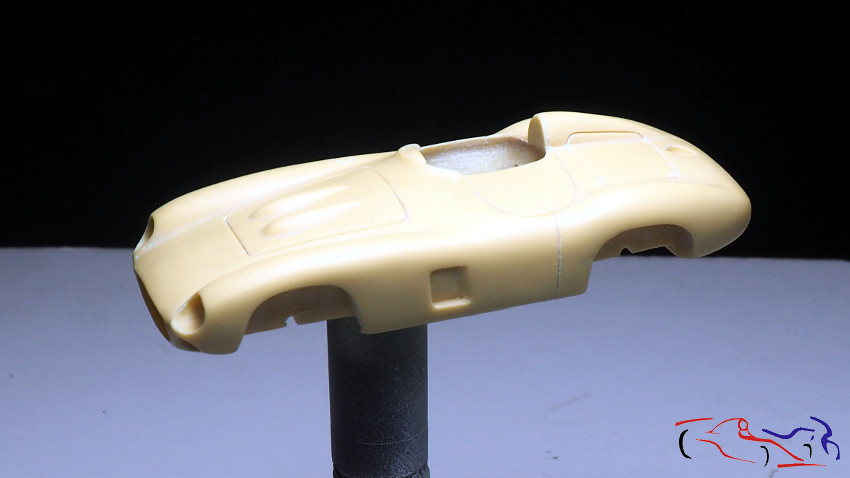 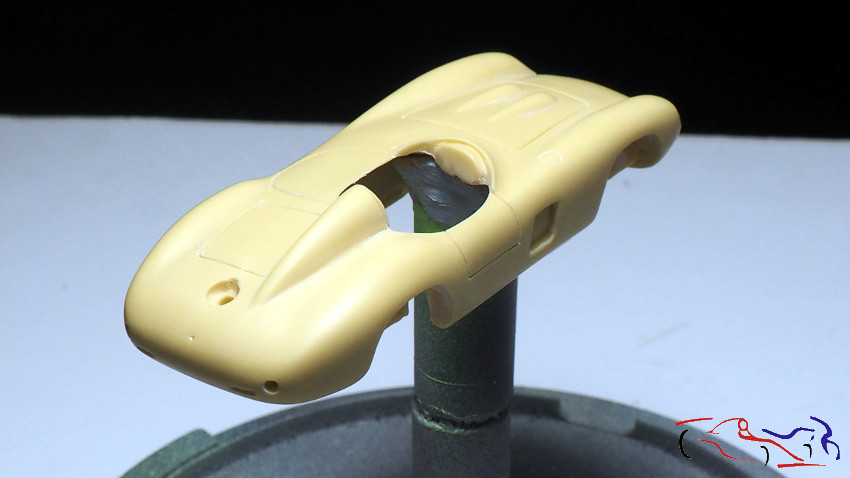 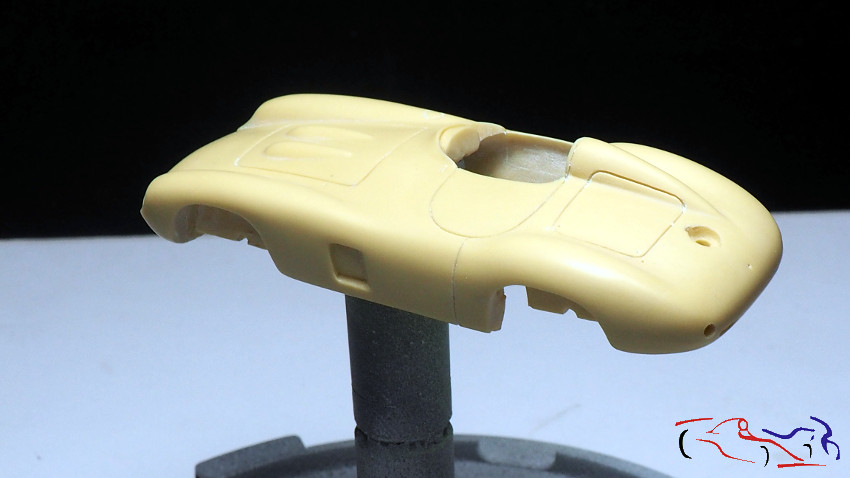 Y pasamos a imprimar con Gravity. Dos capas para ver imperfecciones. And we start priming with Gravity. Two layers to see imperfections. 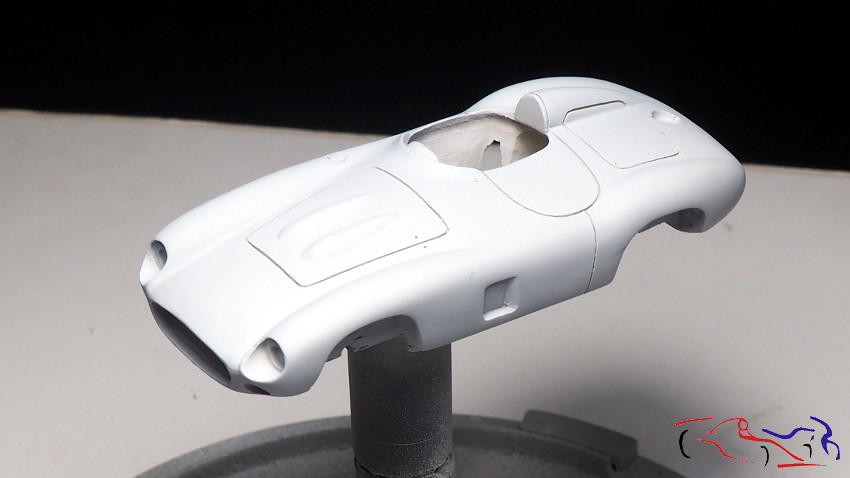 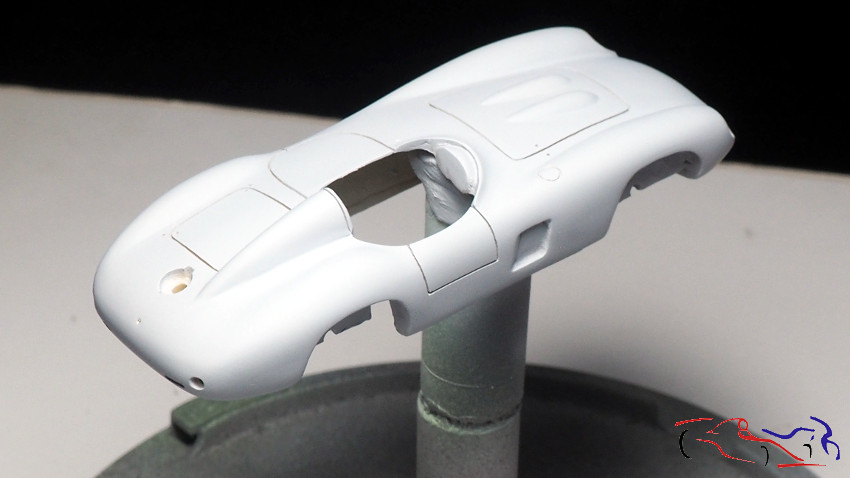 Se corrigen algunos puntos y aplico otras dos manos de imprimación. Después, revisamos los paneles y lijamos con grano 2000. Some points are corrected and I apply two other coats of primer. Then, we check the panels and sand with 2000 grit. 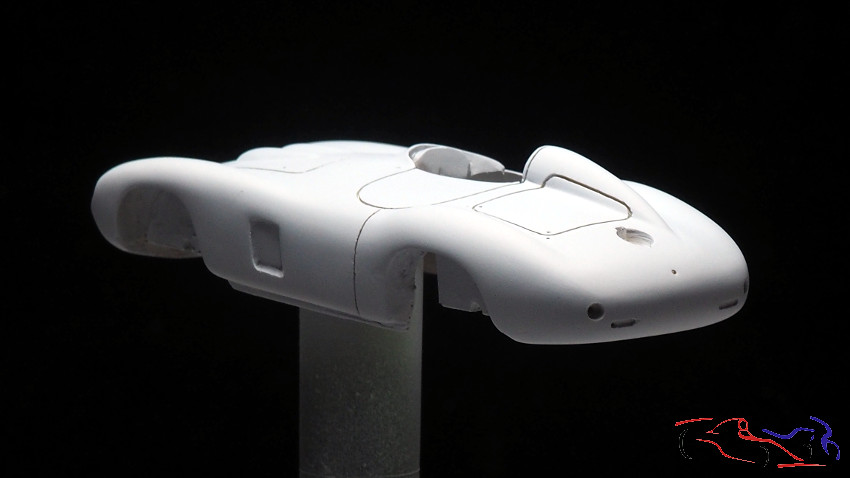 Para finalmente, dar 3 capas de Rosso Corsa de Gravity!! Finally, give 3 layers of Rosso Corsa de Gravity !! 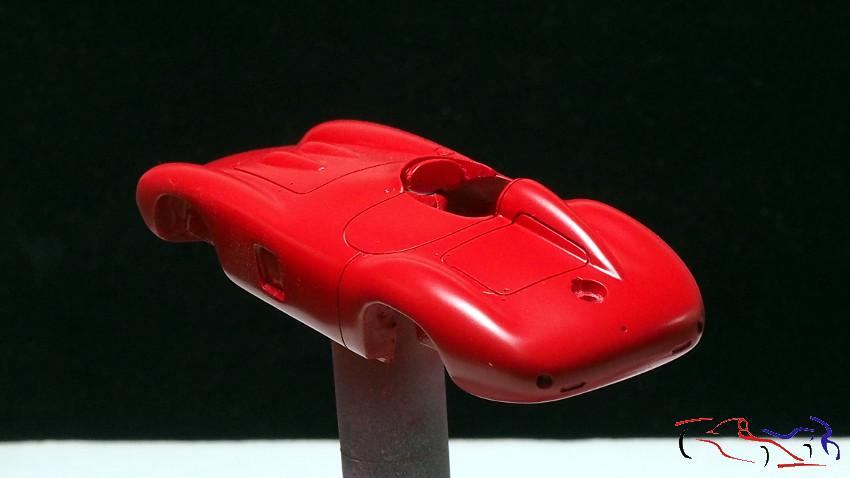 La otra foto la visteis al principio del post! Gracias por ver y comentar!! You saw the other photo at the beginning of the post! Thanks for viewing and commenting!! Last edited by JesusM; 02-20-2020 at 05:10 AM. Reason: Mistakes |
|

|

|
|
02-20-2020, 11:45 PM
|
#2 | |
|
AF Moderator
 
Join Date: Sep 2002
Location: Fort Worth, Texas
Posts: 3,246
Thanks: 31
Thanked 314 Times in 241 Posts
|
Re: Ferrari 875 S Renissance (1/43)
Great start!
__________________
The client is not always right. - Enzo Ferrari ItalianHorses.net    
|
|
|
|
|
|
03-20-2020, 01:47 PM
|
#3 | ||
|
AF Enthusiast
Thread starter
Join Date: Mar 2009
Location: Madrid
Posts: 649
Thanks: 109
Thanked 68 Times in 67 Posts
|
Re: Ferrari 875 S Renissance (1/43)
Quote:
|
||
|
|
|
|
03-20-2020, 01:48 PM
|
#4 | |
|
AF Enthusiast
Thread starter
Join Date: Mar 2009
Location: Madrid
Posts: 649
Thanks: 109
Thanked 68 Times in 67 Posts
|
Re: Ferrari 875 S Renissance (1/43)
Buenas a todos. Añado más fotos al proceso de este Ferrari, que en este momento está así, recien pintado!!
Good morning everyone. I add more photos to the process of this Ferrari, which at the moment is like this, freshly painted !! 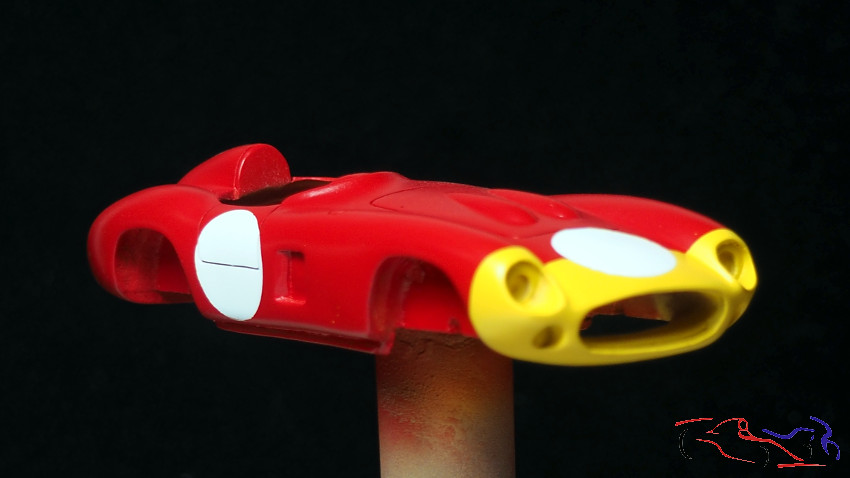 Y damos pasos atrás para ver lo realizado. Empezamos por los pilotos traseros, que al ser de resina, decido hacerlos de aluminio. Para ello, y como no tengo torno, cojo un redondo y empiezo a disminuir el grosor con la fresadora: And we take steps back to see what has been done. We start with the rear lights, which being made of resin, I decide to make them out of aluminum. For this, and since I do not have a lathe, I take a round and start to decrease the thickness with the milling machine: 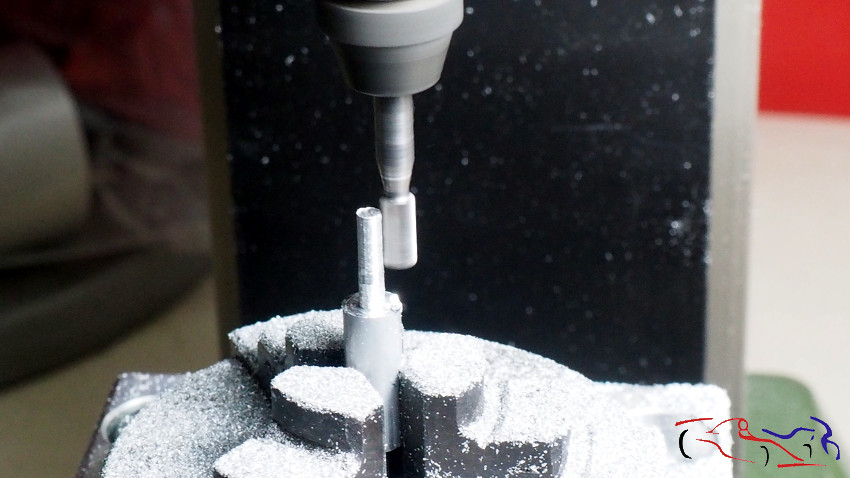 A continuación, esa parte disminuida la ponemos en el prolongador del minitaladro (para que no sufra el motor), y empezamos a darle forma con limas, lijas y el cutter: Next, we put that diminished part in the extension of the mini drill (so that the motor does not suffer), and we begin to shape it with files, sandpaper and the cutter: 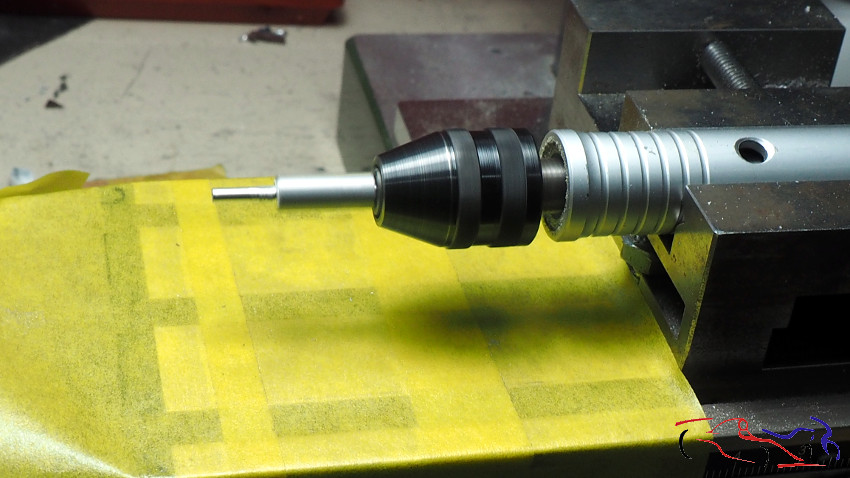 Hasta que formamos este cono. Como muestra, he puesto la pieza original al lado, sujetada con cinta de enmascarar: Until we form this cone. As a sample, I have put the original piece to the side, fastened with masking tape:  Pasamos a las llantas. Para darles un tono más real, las voy a pintar. Aquí están preparadas para el proceso: We turn to the tires. To give them a more realistic tone, I am going to paint them. Here they are prepared for the process:  Las imprimamos con Gravity: Lets prim them with Gravity: 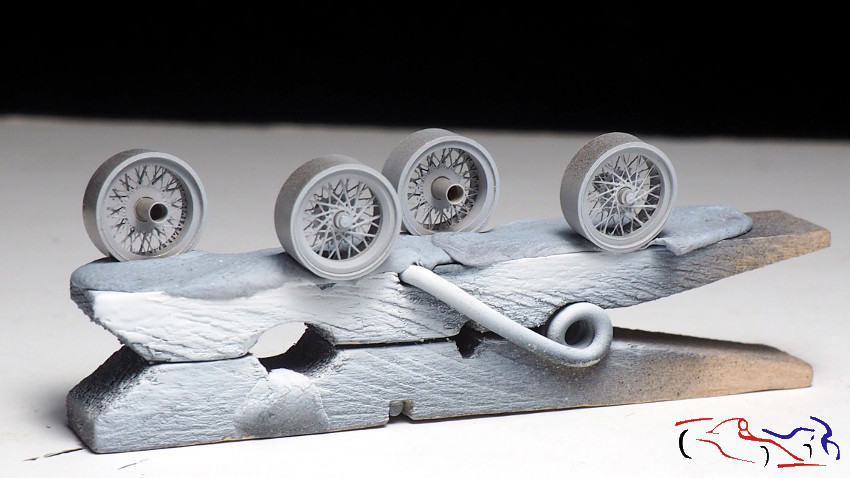 y las pintamos con Vallejo, color Aluminio mate. Vemos que el tono no es tan brillante and we paint them with Vallejo, matt aluminum color. We see that the tone is not so bright 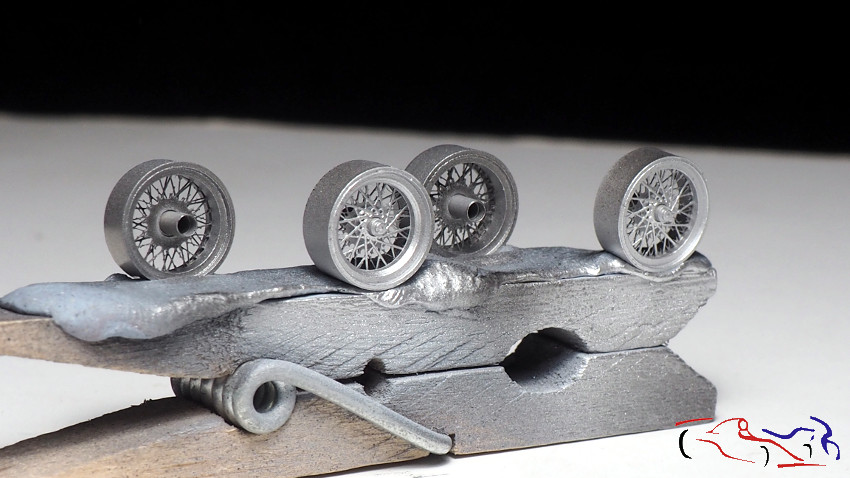 Pasamos a otra pieza: el tubo de escape, que rehacemos en latón: dos varillas hasta la mitad, que se unirán a otra más gruesa: We move on to another piece: the exhaust pipe, which we remake in brass: two rods halfway, which will be joined to a thicker one: 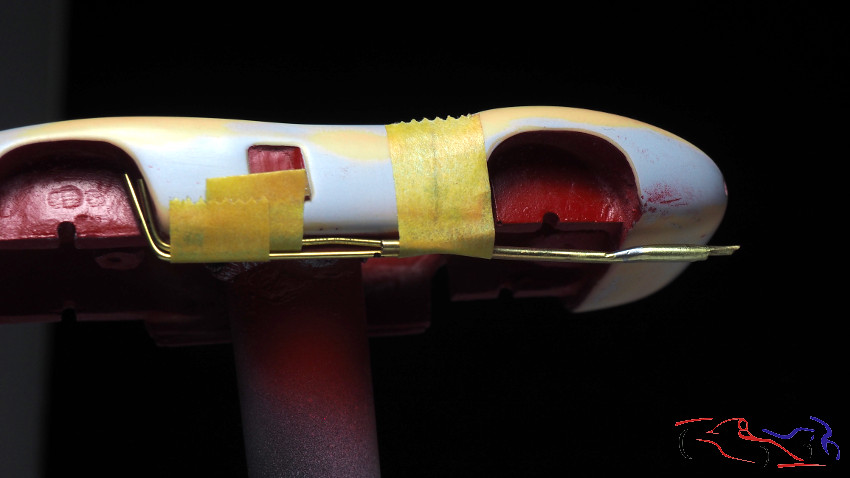 Decir que la parte trasera, la más gruesa, se ha unido a otro tubo aun más grueso, que en su parte final, fue aplastado para darle una forma de elipse, y cortado en su parte final: Saying that the back, the thickest part, has been attached to another even thicker tube, which in its end part, was crushed to give it an ellipse shape, and cut in its end part: 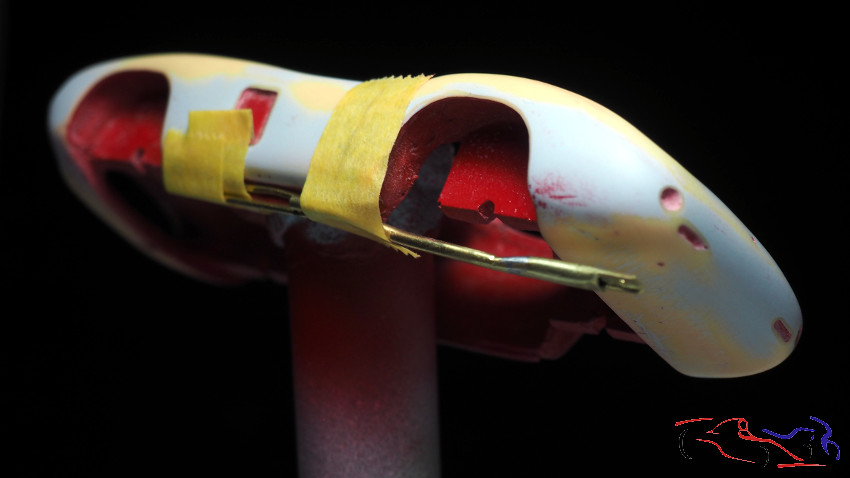 Utilicé tubos en lugar de redondos para pegar los tubos delanteros con el trasero sin mayor problema . I used tubes instead of round ones to glue the front tubes to the rear without much trouble . 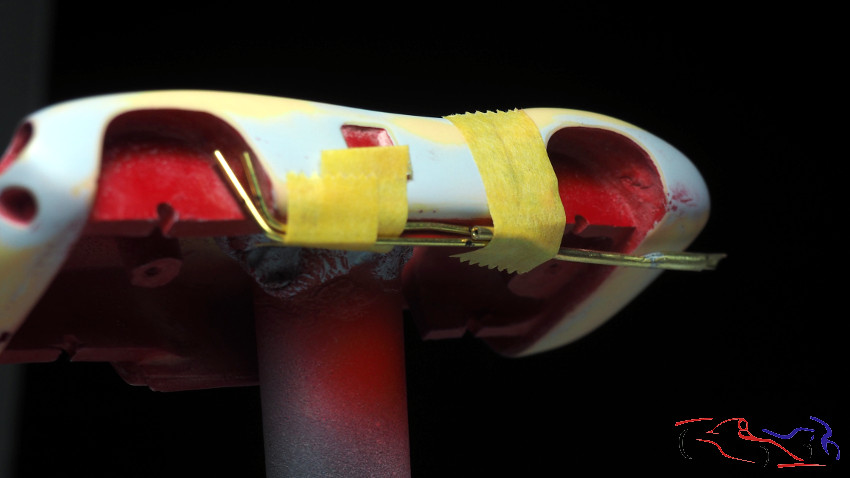 metiendo hilo de cobre entre los tres tubos, y fijándolo con ciano para después soldarlo. Decir que las cuatro partes del tubos de escape van soldadas entre si: putting copper wire between the three tubes, and fixing it with cyano and then soldering it. Say that the four parts of the exhaust pipe are welded together: 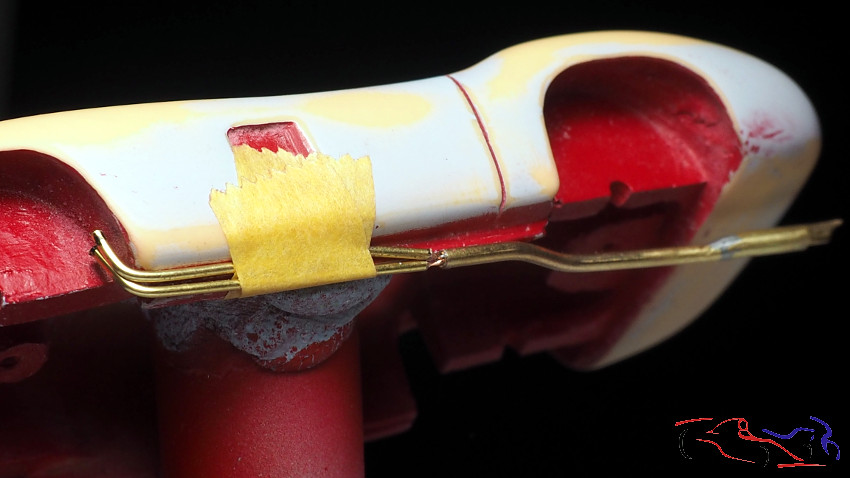 Aquí le vemos con el original. El gancho final es la pequeña pieza que lo unirá a la carrocería: Here we see you with the original. The final hook is the small piece that will attach it to the body:  Lo imprimamos .. Lets primer it .. 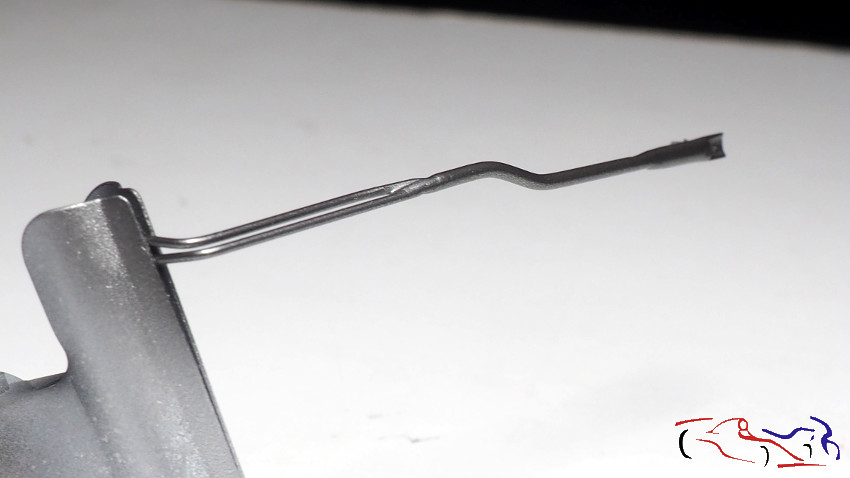 y pintamos con gris metálico de Zero: ... and we paint with Zero metallic gray: 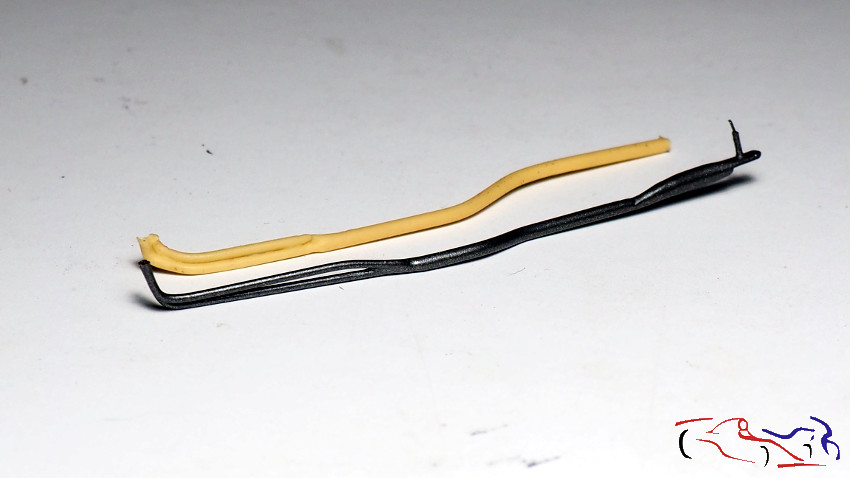 Continuamos con más procesos. Limpiamos el habitáculo con la fresa . We continue with more processes. We clean the cabin with the machine 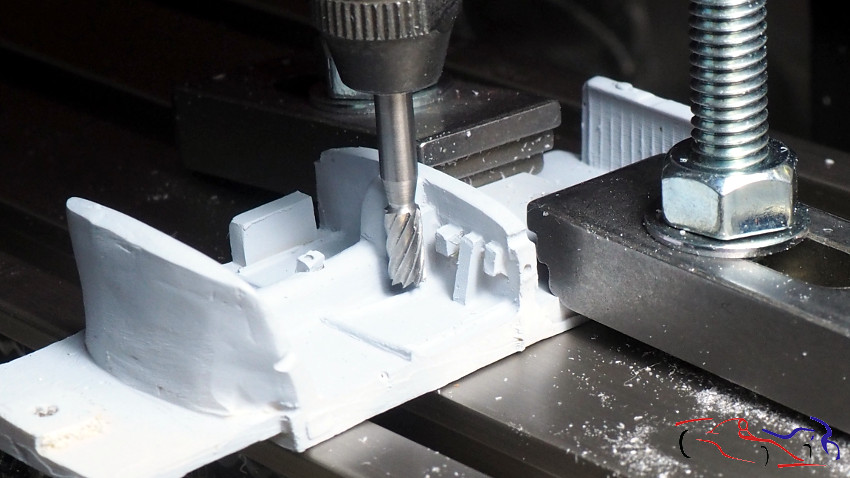 Aquí lo tenemos limpio: Here we have it clean: 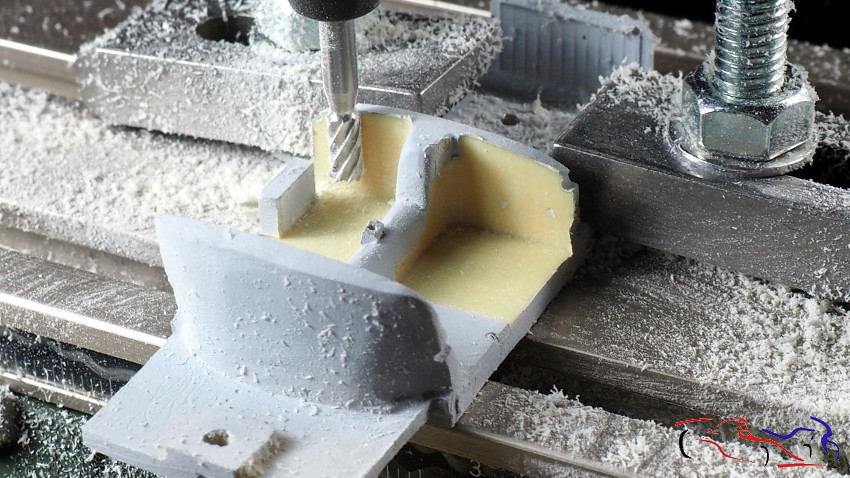 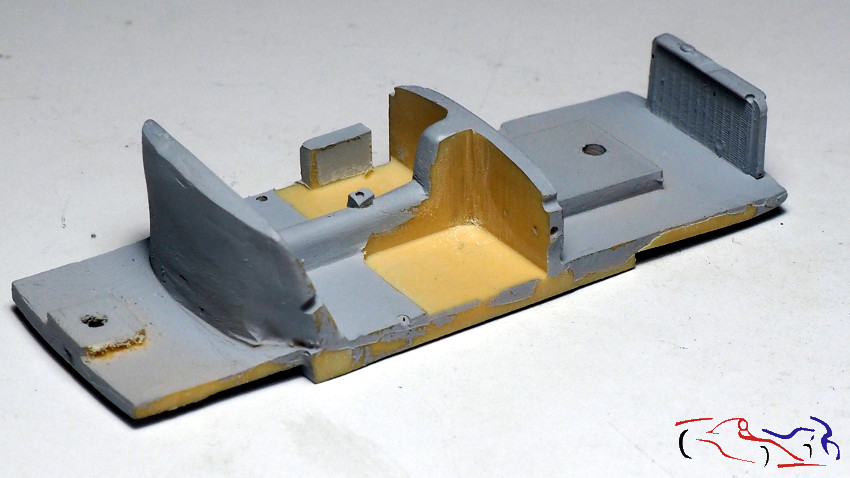 Aprovecho aquí, para mostraros los nervios de la carrocería realizados por mi en cobre, con los originales de resina . I take advantage here, to show you the nerves of the body made by me in copper, with the original resin ones: 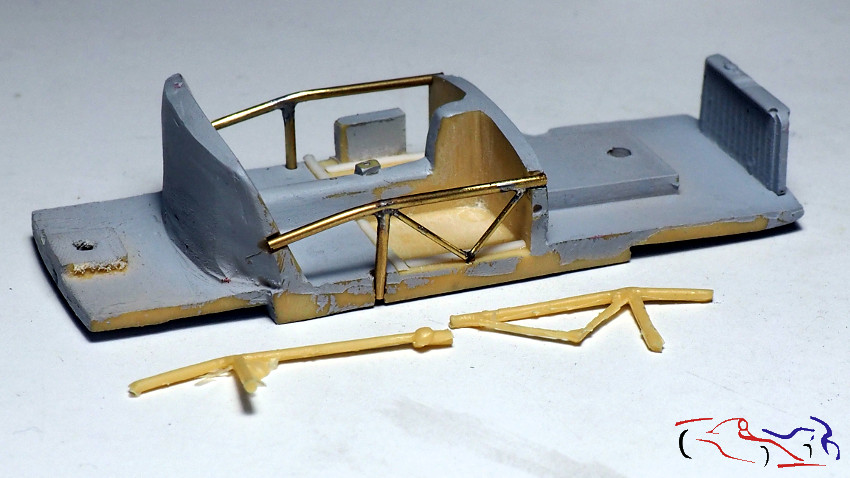 Dichos nervios se impriman y pintan con gris medio de Tamiya: These nerves are printed and painted with Tamiya medium gray: 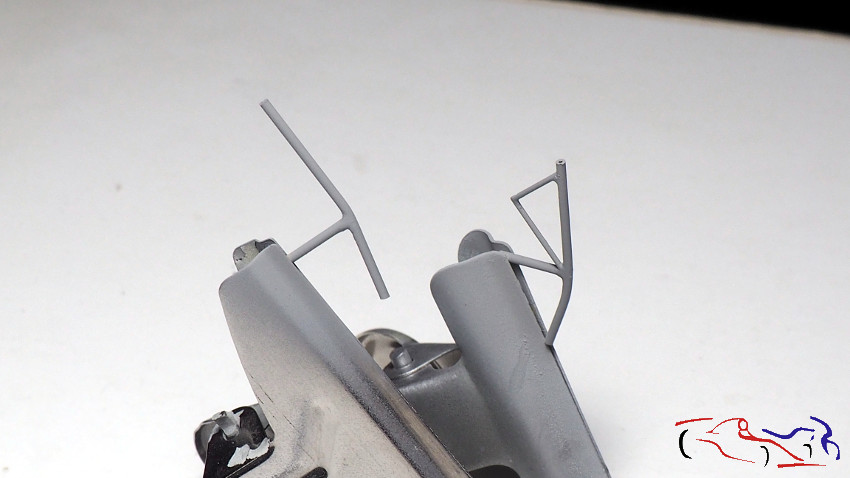 al igual que el chasis: and the same for the chasis: 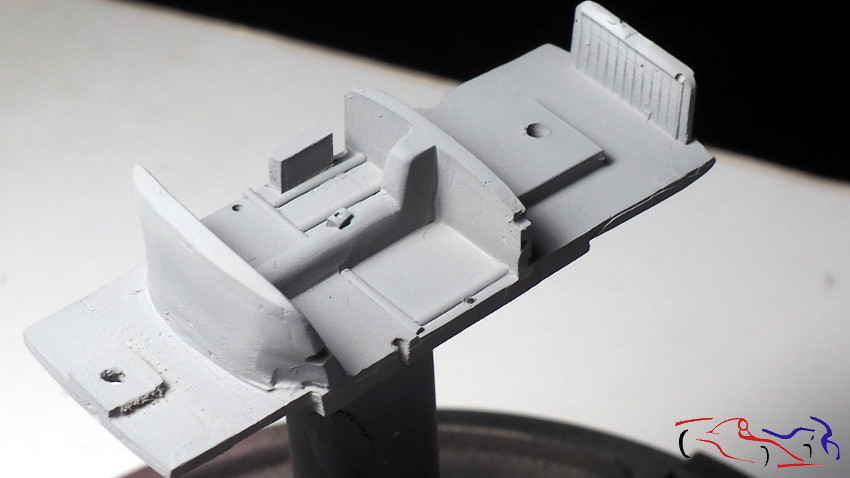 A este chasis, enmascaramos su parte gris y pintamos de negro mate de Zero: To this chassis, we mask its gray part and paint Zero matt black: 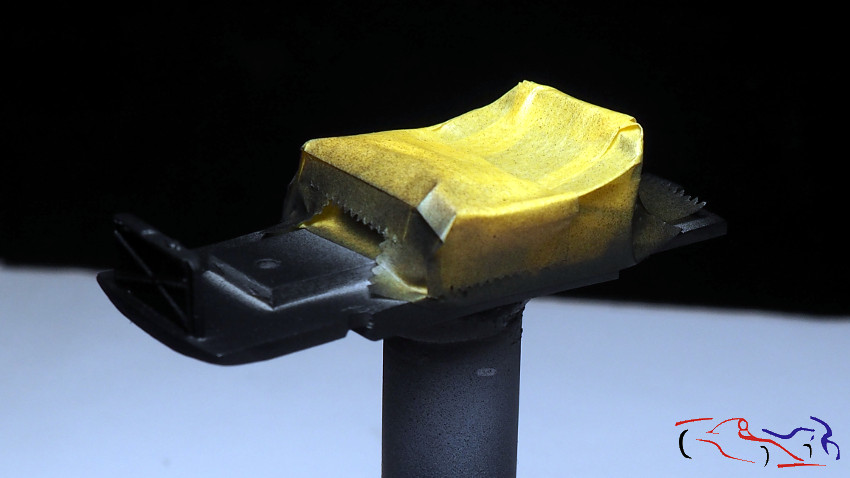 Siendo este el resultado: Being this the result: 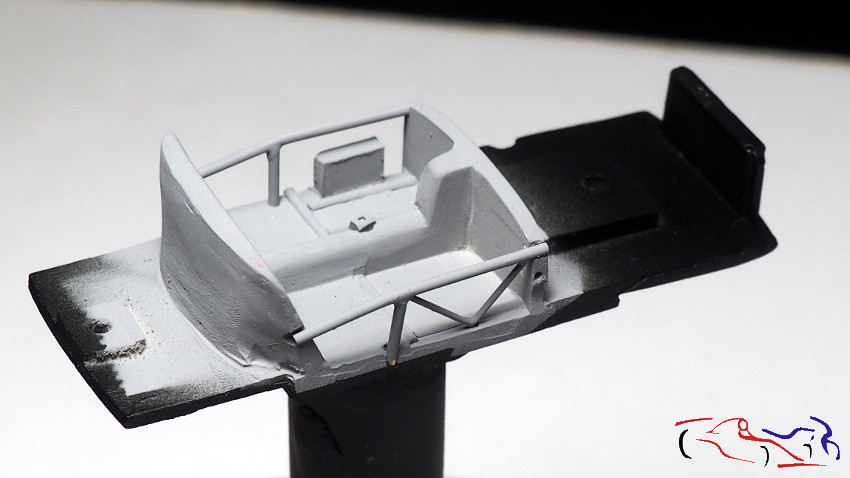 A la hora de imprimar, preparamos más piezas por colores: espejo en color de carrocería, la rejilla delantera y otras piezas para negro, y las fijaciones de los capós para color cuero: When it comes to priming, we prepare more parts by colors: body color mirror, the front grille and other parts for black, and the hood mountings for leather: 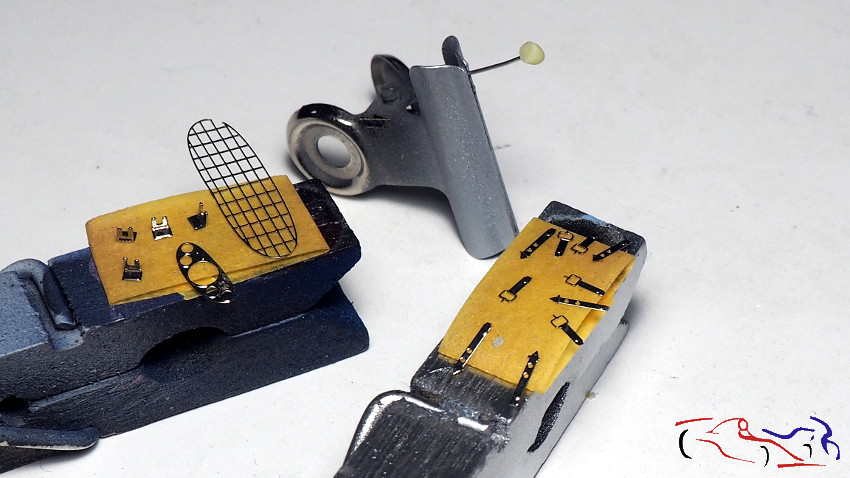 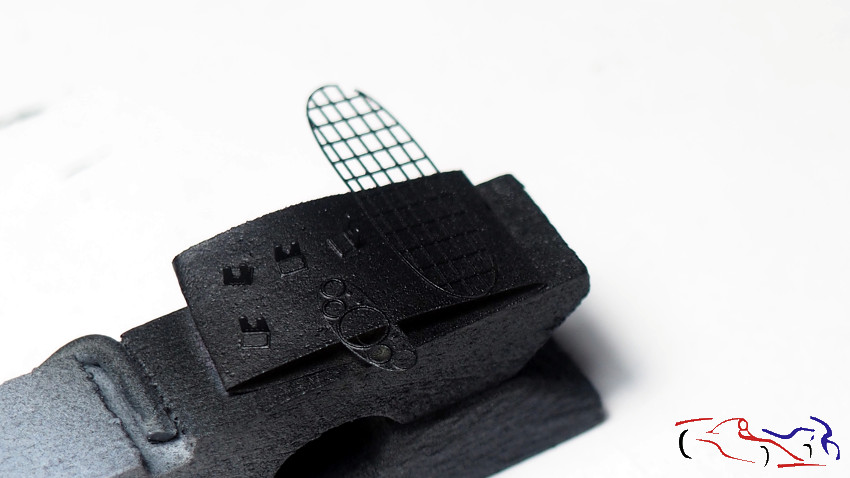 Una vez imprimadas, las fijaciones las pinto con marrón oscuro y marron claro de Vallejo: Once primed, the fixings are painted with dark brown and light brown from Vallejo:  Y los asientos, con azul de Zero: And the seats, with Zeros blue: 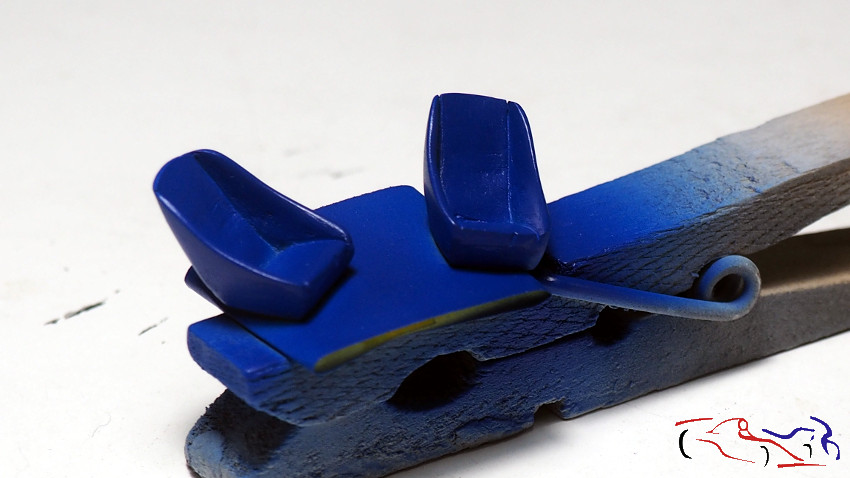 Y para terminar, la carrocería. La lijé un poco por que vi unos arañazos sobre el rojo And finally, the body. I sanded it a little because I saw some scratches on the red 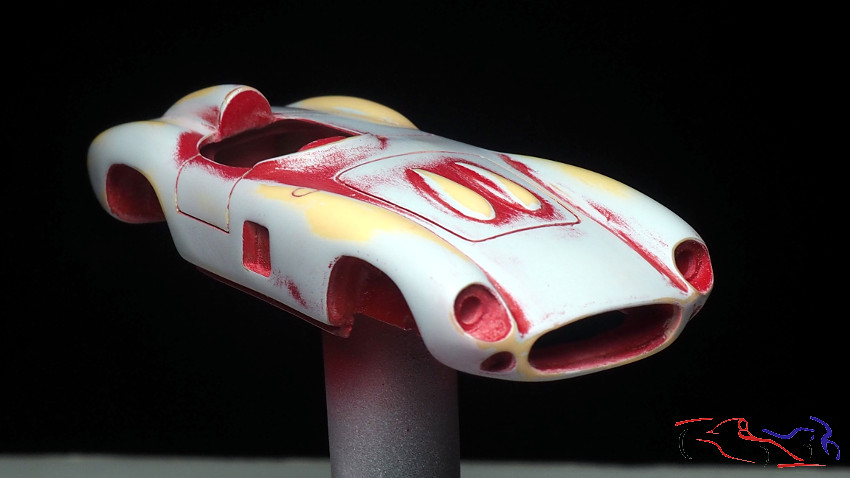  Pasamos a imprimar con Gravity: We move to primer with Gravity:  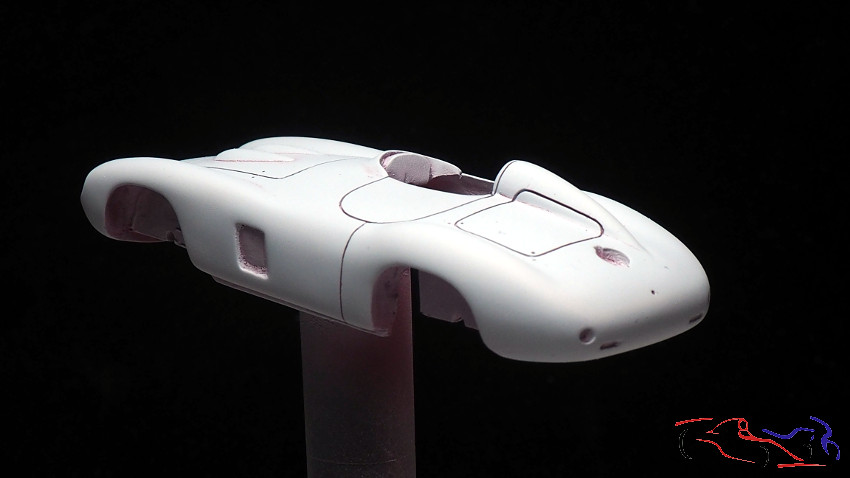 Pintamos con blanco de Zero: We paint it with Zero White: 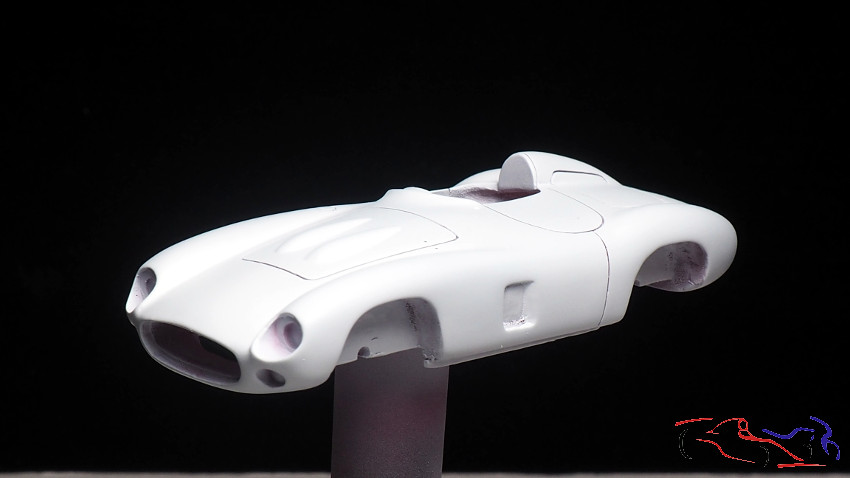  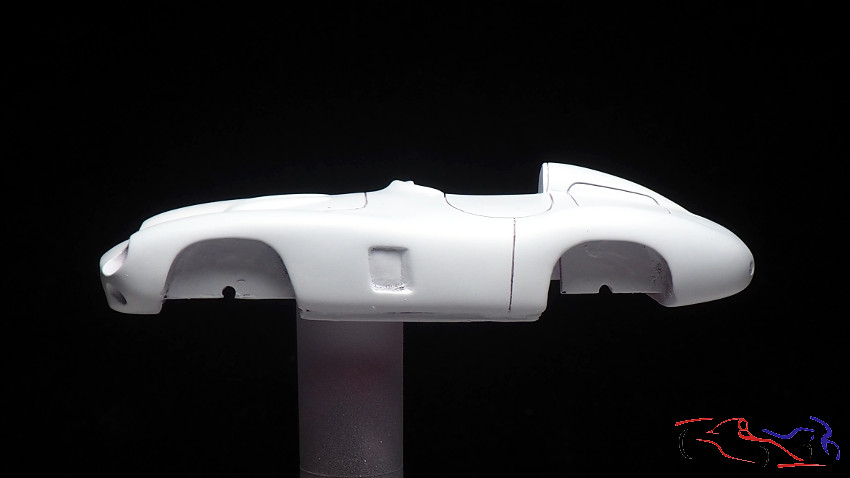 En este punto, hacemos los circulos de lso dorsales con DSPIAE: At this point, we make the dorsal circles with DSPIAE: 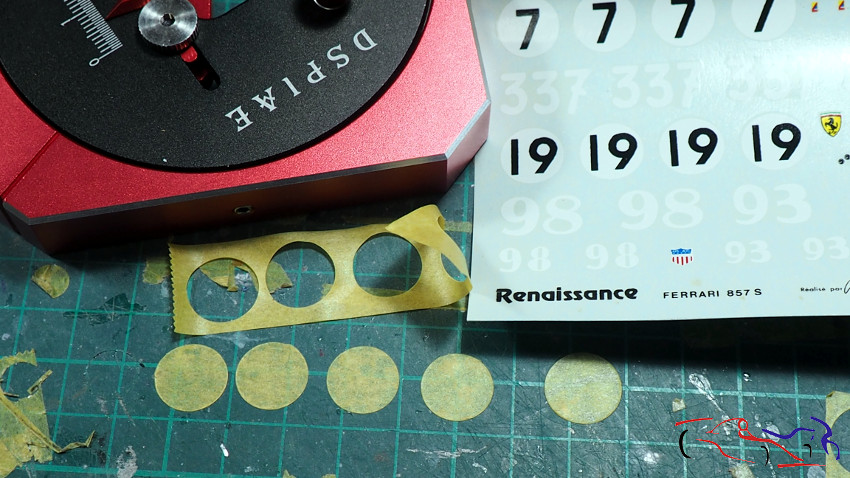 Y los ponemos: And we put them: 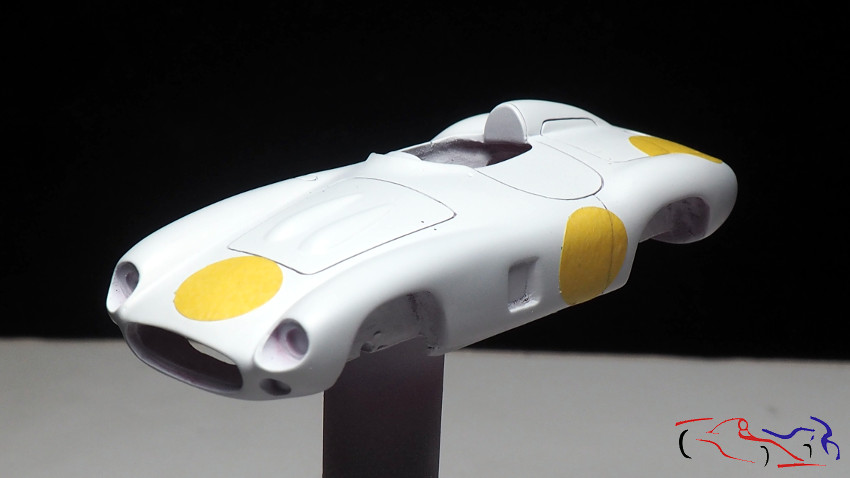 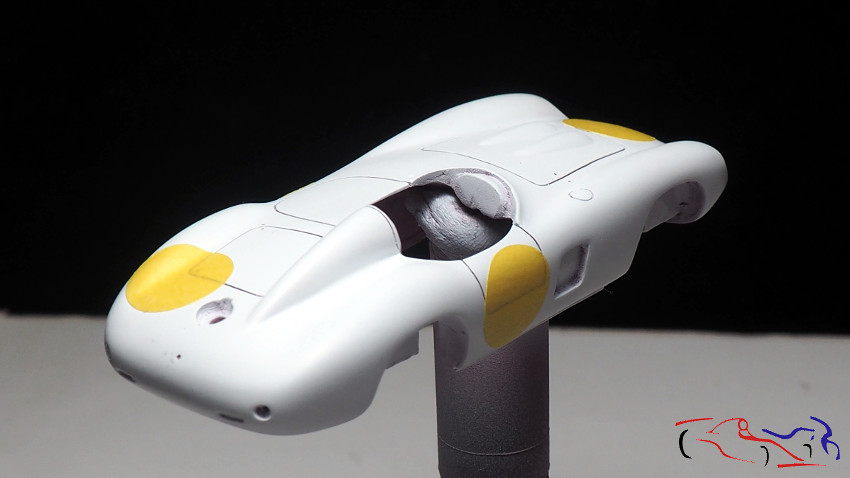 Pintamos de amarillo Giagio de Zero: We paint yellow Giagio de Zero: 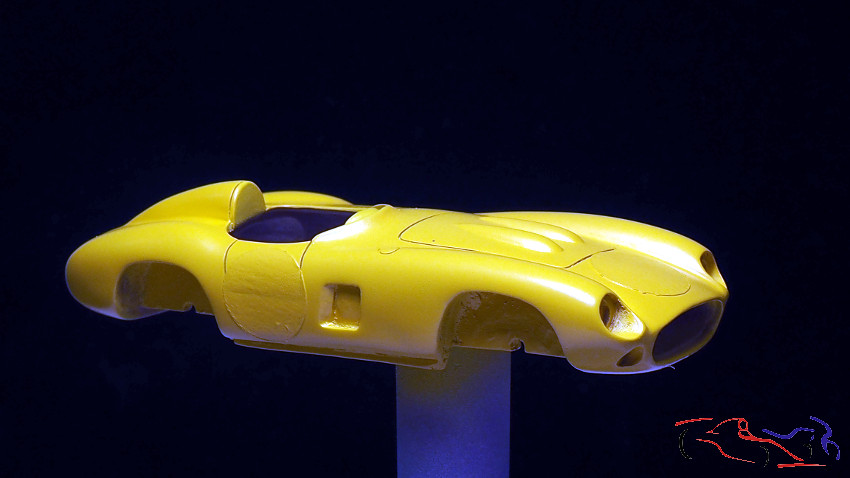 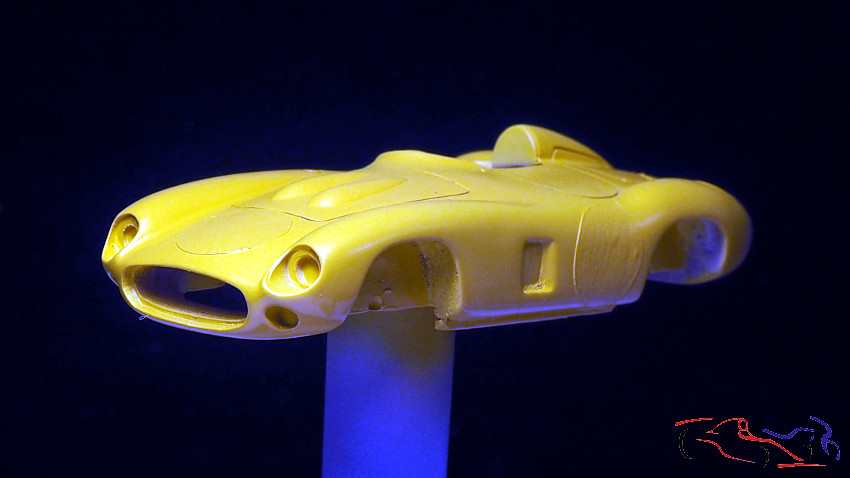 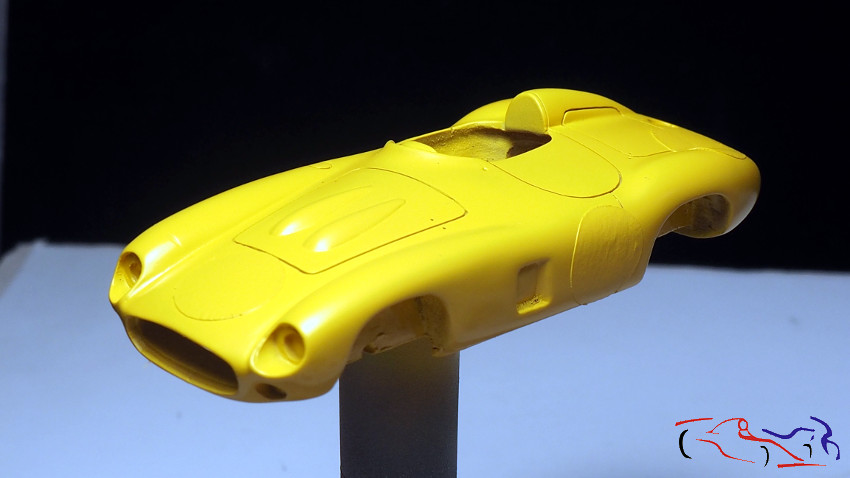 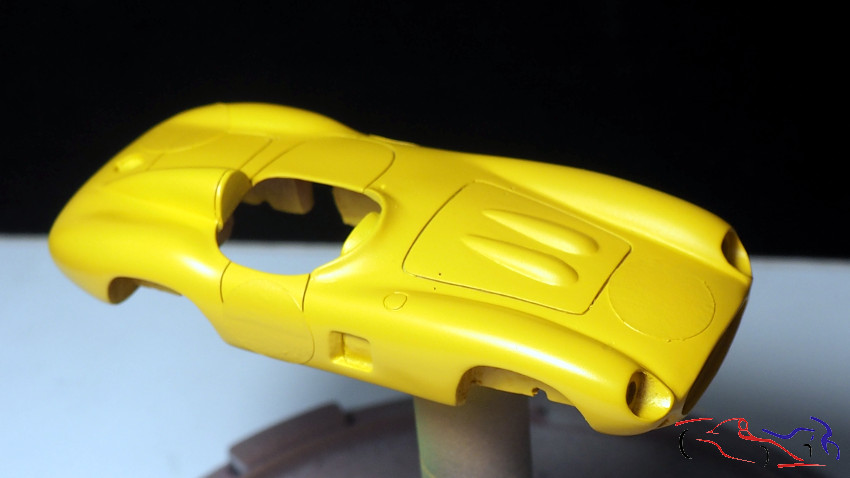 Enmascaramos el morro, y pintamos finalmente con Rojo Corsa de Gravity: We mask the nose, and finally paint with Corsa Red from Gravity: 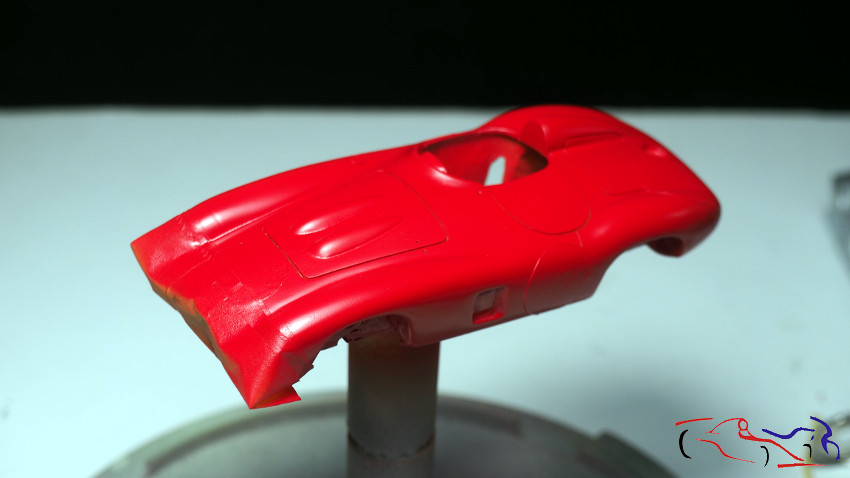 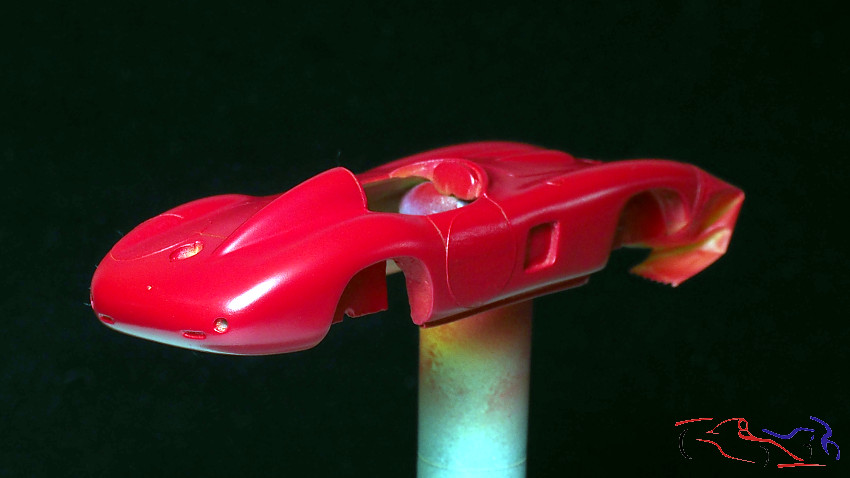 Y voilá: el Ferrari ya pintado, a falta de calcas: And voila: the Ferrari already painted, in the absence of decals: 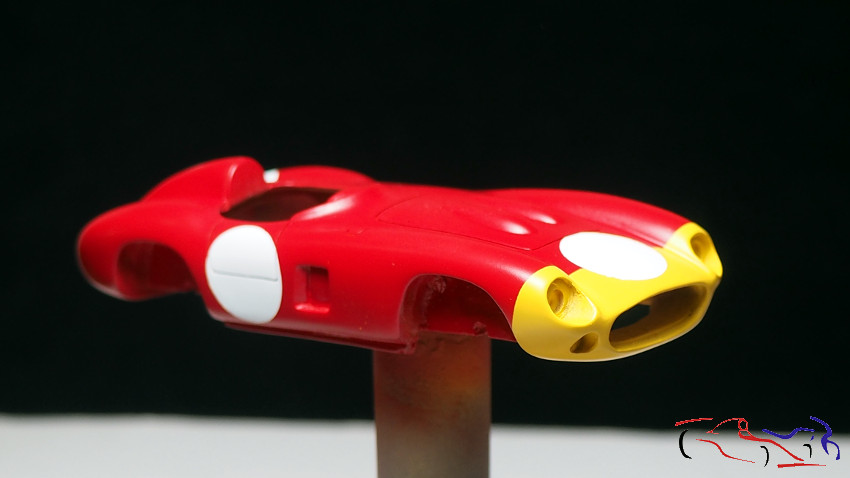 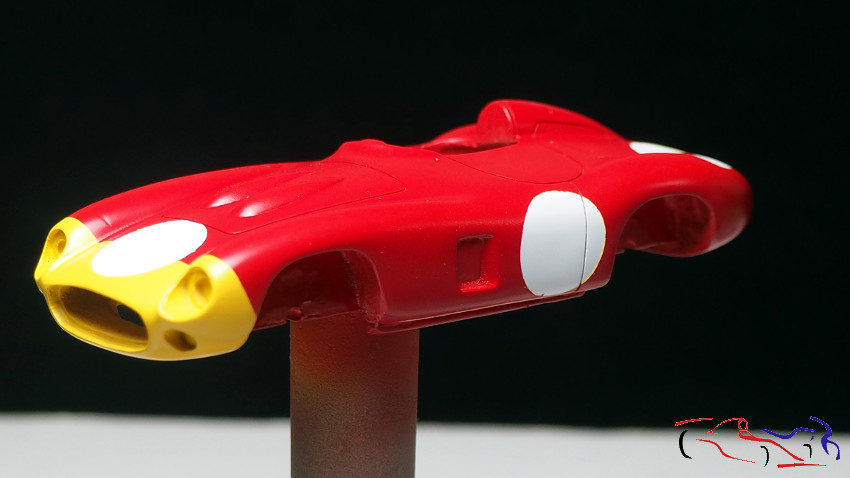 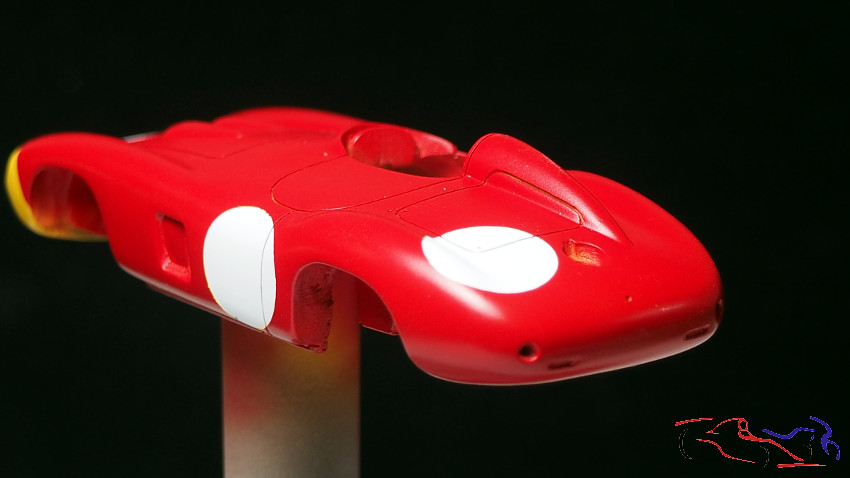 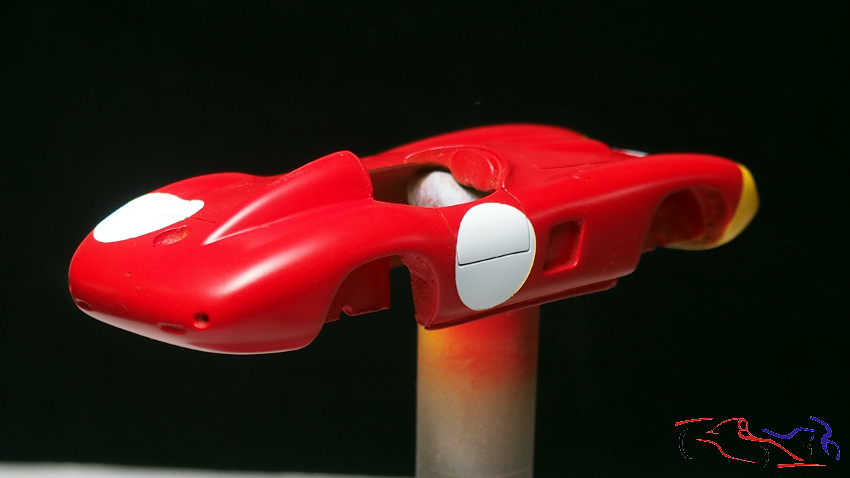 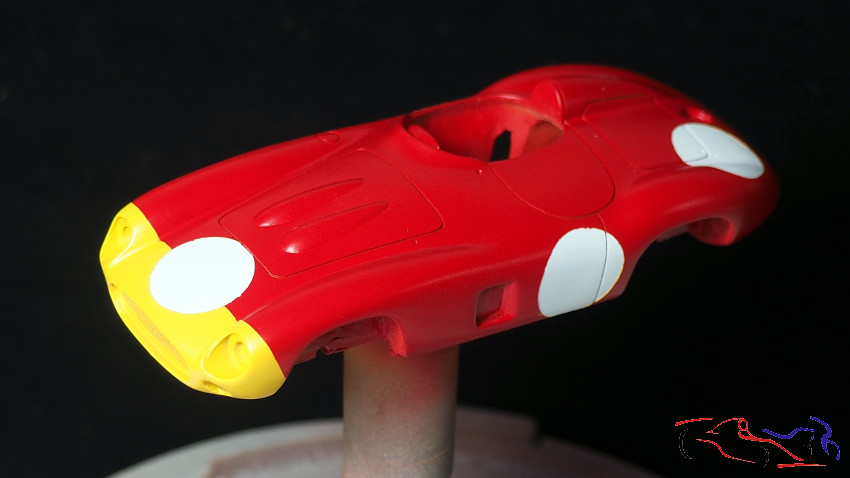 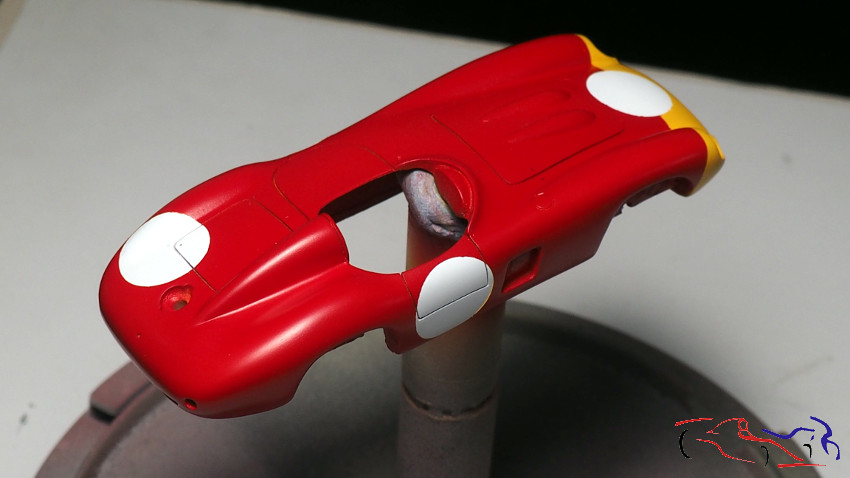 Precioso!! Garcias por ver y comentar! Beautiful!! Thanks for viewing and commenting! |
|
|
|
|
|
04-13-2020, 03:22 AM
|
#5 | |
|
AF Enthusiast
Thread starter
Join Date: Mar 2009
Location: Madrid
Posts: 649
Thanks: 109
Thanked 68 Times in 67 Posts
|
Re: Ferrari 875 S Renissance (1/43)
Hola a todos. Pocos avances he dado con este coche debido a un problema con las calcas, y solo he podido poner la pequeñas, quedando la carrocería en este estado:
Hello everyone. I have made little progress with this car due to a problem with the decals, I have only been able to put the small ones, leaving the body in this state: 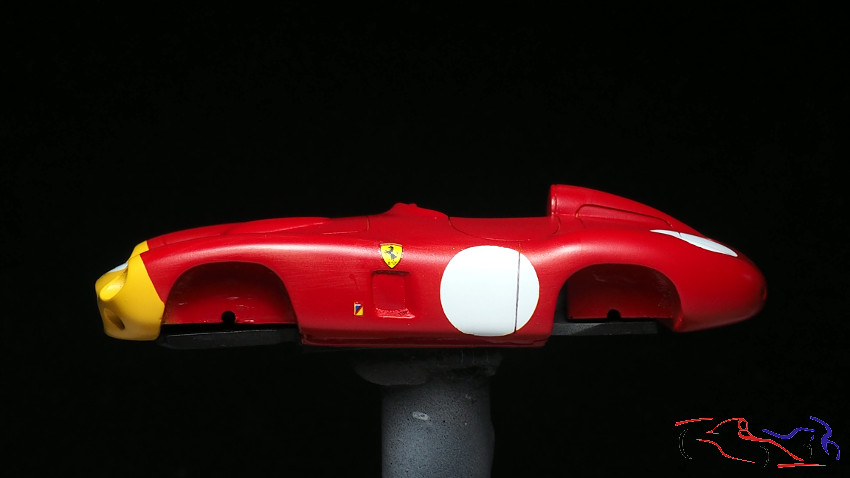 Pero demos unos pasos atrás para ver lo que pasó. De primeras, le pasé una lija muy fina con agua y con jabón para eliminar las marcas de pintura de las máscaras. Todo fue bien hasta que vi que me había pasado en la aleta izquierda trasera, al lado del numeral blanco. Por tanto, hice otra máscara redonda y enmascaré la parte delantera del coche: But lets take a few steps back to see what happened. At first, I passed a very fine sandpaper with water and soap to remove paint marks from the masks. Everything went well until I saw that I had passed me on the left rear fin, next to the white numeral. So I made another round mask and masked the front of the car: 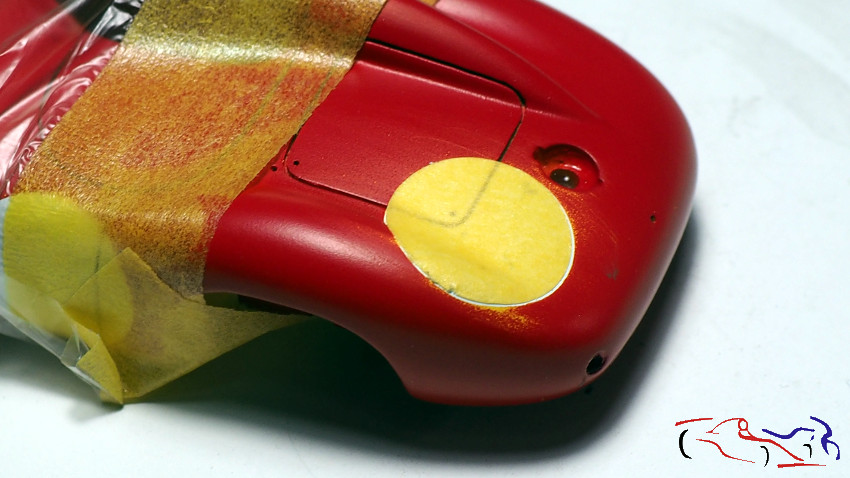 Le apliqué oar vez el mismo rojo de Gravity, quedando perfecto!! I applied the same Gravity red once, making it perfect !! 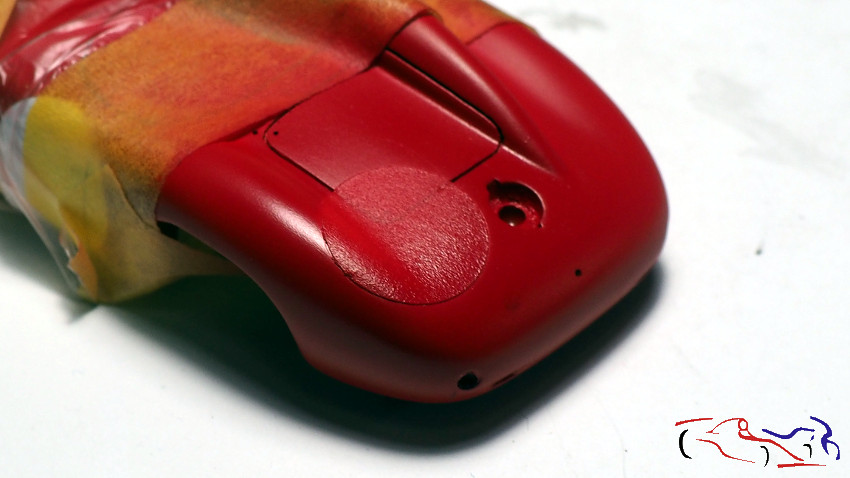 Era entonces el momento de poner las calcas. Recorté los 7 negros pero .empezaron a romperse dentro del agua!! It was then time to put the decals on. I cut the black 7 but . they started to break in the water !! 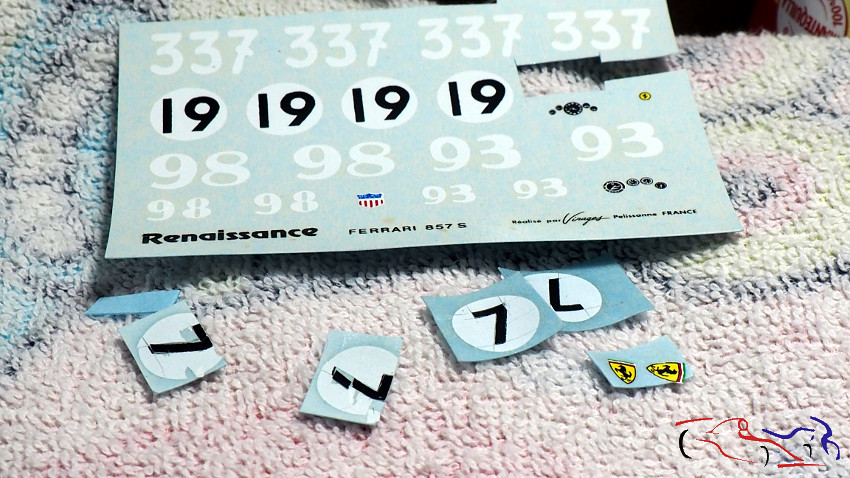 Por tanto, pedí unas nuevas calcas a Spotmodel, y mientras tanto, pegué los escudos Ferrari de unas hojas que tenía de escudos de todas las medidas. Y así es como quedó: Therefore, I ordered new decals to Spotmodel, and meanwhile, I glued the Ferrari shields to some sheets that had shields of all sizes. And this is how it turned out: 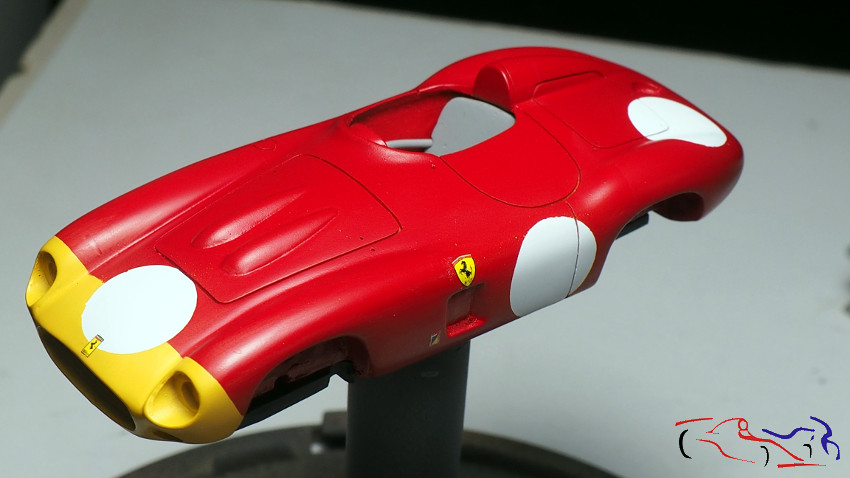 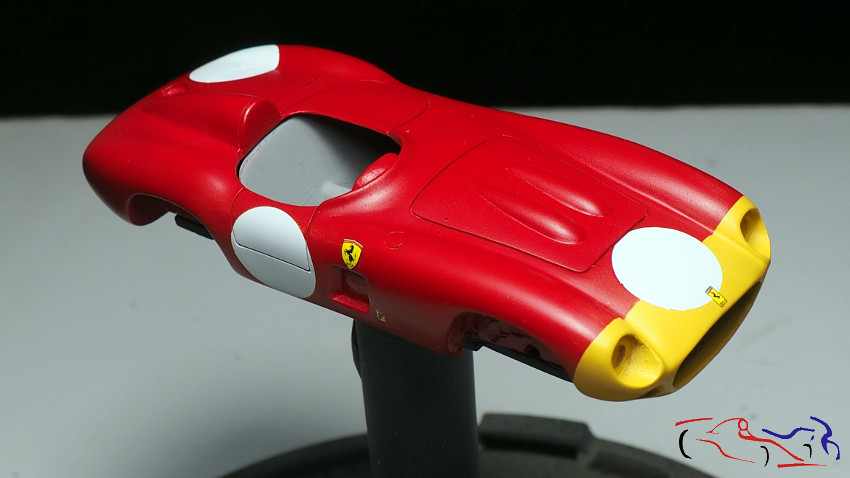 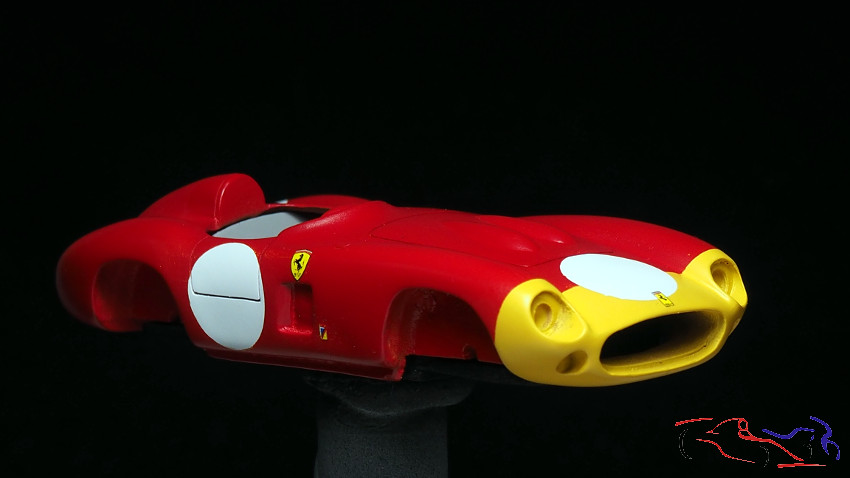 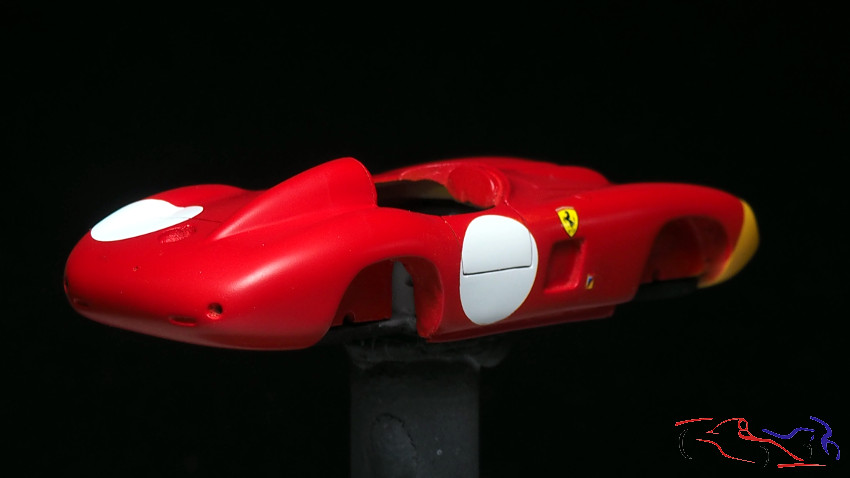 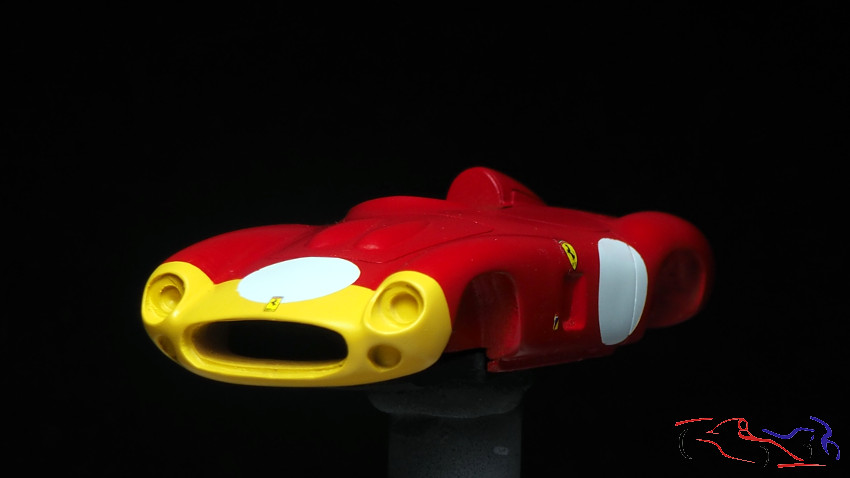 Mientras esperaba las calcas, decidí meterme un poco con el cockpit. Esto es como lo dejé, pintado de un gris, que en la foto parece blanco: While waiting for the decals, I decided to mess with the cockpit a bit. This is how I left it, painted a gray, which in the photo looks white: 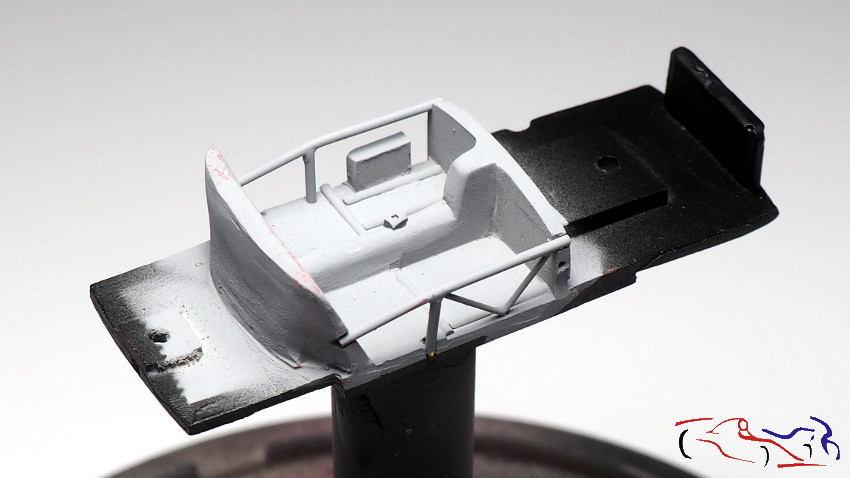 Y utilizando los óleos de MIG, le fui ensuciando con blanco, negro, gris y color polvo. Acentué su aplicación en los bordes: And using MIGs oils, I was dirtying it with white, black, gray and dust color. I accentuated its application at the edges: 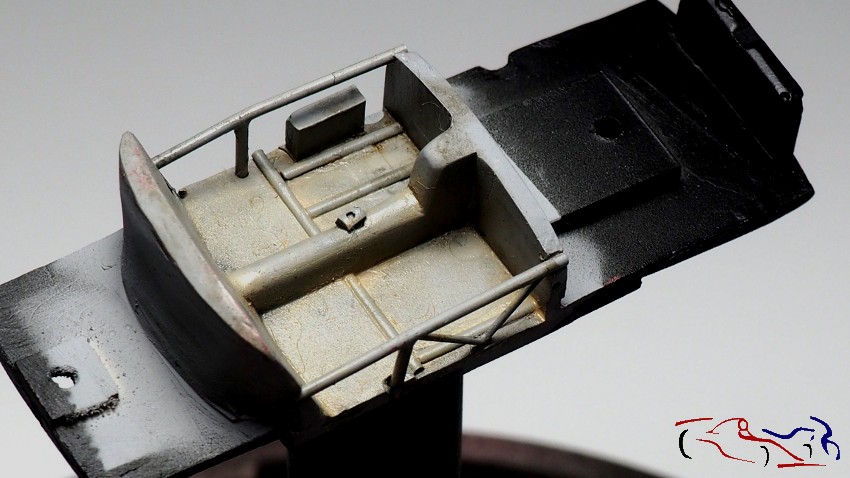 Este es el resultado de como se verá desde fuera. Es un ligero ensuciado muy natural: This is the result of how it will look from the outside. It is a very natural light soiling: 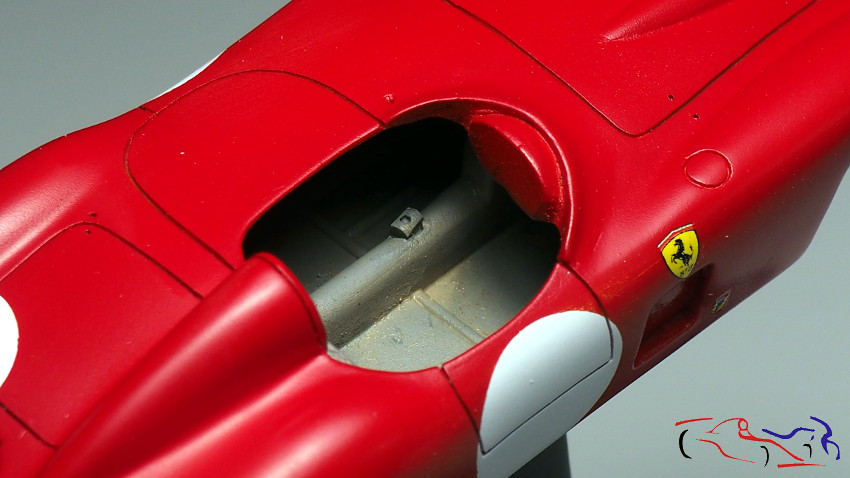 También apliqué un poco a los asientos, pero tengo que continuar con ellos. I also applied a bit to the seats, but I have to continue with them. 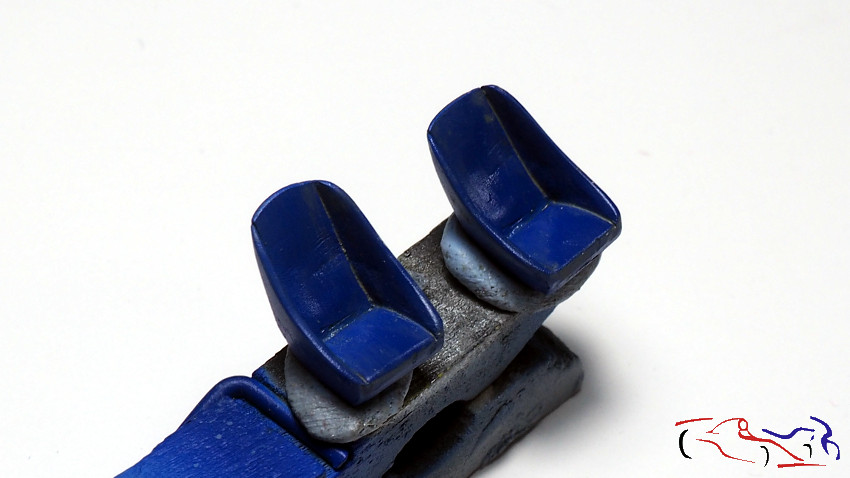 Gracias por ver y comentar!! Thanks for viewing and commenting!! |
|
|
|
|
|
04-14-2020, 03:30 PM
|
#6 | |
|
AF Enthusiast
Join Date: Sep 2011
Location: Redwood City, California
Posts: 651
Thanks: 0
Thanked 39 Times in 39 Posts
|
Re: Ferrari 875 S Renissance (1/43)
Love watching the 1/43 builds. Great work!
ianc |
|
|
|
|
| The Following User Says Thank You to ianc911 For This Useful Post: |
JesusM (04-14-2020)
|
|
07-22-2020, 01:29 PM
|
#7 | |
|
AF Enthusiast
Thread starter
Join Date: Mar 2009
Location: Madrid
Posts: 649
Thanks: 109
Thanked 68 Times in 67 Posts
|
Re: Ferrari 875 S Renissance (1/43)
Continuamos con este pequeñín a 1/43, después de 3 meses de espera, ya que finalmente, recibí las calcas que durante el confinamiento, se perdieron!!
We continue with this little one at 1/43, since finally, I received the decals that were lost during the confinement!! 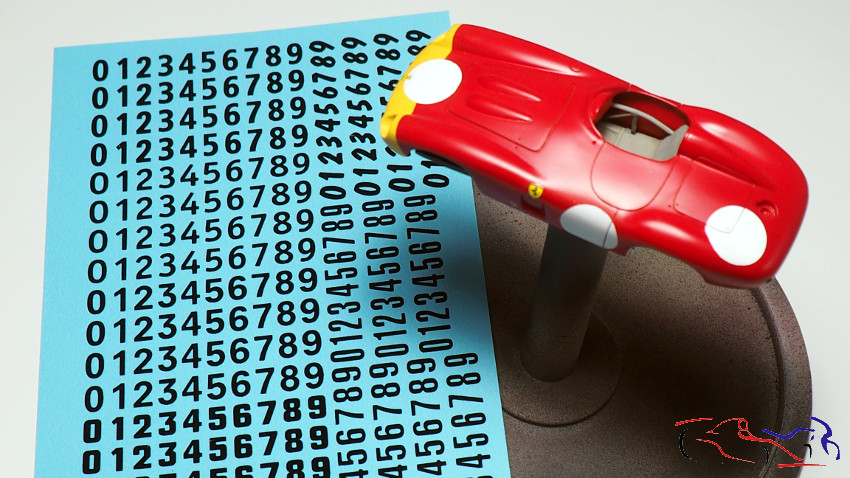 Y aquí ya están puestas. He cogido las del nº7 que condujo Fernando de Portago con Phill Hill en los 1000 kms de Paris, Monthlery de 1956, quedando quintos: And here they are already set. I took the ones from nº7 that Fernando de Portago drove with Phill Hill in the 1000 kms of Paris, Monthlery of 1956, finishing in p5: 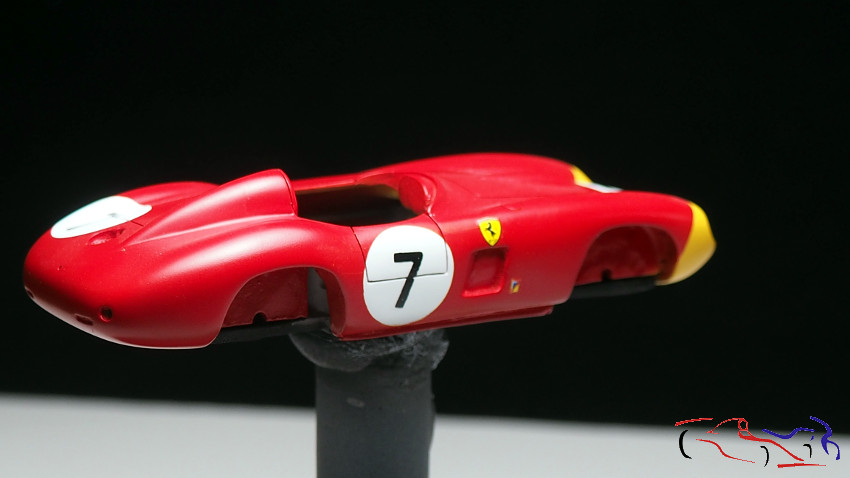 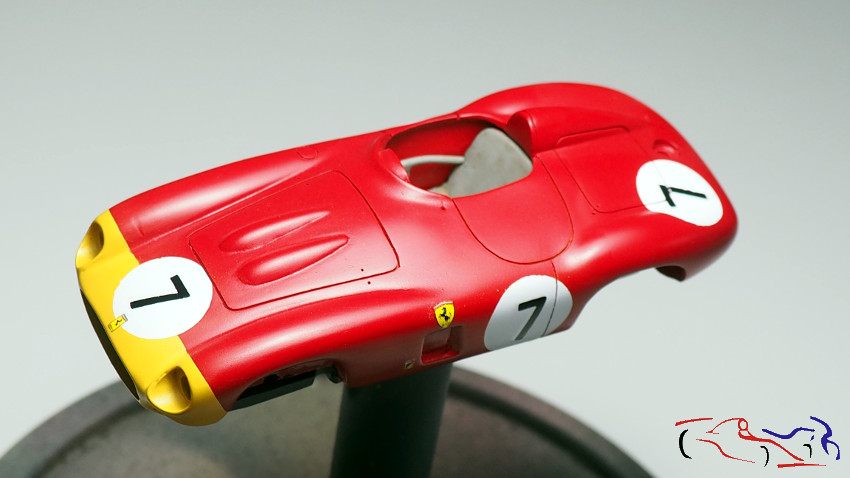 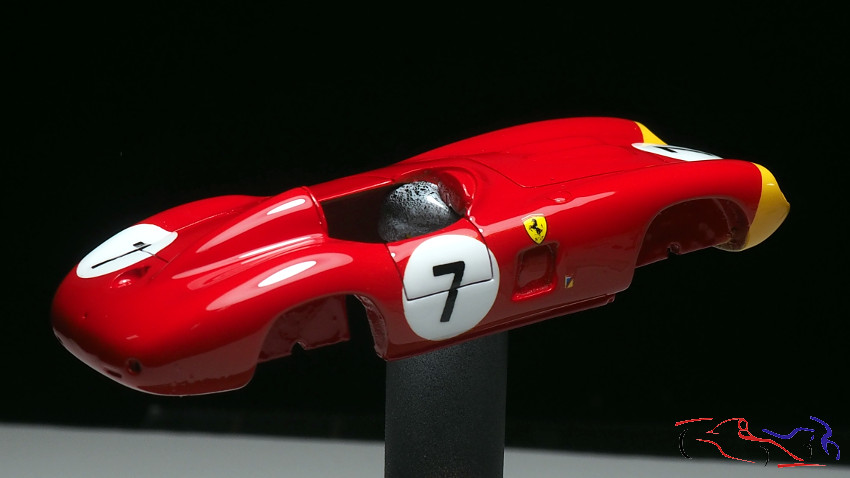 Y aprovechando que me ponía a lacar el Porsche 936, también laqué este kit, con laca de la marca Gravity: el resultado muy bueno, con 2 capas finas y una tercera cargada. And taking advantage of the fact that I put the Porsche 936 to lacquer, I also lacquered this kit, with lacquer from the Gravity brand: the very good result, with 2 thin layers and a third loaded one. 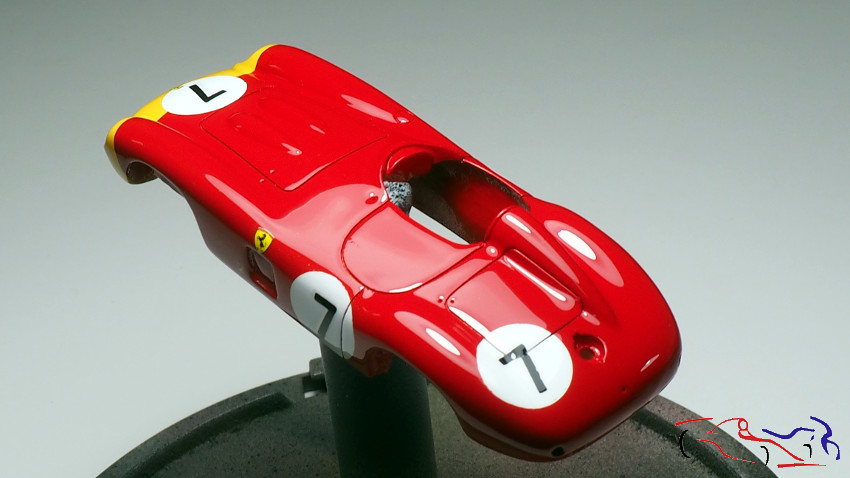 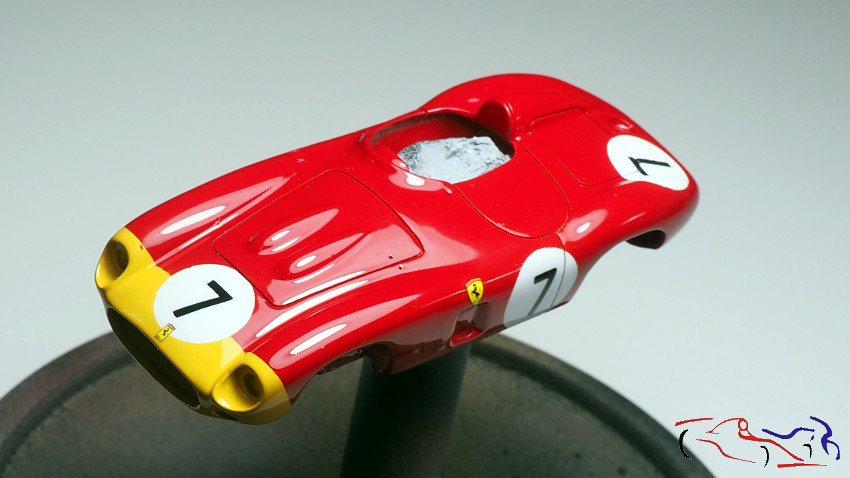 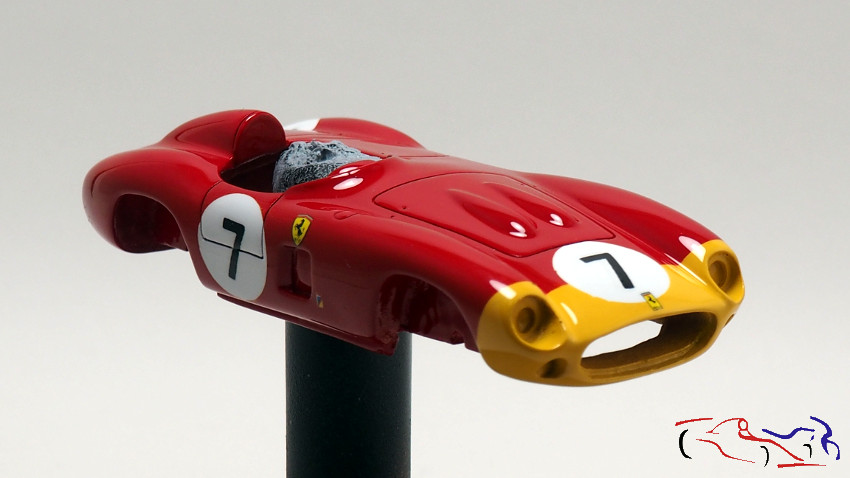 Una vez seco, enmascaramos para pintar las aslidas laterales de aire, de color negro mate: Once dry, we masked to paint the air sides, in matt black: 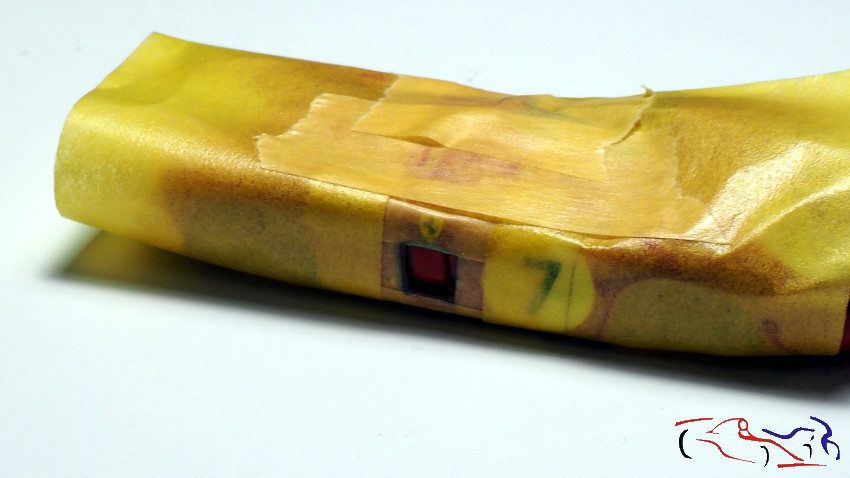 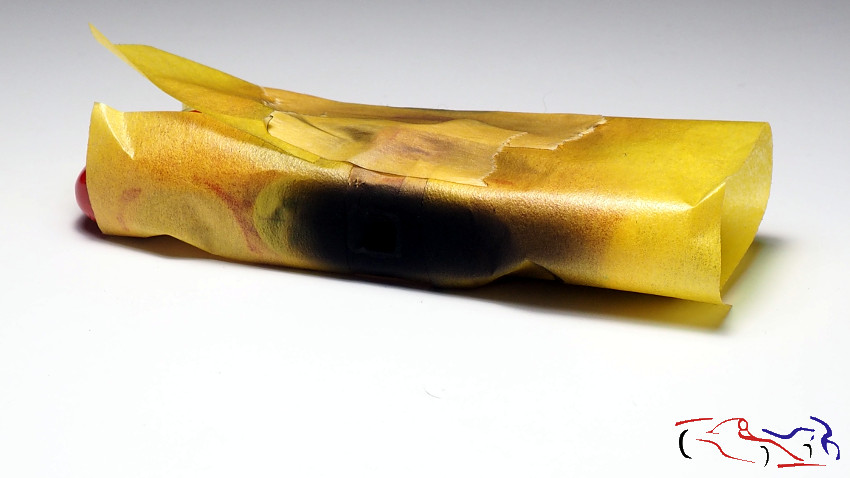 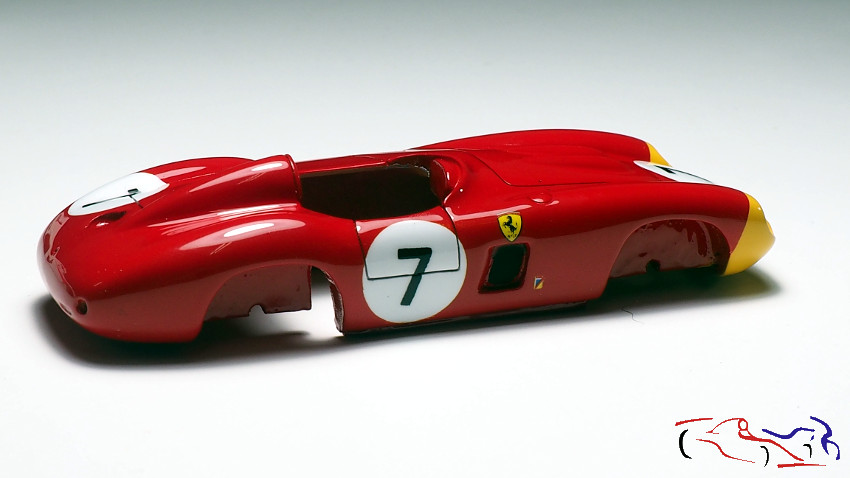 En las faros, pinto las cuencas con gris acrílco de Tamiya, y el interior, donde va la bombilla, con Molotow, auqnue después lo tapará el faro metálico, pero quería ver el resultado: In the headlights, I paint the basins with Tamiya acrylic gray, and the interior, where the bulb goes, with Molotow, although later the metal headlight will cover it, but I wanted to see the result: 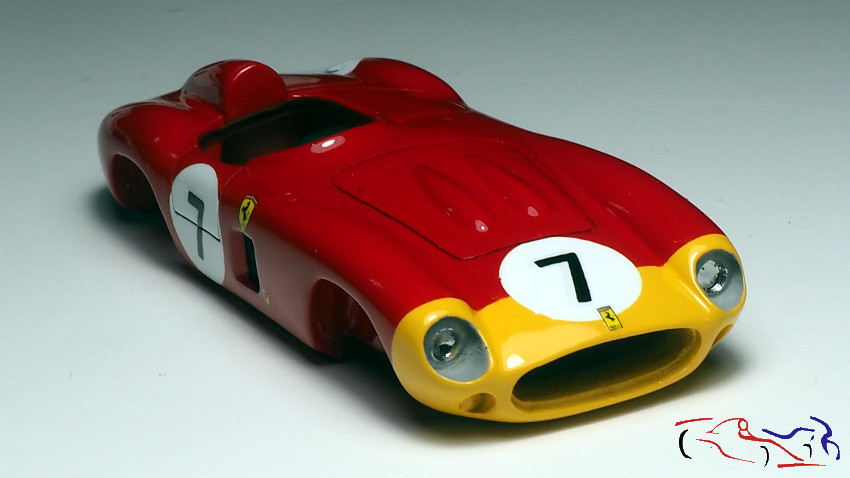 A las ruedas, una vez pintadas y con un par de capas de Smoke diluido, es hora de pegar los fotograbados: To the wheels, once painted and with a couple of layers of diluted Smoke, it is time to stick the photoetches: 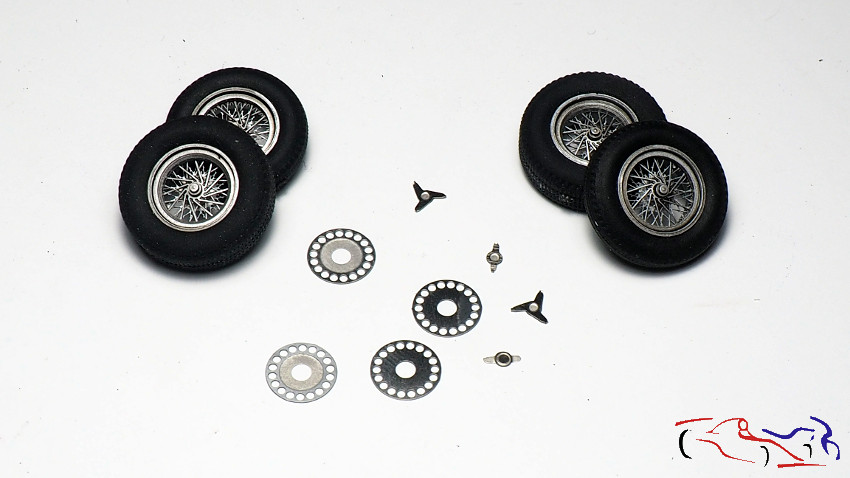 Así mismo, tenemos que recortar los cristales de los moldes. Una buena idea ha sido que incluyan dos copias porque estropear una es muy fácil: Likewise, we have to cut the crystals from the molds. It has been a good idea to include two copies because spoiling one is very easy: 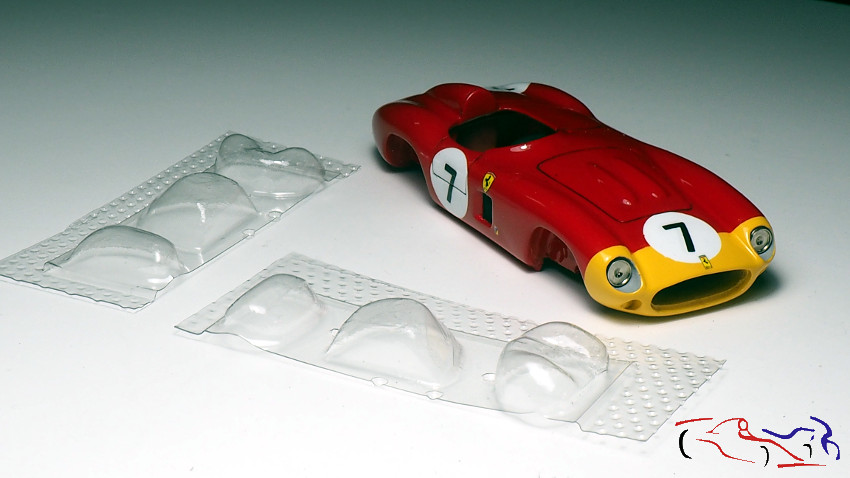 El proceso que he seguido ha sido pintar con un rotulador la parte esterior de donde tengo que cortar .. The process I have followed has been to paint with a marker the outside of where I have to cut .. 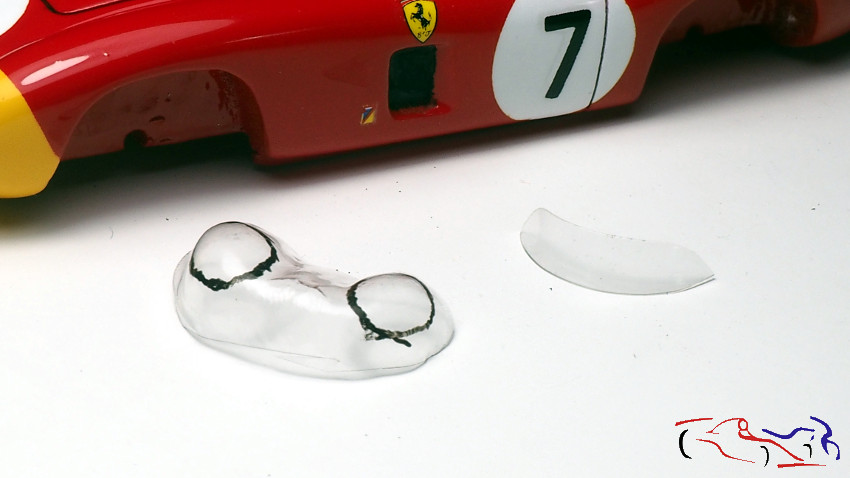 .cortarlo y después lijar hasta llegar a donde tiene que llegar (suelel haber una línea que lo delimita), y después probar y lijar, hasta que encaje. Una vez conseguido, lo pego con cola blanca aplicada con un palillo. También vemos que las piezas metálicas del fonfo del faro, ya están pegadas. . cut it and then sand until it reaches where it has to go (there is usually a line that delimits it), and then test and sand, until it fits. Once achieved, I glue it with white glue applied with a toothpick. We also see that the metal parts of the lighthouse font are already glued. 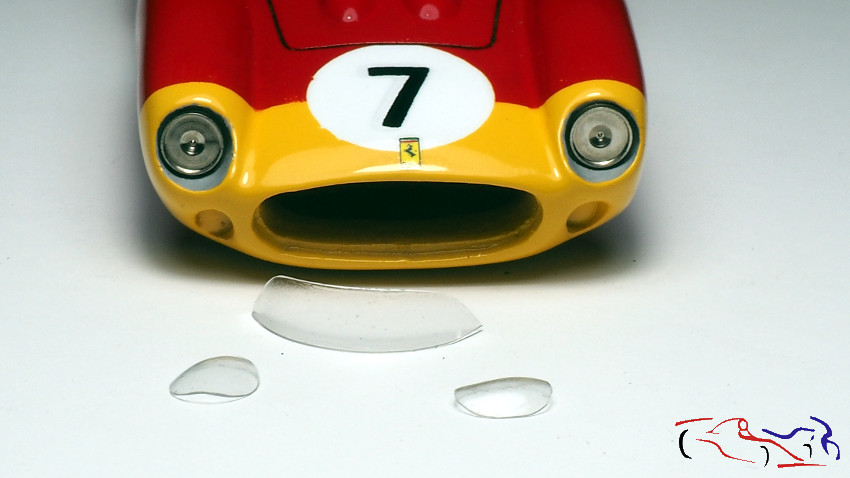 Otro enmascaramiento posterior a la laca de la carrocería: el reposacabezas. Sueles ser de un material blando, que amortigüe el posible golpe de la cabeza. Another post-lacquer masking of the body: the headrest. You are usually made of a soft material, which cushions the possible blow from the head. 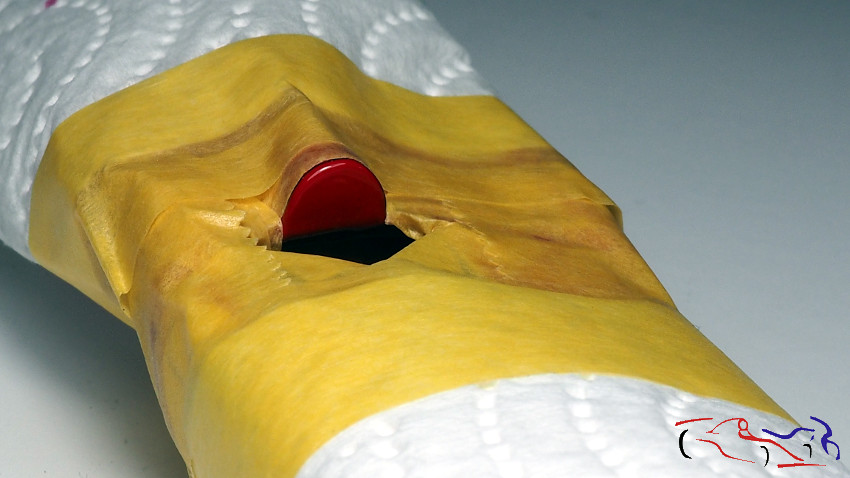 Yo lo he pintado de color rojo Alfa Romero de Zero, que es como si fuera un poco de color cuero: I have painted it Zero Alfa Romero red, which is like a leather colour: 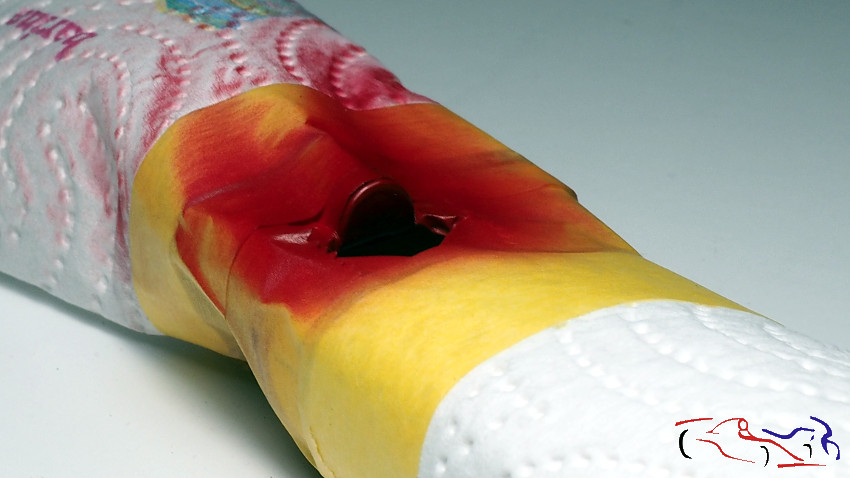 Este es el resultado: This is the result: 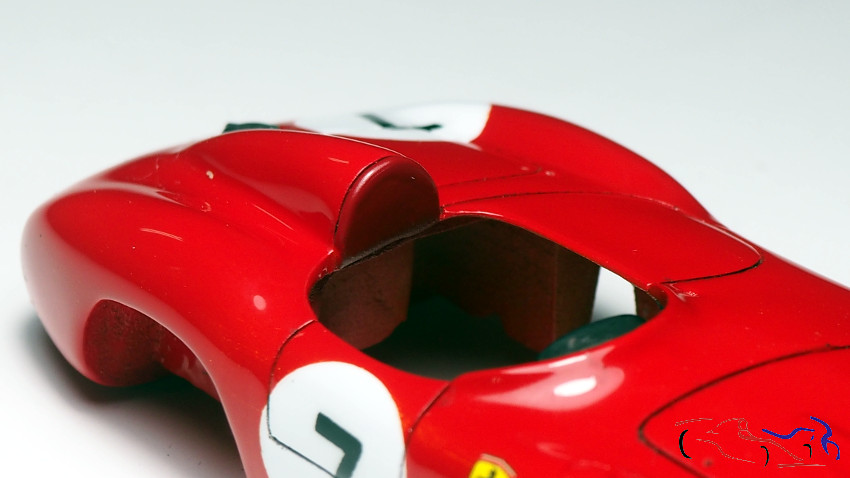 Pasamos al cockpit. Hacemos ters agujeros de 0,4 mm donde vayan air los pedales, cogemos los fotograbados que vienen con el kit, y cortamos unos trozos de tubo de 0,4 mm, que aplastamos por un extremo y doblamos, para pegar el propio pedal. Para el acelerador, la parte aplastada es más grande ya que apoya en la base: We go to the cockpit. We make three 0.4 mm holes where the pedals go, we take the photoetches that come with the kit, and we cut some pieces of 0.4 mm tube, which we crush at one end and bend, to stick the pedal itself. For the accelerator, the flattened part is larger since it rests on the base: 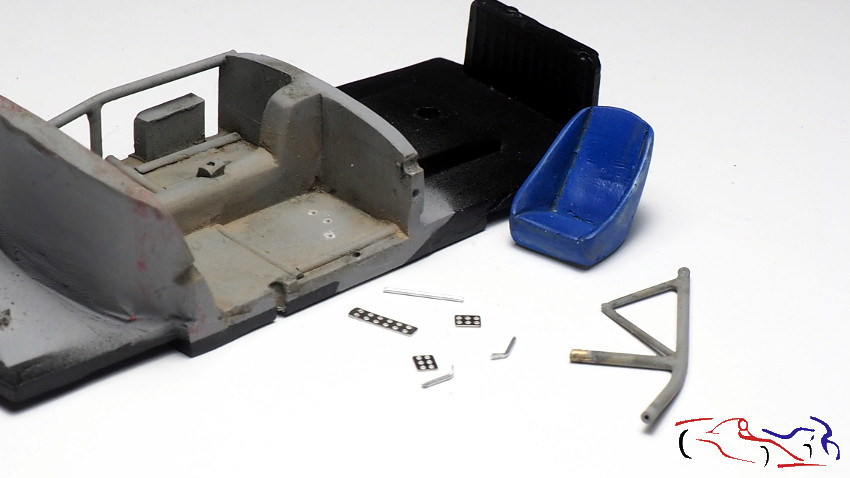 Lo pegamos todo con ciano. Para la palanca de cambios, cojo un fotograbado redondo con la rejilla para la base, recorto un poco la palanca y lo pego todo con ciano.: We glue everything with cyano. For the gear lever, I take a round gravure with the grid for the base, I cut the lever a bit and glue everything with cyano .: 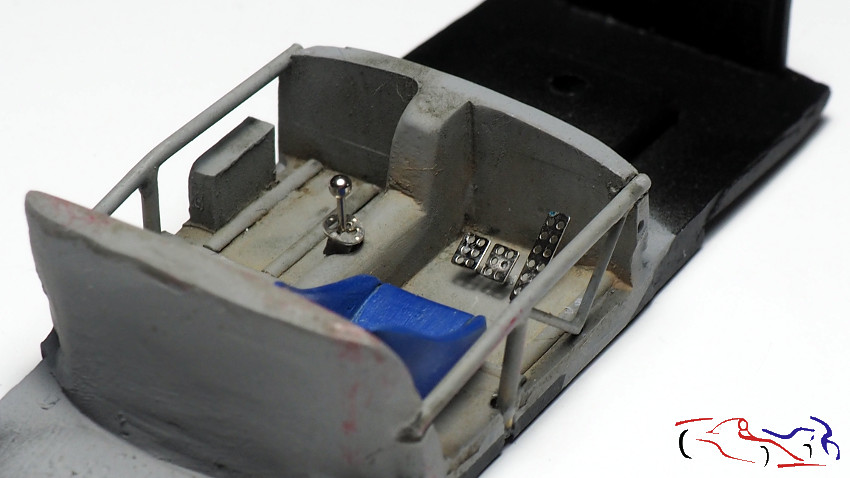 Ponemos la calca de los relojes, pegando el fotograbado encima We put the decal of the watches, sticking the photoengraving on top 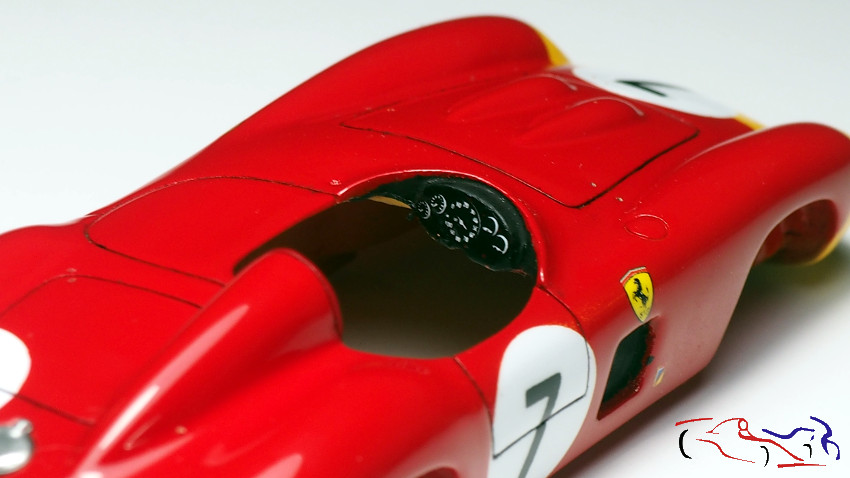 Y posteriormente pegamos el volante, al que le hemos dado previamente, una capa de naranja transparente de Tamiya a la parte de madera: And later we glued the steering wheel, to which we have previously given, a layer of transparent Tamiya orange to the wooden part: 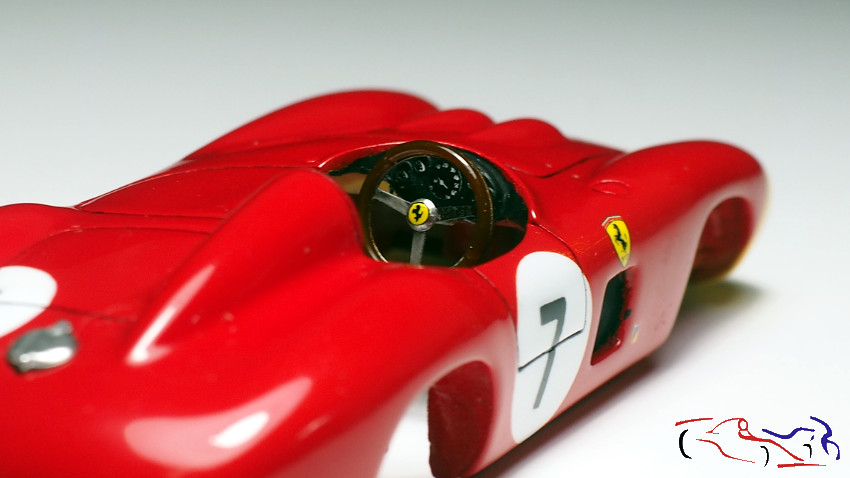 Pegamos los ejes y las ruedas a la carrocería We glue the axles and wheels to the body 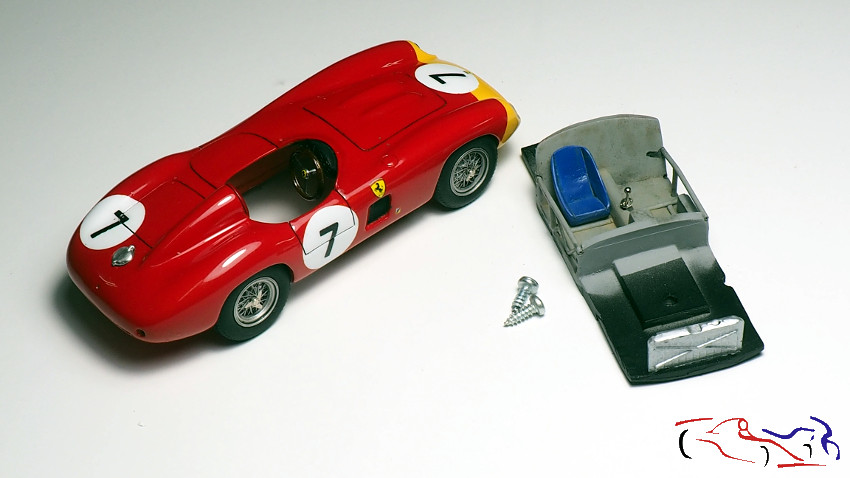 quedando unicamente atornillar el chasis, siendo este el resultado: leaving only to screw the chassis, this being the result: 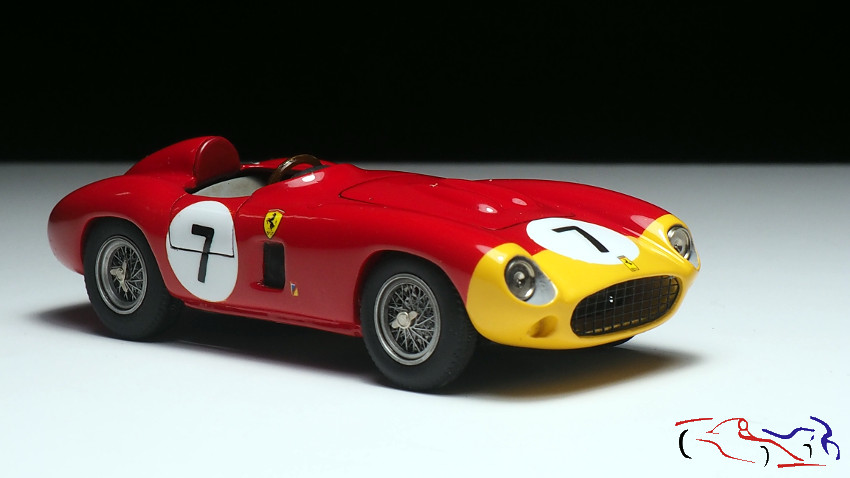 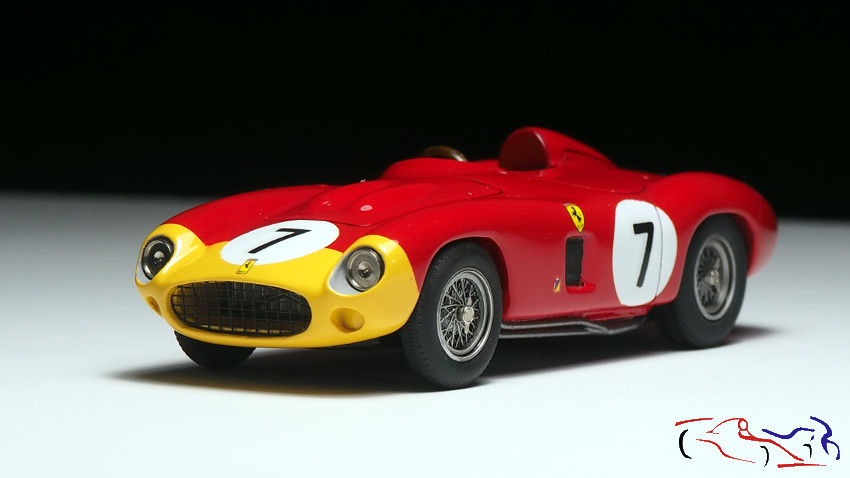 Lo siguiente será poner cristales, y accesorios de la carrocería, con lo que pondremos las fotos finales. Gracias por ver y comentar. The next thing will be to put crystals, and body accessories, with which we will put the final photos. Thanks for viewing and commenting. |
|
|
|
|
|
07-24-2020, 01:08 AM
|
#8 | |
|
AF Newbie
Join Date: Nov 2006
Location: Ry
Posts: 11
Thanks: 0
Thanked 2 Times in 2 Posts
|
Re: Ferrari 875 S Renissance (1/43)
Fantastic WIP. It is not often, that 1:43 builds are described in such details - it is much appreciated.
|
|
|
|
|
|
07-24-2020, 07:08 AM
|
#9 | ||
|
AF Enthusiast
Thread starter
Join Date: Mar 2009
Location: Madrid
Posts: 649
Thanks: 109
Thanked 68 Times in 67 Posts
|
Re: Ferrari 875 S Renissance (1/43)
Quote:
|
||
|
|
|
|
|
POST REPLY TO THIS THREAD |
 |
|
|


