|
|
|

|
|
| Search | Car Forums | Gallery | Articles | Helper | AF 350Z | IgorSushko.com | Corporate |
|
| Latest | 0 Rplys |
|
|||||||
| WIP - Motorsports Post topics for any "Work In Process" motorsports vehicles in this sub-forum. |
 |
 Show Printable Version | Show Printable Version |  Email this Page | Email this Page |  Subscribe to this Thread
|
|
|
Thread Tools |
 11-09-2019, 02:08 PM
|
#46 | |
|
AF Enthusiast
Join Date: Mar 2009
Location: Rio de Janeiro, Brazil
Posts: 1,209
Thanks: 6
Thanked 144 Times in 136 Posts
|
Re: Lancia Delta S4 Marlboro Beemax 1/24
Super nice!
__________________
https://www.instagram.com/denilsonvm_modelcars/ |
|

|

|
| The Following User Says Thank You to denilsonvm For This Useful Post: |
JesusM (11-09-2019)
|
|
11-09-2019, 03:02 PM
|
#47 | ||
|
AF Enthusiast
Thread starter
Join Date: Mar 2009
Location: Madrid
Posts: 649
Thanks: 109
Thanked 68 Times in 67 Posts
|
Re: Lancia Delta S4 Marlboro Beemax 1/24
Quote:
|
||
|
|
|
|
11-09-2019, 03:03 PM
|
#48 | ||
|
AF Enthusiast
Thread starter
Join Date: Mar 2009
Location: Madrid
Posts: 649
Thanks: 109
Thanked 68 Times in 67 Posts
|
Re: Lancia Delta S4 Marlboro Beemax 1/24
Quote:
|
||
|
|
|
|
11-10-2019, 12:14 PM
|
#49 | |
|
ItaloSvensk

Join Date: Mar 2009
Location: Marstrand
Posts: 3,383
Thanks: 1,077
Thanked 296 Times in 270 Posts
|
Re: Lancia Delta S4 Marlboro Beemax 1/24
Fantastic build.
__________________
Paolo - LoveGT40 Modelworks website www.alsoldatino.com my YT channel : https://www.youtube.com/channel/UCIp..._as=subscriber FB: https://www.facebook.com/alsoldatino |
|
|
|
|
|
11-10-2019, 01:58 PM
|
#50 | ||
|
AF Enthusiast
Thread starter
Join Date: Mar 2009
Location: Madrid
Posts: 649
Thanks: 109
Thanked 68 Times in 67 Posts
|
Re: Lancia Delta S4 Marlboro Beemax 1/24
Quote:
|
||
|
|
|
|
11-12-2019, 05:26 PM
|
#51 | |
|
AF Moderator
 
Join Date: Sep 2002
Location: Fort Worth, Texas
Posts: 3,246
Thanks: 31
Thanked 314 Times in 241 Posts
|
Re: Lancia Delta S4 Marlboro Beemax 1/24
Lots of very cool bits! Great progress on this one.
__________________
The client is not always right. - Enzo Ferrari ItalianHorses.net    
|
|
|
|
|
| The Following User Says Thank You to 360spider For This Useful Post: |
JesusM (11-16-2019)
|
|
11-16-2019, 05:45 PM
|
#52 | ||
|
AF Enthusiast
Thread starter
Join Date: Mar 2009
Location: Madrid
Posts: 649
Thanks: 109
Thanked 68 Times in 67 Posts
|
Re: Lancia Delta S4 Marlboro Beemax 1/24
Quote:
|
||
|
|
|
|
12-14-2019, 10:16 AM
|
#53 | |
|
AF Enthusiast
Thread starter
Join Date: Mar 2009
Location: Madrid
Posts: 649
Thanks: 109
Thanked 68 Times in 67 Posts
|
Re: Lancia Delta S4 Marlboro Beemax 1/24
Continuamos con el Lancia, pasito a pasito, y esta es la última foto que tengo del proceso del motor:
We continue with the Lancia, step by step, and this is the last photo I have of the engine process: 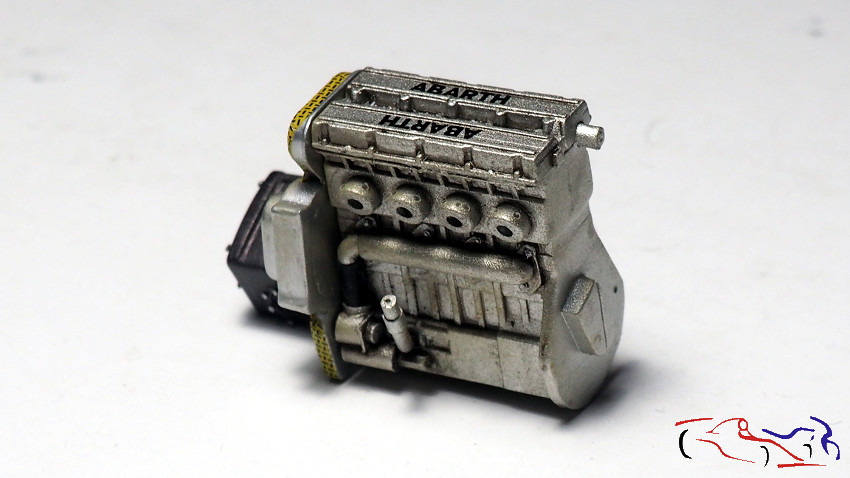 Pero para llegar a ese punto, hemos tenido que realizar varias tareas sobre el mismo. Y lo primero fue, presentarlo en su destino: el chasis: But to get to that point, we had to perform several tasks on it. And the first thing was, present it at your destination: the chassis: 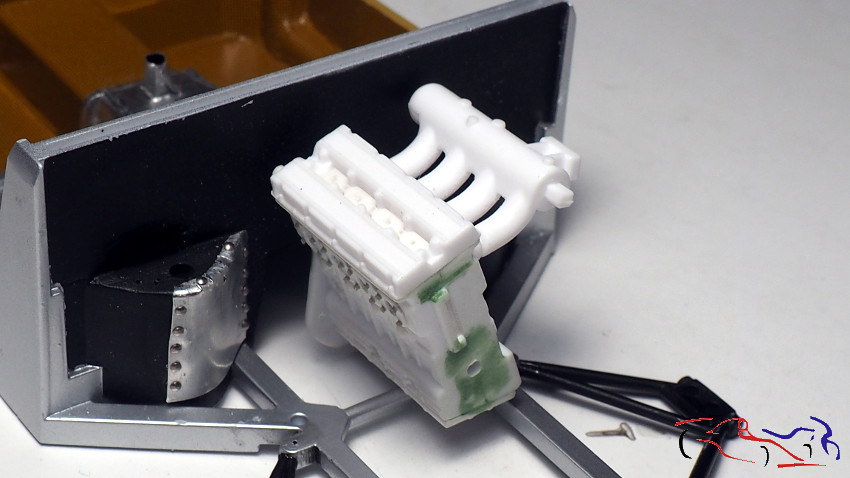 Y viendo que es correcto, empezamos por la imprimación y como siempre, utilizo la de la marca Gravity: And seeing that it is correct, we start with the primer and as always, I use the Gravity brand: 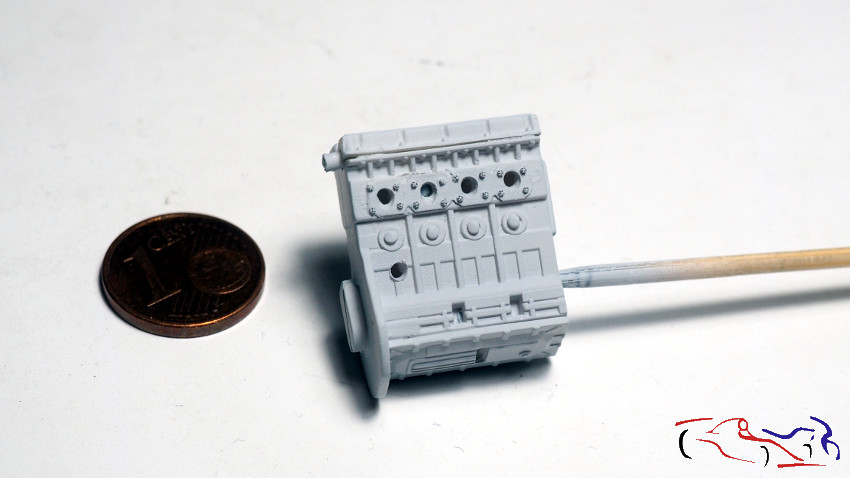 En la otra cara, vemos las piezas añadidas que rellenan ese espacio que estaba vacío: On the other side, we see the added pieces that fill that space that was empty: 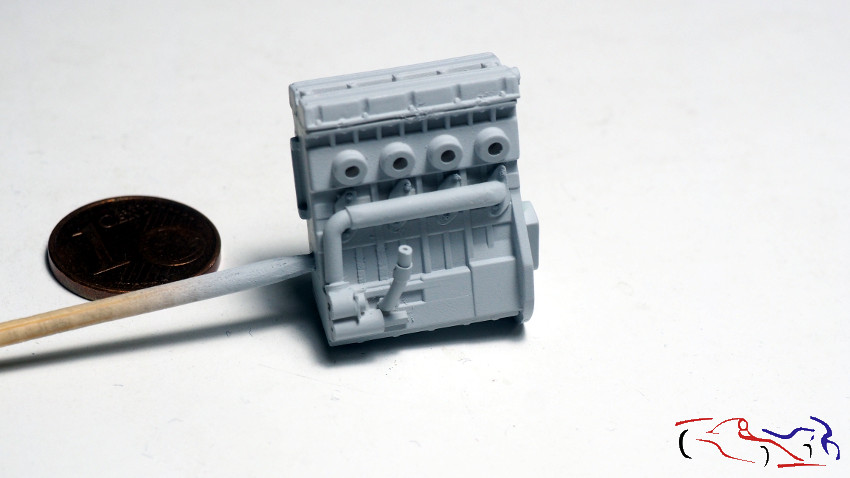 Posteriormente, le aplico el color plata-titanio de Zero paints, el cual ha dado al motor, un pequeño grano muy aparente: Later, I apply the silver-titanium color of Zero paints, which has given the engine, a small grain very apparent: 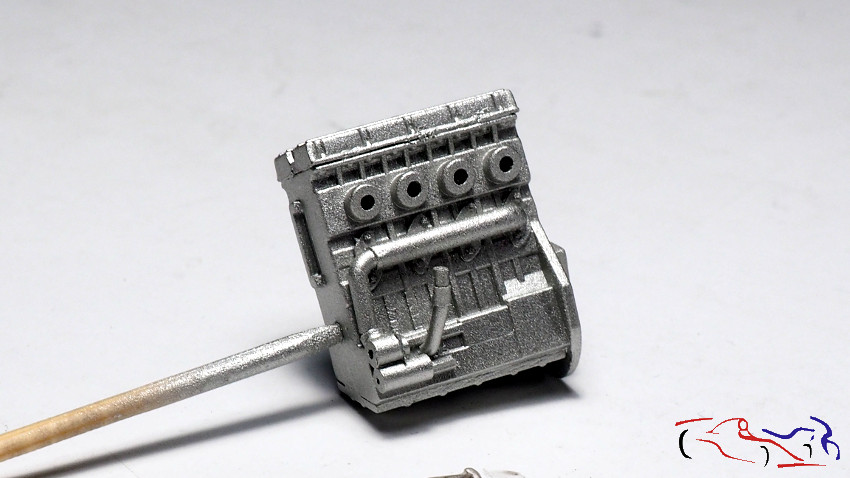 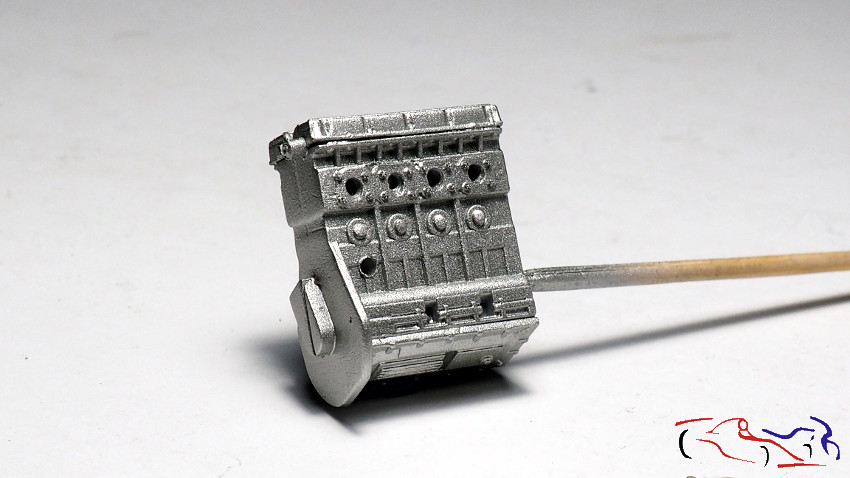 A su vez, pinto la parte de la transmisión de Gris metálico de Zero: At the same time, I paint the part of the Zero Metallic Gray transmission: 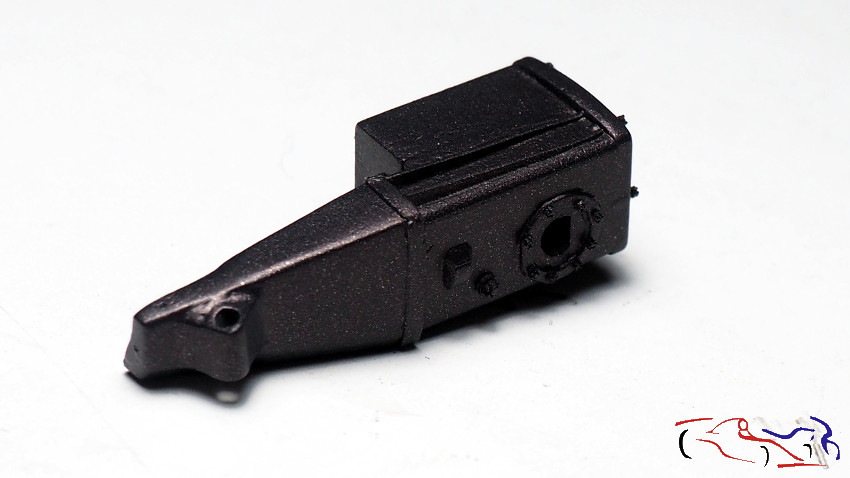 Y ya en la siguiente foto, pego el bloque motor, el lateral de las correas, que van cubiertas, y la transmisión. Al bloque motor le he aplicado un lavado de humo de Tamiya diluido And in the next photo, I hit the engine block, the side of the belts, which are covered, and the transmission. I have applied a diluted Tamiya smoke wash to the engine block 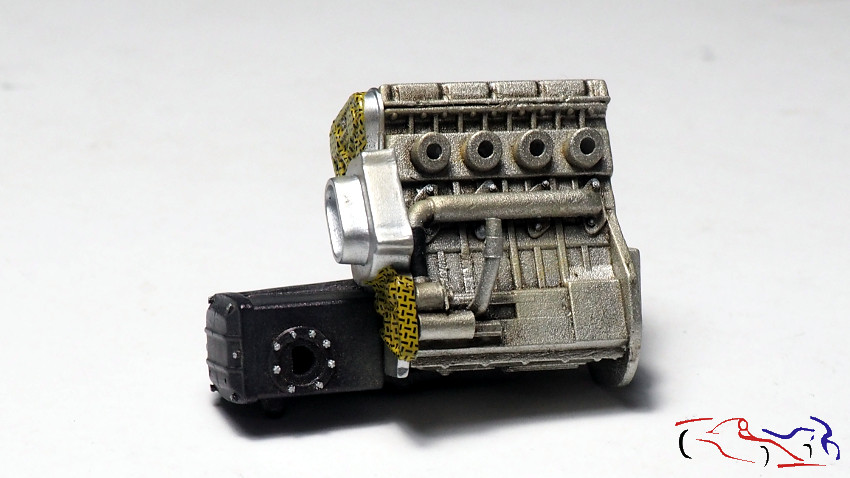 y a la transmisión, pigmentos de Tamiya de color metálico y arena, para envejecerla un poco. A su vez, un toque de aluminio a las tuercas: and to the transmission, Tamiya pigments of metallic color and sand, to age it a bit. In turn, a touch of aluminum to the nuts: 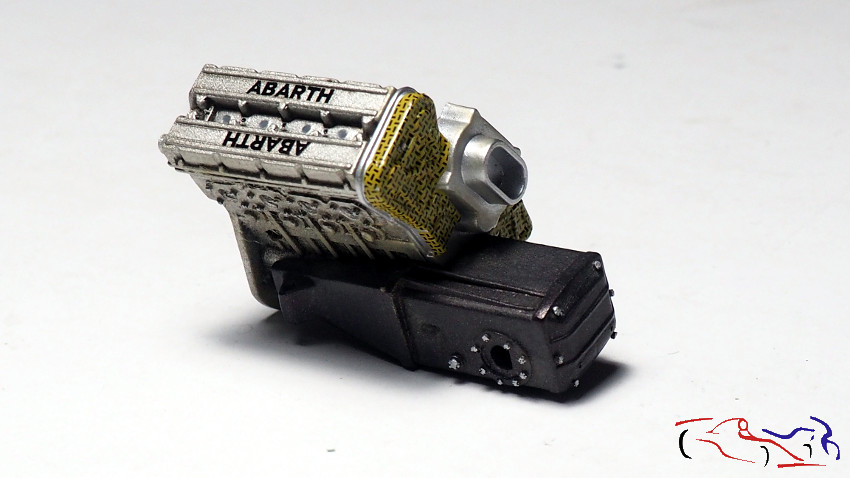 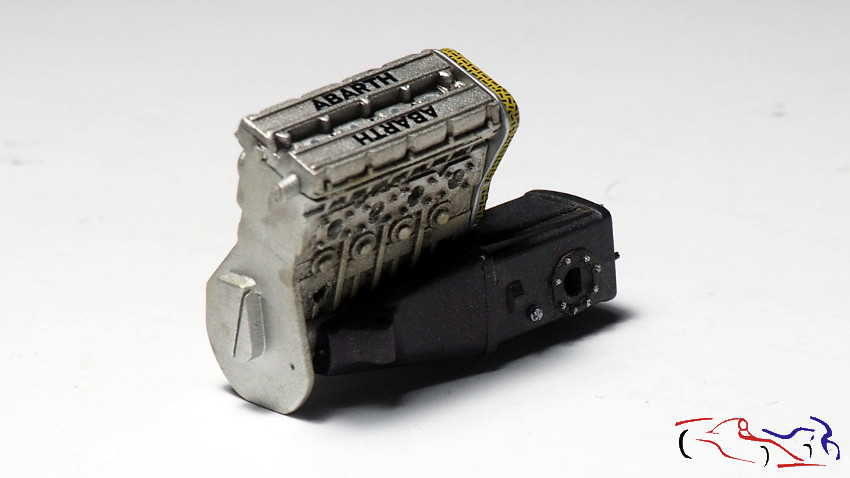 A los colectores de escape, que había pintado de aluminio de Zero, les aplico el hierro quemado de Alclad, y después un lavado con negro mate de Tamiya muy diluido: To the exhaust manifolds, which I had painted from Zero aluminum, I apply Alclads burnt iron, and then a wash with very dilute Tamiya black matte: 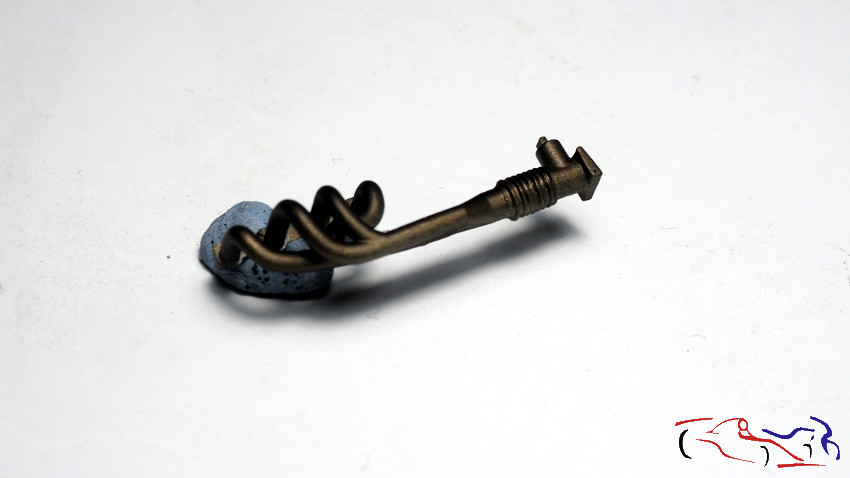 Mismo tratamiento al turbo en su parte de salida de gases, previo enmascarado. Ahora le falta el lavado con humo: Same treatment to the turbo in its part of exit of gases, previous masked. Now the smoke wash is missing: 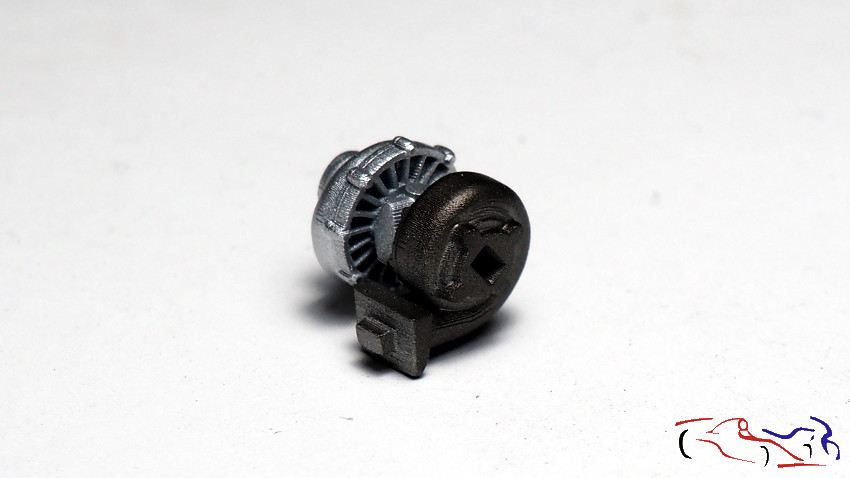 Si los unimos, vemos como es el conjunto: If we join them, we see how the set is: 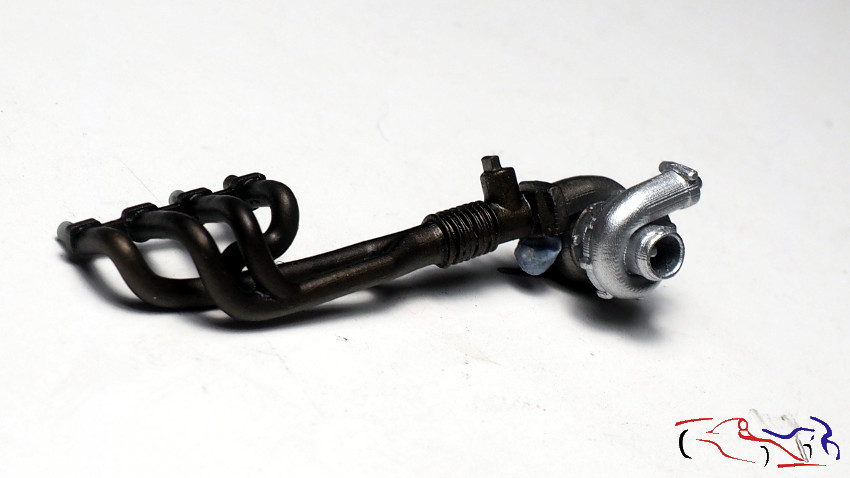 Pasamos a la entrada de aire. Es como una bombona de gas, que conecta a cada cilindro. Pintamos de negro mate satinado de Zero.. We pass to the air inlet. It is like a gas cylinder, which connects to each cylinder. We painted satin matte black from Zero .. 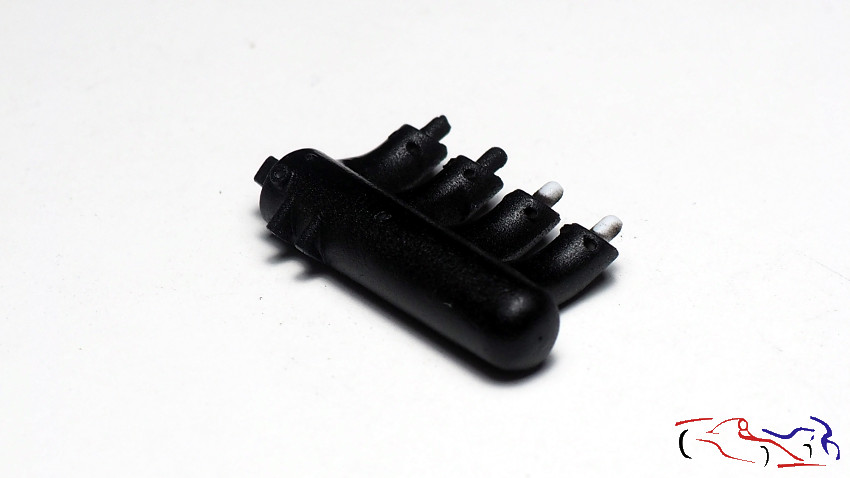 para después aplicar calcas de fibra de carbono negra, trama pequeña de Scale Motorsport: then apply black carbon fiber decals, small plot of Scale Motorsport: 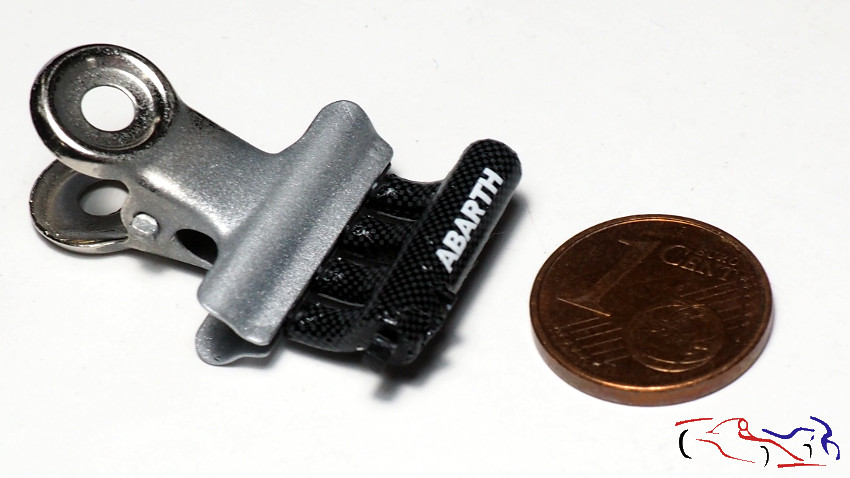 Pasamos al filtro de la toma de aire: Esta pieza ya está terminada con los cierres de la parte superior: We pass to the air intake filter: This piece is already finished with the closures of the upper part:  Pasamos a otra pieza hecha que no viene en el kit: va en el medio del cortafuegos trasero, en la cara del motor. Aun le falta la fibra: We move on to another piece that does not come in the kit: it goes in the middle of the rear firewall, on the face of the engine. The fiber is still missing: 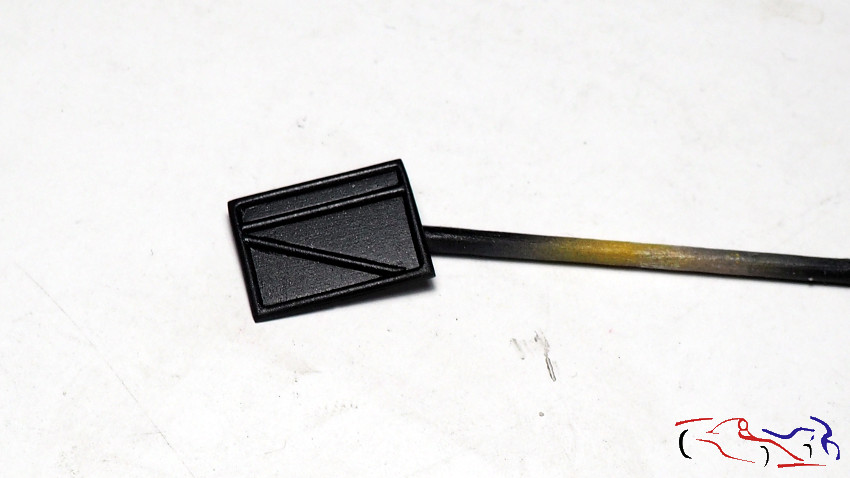 Más piezas pintadas: la batería que he retocado los bornes, para que se puedan poner los fotograbados de los conectores, y el depósito de KMP modificado: More painted parts: the battery that I have retouched the terminals, so that the photoetches of the connectors can be placed, and the modified KMP tank: 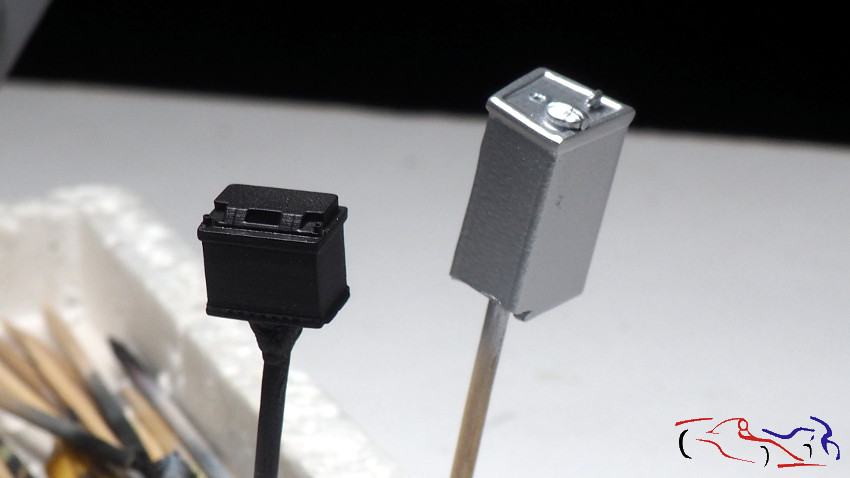 Ahora, os muestro el cristal que separa el cockpit de la zona del motor, una vez pintado con Smoke para oscurecerlo: Now, I show you the glass that separates the cockpit from the engine area, once painted with Smoke to darken it: 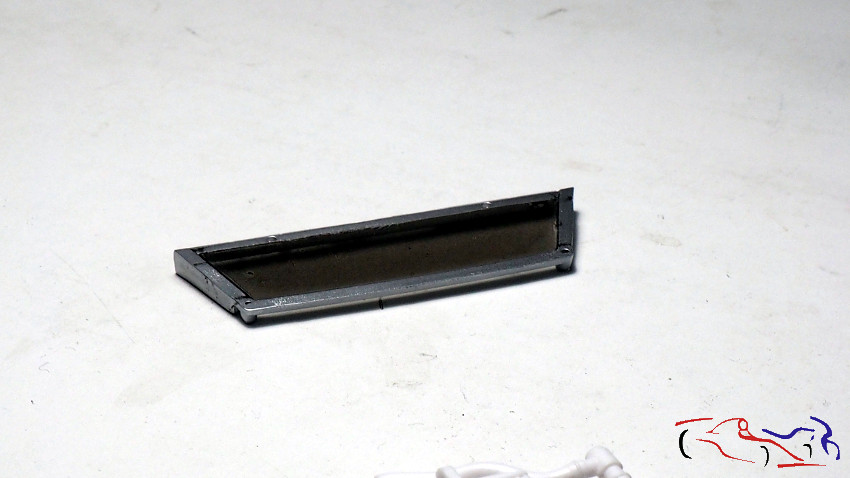 Y a la pieza del TK de KMP, la toma de aire trasera que cubrí con calca de Kevlar, la he oscurecido con humo y negro diluido: And to the piece of the KMP TK, the rear air intake that I covered with Kevlar decal, I have darkened it with smoke and diluted black: 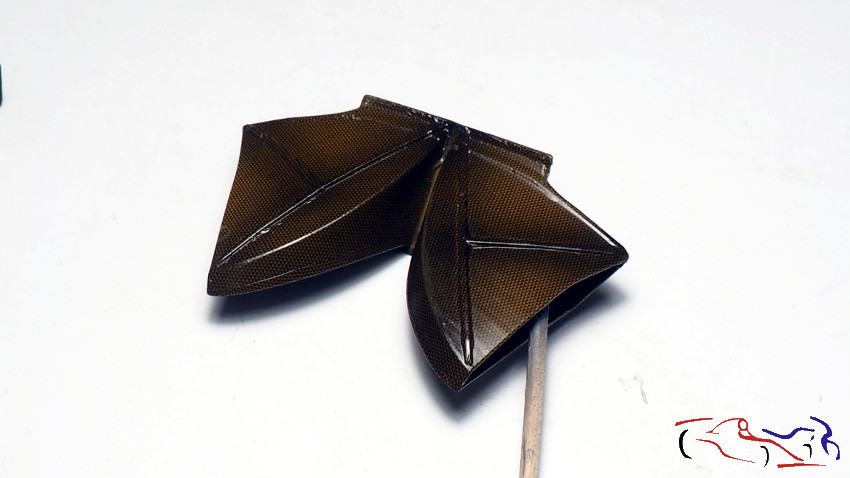 Más piezas: estas son los cuatro conectores de la bujias. Los he hecho con tubo de latón ya que las del TK de KMP, eran muy largas y tenían una base común que no me gustaba: More parts: these are the four spark plug connectors. I have made them with a brass tube since those of the KMP TK, were very long and had a common base that I did not like: 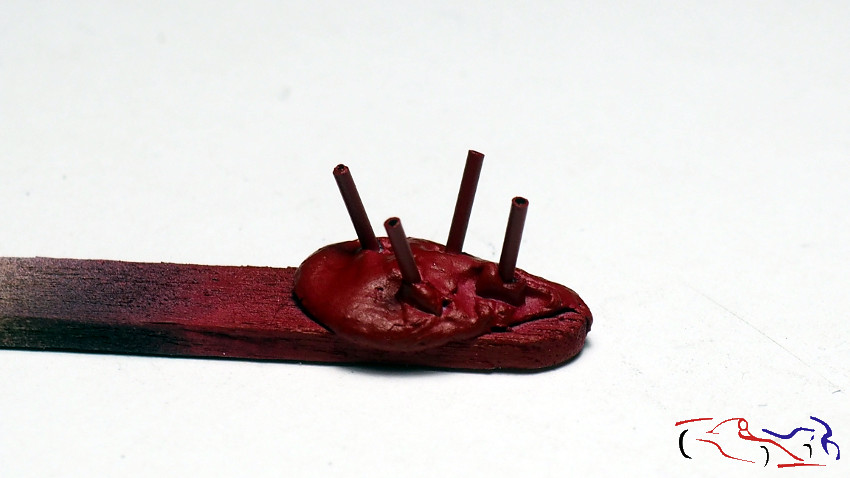 A su vez, la fibra del filtro del aire superior también se ha ensuciado un poco para hacerla más usada: In turn, the fiber of the upper air filter has also got a bit dirty to make it more used: 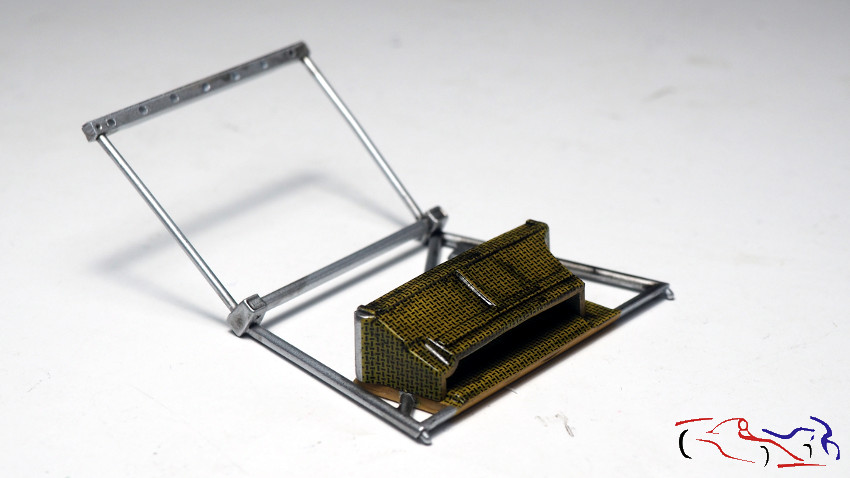 Pasamos a más piezas nuevas. En este caso la distribución de gasolina en los distintos cilindros. Para ello, y a modo de torno, utilizo mi minitaladro con un redondo de aluminio, que tallo con limas, cuchillas y lijas hasta dejarlo como en la foto: We move on to more new pieces. In this case the distribution of gasoline in the different cylinders. To do this, and as a lathe, I use my mini drill with an aluminum round, which stalk with files, blades and sandpaper until it is left as in the photo: 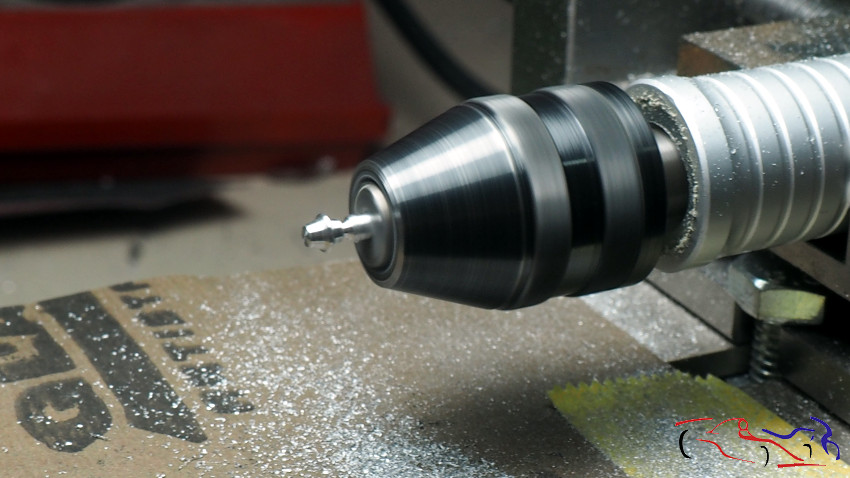 A esa pieza, le hago dos taladros perpendiculares para fijarlo al resto. Vemos tubos de latón, piezas de plástico taladradas, una lámina de metal y dos tubos metálicos, ya pintados de negro: I make two perpendicular holes to that piece, to fix it to the rest. We see brass tubes, drilled plastic parts, a sheet of metal and two metal tubes, already painted black: 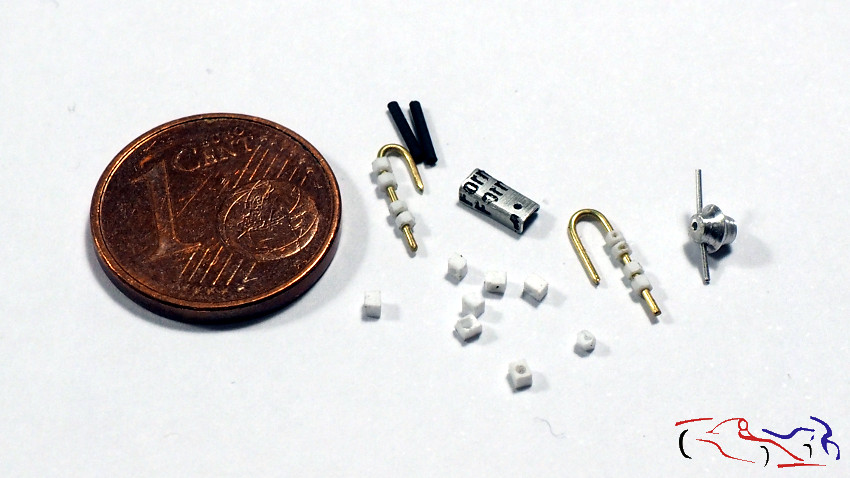 Aquí vemos los dos tubos metálicos ya imprimados y pintados de negro semimate de Zero: Here we see the two metal tubes already primed and painted in semi-black Zero: 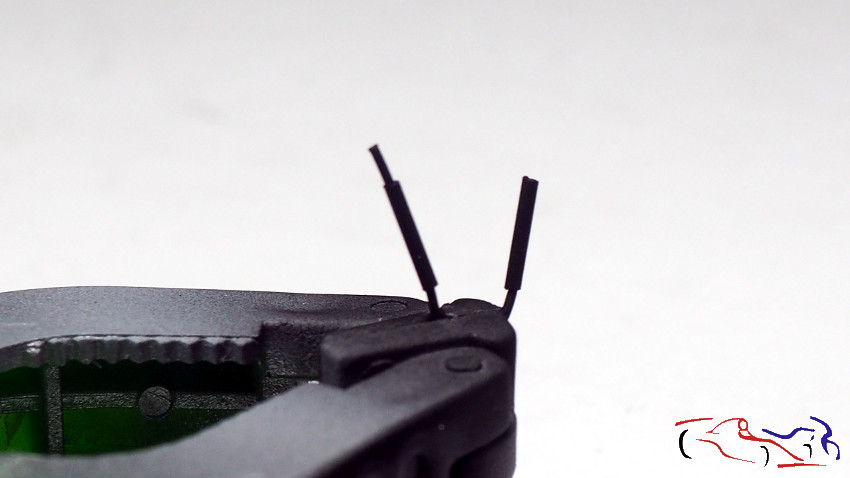 En la siguiente, vemos algunas piezas más que ya están pintadas y pegadas, y otras nuevas, listas todas para pegar cuando el motor esté preparado para esa zona, entre la entrada de aire y el bloque: In the following, we see some more pieces that are already painted and glued, and new ones, all ready to glue when the engine is ready for that area, between the air inlet and the block: 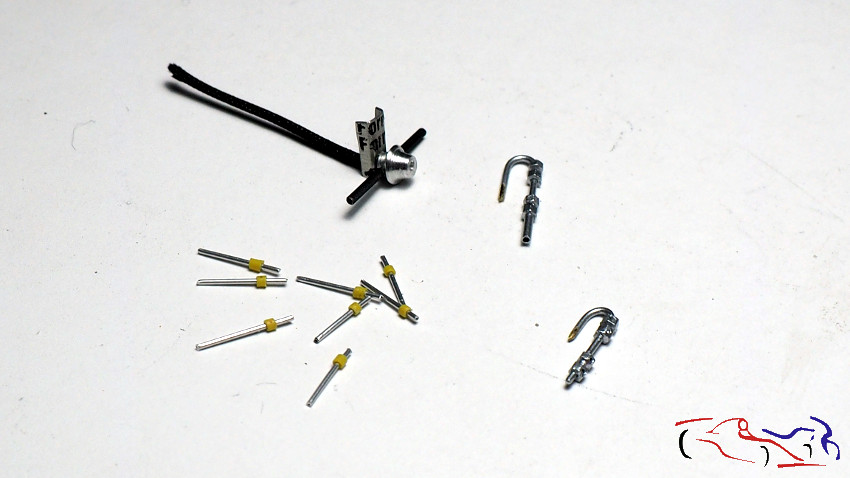 Siguiente paso: las bisagras superiores del portón trasero. Les he practicado unos agujeros para introducir unos vástagos que irán en el portón, dándole fortaleza a la unión: Next step: the upper hinges of the tailgate. I have made some holes to introduce some stems that will go in the gate, giving strength to the union:  Y aquí, imprimadas y pintadas de aluminio de Zero: And here, Zeros primed and painted aluminum: 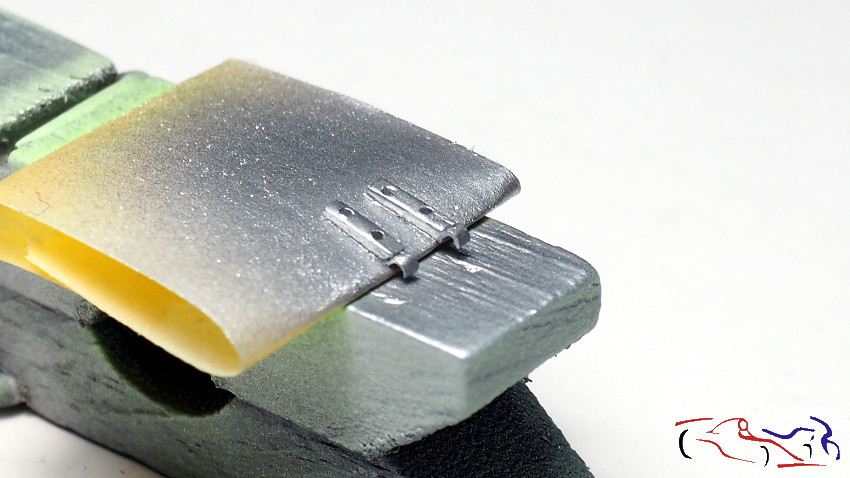 Mas procesos realizados: aplico selectivamente humo de Tamiya a la calca de kevlar interior, dándole profundidad: More processes performed: I selectively apply Tamiya smoke to the inner kevlar decal, giving it depth: 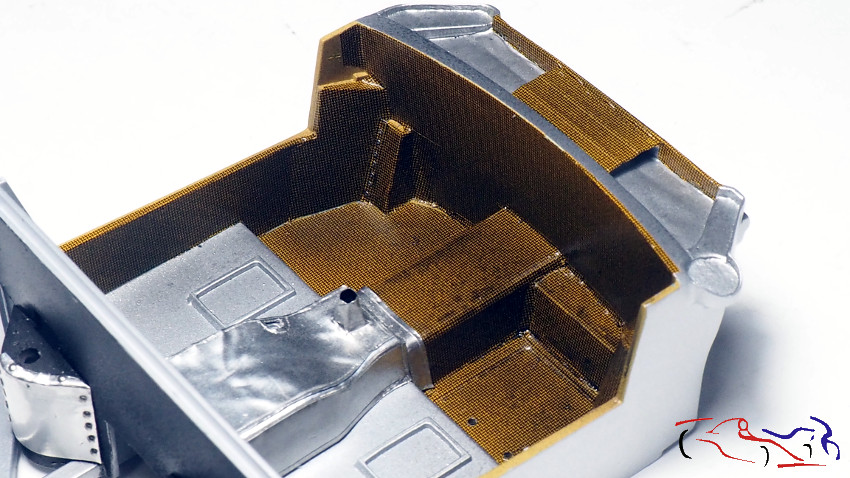 Y aplicando posteriormente, los pigmentos de arena oscura y clara de Tamiya. Después, barniz semimate de Zero: And subsequently applying, Tamiyas dark and light sand pigments. Next, Zeros semi-varnish: 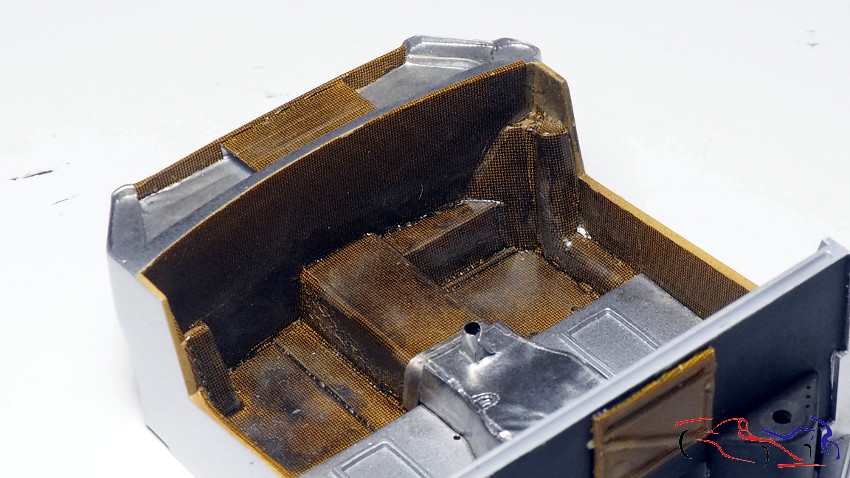 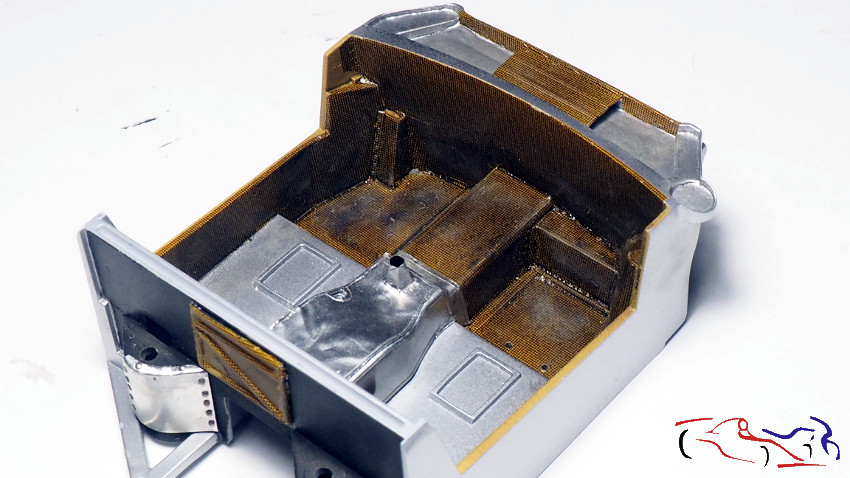 Aquí os muestro el extintor pintado con spray cromo de la ferretería: se puede tocar todo lo que se quiera!! Here I show you the chrome spray fire extinguisher of the hardware store: you can touch everything you want!  Y ahora, piezas nuevas en el mercado. Empezamos con las válvulas de ruedas de Decalcas, ya imprimadas y pintadas con aluminio de Zero: And now, new parts in the market. We start with the Decalcas wheel valves, already primed and painted with Zero aluminum: 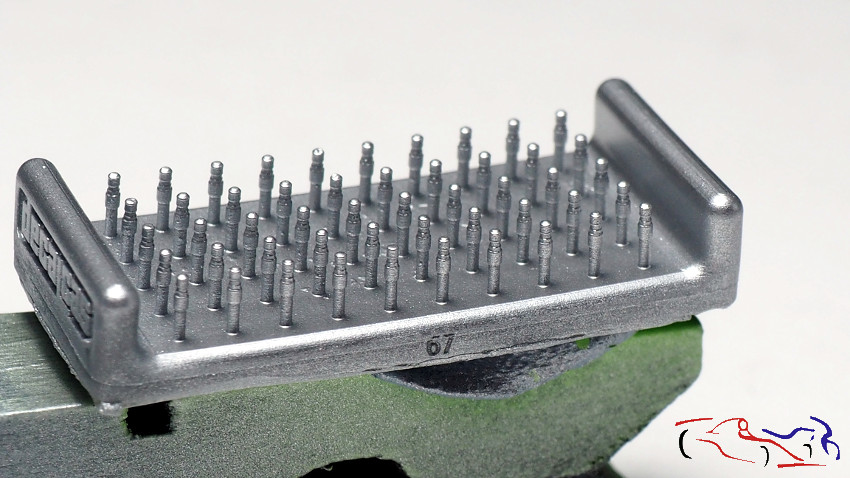 Y los cortes de extinción de Scalelab, imprimados And the Scalelab extinction cuts, primed 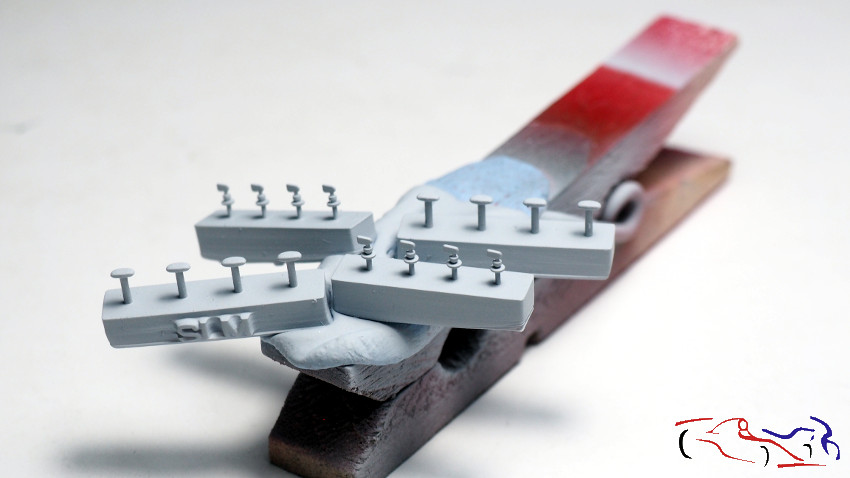 y pintados de rojo Zero similar al TS49: tienen buena pinta auqneu ya ha hecho unos más pequeños (e cuanto los tenga, os los muestro): and painted red Zero similar to the TS49: they look good auqneu has already made some smaller ones (and as much as I have them, I show you): 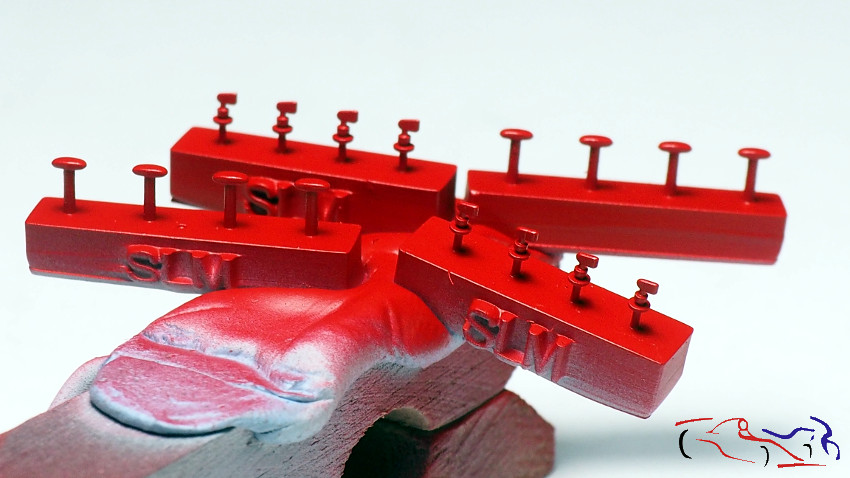 Espero que os haya gustado, y gracias por ver y comentar!! I hope you liked it, and thanks for watching and commenting! |
|
|
|
|
| The Following 2 Users Say Thank You to JesusM For This Useful Post: |
chris24 (12-16-2019)
|
|
12-18-2019, 07:51 AM
|
#54 | |
|
AF Enthusiast

Join Date: Oct 2012
Location: Doornenburg , Netherlands
Posts: 502
Thanks: 80
Thanked 74 Times in 74 Posts
|
Re: Lancia Delta S4 Marlboro Beemax 1/24
looks great so far.
one to put on my shelf
__________________
my English is not perfect but hopefully be readable |
|
|
|
|
| The Following 2 Users Say Thank You to michel1973 For This Useful Post: |
JesusM (12-26-2019)
|
|
12-26-2019, 04:59 AM
|
#55 | |
|
AF Enthusiast
Thread starter
Join Date: Mar 2009
Location: Madrid
Posts: 649
Thanks: 109
Thanked 68 Times in 67 Posts
|
Re: Lancia Delta S4 Marlboro Beemax 1/24
Continuamos con el Lancia Delta S4, y aquí os presento el estado del motor, con las piezas simplemente puestas sin pegar para verificar su ajuste:
We continue with the Lancia Delta S4, and here I present the state of the engine, with the parts simply placed without pasting to verify its adjustment: 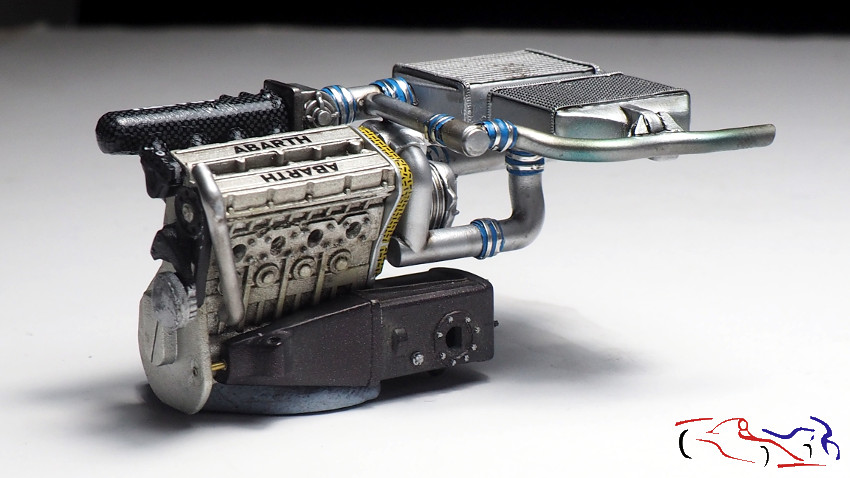 Pero demos unos pasos atrás, y veamos el proceso qeu he realizado para llegar a ello! En principio, decidí cambiar las salidas de los escapes, sustituyendo las piexzas de plástico del kit por tubos de latón, los cuales tenía que adelgazar la anchura de sus bordes. Para ello, utilicé la fresadora con la punta que véis en la foto: But lets take a few steps back, and lets see the process Ive done to get to it! In principle, I decided to change the exhaust outlets, replacing the plastic pieces of the kit with brass tubes, which had to thin the width of their edges. To do this, I used the milling machine with the tip you see in the photo: 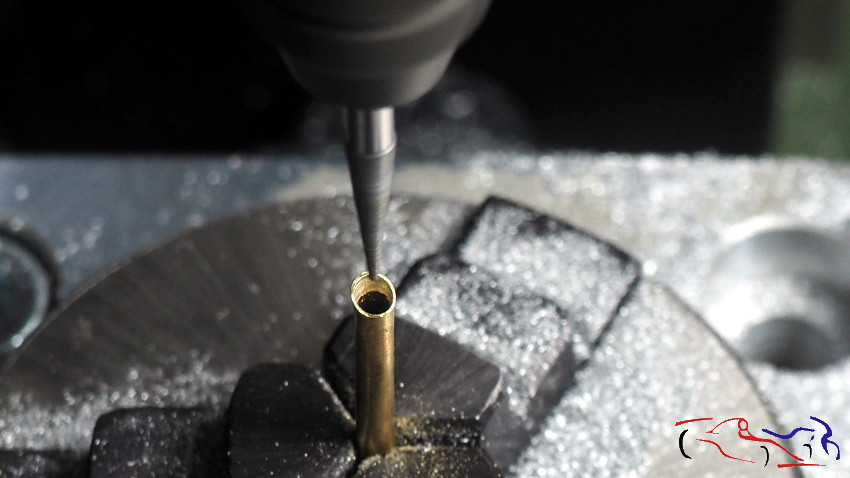 Y una vez hecha, la pegué al tubo de escape. Aquí lo véis comparándola con el original: And once done, I glued it to the exhaust pipe. Here you see it comparing it with the original: 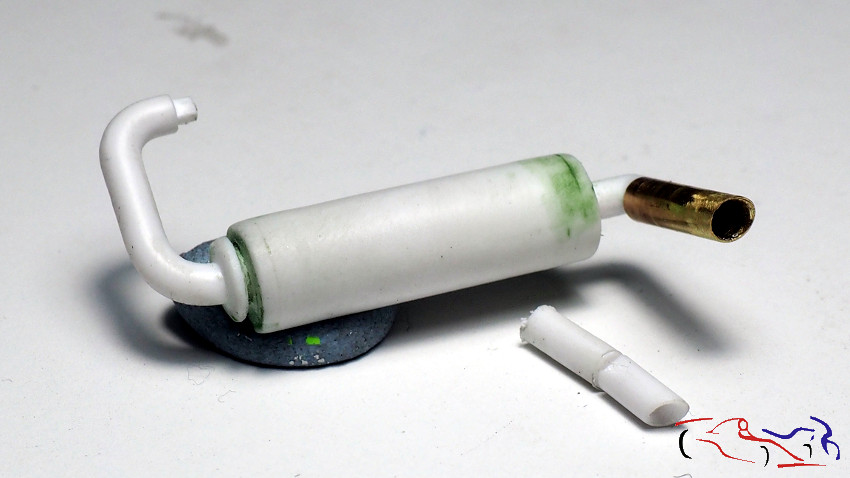 Y como tenía otra salida de escape, pero más pequeña, la sustituí de la misma manera! And since I had another escape exit, but smaller, I replaced it in the same way! 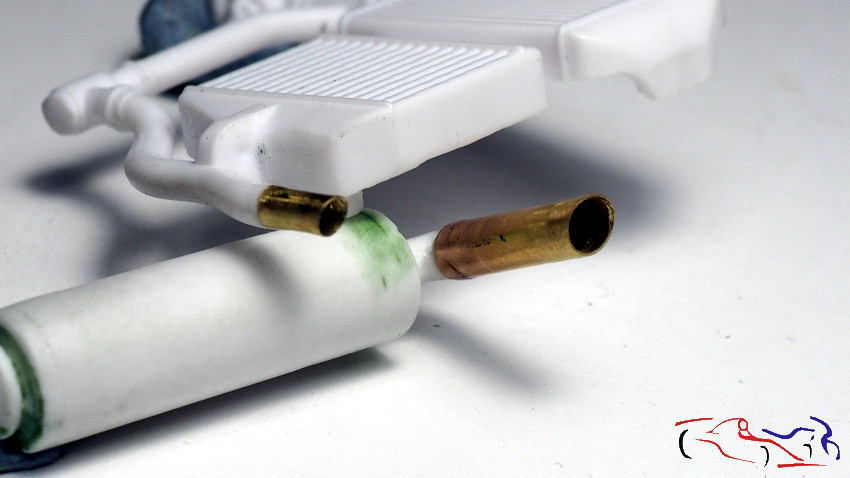 Aquí véis otra vista del escape, y la soldadura que he eñadido en la unión. Here you see another view of the exhaust, and the welding that I have built in the joint. 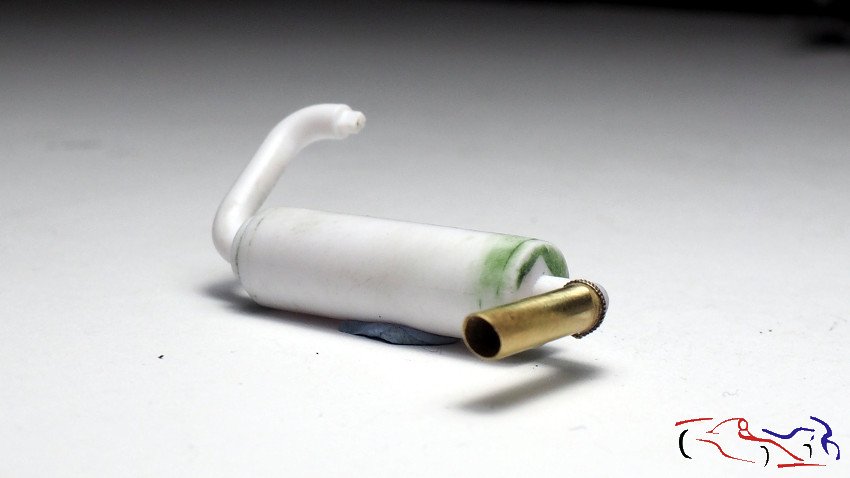 También le añadí los fotograbados del TK de HD, que es muy bueno con muchos detalles para mejorar el kit: I also added the photoetches of the HD TK, which is very good with many details to improve the kit: 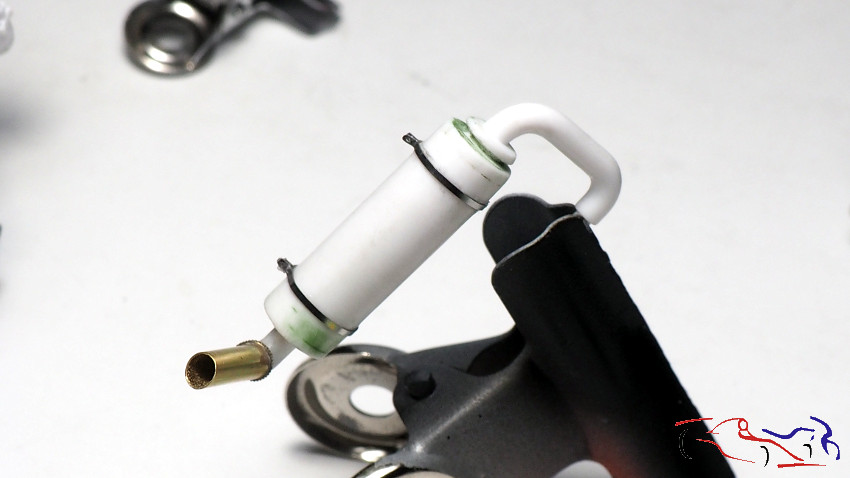 Y pasamos a la pintura. Una vez imprimado con Gravity, lo pinto con Metal Aluminio de Zero: And we move on to painting. Once primed with Gravity, I painted it with Zero Aluminum Metal: 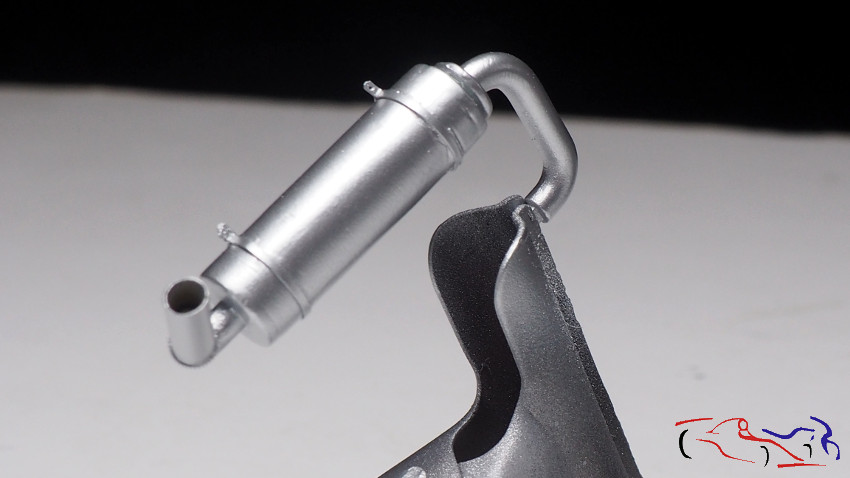 Un poco de amarillo y azul traslúcidos, seguidos de metal quemado, todos de Alclad: A little yellow and blue translucent, followed by burnt metal, all of Alclad: 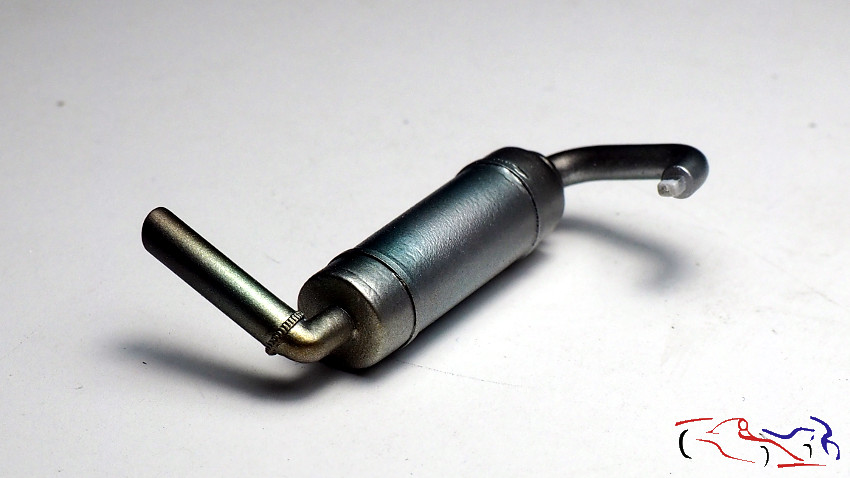 Y para terminar esta fase, color sepia también de Alclad: And to finish this phase, sepia color also from Alclad: 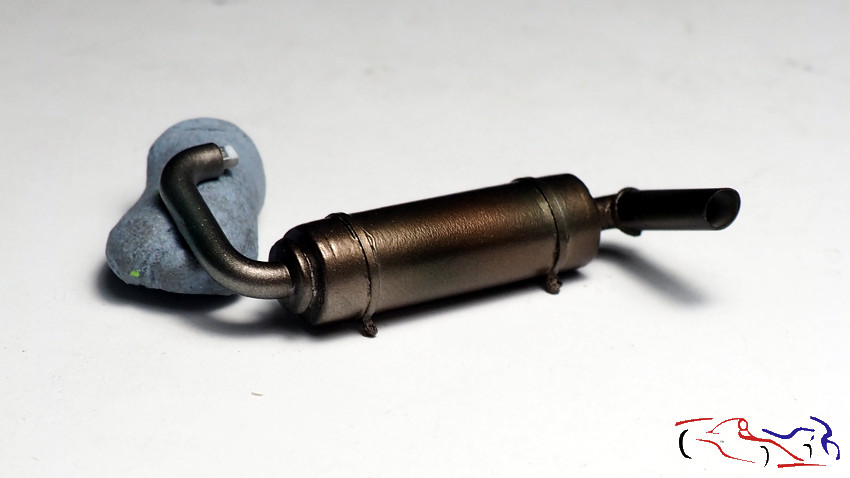 Continuamos poniendo mas fotograbados. Ahora le toca el turno a los dos grandes radiadores traseros. Le pego las rejillas, dos de arriba y otras dos en la pate inferior, y las correspondientes soldaduras de TM, que también utilicé en el escape: We continue to put more photogravures. Now is the turn of the two large rear radiators. I hit the grilles, two from the top and two from the bottom pate, and the corresponding TM welds, which I also used in the exhaust: 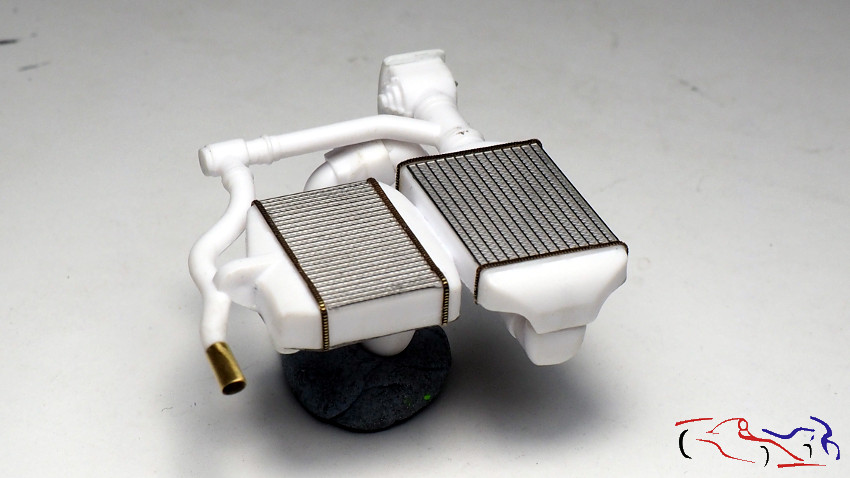 Y cuando enseñé esta foto a algunos colegas, me dijeron que la fijación del tubo era poco real, por lo que busqué fotos y vi que tenía unas fijaciones extras. Las hice con lámina de metal, cortada y limada para que se adaptara a la curva del tubo. En el centro le puse una cabeza de tornillo de MasterClub: And when I showed this photo to some colleagues, they told me that the fixation of the tube was unreal, so I looked for photos and saw that I had some extra fixations. I made them with sheet metal, cut and file so that it would adapt to the curve of the tube. In the center I put a screw head of MasterClub: 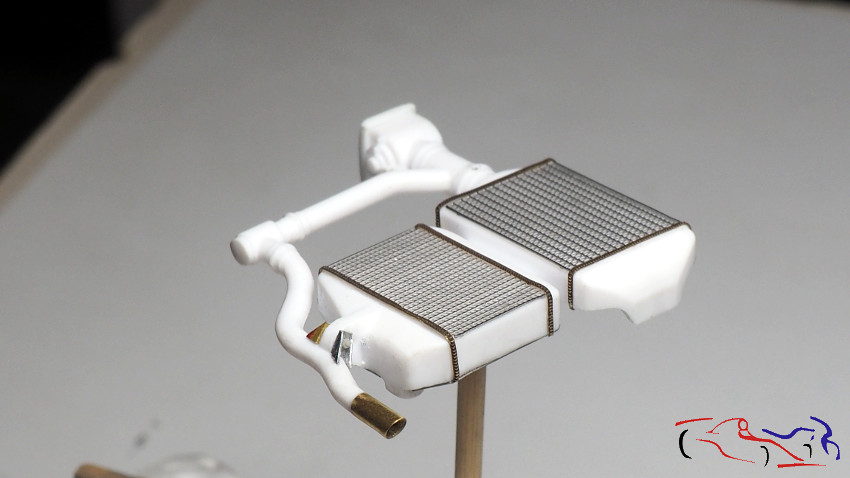 Y pasamos a pintarlo. Después de la imprimación Gravity, le di un par de manos de Aluminio mate de Vallejo, que más adelante, tendré que matizar más: And we go on to paint it. After the Gravity primer, I gave him a pair of Vallejo Matte Aluminum hands, which later, I will have to clarify more:  Y le doy los mismos colores que al tubo de escape, amarillo y azul transparentes, y hierro quemado, todos de Alclad: And I give it the same colors as the exhaust pipe, transparent yellow and blue, and burnt iron, all of Alclad: 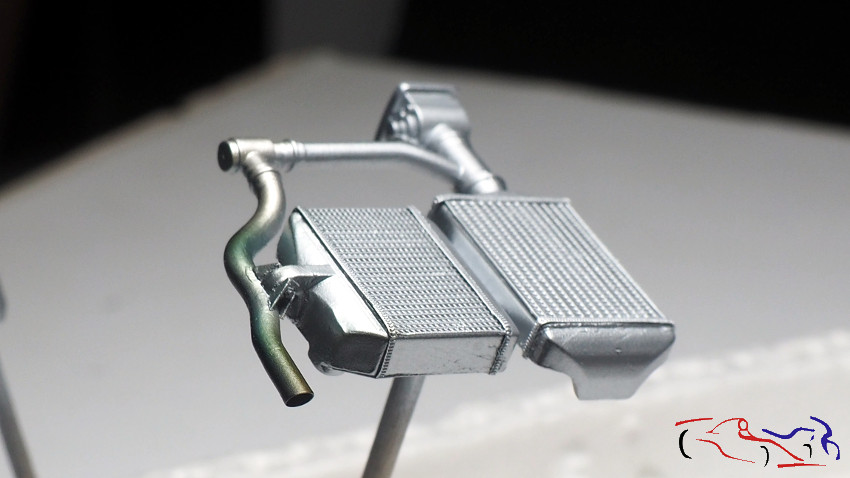 Enmascaramos el extremo para pintarlo de gris metálico de Zero: We mask the end to paint it from metallic gray of Zero: 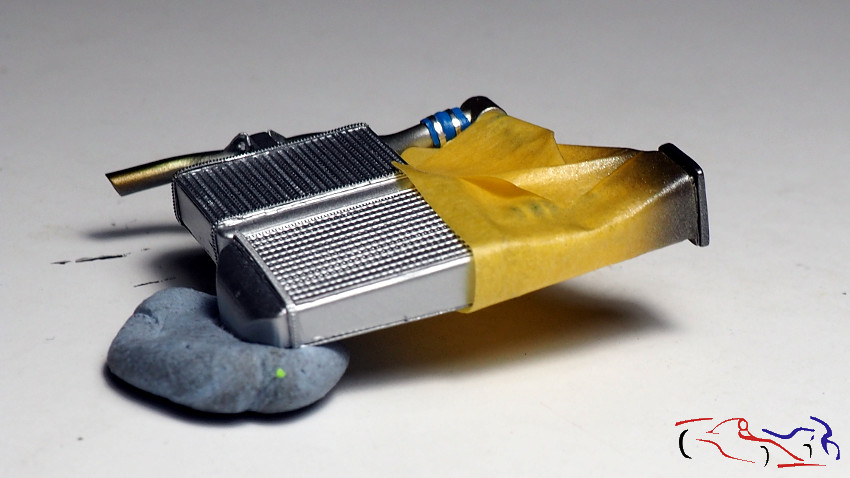 Otra pieza que va con el mismo tratamiento que la de los radiadores, y que va situada debajo de éstos: Another piece that goes with the same treatment as that of the radiators, and that goes under them: 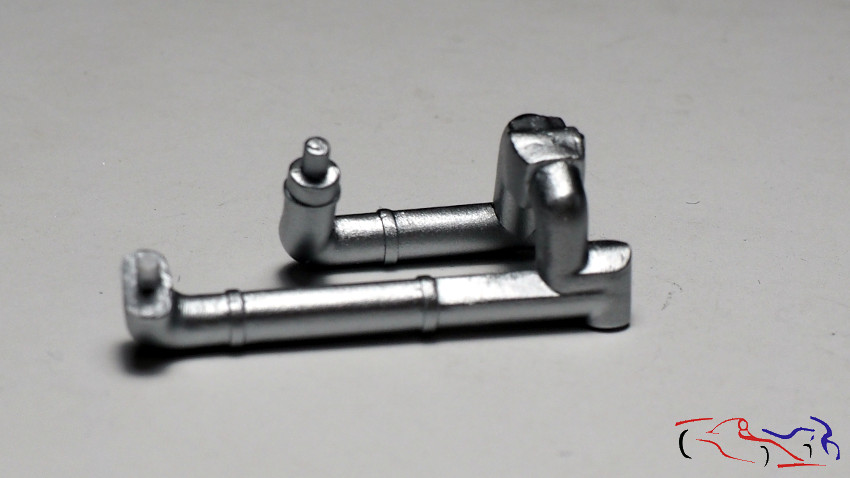 Aquí las vemos juntas: Here we see them together: 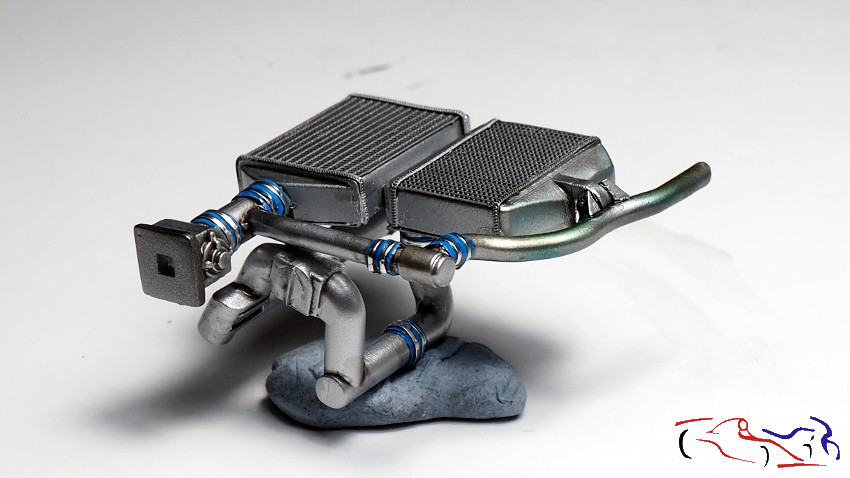 Para cambiar un poco,os muestro el proceso de una pieza que es la fijación del cable del acelerador. Va situada en la parte derecha en orden de marcha, y colocada en la pieza negra de fibra que pone el rótulo de Abarth. Primero marco las lineas e corte exteriores y las de los dobleces, así como los agujeros, todo sobre la lámina grande: To change a little, I show you the process of a piece that is the throttle cable fixing. It is located on the right side in running order, and placed on the black piece of fiber that puts the Abarth label. First I mark the outer lines and cut and those of the folds, as well as the holes, all on the large sheet: 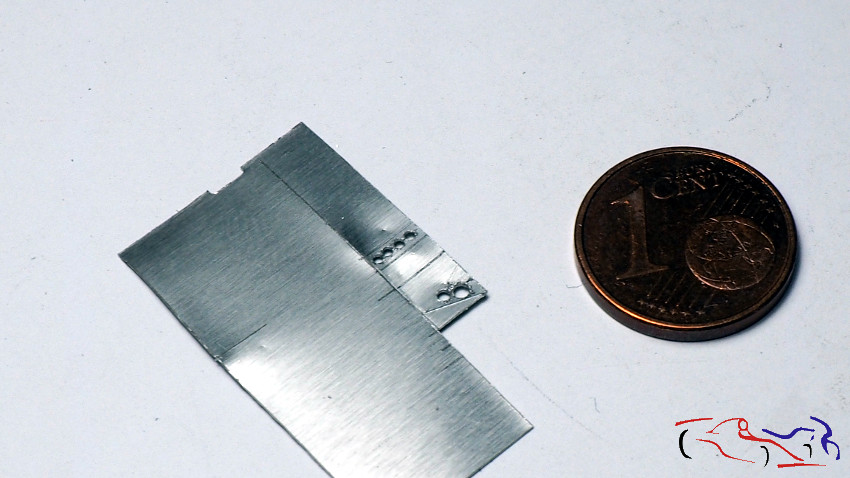 Una vez hecha, la corto y doblo. En este caso, cambié de lata de refresco a latón, y así no tenía que pintarla: Once done, I cut it and fold it. In this case, I changed from soda can to brass, and so I didnt have to paint it: 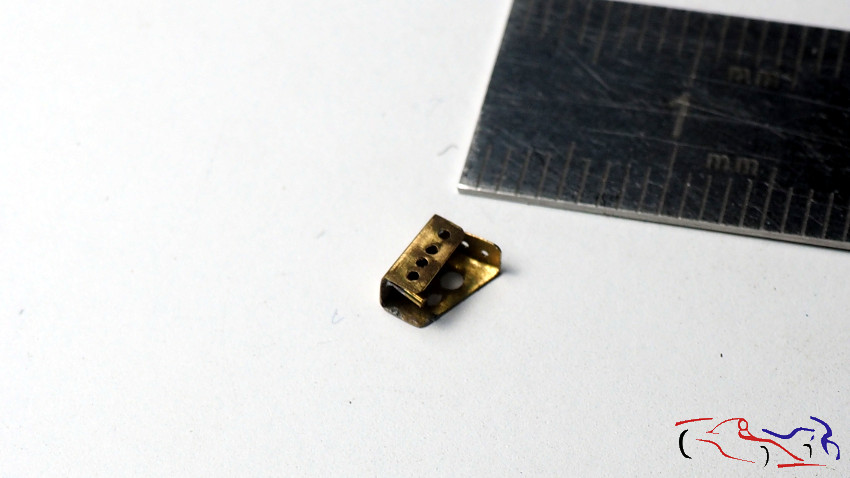 Pasamos a otra pieza, también con salida de escapes, en la que le cambiamos la parte final, por otra de plástico, pero con el borde adelgazado: We pass to another piece, also with leakage outlet, in which we change the final part, by another piece of plastic, but with the thinned edge: 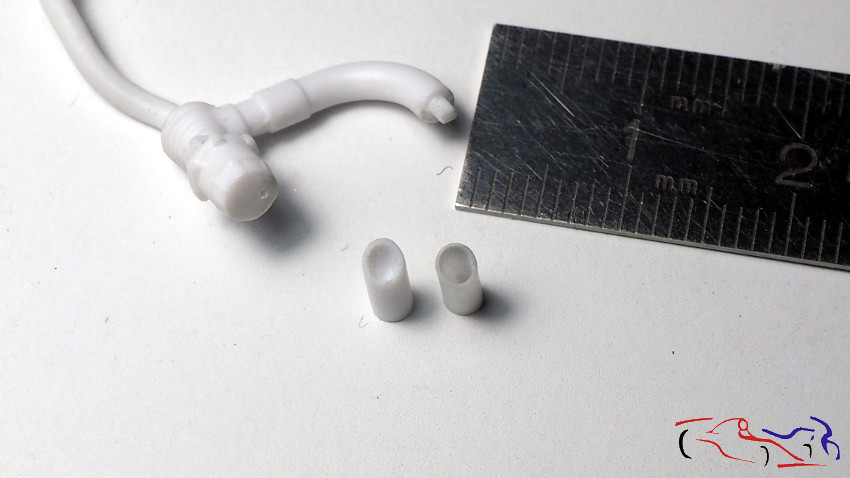 Imprimamos con Gravity y pintamos con Metal Aluminio de Zero: We print with Gravity and paint with Zero Aluminum Metal:  Un poco de amarillo y azul transparentes, y el metal quemado de Alclad: A bit of transparent yellow and blue, and the burnt metal of Alclad: 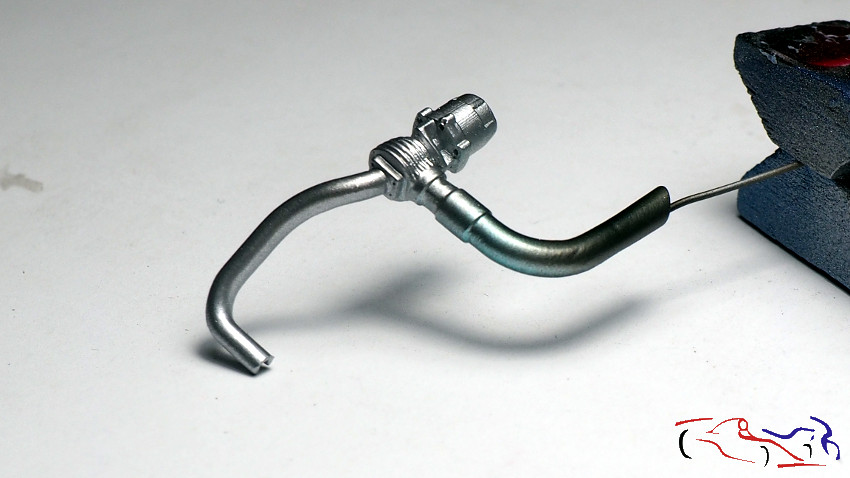 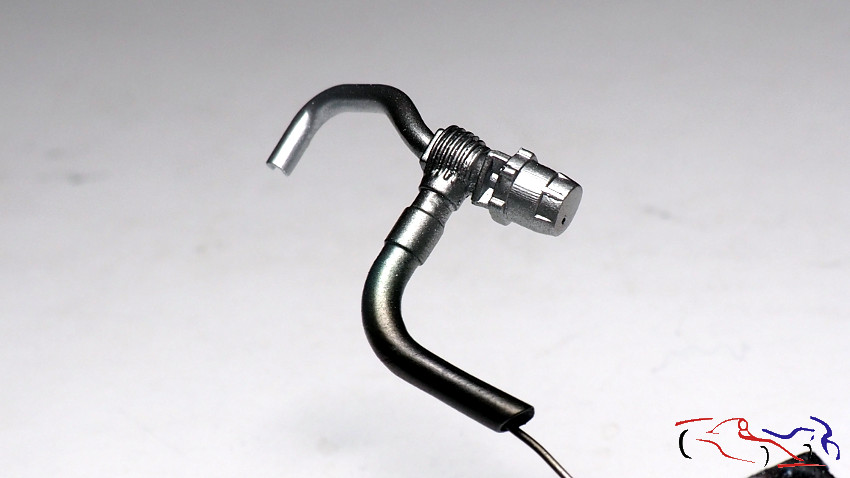 Enmascaramos otra pieza ara pintarla de gris metálico de Zero: We will mask another piece to paint it of metallic gray of Zero: 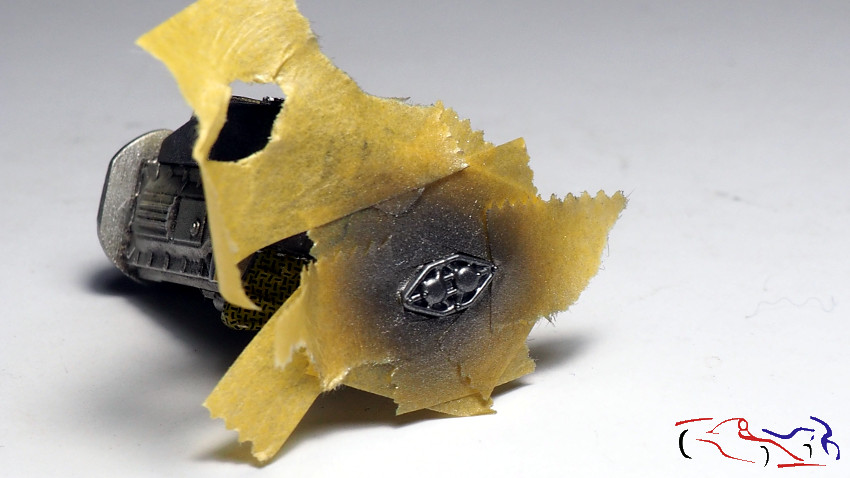 Y aquí, la pieza ya pegada en el motor And here, the piece already glued in the engine 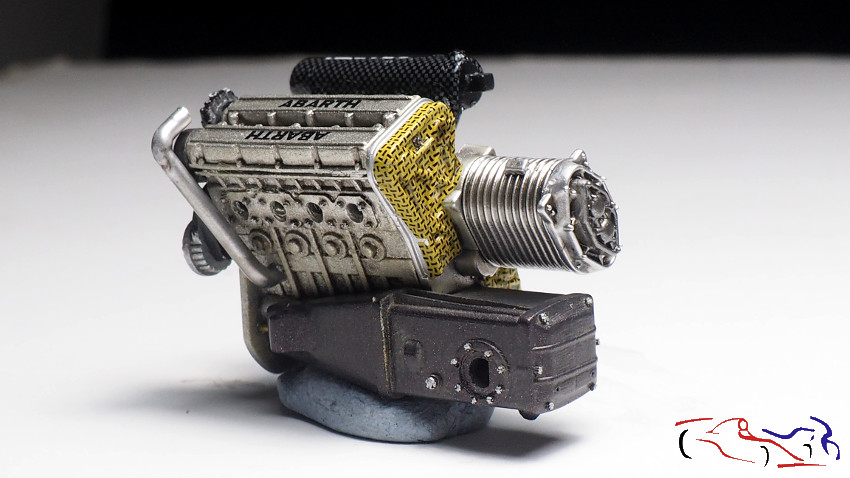 a la que le hemos dado unos lavados de Humo acrílico diluido: to which we have given some washings of diluted acrylic smoke: 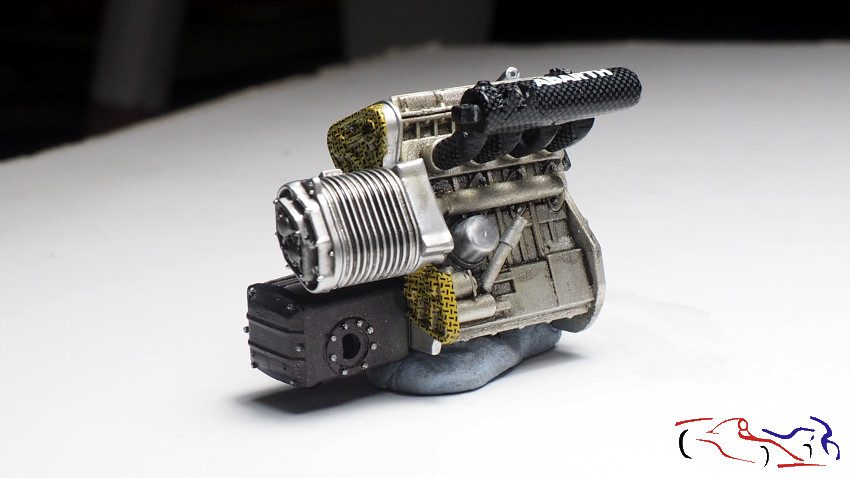 Para terminar de detallar las piezas de los radiadores, hago previamente una prueba para testear los manguitos que unen los tubos. Sobre lámina metálica autoadhesiva, corto varias tiras, elimino las intermedias, las imprimo y pinto de azul Ligier de Zero. Después las pego en sus sitios,y le añado dos tiras muy finas del mismo material a modo de abrazaderas, siendo este el resultado final del test: To finish detailing the radiator parts, I previously made a test to test the sleeves that join the tubes. On self-adhesive metal sheet, I cut several strips, remove the intermediate ones, print them and paint Ligier de Zero blue. Then I paste them in their places, and I add two very thin strips of the same material as clamps, this being the final result of the test: 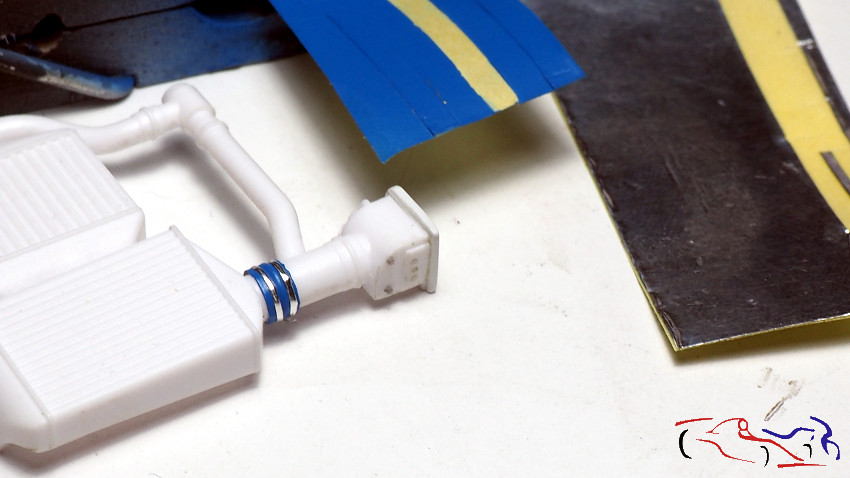 Y como vi que era buena, lo hago en la totalidad de las abrazaderas existentes. Depsués de ello, un par de lavados de humo diluido, por todos lados, especialmente en los filtros y bordes de la pieza: And as I saw that it was good, I do it in all existing clamps. After that, a couple of diluted smoke washes, everywhere, especially in the filters and edges of the piece: 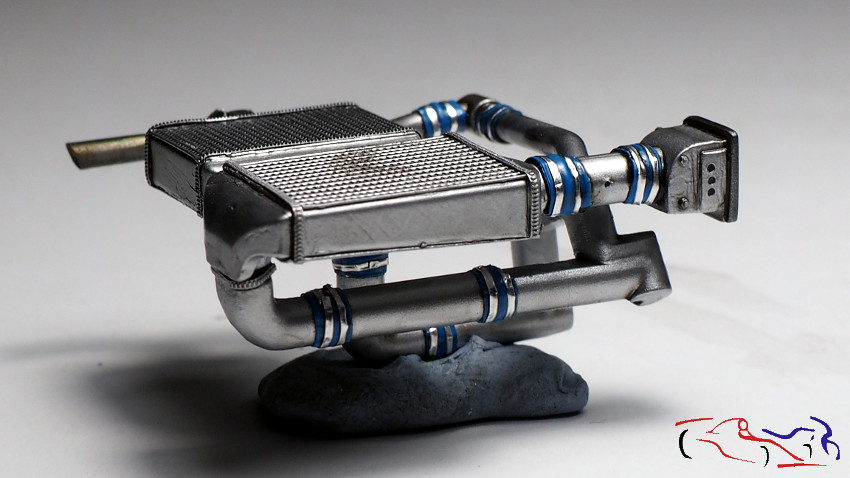 [img]http://blog.maquetea.com/wp-content/uploads/2019/12/S4-Marlb- 10-45.jpg[/img] 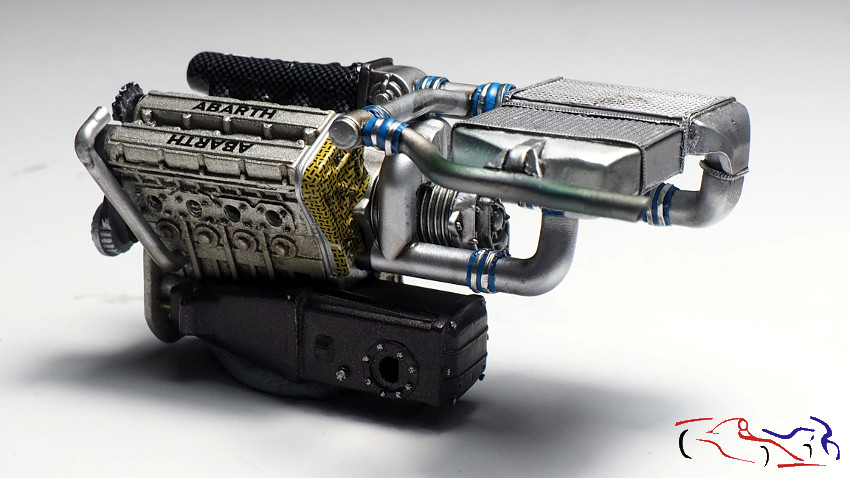 Y para terminar, pego los amortiguadores delanteros que tenía ya pintados, y los comparamos con uno original: la diferencia es clara. And finally, I glue the front shock absorbers I had already painted, and we compare them with an original one: the difference is clear. 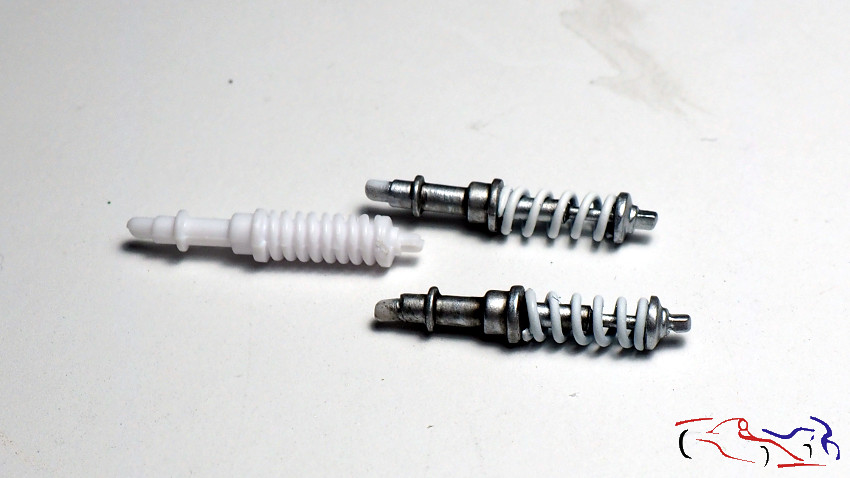 Ahora ya podemos pegar todo el conjunto delantero!! Pero eso será en próximos post! Gracias por ver y comentar!! Now we can paste the entire front set !! But that will be in the next post! Thanks for viewing and commenting!! |
|
|
|
|
|
01-08-2020, 09:20 AM
|
#57 | |
|
AF Regular

Join Date: Feb 2006
Location: Parla - Madrid
Posts: 194
Thanks: 37
Thanked 30 Times in 27 Posts
|
Re: Lancia Delta S4 Marlboro Beemax 1/24
What a process! Thanks for so good explanations about steps you are doing! Really good as a guide for our future projects. Really nice details. Waiting for more...
|
|
|
|
|
|
01-08-2020, 01:04 PM
|
#58 | ||
|
AF Enthusiast
Thread starter
Join Date: Mar 2009
Location: Madrid
Posts: 649
Thanks: 109
Thanked 68 Times in 67 Posts
|
Re: Lancia Delta S4 Marlboro Beemax 1/24
Quote:
 |
||
|
|
|
|
01-08-2020, 02:01 PM
|
#59 | |
|
Loser

Join Date: Aug 2007
Location: Moscow
Posts: 1,170
Thanks: 110
Thanked 248 Times in 195 Posts
|
Re: Lancia Delta S4 Marlboro Beemax 1/24
Just a short question. Did this Lancia have coil springs with variable pitch of turns?
https://i.wheelsage.org/pictures/a/a...group_b_16.jpg
__________________
Best regards, Mikhail   
|
|
|
|
|
|
01-09-2020, 05:56 AM
|
#60 | ||
|
AF Enthusiast
Thread starter
Join Date: Mar 2009
Location: Madrid
Posts: 649
Thanks: 109
Thanked 68 Times in 67 Posts
|
Re: Lancia Delta S4 Marlboro Beemax 1/24
Quote:
|
||
|
|
|
|
|
POST REPLY TO THIS THREAD |
 |
|
|


