|
|
|

|
|
| Search | Car Forums | Gallery | Articles | Helper | AF 350Z | IgorSushko.com | Corporate |
|
| Latest | 0 Rplys |
 10-08-2007, 01:22 AM
|
#76 | |
|
AF Enthusiast
Thread starter

Join Date: Feb 2003
Location: Chicago
Posts: 528
Thanks: 2
Thanked 17 Times in 16 Posts
|
Re: 1/24 Tamiya Ferrari Enzo "Build Diary"
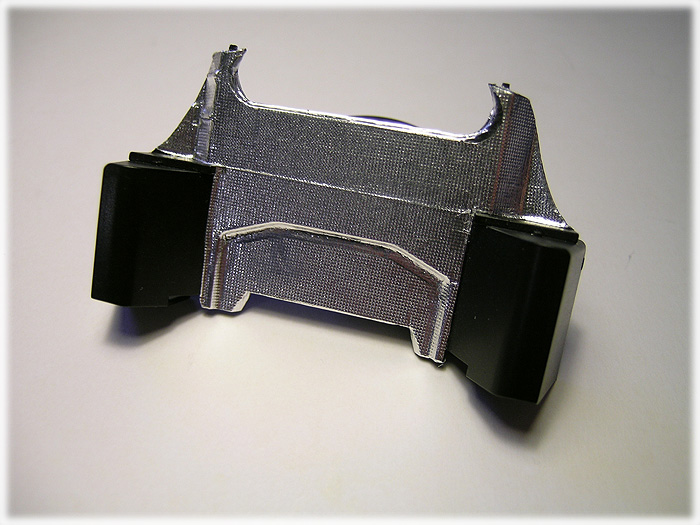 It was quite easy to work with and I didn't have problems applying this heat shield except it was bit thicker than what I would like to be. 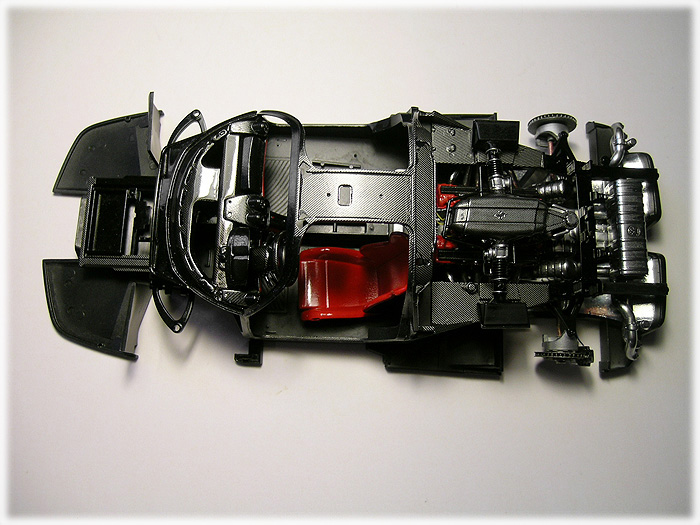 This is how it looks so far. I still need to complete the C/F decal work on the chassis and also give several clear coat layers. 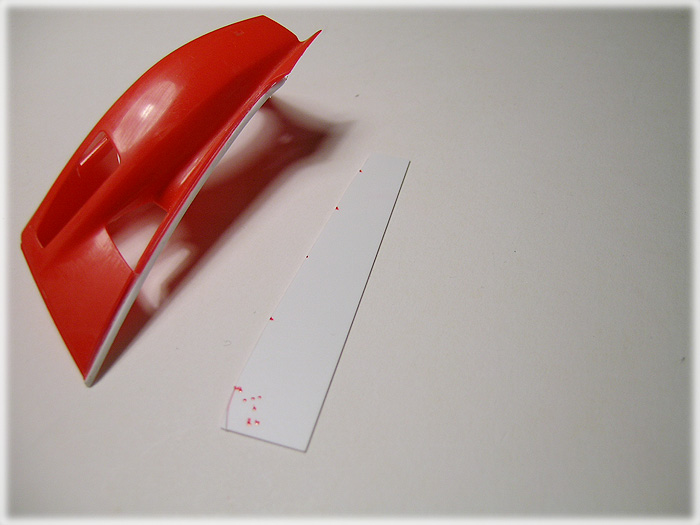 I started to work on the front fenders, but found the work to be somewhat difficult. I wanted to create the moldings for the edges; still lots of work to do. 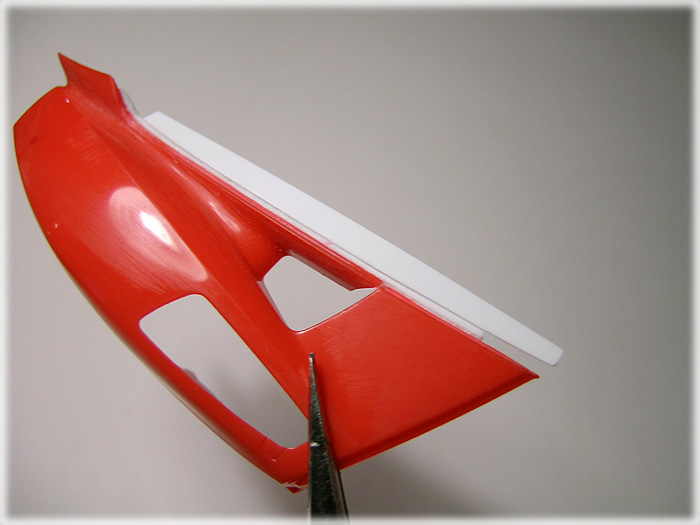 I had to ditch the idea of reproducting this area 100% because my skill is not allowing me to do so.  Instead, I will do what makes sense by making things look acceptable.  I will need to find away to add "rubber gasket" on (A). I will spend some time thinking about what I need to do to this make this work...  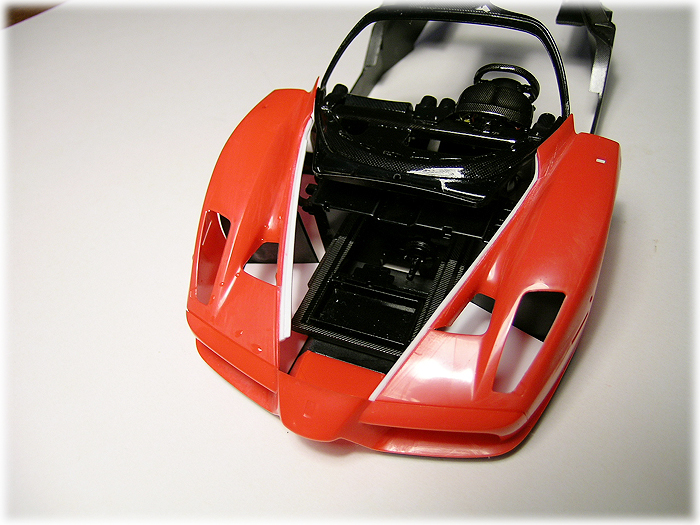 I wanted to make sure that the fit is still good, I test fitted parts~ 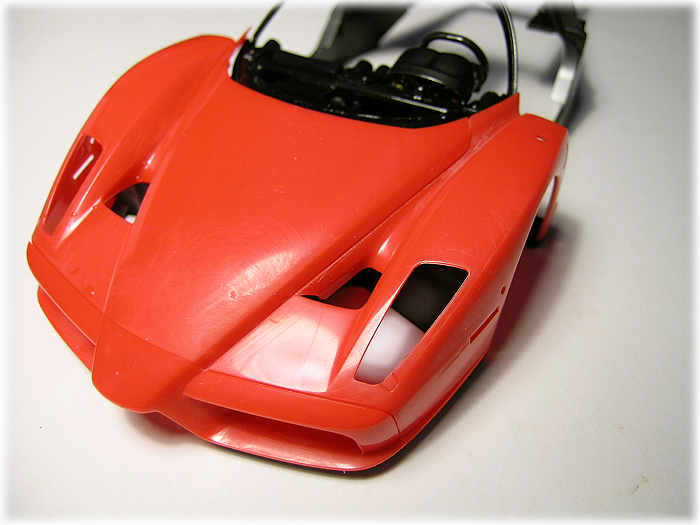 This is a good sign! The front trunk closes!  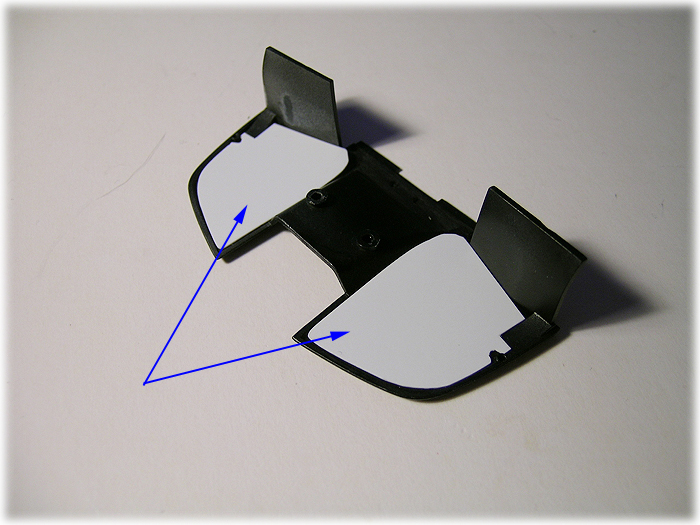 Coming back to the front spoiler area and the bottom cover: I used plastruct sheets to fill the inside. 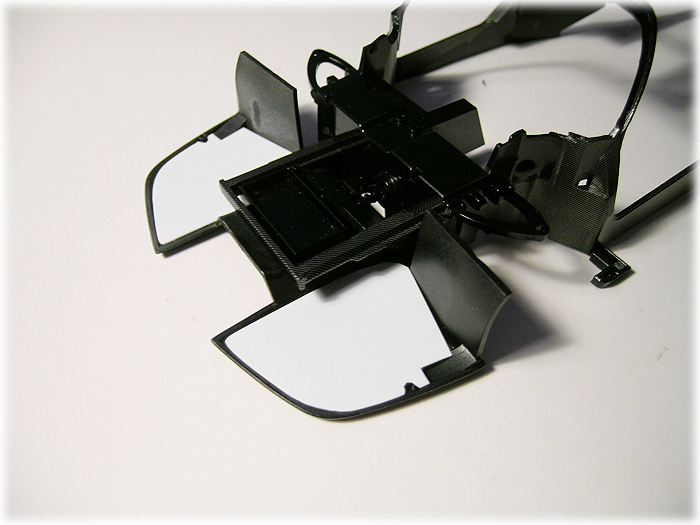 These will get C/F later on... 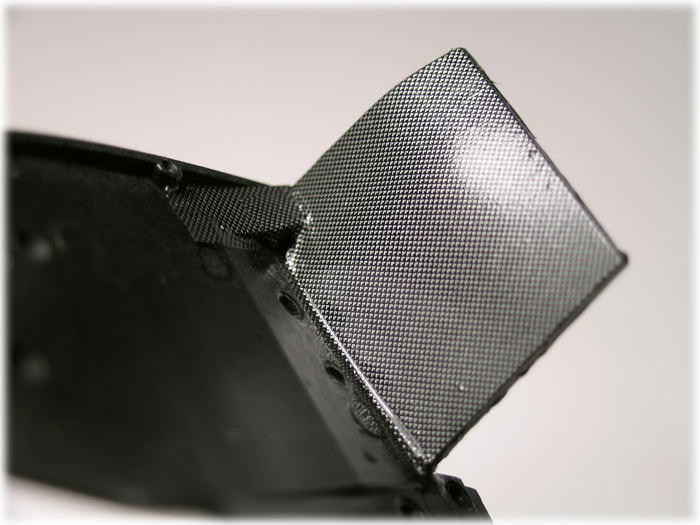 Just like this! I see some debris on C/F, will take care of that soon.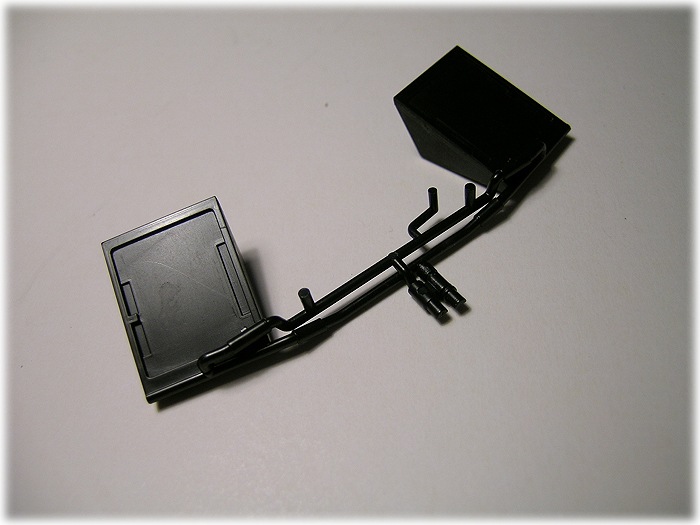 Detailing is always fun, but I need to balance out so I don't go crazy. Working on the front radiator areas... 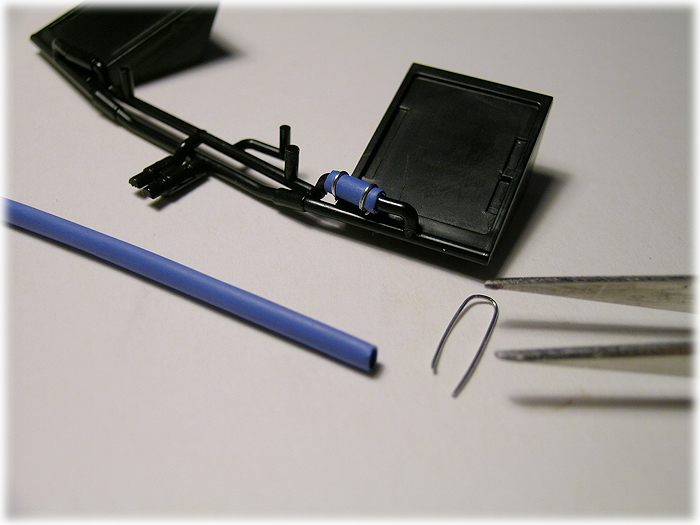 Whether it is "reference"-ed correctly or not, I decided to give a "focal" point for this area. I used a heat srinking tube and thin metal wires to represent radiator "connecting hoses". 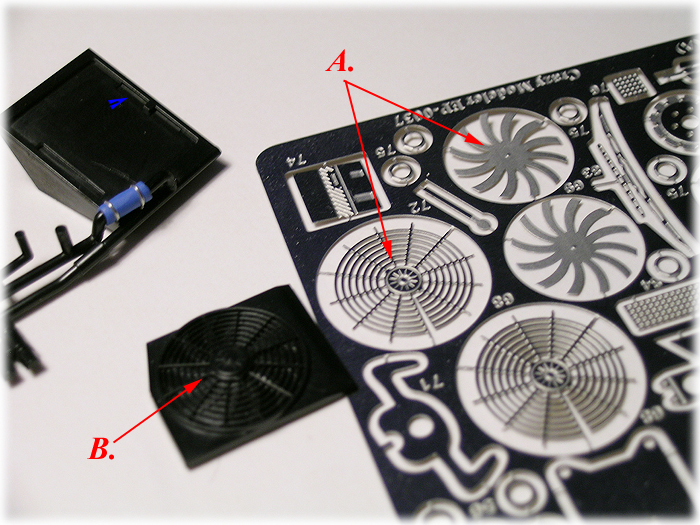 Should I scratch build this or use the P/E??... I think I should balance the effectiveness based on the effort. Don't you agree? 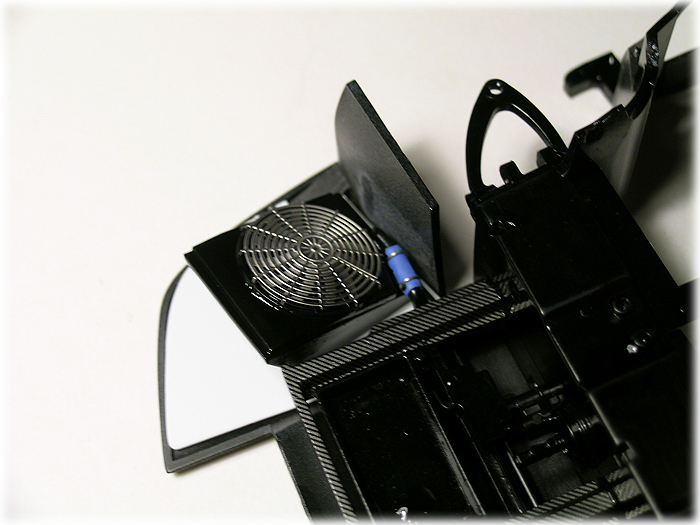 I took the easier route...  Will see you soon!
__________________
-- CifeNet |
|

|

|
|
10-08-2007, 01:33 AM
|
#77 | ||
|
AF Enthusiast
Thread starter
Join Date: Feb 2003
Location: Chicago
Posts: 528
Thanks: 2
Thanked 17 Times in 16 Posts
|
Re: 1/24 Tamiya Ferrari Enzo "Build Diary"
Quote:
I will follow your advise and spend hours and hours to apply the P/E bolts. 
__________________
-- CifeNet |
||
|
|
|
|
10-08-2007, 02:21 AM
|
#78 | |||
|
AF Enthusiast
 
Join Date: Jul 2004
Location: Taipei
Posts: 781
Thanks: 0
Thanked 2 Times in 2 Posts
|
Re: 1/24 Tamiya Ferrari Enzo "Build Diary"
Quote:
Quote:
And all I could see from the link you gave me was the trunk lid open. Couldn't really see what was goin on inside the trunk or how you made the mods...
__________________
Please read the following linked articals before posting a question. Once you have and still have questions, try to post your questions clearly. This will make a lot of people's blood pressure drop back to normal, including mine.  NEW TO THE AF MODELLING FORUM? PLEASE READ THIS FIRST AF Car Modeling Tutorial, How-To and Product Review Depository AF Car Modeling Frequently Asked Questions [FAQ] - * Look here first! * ver2.0 And finally,I wish you all happy modeling 
|
|||
|
|
|
|
10-08-2007, 03:12 AM
|
#79 | ||
|
AF Fanatic

Join Date: Dec 2004
Location: Up the creek with no paddle
Posts: 5,888
Thanks: 7
Thanked 16 Times in 15 Posts
|
Re: 1/24 Tamiya Ferrari Enzo "Build Diary"
Quote:
 What's the hurry? What's the hurry?  The rivet advice is good to though (just expensive  ) )
__________________
Guideline for happy modeling: Practice on scrap. Always try something new. Less is more. "I have a plan so cunning, you could put a tail on it and call it a weasel" - Edmund Blackadder |
||
|
|
|
|
10-10-2007, 04:09 PM
|
#80 | |
|
AF Regular

Join Date: Aug 2007
Location: Niagara Falls
Posts: 205
Thanks: 0
Thanked 0 Times in 0 Posts
|
Re: 1/24 Tamiya Ferrari Enzo "Build Diary"
Great Work!!!!!
|
|
|
|
|
|
10-10-2007, 06:53 PM
|
#81 | ||
|
AF Enthusiast
Thread starter
Join Date: Feb 2003
Location: Chicago
Posts: 528
Thanks: 2
Thanked 17 Times in 16 Posts
|
Re: 1/24 Tamiya Ferrari Enzo "Build Diary"
Quote:
__________________
-- CifeNet |
||
|
|
|
|
10-10-2007, 07:12 PM
|
#82 | |
|
AF Enthusiast
Thread starter
Join Date: Feb 2003
Location: Chicago
Posts: 528
Thanks: 2
Thanked 17 Times in 16 Posts
|
Re: 1/24 Tamiya Ferrari Enzo "Build Diary"
Thanks everyone for your positive feedback on this.
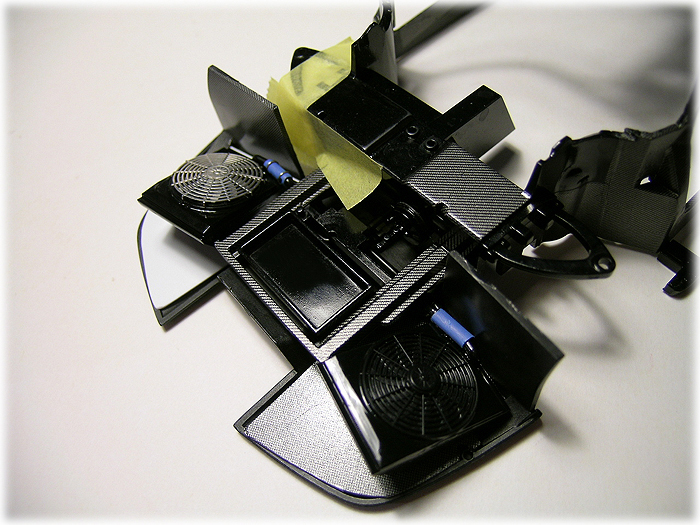 I continue the work on the radiators... 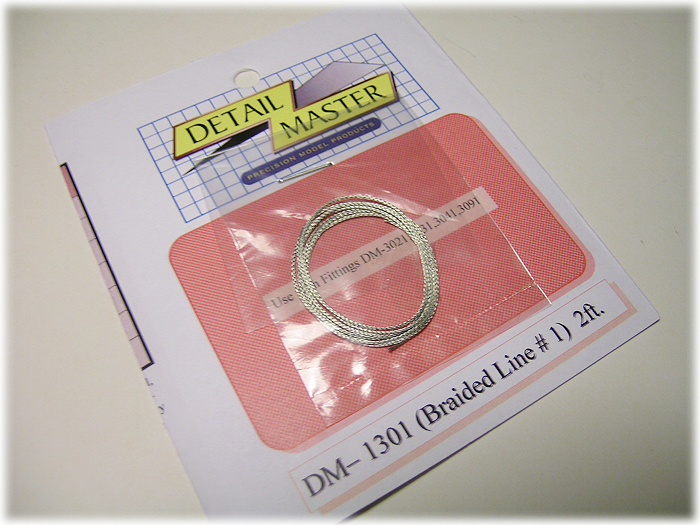 More carbon fiber work and try to see if everything fits... 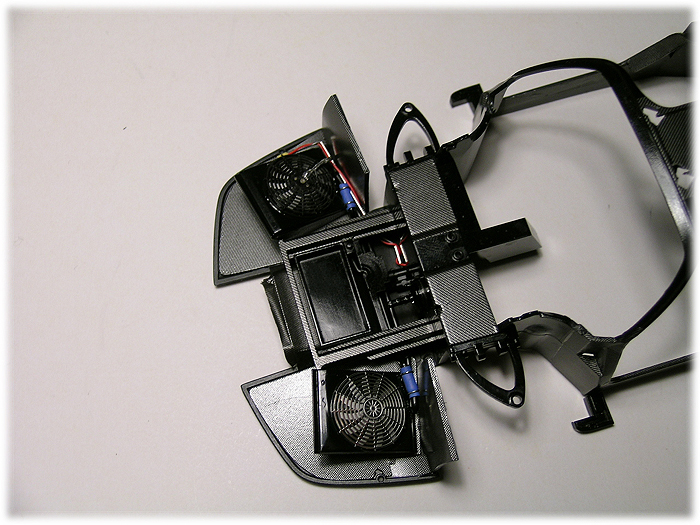 I will try this braided line to represent the heat sensor wiring. 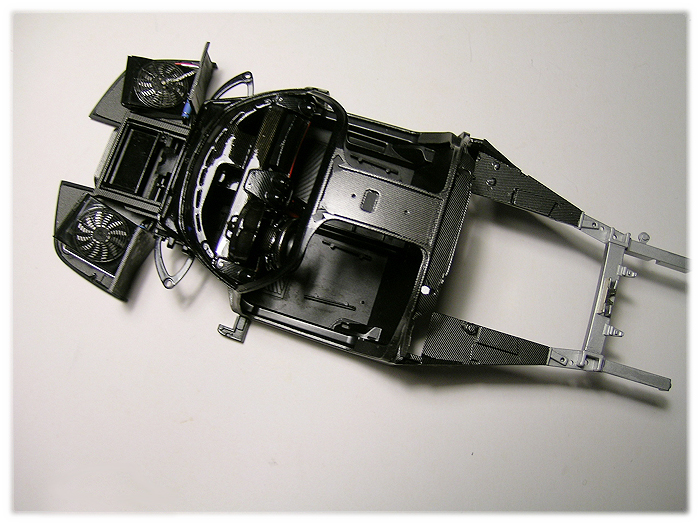 I have added minor wiring!  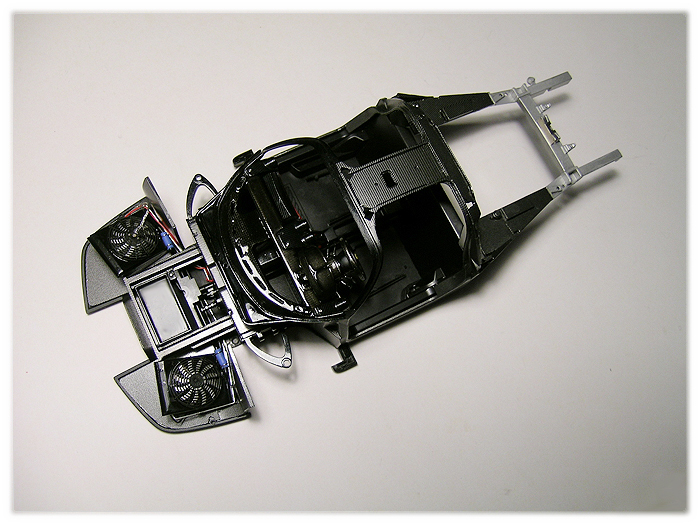 I am starting to get bored with the C/F work here...  This is too much... I think I still need another 2 hours or so on the chassis and then I can start applying the clearcoat to protect the surface.  I will have to apply clearcoat on the front air dam as well. 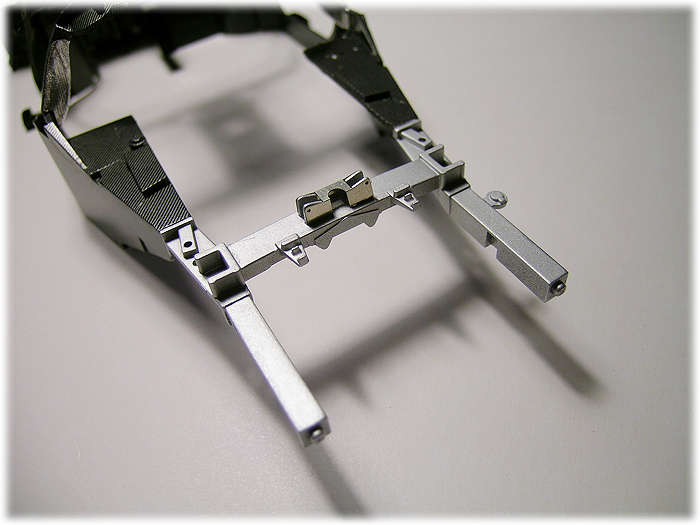 The rear frame received a coat of flat silver...  Since it seems to be bit boring, I added rivets...and they helped somewhat~ 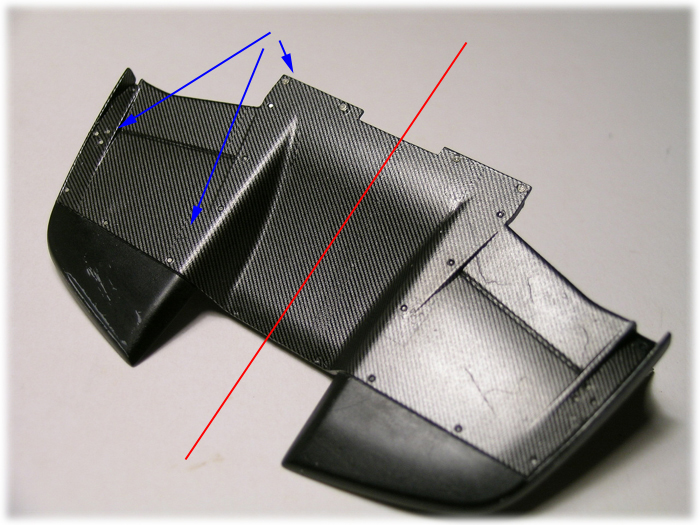 I am spending lots of time applying these small P/E bolts and they fly out from my twizzers; I lost almost half of them while trying to apply!  This air dam looks ugly at this moment, but I am confident that I can bring this up to a better looking part soon... Will see you soon~
__________________
-- CifeNet |
|
|
|
|
|
10-10-2007, 07:46 PM
|
#83 | |
|
AF Fanatic
Join Date: Dec 2004
Location: Up the creek with no paddle
Posts: 5,888
Thanks: 7
Thanked 16 Times in 15 Posts
|
Re: 1/24 Tamiya Ferrari Enzo "Build Diary"
Good luck with those p/e rivets (I even feel a little bit guilty
)Super clean work!
__________________
Guideline for happy modeling: Practice on scrap. Always try something new. Less is more. "I have a plan so cunning, you could put a tail on it and call it a weasel" - Edmund Blackadder |
|
|
|
|
|
10-10-2007, 10:11 PM
|
#84 | |
|
AF Enthusiast
Join Date: Jul 2004
Location: Taipei
Posts: 781
Thanks: 0
Thanked 2 Times in 2 Posts
|
Re: 1/24 Tamiya Ferrari Enzo "Build Diary"
Great work, truely enspiring.
As for applying the PE rivets.. I think this thread will help: http://www.automotiveforums.com/vbul...d.php?t=755468 especially the 'wet toothpick' trick. HTH, Steve Edit: What did you use to cover : ?it looks like CF in some pics yet it looks like a heat shielding material in others.
__________________
Please read the following linked articals before posting a question. Once you have and still have questions, try to post your questions clearly. This will make a lot of people's blood pressure drop back to normal, including mine. NEW TO THE AF MODELLING FORUM? PLEASE READ THIS FIRST AF Car Modeling Tutorial, How-To and Product Review Depository AF Car Modeling Frequently Asked Questions [FAQ] - * Look here first! * ver2.0 And finally,I wish you all happy modeling
|
|
|
|
|
|
10-12-2007, 10:05 AM
|
#85 | |
|
AF Newbie
 Join Date: Jan 2004
Location: urbana, Ohio
Posts: 34
Thanks: 0
Thanked 0 Times in 0 Posts
|
Re: 1/24 Tamiya Ferrari Enzo "Build Diary"
this thing looks AWESOME!!!
|
|
|
|
|
|
10-12-2007, 11:52 AM
|
#86 | ||||
|
AF Enthusiast
Thread starter
Join Date: Feb 2003
Location: Chicago
Posts: 528
Thanks: 2
Thanked 17 Times in 16 Posts
|
Re: 1/24 Tamiya Ferrari Enzo "Build Diary"
Quote:
Quote:
Ah, for the radiatior bottom: the image might not be clear, I used the Museum Collection carbon fiber decals and I have not yet applied the heat shielding materials... Quote:
Hopefully, I don't mess up till end and finish this...
__________________
-- CifeNet |
||||
|
|
|
|
10-12-2007, 12:03 PM
|
#87 | |
|
AF Fanatic

Join Date: Feb 2004
Location: Hartford, Connecticut
Posts: 5,601
Thanks: 7
Thanked 108 Times in 103 Posts
|
Re: 1/24 Tamiya Ferrari Enzo "Build Diary"
I never get tired seeing a detailed enzo build. Awesome work.
__________________
In Progress    
|
|
|
|
|
|
10-12-2007, 04:54 PM
|
#88 | |
|
AF Premium User
 
Join Date: Dec 2002
Location: Melbourne
Posts: 1,746
Thanks: 9
Thanked 12 Times in 12 Posts
|
Re: 1/24 Tamiya Ferrari Enzo "Build Diary"
Wow - this is an amazing WIP!!
|
|
|
|
|
|
10-16-2007, 08:11 PM
|
#89 | |
|
AF Enthusiast

Join Date: Jan 2007
Location: South Eastern, Wisconsin
Posts: 667
Thanks: 1
Thanked 0 Times in 0 Posts
|
Re: 1/24 Tamiya Ferrari Enzo "Build Diary"
You're back!!! Can't wait to see the finished product!
__________________
Recently completed projects:      |
|
|
|
|
|
10-16-2007, 09:46 PM
|
#90 | |
|
AF Newbie
Join Date: Oct 2007
Location: OC, California
Posts: 25
Thanks: 0
Thanked 0 Times in 0 Posts
|
Re: 1/24 Tamiya Ferrari Enzo "Build Diary"
I cant believe how detailed this model is!
|
|
|
|
|
|
 |
POST REPLY TO THIS THREAD |
 |
|
|


