|
|
|

|
|
| Search | Car Forums | Gallery | Articles | Helper | AF 350Z | IgorSushko.com | Corporate |
|
| Latest | 0 Rplys |
|
|||||||
| WIP - Motorbikes Post topics for any "Works In Progress" motobikes projects in this sub-forum. |
 |
 Show Printable Version | Show Printable Version |  Email this Page | Email this Page |  Subscribe to this Thread
|
|
|
Thread Tools |
 07-01-2012, 07:47 AM
|
#1 | |
|
AF Regular

Join Date: Nov 2009
Location: Italy
Posts: 143
Thanks: 4
Thanked 1 Time in 1 Post
|
A couple of weeks ago I started my new work.. Why "next project"?
I don't know why.. but i like it.. it looks so aggressive! The bike is based on the shovelhead engine stolen from a revell 1/8 Electra Glide kit wich i'd like to modify until it would looks like a knucklehead.. I started with the frame: I folded hand, filling the tubes with a steel wire and then were soldered to a stable seal. At the same time I started wheels improving them with steel wire and a lot of holes on hub and rim.. I made only a raw of spokes to see the effect and to study the spoken method.. 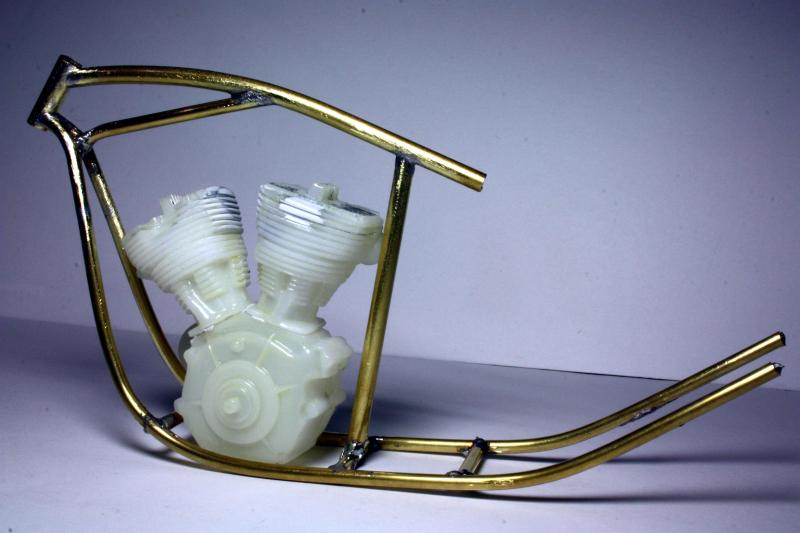 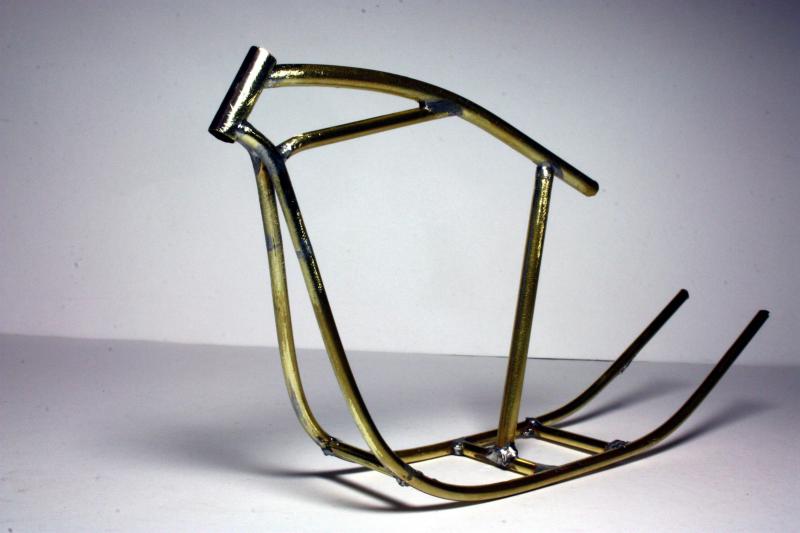 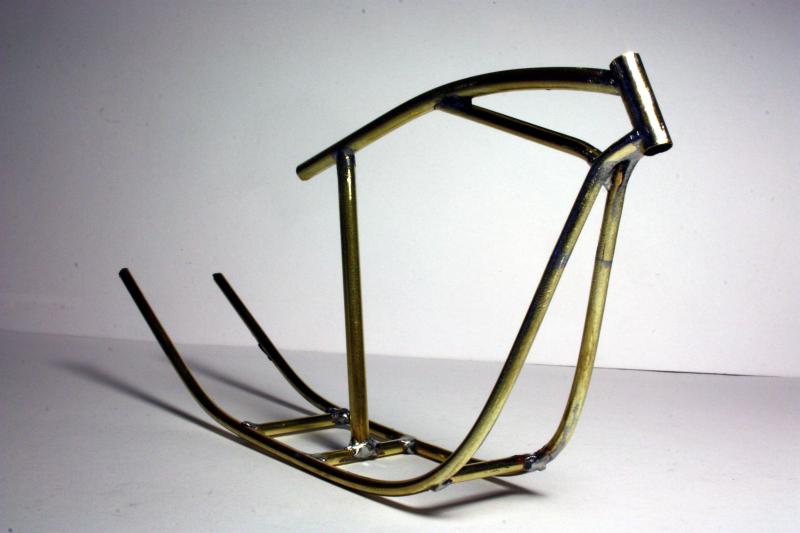 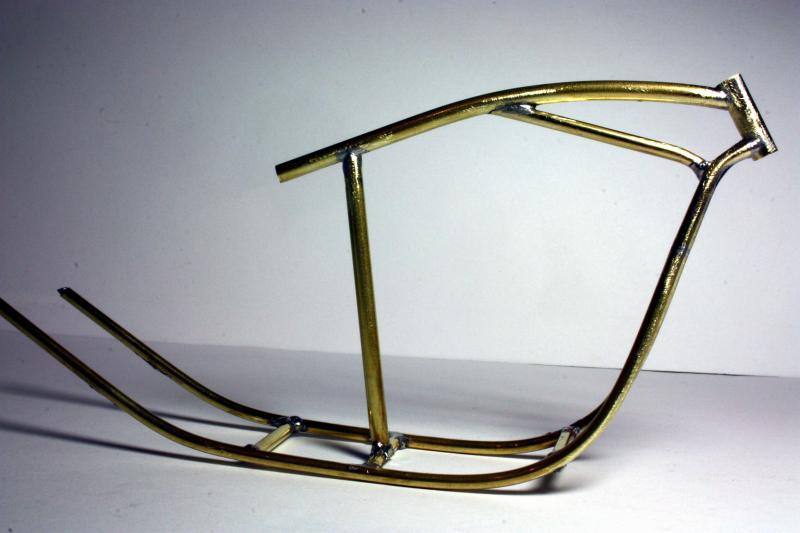  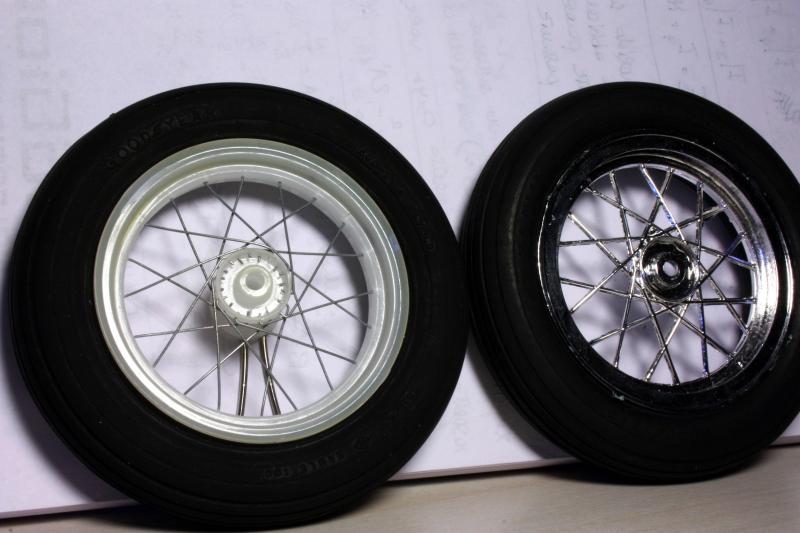  |
|

|

|
|
07-01-2012, 07:47 AM
|
#2 | |
|
AF Regular
Thread starter
Join Date: Nov 2009
Location: Italy
Posts: 143
Thanks: 4
Thanked 1 Time in 1 Post
|
Re: Harley Next Project 1/8
Frame .. part 2
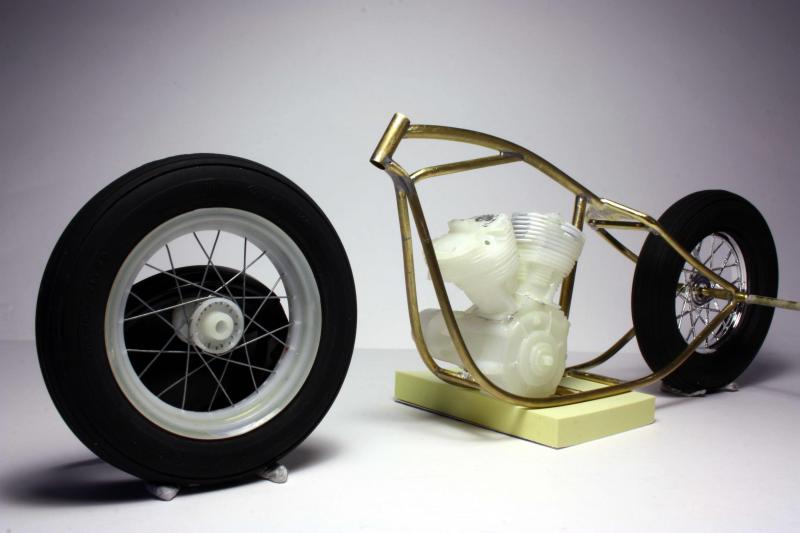      1/10 vs. 1/8  |
|
|
|
|
|
07-02-2012, 02:36 AM
|
#3 | |
|
AF Newbie
Join Date: Jun 2006
Location: Limassol
Posts: 78
Thanks: 0
Thanked 4 Times in 4 Posts
|
Re: Harley Next Project 1/8
Frame looks excellent. I would be interested to know more about how did u bent them.
|
|
|
|
|
|
07-05-2012, 01:49 AM
|
#4 | |
|
AF Regular
Thread starter
Join Date: Nov 2009
Location: Italy
Posts: 143
Thanks: 4
Thanked 1 Time in 1 Post
|
Re: Harley Next Project 1/8
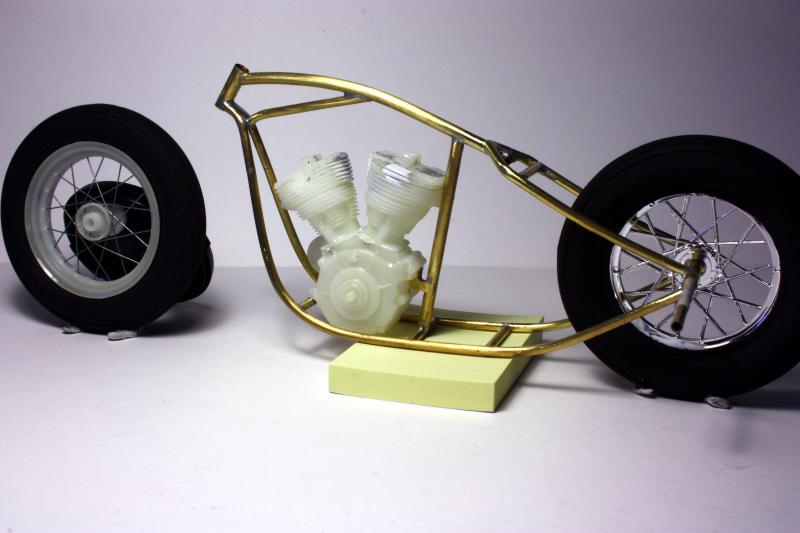
Ciao utzelu, the frame tubes were initially filled with a stell wire to prevent the material deforms, then to maintain the symmetries I welded two parallel tubes together in a couple of points just to keep them attached.
Then I bent them into desired shapes and at the end I removed the welds between the two tubes. Once put back into position, the two main tubes, were welded to the joists and to the upper curved central beam. And slowly all the other parts .. then a good roughing the welds and voilà .. |
|
|
|
|
|
07-05-2012, 02:04 AM
|
#5 | |
|
AF Regular
Thread starter
Join Date: Nov 2009
Location: Italy
Posts: 143
Thanks: 4
Thanked 1 Time in 1 Post
|
Re: Harley Next Project 1/8
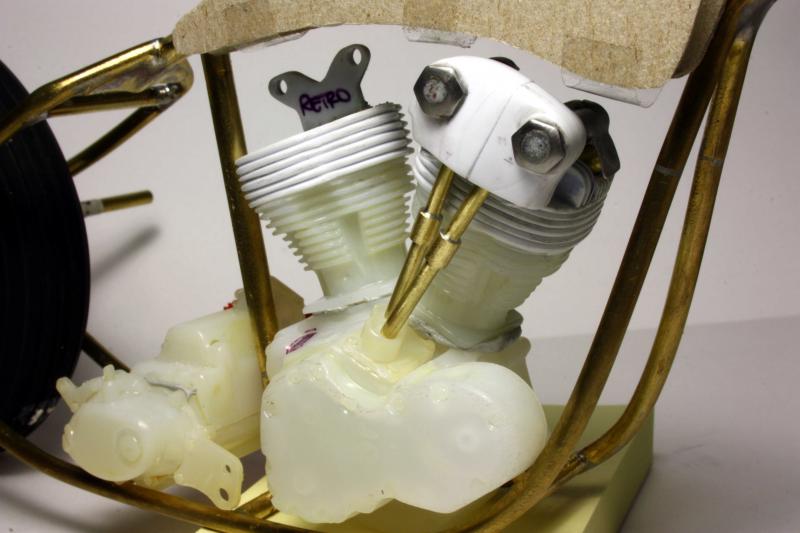
In these days I dedicated back to the engine .. did not satisfy me so I changed further ..
The motor is left only the base and the initial part of the cylinders .. The cylinder heads have been studied to a computer and, after viewing tons of photos, I designed the templates that, after being glued onto plasticard, I have helped cut in the right shape. Once pasted on top of each other all the layers, I recorded the new fins .. This foto is property of LINK and I took it only for purpose of discussion      |
|
|
|
|
|
07-05-2012, 02:11 AM
|
#6 | |
|
AF Regular
Thread starter
Join Date: Nov 2009
Location: Italy
Posts: 143
Thanks: 4
Thanked 1 Time in 1 Post
|
Re: Harley Next Project 1/8
Another flaw were the vertical blades on the cylinder head ..
Initially thought to play them as horizontal tabs but it would have created a thick and surreal surely I would have had difficulty in giving a shape. So I aligned many rectangles of plasticard alternating thicknesses of 0.5mm and 1mm. I also mounted two pieces of brass tubing from 4mm to simulate the valve seats.     |
|
|
|
|
|
07-05-2012, 02:45 AM
|
#7 | |
|
Authorized Vendor

Join Date: Oct 2005
Location: Vicenza - veneto de rassa
Posts: 3,909
Thanks: 6
Thanked 46 Times in 41 Posts
|
Re: Harley Next Project 1/8
My dear friend this is fantastic
 I have the benefit of the spoiler due the last updates on ita forums and.... amazing, what really amaze me most are the basic techniques: you uses the old school modeling tech., incredible. Now I understood better when you said about big scale models: yes I agree, for this kind of level 1/8 or even 1/6 models are quite better!
__________________
 gio gio
|
|
|
|
|
|
07-05-2012, 03:34 AM
|
#8 | |
|
AF Regular
Thread starter
Join Date: Nov 2009
Location: Italy
Posts: 143
Thanks: 4
Thanked 1 Time in 1 Post
|
Re: Harley Next Project 1/8
Thanks a lot Gio,your compliments give me a lot of enthusiasm and desire to continue with this project.
I've always preferred the "sustainable" modeling to the vanguard technologies, using things easily available at home, although at times that are more modern tecnique necessary like photo-etching or cnc lathe-mill.. I often prefer to do things by hand avoiding drills and burs to sculpt and shape the pieces, in order to have more manual control and a unique feeling once the piece is finished .. is a unique satisfaction to see a unique component that comes out of nowhere slowly piece by piece Grazie "friend" Gio.. mi dai un sacco di carica!... See you soon! |
|
|
|
|
|
07-05-2012, 12:30 PM
|
#9 | ||
|
Loser

Join Date: Aug 2007
Location: Moscow
Posts: 1,170
Thanks: 110
Thanked 248 Times in 195 Posts
|
Re: Harley Next Project 1/8
Quote:
__________________
Best regards, Mikhail   
|
||
|
|
|
|
07-06-2012, 02:46 AM
|
#10 | |
|
AF Regular
Thread starter
Join Date: Nov 2009
Location: Italy
Posts: 143
Thanks: 4
Thanked 1 Time in 1 Post
|
Re: Harley Next Project 1/8
Thanks a lot Stratos!
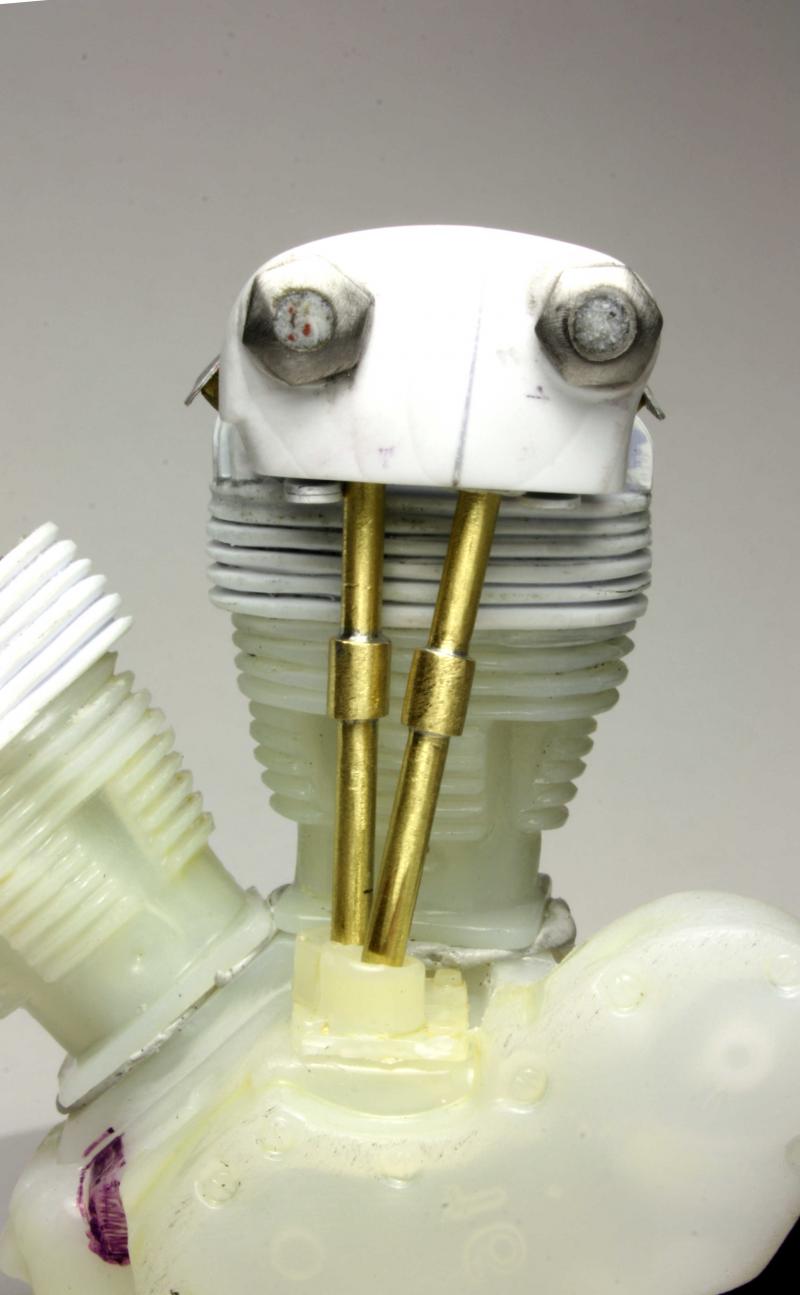
The matter is getting harder .. but I knew it .. and whoever takes the win .. but it is also required so much patience, I assure you .. For the work I did in those days at least it is so .. I dedicated my time to the heads (just the first to tell the truth ..). I started by removing the vertical fins that I showed a few days ago because a millimeter in thickness between one and the other was too much, not a lot, but excessive. I then folded up to a thickness of 0.7 and 0.5 by fins and the whole is more commensurate and in appropriate scale. And then the first thing you notice in a knuckle can't not be the rocker (the head itself), so.. project at hand, I designed the PC mirror masks to get the parts from solid. I glued 10 rectangles of plasticard from 1 mm to form a solid on whose faces I glued the templates .. ... The result is a pile of rubble and a brand new rocker .. Lacking only the bolts front and rear cam cover. The cam cover in particular were starting to play some brass tubes that hold the structure intenramente and, using the plate of a tube of glue (do not know .. maybe it's aluminum ..), I shaped it directly on the cylinder creating a couple of carter, then glued and finished .. I know a lot of work .. but it is a unique satisfaction I guarantee .. Now that I've done a little 'practice on the front cylinder I will dedicate myself more to the rear .. see you soon!      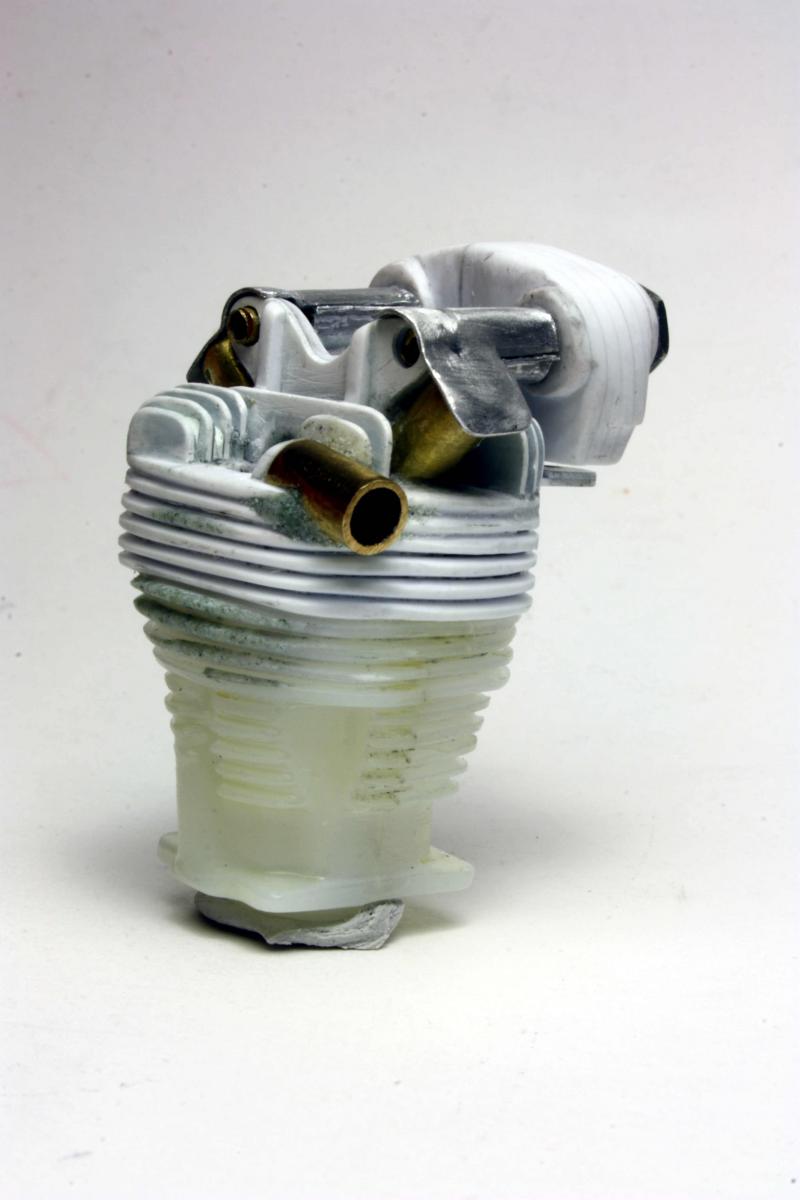    |
|
|
|
|
|
07-06-2012, 02:51 AM
|
#11 | |
|
AF Regular
Thread starter
Join Date: Nov 2009
Location: Italy
Posts: 143
Thanks: 4
Thanked 1 Time in 1 Post
|
Re: Harley Next Project 1/8
And then push-rod.. they don't required me particular attention, , I just welded together some pieces of brass pipe from 2 and 3mm and just a few shot of file..
     |
|
|
|
|
|
07-15-2012, 03:18 PM
|
#12 | |
|
AF Regular
Thread starter
Join Date: Nov 2009
Location: Italy
Posts: 143
Thanks: 4
Thanked 1 Time in 1 Post
|
Re: Harley Next Project 1/8
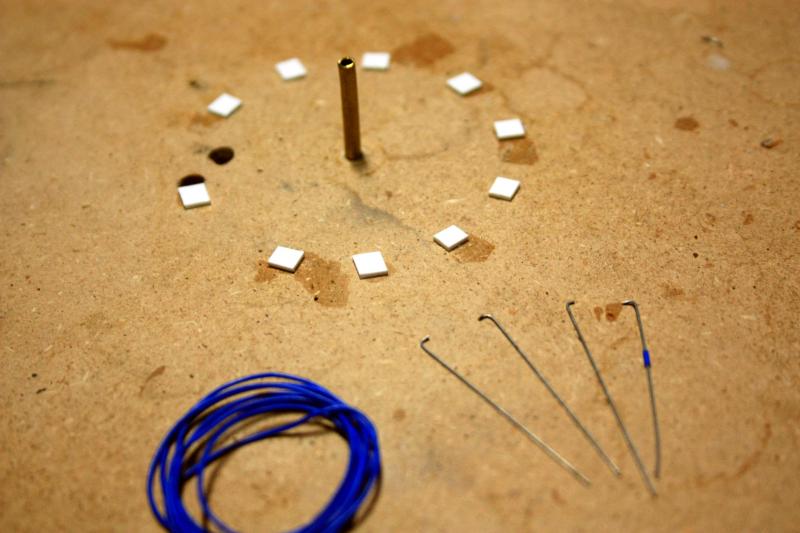
scratchbuilt spark plugs..
    |
|
|
|
|
|
07-23-2012, 04:40 AM
|
#13 | |
|
AF Regular
Thread starter
Join Date: Nov 2009
Location: Italy
Posts: 143
Thanks: 4
Thanked 1 Time in 1 Post
|
Re: Harley Next Project 1/8
In these days, I started working on the front fork.
Of all the technical solutions that I thought I chose the springer fork with leaf springs, which ultimately has a very vintage look. As usual, I started to work from brass tubes 2 and 3 mm, which I folded in pairs to maintain symmetry between the parties. Once calculated the dimensions and angles I soldered everything and I put the fork on the rest of the frame. Finally I added the leaf spring with some real self-made from 0.5mm plasticard strips of different lengths between 15 and 30mm.       |
|
|
|
|
|
08-10-2012, 01:37 AM
|
#14 | |
|
AF Regular
Thread starter
Join Date: Nov 2009
Location: Italy
Posts: 143
Thanks: 4
Thanked 1 Time in 1 Post
|
Re: Harley Next Project 1/8
finished front forks..
    |
|
|
|
|
|
08-19-2012, 04:58 AM
|
#15 | |
|
AF Regular
Thread starter
Join Date: Nov 2009
Location: Italy
Posts: 143
Thanks: 4
Thanked 1 Time in 1 Post
|
Re: Harley Next Project 1/8
Laced wheels..
     |
|
|
|
|
| ||||||||||||||||||||||||||||||||||||||
|
POST REPLY TO THIS THREAD |
 |
|
|


