|
|
|

|
|
| Search | Car Forums | Gallery | Articles | Helper | AF 350Z | IgorSushko.com | Corporate |
|
| Latest | 0 Rplys |
|
|||||||
| WIP - Motorsports Post topics for any "Work In Process" motorsports vehicles in this sub-forum. |
 |
 Show Printable Version | Show Printable Version |  Email this Page | Email this Page |  Subscribe to this Thread
|
|
|
Thread Tools |
 06-09-2022, 09:33 PM
|
#16 | |
|
AF Enthusiast
Join Date: Mar 2009
Location: Rio de Janeiro, Brazil
Posts: 1,209
Thanks: 6
Thanked 144 Times in 136 Posts
|
Re: Audi R8 LMS GT3 BWT Nunu 1/24
Great job!
__________________
https://www.instagram.com/denilsonvm_modelcars/ |
|

|

|
|
06-10-2022, 01:10 AM
|
#17 | ||
|
AF Enthusiast
Thread starter
Join Date: Mar 2009
Location: Madrid
Posts: 649
Thanks: 109
Thanked 68 Times in 67 Posts
|
Re: Audi R8 LMS GT3 BWT Nunu 1/24
Quote:
|
||
|
|
|
|
06-28-2022, 06:47 AM
|
#18 | |
|
AF Enthusiast
Thread starter
Join Date: Mar 2009
Location: Madrid
Posts: 649
Thanks: 109
Thanked 68 Times in 67 Posts
|
Re: Audi R8 LMS GT3 BWT Nunu 1/24
Vamos avanzando en el Audi con grandes cambios. Lo primero que os muestro es referente a los discos de freno. Como hay que pintar la parte interior, creo unas plantillas del diámetro exacto con el cortador de círculos DSPIAE, y las pongo en los discos. La pintura utilizada es Titanium Silver de Tamiya, siendo este el resultado:
We are making progress on the Audi with big changes. The first thing I show you is the brake discs. As the inside has to be painted, I create some templates of the exact diameter with the DSPIAE circle cutter, and put them on the discs. The paint used is Titanium Silver from Tamiya, and this is the result: 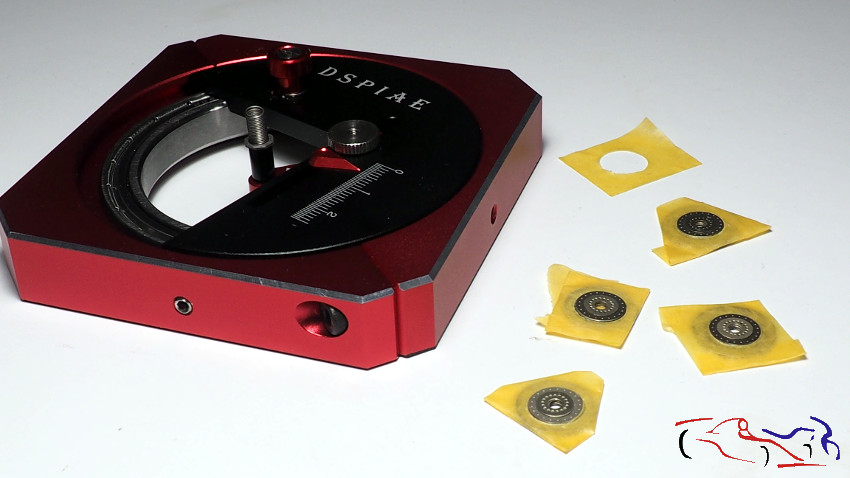 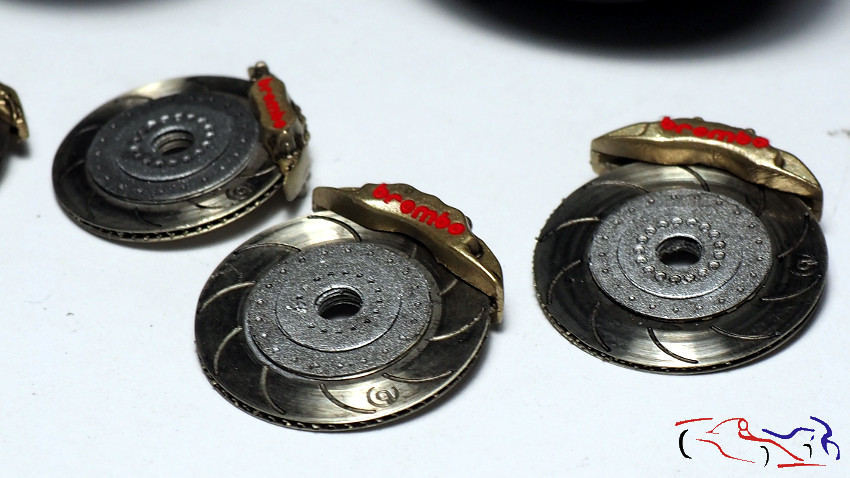 Aquí los muestro con un lavado de panel liner de Tamiya, junto a las ruedas: Here I show them with a Tamiya liner panel wash, next to the wheels: 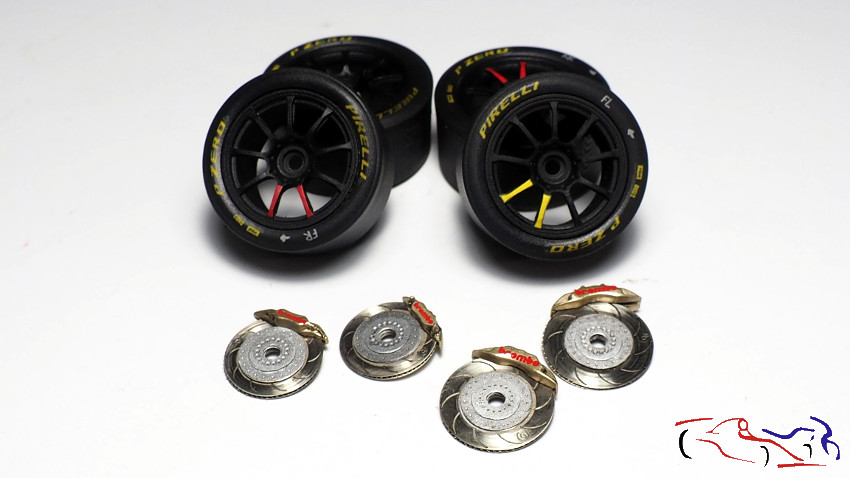 Decir que las ruedas ya están terminadas, inclyendo las válvulas: The wheels are already finished, including the valves: 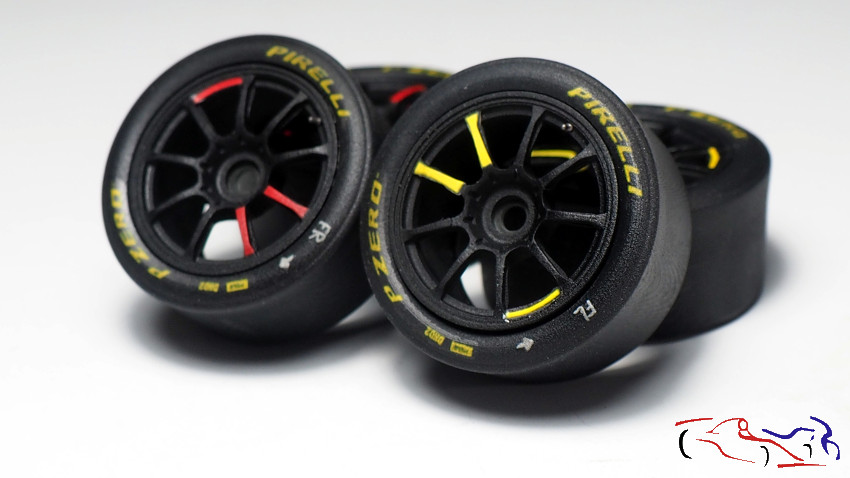 Pasamos al alerón trasero. Aquí, lo que hice fue adaptar las fijaciones de plástico a los fotograbados, pero la verdad es que en la misma hoja de los fotograbados, había una pieza muy pequeñita que sustituía a la que yo había recortado de la pieza de plástico. Por tanto, despegué la parte de plástico para colocar la pequeña pieza del fotograbado. En la foto d ela izquierda, os muestro la fijación de la derecha, tal como la había dejado; la de la izquierda, con el plástico eliminado, y las dos pequeñas piezas del fotograbado. EN la foto de la derecha, tenemos todo listo para pintar: las fijaciones ya montadas de fotograbado, y el alerón con los huecos originales tapados con masilla, en los que solo hay una rajita para insertar el fotograbado de las fijaciones (que no se ve muy bien): Lets move on to the rear wing. Here, what I did was to adapt the plastic fixings to the photoetched parts, but the truth is that on the same sheet, in the photoetched parts, there was a very small piece that replaced the one I had cut out of the plastic part. Therefore, I peeled off the plastic part to place the small piece of the photoengraving. In the photo on the left, I show you the fixture on the right, as I had left it; the one on the left, with the plastic removed, and the two small pieces of the photoetched parts. In the photo on the right, we have everything ready to paint: the photoetched parts already mounted, and the aileron with the original holes covered with putty, in which there is only a crack to insert the photoetched parts of the mountings (which is not very well seen): 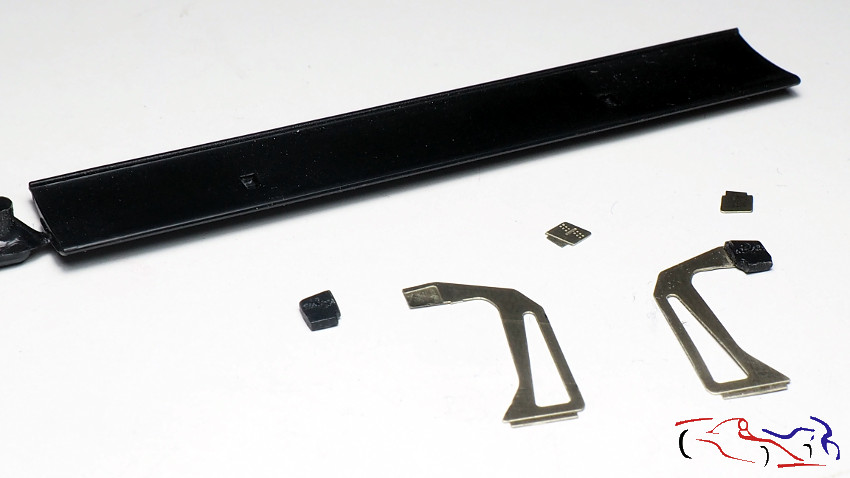 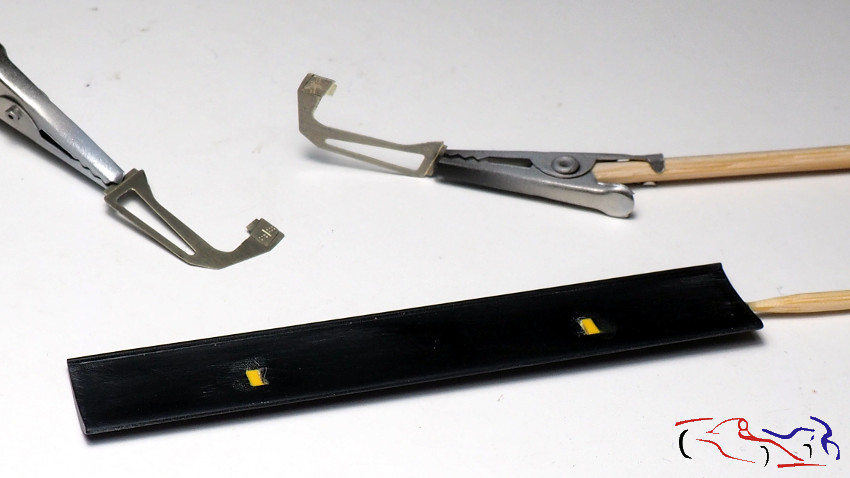 En las siguientes fotos, tenemos en la primera las derivas laterales y el propio alerón, ya pintados listos para las calcas, y en la segunda, ya con las calcas puestas, listas para lacar: In the following pictures, we have in the first one the side drifts and the aileron itself, already painted ready for the decals, and in the second one, already with the decals on, ready to be lacquered:  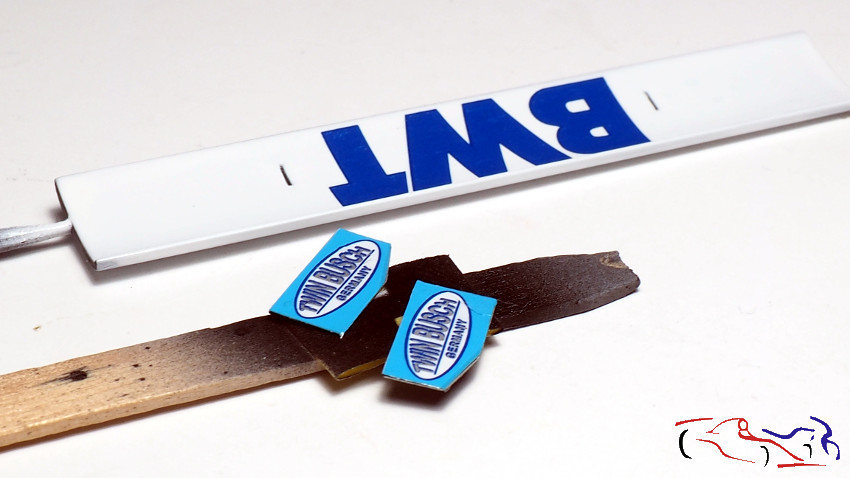 Pasamos al bloque motor, el cual ya está con las calcas de fibra y con una capa de barniz satinado, a falta de detallar y cablear: We move on to the engine block, which is already with the fibreglass decals and a coat of satin varnish, with detailing and wiring still to be done: 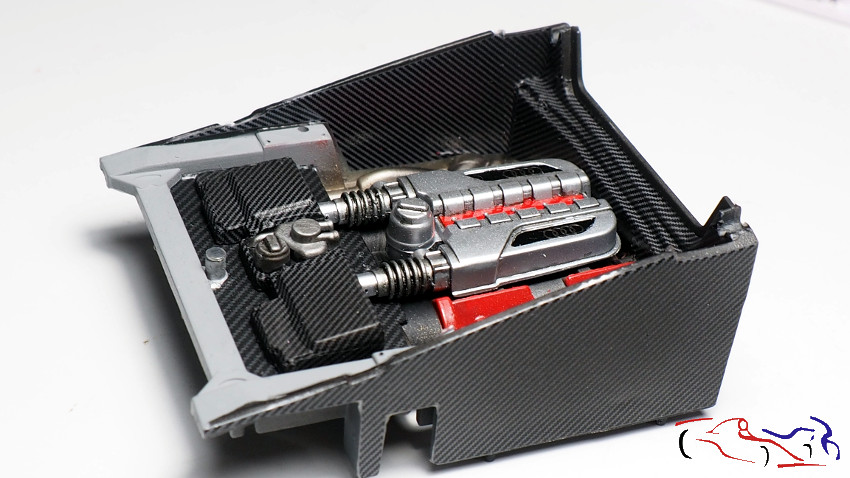 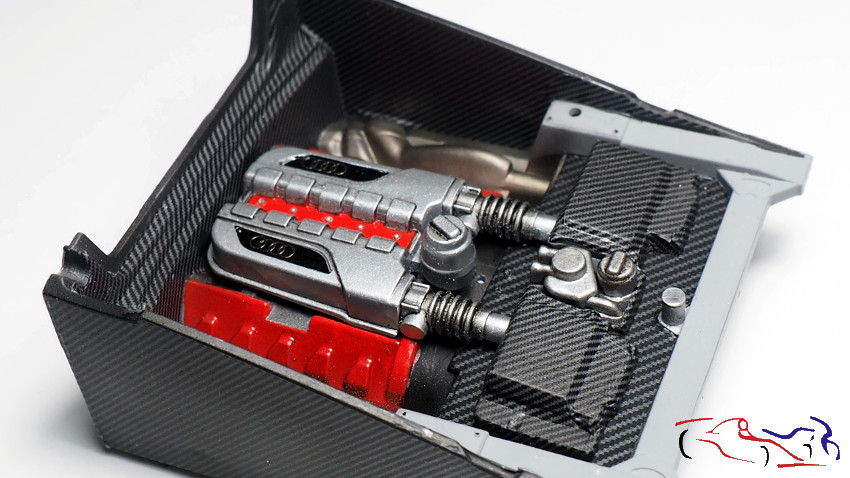 Para los cristales, preparamos las máscaras que tomamos del TK de Scalelab24, añadiendo otras por denbajo para que no encucie el cristal al pintar. Decir que las ventanas las pintaré por encima en negro mate, ya que me gustaba más de esta manera, que quedara mate la parte externa que no brillante si la pinto por debajo. Vemos los cristales enmascarados sin pintar en la primera foto, estando ya pintados en la segunda, junto al asiento: For the windows, we prepared the masks that we took from Scalelab24s TK, adding others underneath so that they dont bind the glass when painting. I will paint the windows in matt black on top, as I liked it better this way, so that the external part would be matt rather than shiny if I paint it underneath. We can see the unpainted masked windows in the first picture, being already painted in the second one, next to the seat: 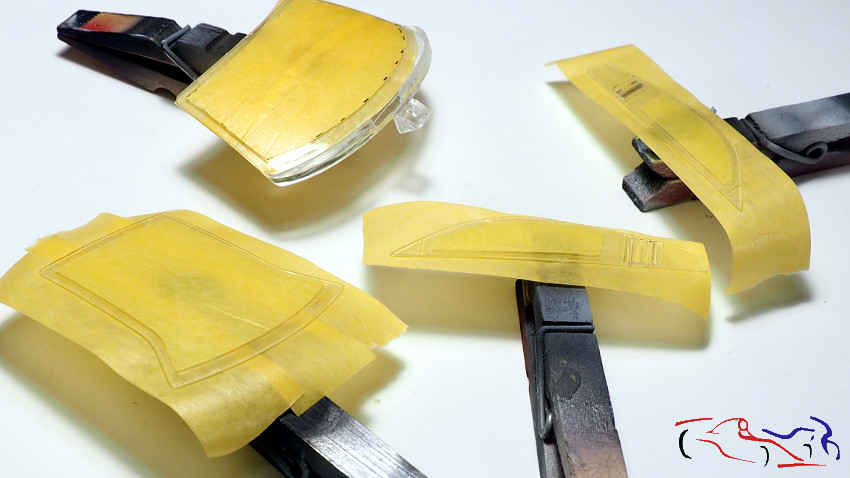 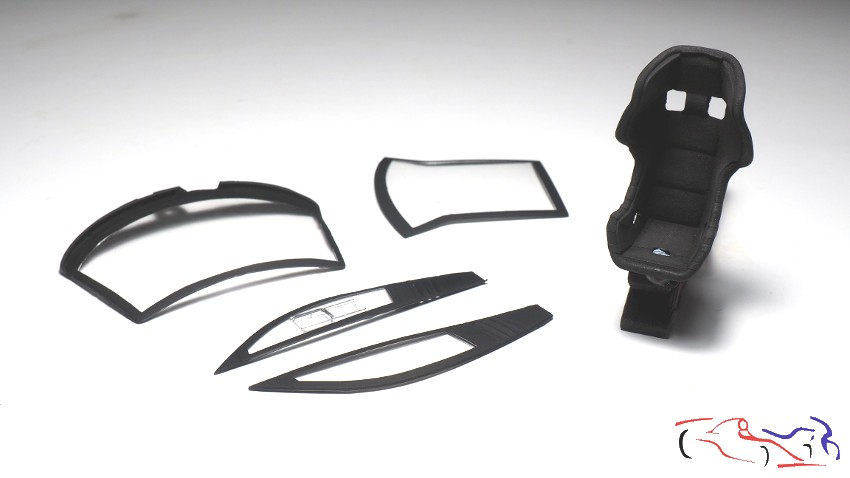 Y pasamos al proceso de lacado. Aquí os muestro todas las piezas que iba a lacar en sus soportes: And now we move on to the lacquering process. Here I show you all the pieces that I was going to lacquer on their supports: 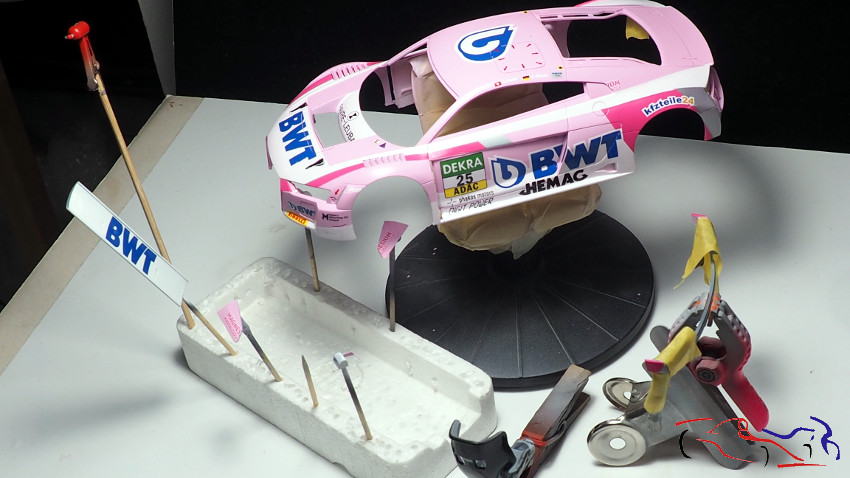 Y ahora, la carrocería lacada. Usé la laca Number5 que tenía abierta, y si bien estaba un poco espesa, le di dos manos muy ligeras y una tercera húmeda. Alguna mota tiene y alguna piel de naranja, pero la idea es pulir la carrocería, con lo que no me importaba que la capa de laca fuera gorda: And now, the lacquered bodywork. I used the Number5 lacquer I had open, and although it was a bit thick, I applied two very light coats and a third wet one. It has some speckles and some orange peel, but the idea is to polish the bodywork, so I didnt mind a thick coat of lacquer: 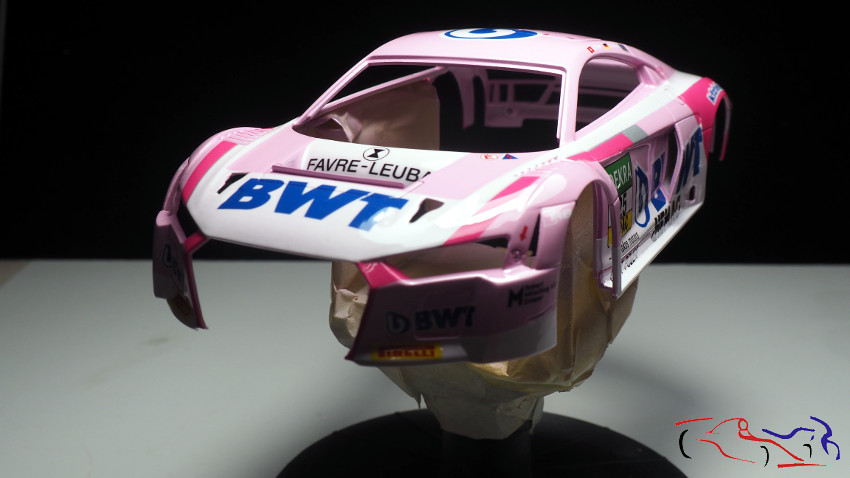 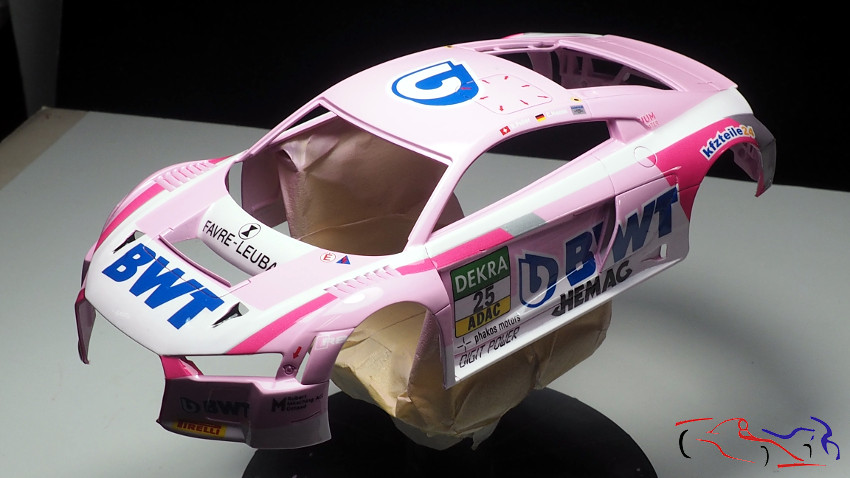 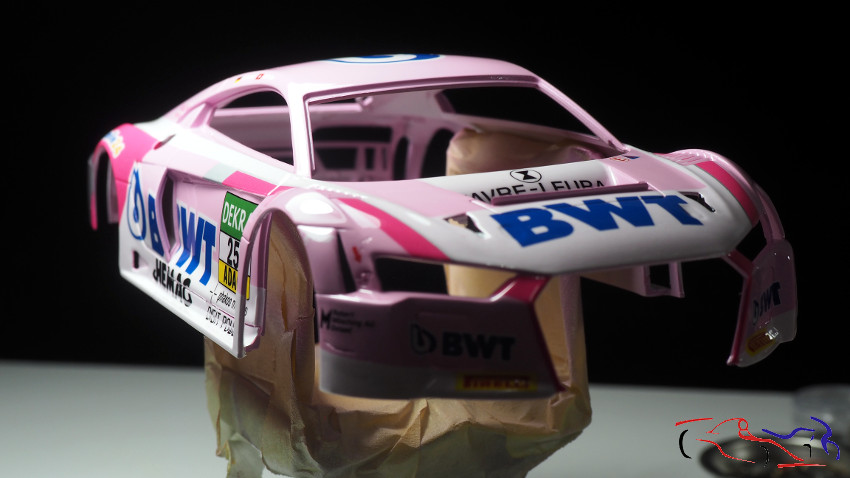 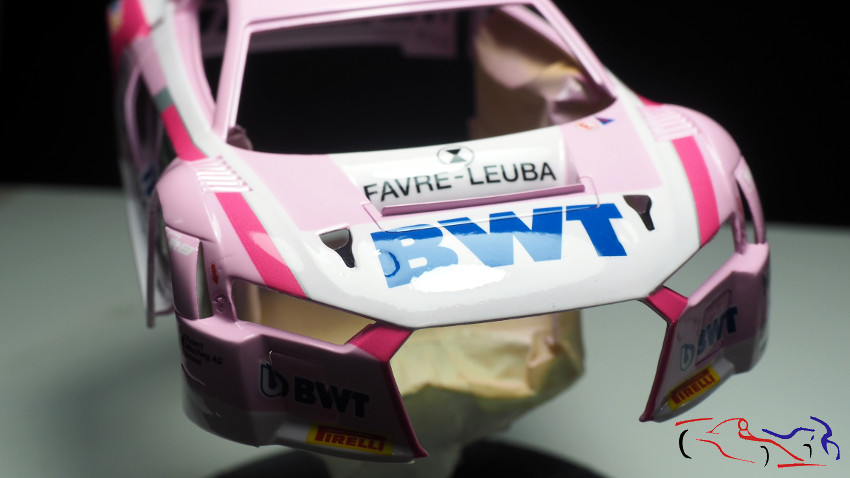 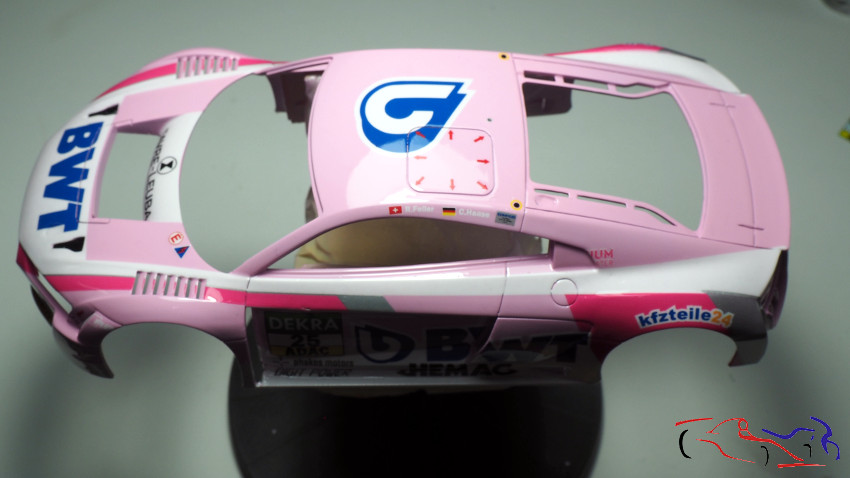 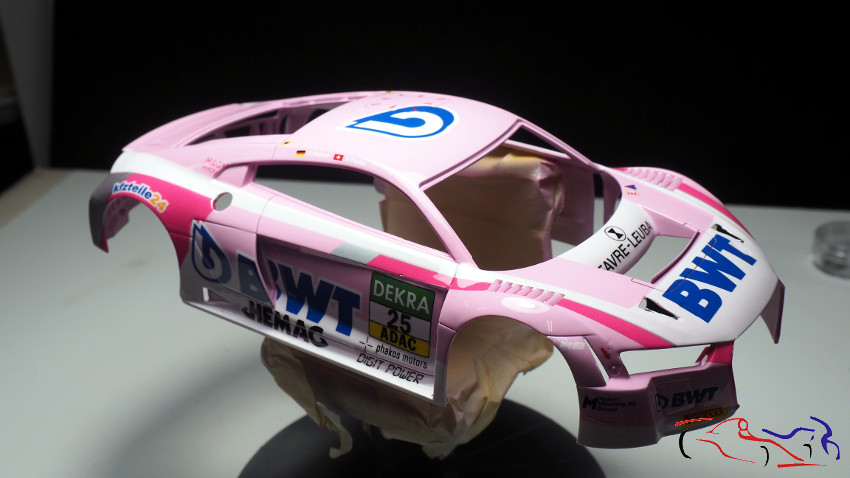 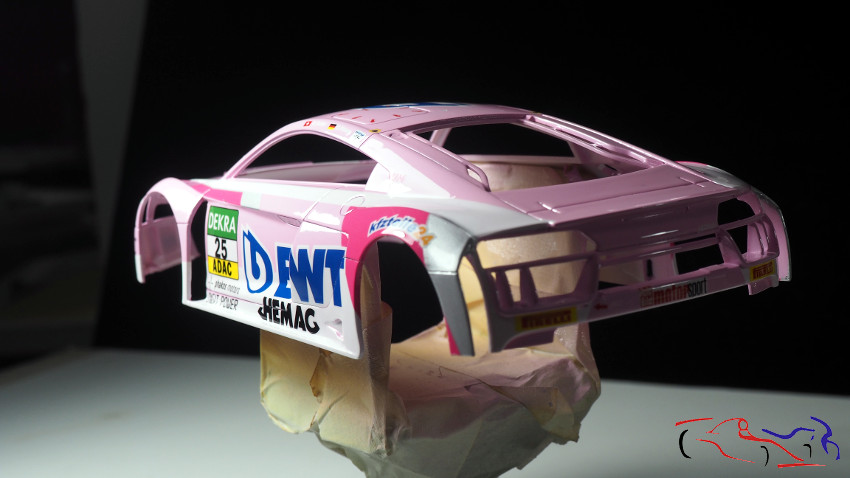 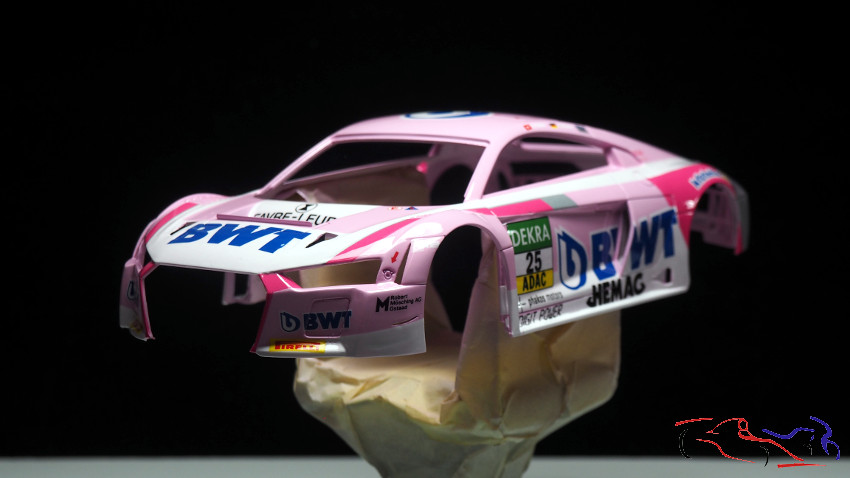 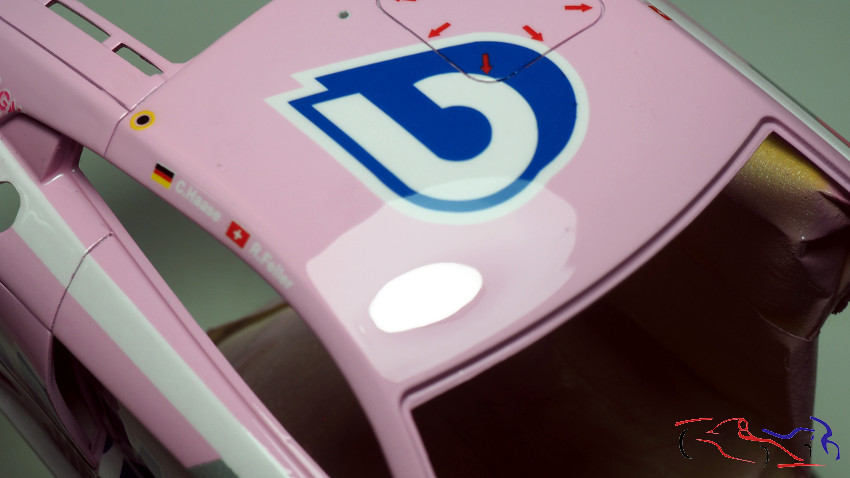 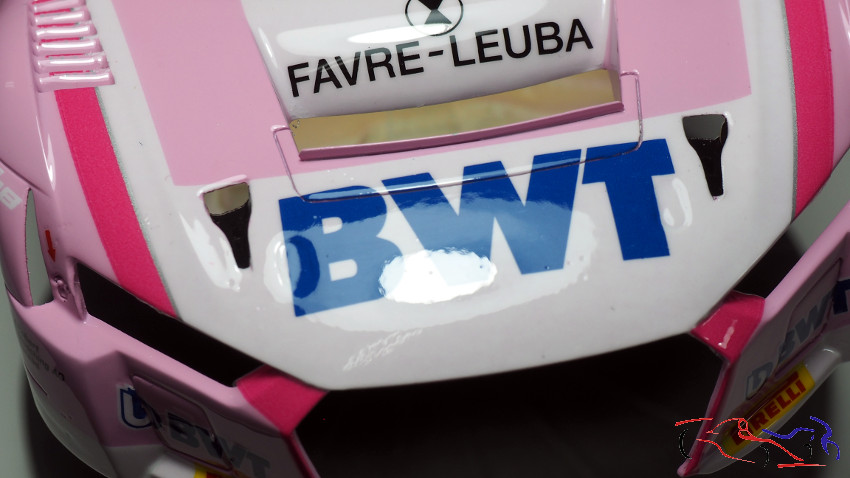 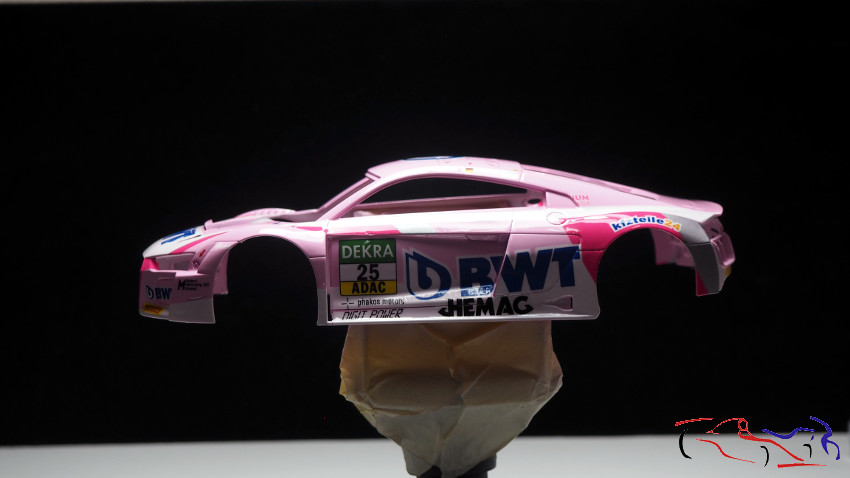 Para terminar el proceso de lacado, os muestro otras piezas. Destacar en la segunda foto, el asiento, en el que laqué la fibra trasera para enmascararla y poder acometer el siguiente proceso: To finish the lacquering process, I show you other parts. The second picture shows the seat, where I lacquered the rear fibre to mask it and to be able to start the next process: 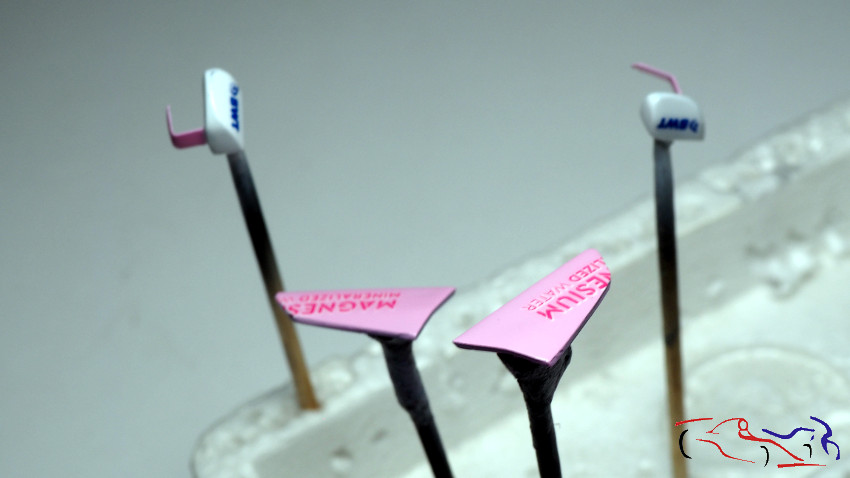 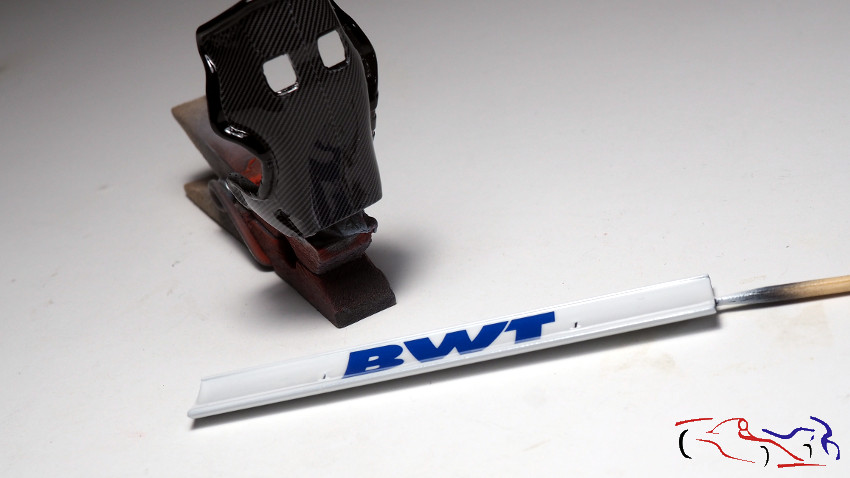 El asiento. Había oido que mezclando la pintura con polvos de talco, se podía crear esa textura típica de los asientos de competición. Y así lo hice: una vez enmascarada la fibra d ela parte trasera, y como tenía la pintura Tamiya LP3 negro mate que había diluido para los cristales, le añadí polvos de talco, una buena cantidad de ellos. Lo mezclé y lo puse en el aero con una aguja 0,4, y empecé a pintar. Dí una capa fina y esperé un poco a que se secara para ver el efecto. Me gustó y dí otra capa más espesa. Cuando se secó, le pasé un bastoncillo de algodón sobre las superficies con más desgaste, y se aclaró un poco el negro (creo que debido a los polvos de talco blancos). Y este es el resultado. Pongo una foto de lejos que es como se ve normalmente, y otra de cerca para que veáis el detalle: The seat. I had heard that by mixing the paint with talcum powder, you could create that texture typical of competition seats. And so I did it: once the fiber of the rear part was masked, and as I had the Tamiya LP3 matt black paint that I had diluted for the windows, I added talcum powder, a good amount of it. I mixed it and put it in the airbrush with a 0.4 needle, and started painting. I did a thin coat and waited a bit for it to dry to see the effect. I liked it and did another thicker coat. When it was dry, I ran a cotton swab over the surfaces with more wear, and the black lightened a bit (I think because of the white talcum powder). And this is the result. I put a picture from a distance, which is how it normally looks, and a close-up picture so you can see the detail: 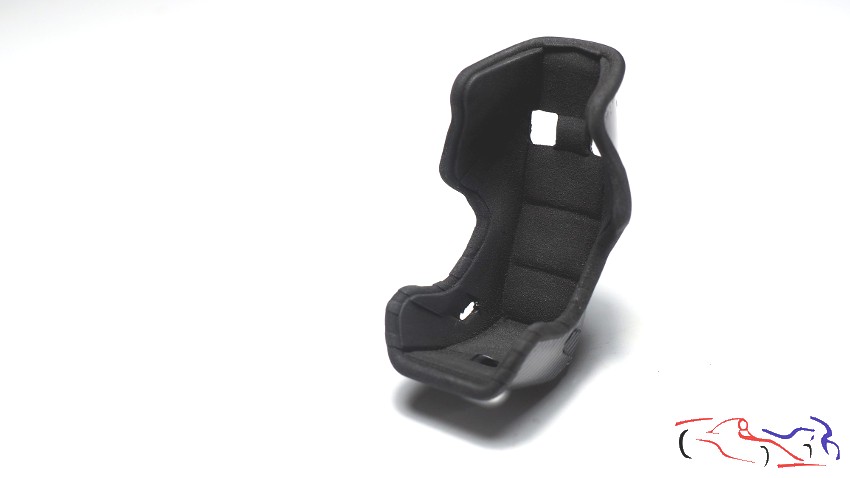 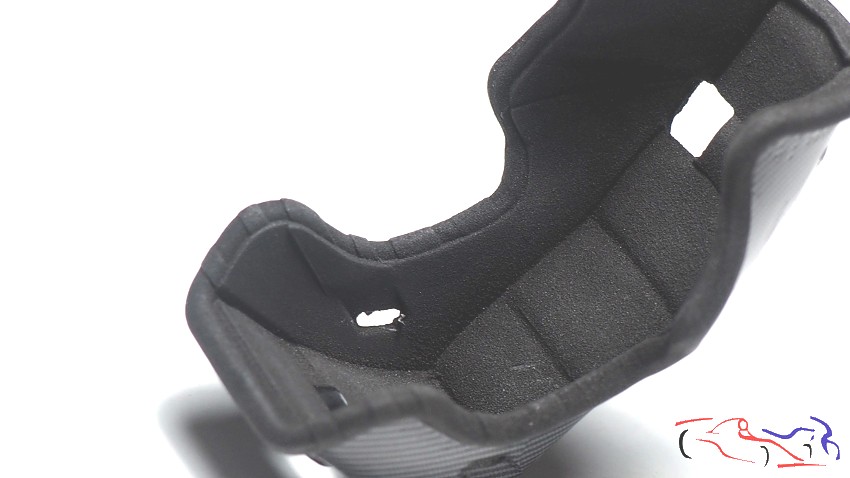 Espero que os haya gustado, y gracias por ver y comentar!! I hope you liked it, and thanks for watching and commenting! |
|
|
|
|
|
06-28-2022, 03:35 PM
|
#19 | |
|
Loser

Join Date: Aug 2007
Location: Moscow
Posts: 1,170
Thanks: 110
Thanked 248 Times in 195 Posts
|
Re: Audi R8 LMS GT3 BWT Nunu 1/24
The texture looks realistic.
__________________
Best regards, Mikhail   
|
|
|
|
|
|
06-28-2022, 04:49 PM
|
#20 | ||
|
AF Enthusiast
Thread starter
Join Date: Mar 2009
Location: Madrid
Posts: 649
Thanks: 109
Thanked 68 Times in 67 Posts
|
Re: Audi R8 LMS GT3 BWT Nunu 1/24
Quote:
|
||
|
|
|
|
06-29-2022, 01:09 PM
|
#21 | |
|
AF Regular
Join Date: Aug 2011
Location: Torino
Posts: 389
Thanks: 175
Thanked 62 Times in 58 Posts
|
Re: Audi R8 LMS GT3 BWT Nunu 1/24
Hello Jesus, that seat is just looking fantastic! Thanks for sharing the technique, I will certainly try it! Looks much better than the zero paint texture!
|
|
|
|
|
|
06-29-2022, 01:35 PM
|
#22 | ||
|
AF Enthusiast
Thread starter
Join Date: Mar 2009
Location: Madrid
Posts: 649
Thanks: 109
Thanked 68 Times in 67 Posts
|
Re: Audi R8 LMS GT3 BWT Nunu 1/24
Quote:
|
||
|
|
|
|
07-11-2022, 02:08 AM
|
#23 | |
|
AF Enthusiast
Thread starter
Join Date: Mar 2009
Location: Madrid
Posts: 649
Thanks: 109
Thanked 68 Times in 67 Posts
|
Re: Audi R8 LMS GT3 BWT Nunu 1/24
Before I post the engine/cockpit process, I can show how it is finished in this video:
https://youtu.be/Aw0JMdVVuvQ |
|
|
|
|
|
07-20-2022, 09:44 AM
|
#24 | |
|
AF Enthusiast
Thread starter
Join Date: Mar 2009
Location: Madrid
Posts: 649
Thanks: 109
Thanked 68 Times in 67 Posts
|
Re: Audi R8 LMS GT3 BWT Nunu 1/24
Continuamos con el Audi, y ahora vamos a detallar el interior. Empezamos por unos cables que tienen unos manguitos de colores y van colocados en el tunel central. Los hago con cable negro de 0,3 mm siendo los manguitos de colores, camisas de cable estandar.
We continue with the Audi, and now we are going to detail the interior. We start with some wires that have coloured sleeves and are placed in the central tunnel. I make them with 0,3 mm black cable, being the coloured sleeves, standard cable sleeves. 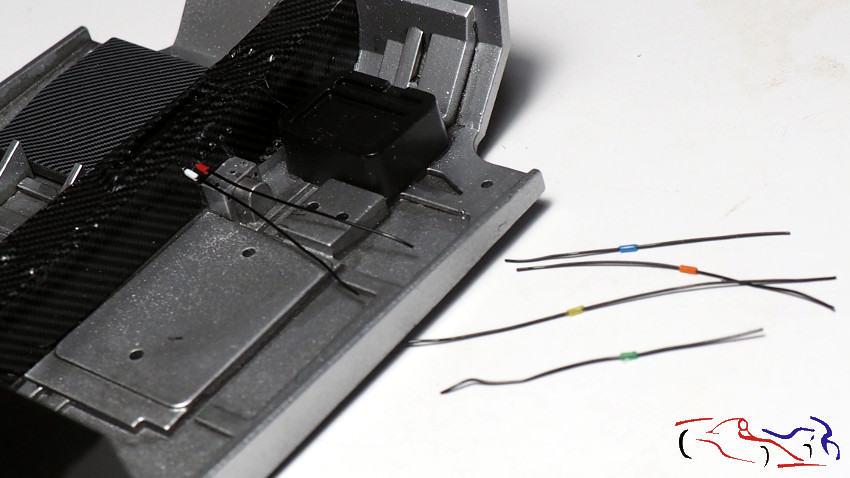 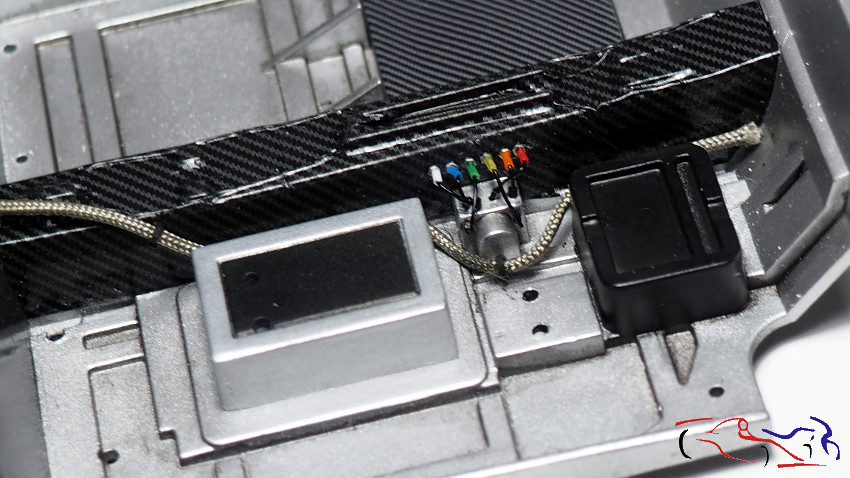 A su vez, también voy pintando piezas, colocando tubos y conexiones. Las dos piezas doradas son las fijaciones de las mallas que tiene el piloto a ambos lados, y la caja roja es el control de extintores: At the same time, I am also painting parts, placing tubes and connections. The two golden pieces are the mesh fixings that the pilot has on both sides, and the red box is the fire extinguisher control: 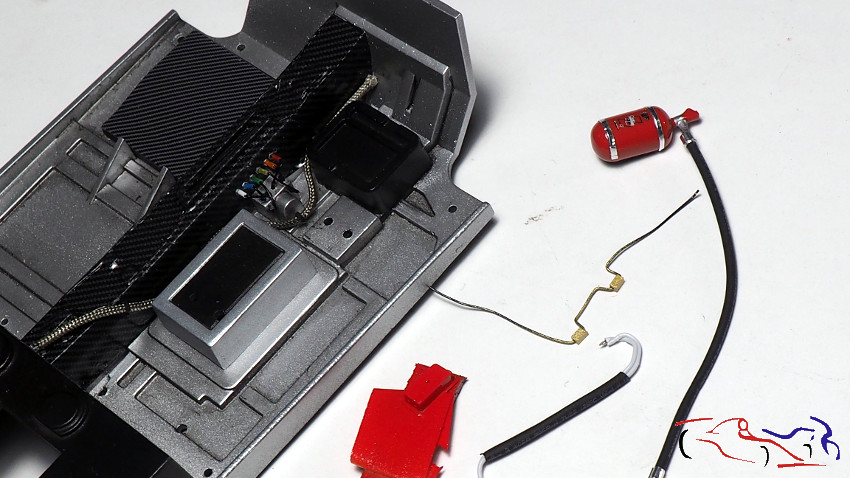 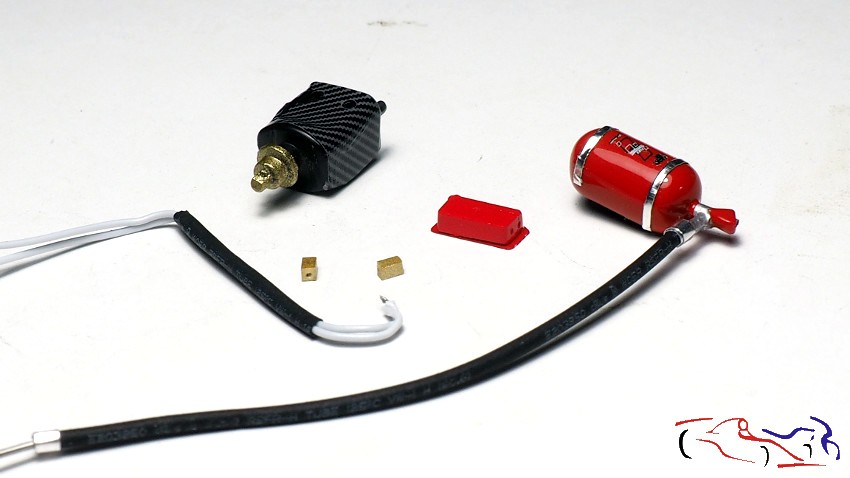 Y aquí vemos la parte de la electronica completada: And here we see the completed electronics part: 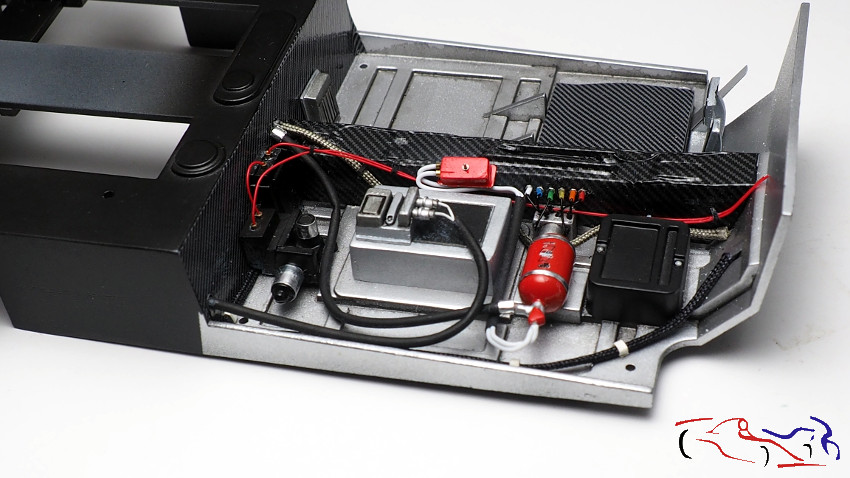 Pasamos al arco de seguridad. Le he puesto las fijaciones a todos los protectores que lleva, habiendo usado la cinta de enmascara negra de 0,2 mm de Hasegawa: We move on to the roll bar. I have attached the fixings to all the guards on it, having used Hasegawas 0.2 mm black masking tape: 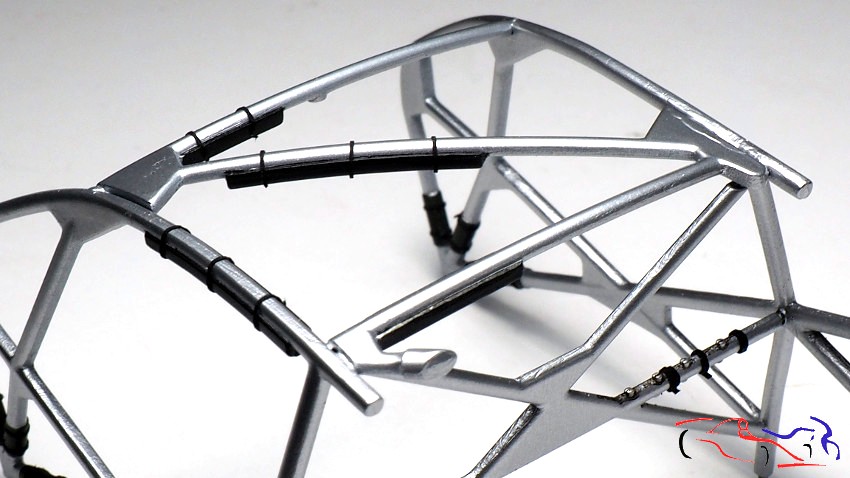 Ahora, os muestro una foto del salpicadero, una vez terminado. Destacar la fijación de la malla protectora izquierda, con una arandela por la que se meterá el extremo de la malla. Now, I show you a picture of the finished dashboard. I have to point out the fixing of the left protective mesh, with a washer through which the end of the mesh will be inserted. 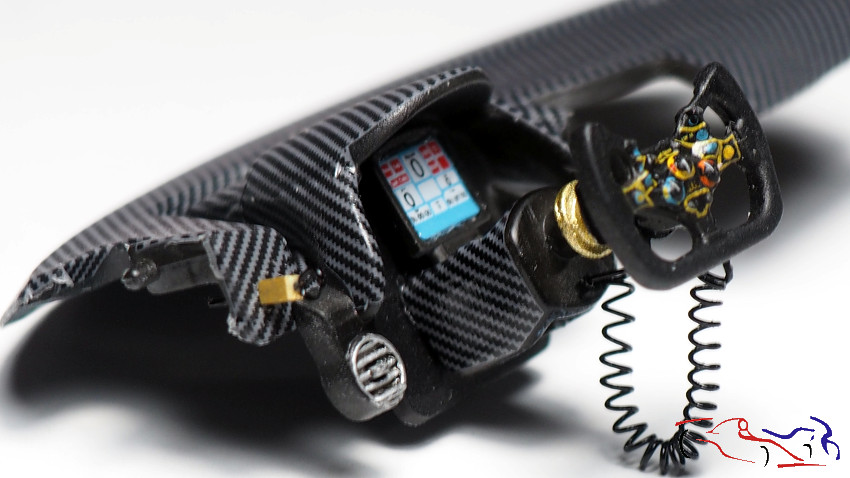 Y el asiento con los cinturones ya colocados. And the seat with the seat belts already in place. 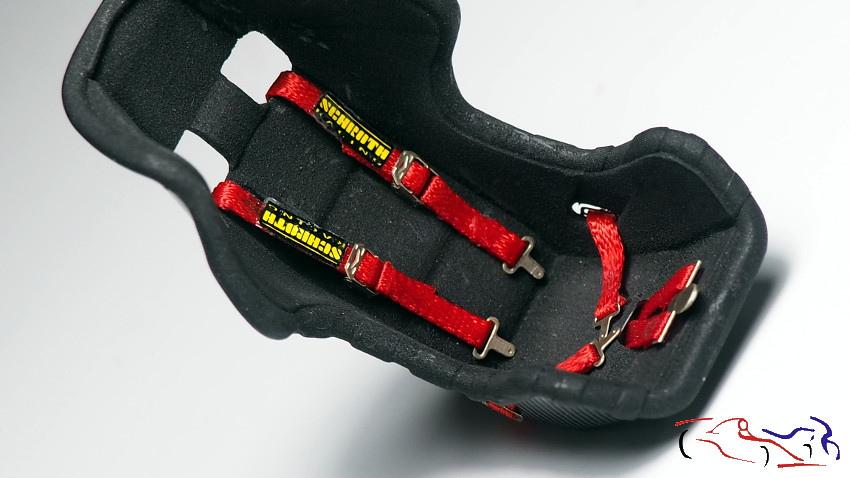 Aquí vemos como va colocada la malla derecha y su fijación en el salpicadero. Notad que he doblado la malla para que resulte como en la realidad: Here we can see how the right mesh is positioned and how it is fixed to the dashboard. Note that I have bent the mesh to make it look like the real thing: 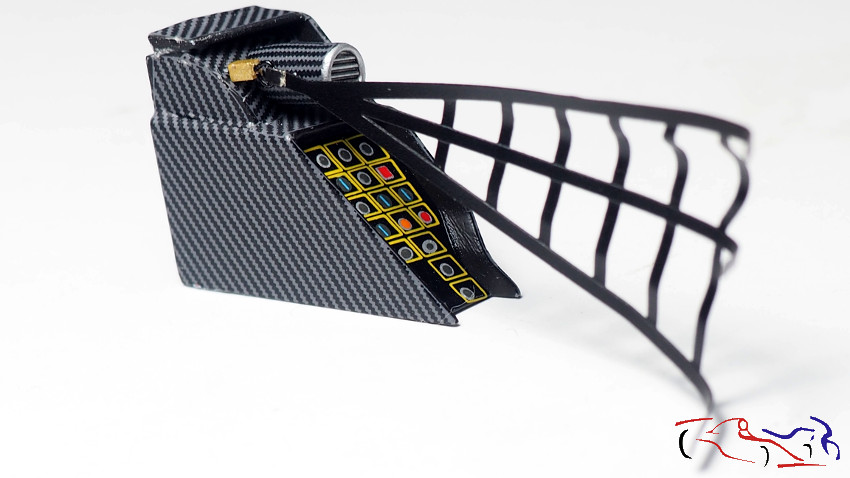 Y una vez montado todo, este es el resultado: And once everything was assembled, this is the result: 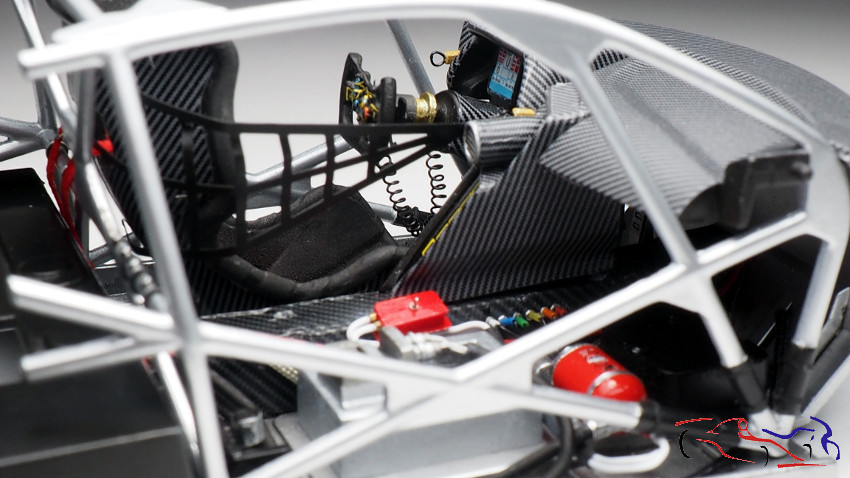 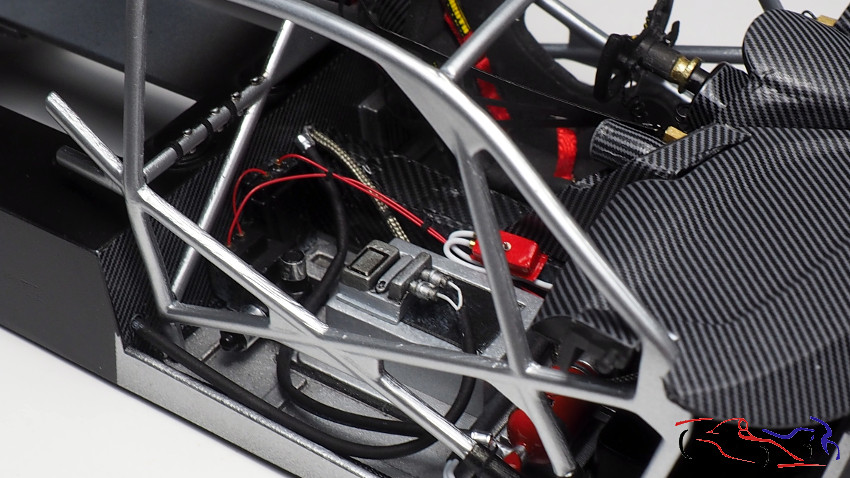 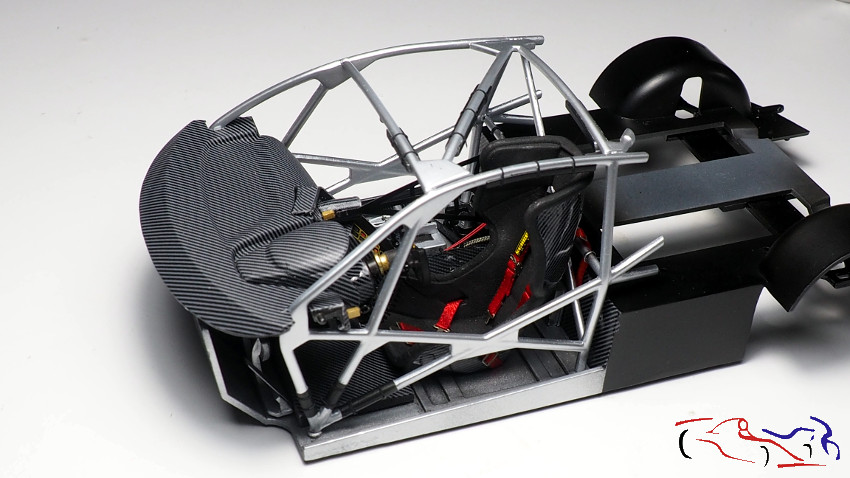 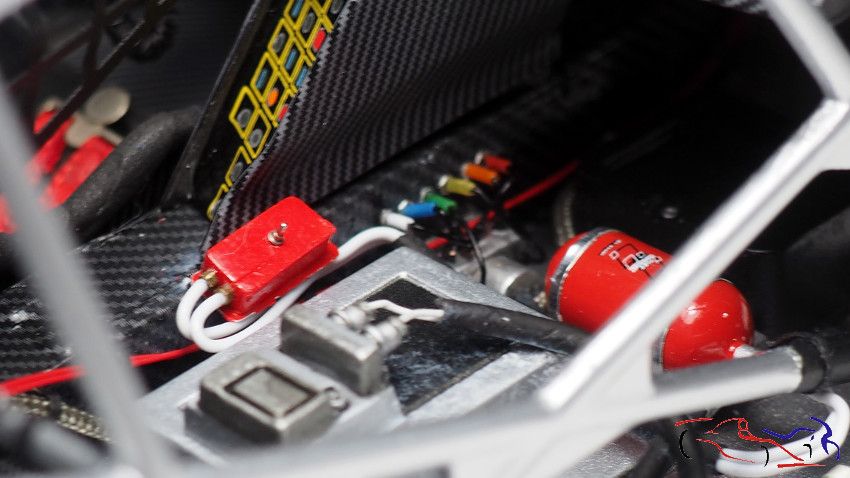 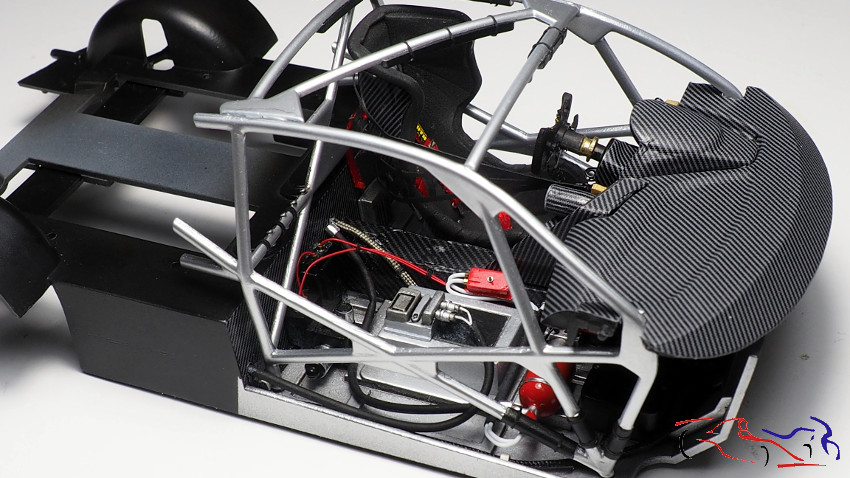 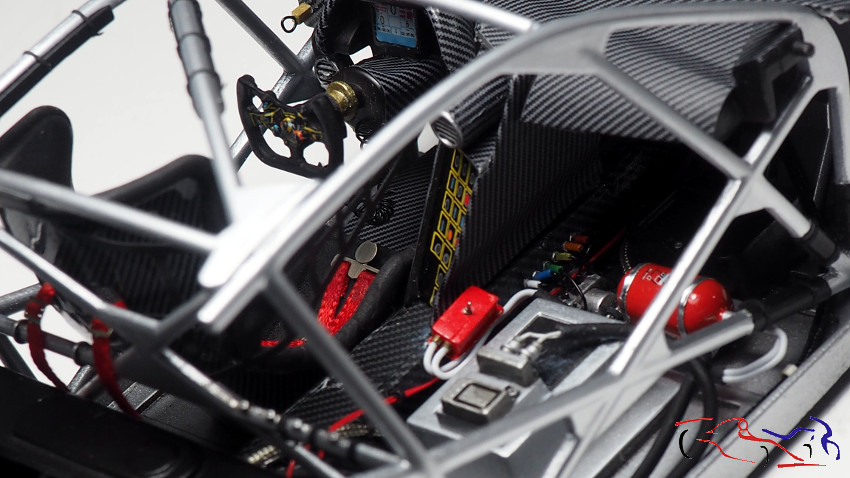  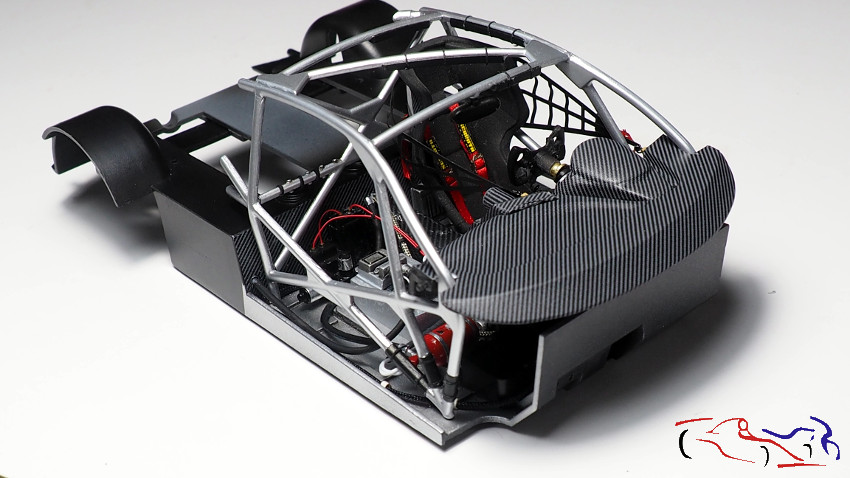 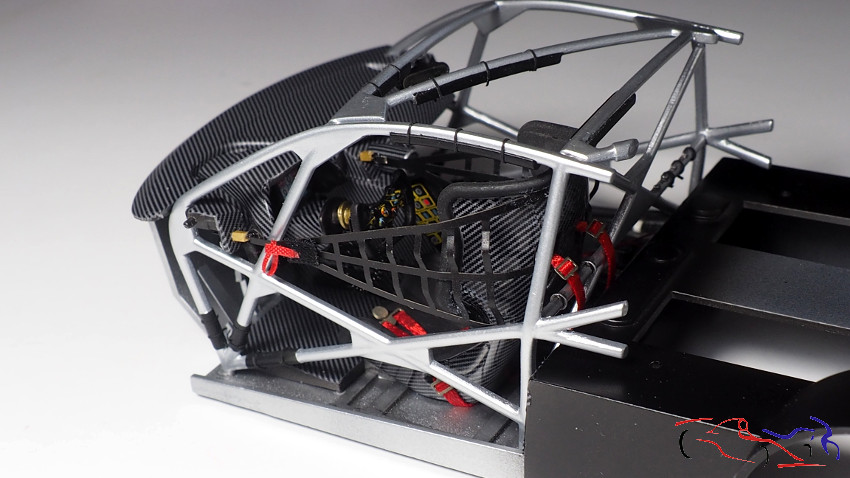 Vamos con el motor. Le añadimos los cables de las bujias, que introduciomos dentro de un tubo termorretractil: Lets go to the engine. We add the spark plug wires, which we put into a heat-shrinkable tube: 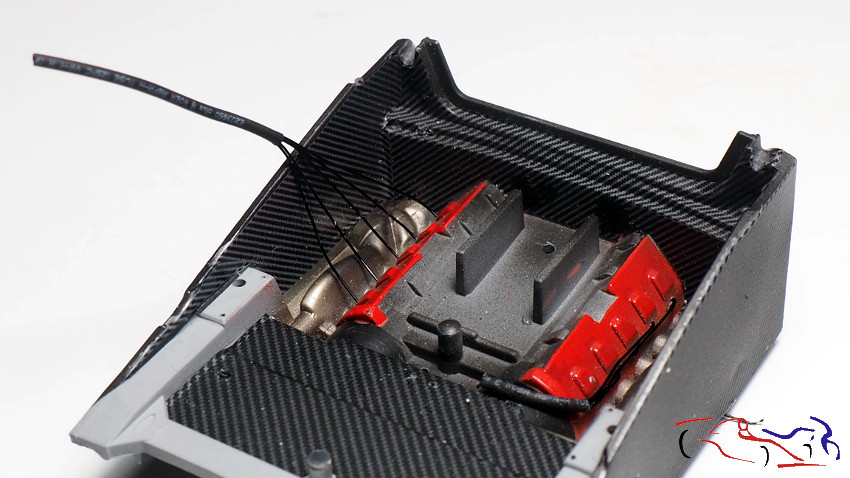 También cableamos la parte del arco de seguridad que lleva el motor, e incluimos el deposito blanco con el tapón azul, típico en los motores del grupo WV. We also wired the safety arch part of the engine, and included the white tank with the blue cap, typical of the WV group engines. 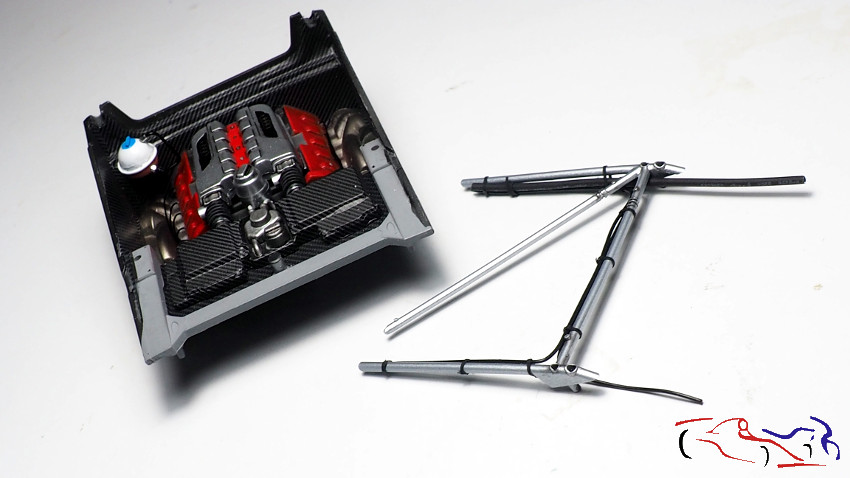 Y un par de fotos del motor terminado: And a couple of pictures of the finished engine: 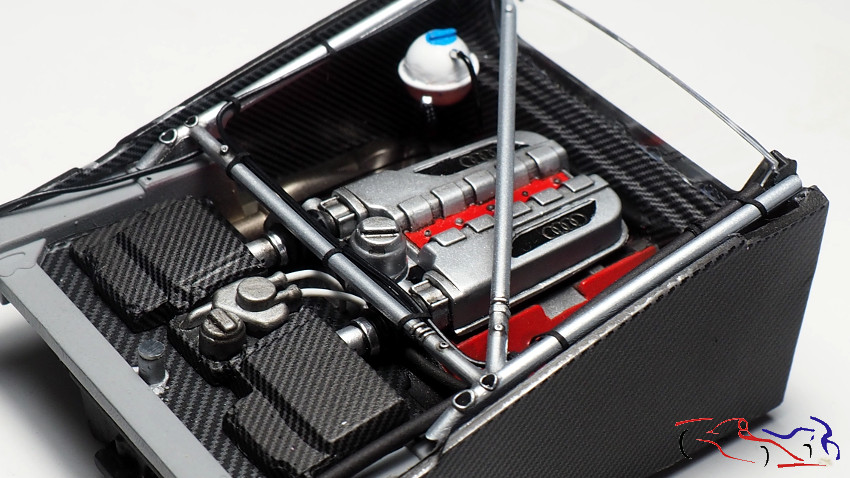 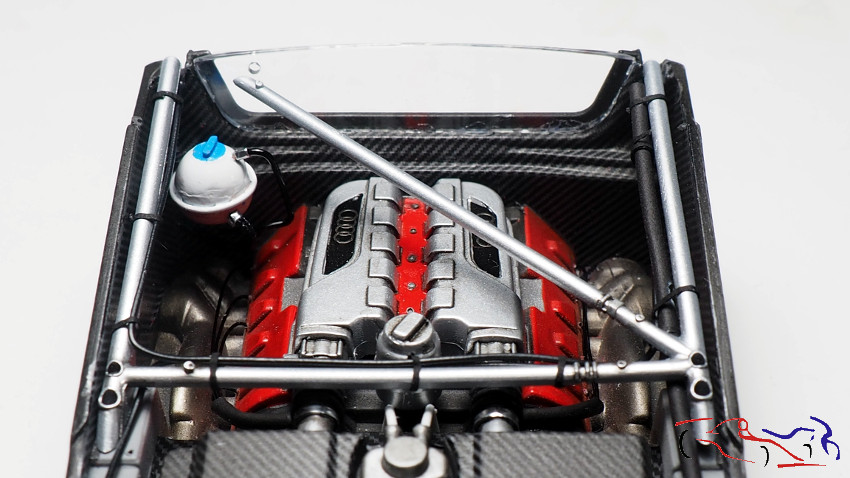 Y si unimos el motor al chasis superior con el cokpit, éste es el resultado: And if we attach the engine to the upper chassis with the cockpit, this is the result: 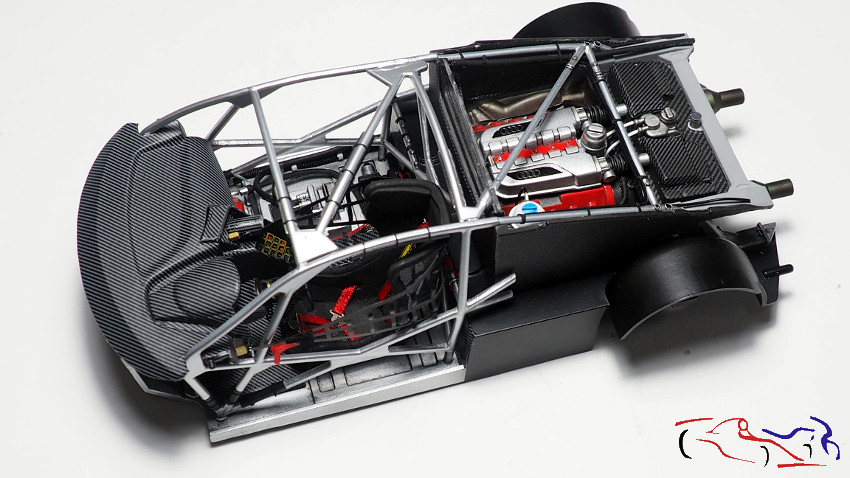  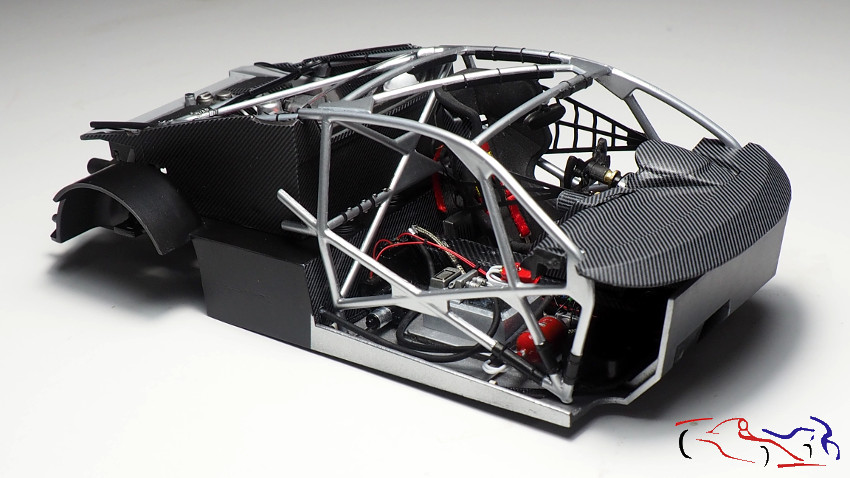 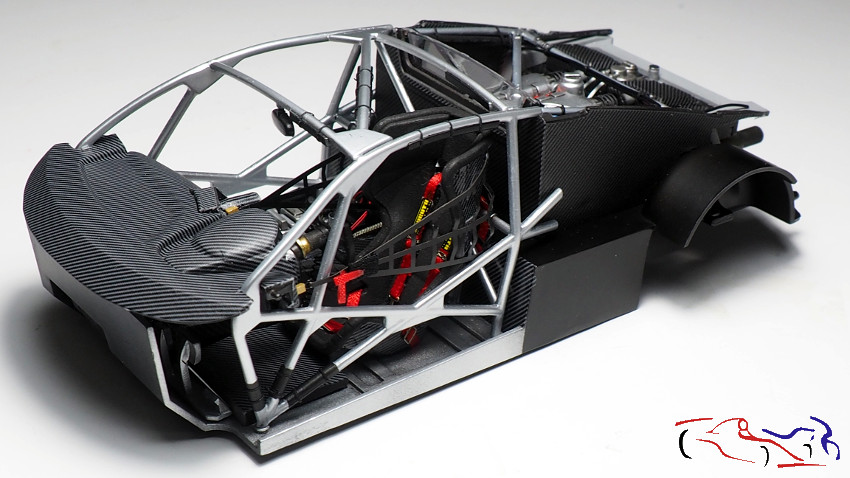 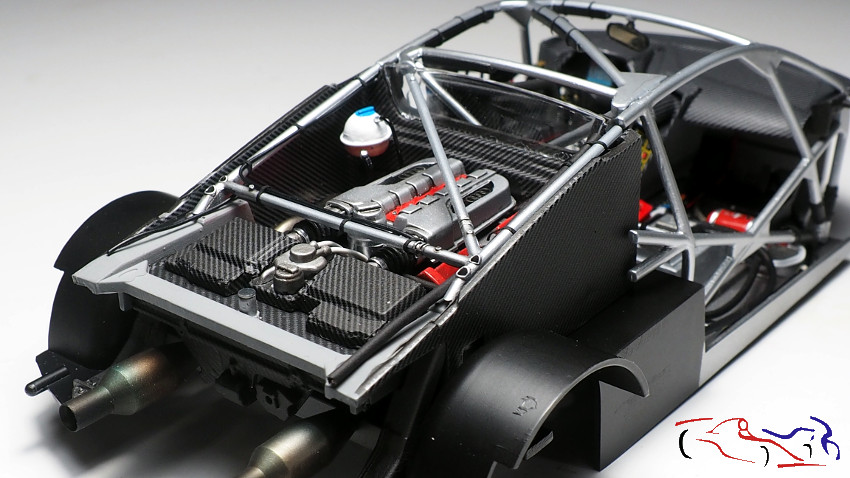 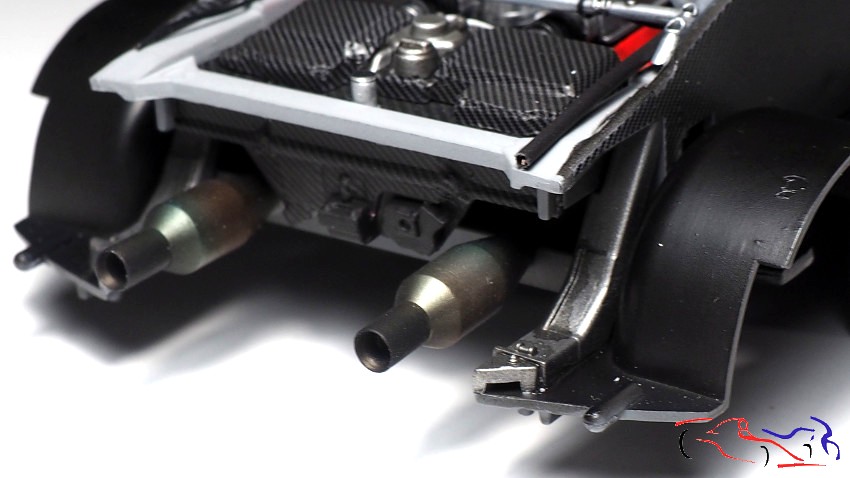 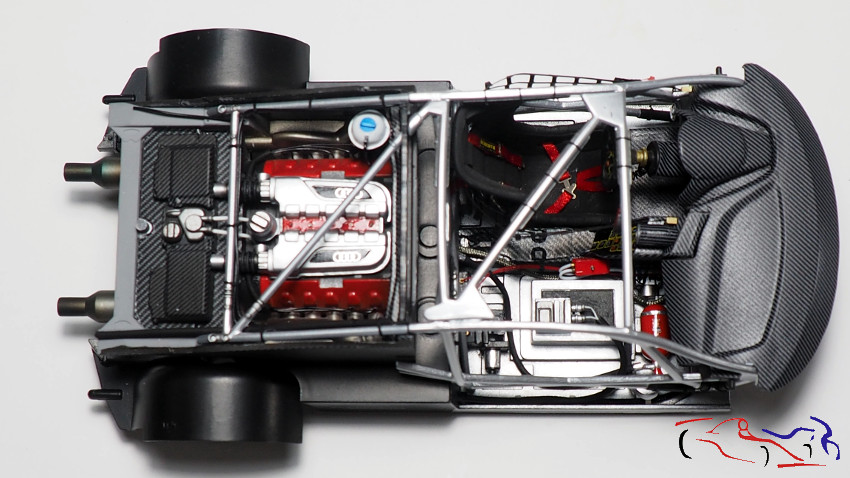 Ahora es momento de iniciar los trabajos en el chasis, y lo primero, es la fijación de la tuerca en el chasis, para fijar la maqueta a la base: ciano con polvos de talco!! Now its time to start working on the chassis, and the first thing to do is to fix the nut on the chassis, to fix the model to the base: CA glue with talcum powder! 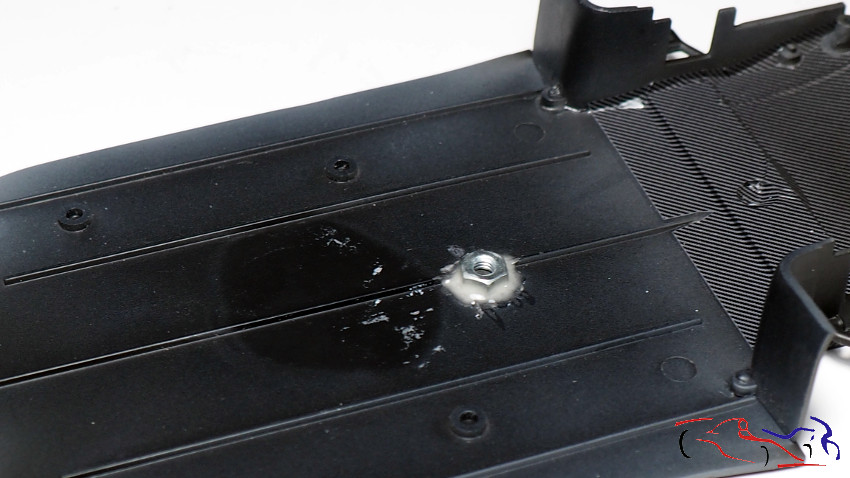 Y ahora es el turno de añadir piezas al chasis correspondinentes al eje delantero y trasero: And now its time to add front and rear axle parts to the chassis: 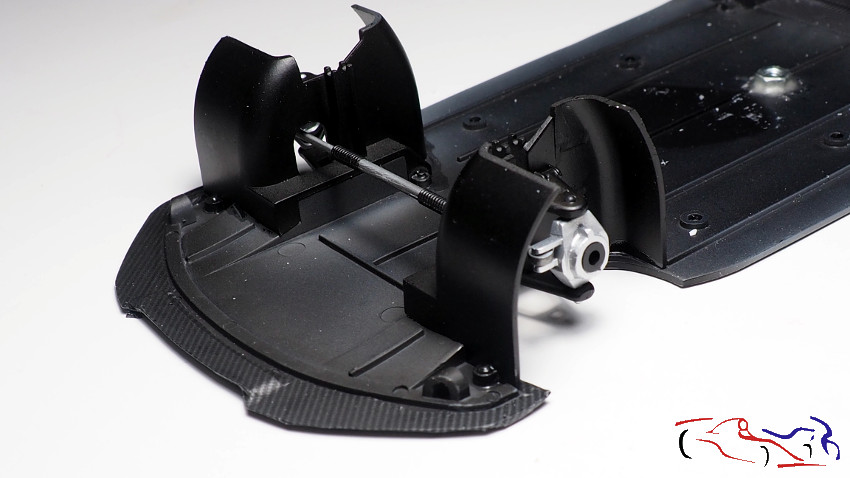 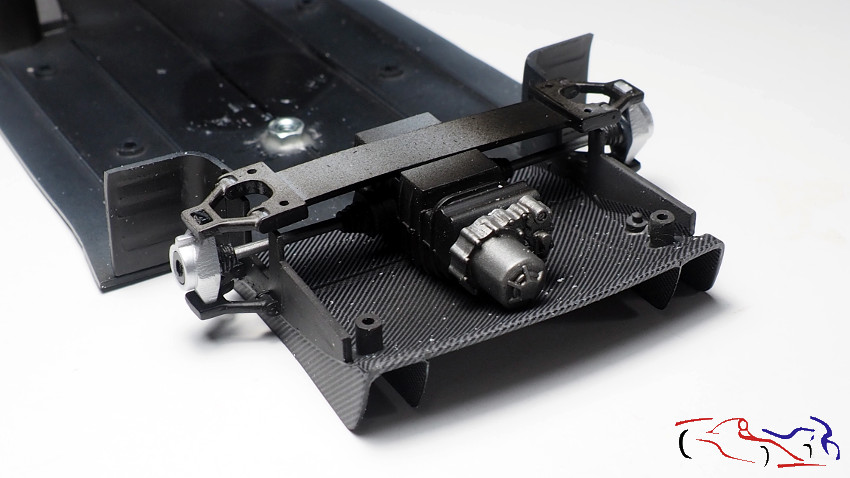 Mas detalles: el filtro del aire con el ventilador, colocado también en el chasis: More details: the air filter with the fan, also placed in the chassis: 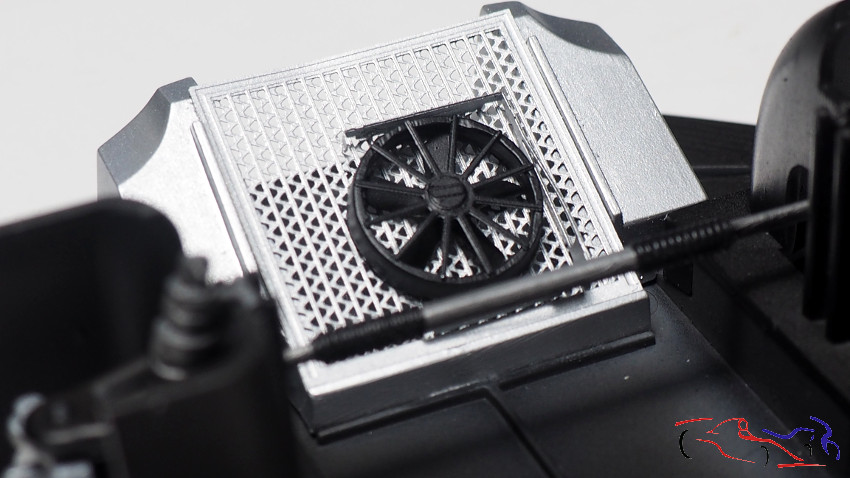 A las ruedas, les he pegado el disco con la pinza de freno: I have glued the disc with the brake caliper to the wheels: 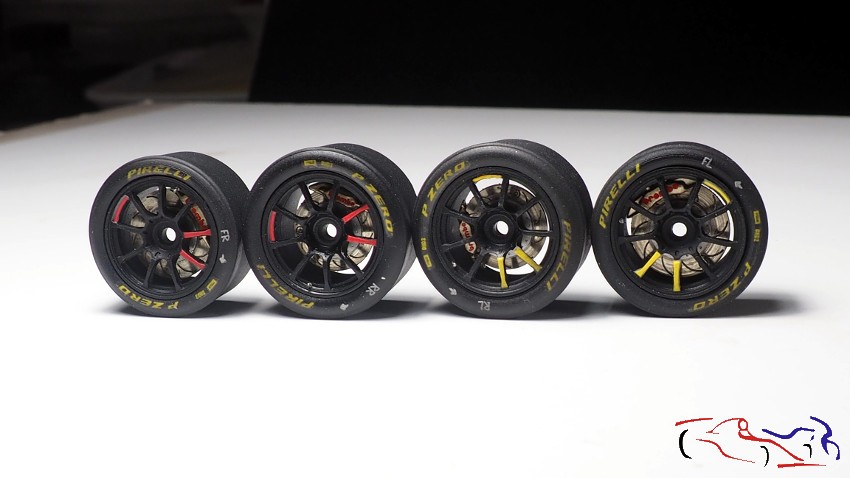 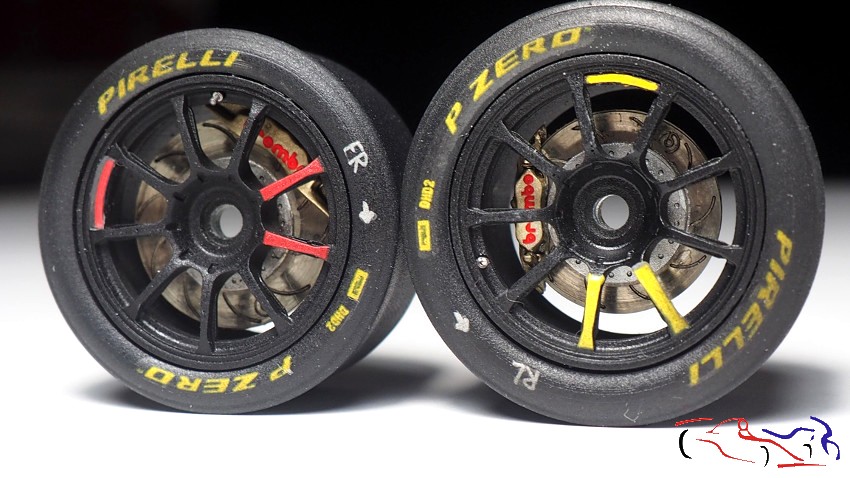 Y a los retrovisores, les he añadido la pieza de fotograbado que he pulido para que refleje como buen espejo que debe ser (se ve en el retrovisor de la izquierda, el logo del restrovisor derecho). Ese espejo se ve amarillento por la luz existente, pero es un espejo normal. I have added the photoetched piece that I have polished to the mirrors, so that it reflects like the good mirror it should be (you can see the logo of the right mirror on the left mirror). This mirror looks yellowish because of the existing light, but it is a normal mirror. 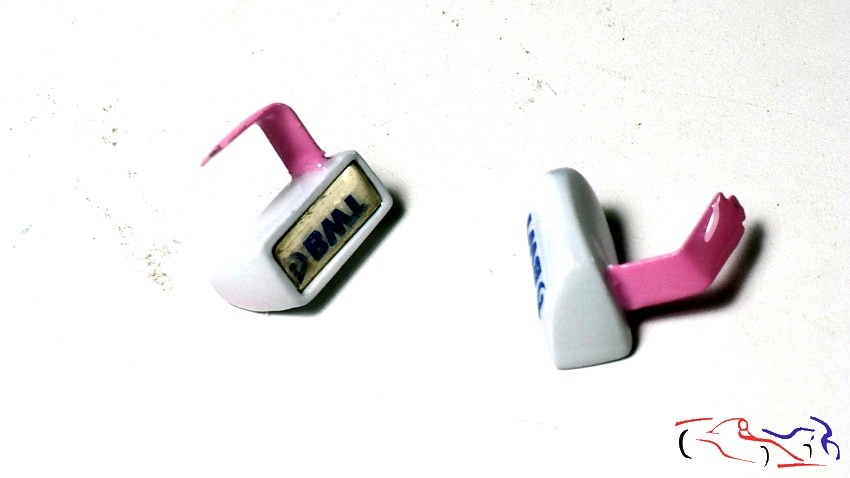 Y para terminar, el paso previo al pulido: lijado de toda la carrocería con lija al agua de grano 1000, y posteriormente con 2000. And finally, the step prior to polishing: sanding of the entire bodywork with 1000 grit waterproof sandpaper, and then with 2000 grit sandpaper. 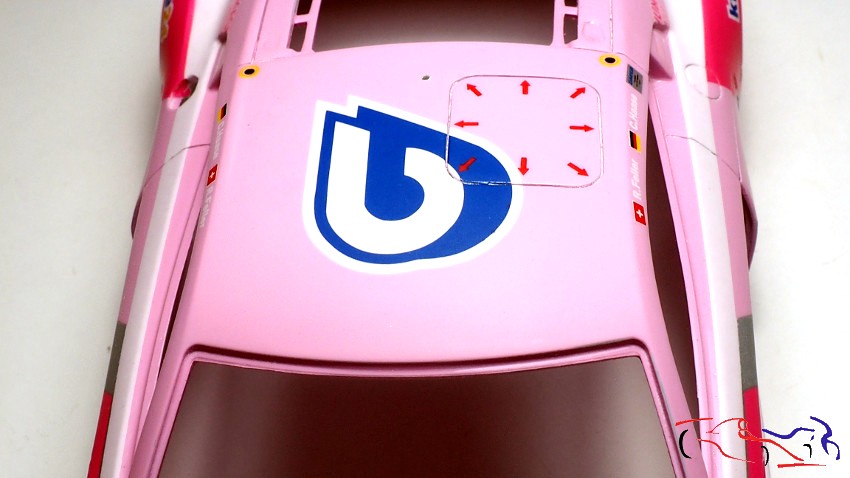 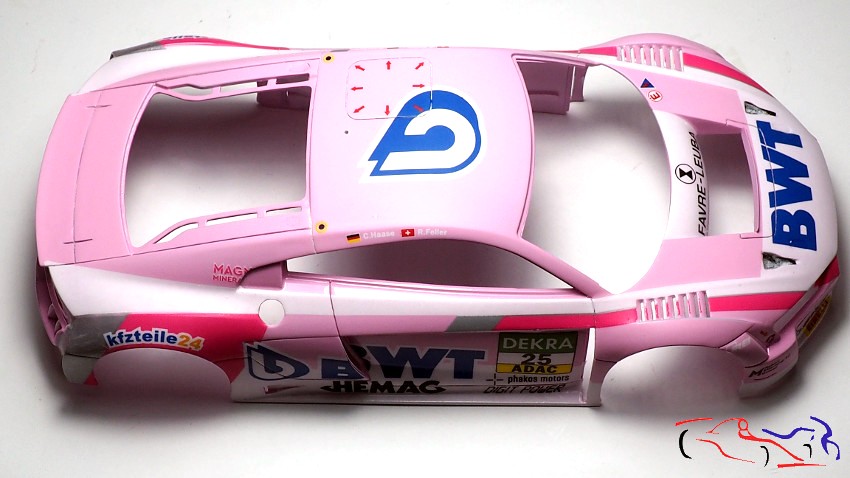 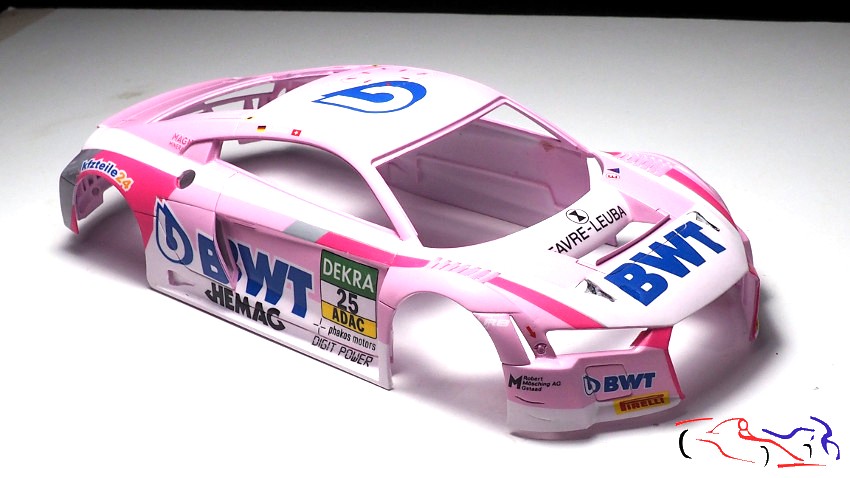 Y yo creo, que la siguiente actualización será casi la final, con el pulido y pegado de piezas a la carroceria. Gracias por ver y comentar! And I think, the next update will be almost the final one, with the polishing and gluing of parts to the body. Thanks for watching and commenting! |
|
|
|
|
| The Following User Says Thank You to JesusM For This Useful Post: |
mrgixxer (11-27-2022)
|
|
07-20-2022, 01:00 PM
|
#25 | |
|
AF Regular
Join Date: Aug 2011
Location: Torino
Posts: 389
Thanks: 175
Thanked 62 Times in 58 Posts
|
Re: Audi R8 LMS GT3 BWT Nunu 1/24
Looks fantastic Jesus! Greatly detailed interior and superb engine room! The carbon looks really cool! Muy bueno!
 |
|
|
|
|
|
07-20-2022, 01:34 PM
|
#26 | ||
|
AF Enthusiast
Thread starter
Join Date: Mar 2009
Location: Madrid
Posts: 649
Thanks: 109
Thanked 68 Times in 67 Posts
|
Re: Audi R8 LMS GT3 BWT Nunu 1/24
Quote:
|
||
|
|
|
|
07-21-2022, 03:12 AM
|
#27 | |
|
AF Enthusiast

Join Date: Jun 2002
Location: Osijek
Posts: 2,329
Thanks: 0
Thanked 9 Times in 7 Posts


|
Re: Audi R8 LMS GT3 BWT Nunu 1/24
Great work, great details!
Good inspiration for my model when I start it.
__________________
Zeljko Segin http://www.hrmodeler.com - Fast wheels - my pages My current project - ..... 
|
|
|
|
|
|
07-21-2022, 04:33 AM
|
#28 | ||
|
AF Enthusiast
Thread starter
Join Date: Mar 2009
Location: Madrid
Posts: 649
Thanks: 109
Thanked 68 Times in 67 Posts
|
Re: Audi R8 LMS GT3 BWT Nunu 1/24
Quote:
|
||
|
|
|
|
07-26-2022, 02:56 AM
|
#29 | |
|
AF Enthusiast

Join Date: Oct 2005
Location: Monza
Posts: 1,150
Thanks: 21
Thanked 56 Times in 38 Posts
|
Re: Audi R8 LMS GT3 BWT Nunu 1/24
Job on the cockpit is mind blowing... WOW!
Thanks for sharing photos and explanations. |
|
|
|
|
|
07-26-2022, 11:54 AM
|
#30 | ||
|
AF Enthusiast
Thread starter
Join Date: Mar 2009
Location: Madrid
Posts: 649
Thanks: 109
Thanked 68 Times in 67 Posts
|
Re: Audi R8 LMS GT3 BWT Nunu 1/24
Quote:
|
||
|
|
|
|
|
POST REPLY TO THIS THREAD |
 |
|
|


