

|
| Search | Car Forums | Gallery | Articles | Helper | AF 350Z | IgorSushko.com | Corporate |
|
| Latest | 0 Rplys |
|
|||||||
| WIP - Motorsports Post topics for any "Work In Process" motorsports vehicles in this sub-forum. |
 |
 Show Printable Version | Show Printable Version |  Email this Page | Email this Page |  Subscribe to this Thread
|
|
|
Thread Tools |
|
|
#646 | |
|
AF Enthusiast
Join Date: Sep 2011
Location: Redwood City, California
Posts: 651
Thanks: 0
Thanked 39 Times in 39 Posts
|
Re: 1/8 Porsche 935/78 'Moby Dick'
Arrggh... hinge-making! You've got the fiddly bits down with a vengeance. Congrats on a beautiful job!
ianc |
|
|
|

|
|
|
#647 | |
|
AF Enthusiast
Thread starter
Join Date: Nov 2008
Location: Norwich
Posts: 649
Thanks: 21
Thanked 111 Times in 87 Posts
|
Re: 1/8 Porsche 935/78 'Moby Dick'
Hello again,
Slightly scary that it's been a month since I last posted an update - as before, it's not for a lack of progress. Instead, it's more that a lot of what I've been doing isn't particularly...exciting...so it's taken a while to get a half-decent update together! Something I touched on last time was the need to expand the outer surface of the inner door structure - here's the rear edge built-up using a notched length of styrene angle, greenstuff, filler, etc: 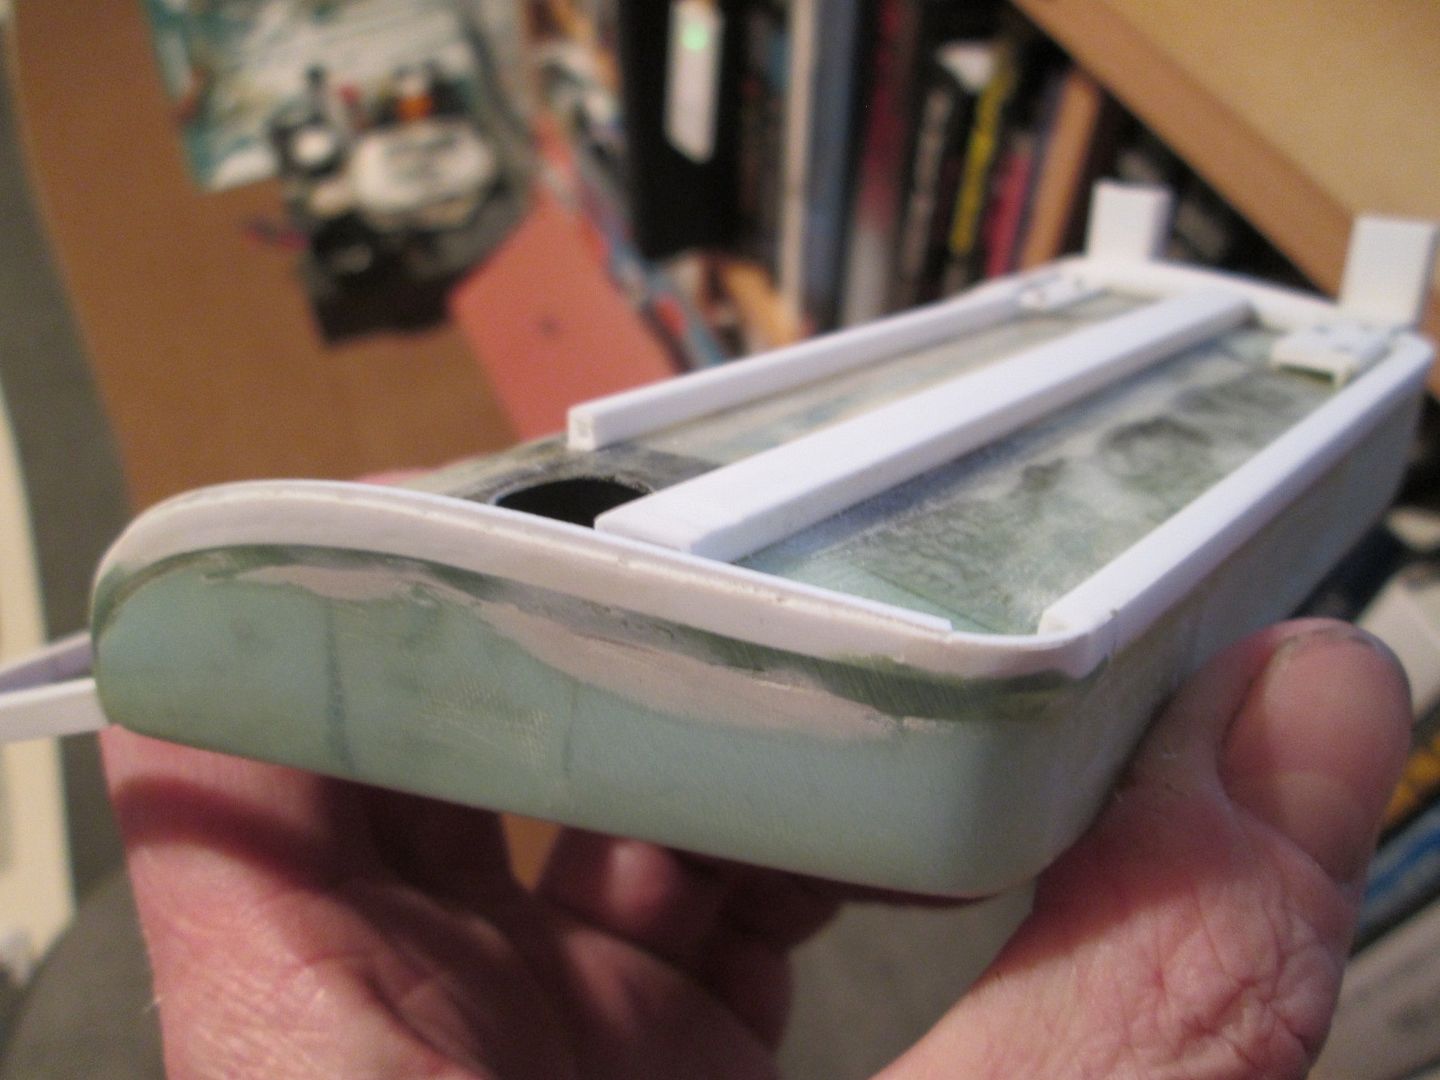 At the front, I've pinned the hinges in place and added various pieces of styrene strip as both reinforcement and to seal the gap between the inner door and the outer fibreglass skin: 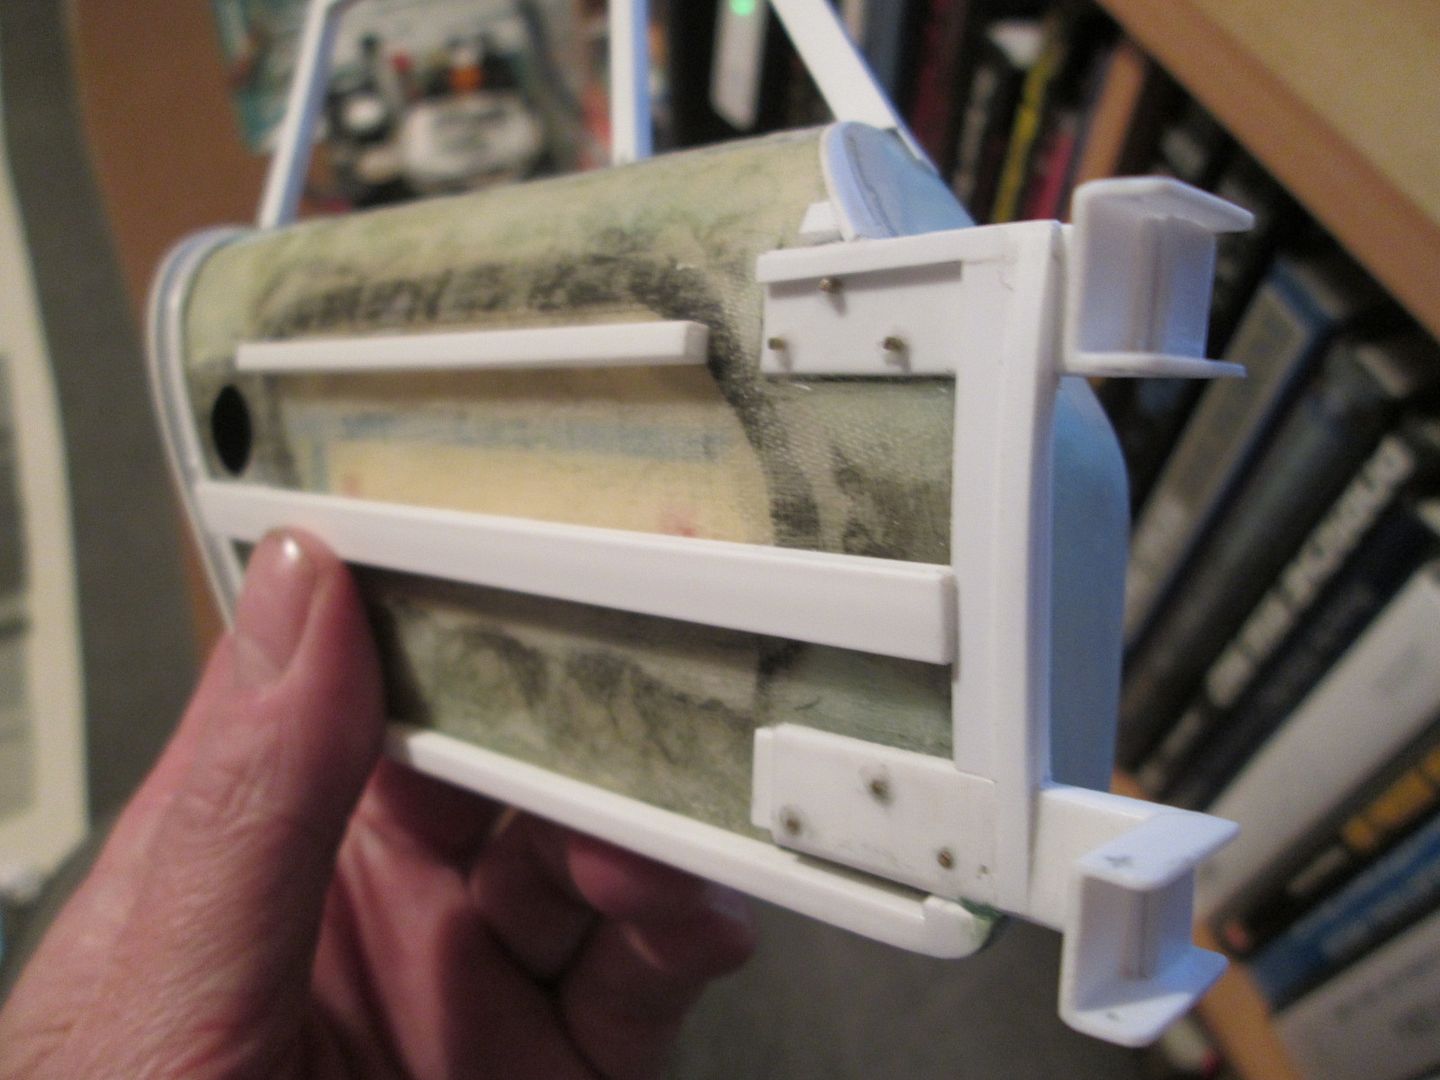 It's not immediately obvious, but the window frames have been glued together and had a thin 0.25mm outer layer of styrene sheet added. I'm not going to do any more work on these until the roof section and the door hinges are glued in place - too much potential for things to move! So... I reached the stage where I had to get the roof section ready to fit. The weather is only going to get colder and wetter from now on, so I wanted to get the roof painted before the winter - it's going to stop me doing lots of jobs if I can't get it painted until the Spring. My plan was to spray the inside with grey primer (ahead of a black final coat), and to spray the outside with white primer for a white final coat. I spent several evenings working on the top section adding little bits of filler, cleaning bits up, and basically getting things ready for the weekend. Given that most of the interior will be obscured once assembled (and be in natural shadow too), this didn't need quite so much attention as the outside: 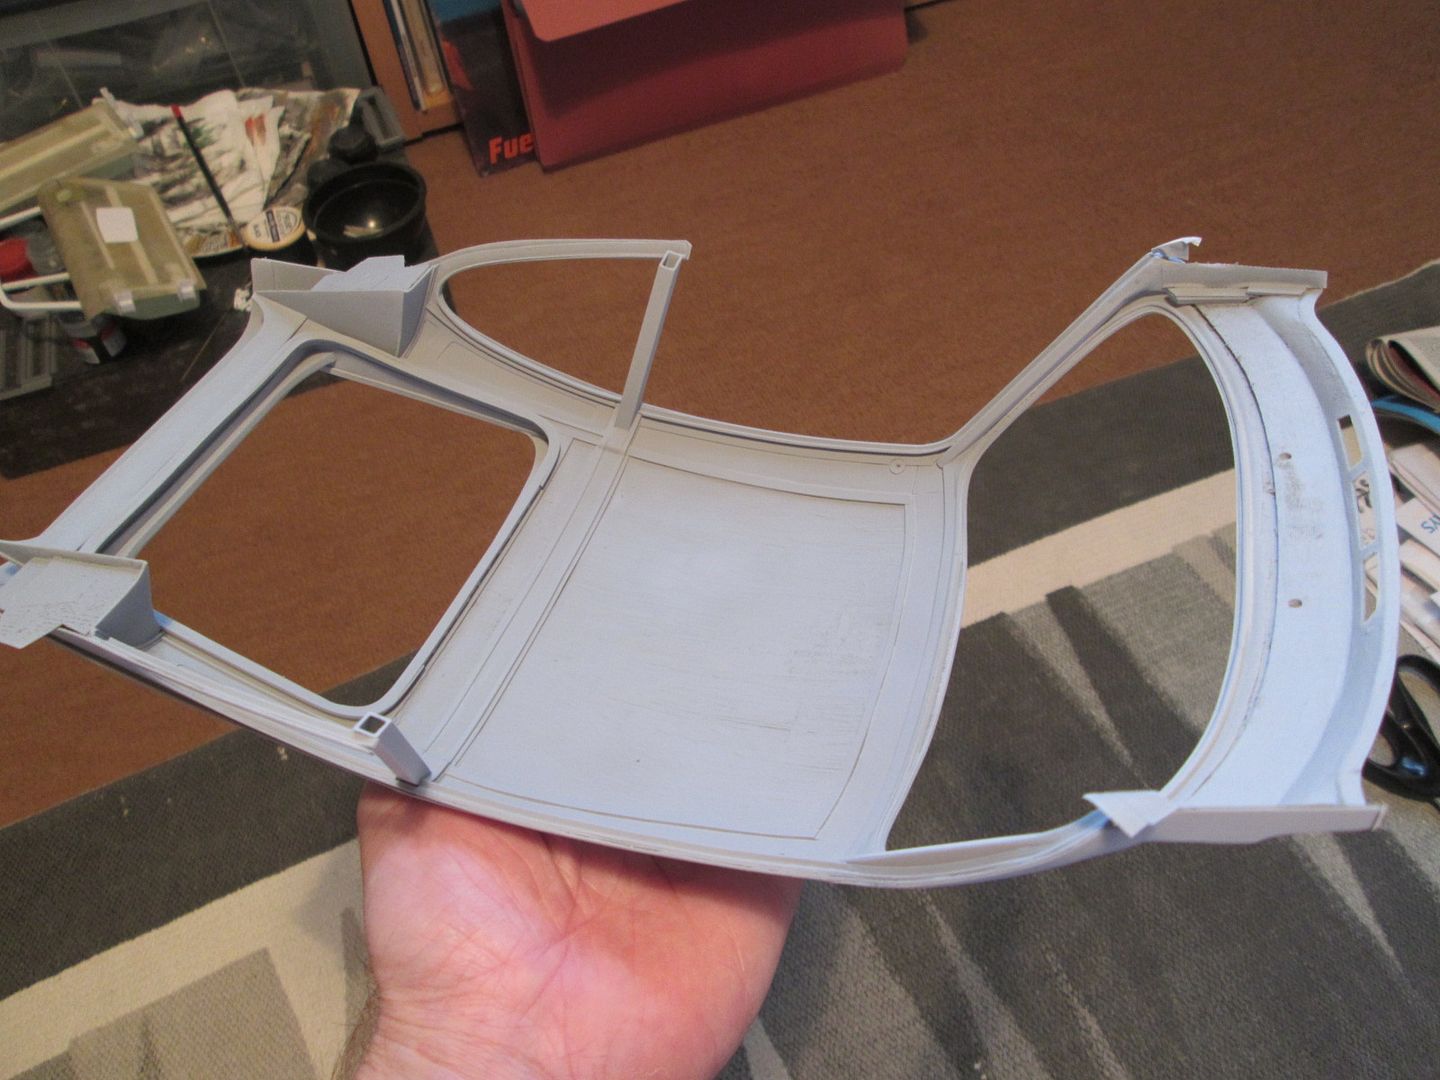 The outside required more filler-work, and I was quite expecting that it would still need more after the initial coat of primer. It was more about seeing just how bad things would be! 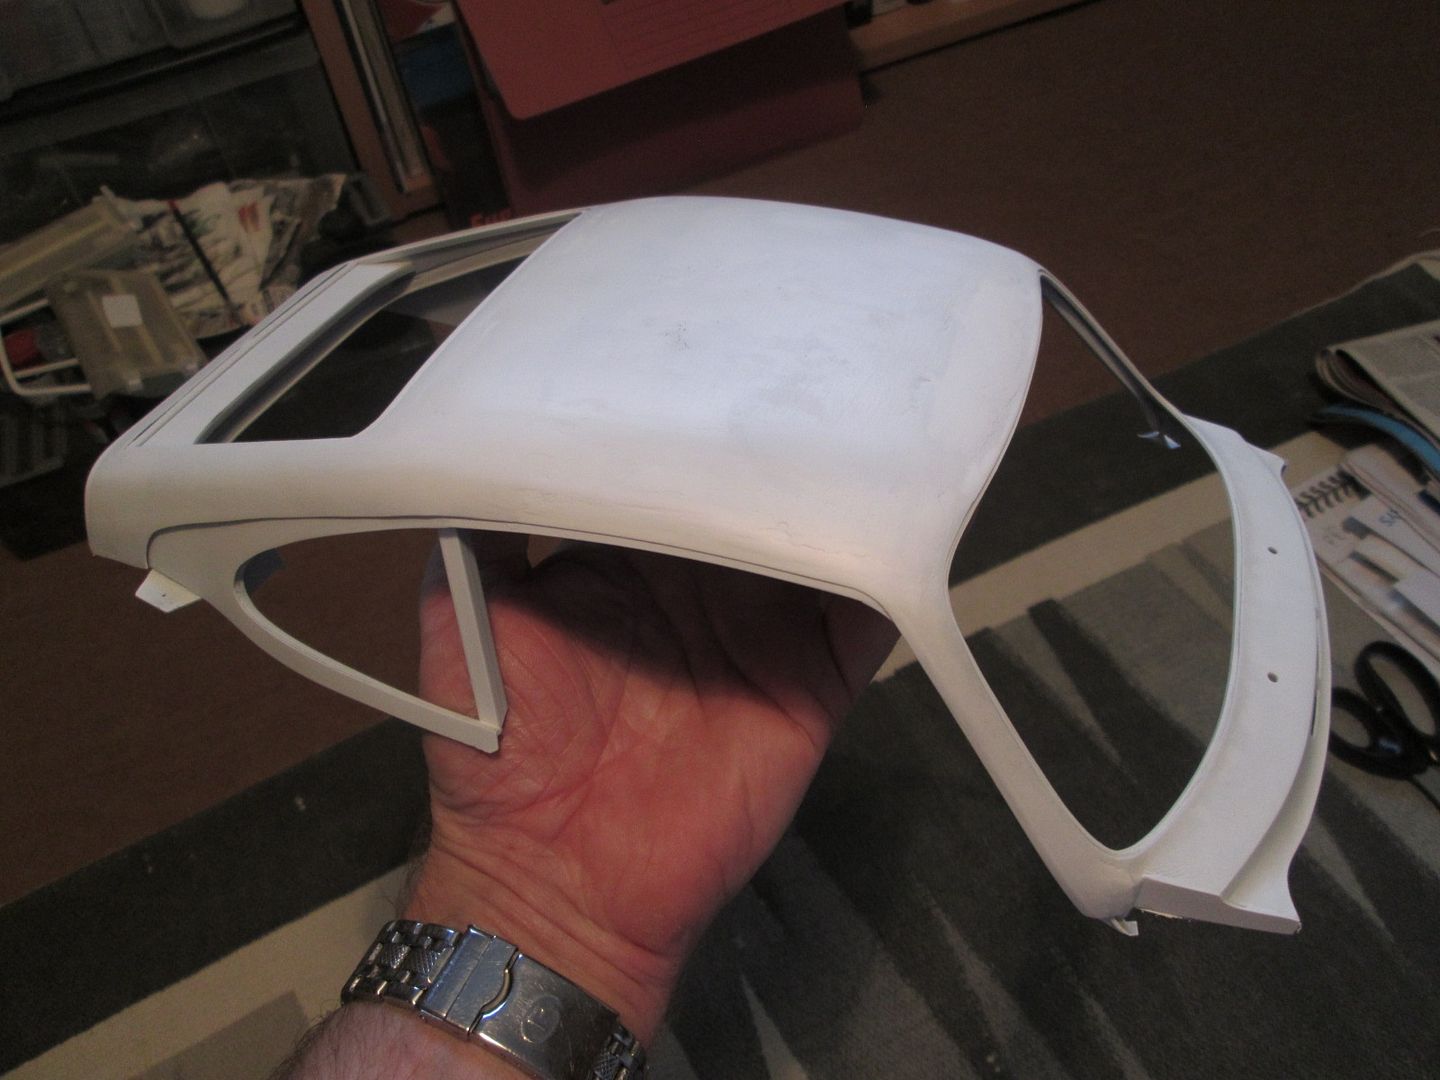 In this photo it doesn't look too bad, but there are several areas that need attention. After spraying the black interior there's a few places where removing the masking tape has also taken the primer, but that's not a major problem. Here's the shell masked-up and with three coats of Tamiya semi-gloss black: 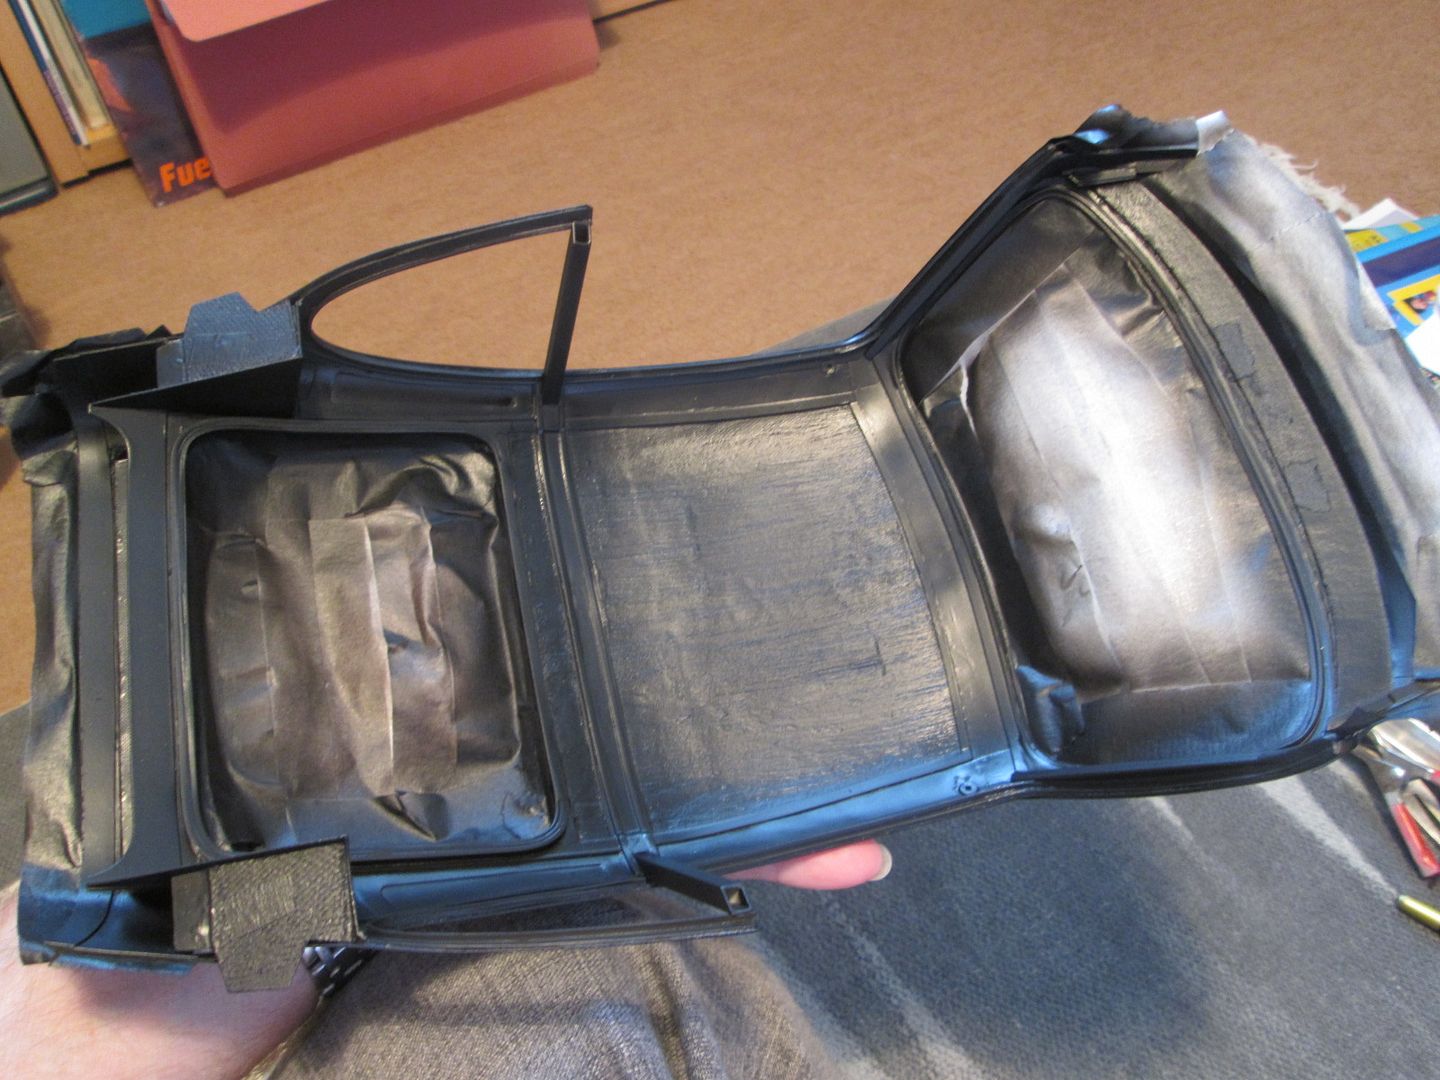 While spraying the shell, I also painted the turbo air inlet ducting and the four inner hinges: 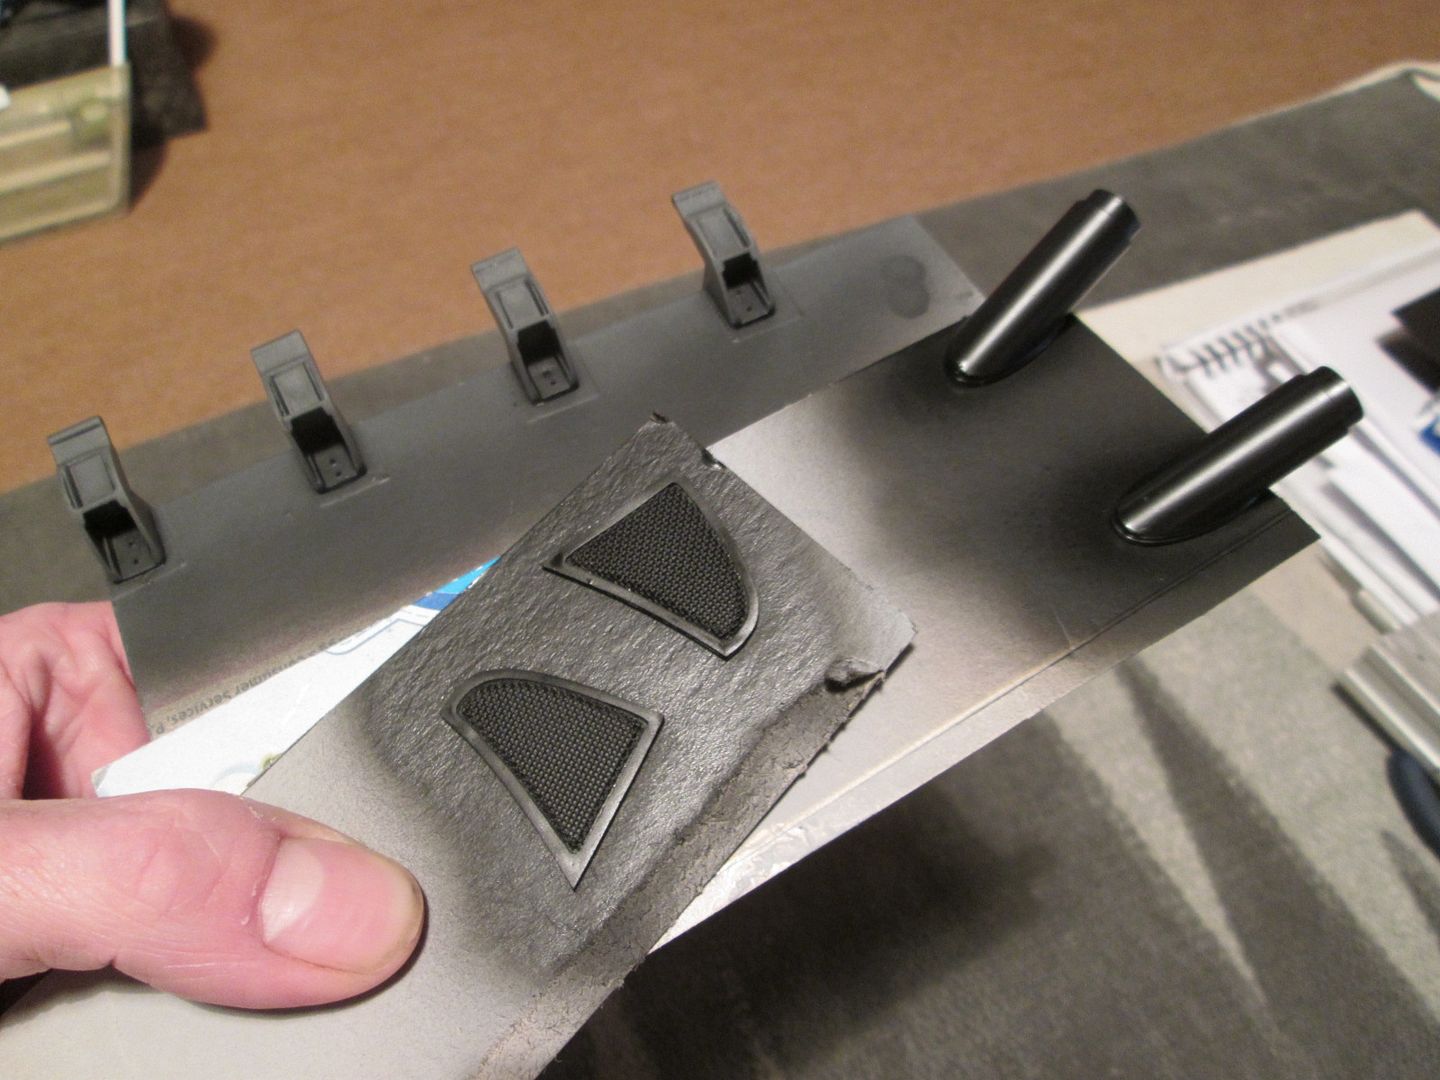 It's surprising how much difference a coat of white primer makes: 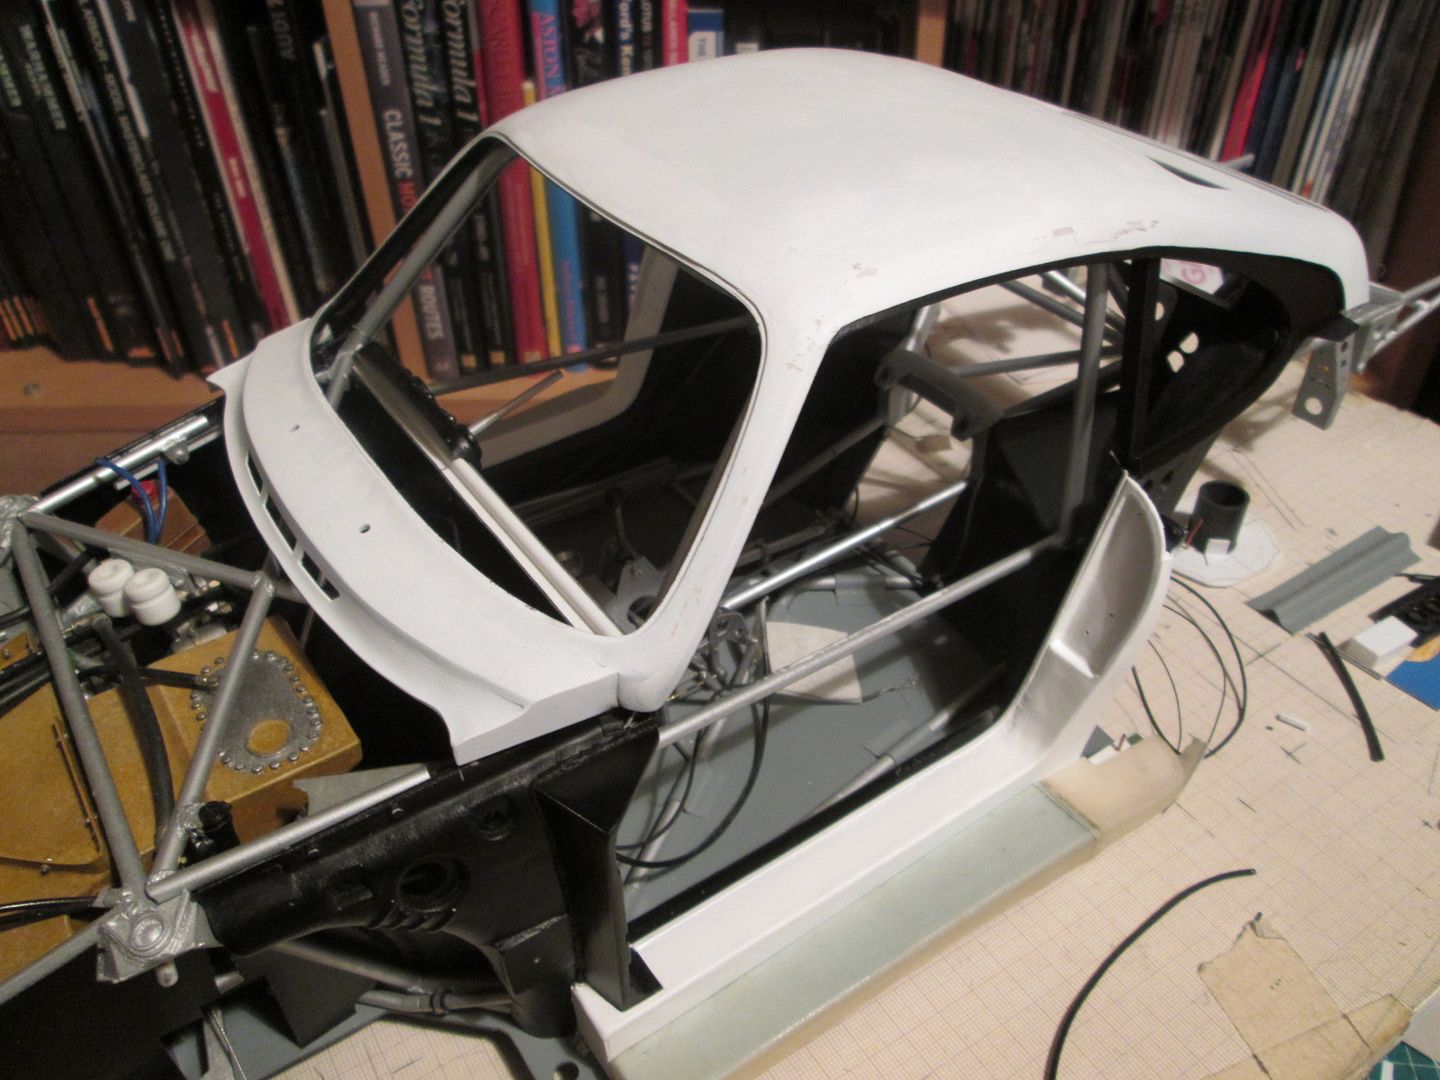 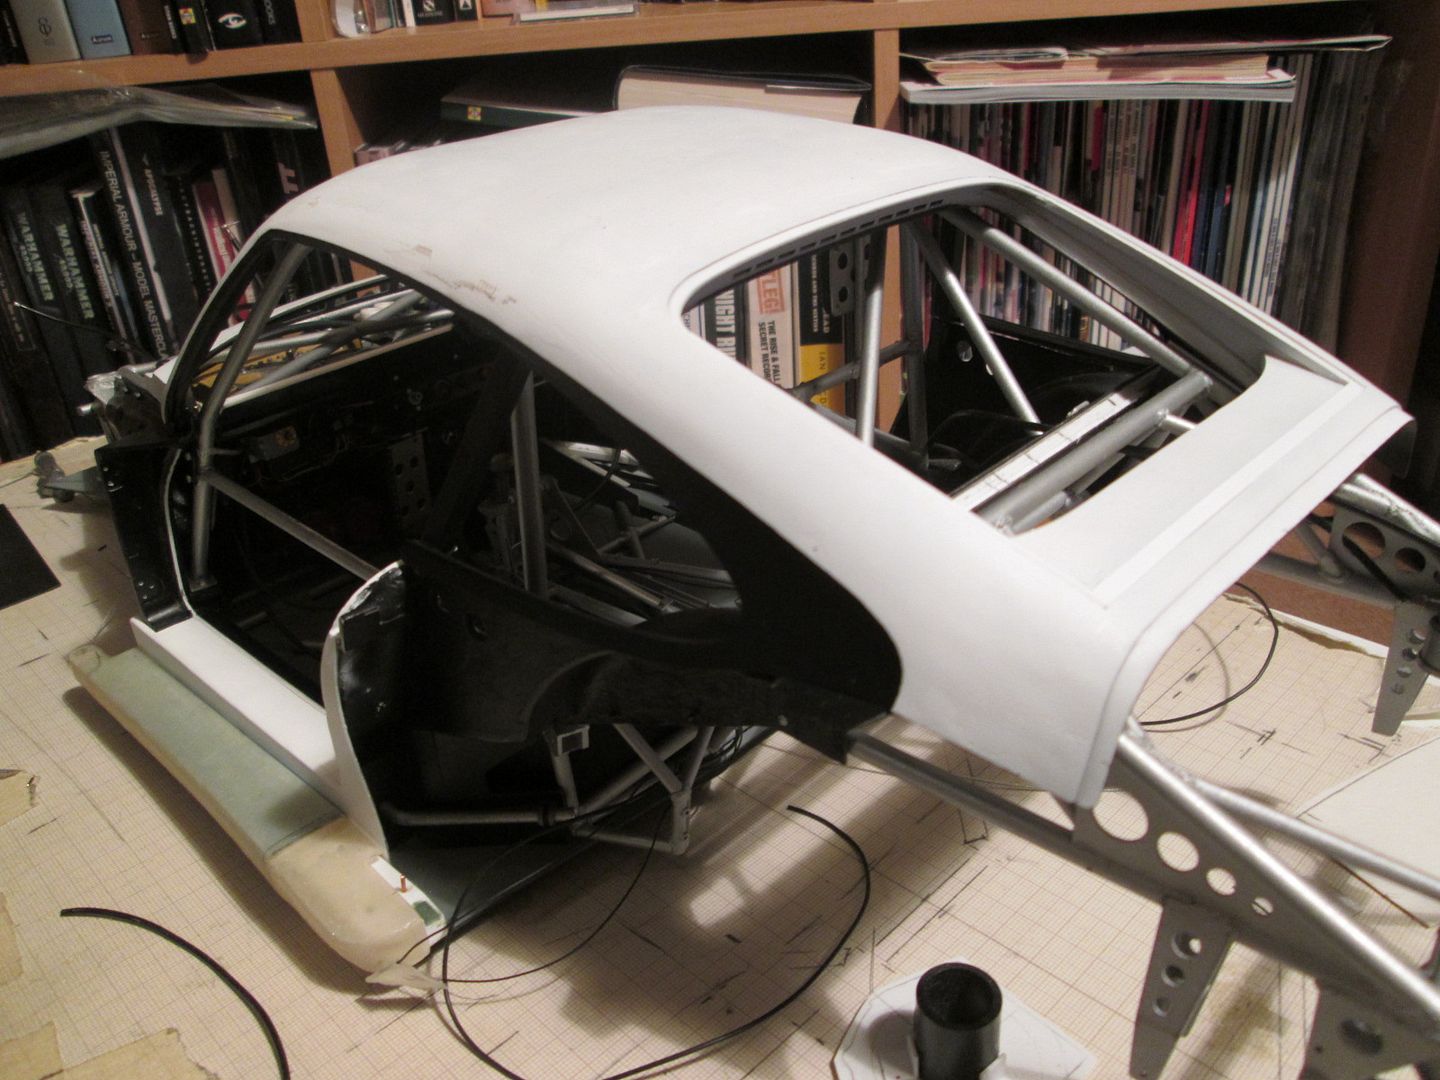 Other than the outer 'running-board' sections, everything currently fitted to the chassis is now painted (to varying degrees!). You can see the areas where the masking has removed some of the primer, but I suspect most of the roof will be papered back to bare fibreglass again during the coming days. In preparation for fitting the door hinges I touched in the greenstuff weld details on the doorframe supports. So, what's next? I'll spend the next few evenings working on the roof again, with the plan to re-prime it and maybe get some Tamiya white sprayed on at the weekend. While I'm at it I guess I could also prep and paint the running-boards too. I'm also going through all the small little bits and pieces that need hand-painting before fitment - the windscreen motor mechanism, starter motor, etc, making progress on several fronts. I need to tackle the dashboard top and instrument pod cowl soon, too, as they will need to be installed before the roof is fitted. There's not much more that actually needs to be made (seatbelts, steering wheel, headlights, tyres and wheel covers, etc), but I'm now trying to work out the final assembly sequence... At some point during the next few weeks I might put together a huge parts list for the project, to hopefully make it easier to see what's still to be completed. I might get a few surprises! Have a good week - more next time. SB |
|
|
|

|
|
|
#648 | |
|
AF Enthusiast
Join Date: Sep 2011
Location: Redwood City, California
Posts: 651
Thanks: 0
Thanked 39 Times in 39 Posts
|
Re: 1/8 Porsche 935/78 'Moby Dick'
Paint! Woo-hoo!
ianc |
|
|
|

|
|
|
#649 | |
|
AF Enthusiast
Join Date: Nov 2004
Location: San Diego, California
Posts: 833
Thanks: 2
Thanked 6 Times in 6 Posts
|
Re: 1/8 Porsche 935/78 'Moby Dick'
Very inspiring work, I've been keeping up over the years and believe me, I'm always excited to see when you update this thread!
__________________

|
|
|
|

|
|
|
#650 | |
|
AF Enthusiast
Join Date: Mar 2009
Location: Madrid
Posts: 649
Thanks: 109
Thanked 68 Times in 67 Posts
|
Re: 1/8 Porsche 935/78 'Moby Dick'
|
|
|
|

|
|
|
#651 | |
|
AF Enthusiast
Thread starter
Join Date: Nov 2008
Location: Norwich
Posts: 649
Thanks: 21
Thanked 111 Times in 87 Posts
|
Re: 1/8 Porsche 935/78 'Moby Dick'
Hello again,
I'm trying to get on top of various jobs before I have some time-off from work later this month. I've got all sorts of things planned for that, but first I need to do some preparation! Firstly tonight, here's a few small bits that have been painted recently - 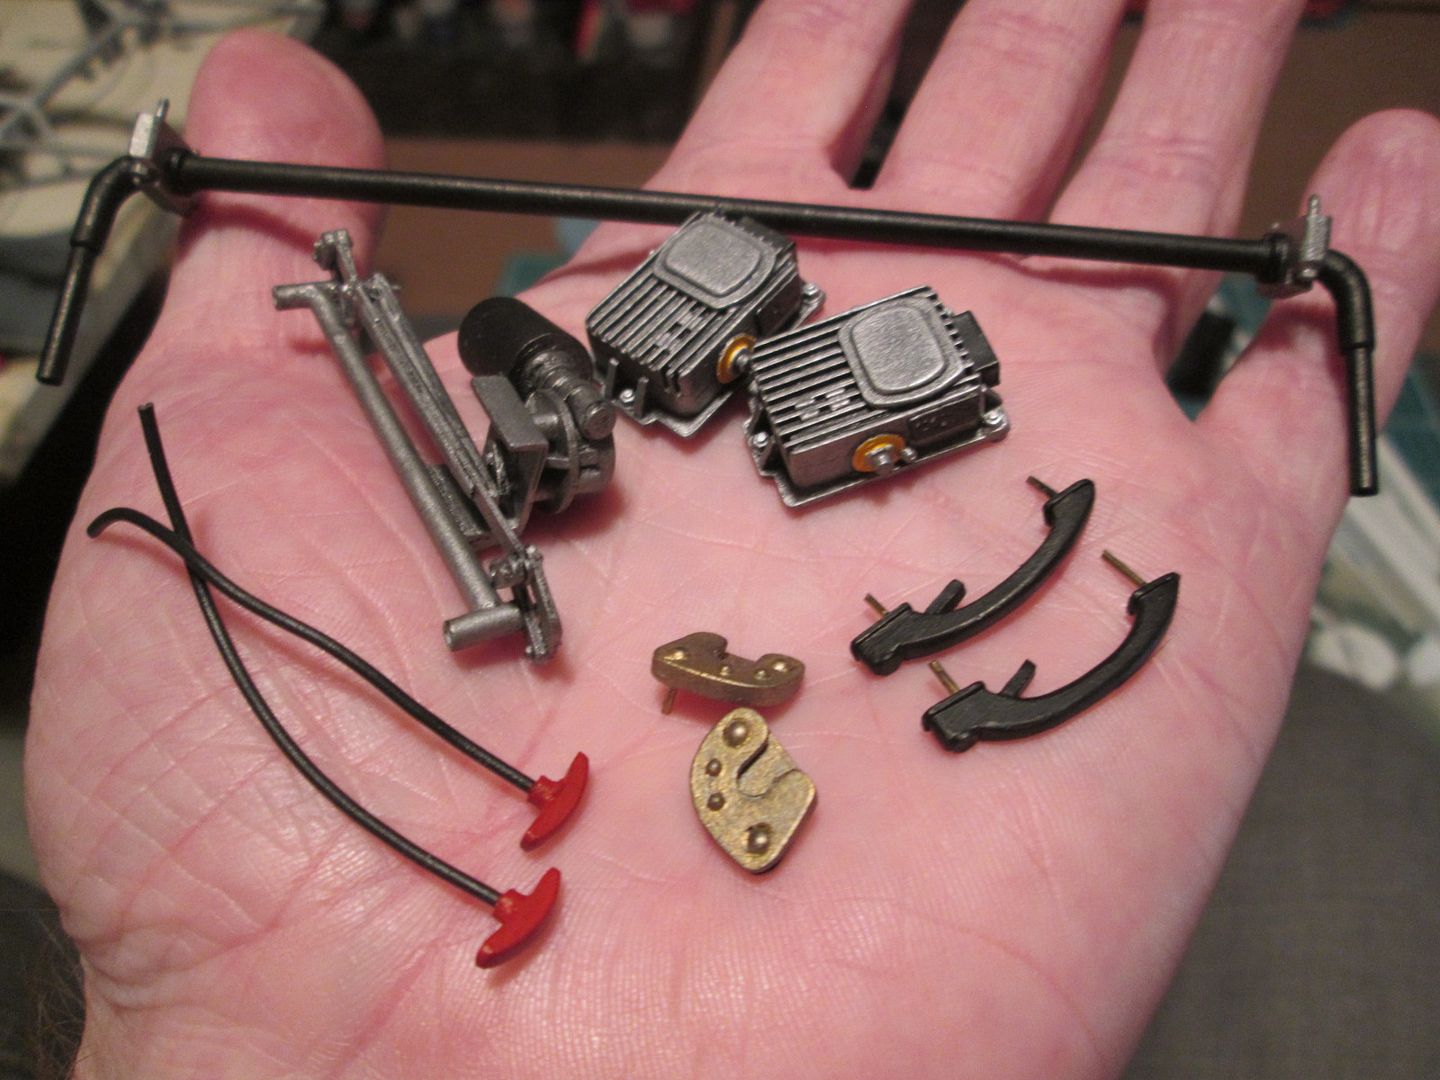 Rear anti-roll bar with mounting blocks, door mechanism pull handles, door strike-plates, external door handles, wiper mechanism, and two ignition spark-boxes (I think!). The wiper mechanism was a major pain to finish - the little linkages were so fragile that I broke them twice during the painting process. First time I re-made the link, the second time I just glued it all together - it'll barely be visible once assembled. You might remember that I started making the first spark-box months ago...but never got around to completing it. For a long time I was only going to fit the single unit (as I didn't think the second was technically necessary) but there were enough period photos showing the pair that I gave up and made another. As is often the case, the second only took a couple of evenings, after the months required for the original... Next up - the dashboard top. As I'm hoping to fit the roof during the winter, I need to complete as much of the interior first. The instrument pod cover was filed to suit and glued in place, with a length of split wire sheath added as a length of edging strip. On the left-hand side I added a length of half-round styrene for the edging, and filled the cutout in the middle with a piece of scrap fibreglass: 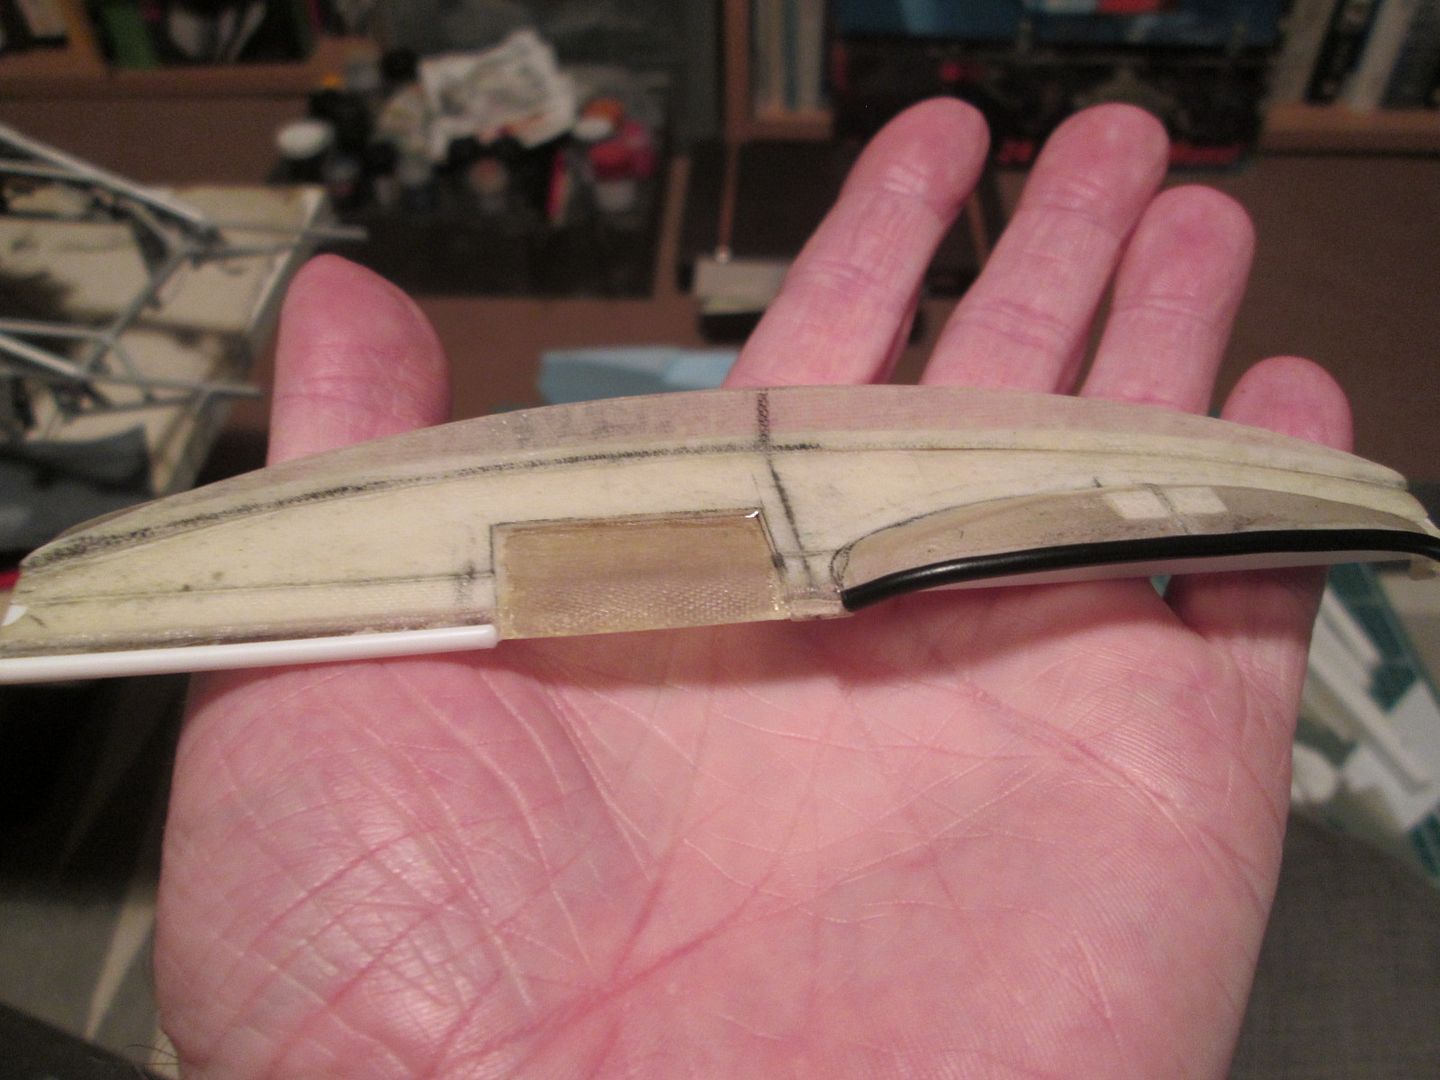 My original plan had been to cover the top panel with cloth (as per the seat), but I was so pleased with the results of the textured paste on the intercoolers that I used the same technique here: 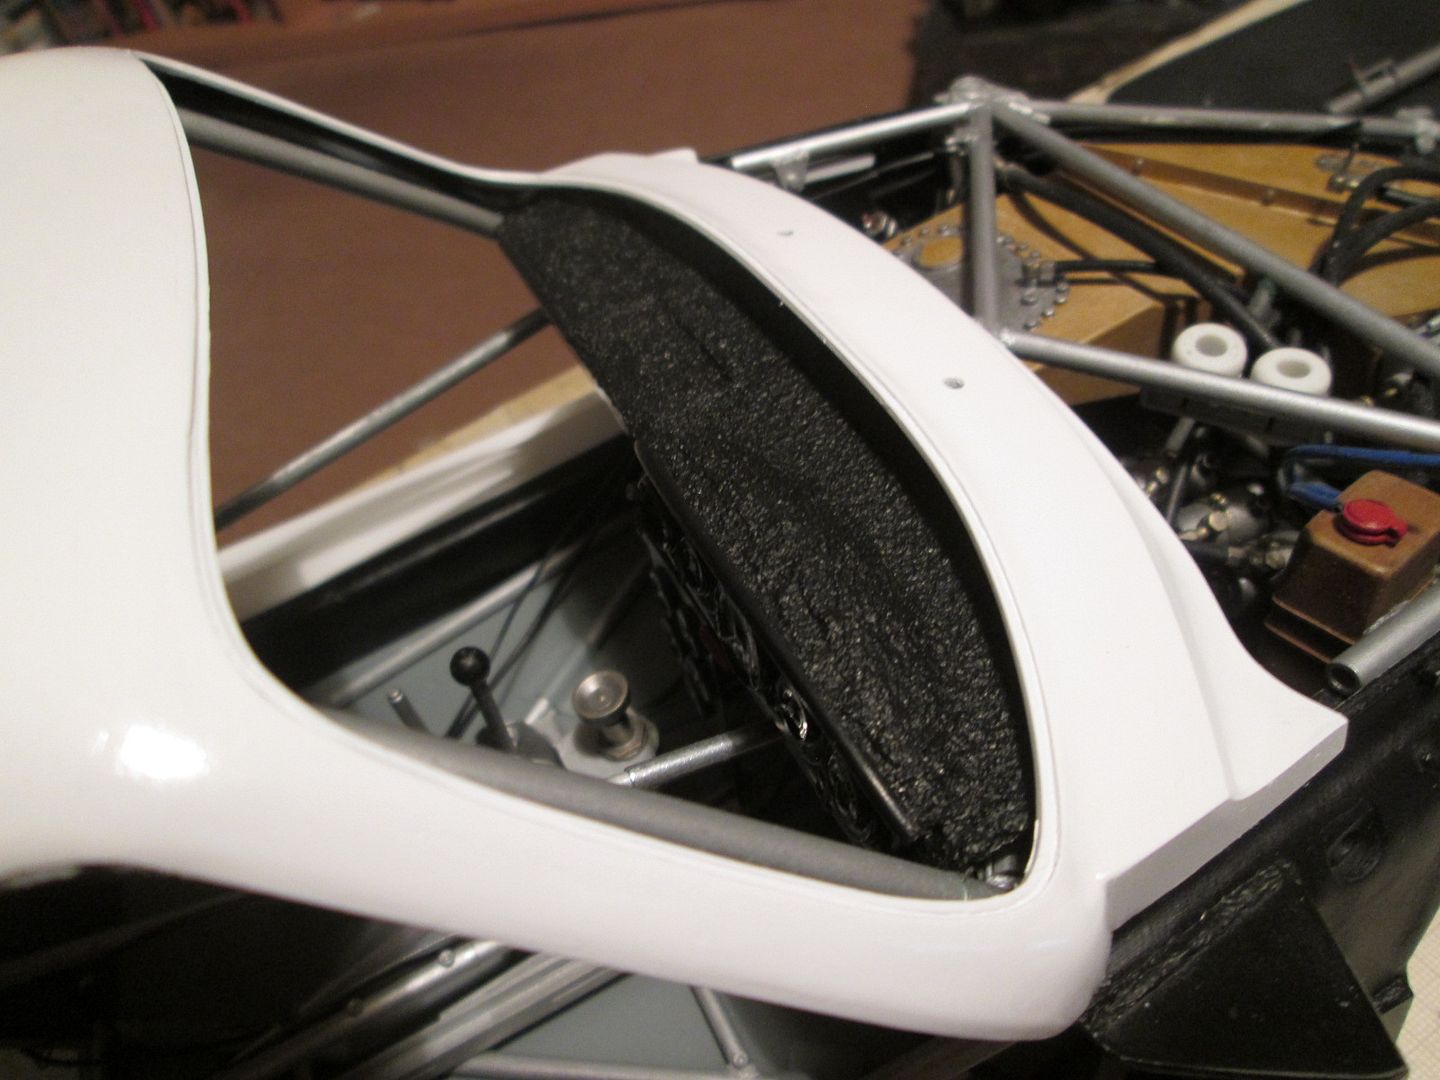 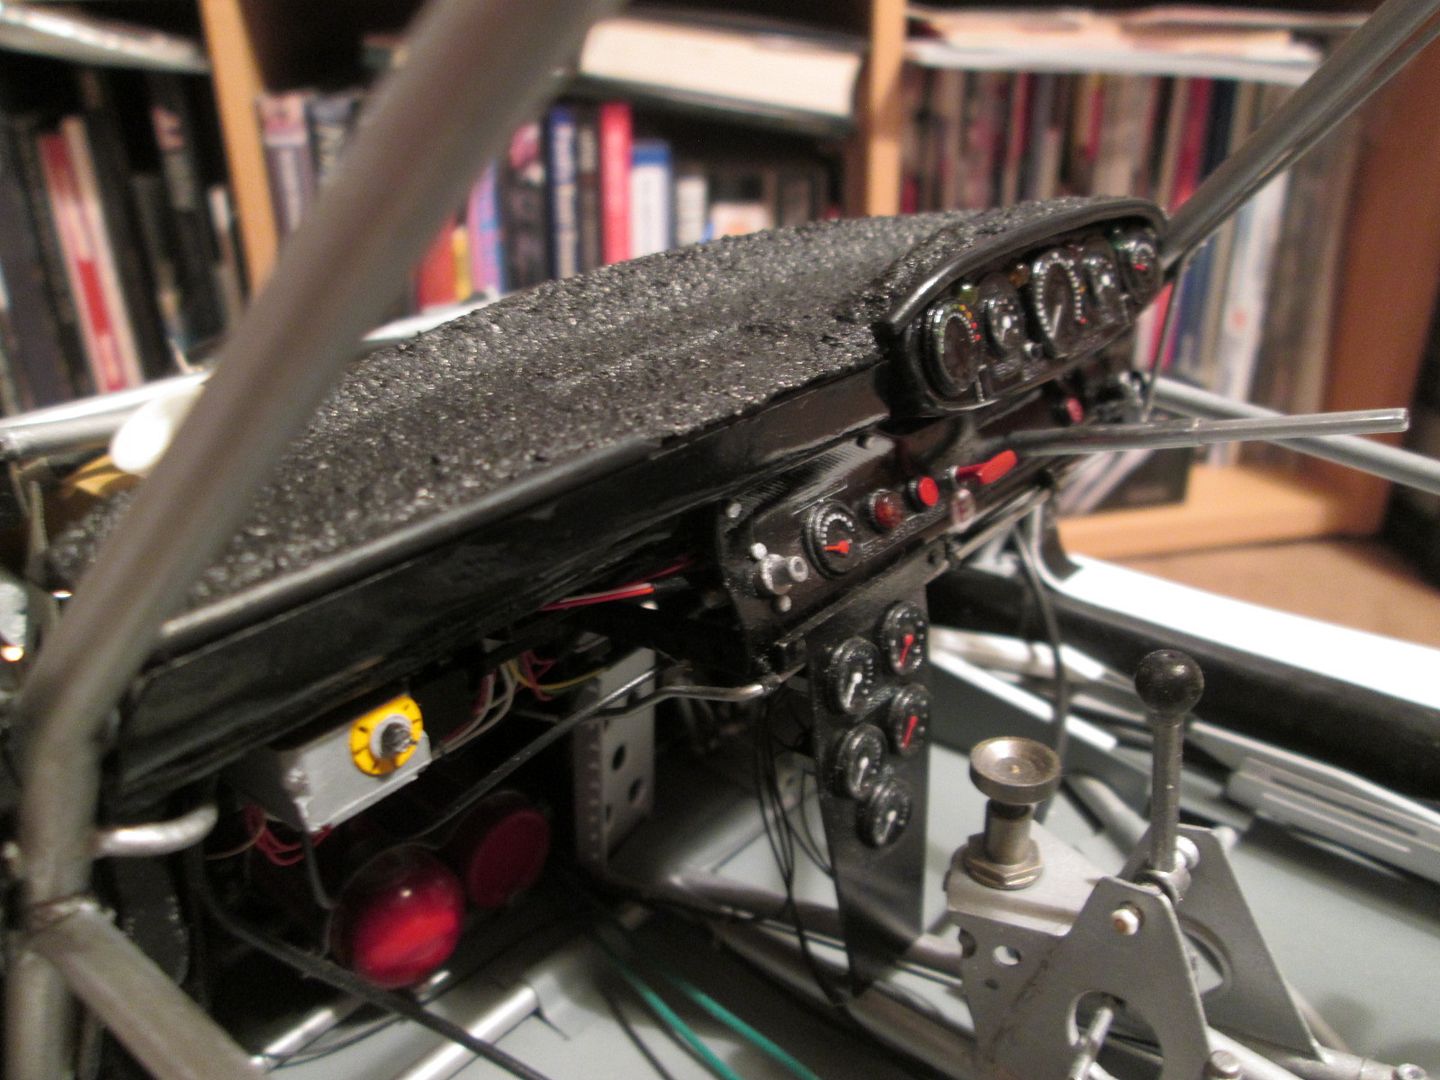 Amongst all this I've been painting and re-painting the roof section and the two running-boards. The roof still needs a little work, but the running-boards are basically done: 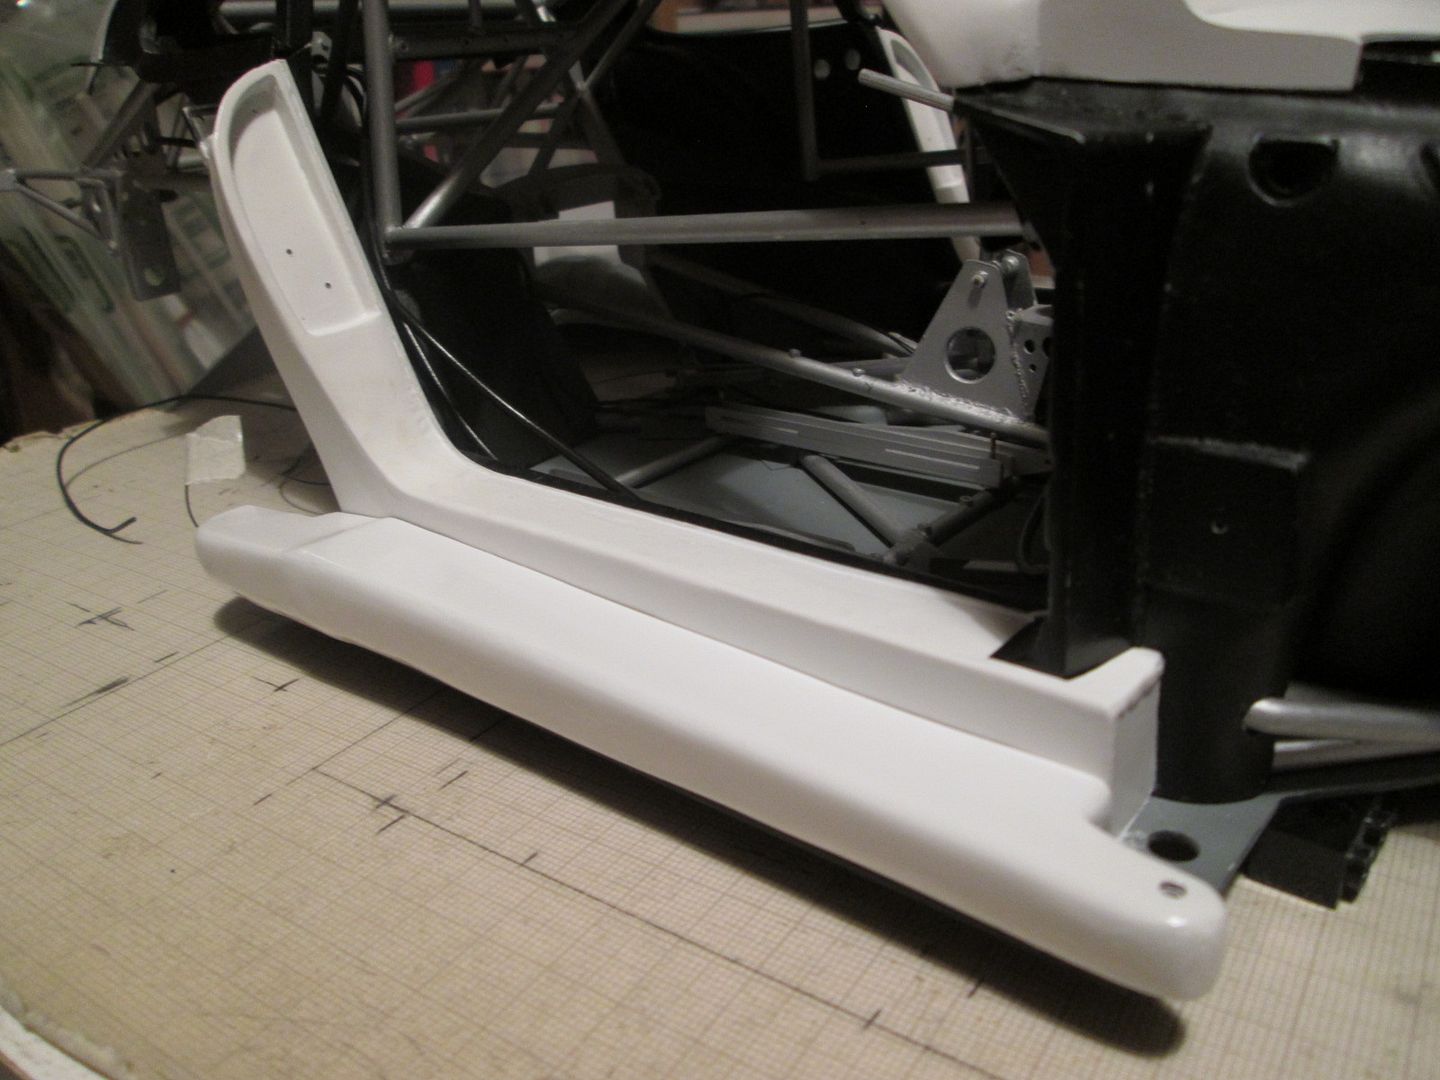 Trying to get a smooth finish on these fibreglass parts is killing me! No matter how smooth it feels, once that first coat of primer goes on all the tiniest of pin-holes and imperfections show up! So, for the next batch of parts I'm getting in with the filler putty first: 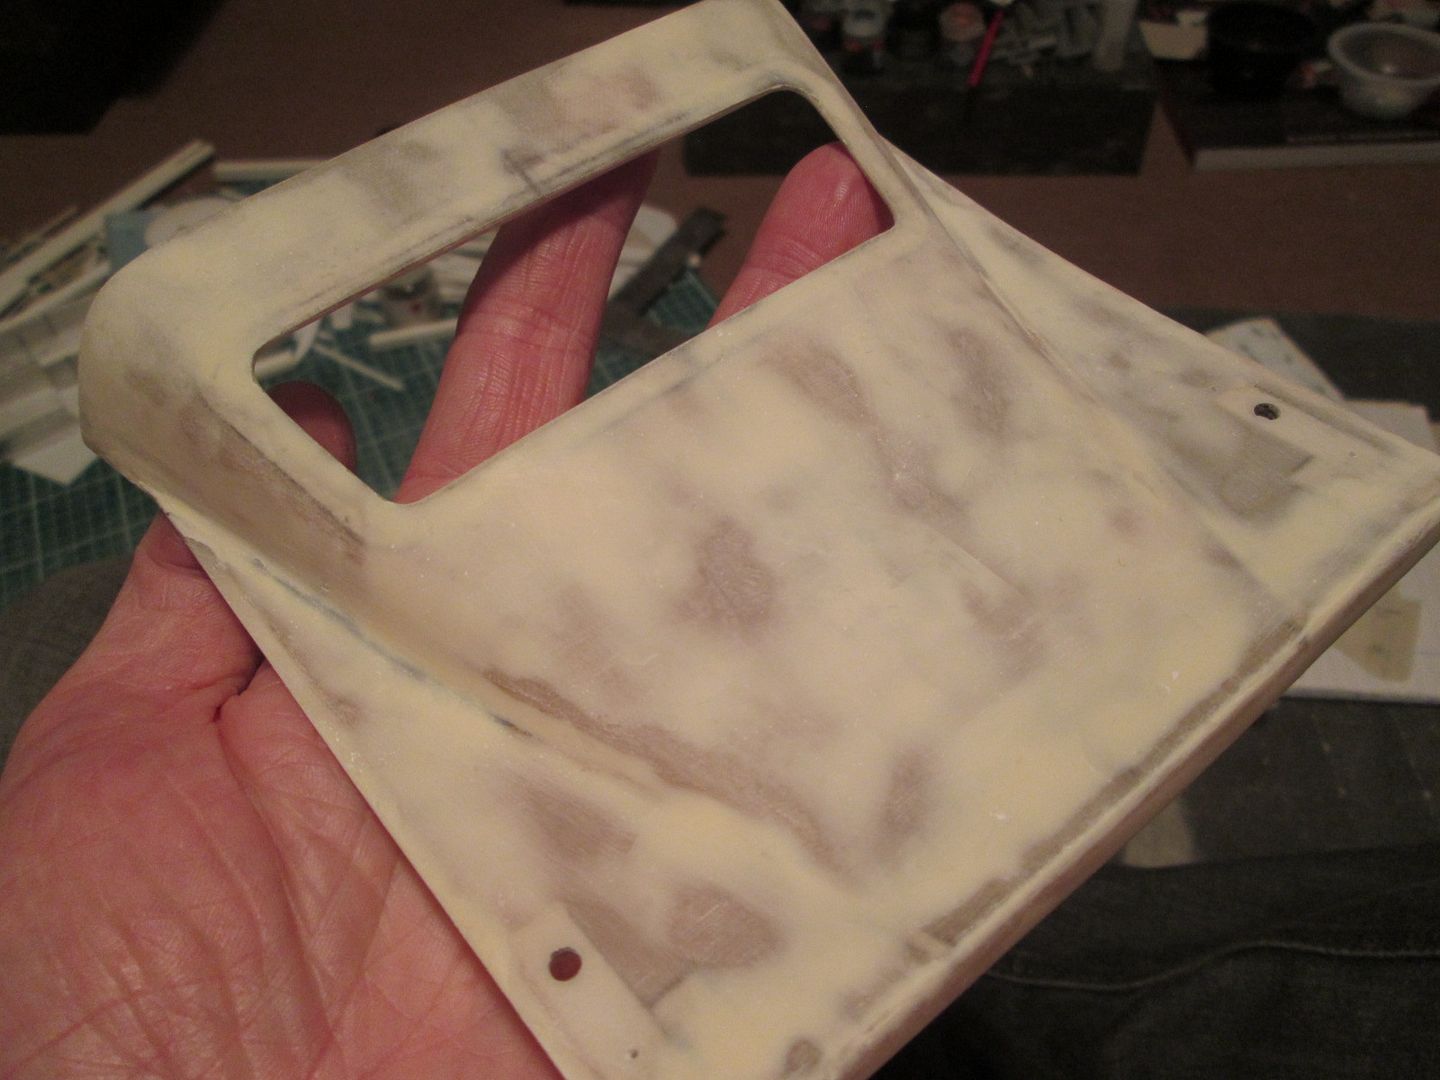 I've also been puttying the rear wing end-plates (both inner and outer faces), the wing main plane (again...) and the rear bumper centre panel. They'll all get a coat of primer next weekend, and hopefully they won't need too much rectification before the top coats. Given that I've still got the large front body section, bonnet, doors and the two rear wings / fenders to door, three more tubes of 'Mr White Putty' and another can of white primer are on order... Finally for tonight, I spent a large part of last weekend making these: 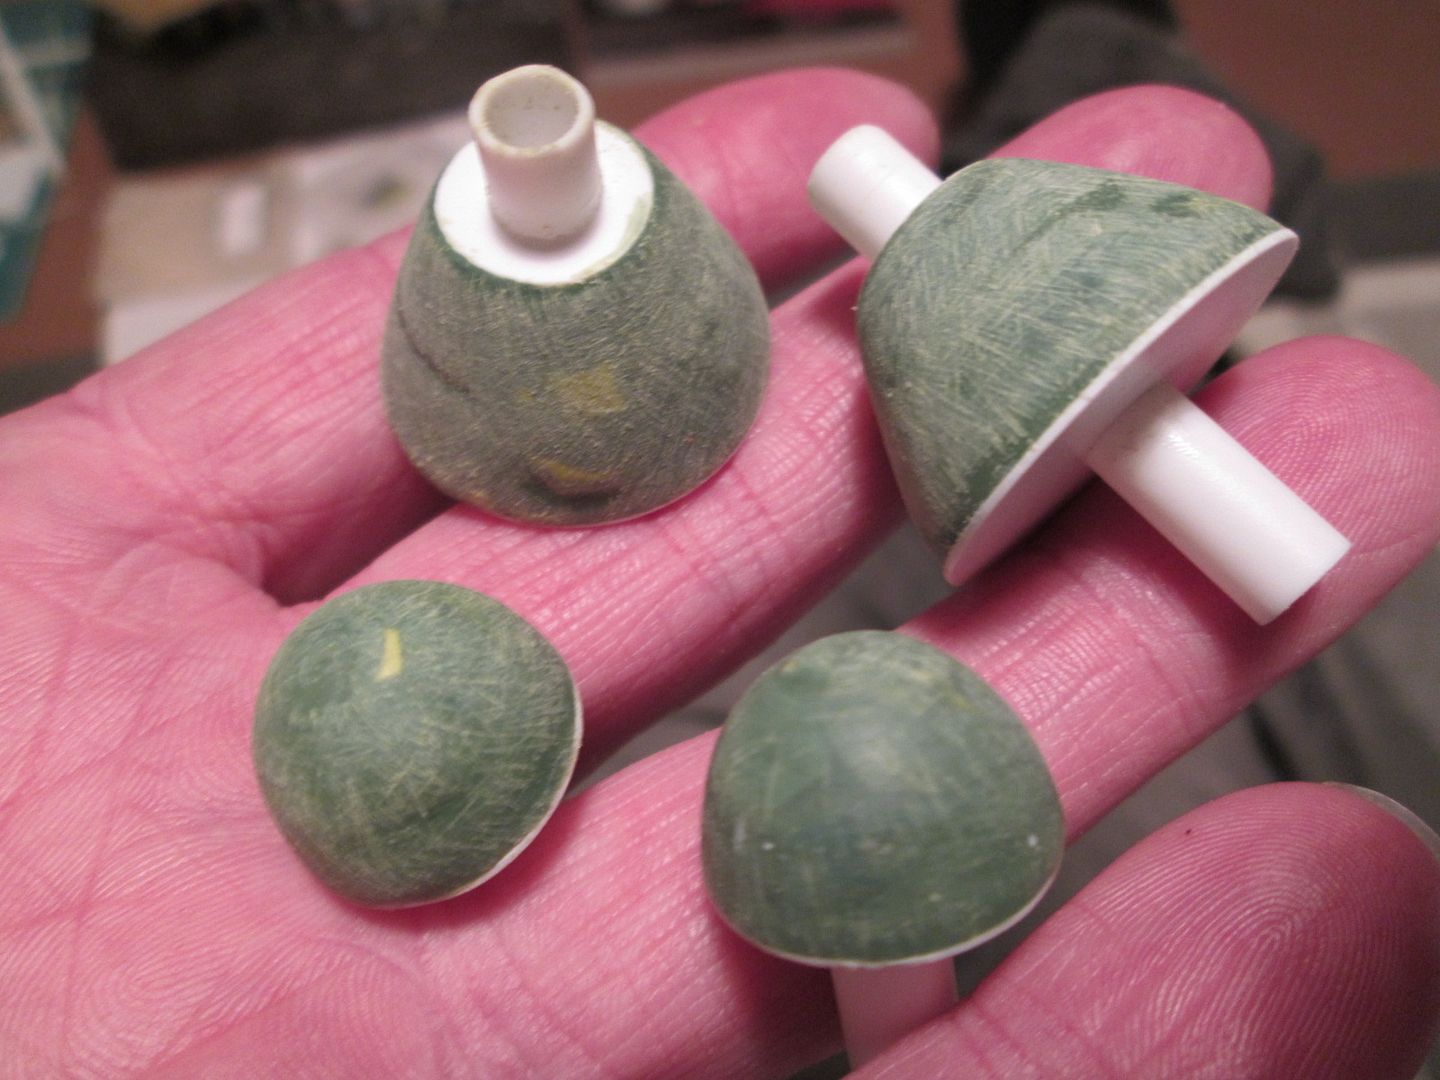 Not spinning-top toys, but patterns for making two headlight bowls and two fuel filler-neck collars. The headlights are one of the jobs I want to tackle in a couple of weeks - I want to make the bowls in fibreglass, line them with aluminium foil, add some sort of electrical and bulb detailing, then make two lenses. The filler-neck collars will be trimmed back to match the underside of the bonnet panel, and will probably receive a rim of split wire sheathing. I'll make a start on laying up the fibreglass next week, so they're ready to work with later in the month. The list of outstanding jobs doesn't seem to be getting much shorter, though...! More next time, SB |
|
|
|

|
|
|
#652 | |
|
AF Enthusiast
Join Date: Sep 2011
Location: Redwood City, California
Posts: 651
Thanks: 0
Thanked 39 Times in 39 Posts
|
Re: 1/8 Porsche 935/78 'Moby Dick'
Just when I think you've been slagging off... But no...
 It's all looking fabulous as usual. One thing that gives me a slight pause is the texture of the dash top though. The 4th pic down in this installment seems a bit rough-looking? I'm trying to reconcile it with the dashes in my 80 targa and 87 coupe, but not really able to... Love the first 'handful o' goodies' shot though! ianc |
|
|
|

|
|
|
#653 | |
|
AF Newbie
Join Date: Nov 2010
Location: Portugal
Posts: 62
Thanks: 4
Thanked 2 Times in 2 Posts
|
Re: 1/8 Porsche 935/78 'Moby Dick'
I continue to watch this incredibly inspiring work with regularity.
But I second ianc's opinion: it seems the dashboard is too textured. Maybe the cloth solution is a better one. Just my 2 cents. Keep-on-going, mate! Art |
|
|
|

|
|
|
#654 | |
|
AF Enthusiast
Thread starter
Join Date: Nov 2008
Location: Norwich
Posts: 649
Thanks: 21
Thanked 111 Times in 87 Posts
|
Re: 1/8 Porsche 935/78 'Moby Dick'
Okay folks - don't let it be said that I don't respond to constructive criticism! Take one dashboard top, add double-sided tape, CA glue, and what's left of one of my old work shirts:
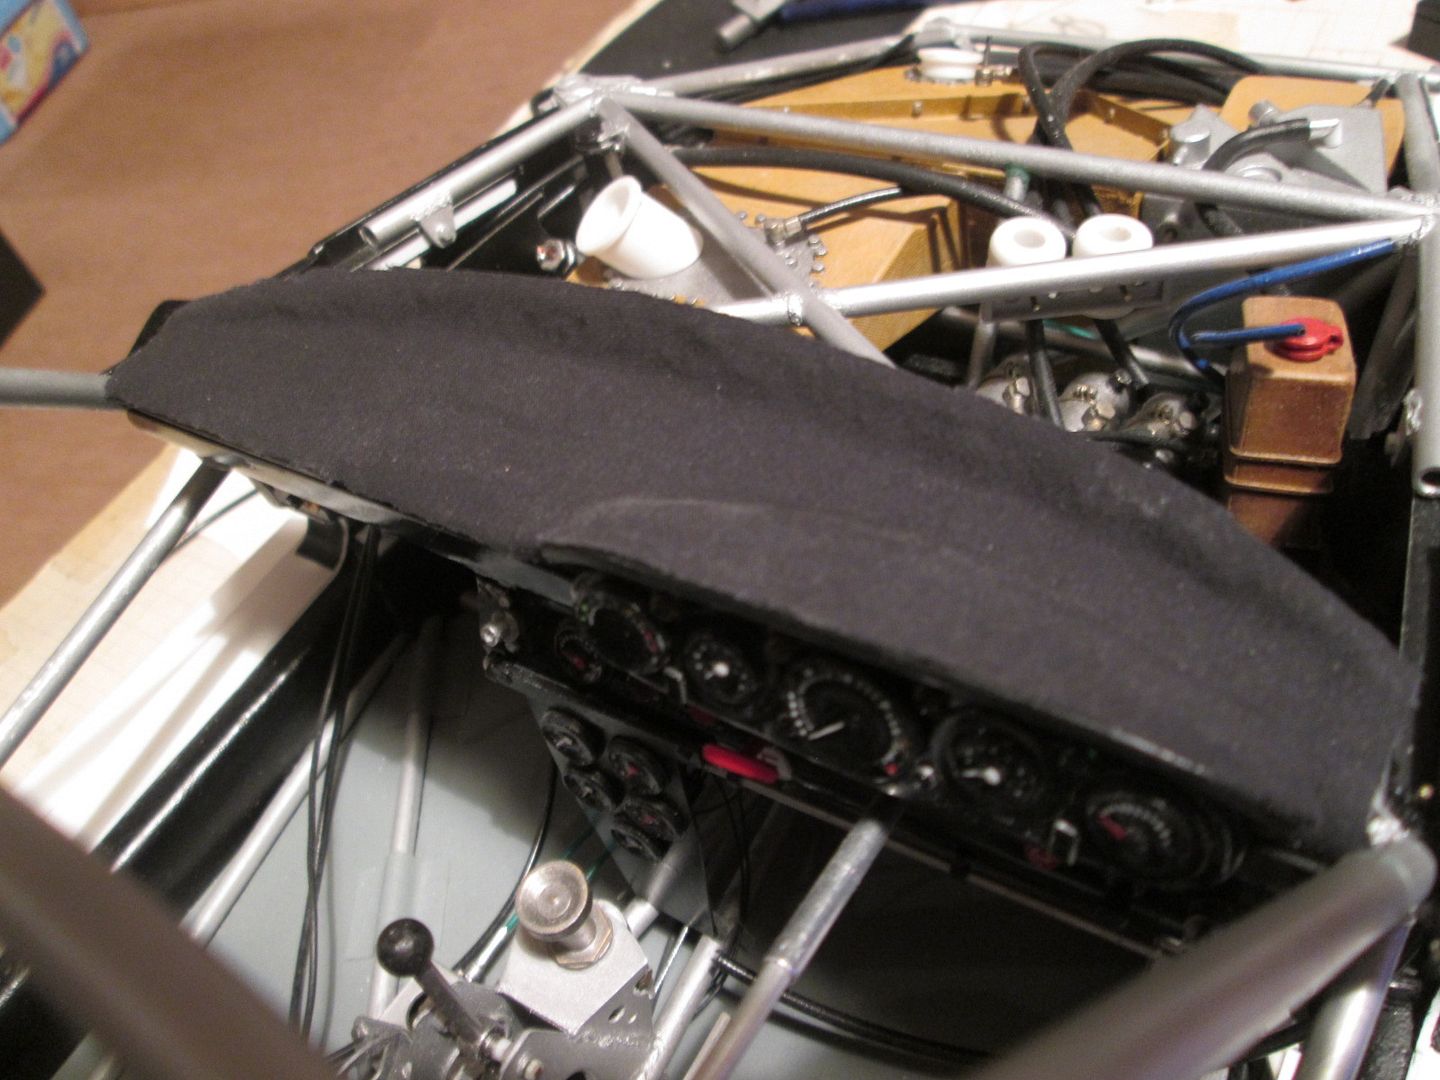 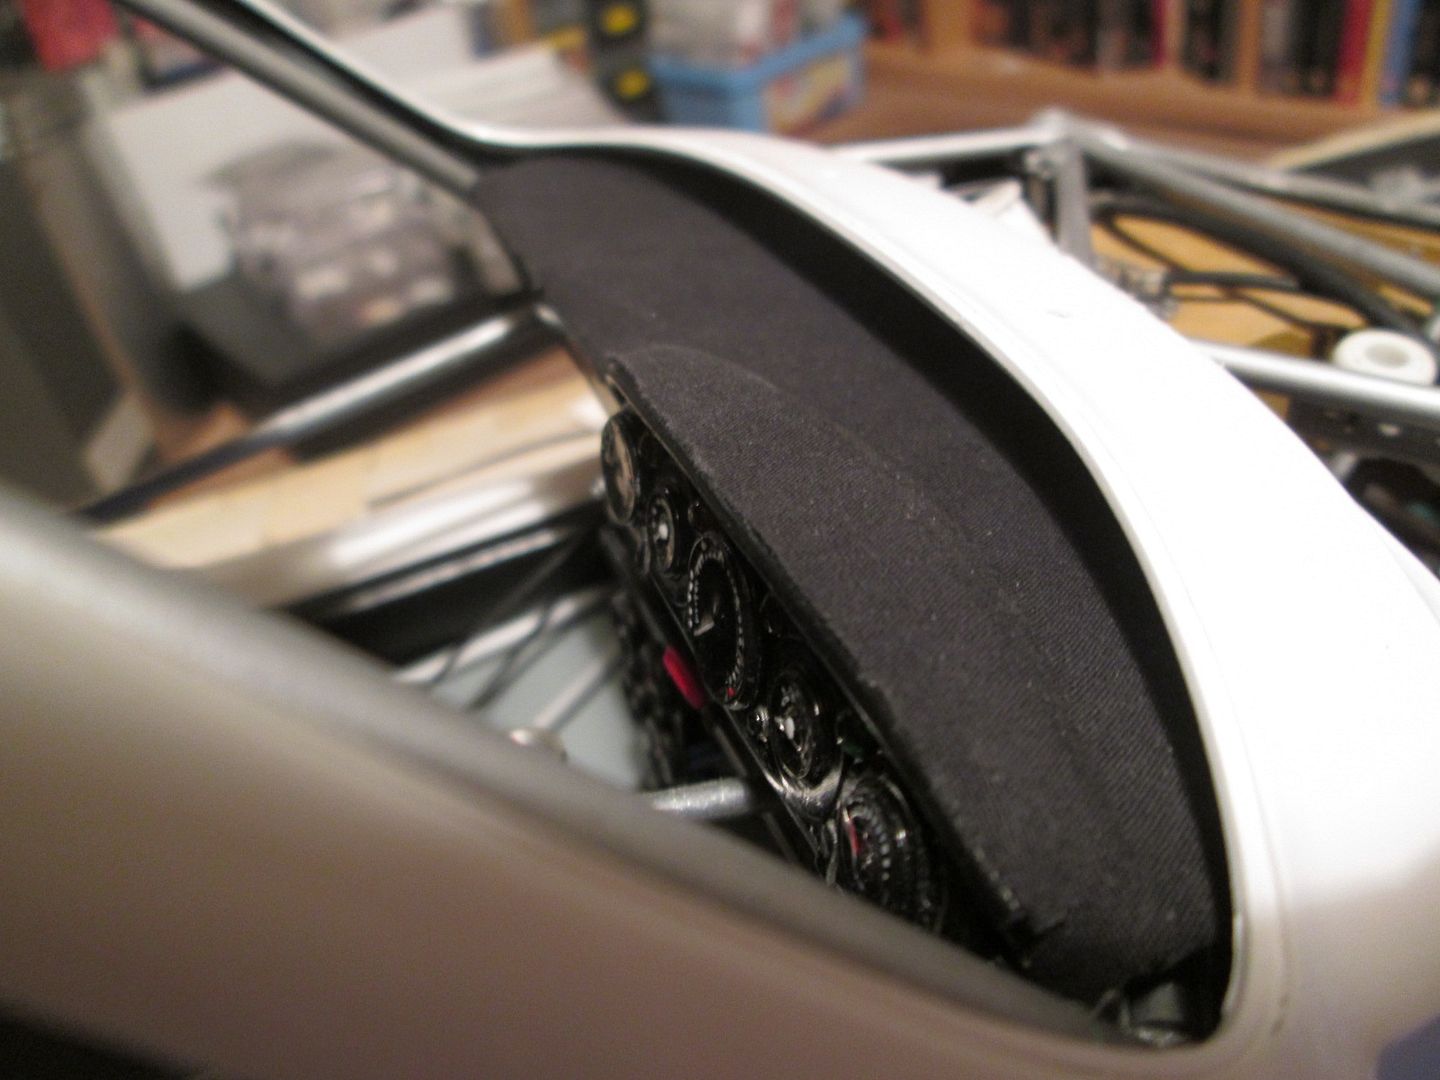 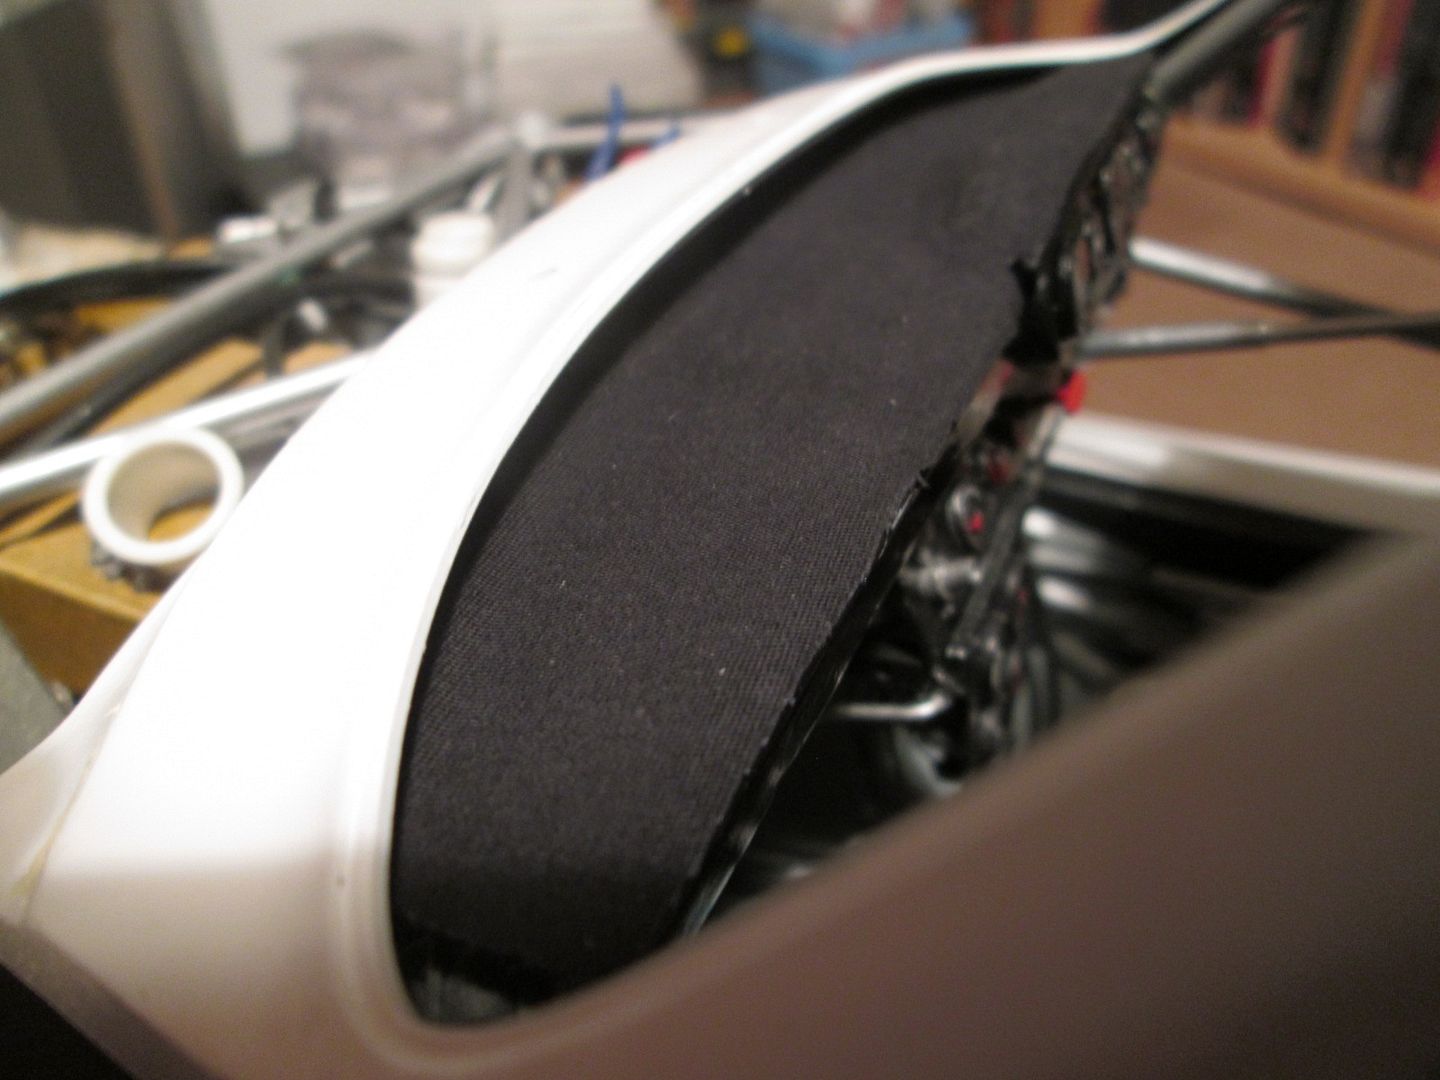 Needs a little more work, but as I only saw the two previous replies 2 1/2 hours ago, I'm pleased with the result. I wasn't planning on doing this tonight, but I thought it was worth posting immediately. Instant feedback! Thanks for the gentle nudge, Art and Ian. SB |
|
|
|

|
|
|
#655 | |
|
AF Enthusiast
Join Date: Sep 2011
Location: Redwood City, California
Posts: 651
Thanks: 0
Thanked 39 Times in 39 Posts
|
Re: 1/8 Porsche 935/78 'Moby Dick'
Brilliant! Thanks for listening!
ianc |
|
|
|

|
|
|
#656 | |
|
AF Newbie
Join Date: Nov 2010
Location: Portugal
Posts: 62
Thanks: 4
Thanked 2 Times in 2 Posts
|
Re: 1/8 Porsche 935/78 'Moby Dick'
My god!
Now it's better than the real thing! Art |
|
|
|

|
|
|
#657 | |
|
AF Enthusiast
Thread starter
Join Date: Nov 2008
Location: Norwich
Posts: 649
Thanks: 21
Thanked 111 Times in 87 Posts
|
Re: 1/8 Porsche 935/78 'Moby Dick'
Hello again,
I always find the best thing about modelling while on holiday from work is that I can tackle certain jobs that would be a major pain to do during a normal week, a couple of hours each night. With this in mind, I made sure that everything was in place and prepared so that I could dive straight in last weekend. First up, here's the headlight bowls and filler neck collars being laid-up with fibreglass: 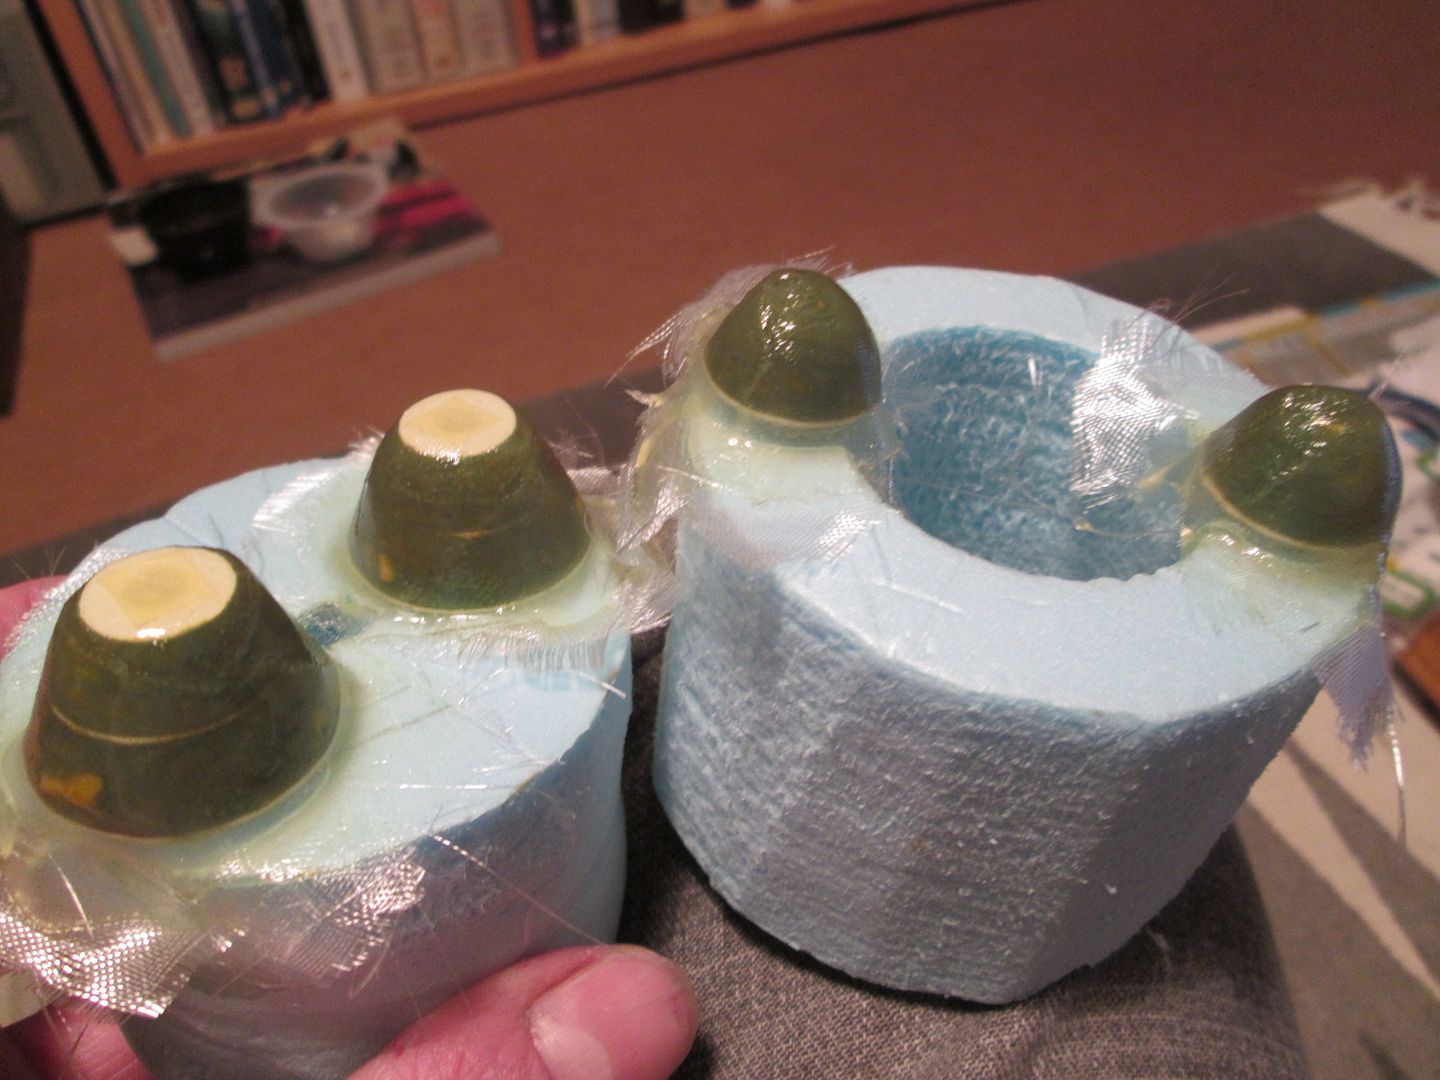 No problems with the resin / hardener mix this time, everything went off as planned and I only needed to use four layers of the thinnest cloth. They didn't even fight me when I tried to remove the parts from the moulds: 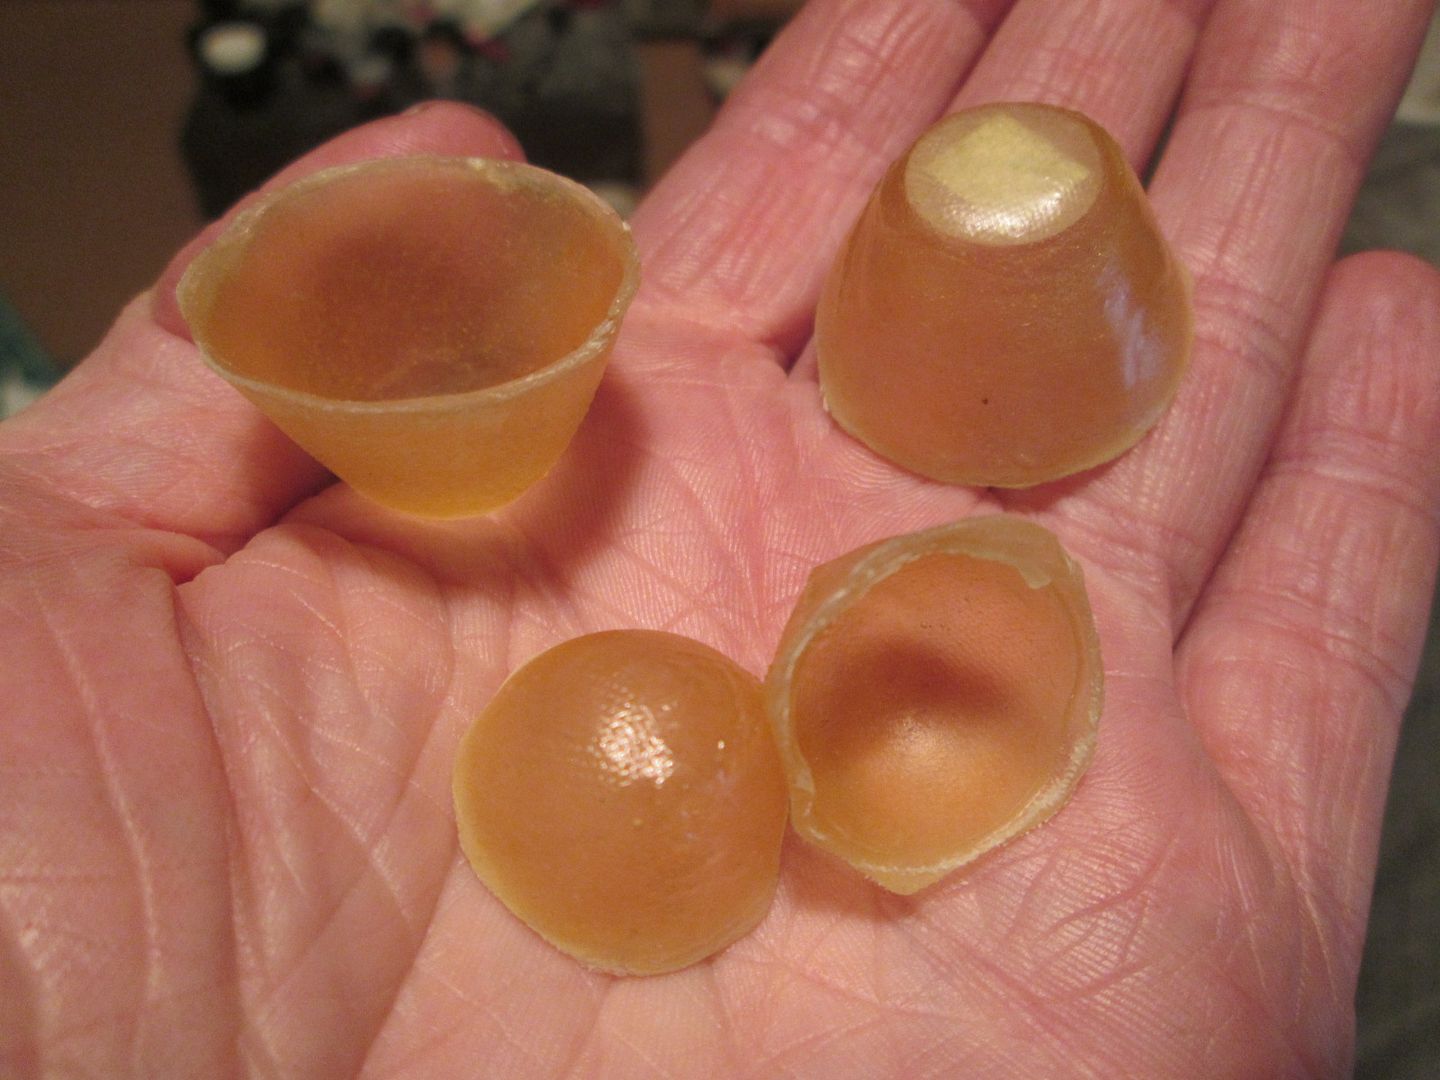 I'll return to the headlight bowls another time, but the filler neck collars were easy to trim to size: 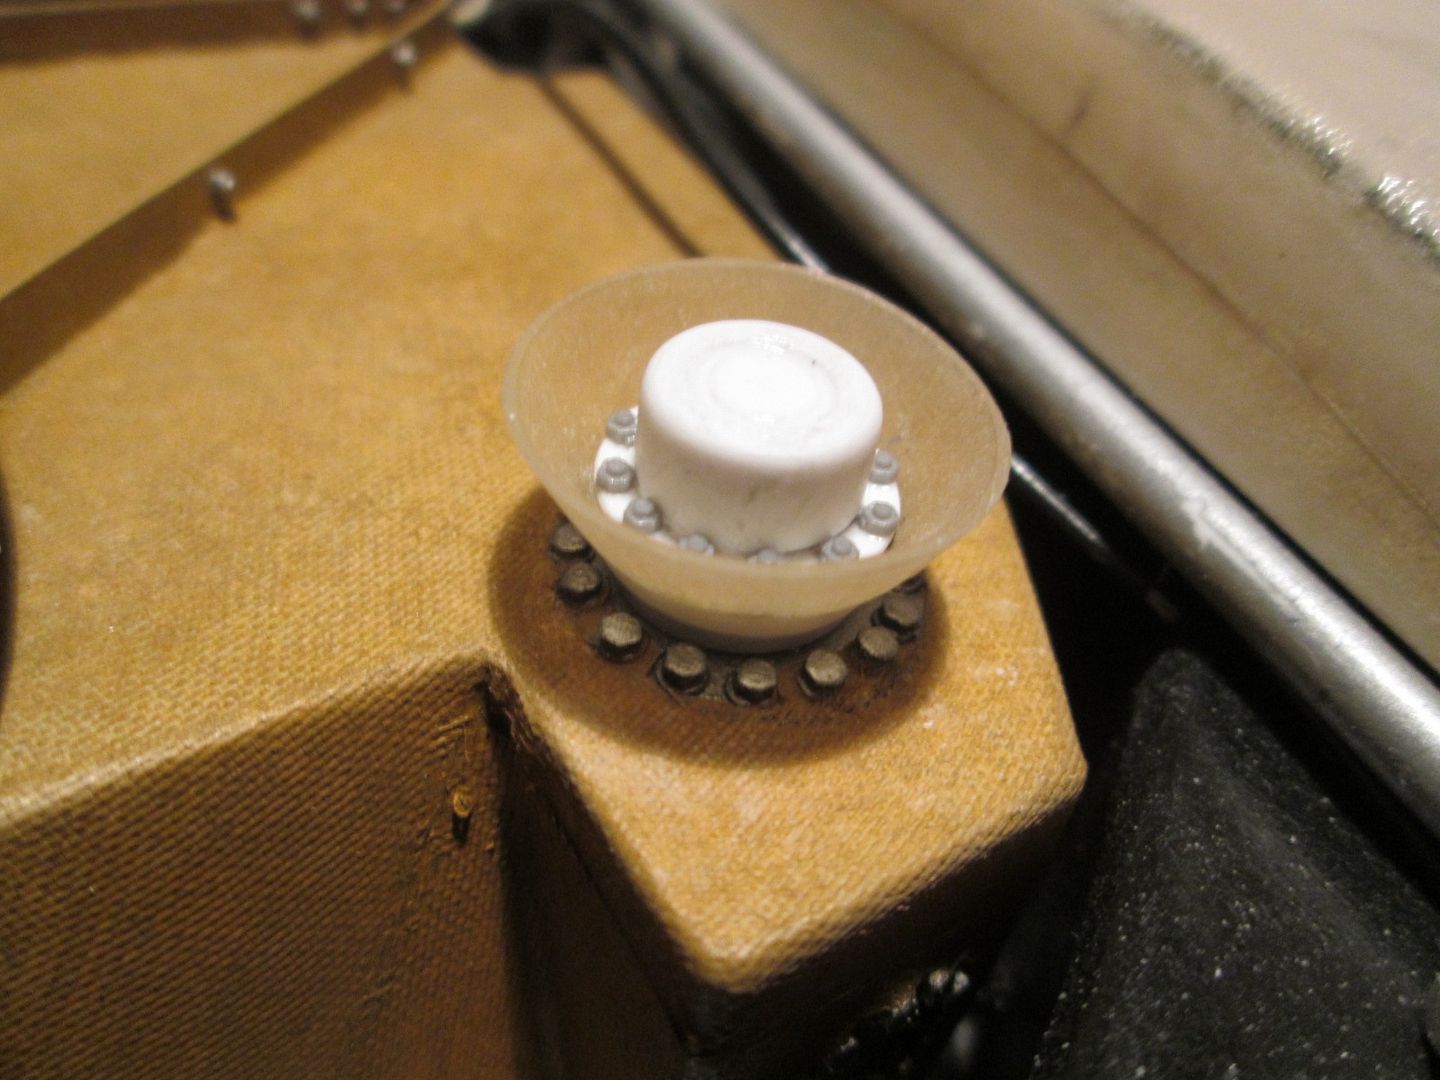 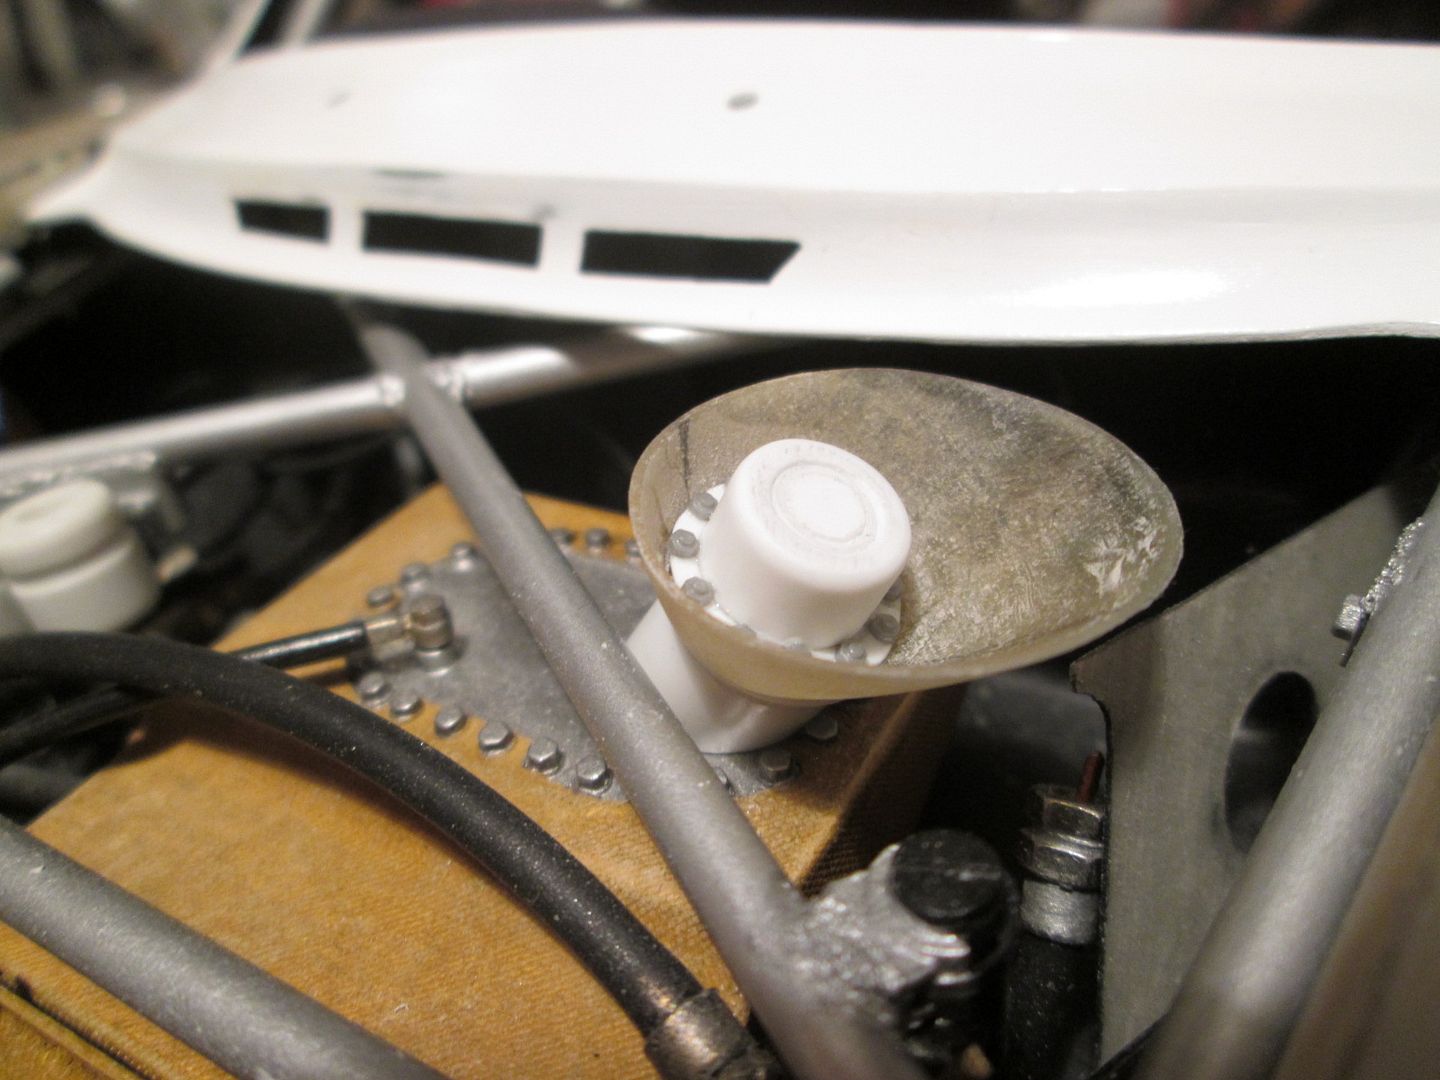 I just need to add a couple of small overflow lines to these and they're ready for painting. Staying in the front under-bonnet area, I've trimmed the Mk2 bonnet panel (made some time ago) and added the holes for the oil and fuel fillers: 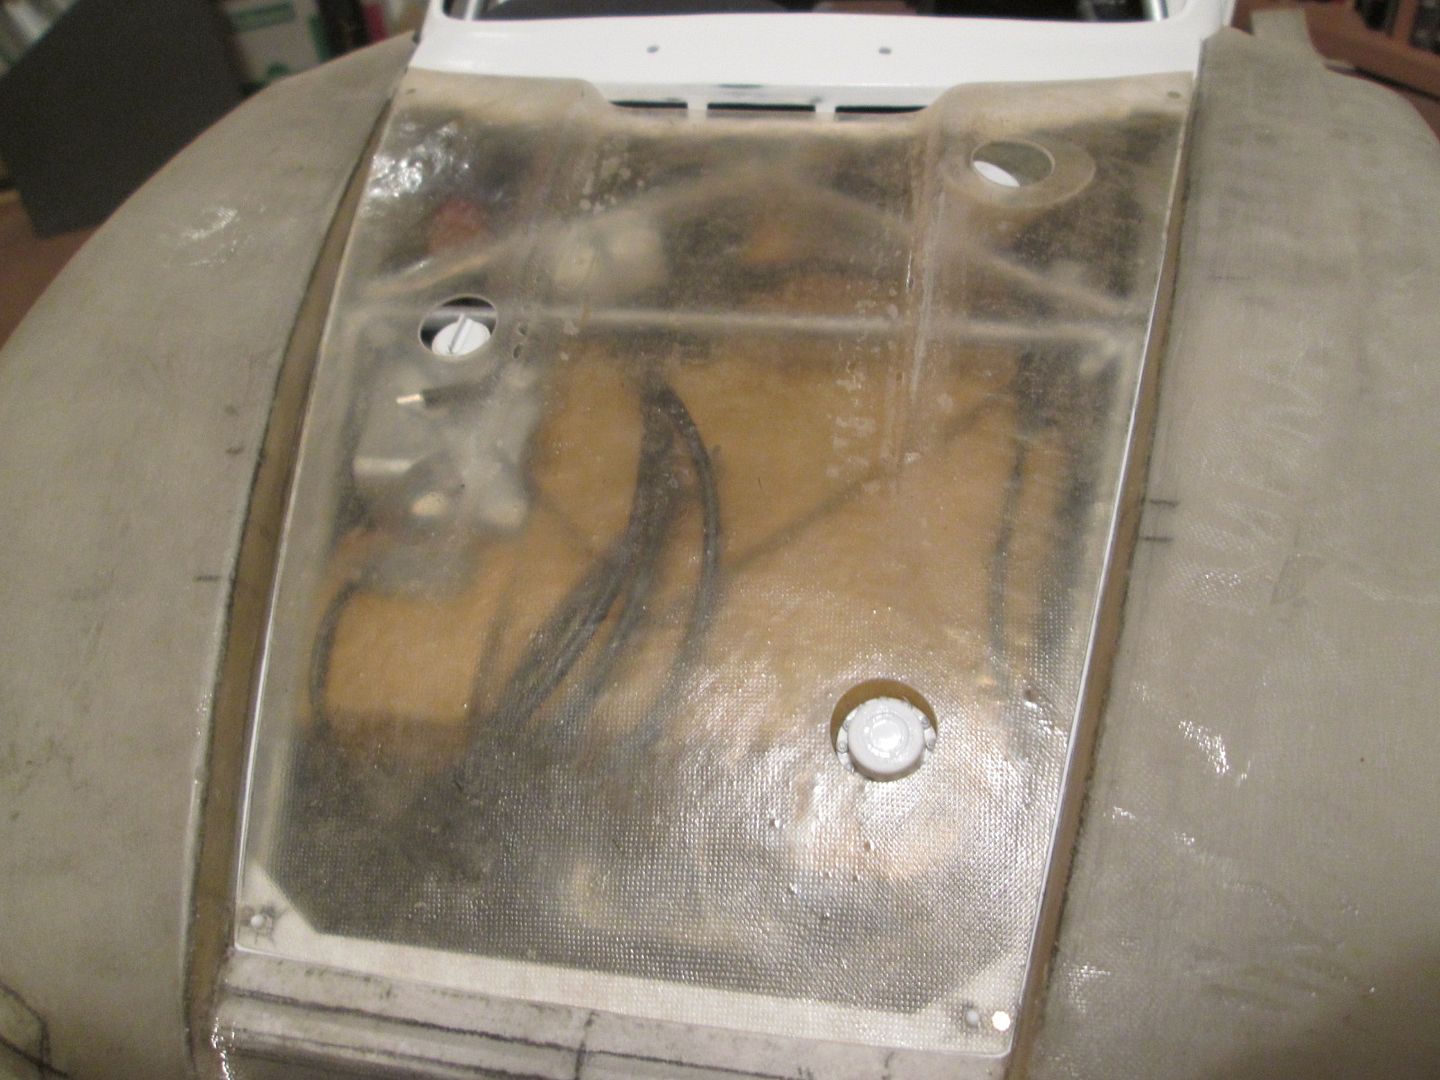 In each corner of the bonnet I've added a small 2mm diameter magnet, with matching magnets hidden under the edging of the nose section. It's not a super-strong attraction, but it's enough that it does a good job of locating the panel in place. There's some styrene strip and panelling added around the edge of the bonnet opening, so it's all looking tidier. The bonnet itself now needs some major rubbing-down before it's ready for filler and painting. In the front two corners you can just about see that I've also added a pair of locating pins. These go through the bonnet and are glued into the chassis X-frame. Eventually there'll be a couple more at the top corners too. To go with these, there should also be some removable bonnet clips, right? Something like these: 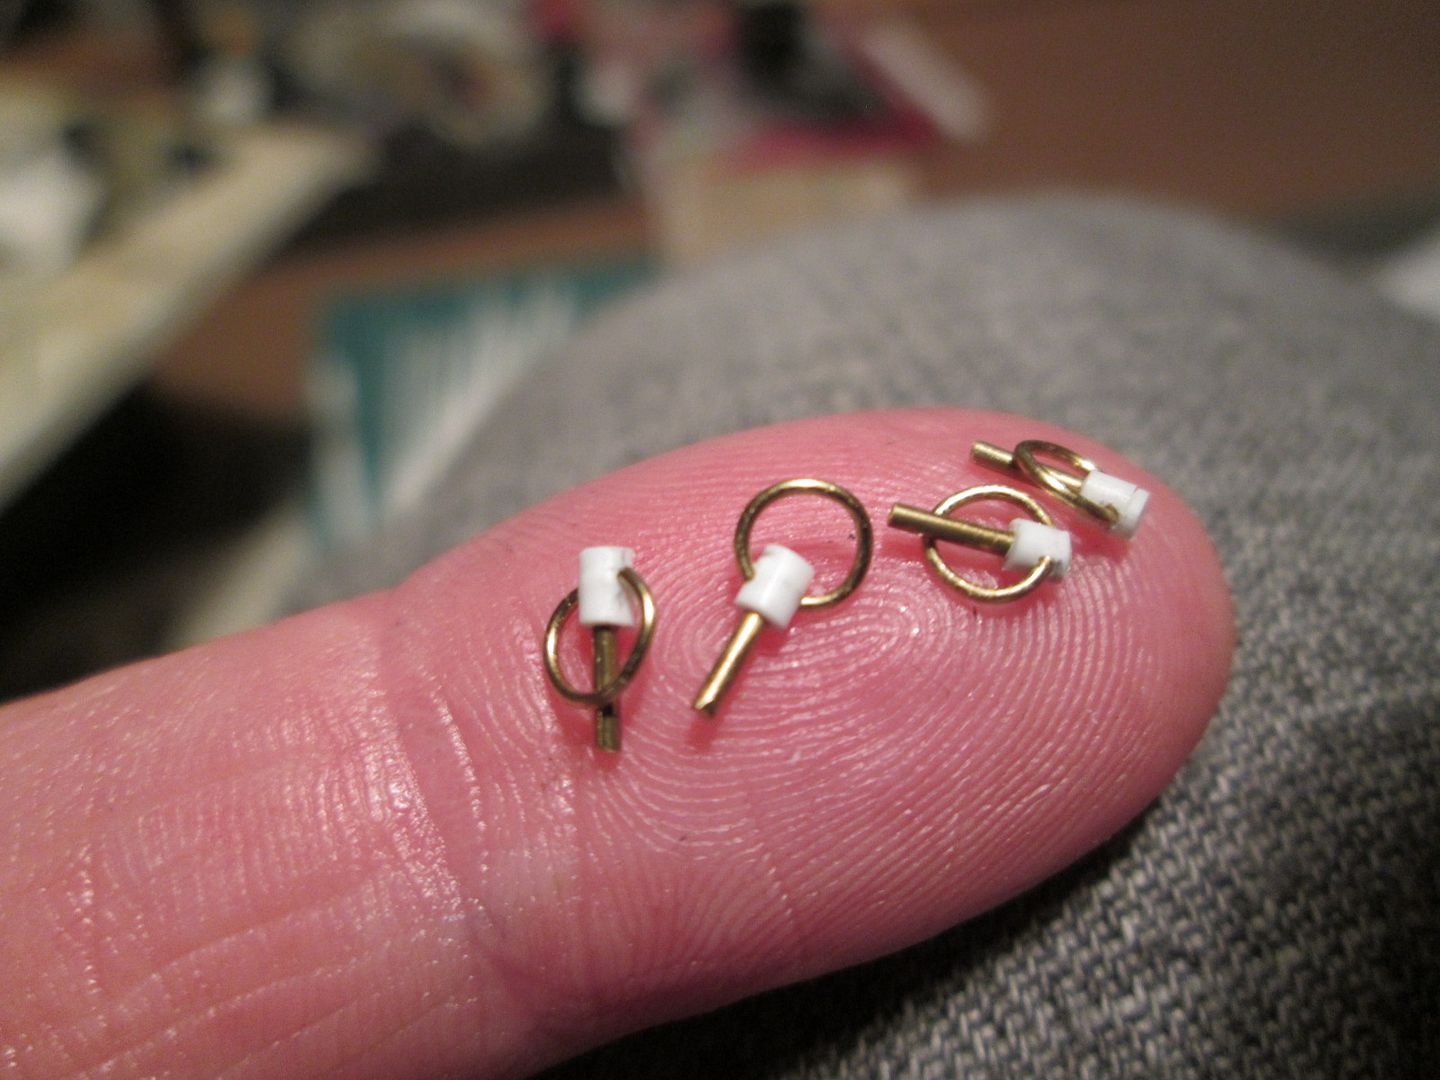 These will be tethered to the bonnet panel and left to hang free - I am not even considering making them functional! Next up, the steering wheel. A different technique for this one - normally I curve a piece of plastic hose over a wire core, but this never results in a nice round wheel. So, this time I cut five rings from 0.75mm styrene sheet, glued two pairs together to make the front and back for the rim, and cut notches in the fifth to locate the centre spokes: 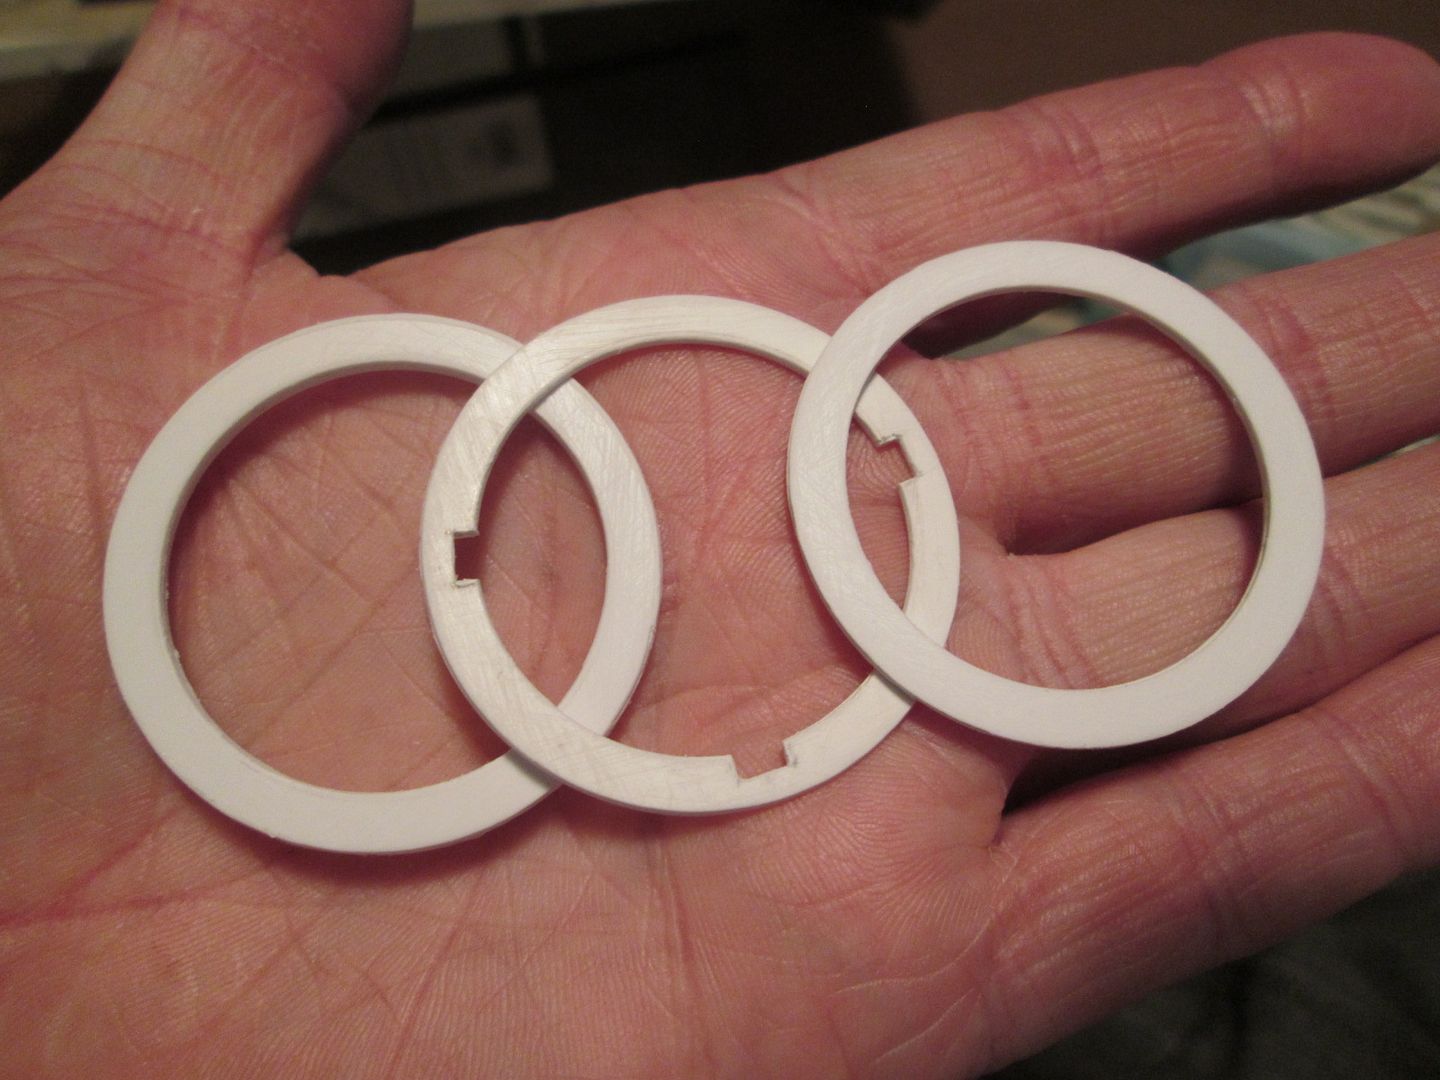 This lot was glued together and left under a heavy weight for a few days - I will be very annoyed if it starts to warp out of shape! The next step was to start shaping the rim, so I fitted it to my small modelling lathe and gently attacked it with emery cloth: 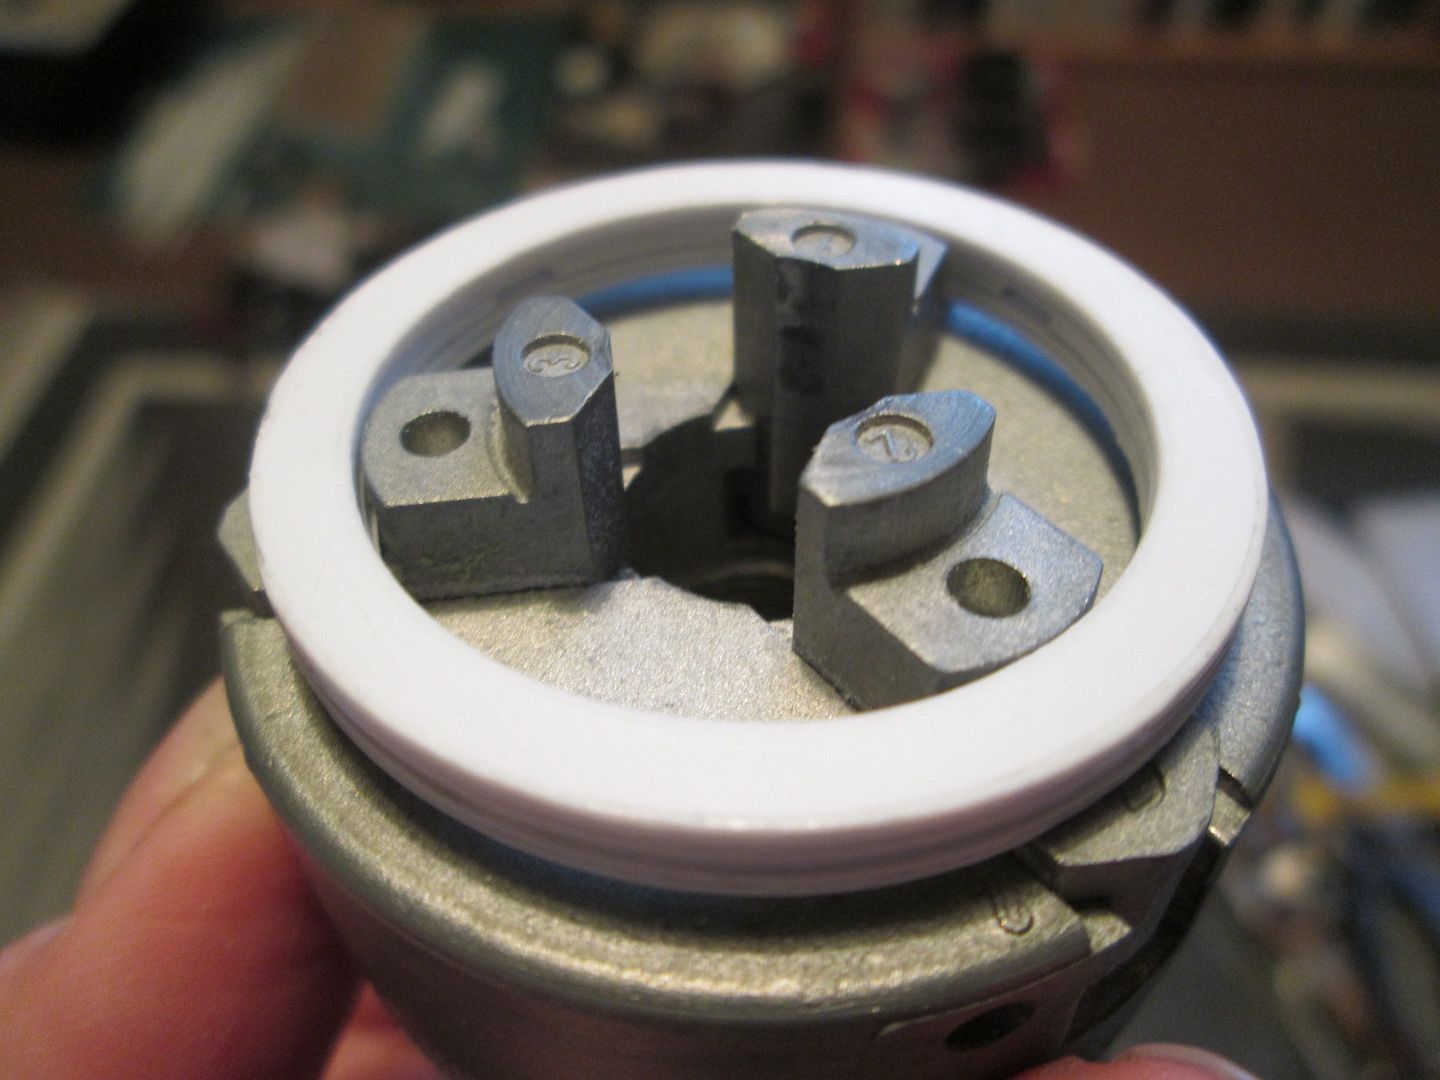 The three-spoke centre was also marked and trimmed from 0.75mm sheet, making sure that the spokes lined-up with the notches in the rim: 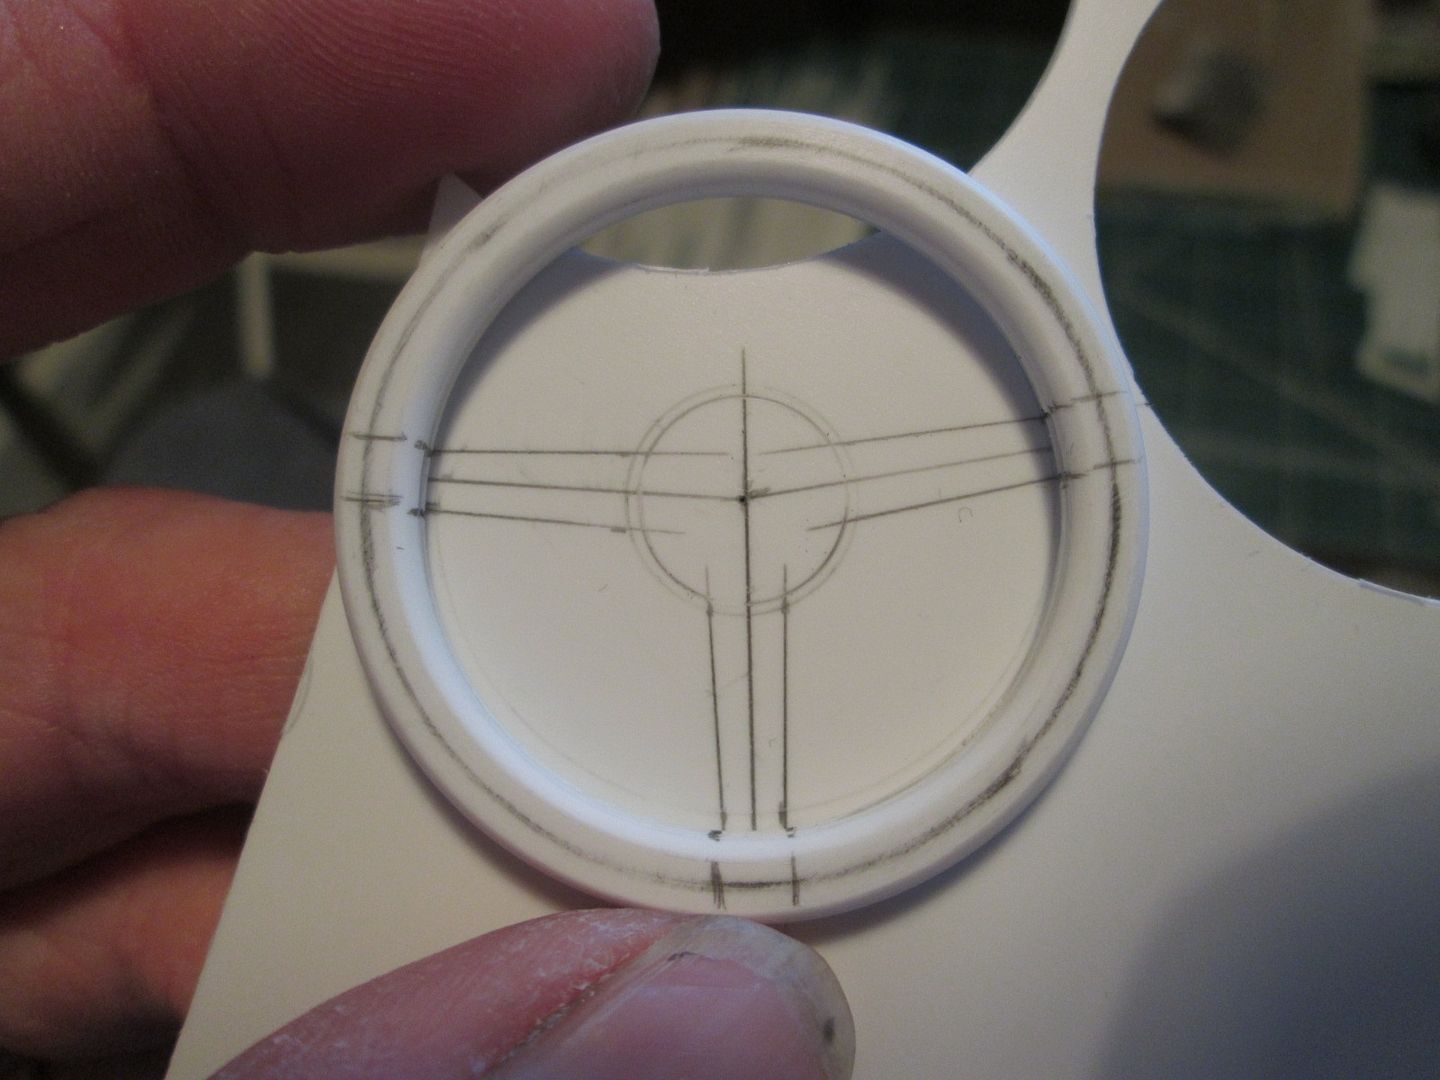 The upper part of the steering column was made from various pieces of aluminium tube and styrene. Small hex-nut detailing was added to the back, and some 'capscrew heads' added to the front (two of which allow me to pin the centre to the column. Greenstuff was added around the outside and inside of the rim to smooth everything off, and some small holes added for stitching detail. It's now pretty much ready for painting: 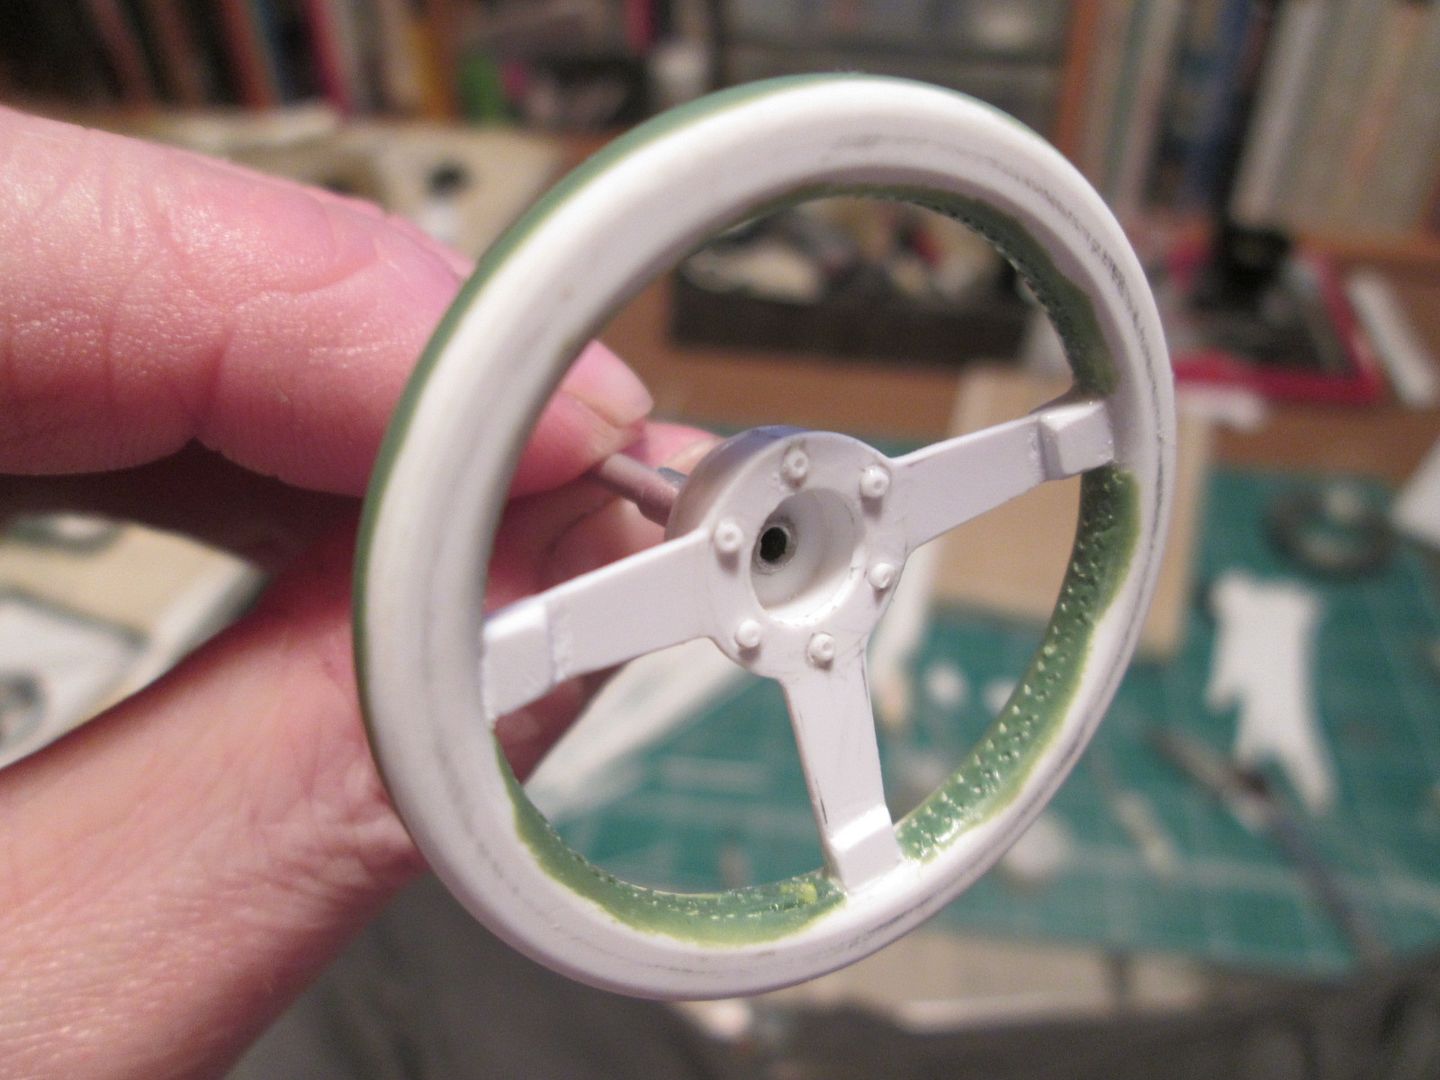 Finally for tonight, I've made a start on the components for the seatbelts. I want to make these even more detailed than the ones on the 908-03, but they're always a fiddly job. I still have to make the release buckle for the lap-straps, but all the other plates and mountings are well underway: 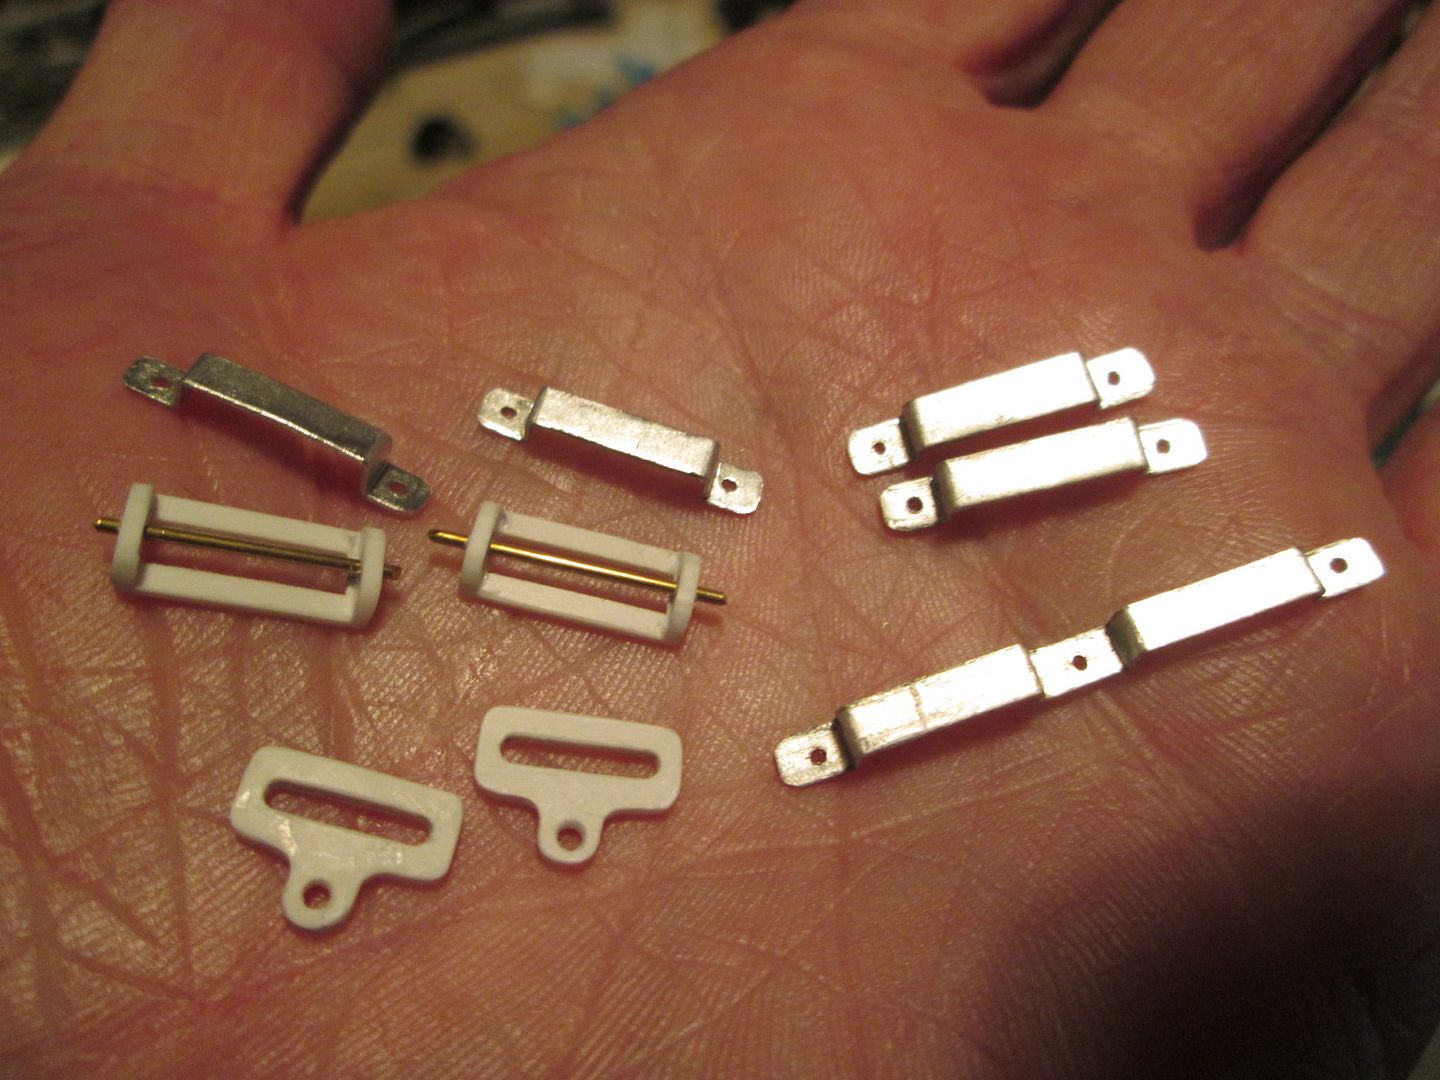 I'll continue to work on these during the next few days, and hopefully by next weekend they'll be ready to fit into the car. Time for some needle-work! In amongst all this I've been doing a little priming and painting too, but this can wait until the next update when things are finished. There's a few other jobs I'd pencilled-in for my holiday - headlights, re-making the tyres, making some more decals, etc - but I don't think it's all going to fit in! Still, it won't be too long until Christmas... That's it for tonight. Not heavy on the technical detail, but I think by now you know how I do what I do! Hopefully next weekends update will have the same variety - and some finished parts. SB |
|
|
|

|
|
|
#658 | |
|
AF Enthusiast
Join Date: Aug 2005
Location: where "sky grey" is a colour
Posts: 822
Thanks: 3
Thanked 32 Times in 29 Posts
|
Re: 1/8 Porsche 935/78 'Moby Dick'
Lovin' it! :-)
|
|
|
|

|
|
|
#659 | |
|
AF Newbie
Join Date: Nov 2010
Location: Portugal
Posts: 62
Thanks: 4
Thanked 2 Times in 2 Posts
|
Re: 1/8 Porsche 935/78 'Moby Dick'
Great update
I love particularly the "stitches" on the steering wheel; a great detail! Art |
|
|
|

|
|
|
#660 | |
|
AF Enthusiast
Join Date: Sep 2011
Location: Redwood City, California
Posts: 651
Thanks: 0
Thanked 39 Times in 39 Posts
|
Re: 1/8 Porsche 935/78 'Moby Dick'
I too love the wheel, with the attendant stitching holes. How do you plan to simulate the actual stitching there though? Tricky...
ianc |
|
|
|

|
| ||||||||||||||||||||||||||||||||||||||
 |
POST REPLY TO THIS THREAD |
 |
|
|