|
|
|

|
|
| Search | Car Forums | Gallery | Articles | Helper | AF 350Z | IgorSushko.com | Corporate |
|
| Latest | 0 Rplys |
 02-21-2007, 08:35 PM
|
#166 | |
|
AF Regular

Join Date: Jun 2004
Location: Hong Kong SAR
Posts: 377
Thanks: 0
Thanked 0 Times in 0 Posts
|
Re: FXX...long WIP
You are gonna to CF the entire FXX, looking great!!!
|
|

|

|
|
02-21-2007, 11:57 PM
|
#167 | |
|
AF Moderator
 
Join Date: Jun 2002
Location: Cincinnati, Ohio
Posts: 12,565
Thanks: 363
Thanked 46 Times in 42 Posts

|
Re: FXX...long WIP
It's simply amazing!!

__________________
http://public.fotki.com/tonioseven/ |
|
|
|
|
|
02-22-2007, 12:26 AM
|
#168 | |
|
AF Regular
Join Date: Sep 2006
Location: Sydney
Posts: 127
Thanks: 1
Thanked 0 Times in 0 Posts
|
Re: FXX...long WIP
Thats amazing
|
|
|
|
|
|
02-22-2007, 12:49 AM
|
#169 | |
|
AF Enthusiast

Join Date: Aug 2002
Posts: 906
Thanks: 0
Thanked 3 Times in 3 Posts
|
Re: FXX...long WIP
Looking excellent Paul. You've really got the hang of applying the CF and making the templates! I quick question regfarding the seatbelts, aren't the crotch belts supposed to come through the seat cushion, directly under where the driver's crotch would be as opposed to wrapping up from underneath the front of the seat?
Keep up the good work!
__________________
Bill "Why yes, that IS my bare, carbon fiber Enzo in Scale Motorsport's "How to Carbon Fiber Decaling video!" |
|
|
|
|
|
02-22-2007, 01:27 AM
|
#170 | |
|
AF Fanatic

Join Date: Dec 2004
Location: Up the creek with no paddle
Posts: 5,888
Thanks: 7
Thanked 16 Times in 15 Posts
|
Re: FXX...long WIP
Outstanding build that just keeps getting better.
Good question on the harness, Bill - even if it is correct, I still get tears in my eyes just looking at it 
__________________
Guideline for happy modeling: Practice on scrap. Always try something new. Less is more. "I have a plan so cunning, you could put a tail on it and call it a weasel" - Edmund Blackadder Last edited by klutz_100; 02-22-2007 at 11:08 AM. |
|
|
|
|
|
02-22-2007, 01:34 AM
|
#171 | |
|
AF Regular

Join Date: Feb 2006
Location: NorCal!, California
Posts: 475
Thanks: 0
Thanked 0 Times in 0 Posts
|
Re: FXX...long WIP
insane.
|
|
|
|
|
|
02-22-2007, 01:44 AM
|
#172 | |
|
AF Enthusiast

Join Date: Jun 2005
Location: Céroux-Mousty
Posts: 506
Thanks: 11
Thanked 5 Times in 5 Posts

|
Re: FXX...long WIP
Hello,
The more I see your WIP, the more i want to continue working on my Ejan Transkit.......  The seats are really very nice. CF also. Jamme
__________________
WIP: LaFerrari Tamiya 1/24 |
|
|
|
|
|
02-22-2007, 04:27 AM
|
#173 | |
|
AF Newbie
 Join Date: Apr 2006
Location: Hamilton
Posts: 41
Thanks: 0
Thanked 0 Times in 0 Posts
|
Re: FXX...long WIP
your CF work gets better with each part you do!!!!
cait wait for more updates... |
|
|
|
|
|
02-22-2007, 09:34 AM
|
#174 | ||
|
AF Premium User
 Join Date: Sep 2003
Location: Bay Area, California
Posts: 1,650
Thanks: 0
Thanked 0 Times in 0 Posts

|
Re: FXX...long WIP
Quote:
Yep, you got a sharp eye. I messed up - I am already working on redoing the 5th loop. It was late at night and I forgot about the weird configuration of the FXX belts... so I put them the wrong way.Thanks everyone for the nice comments - The CF is a major b*tch. Between working with complex curviature, multiple pieces and uncooperable solvaset, it has become the curse of this model. But it is coming together, albeit slowly, well. I have to still order another mode for the undamaged monocoque. 
__________________
In Progress: FXX - test mule in CF 49' Mercury |
||
|
|
|
|
02-22-2007, 10:17 AM
|
#175 | |
|
AF Regular

Join Date: Jan 2005
Location: Puebla
Posts: 439
Thanks: 6
Thanked 13 Times in 3 Posts

|
Re: FXX...long WIP
Good job on the front and rear end, I did the Porsche GT1 testing prototype, also entirely covered by CF decal, so I know how hard it can be!
Have you tried using a hair dryer to heat the decal a little? It helps a lot. And at the end, which seat belts did you use? Needless to say that they look great, just correcting the antisub and theyll be perfect! Cheers!
__________________
Happy modeling! Ramon Garcia Puebla, Mexico |
|
|
|
|
|
02-22-2007, 12:36 PM
|
#176 | ||
|
AF Enthusiast
Join Date: Aug 2002
Posts: 906
Thanks: 0
Thanked 3 Times in 3 Posts
|
Re: FXX...long WIP
Quote:
The trick with the SMS decals is that it was engineered to work best with 3 things. 1. MicroSet (a cleaning agent) 2. MicroSol (a decal solvent) 3. Heat from a low wattage hair dryer. Solvaset is a great product, but Matthew Wells (owner of SMS) worked directly with MicroScale when he created the decals and they work best with their products. hth and if you come across any problems, just ask (as you know I'm also building the same model!)...I don't have all the answers, but I may have come across the solution! Bill
__________________
Bill "Why yes, that IS my bare, carbon fiber Enzo in Scale Motorsport's "How to Carbon Fiber Decaling video!" |
||
|
|
|
|
02-22-2007, 04:38 PM
|
#177 | |
|
AF Premium User
Join Date: Sep 2003
Location: Bay Area, California
Posts: 1,650
Thanks: 0
Thanked 0 Times in 0 Posts
|
Re: FXX...long WIP
Thanks Bill!
I will have to go out and by MicroSet/MicroSol. BTW - your FXX (at least the seat) looks fantastic... Agamo - thanks mate! I used a craft ribbon for the seatbelt material. Turned out ok. I used the PE set from Tamiya and harness decals from CM.
__________________
In Progress: FXX - test mule in CF 49' Mercury |
|
|
|
|
|
02-22-2007, 09:26 PM
|
#178 | |
|
AF Premium User
Join Date: Sep 2003
Location: Bay Area, California
Posts: 1,650
Thanks: 0
Thanked 0 Times in 0 Posts
|
Re: FXX...long WIP
Small update:
I have completed the rear end, including the winglets and the exhaust pipes (they are not attached yet...obviously) The winglets are adjustable, since I put a metal rod in them. 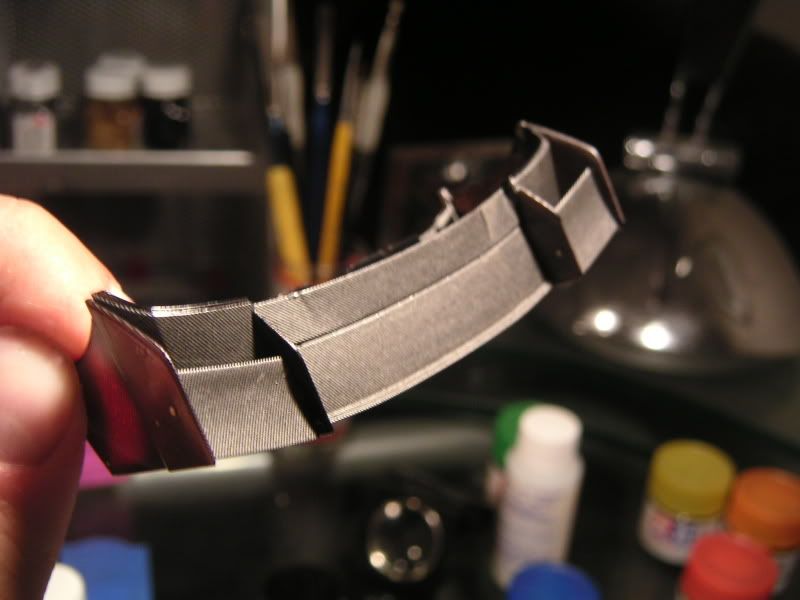 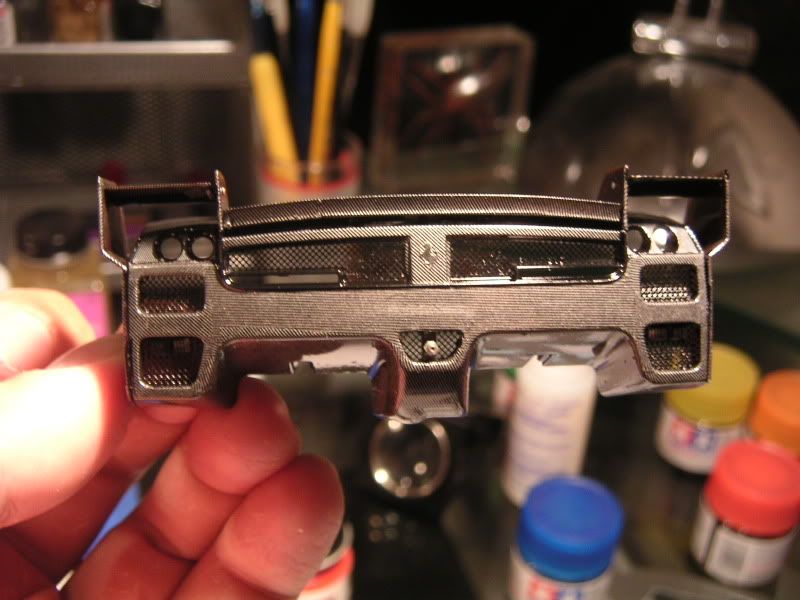 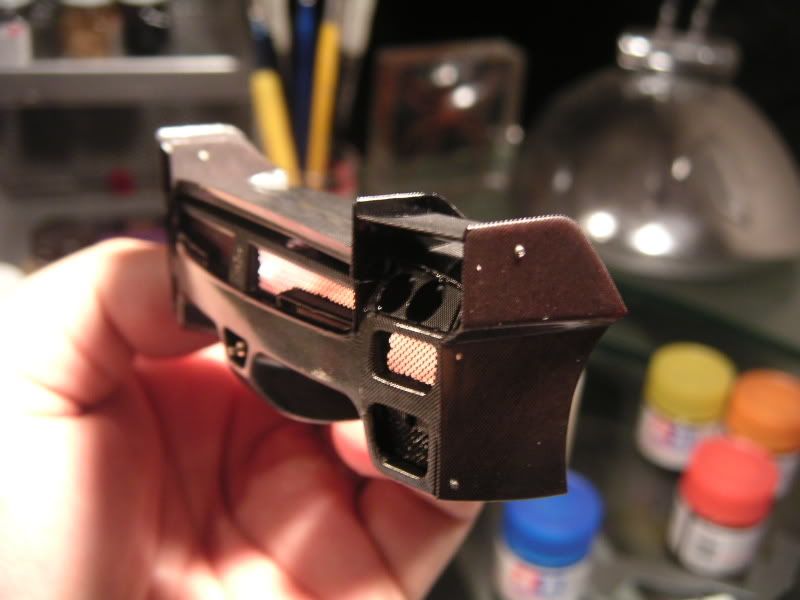 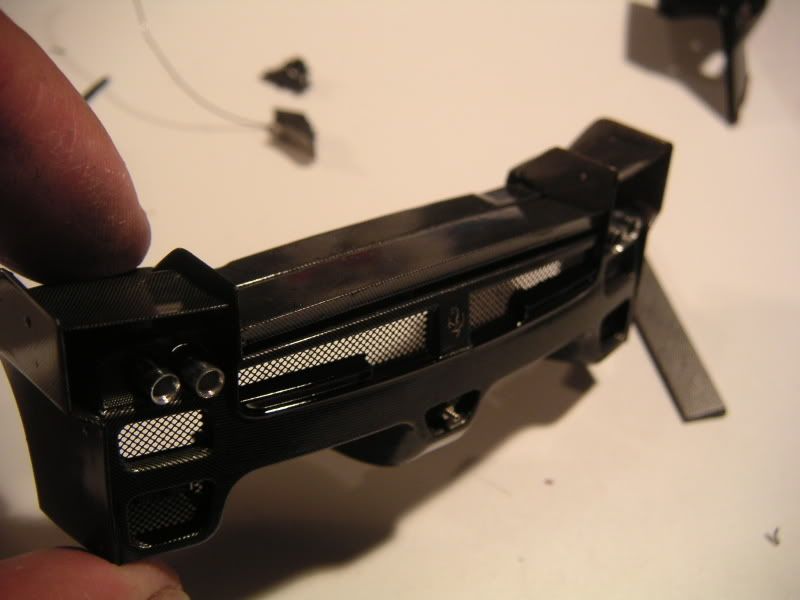 Here is the hood, freshly detached from the fenders, painted and starting to take shape 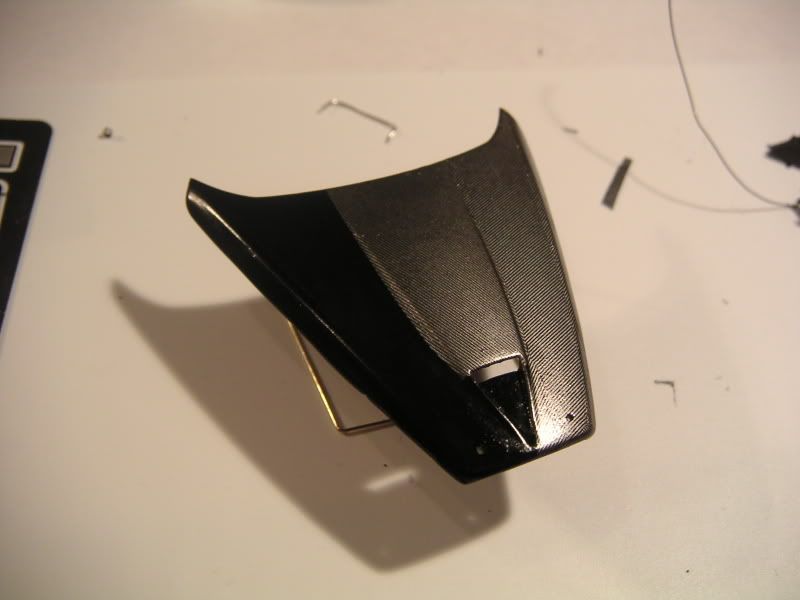 more soon
__________________
In Progress: FXX - test mule in CF 49' Mercury |
|
|
|
|
|
02-23-2007, 01:11 AM
|
#179 | |
|
AF Enthusiast

Join Date: May 2003
Location: Sunshine Coast, AUSTRALIA
Posts: 2,215
Thanks: 16
Thanked 8 Times in 8 Posts
|
Re: FXX...long WIP
Paul,
I thought I would jump in and do a quick review of the Crazy Modeler PE set for the FXX which I just received. It has inspired me to start my kit! The kit comes with 5 PE frets with an abundance of parts! I'll try to make sense of them all The first sheet consists of seat belt harness hardware (similar to the Tamiya offering but a bit finer), plenty of logo's, the front grill, the pedals, instrument gauge (which will look very nice painted and polished), vents, hose clamps, tops of the Ferrari caps, and some engine bay details (see the yellow highlights). This last part is a very nice addition and is continued in more detail on the fret with the brake discs. 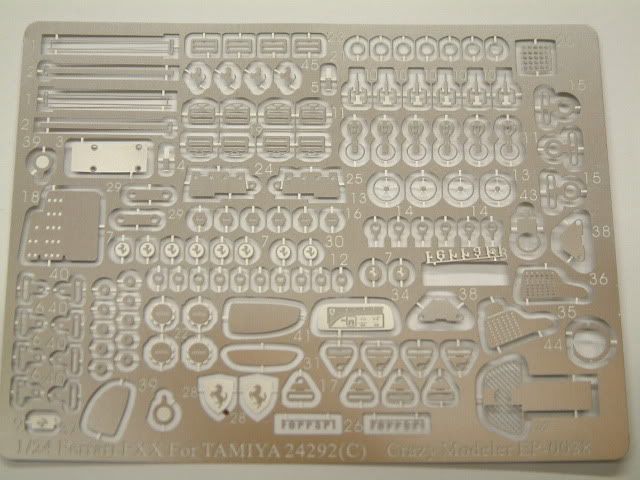 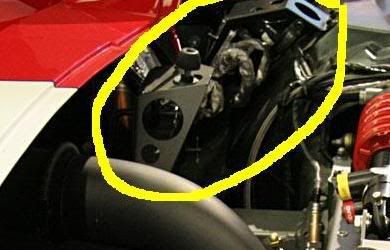 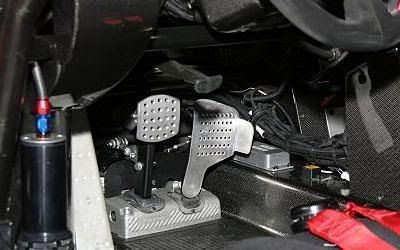 The second fret has the box that the pedals fix to, the brake disc details, the front thermal fans and covers, windscreen wiper, gear change paddles, and a few other misco parts. The only suggestion here is the gear change paddles could have had the shift controls etched into them (see picture) 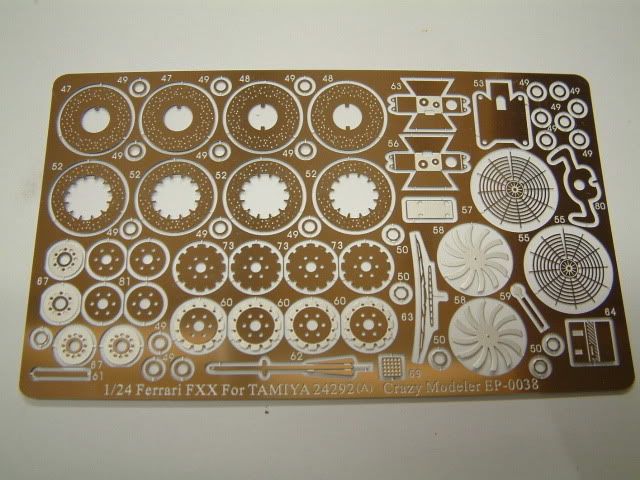 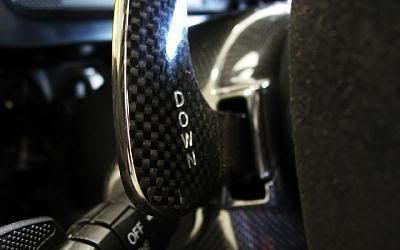  The third fret contains all the mesh screens for the car. This is a much more comprehensive set compared to the Tamiya offering and the fit of the parts is perfect from what I have checked so far. There are also radiator faces included - top left of picture CRAZY MODELER SCREENS  TAMIYA SCREENS 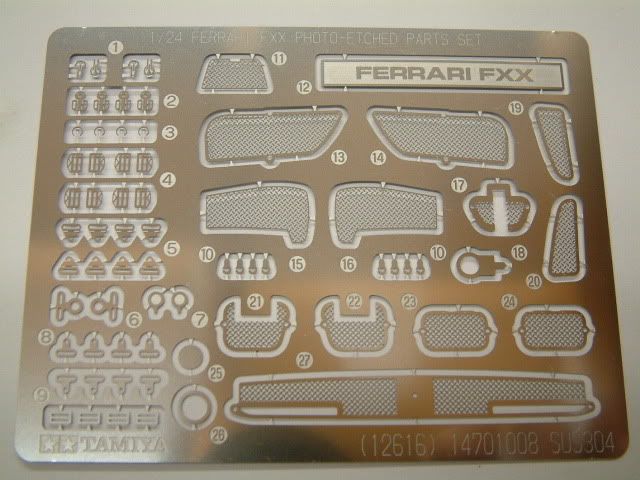 The fourth sheet has all the fasteners, body ID tags, and the heat screens for the firewall and engine cover. These fit perfectly and are a very innovative approached compared to the usual metal foil. The only concern I have here is the windscreen cover which I thought was a decal on the real car. CM have made it as a metal part which may be hard to attach if used? They also include the cover for the fuel cap which has the logo etched into it. Unfortunately the logo is silver and the cap is black (see the earlier reference picture) so the way they have done it will make it hard to do. You will have to spray the part black then use a silver wash. If they had etched it in reverse you could have painted the part black then polished the logo? 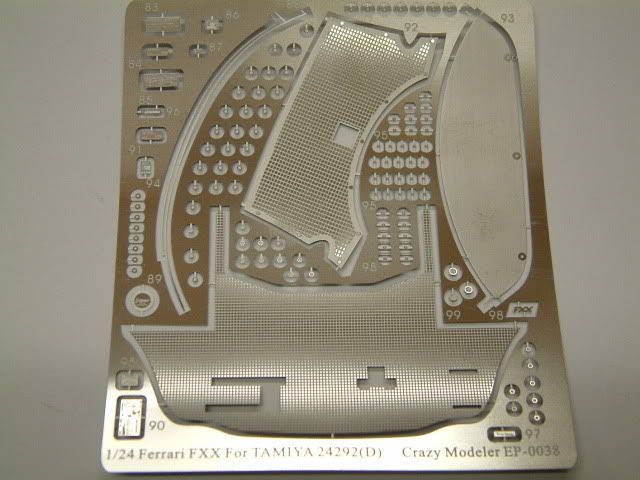 Finally is the second brake set. You have all seen how good these look when they are assembled and I can't wait to put them together. A massive improvement over the kit parts (which are good as they are anyway) 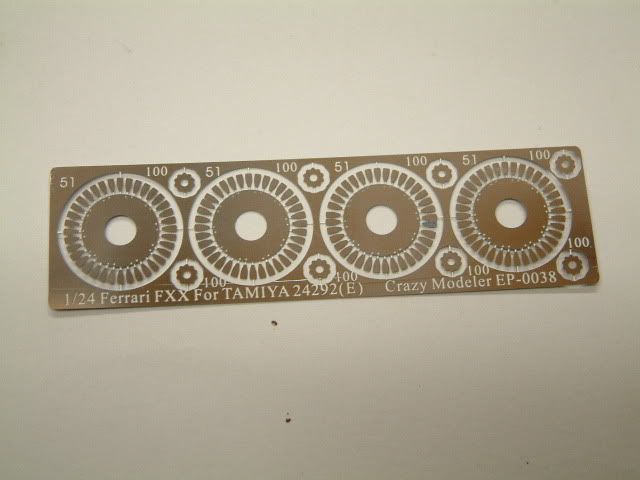 Full and comprehensive instructions are also included 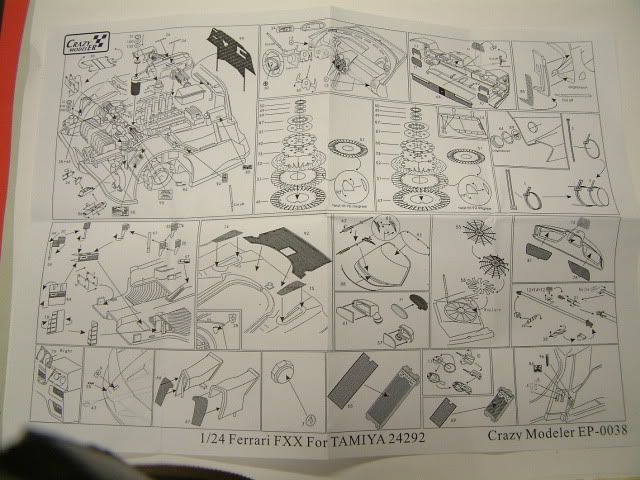 like I said earlier, this set has made me want to pick up the kit and start building it. Paul, I hope I haven't convinced you to spend more money by posting this review? I have the ZERO decals and a bottle of Bianco Fuji ready to go! Excellent product!
__________________
Rob 
|
|
|
|
|
|
02-23-2007, 03:27 AM
|
#180 | |
|
AF Regular
 
Join Date: Apr 2004
Location: Istanbul
Posts: 215
Thanks: 0
Thanked 1 Time in 1 Post
|
Re: FXX...long WIP
Robrex you said...
Unfortunately the logo is silver and the cap is black (see the earlier reference picture) so the way they have done it will make it hard to do. You will have to spray the part black then use a silver wash. If they had etched it in reverse you could have painted the part black then polished the logo? Well as an idea.... you can prime then paint the part silver. and carefully dry brush the high part black... SLK230... that is an excellent build.
__________________
Toughbeard...  -------------- Destroyed Projects: 1/20 Tamiya BMW/Williams FW-24 Noob Projects:1/24 Tamiya GT3 + Tamiya 1/12 Honda NR ---------------  
|
|
|
|
|
|
 |
POST REPLY TO THIS THREAD |
 |
|
|


