|
|
|

|
|
| Search | Car Forums | Gallery | Articles | Helper | AF 350Z | IgorSushko.com | Corporate |
|
| Latest | 0 Rplys |
|
|||||||
 |
 Show Printable Version | Show Printable Version |  Email this Page | Email this Page |  Subscribe to this Thread
|
|
|
Thread Tools |
 08-30-2006, 12:10 PM
|
#31 | |
|
Geo Metro Lover
 
Join Date: May 2005
Location: Eastern Washington State, Washington
Posts: 1,622
Thanks: 0
Thanked 0 Times in 0 Posts
|
Re: That's the end of my '93 Metro.....
Holy Cow, my friend!
My God! What you've just told me is incredible information! I was thinking about soaking the heads in hot detergent solution to clean them! Then wire brushing with a drill brush the top of the cylinders to get all the carbon off.... Damn, I am so glad you decided to explain this! I am sure a lot of guys will be helped by this message. Back to the content.... I wanted to get this job done ASAP. That is my mental disorder. I decide on something and then feel compelled to get it done NOW! So I did not want to wait on any Mail Order and I have this big dislike of paying Shipping Charges which kills all savings on the price! Why stainless valves if 'normal' ones last 150,000 miles. At 15,000 miles per year, I would need 10 years to get back to where I am. I'll be 73.5 by then and (hopefully still driving) the car will be a rust bucket. What is decarb - a chlorinated hydrocarbon oil based product? I will keep water away from everything! May I ask why no wire brushes? Do scratches on the top of the piston cause some later problem? I WD-40 everything! Was wondering if it would make a good lubricant for getting together with my spouse....lol I don't follow about the "Mesh" type ring business.... Does this mean that each ring is in fact three rings, thin-thick-thin? Any web site links where this is explained - with pictures? Also, the gaps must be offset by 90 degrees, yes? You would think that 180 degrees would be best...(?) Don't these rings rotate as the engine runs?! Or do they stay tight and where they were placed? How does one know the compression rings from the oil rings when you get the rings from the store? Labelled in a sleeve? Do they look the same? And this is probably obvious to you, but you put the bottom rings on FIRST going up...no? Why does one "hone" the cylinder walls? Honing cannot make them round if they have worn 'out of round.' Is this to remove a glaze so the new ones grind a new "fit?" I know from working at an Oil Company back when I was between my Bachelor's and Master's in Chemistry that about 5% of motor oil is Sulfur (that's why oil is yellow) which is put into oil so that Iron Sulfide forms on all exposed surfaces and acts as a lubricant and skin to protect the metal (Iron) surfaces from wear... You say be patient! lol Ha! Patience is not one of my virtues. "Be patient. All things come to those who wait." Death, Taxes, Car problems. etc..... As you can tell, I am a car engine virgin.... Never been into one.  DoctorBill
__________________
|
|

|

|
|
08-30-2006, 01:44 PM
|
#32 | |
|
AF Moderator

Join Date: Oct 2004
Location: Bellingham, Washington
Posts: 1,751
Thanks: 0
Thanked 73 Times in 73 Posts
|
Re: That's the end of my '93 Metro.....
the oil ring it made up of 3 pieces, thats why they show 15 rings. you have 2 thin rings for top and bottom and a spacer ring to hold them apart. the compression rings will have a bevel or dot on them so you know what side goes up. box will say on that. for spacing check your book or look on box for recomended gap location. if you use a brush for top of pistons use a brass one gentyl. i usually use a old ring on its side to scrape off th worst stuff and then end to clean the ring grooves, you have to make sure you get out any build up thats behind the old ring or you can break new one installing it. also check piston over well for any cracks in the skirt. the bead hone will break the glaze on the cyl walls so new rings break in. the correct way is to have a 45 degree cross hatch pattern. you move drill up and down as it turns. bead hone will not make it round, they have a bar home that will do same job but its mostly used for new rebored holes, if use on stock cyls can sometimes make taper worse in cyl. did you check to see if you had any ridge at top of cyl? after you home cyl walls make sure you wash them out very well and clean crank off as well, to assemble coat rings with oil before putting rings compressor on. once ring compressor is on put rod end of bearing in rod and lube well with motor oil or break in lube. notch or dot on piston goes to belt end of engine. put your hoses on end of rod bolts and using wood end of hammer to tap piston into bore. if it doesn't go in easily take it out and make sure none of the rings are sticking out from bottom of compressor. you have to hold it down as you tap the piston in. also make sure you do not mix up rod caps, they are machined to fit only 1 rod, also observe what way the cap was on and take it off the same way, if they are not numbered mark the top of each piston as you remove it so you know what hole it goes back into
|
|
|
|
|
|
08-30-2006, 01:45 PM
|
#33 | |
|
AF Enthusiast
 Join Date: Jul 2003
Location: Detroit, Michigan
Posts: 1,307
Thanks: 0
Thanked 0 Times in 0 Posts
|
Re: That's the end of my '93 Metro.....
 That's the "mesh" type one. The oil control ring. It's a 3 piece set, made up of one serpentine ring, and 2 paper thin rings. The 2 compression rings are MUCH thicker. A good ring will have the top and bottom of them labeled. If not, refer to the instructions or diagram that came with them. Also, make sure to install the compression rings in the proper order too(again, should tell you which one is wich in the leaflet that came with the rings). Don't ever clean engine parts with a wire brush, because it can strip any type of coating that was on the parts off. It can also put scratches in a surface that will collect soot and carbon like you wouldn't believe. It can cause hotspots on the piston, and cause pre-detonation down the road. As for the WD-40, don't use it to assemble your engine, only to coat parts that will be sitting in the air for a length of time. I personally use lithium grease. You'll most likely spin a bearing usind WD-40 during the first dry start. Stainless valves won't burn like regular valves do. If you get carbon buildup on them, they still won't burn or warp. It's a good piece of preventative maintenence to make sure you won't have to do that again. Yes, the piston ring gaps should be 180* offset from each other Ring 1 should be 90* offset from the wrist pin Ring 2 should be 180* from that The oil rings should be in-line with the wrist pin, 180* facing away from each other, and the serpentine like one should be lined up with either one of the compression rings. The reason for honing is the same reason we machine flywheels and brake rotors. They evenly put small scratches in the surface so the rings can make their own wear patterns. You can't really see it, but your old rings wore their own wear pattern into the cylinder walls. So honing them is basically like shaking an etch-a-sketch, so they have a new surface to wear into. The rings won't move inside the cylinder if they're broken in properly. The ring end-gaps wear a very very small groove into the cylinder wall and ride on that. They are in so tight too, that they have no reason to spin. de-carb solution is used for soaking carburetors to clean them. It will break up the carbon and soot on the piston, so you can pretty much wipe them clean, or spray them down with brake cleaner or WD-40. But anyways, get yourself some assembly lube! You'll kill it with WD. Assembly lube is easier to work with too  |
|
|
|
|
|
08-30-2006, 01:48 PM
|
#34 | |
|
AF Enthusiast
Join Date: Jul 2003
Location: Detroit, Michigan
Posts: 1,307
Thanks: 0
Thanked 0 Times in 0 Posts
|
Re: That's the end of my '93 Metro.....
Oh, here's a good link with diagrams on how to install the rings too. It's for a subaru, but should give you the right idea.
http://www.jepistons.com/pdf/piston_instrc4032.pdf |
|
|
|
|
|
08-30-2006, 02:07 PM
|
#35 | |
|
AF Moderator
Join Date: Oct 2004
Location: Bellingham, Washington
Posts: 1,751
Thanks: 0
Thanked 73 Times in 73 Posts
|
Re: That's the end of my '93 Metro.....
if you have a chiltons or haynes haynes book it will also show you ring spacing.the one i have on metros shows a different spacing than the subaru one. you never want to clean side of piston or a bearing surface with a wire brush, it can remove coating or mar surface like he said. i have used a brass brush on top for stubborn deposits that don't want to come off after soaking, just use it gently and don't scratch piston. a stiff fiber brush and some spray carb cleaner as you clean seems to work well also and less chance of damage
|
|
|
|
|
|
08-30-2006, 04:35 PM
|
#36 | |
|
AF Regular
 Join Date: Jan 2005
Location: Mechanicsville, Virginia
Posts: 478
Thanks: 0
Thanked 0 Times in 0 Posts
|
Re: That's the end of my '93 Metro.....
DOCTORBILL;
The carb cleaning solution can be purchased in a gallon can with strainer bucket inside it so you can just put the part in, close the lid and come back later. The newer stuff (probably all you can buy now) has a lot less odor, quite a change from using carbon tetrachloride way back when. |
|
|
|
|
|
08-30-2006, 08:21 PM
|
#37 | |
|
Geo Metro Lover
Join Date: May 2005
Location: Eastern Washington State, Washington
Posts: 1,622
Thanks: 0
Thanked 0 Times in 0 Posts
|
Re: That's the end of my '93 Metro.....
I picked up the rebuilt Metro Head today - got pics of it. $220 plus I get All of the gaskets for everything!
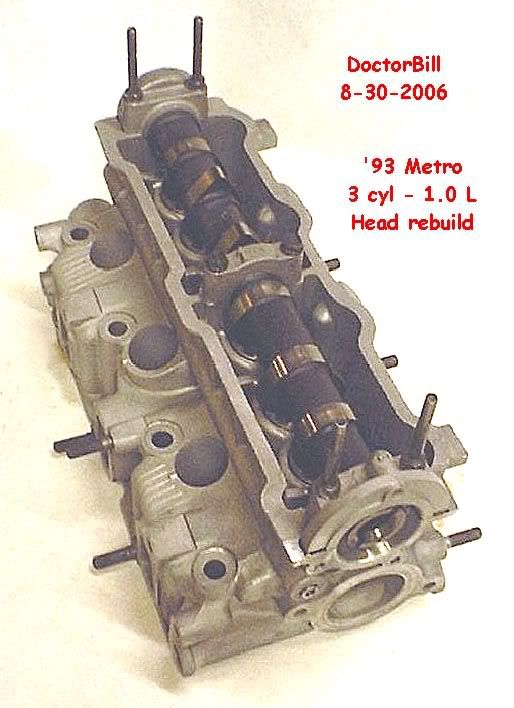 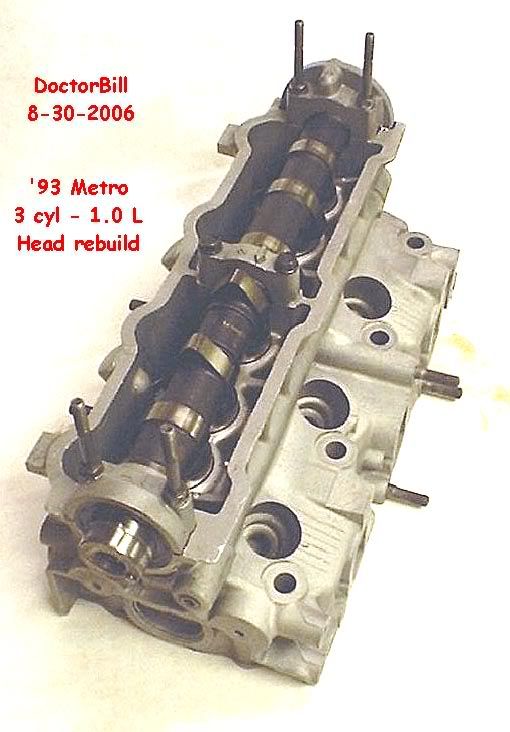  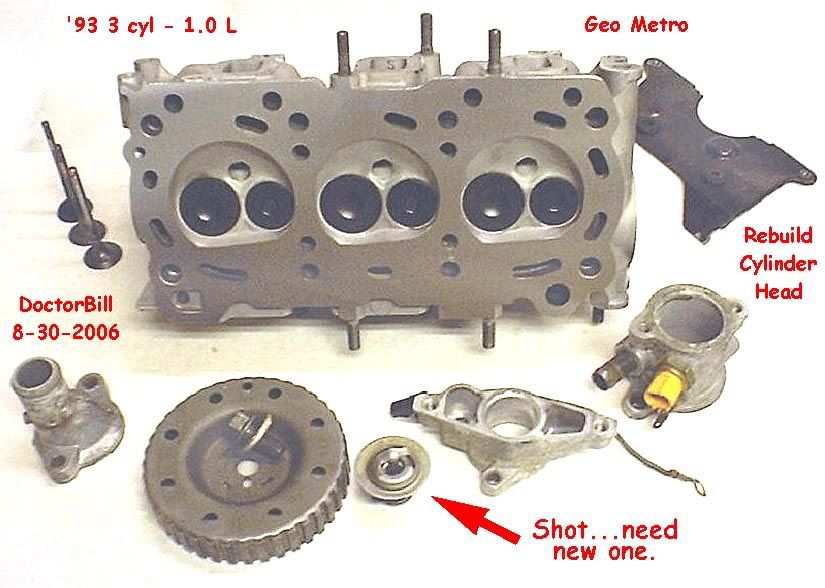 And the old valves... 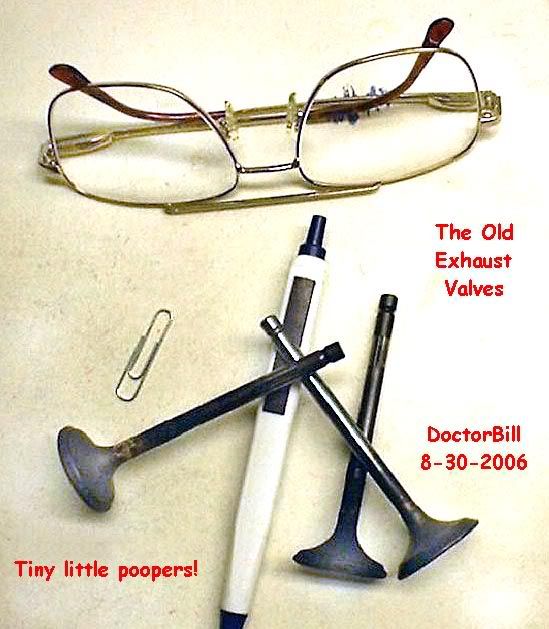 So tiny - they look like something from a lawn mower engine! The Thermostat is a gonner - the rubber in it is all cracked. Need a new one....... I see that Schuck's sells 180 degree and 192 degree thermostats. I think I'll get the 180 degree job. Running at a lower temp will lower efficiency, but make the engine last longer.... DoctorBill PS - On the back side of the Head is a small hole where the exhaust flows thru the Intake Manifold and is for the EGR Valve. That tube in my Intake Manifold is full of carbon. I am going to attempt to "dig it out" with a soft copper wire and a shop vac. Why does that form and can it be prevented? DoctorBill
__________________
Last edited by DOCTORBILL; 08-30-2006 at 10:10 PM. |
|
|
|
|
|
08-31-2006, 01:32 PM
|
#38 | |
|
Geo Metro Lover
Join Date: May 2005
Location: Eastern Washington State, Washington
Posts: 1,622
Thanks: 0
Thanked 0 Times in 0 Posts
|
Re: That's the end of my '93 Metro.....
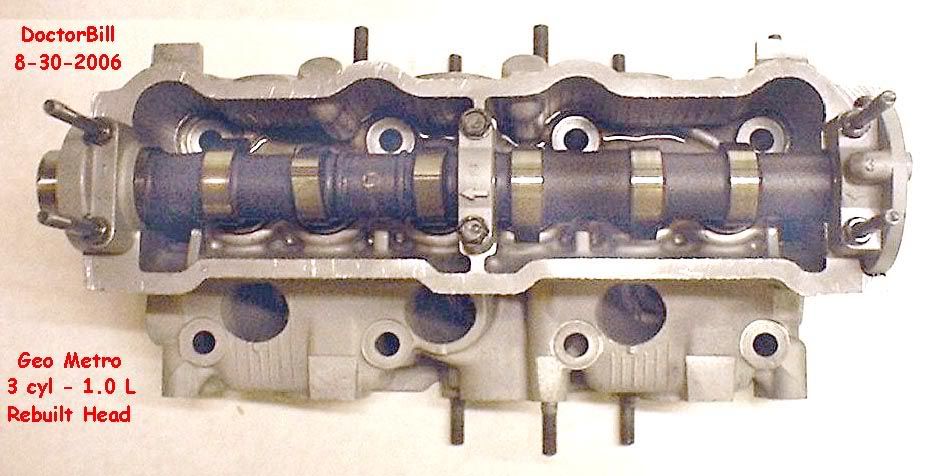
When I got the Head Rebuild back, all the various connections were off and in a bag.
How to Put them back is obvious all except for the thermostat. The manual says "Install the thermostat with the spring down." Lord God - it sets in the Head sideways. No drawing or picture.... Does the spring side face toward the head or out into the hose cap that screws over it? Does it make any difference? DoctorBill
__________________
|
|
|
|
|
|
08-31-2006, 03:16 PM
|
#39 | |
|
AF Newbie
 Join Date: May 2006
Location: cold spring, Minnesota
Posts: 22
Thanks: 0
Thanked 0 Times in 0 Posts
|
Re: That's the end of my '93 Metro.....
Hi Doc,
Great play by play and pictures. The spring expands and contracts with the temp. of the coolent. Place the spring tward the engine. Great job, |
|
|
|
|
|
|
POST REPLY TO THIS THREAD |
 |
|
|


