|
|
|

|
|
| Search | Car Forums | Gallery | Articles | Helper | AF 350Z | IgorSushko.com | Corporate |
|
| Latest | 0 Rplys |
|
|||||||
| Slot Car Modeling Discuss and show Slot Cars that you have modified, or that you have collected. |
 |
 Show Printable Version | Show Printable Version |  Email this Page | Email this Page |  Subscribe to this Thread
|
|
|
Thread Tools |
 06-21-2007, 06:10 PM
|
#16 | ||
|
AF Newbie
Thread starter
Join Date: Nov 2003
Posts: 75
Thanks: 0
Thanked 1 Time in 1 Post
|
Re: Scratch build Lambo Murcie R-GT 2007
Quote:
__________________
Tamar 
|
||

|

|
|
06-21-2007, 08:13 PM
|
#17 | |
|
AF Newbie
Join Date: Jun 2007
Location: miami, Florida
Posts: 2
Thanks: 0
Thanked 0 Times in 0 Posts
|
Re: Scratch build Lambo Murcie R-GT 2007
i mean ,milliput and what else? tools ,etc.......
|
|
|
|
|
|
06-24-2007, 11:14 PM
|
#18 | |
|
AF Enthusiast
Join Date: Apr 2004
Location: C
Posts: 527
Thanks: 0
Thanked 3 Times in 3 Posts
|
Re: Scratch build Lambo Murcie R-GT 2007
very nice progress. but i walso want to see the viper "finished product"
|
|
|
|
|
|
06-26-2007, 12:02 AM
|
#19 | ||
|
AF Newbie
Thread starter
Join Date: Nov 2003
Posts: 75
Thanks: 0
Thanked 1 Time in 1 Post
|
Re: Scratch build Lambo Murcie R-GT 2007
Quote:
Tools I use are basic modelling tools, an x-acto knife and some scalpels, lots of files and emmerypaper, a dremel for the heavy stuff and a proxon for the more delicate milling (with lots of different mill bits). I use several types of silicone to make molds and have several types of resin to cast small parts (epoxy and polyutherane resins) I'll make a picture of my working table in the next post.
__________________
Tamar
|
||
|
|
|
|
06-26-2007, 12:06 AM
|
#20 | ||
|
AF Newbie
Thread starter
Join Date: Nov 2003
Posts: 75
Thanks: 0
Thanked 1 Time in 1 Post
|
Re: Scratch build Lambo Murcie R-GT 2007
Quote:
 ) )I posted this link for pictures of the Viper in an earlier post http://www.slotracinglemans.com/gall...04R5/index.htm For know the Murcie is taking all of my free time
__________________
Tamar
|
||
|
|
|
|
07-05-2007, 02:28 PM
|
#21 | |
|
AF Regular
Join Date: Oct 2004
Location: no, Washington DC
Posts: 146
Thanks: 0
Thanked 0 Times in 0 Posts
|
Re: Scratch build Lambo Murcie R-GT 2007
... And that is time well spent. This is a great project. I just went over the thread again. So much more informative and useful than a simple "bragging" thread of easy to do manual processes.
Take all the time you need to get the proportions just right. It is well worth it in my view. And so what if I'm one of the only people that gets, no, has the HONOR of seeing such dogged craftsmanship unfold? I suspect my appreciation for this one build outstrips a myriad of the common "pat on the back", run of the mill plastic builds in a more frequented area. You can take that to the bank. Keep it up, post as it becomes comfortable, and know that builders such as yourself, inspire, NO! GALVANIZE my own resolve to realize monster projects.  |
|
|
|
|
|
10-21-2007, 08:45 PM
|
#22 | |
|
AF Newbie
Thread starter
Join Date: Nov 2003
Posts: 75
Thanks: 0
Thanked 1 Time in 1 Post
|
Re: Scratch build Lambo Murcie R-GT 2007
Its been a while since I last posted, (actually its been a long time ago that I wrote this on the LMC forum as well, but I wanted to finish the article here on AF as well so here's an way overdue update)
last thing I wrote was...I have to give it some thought (on how to mount the front fenders). As the days passed I thought many solutions, but none were satisfactory so I kept postponing. The problem was that while test fitting the " Burago" fenders on the Auto Art body I found out that they.....didn't. At least not properly..they were not the same left/ right and the shape of the wheelarches was also incorrect. On top of that I had milled the fenders so thin that it was very easy to distort/bend them during the glueing process. And it did not help that the AUto Art body is quite flexible as well.  Positioning of the front fenders has to be very acurate as it they will determine the cars wheelbase and body movement. On the 1/1 car this is a tight fit but there's ample room for the ± 35mm suspension travel, but on 1/24 scale its the body that moves and not only up and down but also sideways. So they have to be in exactly the right position and totally symmetrical. 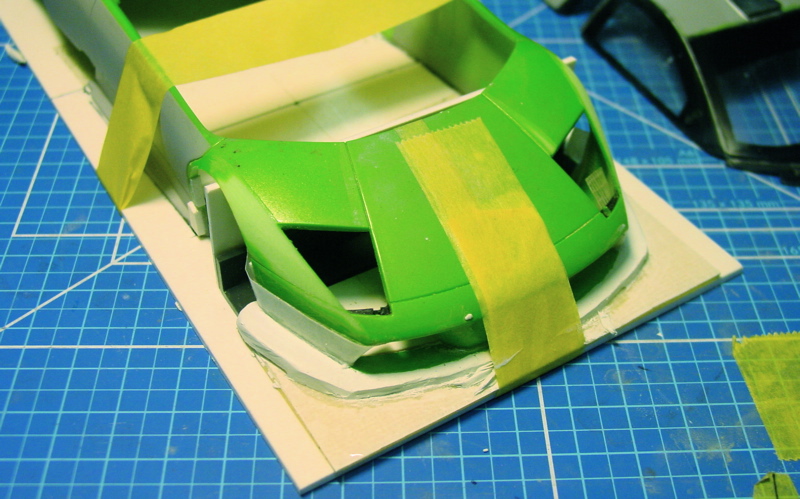 So I decided to build a kind of Jig, basically a flat board with a centreline so I was sure the body was flat and straight and hopefully I could check the proper width of the fenders. To have "something to build on I first needed to extend the front bumper with some milliput. I cut the splitter out of 0,8mm GRP leaving plenty of extra material and glued it with doubble sided tape on the Jig. I covered the top of the splitter with another piece of doubble sided tape, leaving the protectionsheet on so I would have a flat workingspace to add the milliput to, but without the milliput sticking to the splitter. This worked fine, only when I wanted to fit the fenders it was still difficult to see if the wheelarches were spaced evenly around the wheels. So I took the body of the Jig and decided to work with the body placed over the chassis. 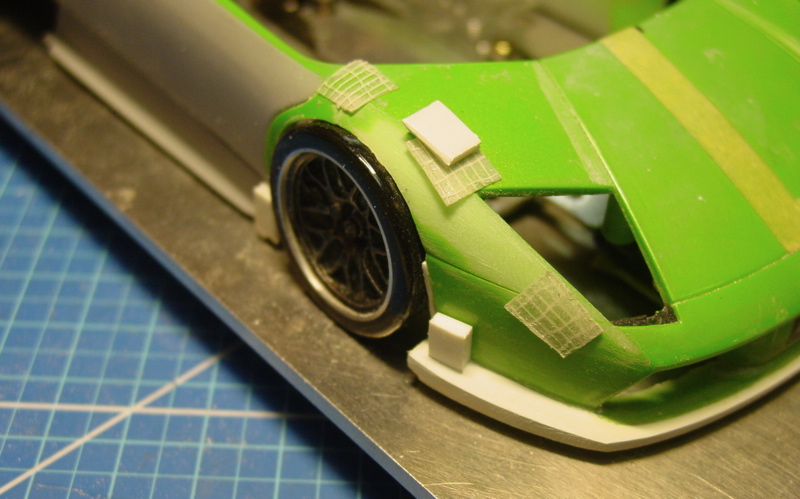 As the jig did not work I needed to find an other way to "fix" the body's position in such a way that whenever I would take it off the chassis I could reposition it exactly in the same way. In the end the simpelest solution always works best... I glued two strips of 0.75mm in the wheelarches to make sure that the wheels would remain centered. 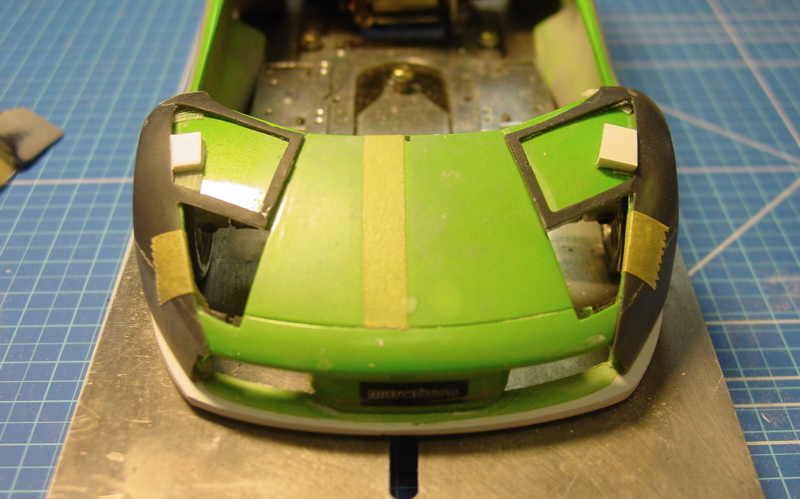 next I added spacers to position the new fenders, using doubble sided tape to test fit their position. But no matter what I did..I could not get a satisfactory position where both the sides and the top parts alligned properly. As the sides matched better than the top I decided to cut the top off as I would have needed filler in this area anyhow. 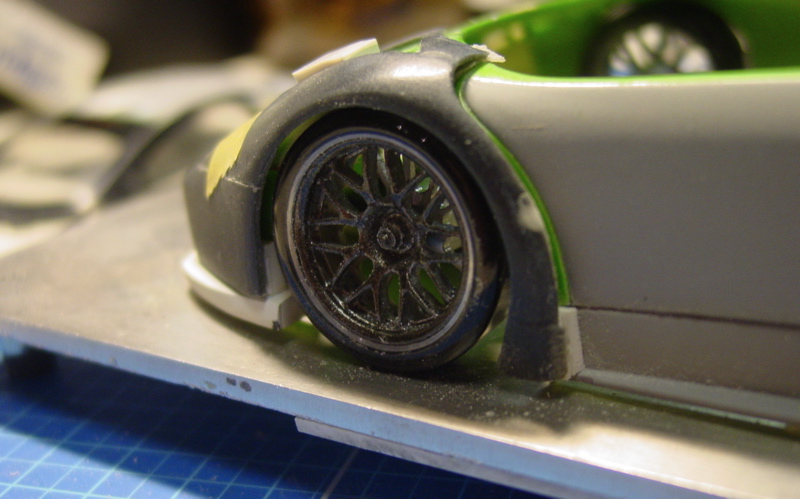 I thought of many ways to glue the fenders to the body , looking for a way that would allow me some repositioning while the glue set. These kind of things is what makes up most of the time in a project, thinking about what to do, considering your options, trying to eliminate as many problems as possible before they appear and in the end finding that each solution always causes unforseen new problems. 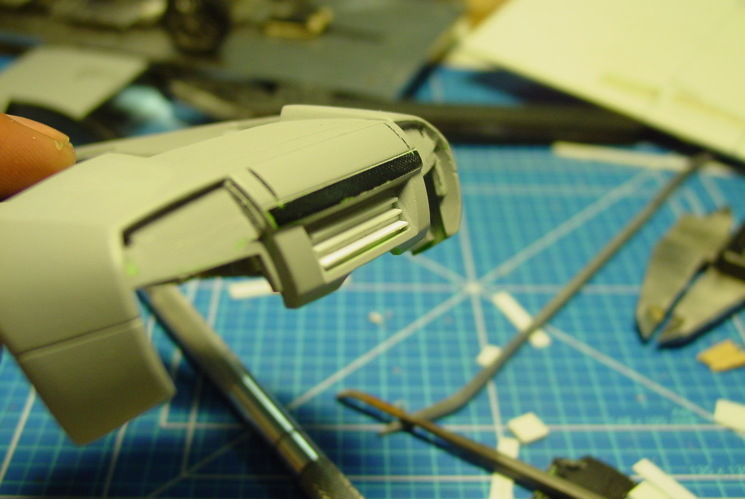 To clear my mind I decided to work on an different area, and moved my attention from front to the back. Here there is an other set of louvres that extract air from the diff cooler. 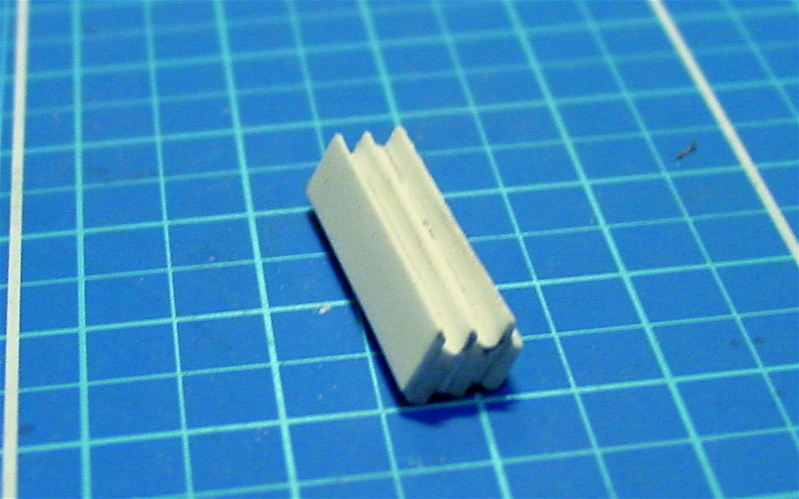 A rectangular space was cut from the centre panel and the louvres were build up by glueing several strips of plastic sheet on to of each other 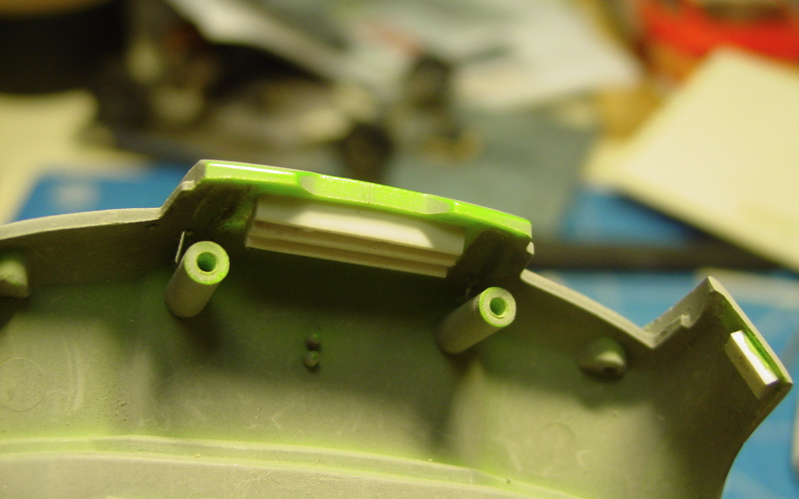 No recessed panel here, just an open window into which the louveres could be "pushed" into position. 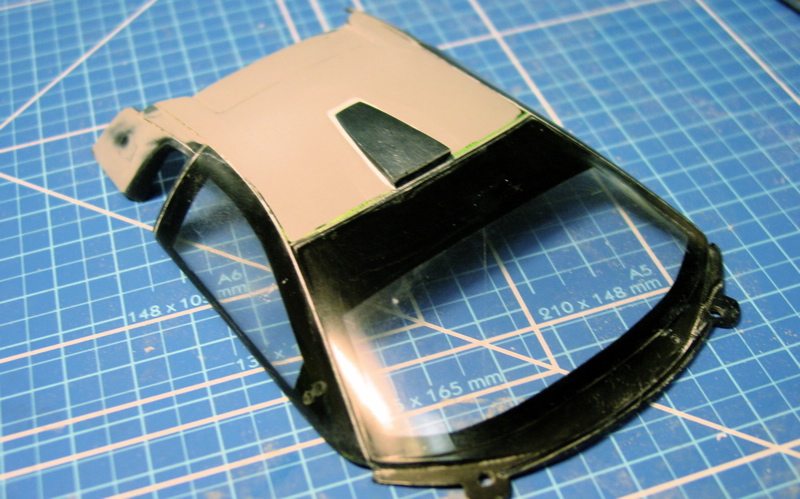 A slot was curt in the roof to recieve the roof duct already made for the burago body 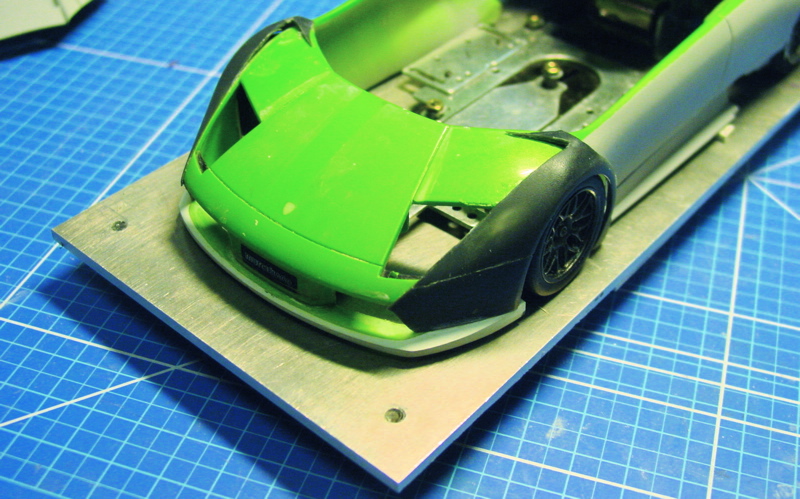 With all the other jobs done it was time to return to the front..... well ...in the end I just took superglue and "tacked" the fenders into their position. 5 minutes was all it took. 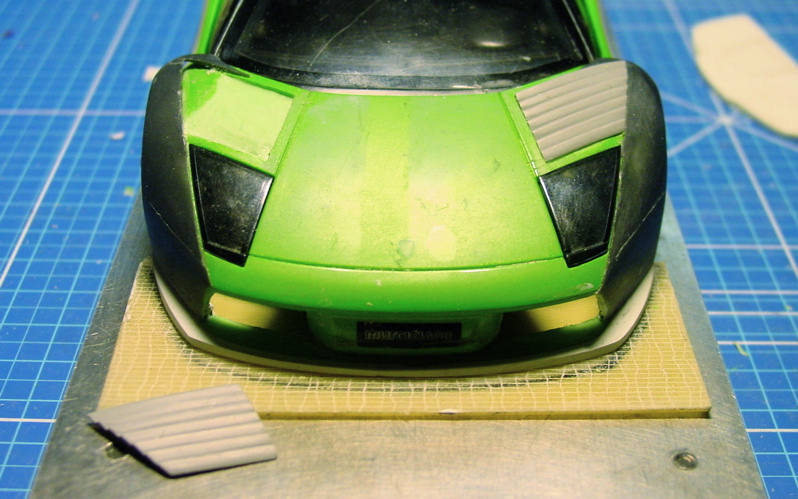 On to the next stage, milling the recess for the louvre panels was so much easier in the AUto Art plastic body than when I did it on the metal Burago. 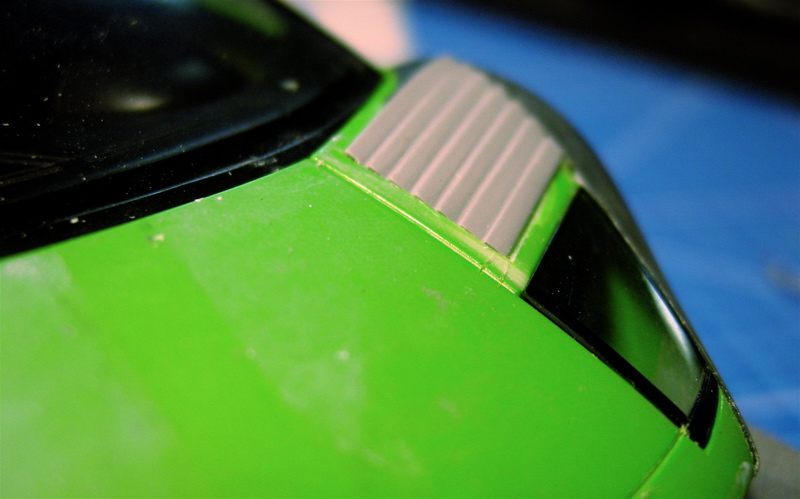 Detail shot shows how the louvers are almost flush with the body on the inside and rise ±1mm to the edge of the fenders. 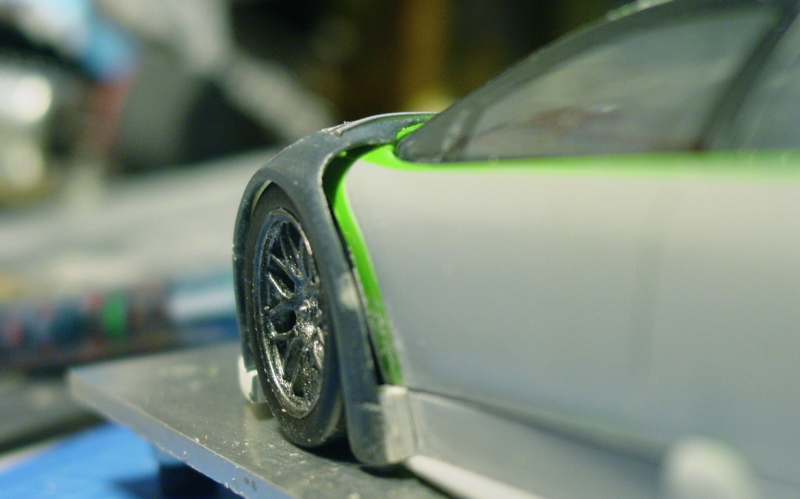 Shot from the side and you see all the complex curves...but so far so good 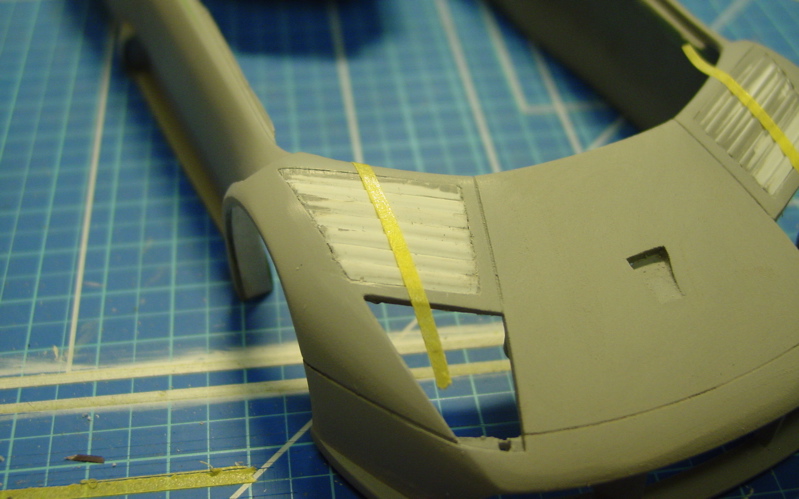 Fast forward one week and the louvre panels have been glued in place, filler was used to create a flush transition to the body. The central Naca duct had been cut and IThe R-GT actually has 4 seperate louvre panels, but to keep all the louvers aligned I chose to make them as one. Because now that they were in place it was much easier to make a division with filler. On the pic step 1 using maksing tape to mark the division.  Step 2 I masked the louvres next to the marker tape, removing the centre tape gave me a nice masked area to which I added some putty! 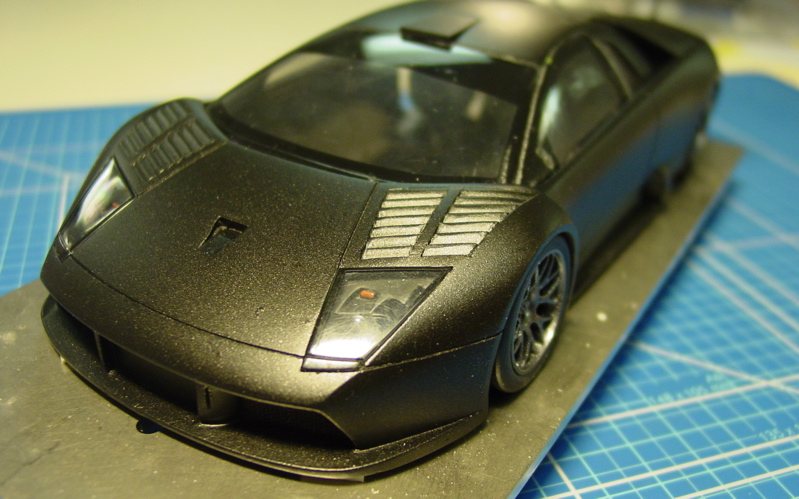 The end result (needs some more tidying up off course) body now in black as I got tired of the primer grey
__________________
Tamar
|
|
|
|
|
|
11-25-2007, 05:17 AM
|
#23 | |
|
AF Enthusiast

Join Date: Jun 2005
Location: Céroux-Mousty
Posts: 506
Thanks: 11
Thanked 5 Times in 5 Posts

|
Re: Scratch build Lambo Murcie R-GT 2007
Hello Tamar,
Long ago that I post in this section......... It was nice to see you once again at JPVR 2007 Worlds in Belgium. Nice work you are doing on those cars. I really like it. Keep on the good work! Jean-Marie (Jamme)
__________________
WIP: LaFerrari Tamiya 1/24 |
|
|
|
|
|
05-14-2008, 03:58 PM
|
#24 | |
|
AF Newbie
Join Date: May 2008
Location: Berlin
Posts: 3
Thanks: 0
Thanked 0 Times in 0 Posts
|
Re: Scratch build Lambo Murcie R-GT 2007
Hi, I am new to AF and I was just wondering: Am I the only one who wants to see more of this? Great craftsmanship. I think this projekt did not get the attention it deserves. Excellent work Tamar, I`d love to see more...
 |
|
|
|
|
|
10-02-2008, 10:57 AM
|
#25 | |
|
AF Newbie
Join Date: Sep 2008
Location: Jakarta
Posts: 37
Thanks: 0
Thanked 0 Times in 0 Posts
|
Re: Scratch build Lambo Murcie R-GT 2007
good job man
i really like your job, i think it's almost the same with what i used to do in modelkit
__________________
|
|
|
|
|
|
11-16-2008, 10:33 AM
|
#26 | |
|
AF Newbie
Thread starter
Join Date: Nov 2003
Posts: 75
Thanks: 0
Thanked 1 Time in 1 Post
|
Scratch build Lambo Murcie R-GT 2007: The finished car
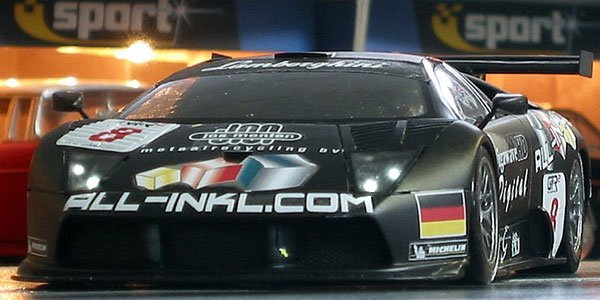
Wow, it has been almost a year since I last posted, a sertious case of to much things to do, to little time and to many loose ends. I was browsing through some old files on my site and realised that had I never posted pictures of the finished car on AF. So better late then never.....here they are
__________________
Tamar
|
|
|
|
|
|
03-01-2009, 10:13 AM
|
#27 | |
|
AF Regular

Join Date: Feb 2005
Location: amsterdam
Posts: 296
Thanks: 9
Thanked 3 Times in 3 Posts
|
Re: Scratch build Lambo Murcie R-GT 2007
You have done a great job on that car. Looks really good in finished state!!
|
|
|
|
|
|
03-01-2009, 08:56 PM
|
#28 | |
|
AF Newbie
Thread starter
Join Date: Nov 2003
Posts: 75
Thanks: 0
Thanked 1 Time in 1 Post
|
Re: Scratch build Lambo Murcie R-GT 2007
He Kingkai
een mede amsterdammer op AF? leuk  Kom eens langs op de club in Noord dan kan je hem in het echt zien groetjes
__________________
Tamar
|
|
|
|
|
|
03-02-2009, 07:15 AM
|
#29 | |
|
AF Regular
Join Date: Feb 2005
Location: amsterdam
Posts: 296
Thanks: 9
Thanked 3 Times in 3 Posts
|
Re: Scratch build Lambo Murcie R-GT 2007
Dat lijkt me wel wat!
Hoewel ik zelf niet echt thuis ben in de slotcar racing begint mijn waardering wel erg te groeien voor deze tak van de modelbouw. Als ik zie wat Nick (de wachter) en Fola allemaal bouwen en verkopen  Zo heb ik ook tenminste toegang tot meer bodies en decals Zo heb ik ook tenminste toegang tot meer bodies en decals  Kan niet wachten tot dat ik wat murcielago's binnen krijg van Nick. Zo kan ik eindelijk de 3 24hLM versies maken. Wel jammer dat hier op AF de gemaakte 1/24 slotcar modellen in een eigen subforum moet en zo niet echt bezocht/gebruikt worden. Denk dat Fola's JetAlliance DBR-9's hier erg gewaardeerd kunnen worden, echter een deel van AF lijkt zich toch te willen distantiëren van de slotcar tak. Sorry for talking in Dutch but we are just talking about this great model  |
|
|
|
|
|
08-12-2009, 05:17 AM
|
#30 | |
|
AF Newbie
Thread starter
Join Date: Nov 2003
Posts: 75
Thanks: 0
Thanked 1 Time in 1 Post
|
More Pics Scratch build Lambo Murcie R-GT 2007
Hello Guys
Here some more Pictures of the finished car, this one was actually build by Nick de Wachter. decals were obtained via Fola This is the #7 car as run during the 2007 SPa Francorchamps 24hrs 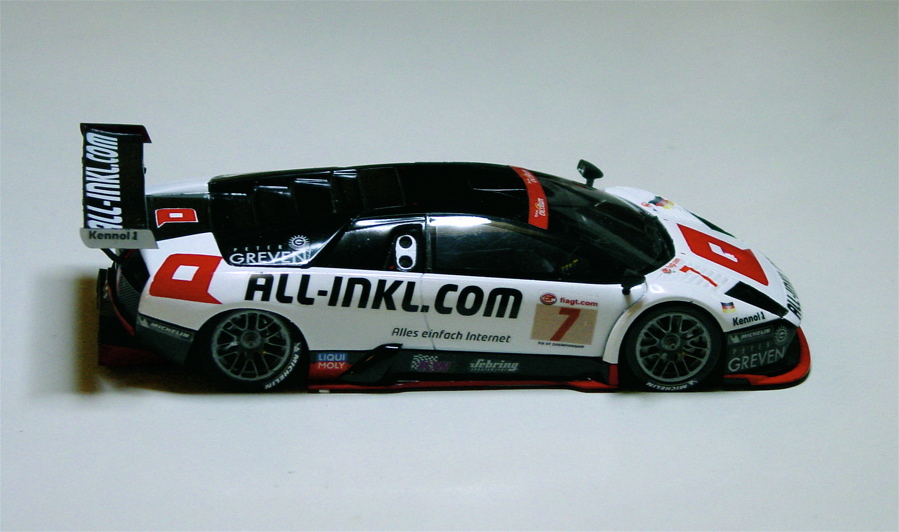  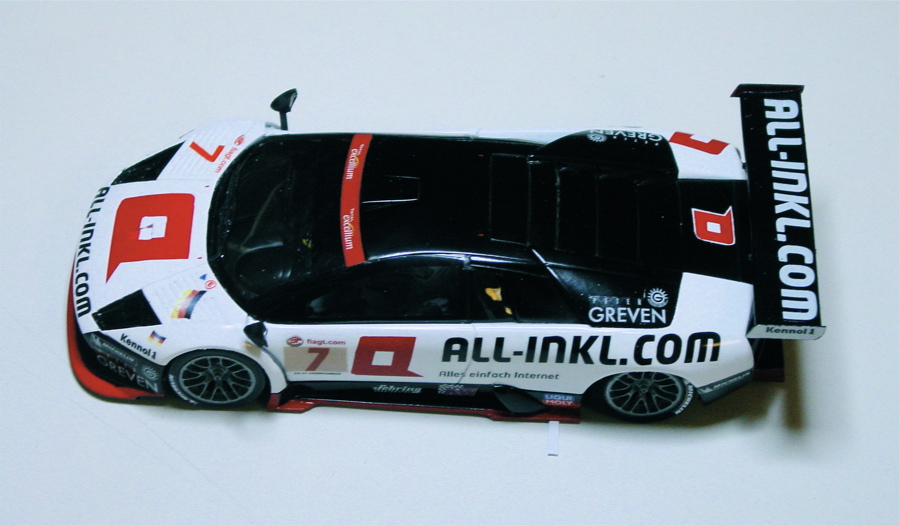 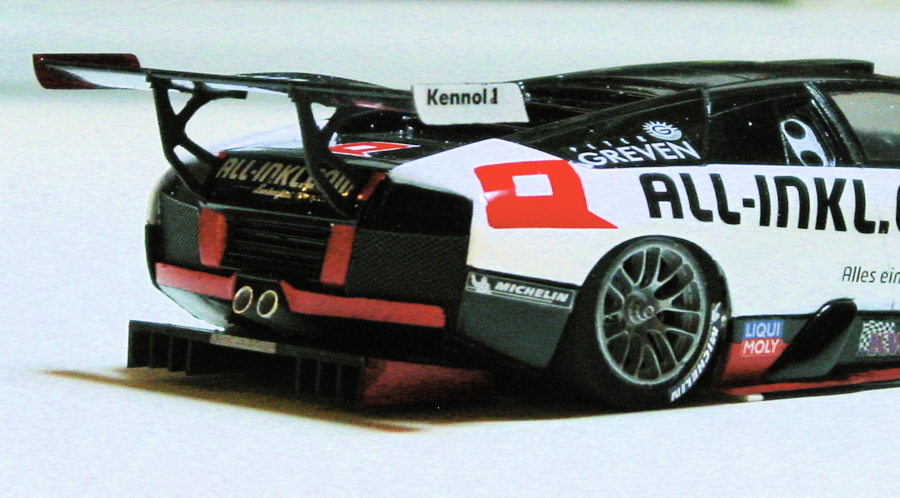   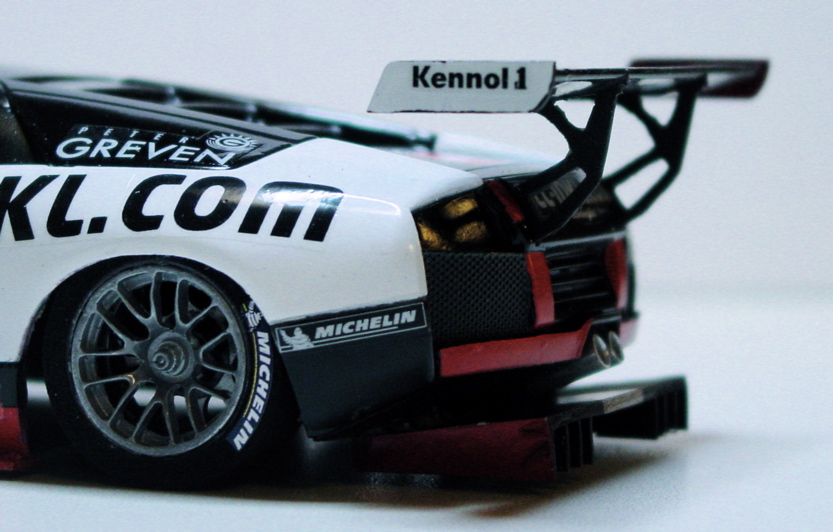 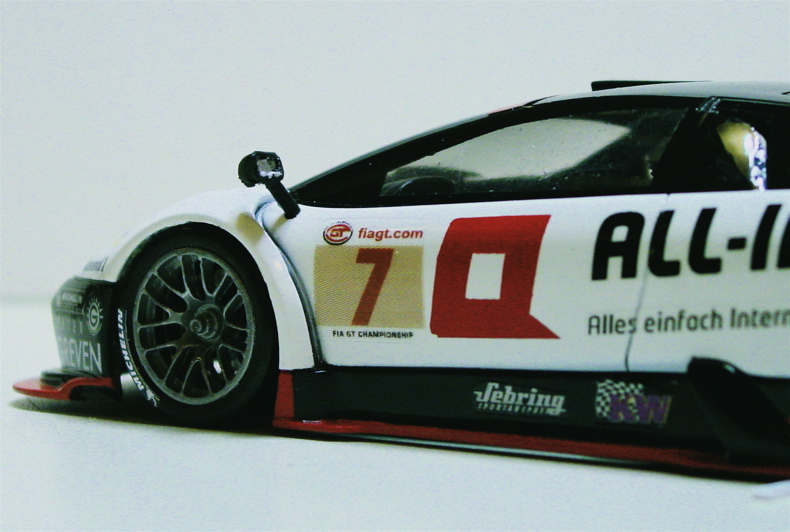
__________________
Tamar
|
|
|
|
|
|
|
POST REPLY TO THIS THREAD |
 |
|
|

