|
|
|

|
|
| Search | Car Forums | Gallery | Articles | Helper | AF 350Z | IgorSushko.com | Corporate |
|
| Latest | 0 Rplys |
 10-18-2009, 03:13 AM
|
#76 | |
|
AF Fanatic

Join Date: Dec 2004
Location: Up the creek with no paddle
Posts: 5,888
Thanks: 7
Thanked 16 Times in 15 Posts
|
Re: Jordan 191
Your work is so amazing, I actually start laughing out loud in disbelief while reading your updates
 100% joy to watch your work 
__________________
Guideline for happy modeling: Practice on scrap. Always try something new. Less is more. "I have a plan so cunning, you could put a tail on it and call it a weasel" - Edmund Blackadder |
|

|

|
|
10-18-2009, 03:18 AM
|
#77 | |
|
AF Enthusiast

Join Date: Feb 2007
Location: San Francisco, California
Posts: 950
Thanks: 1
Thanked 0 Times in 0 Posts
|
Re: Jordan 191
Unbelievable. If you could mass-produce these as kits you would have an amazing detail market at your fingertips.
__________________
Mark R |
|
|
|
|
|
10-18-2009, 07:52 AM
|
#78 | |
|
Authorized Vendor

Join Date: Oct 2005
Location: Vicenza - veneto de rassa
Posts: 3,909
Thanks: 6
Thanked 46 Times in 41 Posts
|
Re: Jordan 191
Jay, you're bringing modeling arts to a whole new perspective.
__________________
 gio gio
|
|
|
|
|
|
10-18-2009, 06:40 PM
|
#79 | |
|
AF Enthusiast

Join Date: Oct 2008
Location: Auckland
Posts: 2,761
Thanks: 51
Thanked 136 Times in 134 Posts
|
Re: Jordan 191
If it wasnt for the Plastic it would look like a 1:1 build!!! I cant wait to see what you do to the engine if youve spent so much time in detailing the suspension. Stunning Work!!!
__________________
 It's Not wheather you Win or Lose, its how you look while you play the Game |
|
|
|
|
|
11-02-2009, 01:48 PM
|
#80 | |
|
AF Enthusiast
Thread starter
Join Date: Aug 2005
Location: where "sky grey" is a colour
Posts: 822
Thanks: 3
Thanked 32 Times in 29 Posts
|
Re: Jordan 191
Houston
we have paint!
Well for the start its primer to be precise :-) I gave the engine a good layer of 2K-body filler and sanded it where necessary. Then, after sanding the primer off the suspension mounting points, I added photoetched Jordan logos left and right on the gear box ( where I had sanded off the molded in ones earlier ) and the part on top.  The same goes for the cam covers. I sanded off the molded in Ford logos, cleaned the parts where necessary and drilled a couple of holes where wires and other detail bits will go later. Then I added etched Ford logos. These and the Jordan ones for the gear box were bitches to make. I pushed the limit a bit in terms of material thickness for the scripts and produced some waste parts until I had a set of usable ones, but I finally got there :-) 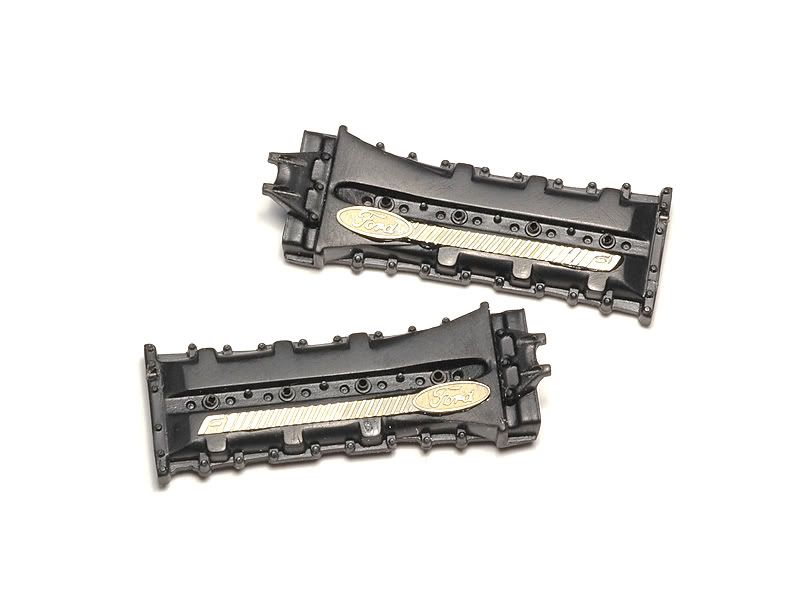 So now the parts were ready for some paint. The kit instructions call for the gear box to be painted gun metal grey, but the paints I had looked a bit bright compared to the original so I made my own darker mix from enamel semi gloss black and aluminium and sprayed a good layer with high pressure and from a bit of a distance to get a rougher cast look. That worked o.k. but the paint took an age to dry After that I masked off the gear box and sprayed the engine block Alclad Aluminium. The cam covers were painted ZERO Jet Black. That done I once more carefully sanded off the paint from the elevated areas of the etched parts, dry brushed the gear box slightly ( I might add some more later ) and glued the came covers in place. 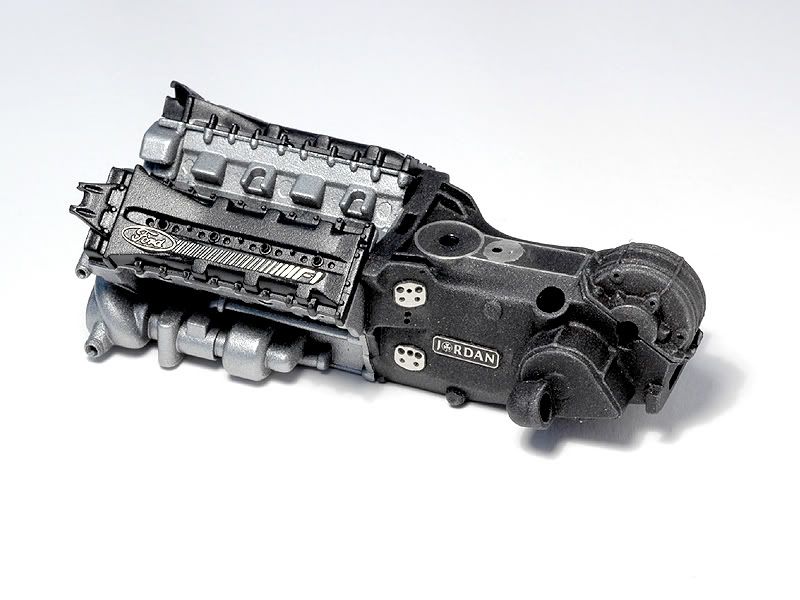 The next step was to glue the turned aluminium rings for mounting the bell cranks and another ring where the external starter is connected on the real car. 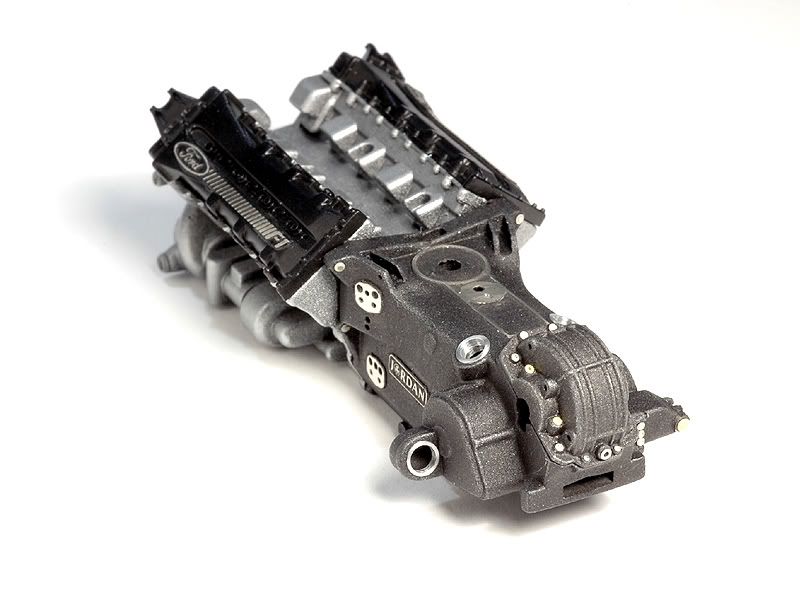 The gear box and the final gear cover in particular were then decorated as per the original with etched bolt heads. 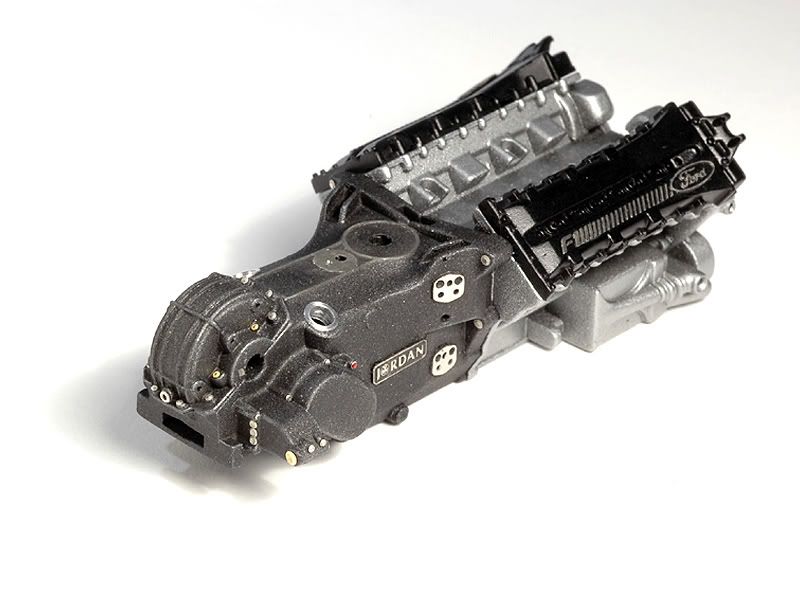 Next step I added the little oil tank on top of the gear box. Its the kit part with a new ( thinner ) oil line and an additional cap. 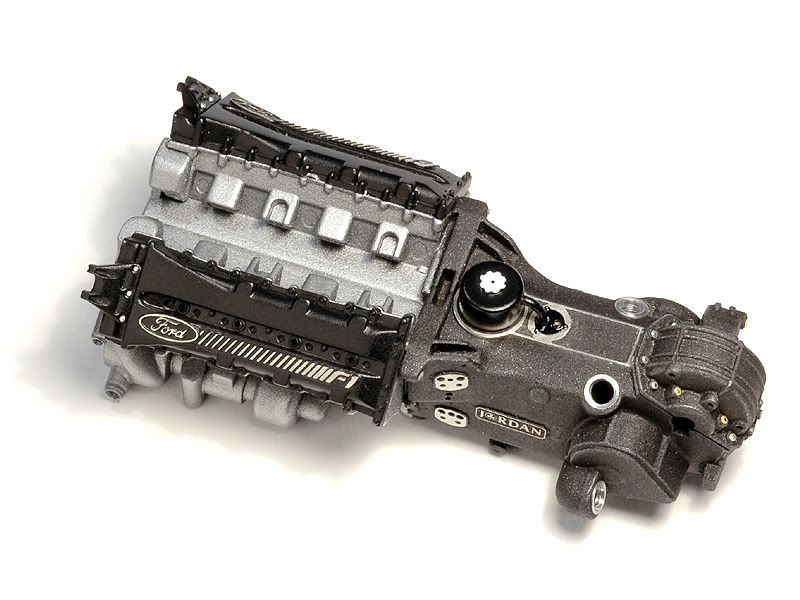 Finally I mounted the first parts of the drive shafts, now painted ZERO gloss black and Alclad Magnesium and the throttle slides that I painted Jet Black again. 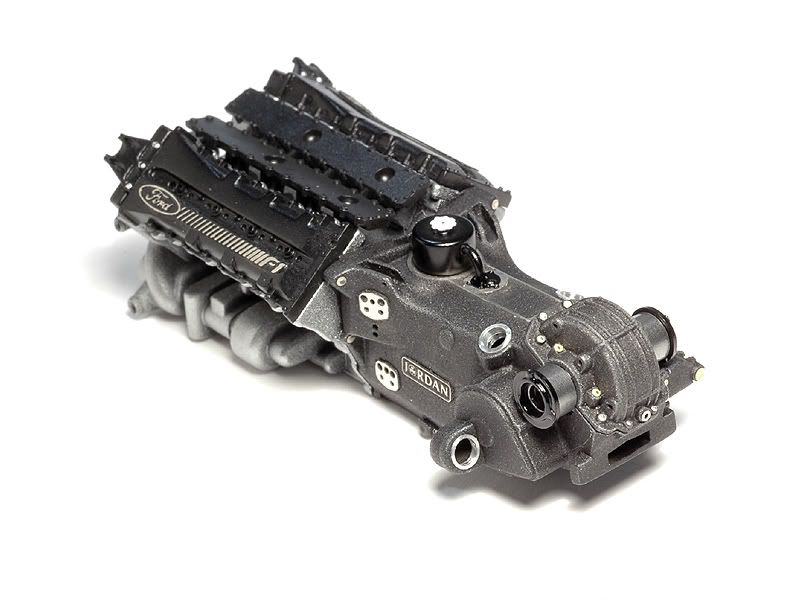 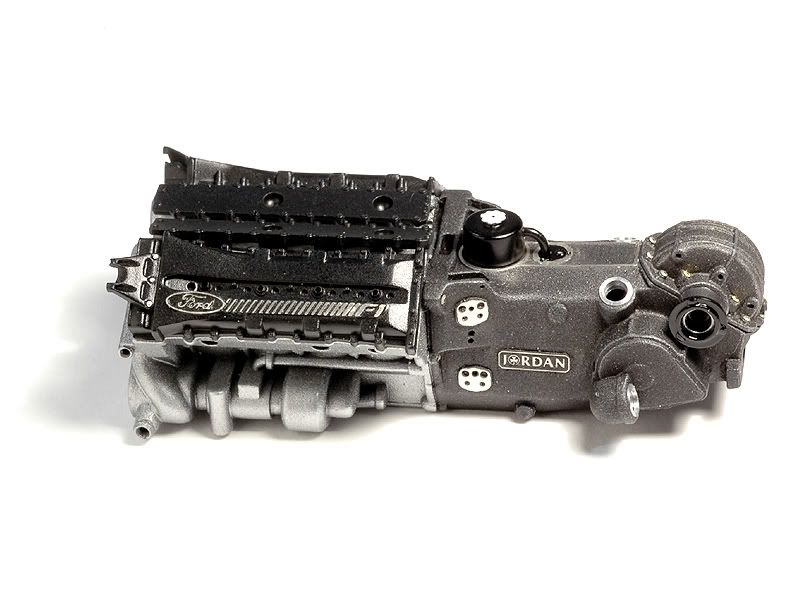 So this is where I am right now. Painting all those parts is really time consuming and slowing progress down but so far at least it worked as planned :-) |
|
|
|
|
|
11-02-2009, 02:38 PM
|
#81 | |
|
AF Enthusiast

Join Date: Feb 2006
Location: beringen
Posts: 682
Thanks: 0
Thanked 6 Times in 6 Posts
|
Re: Jordan 191
This is one sick built
__________________

|
|
|
|
|
|
11-02-2009, 04:29 PM
|
#82 | |
|
AF Enthusiast
Join Date: Jun 2007
Location: Vienna
Posts: 2,399
Thanks: 57
Thanked 27 Times in 26 Posts
|
Re: Jordan 191
That engine and gearbox assembly is breathtaking!
 |
|
|
|
|
|
11-02-2009, 05:36 PM
|
#83 | ||
|
AF Enthusiast
Join Date: Oct 2008
Location: Auckland
Posts: 2,761
Thanks: 51
Thanked 136 Times in 134 Posts
|
Re: Jordan 191
Quote:
__________________
It's Not wheather you Win or Lose, its how you look while you play the Game |
||
|
|
|
|
11-02-2009, 06:19 PM
|
#84 | ||
|
AF Enthusiast
Join Date: Sep 2005
Location: Greenville, Illinois
Posts: 540
Thanks: 1
Thanked 1 Time in 1 Post
|
Re: Jordan 191
Quote:
Double dido!! Nice finish! |
||
|
|
|
|
11-03-2009, 08:35 AM
|
#85 | |
|
AF Regular
Join Date: Jul 2003
Posts: 446
Thanks: 5
Thanked 1 Time in 1 Post
|
Re: Jordan 191
Fantastic work on a fantastic topic.
__________________

|
|
|
|
|
|
11-06-2009, 12:13 PM
|
#86 | |
|
AF Regular

Join Date: Mar 2008
Location: Brantford
Posts: 307
Thanks: 2
Thanked 8 Times in 8 Posts

|
Re: Jordan 191
Quality JayKay just pure quality!!!
|
|
|
|
|
|
11-14-2009, 04:44 PM
|
#87 | |
|
AF Enthusiast
Thread starter
Join Date: Aug 2005
Location: where "sky grey" is a colour
Posts: 822
Thanks: 3
Thanked 32 Times in 29 Posts
|
Re: Jordan 191
Some more progress!
After the steps on the engine I showed you last time I had to carry on and do the dampers:-) The individual parts and the bell cranks were painted Alclad Aluminium and enamel orange/red and blue and then carefully assembled. Here you see one of the rear dampers ( not fully pushed together as I noticed too late :-) 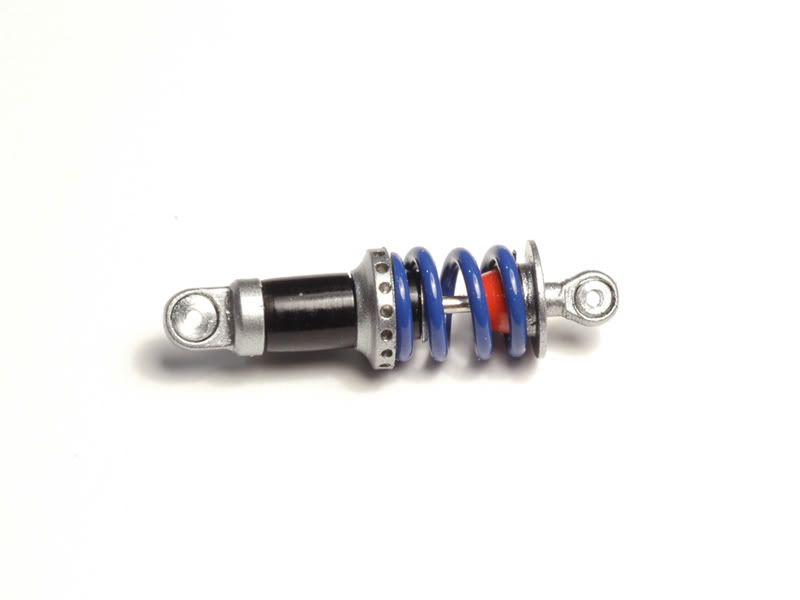 I then put them in their places on top of the gear box: 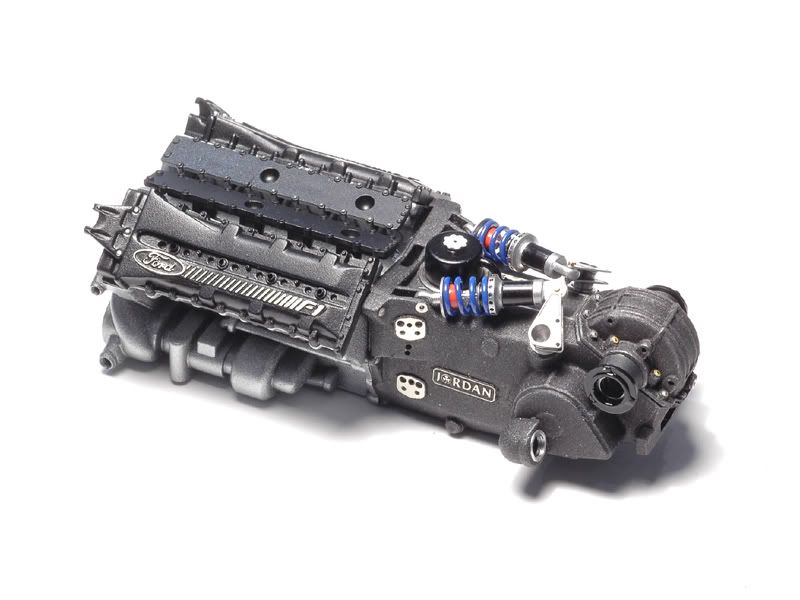 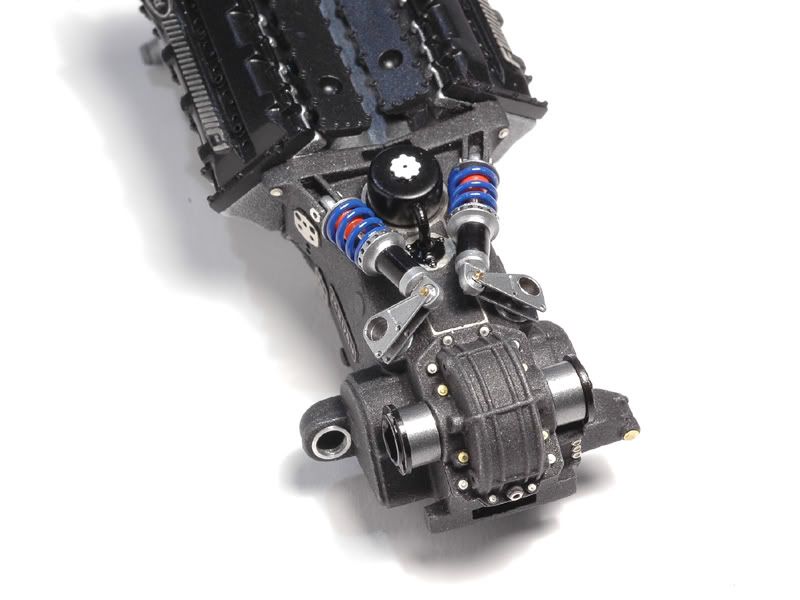  There are of course more parts to follow but I finally had to turn my attention to something else the cowling. Without that done, progress was stuck in several areas so I couldnt avoid it any longer :-) As I mentioned in an earlier update ( I think..:-) I carved out the inside of the cowling to achieve a more realistic material thickness ( now between 0,5 and 0,7mm ) especially in the visible areas. Heres a shot of the inside that may give an idea of all the work involved :-) 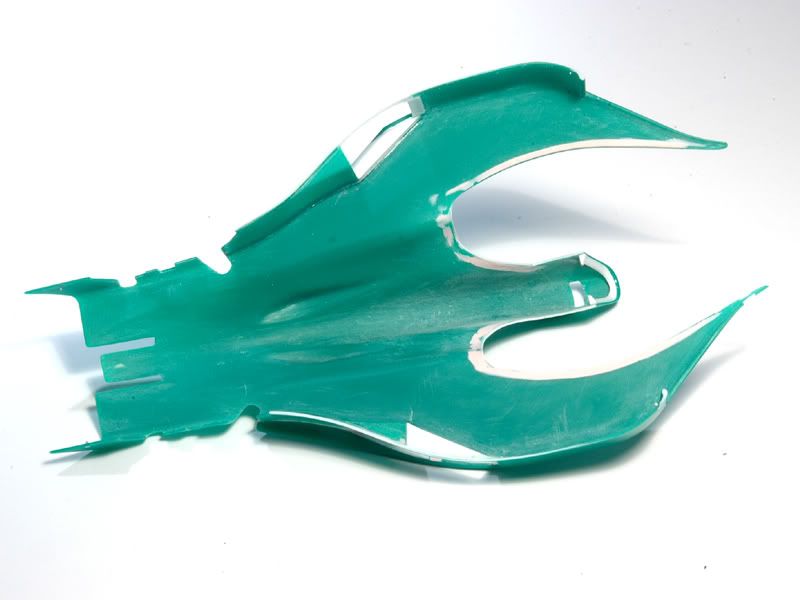 I also cut off the kit parts locator pins that hold the cowling in place. That is very unrealistic and I wanted something better :-) My original plan was to tweak the cowling well enough so it would just nicely slide on and stay in its place. This tweaking involved a hot air gun which is a dangerous tool around styrene . I messed up the original cowling and had to order a replacement and redo all the carving :-( So this time I was extra careful with the heat, not even wearing cotton gloves to rather burn my fingers than melt the cowling again However after half a Saturday carefully heating and bending I finally had to admit to myself that this wasnt gonna work. The Jordan 191 cowling has a too complicated shape ( especially the pointy bits at the front ) to do that. ( I have a semi finished McLaren MP4/8 where it worked fine ) . To my defence I have to say the real F1 cowlings are usually forced in place with DZUS and screws so I was trying to better them :-) Anyway, I had to turn to plan B and also install pins to hold the cowling in place. Just more realistic ones than Tamiya :-) Just drilling thin holes in the plastic parts and sticking a metal pin in wouldnt last too long. The pin would break out and ruin the plastic and paint. So I turned some 0,3mm pins with 1mm diameter heads to have more surface to glue and superglued these in 4 places at the front and rear of the cowling flush with the surface. 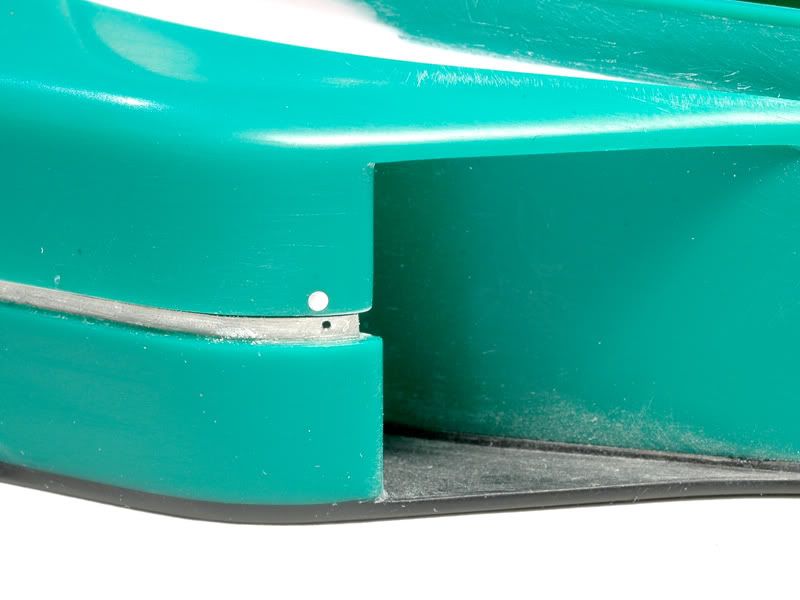 They fit into holes I drilled in the metal flange I added to the lower bodywork panels earlier. The holes are in the same places as on the real car. I just dont use all of them. Next is a picture of the rear where you can see them from both sides. 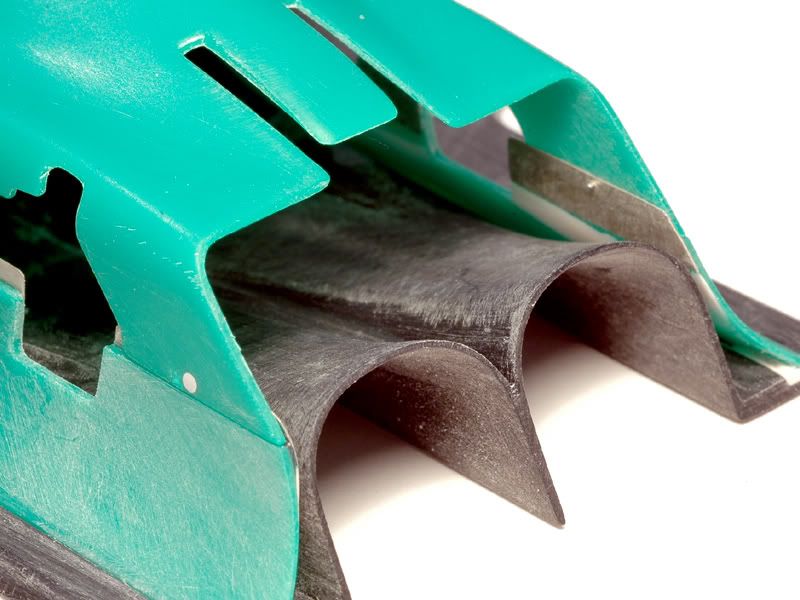 The tricky part will be to keep them clean and functional throughout the painting process and later not make scratches with them on the finished model when installing the cowling :-) In the next picture the cowling sits in its place. I now have tight shutlines like I wanted and keep my fingers crossed this will stay. As you can see I had to rework some areas with polyester putty and styrene to match the surfaces again. That was a result of my modifications and not a mistake of the kit parts. 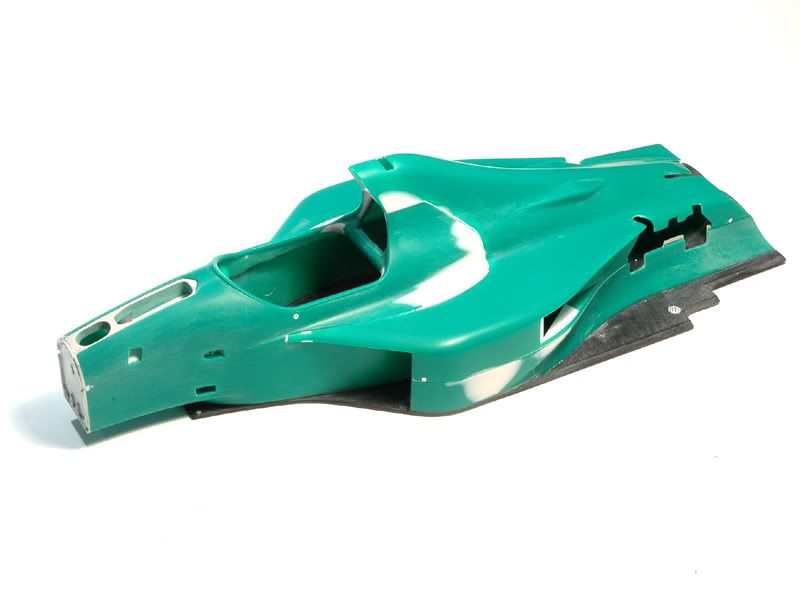 To work on all this I sketch glued the lower bodywork parts and the cockpit tub to the floor with drops of superglue. I then realized that it would be near impossible to get the same fit again after breaking this assembly up and painting the parts individually. So I decided to permanently glue the lower bodywork panels. They were integral parts of the floor on the real car as well. This will make painting and decaling more complicated but I will not have a split line between the green areas and the floor in the end which is more realistic. Another area I worked on was the roll hoop. You may remember that I cut it off the chassis early on. I detailed it with some etched bits and made it a bit higher. This was possible because my cowling is now thinner and I leave no gap in between the hoop and the cowling like Tamiya. 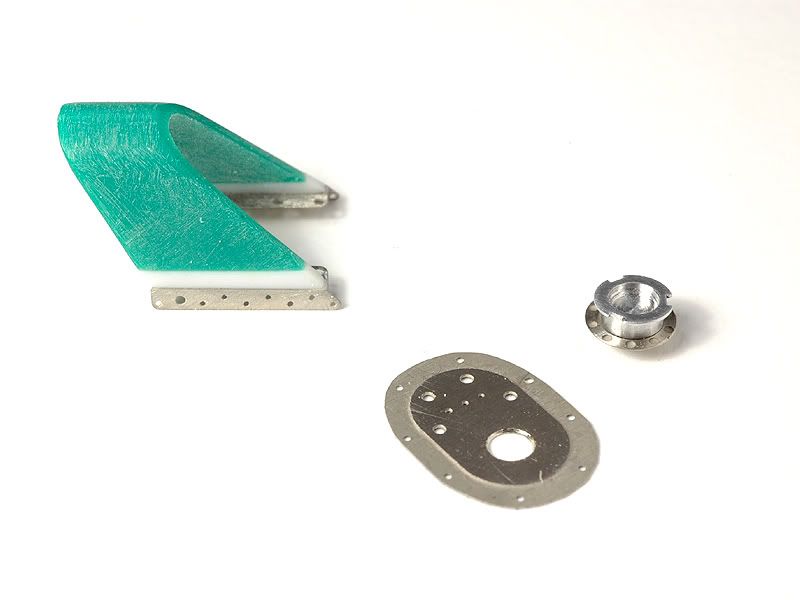 In the picture you also see an etched part for the top of the fuel cell and a new fuel filler I made form an etched base and a turned and milled aluminium piece. Next is the roll hoop in its place. 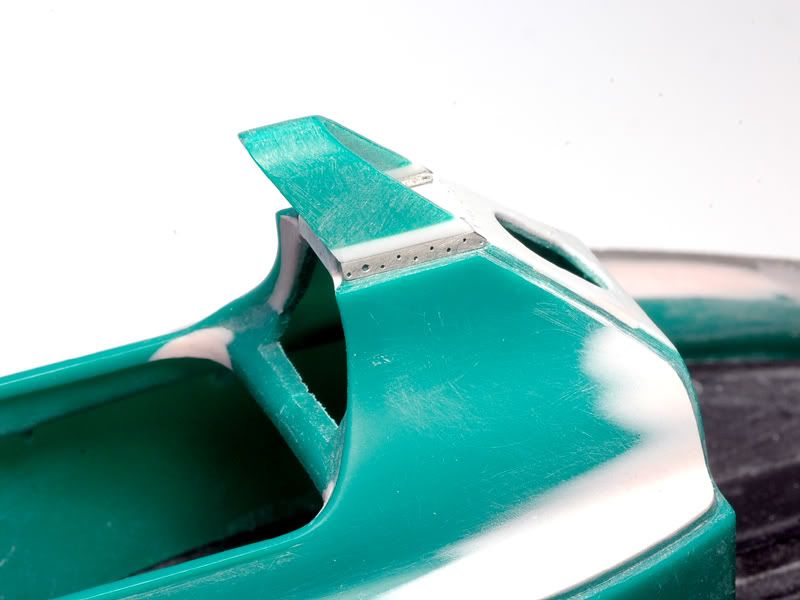 The whole exercise of making it higher and carving out the cowling in the air intake area was done for a reason. On the kit cowling theres a lip missing around the air intake that covers the roll hoop when seen from the front. Tamiya couldnt do it because that part would have had an undercut and not come out of the mould anymore. This is how mine looks now: 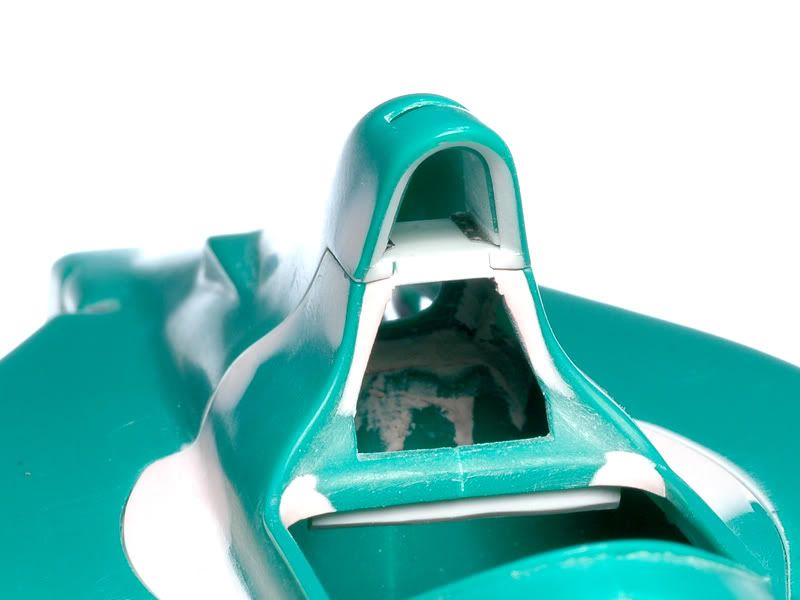 Thats it for now. The parts will now get some primer and then another round of sanding I guess :-) |
|
|
|
|
|
11-14-2009, 05:08 PM
|
#88 | |
|
AF Enthusiast
Join Date: Jun 2007
Location: Vienna
Posts: 2,399
Thanks: 57
Thanked 27 Times in 26 Posts
|
Re: Jordan 191
This build is setting the bar way to high in 1/20th F1 modeling.
The engine-gearbox assembly is stupendous and those dampers are awesome! |
|
|
|
|
|
11-14-2009, 08:17 PM
|
#89 | |
|
AF Regular
Join Date: Jul 2003
Posts: 446
Thanks: 5
Thanked 1 Time in 1 Post
|
Re: Jordan 191
I need beers to view this thread so I don't get depressed by how BLOODY AWESOME this work is.
Fantastic work. I love scratchbuilding.  Nenad
__________________
|
|
|
|
|
|
11-14-2009, 11:54 PM
|
#90 | |
|
AF Fanatic
Join Date: Dec 2004
Location: Up the creek with no paddle
Posts: 5,888
Thanks: 7
Thanked 16 Times in 15 Posts
|
Re: Jordan 191
This isn't modelling from another planet, it's modelling from another galaxy!
Inspiring and educational to follow your thinking processes and techniques. Thank you so much for sharing in such detail
__________________
Guideline for happy modeling: Practice on scrap. Always try something new. Less is more. "I have a plan so cunning, you could put a tail on it and call it a weasel" - Edmund Blackadder |
|
|
|
|
|
 |
POST REPLY TO THIS THREAD |
 |
|
|


