|
|
|

|
|
| Search | Car Forums | Gallery | Articles | Helper | AF 350Z | IgorSushko.com | Corporate |
|
| Latest | 0 Rplys |
|
|||||||
| Car Modeling Share your passion for car modeling here! Includes sub-forum for "in progress" and "completed" vehicles. |
 |
 Show Printable Version | Show Printable Version |  Email this Page | Email this Page |  Subscribe to this Thread
|
|
|
Thread Tools |
 02-26-2016, 02:32 PM
|
#1 | |
|
AF Enthusiast

Join Date: Mar 2002
Location: Western MI, Michigan
Posts: 683
Thanks: 43
Thanked 9 Times in 5 Posts
|
DIY Chrome Foil Decals
Been wanting to try this for some time but never got around to gettin' the supplies.
I was looking for a company that makes custom foil transfers such as those in some of the better kits and kept coming across sites for heat transfer foils for clothing, paper crafts and such. Paper crafting have toner reactive foils (in every color of the rainbow) however, they were meant for paper. 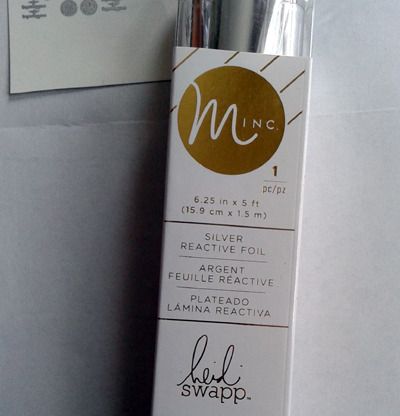 Just for S&G's I wanted to try the application on clear decal film. Here are the first results of just "winging it" . . . I literally printed them out, ran them through the laminator with the foil. Then messed around with no clear coating and clear coating the decals. Again, I was just winging it so the results aren't completely perfect. Just wanted to share. First I took some artwork from the net. 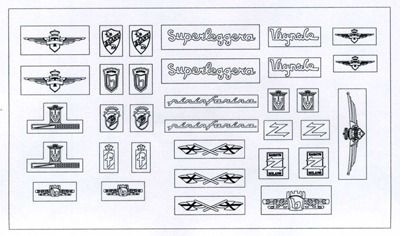 I filled all the emblems in black with photoshop and added a few other detail pics I drew up for future photo-etching projects just to fill a small sheet. I then printed them on clear decal film with my laser printer (this won't work with inkjet printers). 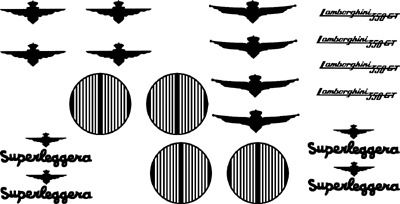 I then put them between a folded piece of plain paper with the foil covering the printed image and ran them through the laminator 3 or 4 times. When I opened the paper I could see the image in the foil carrier. When I removed the foil this is what I was left with.  They look like a dull silver here but that's just the camera angle and I was using a cellphone camera. 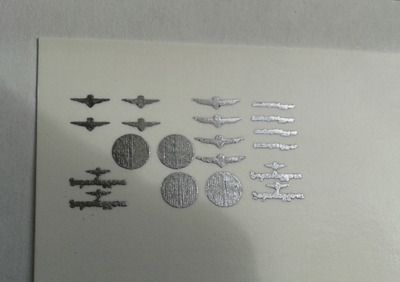 Back side of the foil  At this point I let them cool, trimmed one of the decals and began dipping it in water (no clear coat). It almost worked as-is but, some of the toner chipped away from the decal paper. I then clear coated the rest of the sheet. I was expecting the foil to dull a little due to the clear. Rather, it seemed to enhance the chrome look to them. 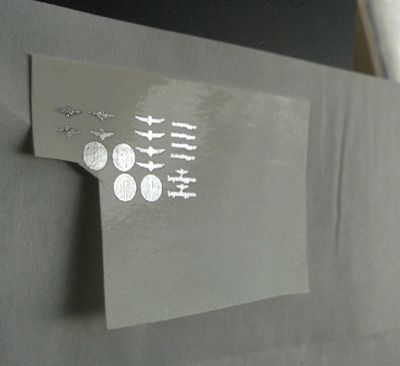 Not only did the clear enhance the decals but it also kept them from chipping. Also note that these were printed using inkjet decal paper rather than laser. So I'm sure the fixative on them contributed to some of the chipping. Using laser decal paper ya might not have to clear them. I also forgot to clean the images using a low-tack masking tape while rushing. You simply place tape over the foiled images and remove. This will take care of any stray foil bits, covered areas that shouldn't have foil and clean up any ragged edges. The also look a little grainy in the pics but it really is minimal and they are quite smooth and very shiny. So for the first try, doesn't look that bad. . .  There are all kinds of tips and techniques online for using toner reactive foils. I'll keep experimenting to try and improve on them. Since the clear worked so well, I'm also going to try an overlay of inkjet printed images to place over the foiled decal shapes. Those will carry some of the finer details in the very first pic. I'll also be adding color to some of those. *edit An important tip I forgot to mention is to let the decal completely cool before removing the foil after it comes out of the laminator. I did not do this above and that's why some of the toner is showing in spots and it's not as smooth as it should be.
__________________
Chuck
Last edited by Lambo003; 02-28-2016 at 06:25 AM. |
|

|

|
| The Following 5 Users Say Thank You to Lambo003 For This Useful Post: |
ataschner (02-27-2016),
Big Pat (05-12-2016),
kaisers_phoenix (02-26-2016),
kbx (02-27-2016),
willimo (02-27-2016)
|
|
02-26-2016, 02:37 PM
|
#2 | |
|
AF Enthusiast
Thread starter
Join Date: Mar 2002
Location: Western MI, Michigan
Posts: 683
Thanks: 43
Thanked 9 Times in 5 Posts
|
Re: DIY Chrome Foil Decals
Excuse my dusty model. . . My 3 year old grandson loves to hug my cars
 lol lol
__________________
Chuck
|
|
|
|
|
|
02-27-2016, 12:44 PM
|
#3 | |
|
AF Enthusiast
Join Date: Mar 2004
Location: Oakland, Minnesota
Posts: 1,015
Thanks: 31
Thanked 57 Times in 55 Posts
|
Re: DIY Chrome Foil Decals
Brilliant!
|
|
|
|
|
|
02-27-2016, 07:26 PM
|
#4 | |
|
Sweet, sweet tiny Hondas.
 Join Date: Jul 2003
Location: Austin, Texas
Posts: 5,720
Thanks: 48
Thanked 89 Times in 65 Posts
|
Re: DIY Chrome Foil Decals
Woah, wait, this is incredible! What an idea! Big thank you for sharing!!
__________________
It ain't cool 'till your wife hates it. Imagine a world without Alabama Recent builds: Rocket Bunny FR-S and stock BRZ Toyota bB Bro-style Civic K20 powered SiR converted EK WIP I build slowly and poorly. 
|
|
|
|
|
|
02-28-2016, 07:24 AM
|
#5 | |
|
AF Enthusiast
Thread starter
Join Date: Mar 2002
Location: Western MI, Michigan
Posts: 683
Thanks: 43
Thanked 9 Times in 5 Posts
|
Re: DIY Chrome Foil Decals
Thanks guys
I wanted to try it using cleaner images and the overlay technique as mentioned in my first post. Specifically with text. I Photoshopped some text real quick to get the outline. ("firehouse" is just the name of a font I came across because I was thinkin' of the gold leafing text done on fire trucks)  I printed them out as seen (2 sets of each), split the decal and ran the solid text through the laminator with the foil. 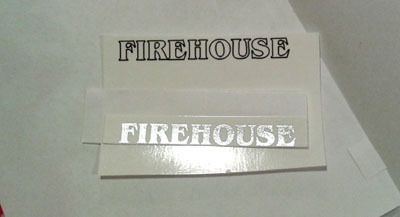  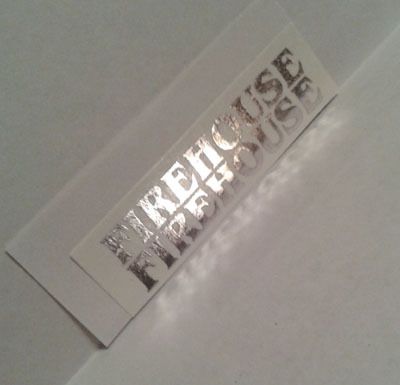 Then lightly cleared each and allowed them to dry for an hour or so. . . I dipped 'em in water putting the solid text down first. Allowed it to set-up a bit and then put the outlined text over the solid. 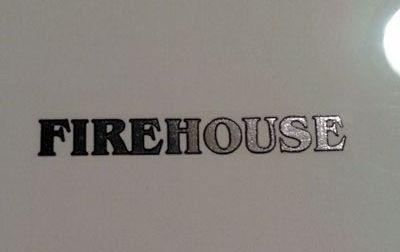  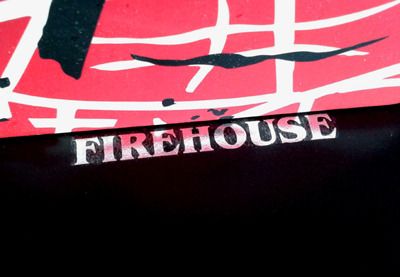 (decal isn't silvering, It's the reflection in the gloss clear and the substrate is a textured semi-gloss black plastic sheet) Hard to photograph shiny material but they're just as reflective as in the first few pics and look much better in person. I also half-assed tried to do a turning effect on part of the lettering with 0000 steel wool before they were cleared but, needed to make a smaller tool to pull that off. 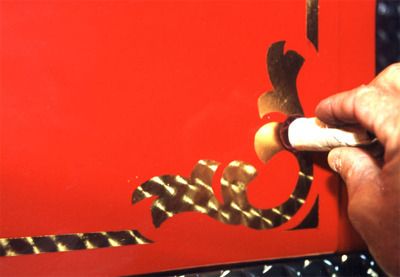 I did work though and the foil was quite durable. They also sell Toner Pens that work with these foils and would allow ya to freehand foiled images. Still gonna keep experimenting using cleaner images and better software.
__________________
Chuck
Last edited by Lambo003; 02-28-2016 at 08:17 AM. |
|
|
|
|
| The Following User Says Thank You to Lambo003 For This Useful Post: |
chris24 (04-01-2016)
|
|
02-28-2016, 02:32 PM
|
#6 | |
|
AF Regular
Join Date: Jul 2009
Location: Honolulu, Hawaii
Posts: 412
Thanks: 2
Thanked 2 Times in 2 Posts
|
Re: DIY Chrome Foil Decals
Great ideas! Looking forward to your updates!
|
|
|
|
|
|
02-28-2016, 09:33 PM
|
#7 | |
|
AF Enthusiast
Thread starter
Join Date: Mar 2002
Location: Western MI, Michigan
Posts: 683
Thanks: 43
Thanked 9 Times in 5 Posts
|
Re: DIY Chrome Foil Decals
I'm building anther AMR Lambo 350 GTS and the kit headlights are horrible.
Cast in clear resin, the parts in the kit still weren't even fully cured and typically yellowed. So this was my plan to replicate new headlights using this method. 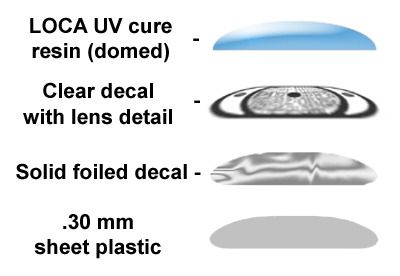 I drew up the artwork, printed multiple copies and foiled the solid black shapes. 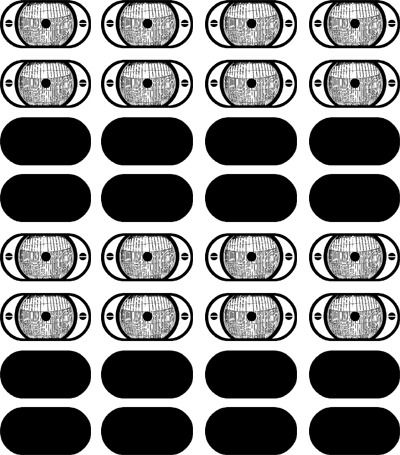 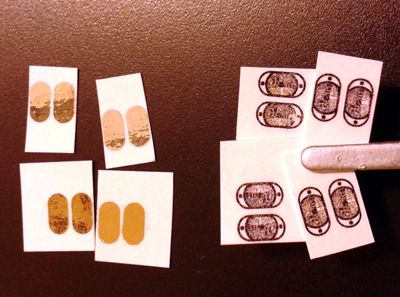 I then layered the decals and allowed them to dry. Once they were dry I was able to sand the edges for a perfect fit. I then domed the assembled decals with an optically clear UV curing resin (Kind of like what bonds LCD displays to digitizers in cellphones). It dries quickly, crystal clear, is rock hard and available in different cure rates from a few seconds to 10 minutes.  Love the stuff. Good for attaching all kinds of parts clean and fast. Works great for photoetched and clear parts Here are the results from different angles. . . 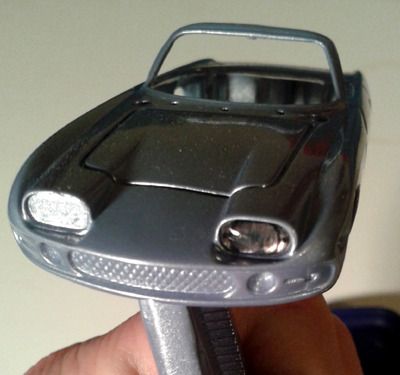 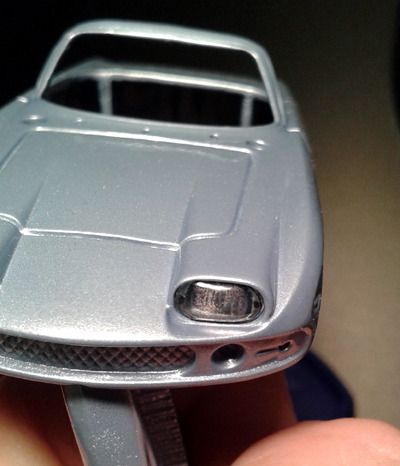  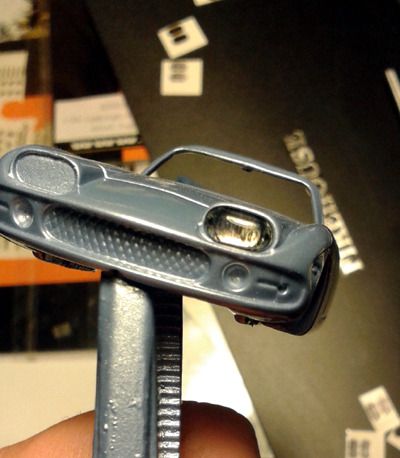 Thousand times better than the kit lights IMO Paint is Tamiya TS58 Light Pearl Blue with Testors Wet Look. Dust is not in the paint, it's just been sitting out curing.
__________________
Chuck
Last edited by Lambo003; 02-28-2016 at 10:14 PM. |
|
|
|
|
|
03-02-2016, 08:57 AM
|
#8 | |
|
AF Enthusiast
Thread starter
Join Date: Mar 2002
Location: Western MI, Michigan
Posts: 683
Thanks: 43
Thanked 9 Times in 5 Posts
|
Re: DIY Chrome Foil Decals
I ordered laser paper (I was using inkjet in the above posts) and additional foils in several colors.
I'm going to try other manufacturers too. So far I've been using Minc foils which are dirt cheap (under $5 bucks for the small roll about $15 for the large) and Pulsar. One color in particular caught my attention.  White pigment TRF for printing in white. I also ordered Pulsar Pro's PCB "Fab-in-a-Box" kit which uses the same system for etching PC boards (photoetching without the photo resist chemicals!) http://www.circuitstew.com/howto/pcb_fabrication.html At some point I'll also try Pulsar's Dry Transfer Decal system with the foils but, from the how-to videos, it takes a little bit longer and is more extensive than I want really to deal with at the moment. I just wanna print the damn decals out, foil 'em and be done with it. lol As far as the overlays with inkjet printed decals, same transparency problem they've always had. The images were fine but the chrome was so bright it washed them out. Granted, they were tiny images (the smaller Touring badges seen in my first post were about an 1/8th of an inch). So for now, waiting on laser paper to try toner images for coloring. Will update with results as soon as I get the stuff.
__________________
Chuck
Last edited by Lambo003; 03-02-2016 at 09:39 AM. |
|
|
|
|
|
03-04-2016, 07:02 AM
|
#9 | |
|
Image Hosting Exceeded
 Join Date: May 2003
Location: Flying in circles
Posts: 4,233
Thanks: 23
Thanked 95 Times in 86 Posts
|
Re: DIY Chrome Foil Decals
What a cool idea!!
Added to the How-to list. 
__________________
PHOTOBUCKET SUCKS |
|
|
|
|
|
03-30-2016, 09:47 PM
|
#10 | |
|
AF Newbie
Join Date: Feb 2003
Location: Somewhere out there
Posts: 45
Thanks: 0
Thanked 1 Time in 1 Post

|
Re: DIY Chrome Foil Decals
I have Pulsar's foils as I was going to try the white myself. None of the foils are working. In fact they even pull the toner from the decal paper. Pulsar has told me their foils will not work on the laser decal paper.
|
|
|
|
|
|
05-12-2016, 09:06 PM
|
#11 | |
|
AF Newbie
Join Date: Oct 2002
Posts: 65
Thanks: 7
Thanked 4 Times in 4 Posts
|
Re: DIY Chrome Foil Decals
Holy moly... Did I really see WHITE as available?
Does that mean I will not have to sell a kidney and buy an Alps printer? Excited, I am! |
|
|
|
|
|
|
POST REPLY TO THIS THREAD |
 |
| Thread Tools | |
|
|

