

|
| Search | Car Forums | Gallery | Articles | Helper | AF 350Z | IgorSushko.com | Corporate |
|
| Latest | 0 Rplys |
|
|||||||
| WIP - Motorsports Post topics for any "Work In Process" motorsports vehicles in this sub-forum. |
 |
 Show Printable Version | Show Printable Version |  Email this Page | Email this Page |  Subscribe to this Thread
|
|
|
Thread Tools |
|
|
#691 | |
|
AF Enthusiast
Thread starter
Join Date: Nov 2008
Location: Norwich
Posts: 649
Thanks: 21
Thanked 111 Times in 87 Posts
|
Re: 1/8 Porsche 935/78 'Moby Dick'
Hi Ian,
I do have a roll of the yellow Tamiya masking tape and also some of their thin 2mm PVC tape, so will be trying these on the test piece too. I'd used the blue 3M vinyl tape when I did the 908, so I wasn't exactly expecting a problem. Yes, I scanned and printed part of the sheet in black/white just for a demo - it won't be a problem to produce the final sheets in colour. I don't think it will be possible to use the Tamiya Martini stripes at 3x size, though - despite my best efforts, it's highly unlikely that the curves of my bodywork will be exactly the same as the kit. I have enough trouble getting small decals in place too, let alone large ones! They'll be useful as a reference for where I want the stripes to be, but I don't think I will be able to use them on the car. Of course, if the masking continues to be a problem, I might be re-thinking the above comments! SB |
|
|
|

|
|
|
#692 | |
|
AF Enthusiast
Join Date: Mar 2009
Location: Madrid
Posts: 649
Thanks: 109
Thanked 68 Times in 67 Posts
|
Re: 1/8 Porsche 935/78 'Moby Dick'
Amazing as always! !
Regarding the colors, have you tesed the Zero colors or the Gravity ones? They are very great paints!!! |
|
|
|

|
|
|
#693 | |
|
AF Newbie
Join Date: Nov 2010
Location: Portugal
Posts: 62
Thanks: 4
Thanked 2 Times in 2 Posts
|
Re: 1/8 Porsche 935/78 'Moby Dick'
I'll second Jesus concerning the Gravity Primer (EXCELENT!), but not on the Zero one. I had serious troubles, this weekend, masking over Zero Paints. The paint went well, but the d##n primer didn't stick to the kit and all the ensemble came sticked to the Tamiya tape, ruining all the work!
 But Gravity primer is very, very resistant to the masking tapes, I can assure you! And I have a question for you: don't you have a friend with an ALPS printer? I guess it would be much easier to work with the 1/8 decal copy you have, retouching the curves with a good drawing app (Corel or Illustrator) and then printing them on an ALPS. I can assure you mixing the colors is not a big deal on that printer, I've done lots of Martini stripes for Lancias... Keep-on-going with that amazing work! Art |
|
|
|

|
|
|
#694 | |
|
AF Enthusiast
Thread starter
Join Date: Nov 2008
Location: Norwich
Posts: 649
Thanks: 21
Thanked 111 Times in 87 Posts
|
Re: 1/8 Porsche 935/78 'Moby Dick'
No, I don't have any experience with Zero or Gravity paints, but having come this far with Tamiya acrylics I'd like to continue with them if possible. As I said last night, the actual colours look okay to me - especially as I'd like to avoid having to mix them if possible - but it's more a concern about the masking. I won't know until I do more tests, so that's the plan for the next few days.
I've actually surprised myself about how much of this project has been painted with my airbrush, even if I haven't really used it for anything 'technical' - I'll still paint things like the engine and gearbox by brush, simply because I like the way I can build up the colours - but as a method of getting a streak-free finish over large areas, I'm sold! I've put more effort into the filler-work, rubbing down, using the various grades of MicroMesh cloth, etc, too and I've been pleased with the results. The surface finish of the fibreglass parts is never going to start out as smooth as a moulded plastic kit (at least, not the way I make fibreglass parts), but it's given me some good ideas of things to pay attention to next time. Art - I did wonder about getting the stripes printed as 'stickers' rather than decals. I'm not familiar with ALPS printers (having just googled them) but it might be something to investigate. The Tamiya decals would be a good starting point, but I'm sure they would need some modification to suit the slightly different contours of my model compared to the 1:24 original. And that's assuming that Tamiya got them right to start with! Either way, it's not going to stop me now! I've always said that getting the stripes on was going to be one of the hardest jobs, so I won't be surprised if it takes time and maybe a couple of dead-ends. Fortunately, they're confined to the nose and rear wing panels only, so I can still continue with assembling the roof section and doors and return to the stripes at a later date... SB |
|
|
|

|
|
|
#695 | |
|
AF Regular
Join Date: May 2010
Location: LIEGE
Posts: 401
Thanks: 148
Thanked 48 Times in 48 Posts
|
Re: 1/8 Porsche 935/78 'Moby Dick'
This should be put in a museum when finished, as a reference for all the future generations !
About the decals : don't you have a loss of definition when magnifying 3x ? Someone out here might be able to print you a proper 1/8 full decals sheet with a performing vector drawing program ?! |
|
|
|

|
|
|
#696 | ||
|
AF Newbie
Join Date: Nov 2010
Location: Portugal
Posts: 62
Thanks: 4
Thanked 2 Times in 2 Posts
|
Re: 1/8 Porsche 935/78 'Moby Dick'
Quote:
The real problem is TO FIT those stripes correctly on the model. Like SB said - and he is most probably right - the curves and dimensions on the 1/24 Tamiya decals aren't the same as in his model. That's why I talked about ALPS printers. If he had a friend who could ACCESS THE MODEL and then correct the 1/8 copy on a drawing app, it would be easy to mix the colors and print the stripes and the logos on the printer, with all the foils, gold, whites, etc needed. Art |
||
|
|

|
|
|
#697 | |
|
AF Enthusiast
Thread starter
Join Date: Nov 2008
Location: Norwich
Posts: 649
Thanks: 21
Thanked 111 Times in 87 Posts
|
Re: 1/8 Porsche 935/78 'Moby Dick'
Back again.
Apologies for the delay in posting this update - as you'll see, it's not for a lack of progress. A few more thoughts on the stripes and decals. Based on the quality of my 3x test-page, I don't think there will be a problem in expanding the logos from the Tamiya sheet. I didn't scan them at a massively high resolution, and I didn't do any post-scan clean-up on the PC, so that's two big positives. I'm 99% convinced that the Martini stripes will end up being painted - even a quick check of the test page stripes over the rear wheelarches confirmed that they were not a direct fit onto my model. I applied several strips of my various masking tapes to the painted test-piece again, left them overnight, then tried removing them - here's the latest result: 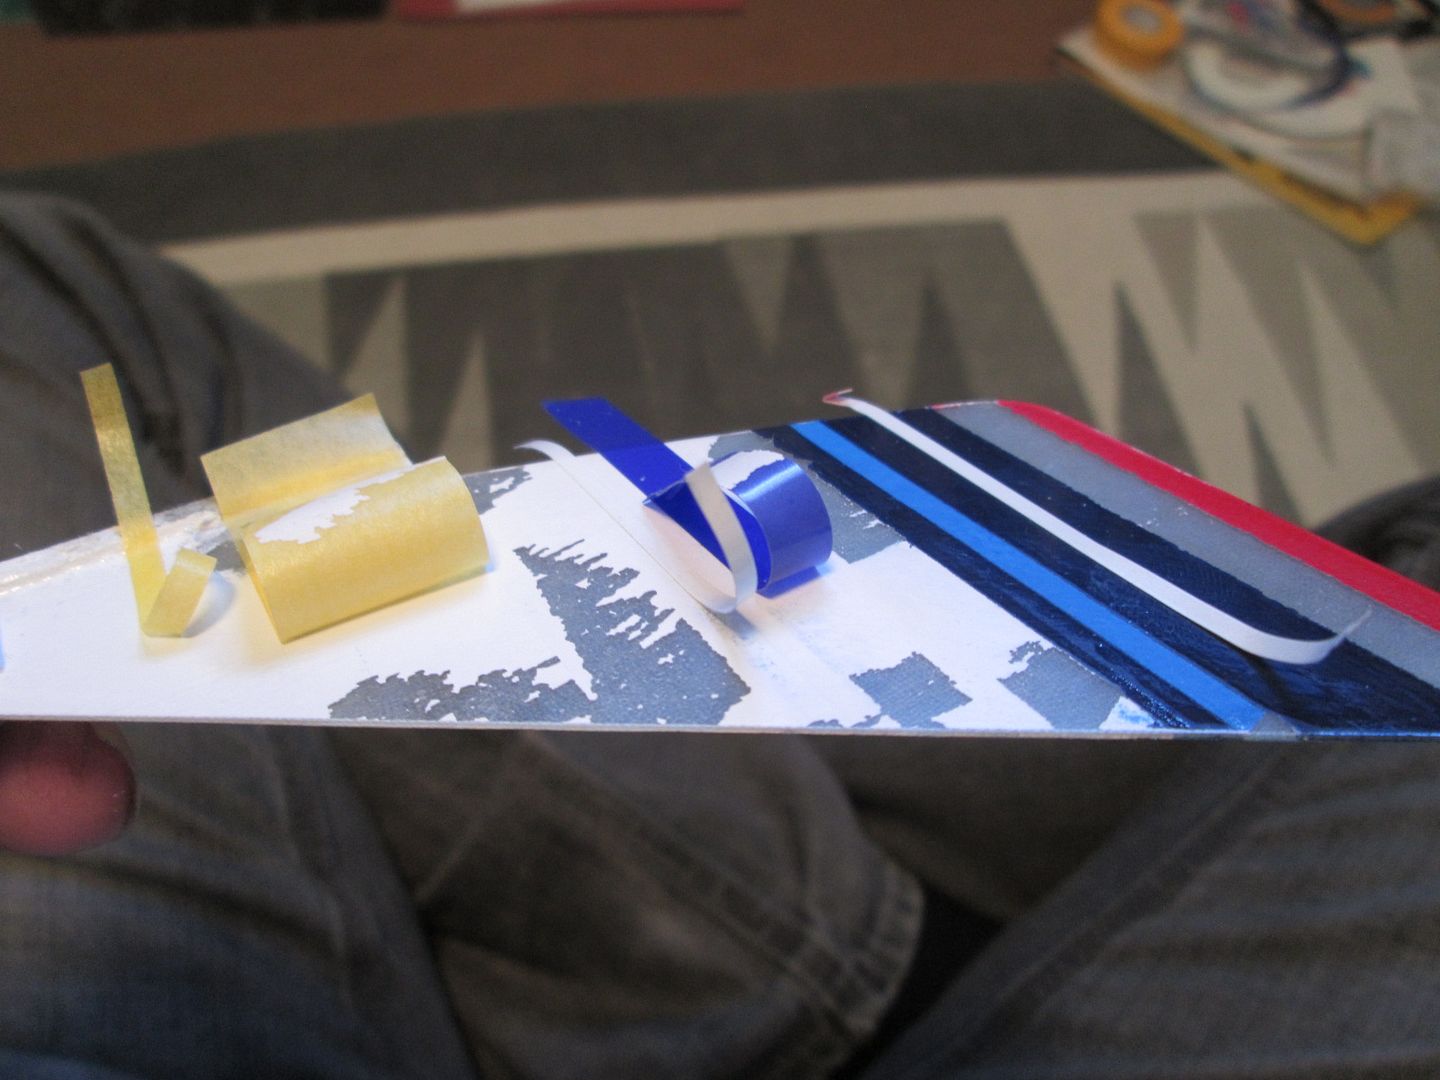 The thin white and yellow tapes seem to be the most successful - the white is a Tamiya vinyl-type tape, and the yellow is a regular tape from 'Tristar'. The wider yellow tape is also Tamiya, and the blue vinyl tape is the 3M I've used before. So, is it that the thinner tapes are not as 'sticky', or is it simply that the wider tapes are stickier because there's more of it in contact with the paint?! Hmm... Elsewhere, I primered and sprayed the four aero wheel covers: 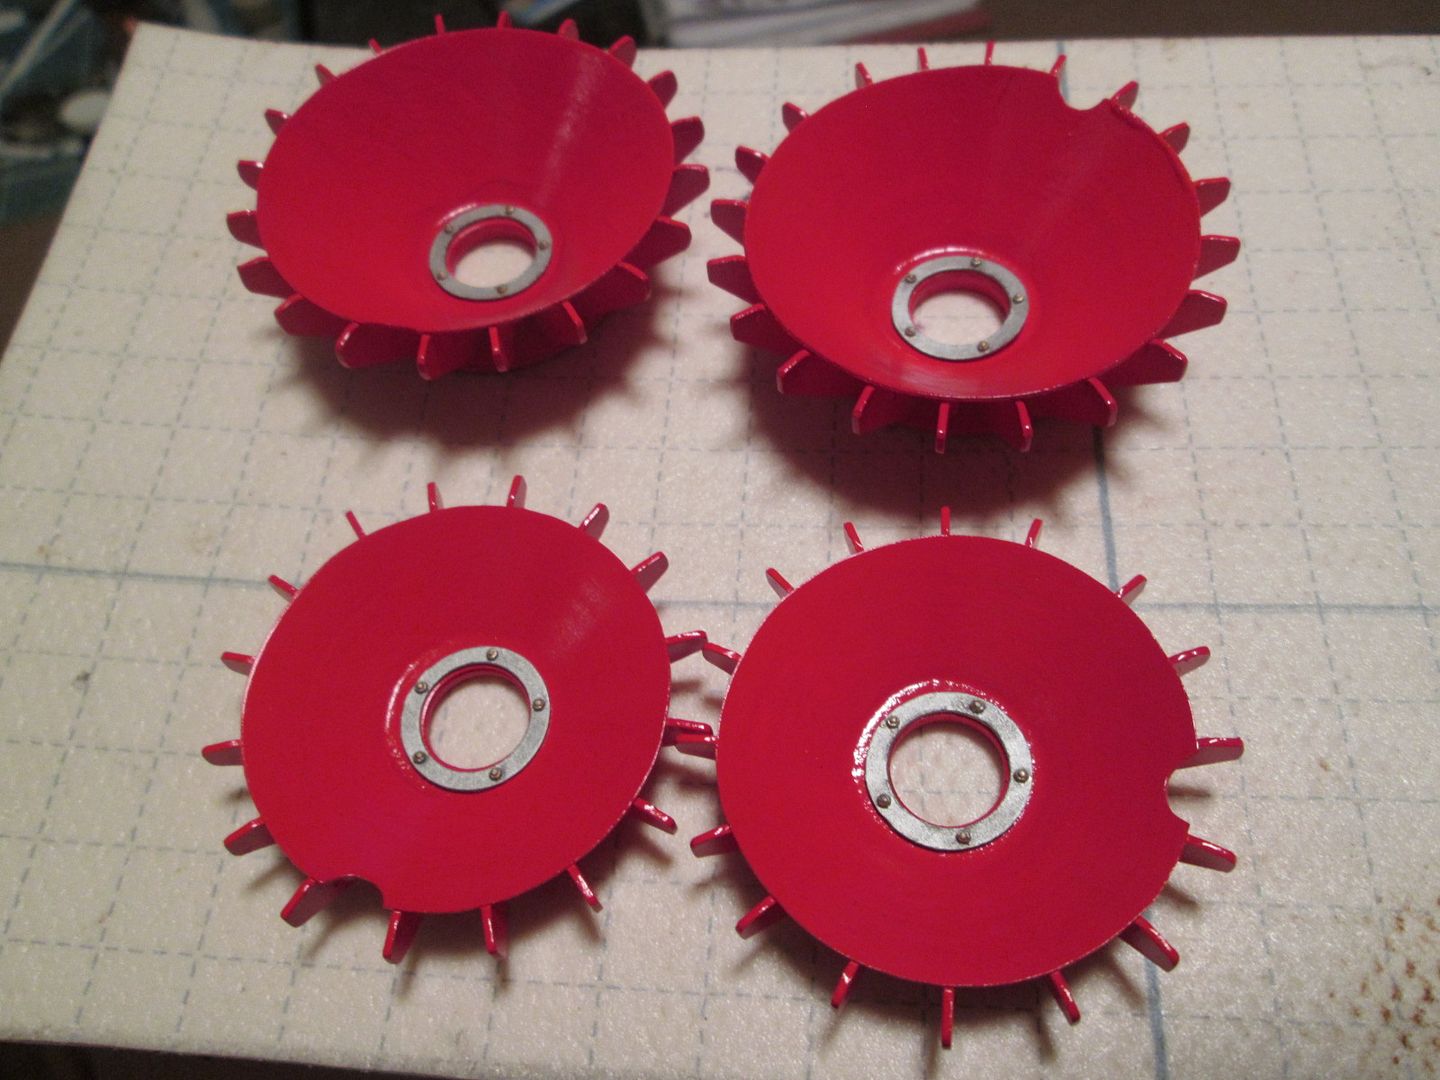 I used a white primer, then a rattle-can of Tamiya TS-31 Bright Orange, then airbrushed X-7 Red over the top. The fixing rings will be glued in place later. Inspired by coverage of the Nürburgring 24Hr last weekend, the plan was to install the engine and gearbox during the race. So leading up to this I was trying to get as much done in the engine bay as I could, while I still had access: 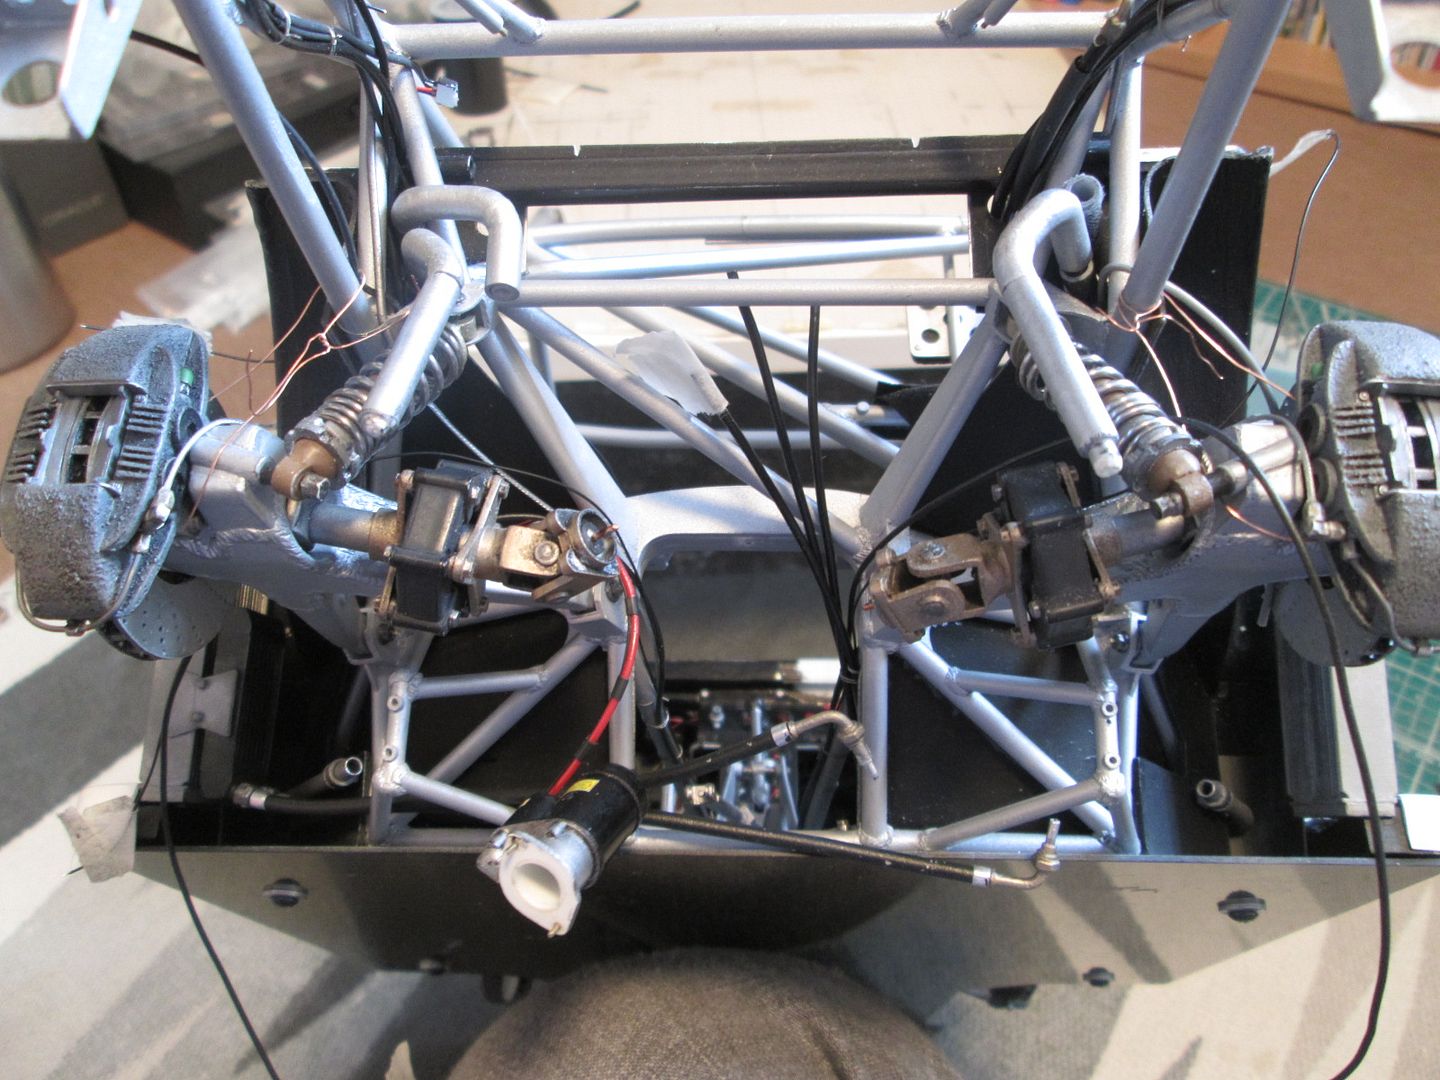 The starter motor is attached, the gearbox oil cooler is fitted and plumbed-in, and you can see here that I'm trying to connect the water-system pipework from the two side radiators. This was one of the trickiest jobs (as I knew it would be) with constant engine removal and re-fitting to check, and limited access while doing it. Having to hold the pipes with tweezers didn't help my stress levels, either! Of course, despite having made the various pipe sections some time ago, a couple of them needed modification once I actually got to the stage of fitting them, so it was a slow process. However, it all worked out, and before the end of the race last Sunday afternoon I had the engine installed. 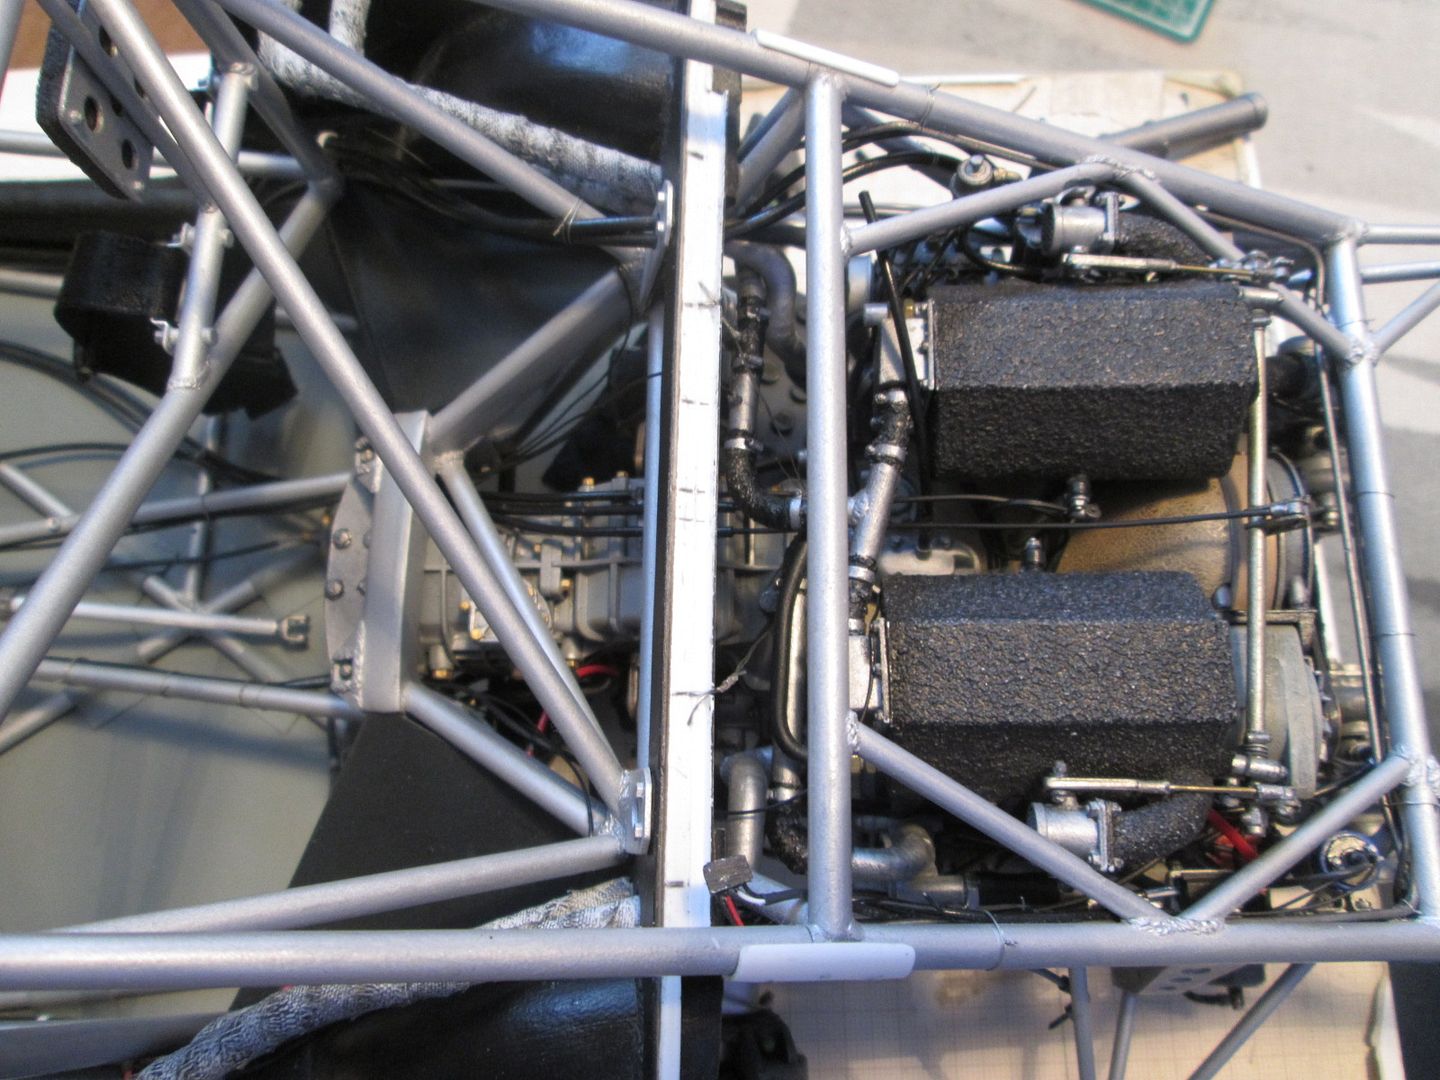 Getting the engine in has opened the floodgates to other jobs. In the photo above you can see the water pipework in place, the clutch and throttle cables are connected above the gearbox, the supporting wires have been threaded through the white beam in the middle of the photo, and I've added the support plate to the front of the gearbox. This has been pinned through to the gearbox, and back into the chassis mountings, so hopefully it's doing something to support some weight. 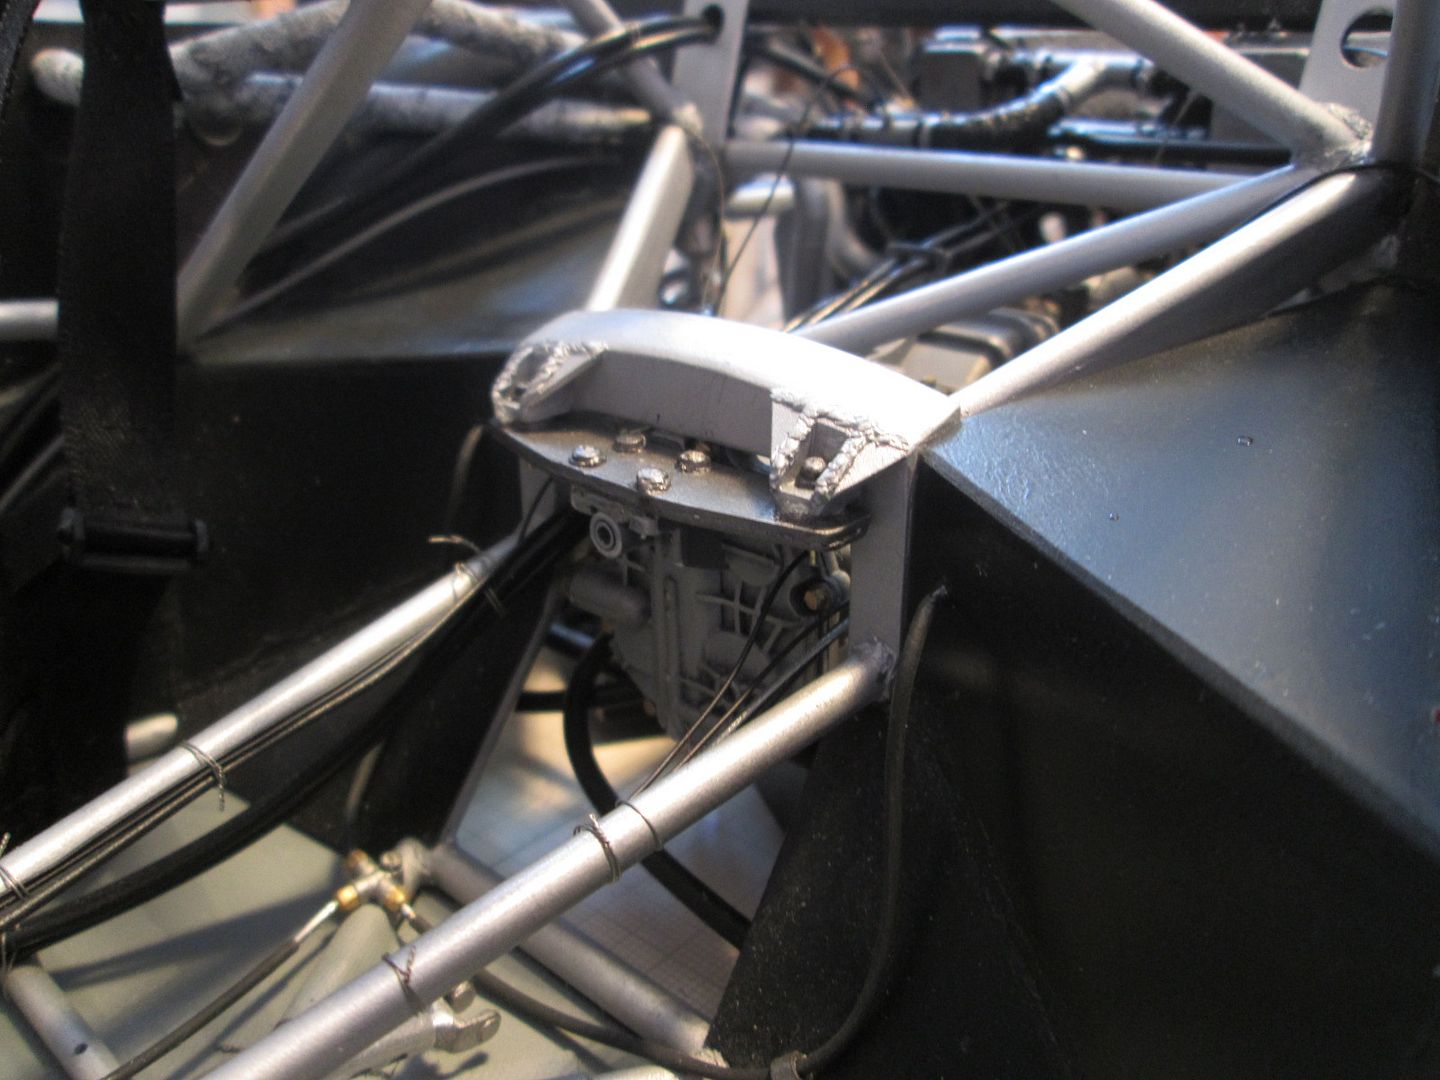 Below, you can see here how the starter motor has tucked in above the solid oil pipe, the various flexible hoses have been connected, and - just today - I've fitted the rear anti-roll bar with droplinks to the trailing arms. 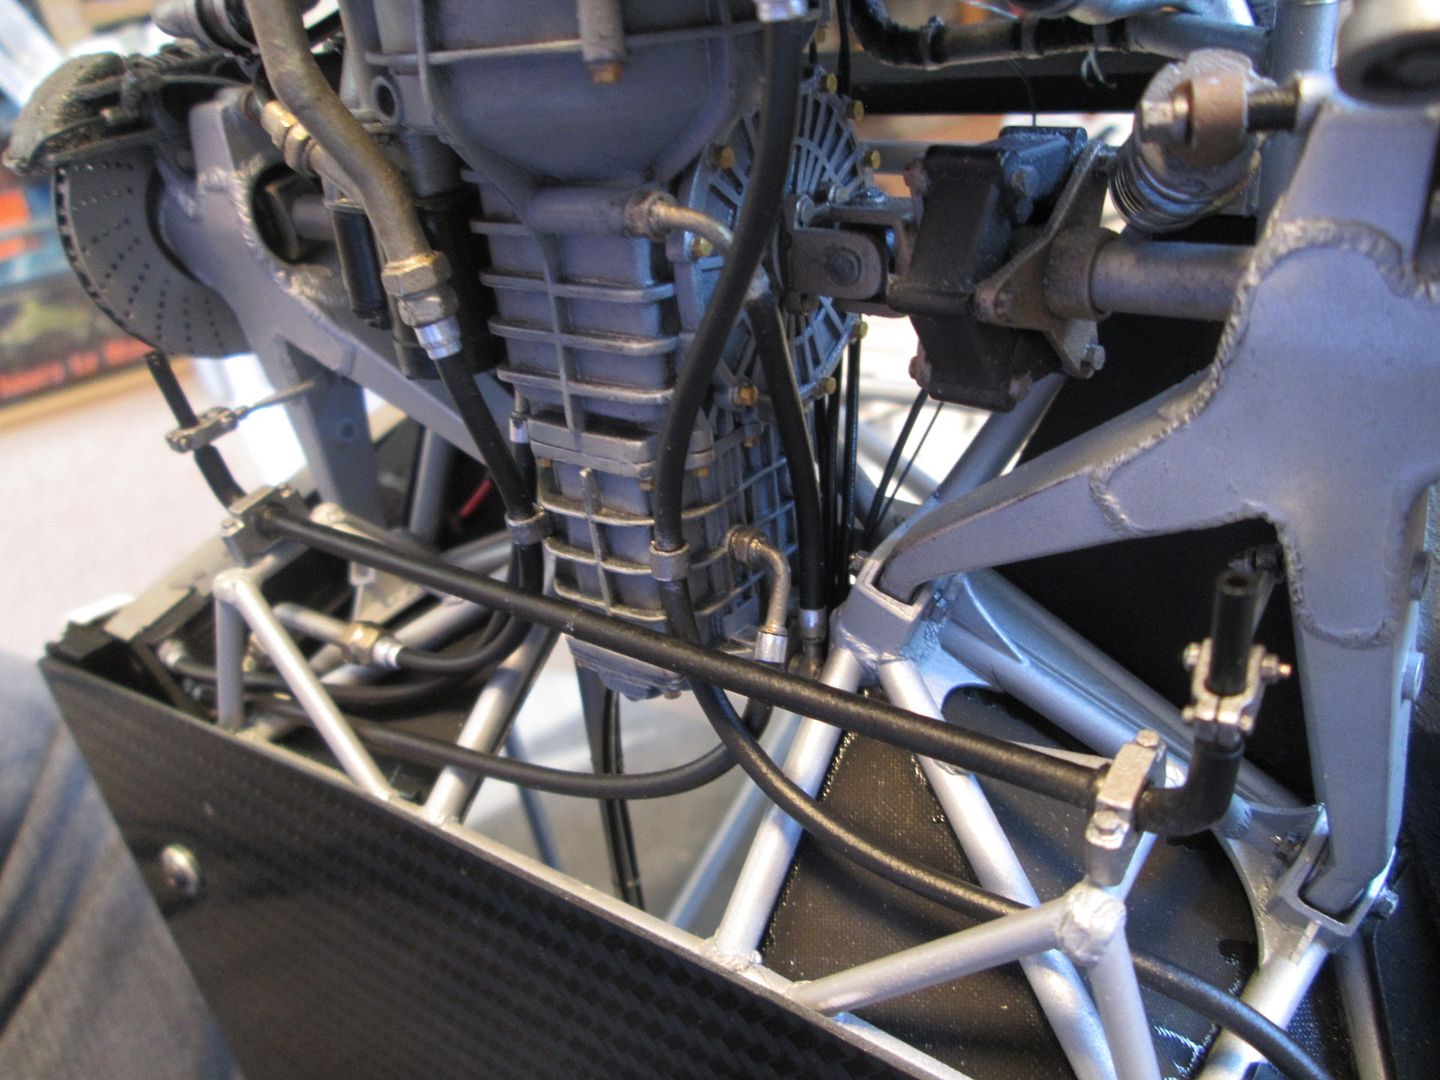 At the back, I've been able to do the final fit of the turbo waste-gate units. The supporting brackets which hang off the main mounting plate had to be re-made to adjust the angle of the exhaust pipes, but no major dramas - fortunately I was able to make new ones cut from a section of the Mk1 rear bumper panel. The main central exhaust pipes have not yet been fitted - I'm leaving these until I do some more work with the body panels, so I can be sure they will fit through the hole! 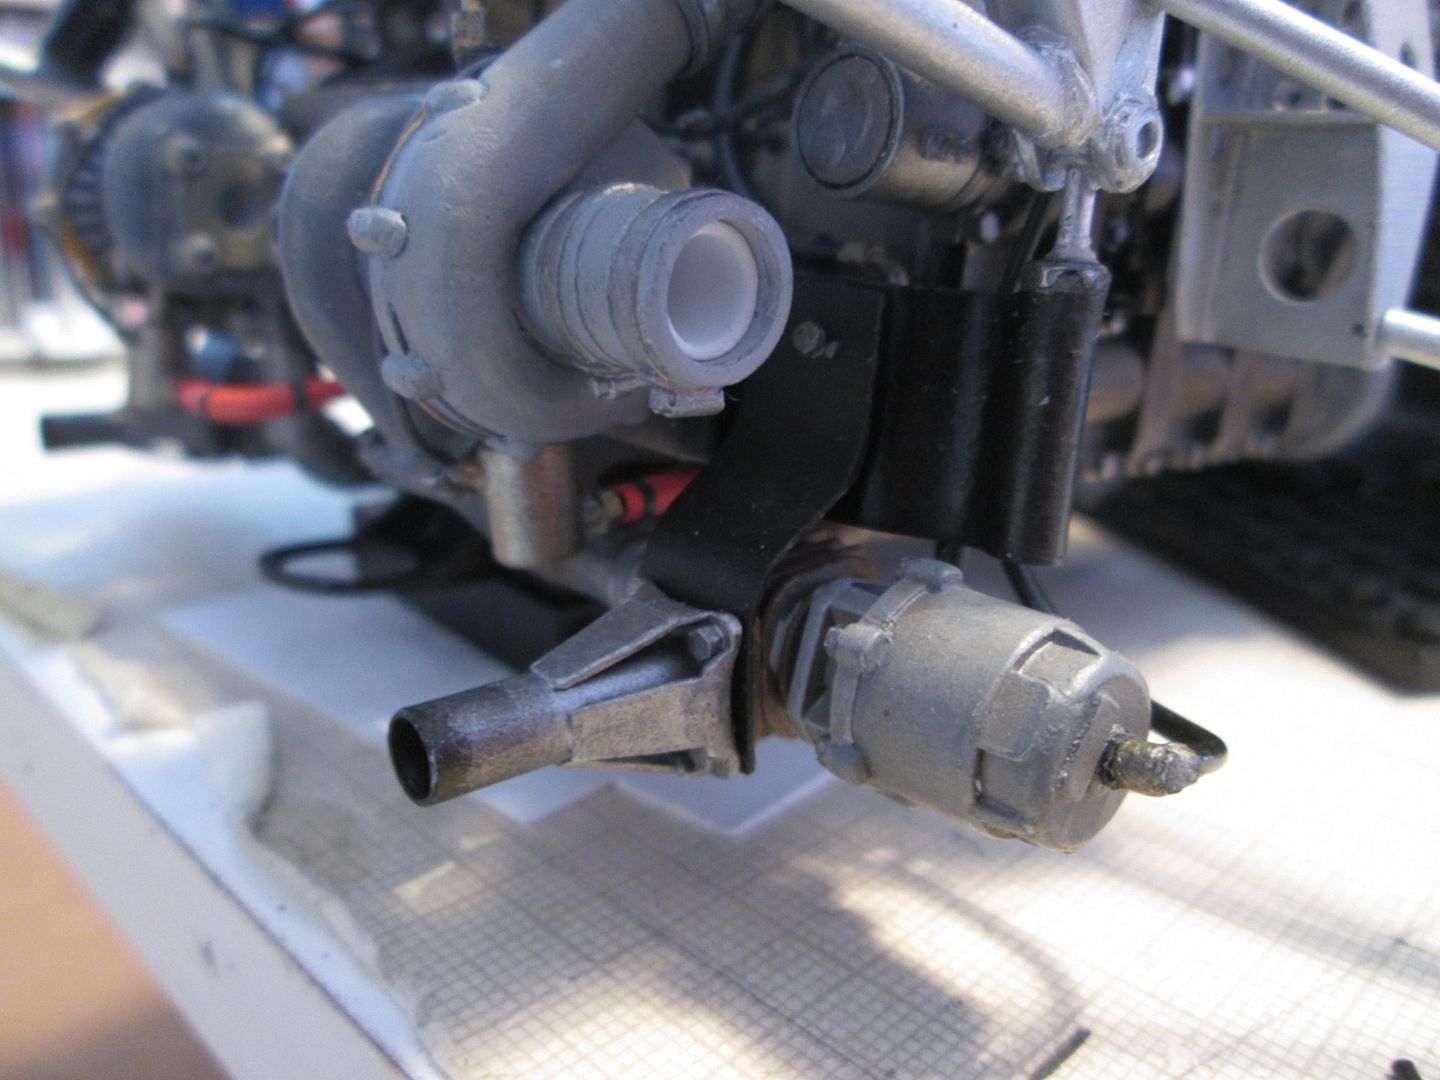 I'll finish this update with an overall shot of the car: 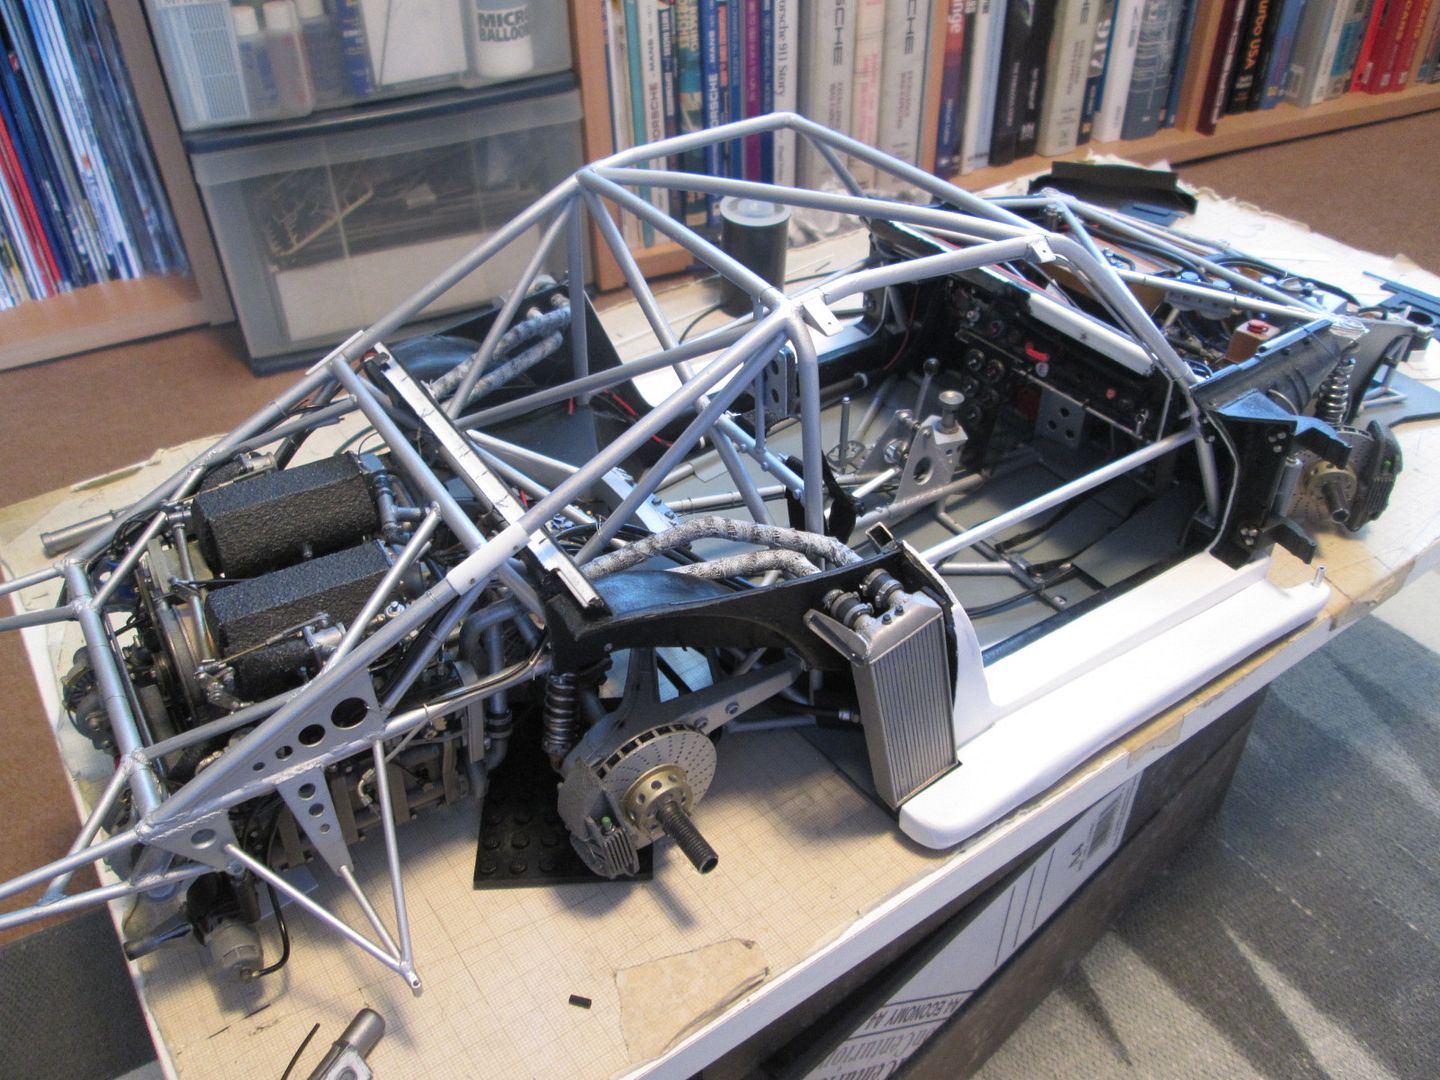 In amongst the jobs mentioned above I've been routing and tidying up a lot of the wiring, touching-up paintwork, etc. The rear air-jacks are ready to be fitted - you can see the right-angle fitting for one of the units just ahead of the mounting bracket. I've fitted the two outrigger frames which support the rear wheelarch sections - these will need a little greenstuff around the ends to finish the joints. The hard part now will be completing the build without knocking these off several times... Surprisingly, in the space of a week I've now reached the stage where there's not much more to do in the engine bay! The next job will be to fit the rear 'parcel shelf' section, then the water header tanks, spark box, etc. It won't be long before I have to fit the covers over the gearbox and much of this work will be hidden away - but it's good to know it's there. After that I can connect the gearshift, fit the seat, steering column, etc, and eventually get to the point where I can fit the roof section! I'll aim to post another update before Le Mans in a few weeks. I've got a three-day weekend coming up, so will probably tackle the Mk2 tyres so I can get the wheels finished. After that, the only major fabrication work will be on the door frames - but I can't do that until the roof is fitted. Fun times ahead! SB |
|
|
|

|
|
|
#698 | |
|
AF Enthusiast
Join Date: Nov 2004
Location: San Diego, California
Posts: 833
Thanks: 2
Thanked 6 Times in 6 Posts
|
Re: 1/8 Porsche 935/78 'Moby Dick'
Since this model is in the home stretch, have you given any thought to the next scratchbuilt model?
__________________

|
|
|
|

|
|
|
#699 | |
|
AF Enthusiast
Thread starter
Join Date: Nov 2008
Location: Norwich
Posts: 649
Thanks: 21
Thanked 111 Times in 87 Posts
|
Re: 1/8 Porsche 935/78 'Moby Dick'
Yes...'the next project'. If I'm honest, it'll probably be a 956/962 - I've got much more reference material for these than for the 935 (including layout drawings of the chassis, engine, gearbox, etc), so it should make life a little easier. The chassis tub will be a new challenge compared to all the tube-frame builds, so I'll probably have to do some tests to work out a suitable approach. It's too early to say whether it would be a specific 'known' car or a generic example - my success or failure with Martini stripes on the 935 could play a big part in that decision!
Whether I'll be posting images of the build, however, depends on the whole Photobucket situation, or whether I switch to an alternative service. Given that the Moby Dick will have taken about six and a half years of my time once it's completed, I might just have a little break between projects, though.. SB |
|
|
|

|
|
|
#700 | |
|
AF Regular
Join Date: Nov 2007
Location: Thuringia/Germany
Posts: 485
Thanks: 1
Thanked 35 Times in 34 Posts
|
Re: 1/8 Porsche 935/78 'Moby Dick'
I can't wait to see the stripes on the car
 As far as the paint peeling off is concerned: You wrote you did coat the bodywork with primer, but if I understand correctly on your test strip you sprayed the flat white directly on the part without primer? If yes, this might be the reason...
__________________
my racing car modelling gallery |
|
|
|

|
|
|
#701 | |
|
AF Enthusiast
Thread starter
Join Date: Nov 2008
Location: Norwich
Posts: 649
Thanks: 21
Thanked 111 Times in 87 Posts
|
Re: 1/8 Porsche 935/78 'Moby Dick'
Unfortunately, MarcoSaupe, what's worrying me is that I did spray the test-piece with primer first, then two or three coats of white, then the red, blue and dark blue. All I can do is to repeat the process with another test piece and try the vinyl masking tapes rather than the paper ones. I bought some of the white Tamiya in 3mm and 5mm widths, to go with the 2mm I already had - hopefully this will be enough. After all this time, I will not be a happy modeller if the Martini stripes ruin the whole project!
Anyway, back to things I have (some) control over! The main project last weekend was to produce the Mk2 tyres. I deliberately made the originals too rough to use as the final pieces, as I knew they would be marked and damaged during the build. So, I set-to in the workshop with my cheap bench drill, adjustable hole cutter and 8mm Dremel-type mill cutter: 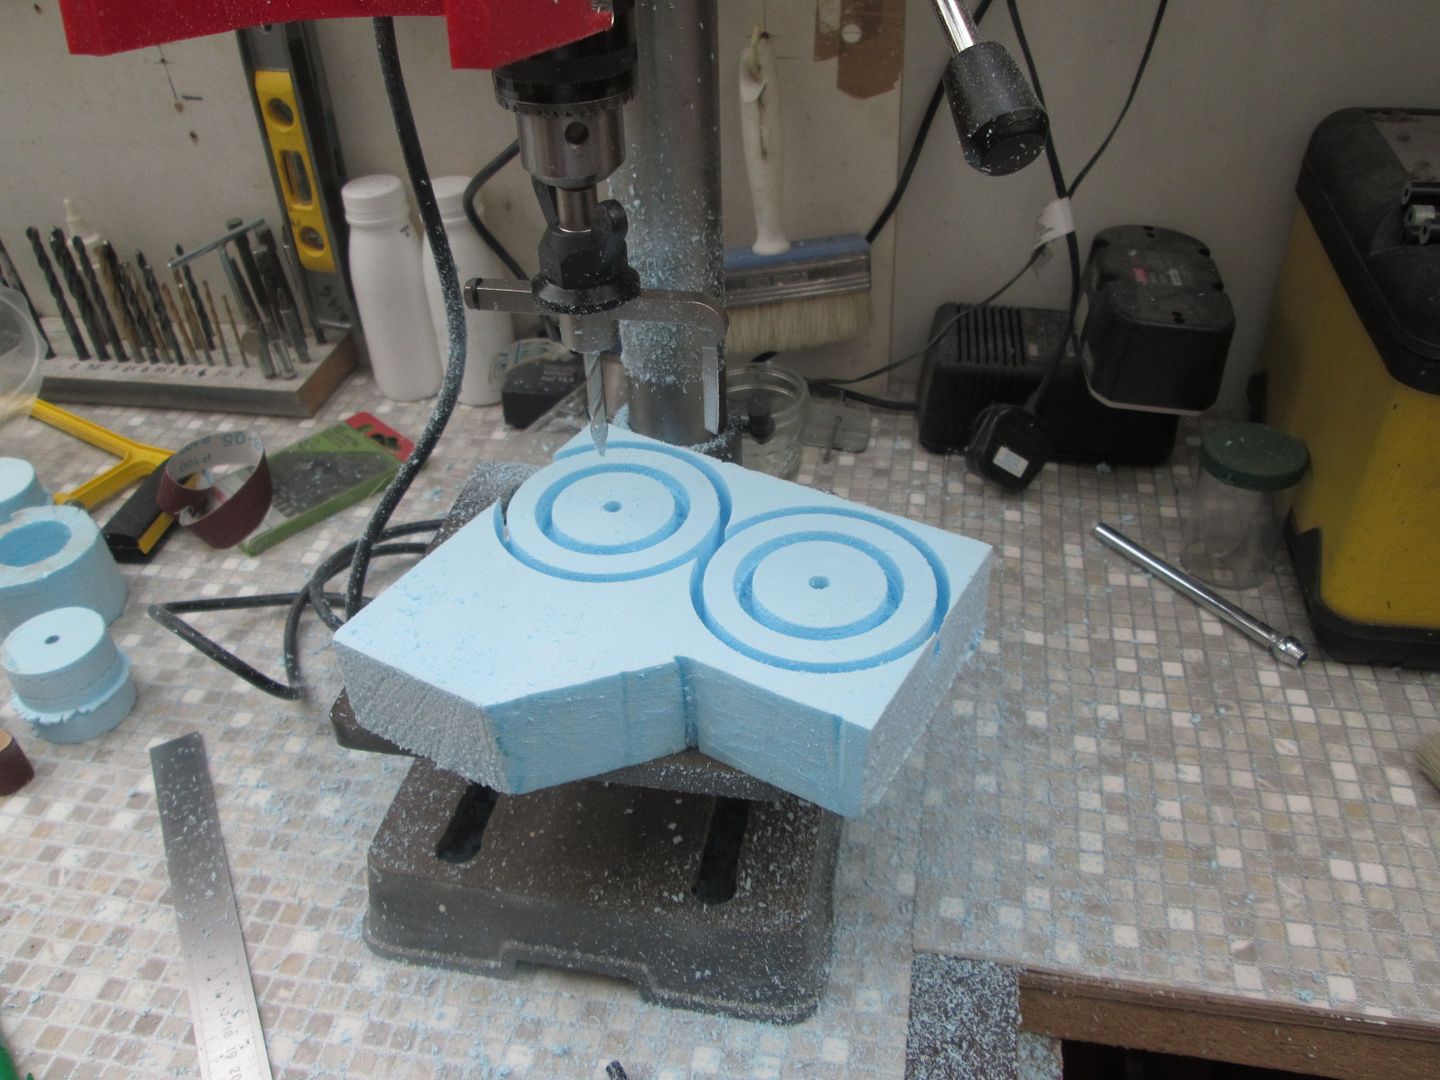 I used the mill cutter to thin down the 50mm foam block to the appropriate widths for the fronts and rears, marked the outside diameter with my compass-cutter, then drilled a pilot hole through the centre. I bored out the internal diameter most of the way through from each side, leaving enough in the middle to allow me to mount the tyre on a bolt later to shape the outside surfaces. Then I cut the outside diameter completely, separating each tyre from the main block. 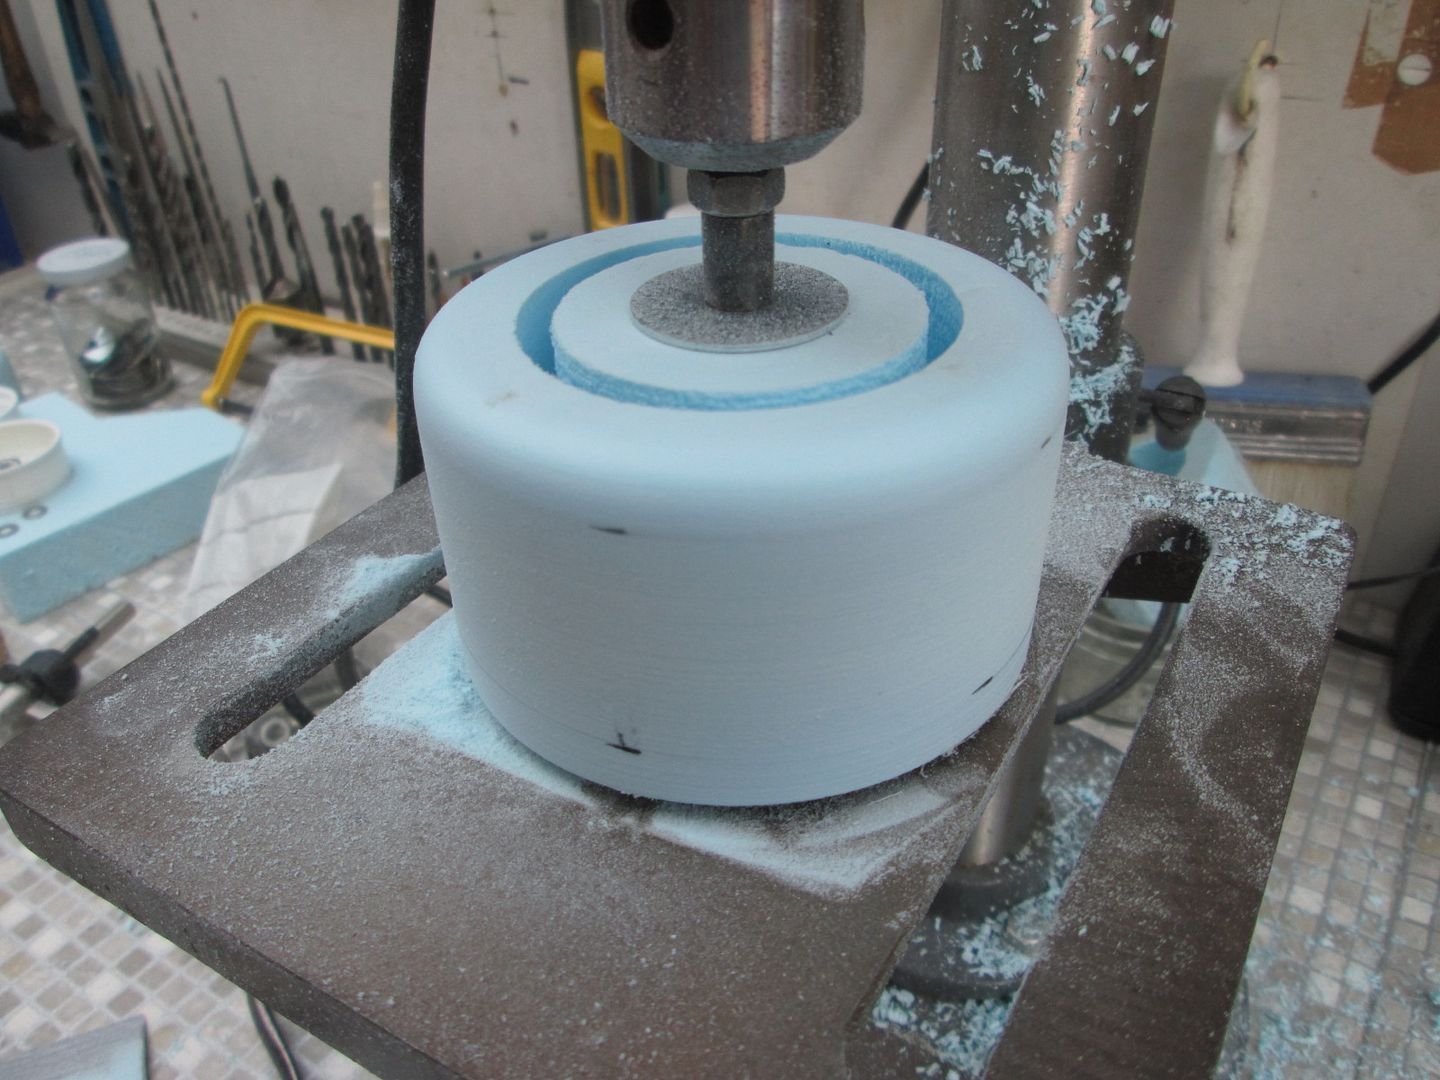 The outside surface needed a bit of sanding to remove the marks left by the cutting tip, but by using the drill as a lathe it was easy enough to spin each tyre and shape them to suit. The circular slot made by the hole-cutter was also big enough to allow me to safely work on the inside edges, too. All of this work was done with emery cloth on a sanding stick, and a foam sanding pad. Before finally removing the centres I used the hole cutter again to add the small shoulder for each rim-half to locate into. Lots of mess, but a good result. In all it took about ten hours to make the four tyres… 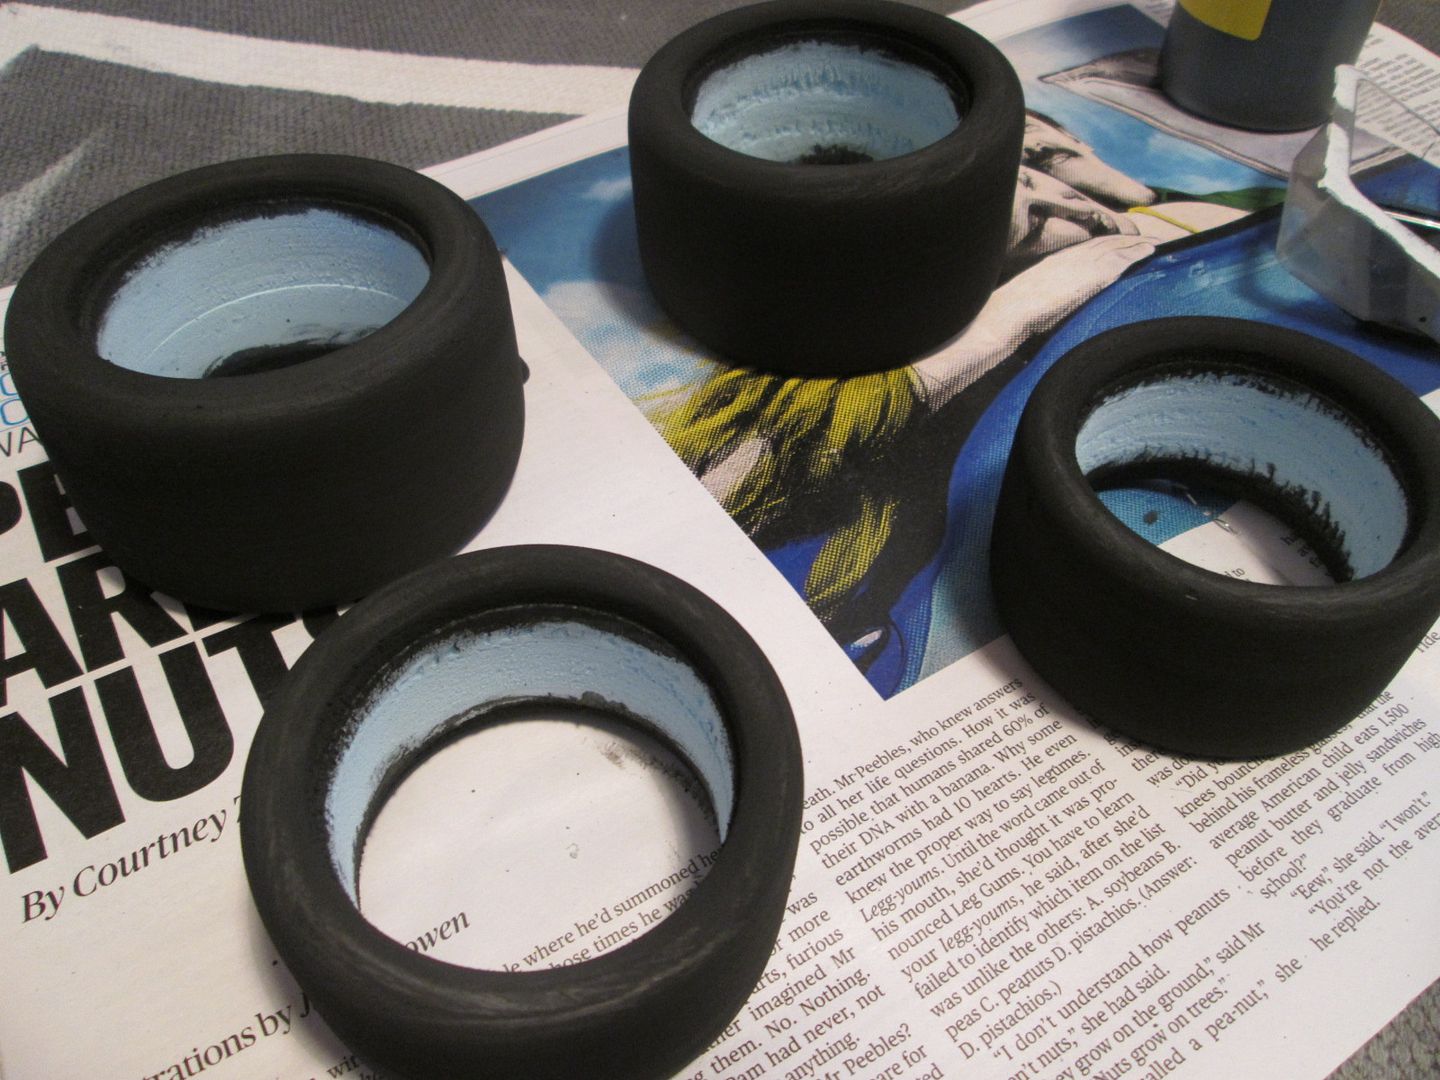 So far I've been building up a few coats of basic black craft paint to start sealing the foam. On the 908 I mixed in some PVA glue to try to give them a bit more strength, but I don't think I'll do that this time. I've been spraying some of the Tamiya acrylics onto a foam test piece - so far it's not eating into the surface, so I'm tempted to use the airbrush to layer on some of the different blacks and build up a better overall colour. Maybe some drybrushing too... The wheels have also been receiving some attention - a grey primer undercoat, then a coat of flat black, then a couple of coats of semi-gloss black. I could spray the outer edges in silver for the look of polished rims, but there's enough evidence to show that at various times in-period it ran with black rims, so that's what I'm going with. 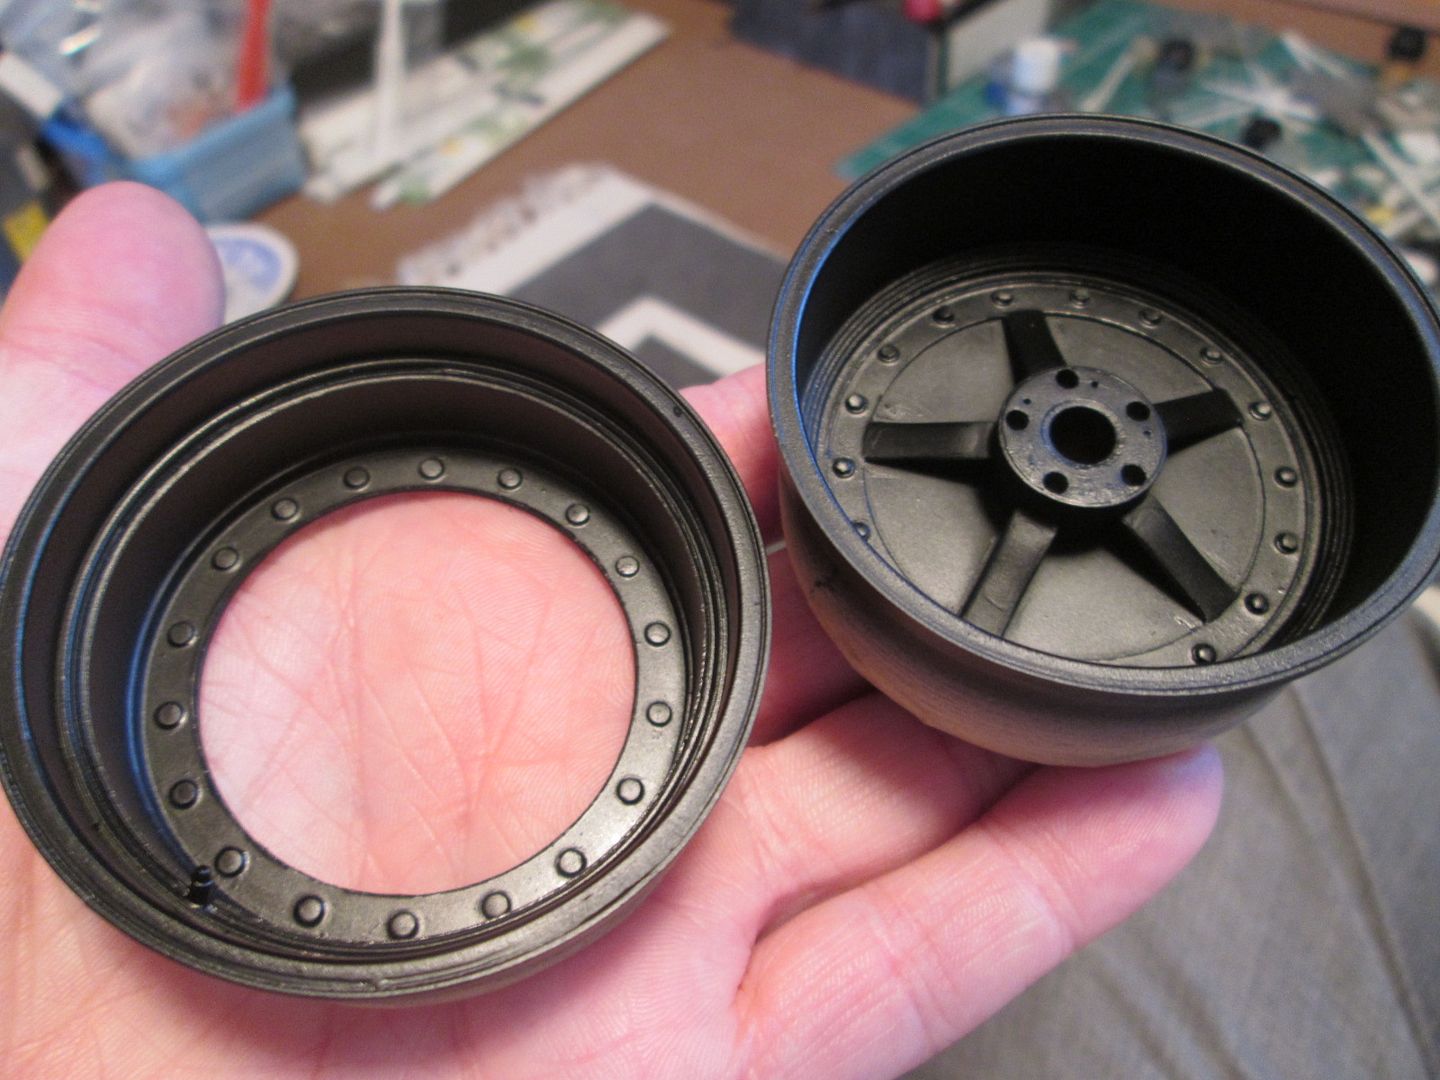 Next up, more interior work. After fitting all the pipework at the front of the engine, connecting the cables, wiring, etc, I could start adding the interior panels to hide all this detail away! First to go in was the rear 'parcel shelf' panel, complete with ignition packs, and then the distinctive water header tank and filler necks: 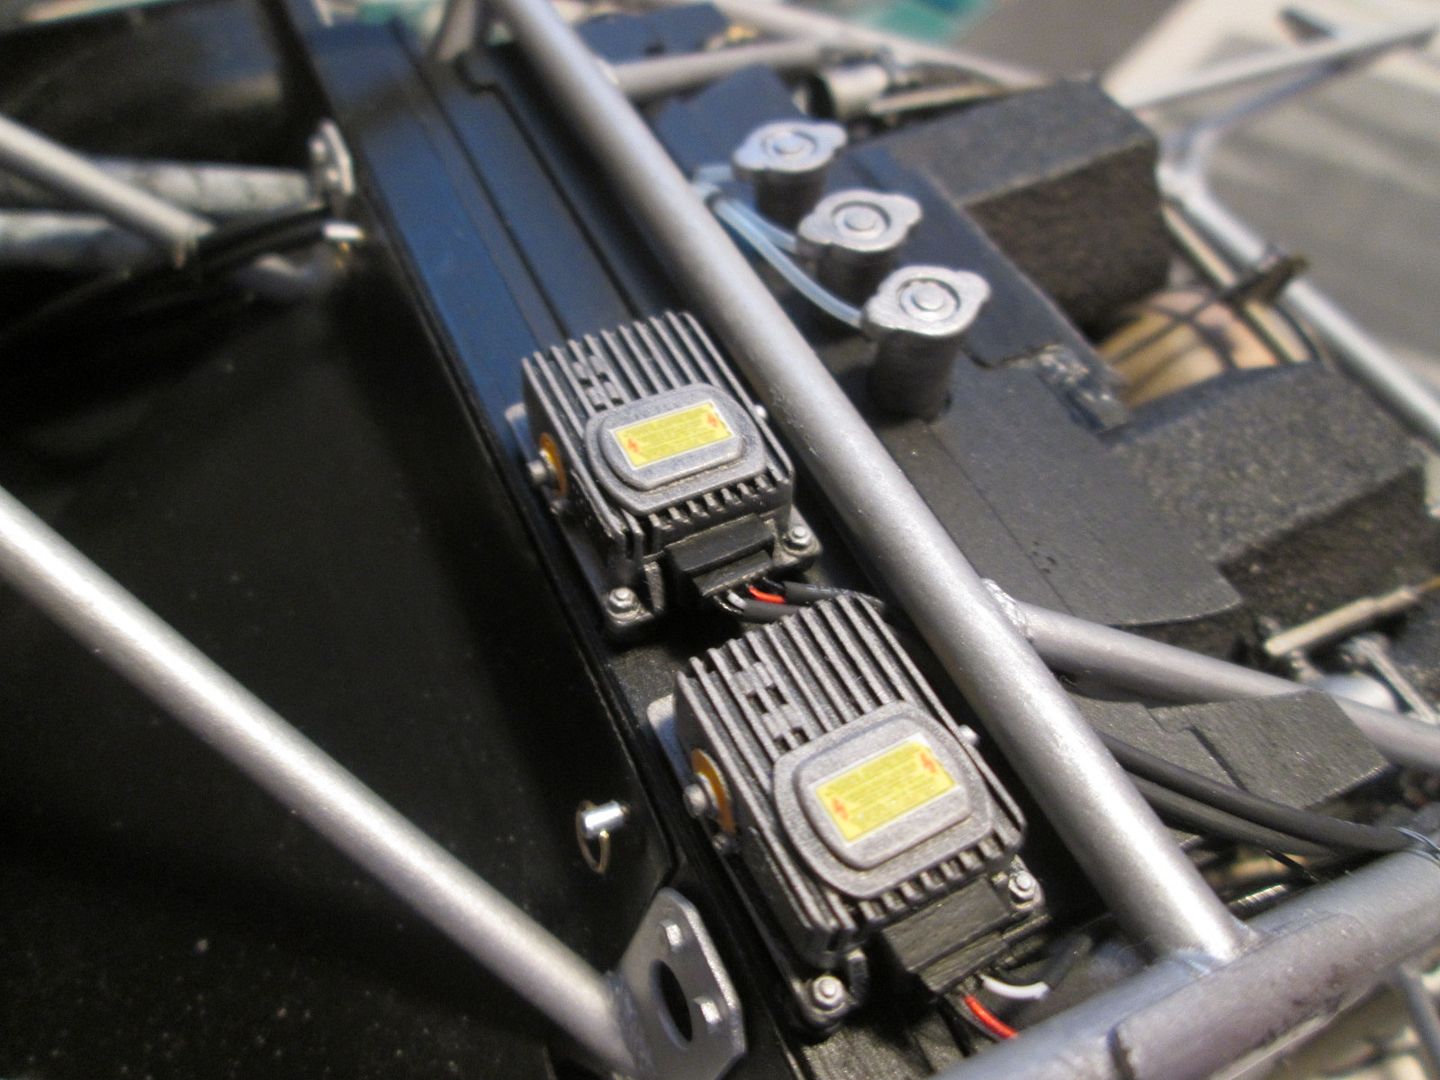 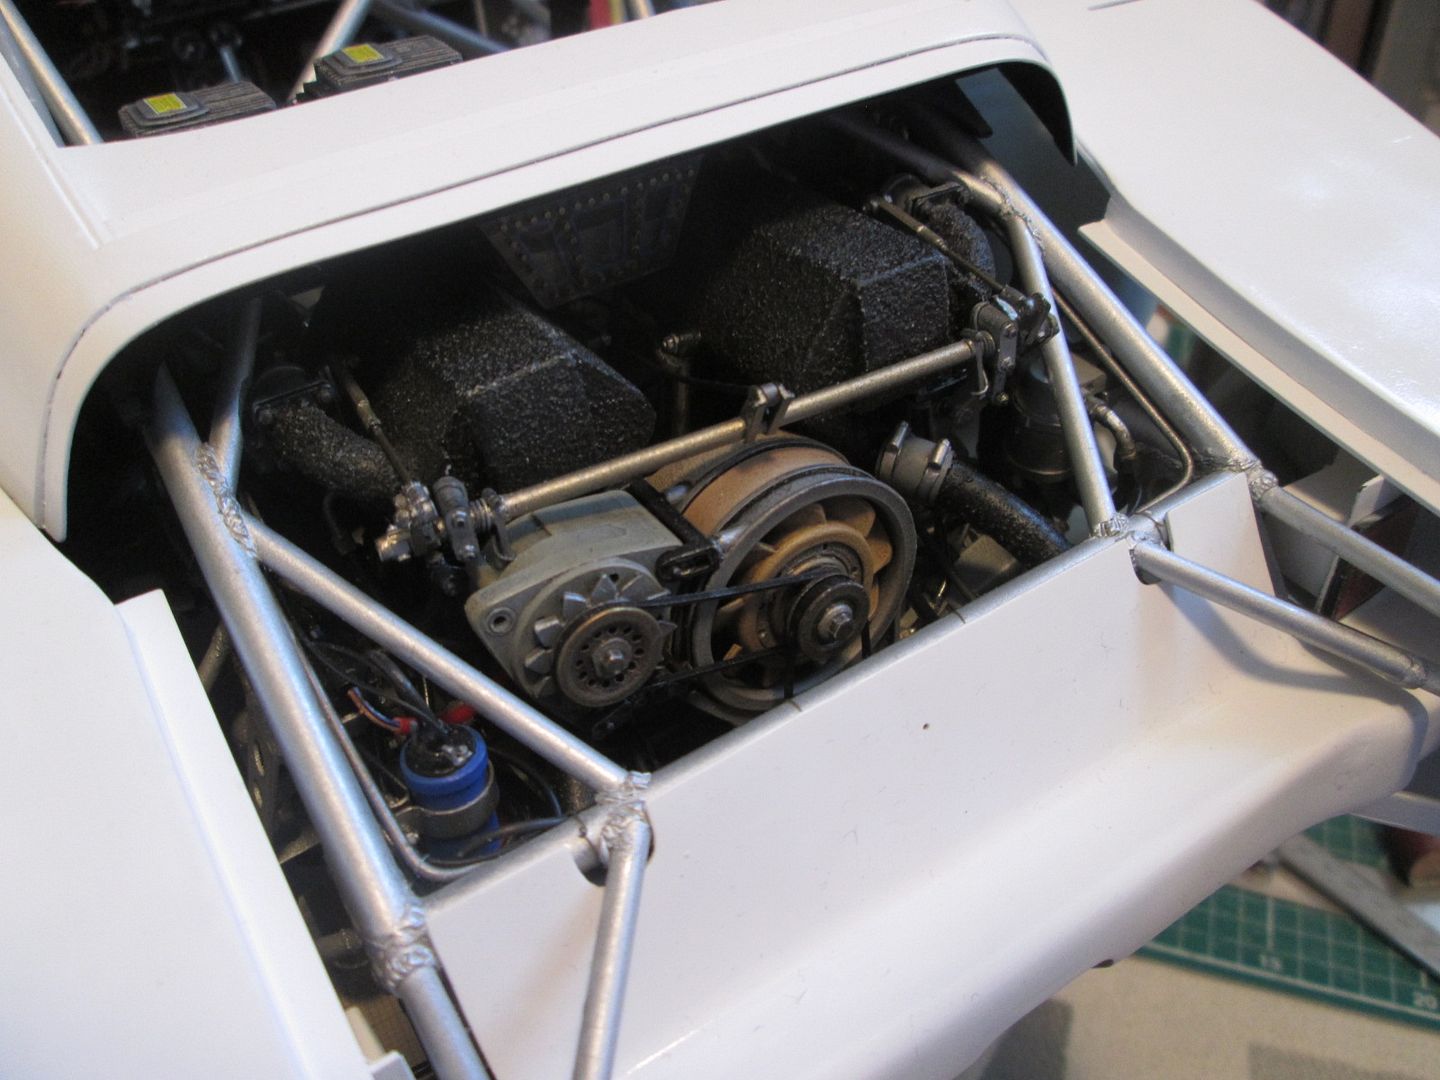 Then the next big step - adding the two gearbox cover panels inside the cockpit. This meant I also had to connect the gearshift, which then allowed be to add the seat, so I could also add the two lap-belts, then I could fit the steering column and instrument pod...and so on, and so on! All these little jobs and parts that have been waiting for months (or years), then the flood-gates open just because of two panels: 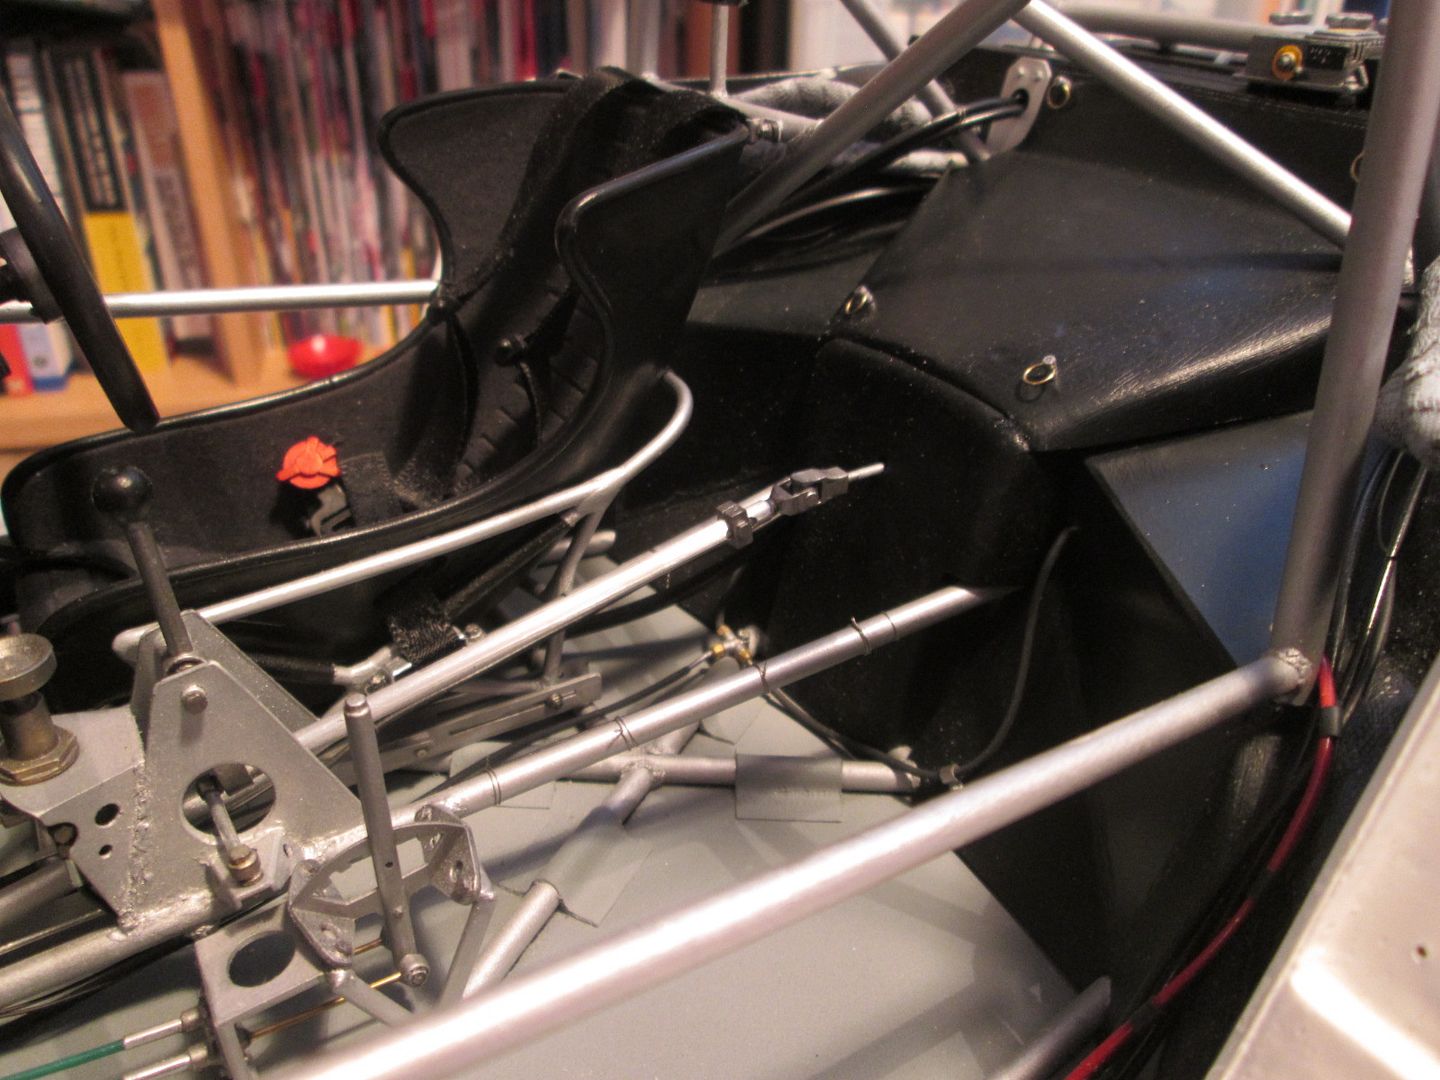 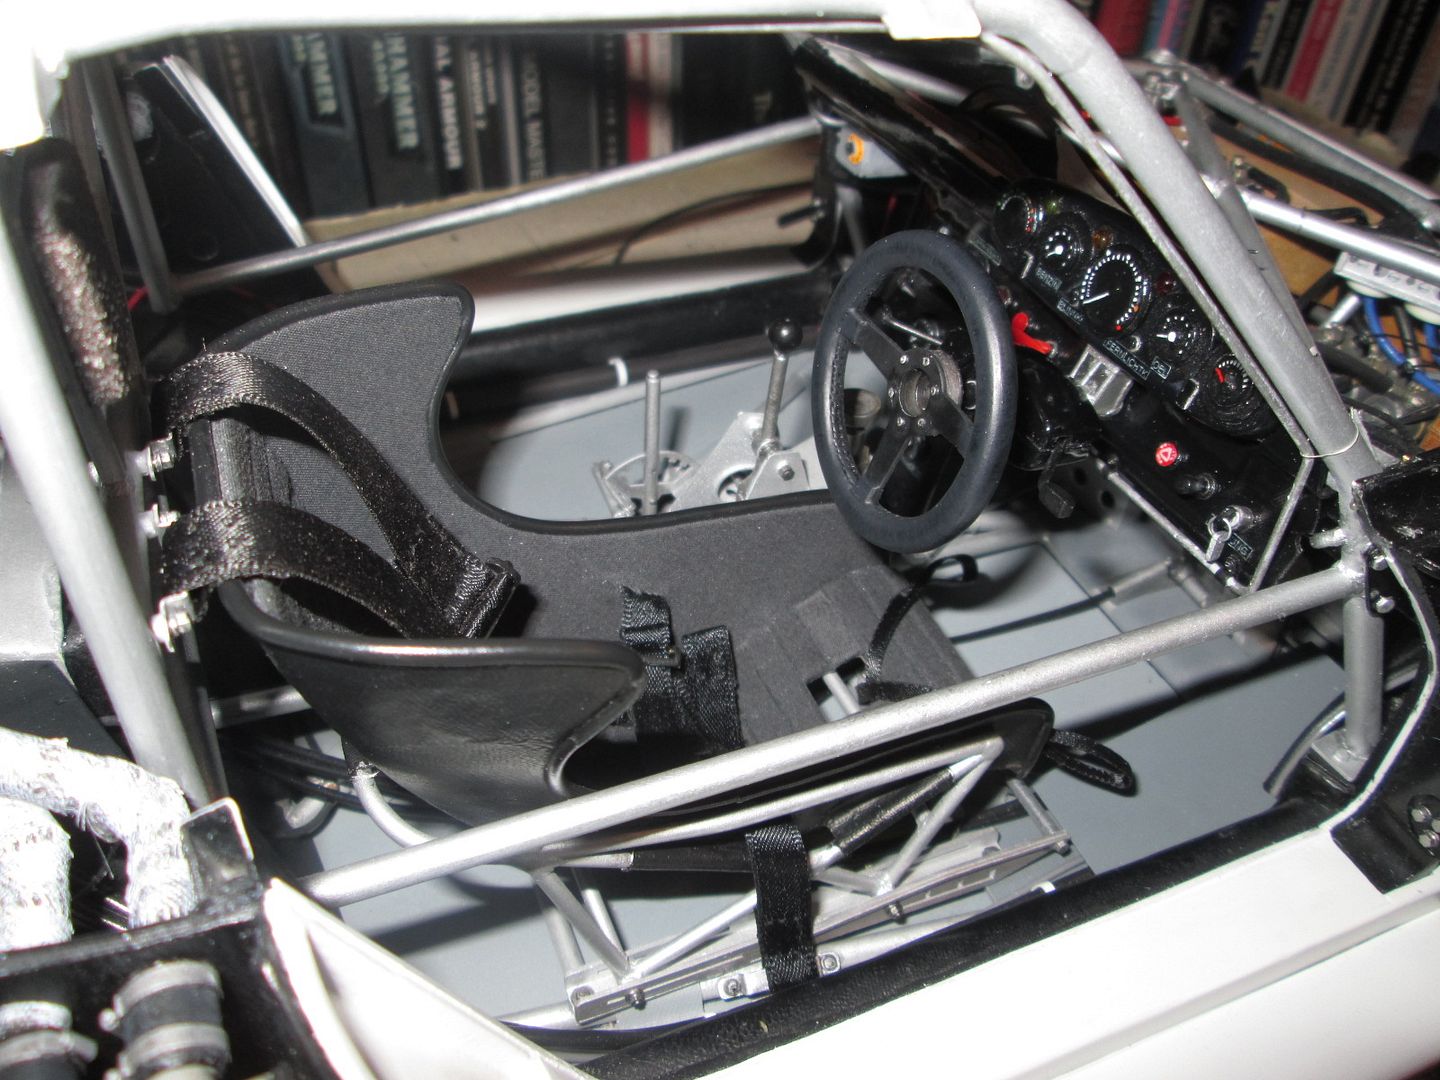 No major problems getting any of this into place as it was all designed to be pinned during the build. The lap-strap fixings were a little tricky, but not impossible. It was always going to be unfortunate to have to add the gearbox covers, but I couldn't see any way of having them removable - especially with the gearshift passing through, and the reduced access once the roof is fitted. You can see enough of the gearbox and suspension once the rear bodywork is removed, so that's compensation. If anything, the biggest problem I have found during these last few weeks of assembly is being able to get CA glue just where I want it - and being able to get the parts into position before it sets! Parts that have been assembled and dis-assembled countless times during the build suddenly decide they don't want to fit properly just because they have the tiniest amount of glue on them... What's next? The roof has been receiving a couple of final coats of white before I take the plunge to varnish it before adding the decals. So, I'll be making the decals, sorting out the final fit of the rear windows, screen, etc (to be added after the varnishing, of course). The dashboard top is ready to go in after I add the washer bottle and pump. I must make an interior mirror sometime, too - will be annoying to forget this and have to add it afterwards! When I'm happy with all this, the roof can be fitted and I can then work on the doors, etc. I don't think all this will happen before Le Mans, but probably not long after... Mind you, it's not looking too bad: 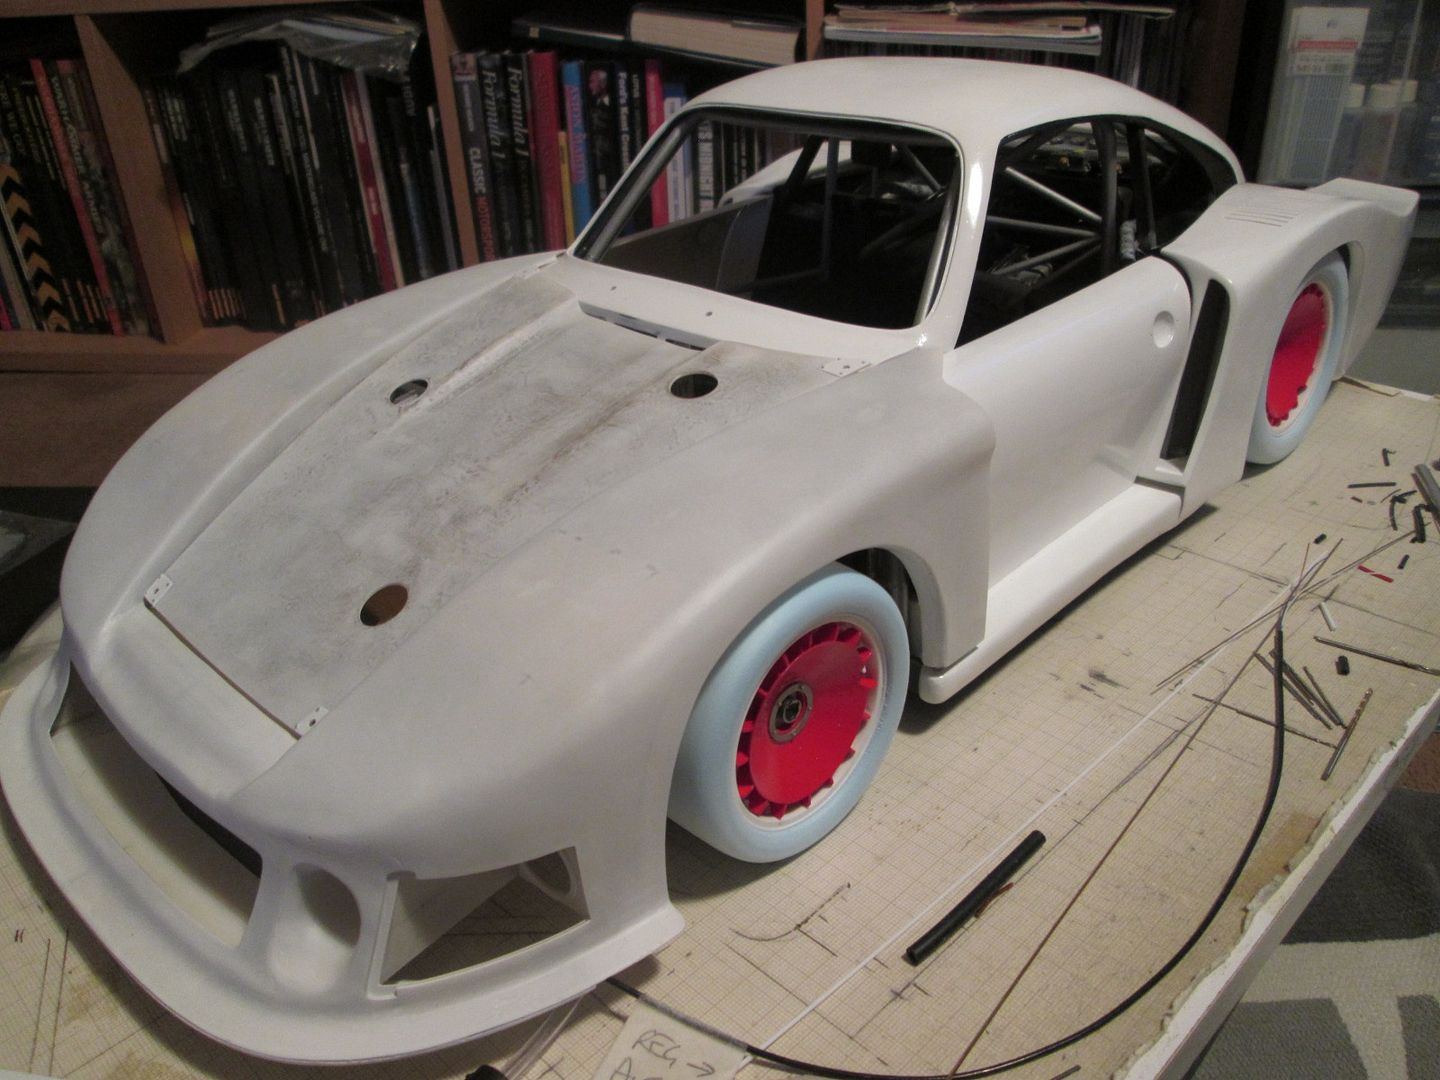 Have a good week, as always! SB |
|
|
|

|
|
|
#702 | |
|
AF Regular
Join Date: Mar 2005
Location: San Marcos, California
Posts: 331
Thanks: 52
Thanked 17 Times in 15 Posts
|
Re: 1/8 Porsche 935/78 'Moby Dick'
" it's not looking too bad."
SB, This is true Craftsmanship/Art. Trevor |
|
|
|

|
|
|
#703 | |
|
AF Newbie
Join Date: Nov 2010
Location: Portugal
Posts: 62
Thanks: 4
Thanked 2 Times in 2 Posts
|
Re: 1/8 Porsche 935/78 'Moby Dick'
Surely it's not looking too bad!
   Just a quick note: when you go to finish the tyres, don't forget to include the XF-85 Tamiya Black, which will give you a nice "rubberish" touch! Art |
|
|
|

|
|
|
#704 | |
|
AF Newbie
Join Date: Jan 2018
Location: Heath, Ohio
Posts: 56
Thanks: 0
Thanked 13 Times in 13 Posts
|
Re: 1/8 Porsche 935/78 'Moby Dick'
SB,
As stated before, nothing more I can add to critique your wonderful work, simply breath taking and outstanding above all your peers! Your dedication and attention to detail is second to nobody. What museum is receiving this once it is DONE? Ben |
|
|
|

|
|
|
#705 | |
|
AF Enthusiast
Thread starter
Join Date: Nov 2008
Location: Norwich
Posts: 649
Thanks: 21
Thanked 111 Times in 87 Posts
|
Re: 1/8 Porsche 935/78 'Moby Dick'
Cheers, guys. No museum plans for this one, Ben - it'll end up on the shelf with all the others, gathering dust! I'd still like to visit the Porsche Museum one day, but I'm not sure if they'd be pleased to see my models, or whether they would set the lawyers on me!
Just a quick update today. I've been working on the frames for the rear side windows, and have fitted the washer bottle and pump at the front of the car. The main focus has been on the tyres, though. After satisfying myself that the foam test-piece had not been affected by the airbrushed paint, I started with a couple of coats of Tamiya 'Nato Black' as a base-colour, followed by a coat of 'Rubber Black'. I wasn't impressed by the results: 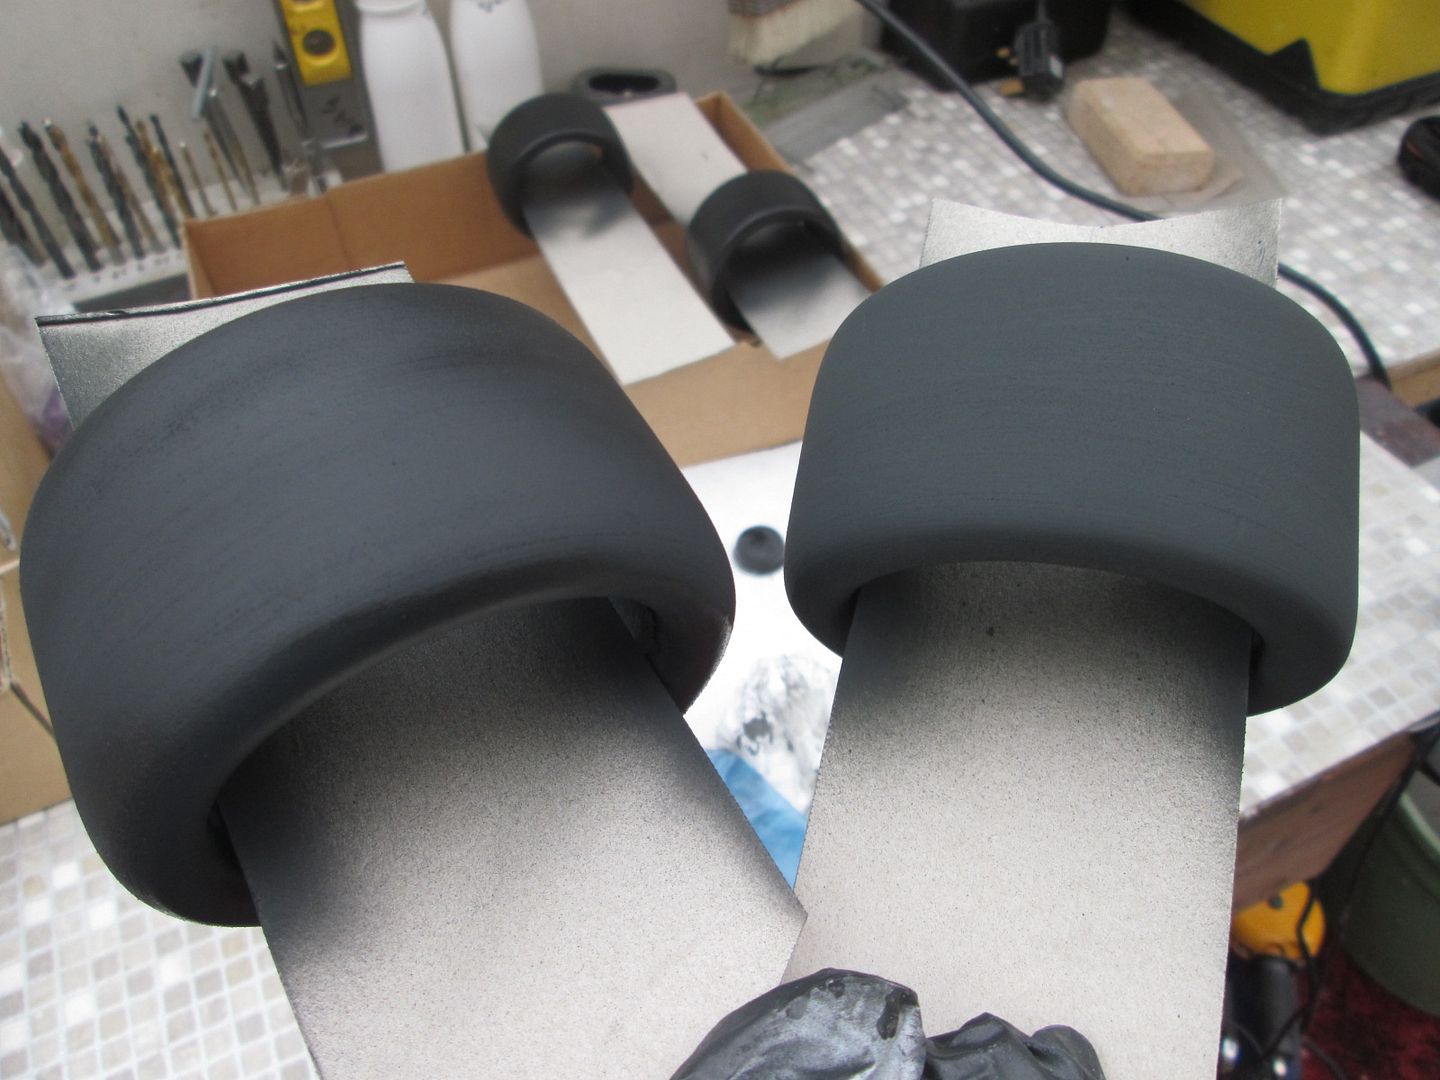 Basic Nato black on the right, Rubber black on the left. Hmm. The rubber black actually looked much better when it was first applied, but it dried off to a dull-ish grey, rather than having that little bit of shine that tyres display. So, the next step was a coat of Semi-gloss Black, and then a light spray of Rubber black around the main body of the tyre (but not on the sidewalls): 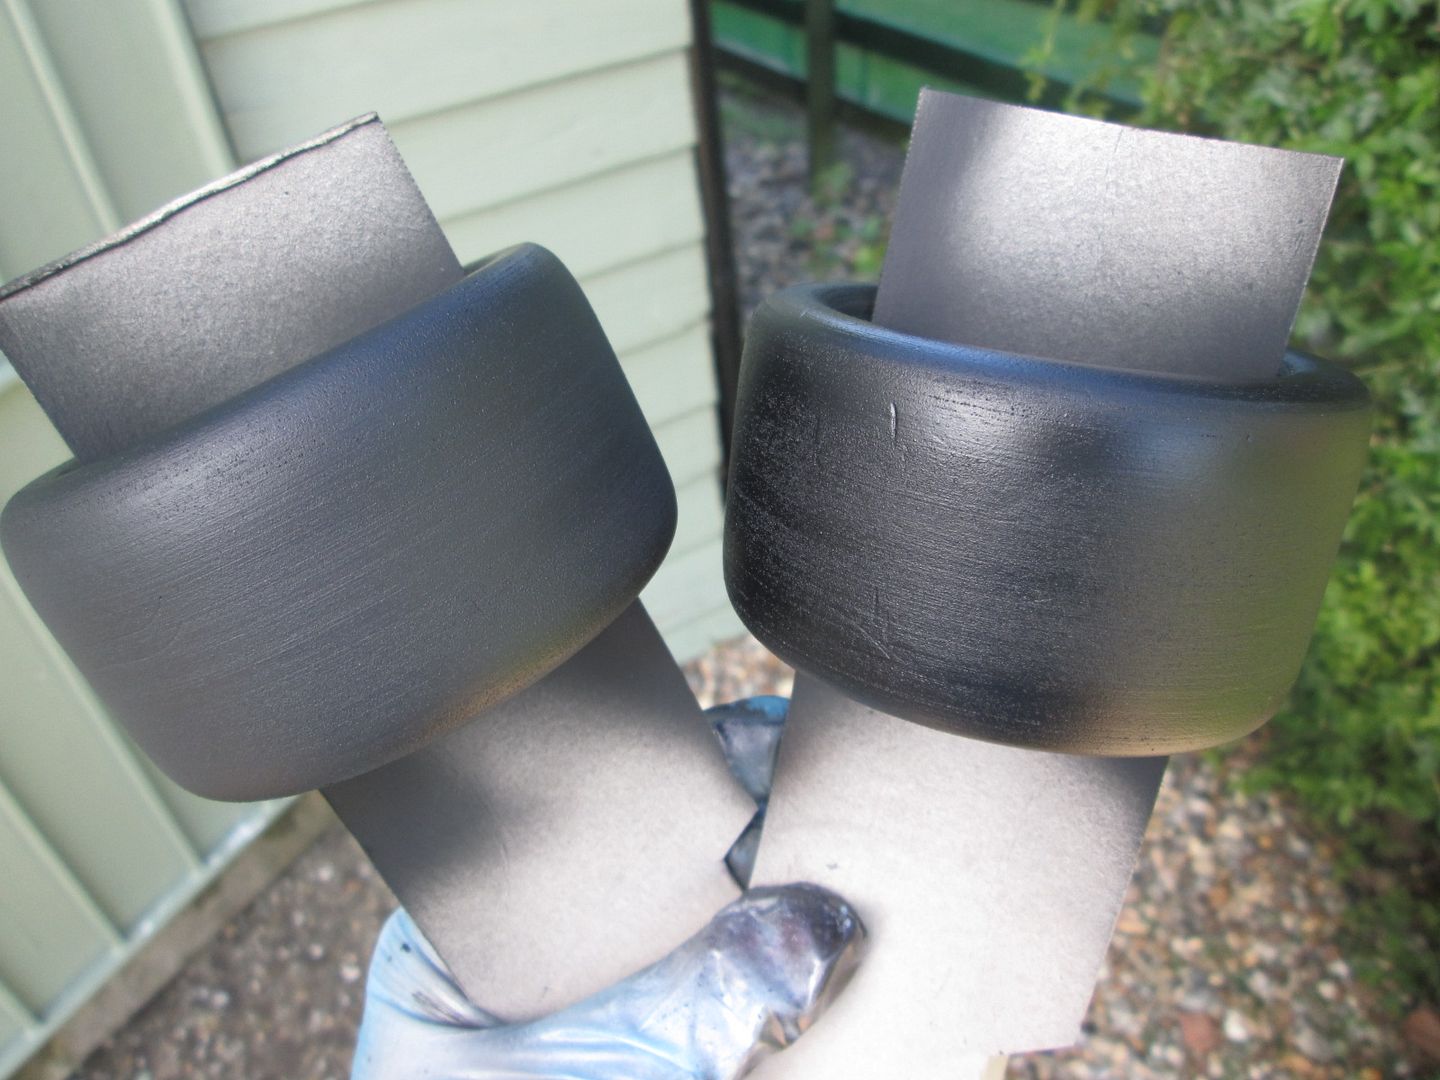 Semi-gloss only on the right, extra Rubber black on the left. Much better! getting the difference to show in the photos is a bit tricky, but the semi-gloss is just giving that bit of shine. The question now is whether to try to drybrush some of the surface texture for a more authentic look, or to quit while I'm ahead. I'll try to take some detail photos of some of the slick tyres at work this week, and use them as references... In the meantime, here's a quick test-assemble of one of the rears: 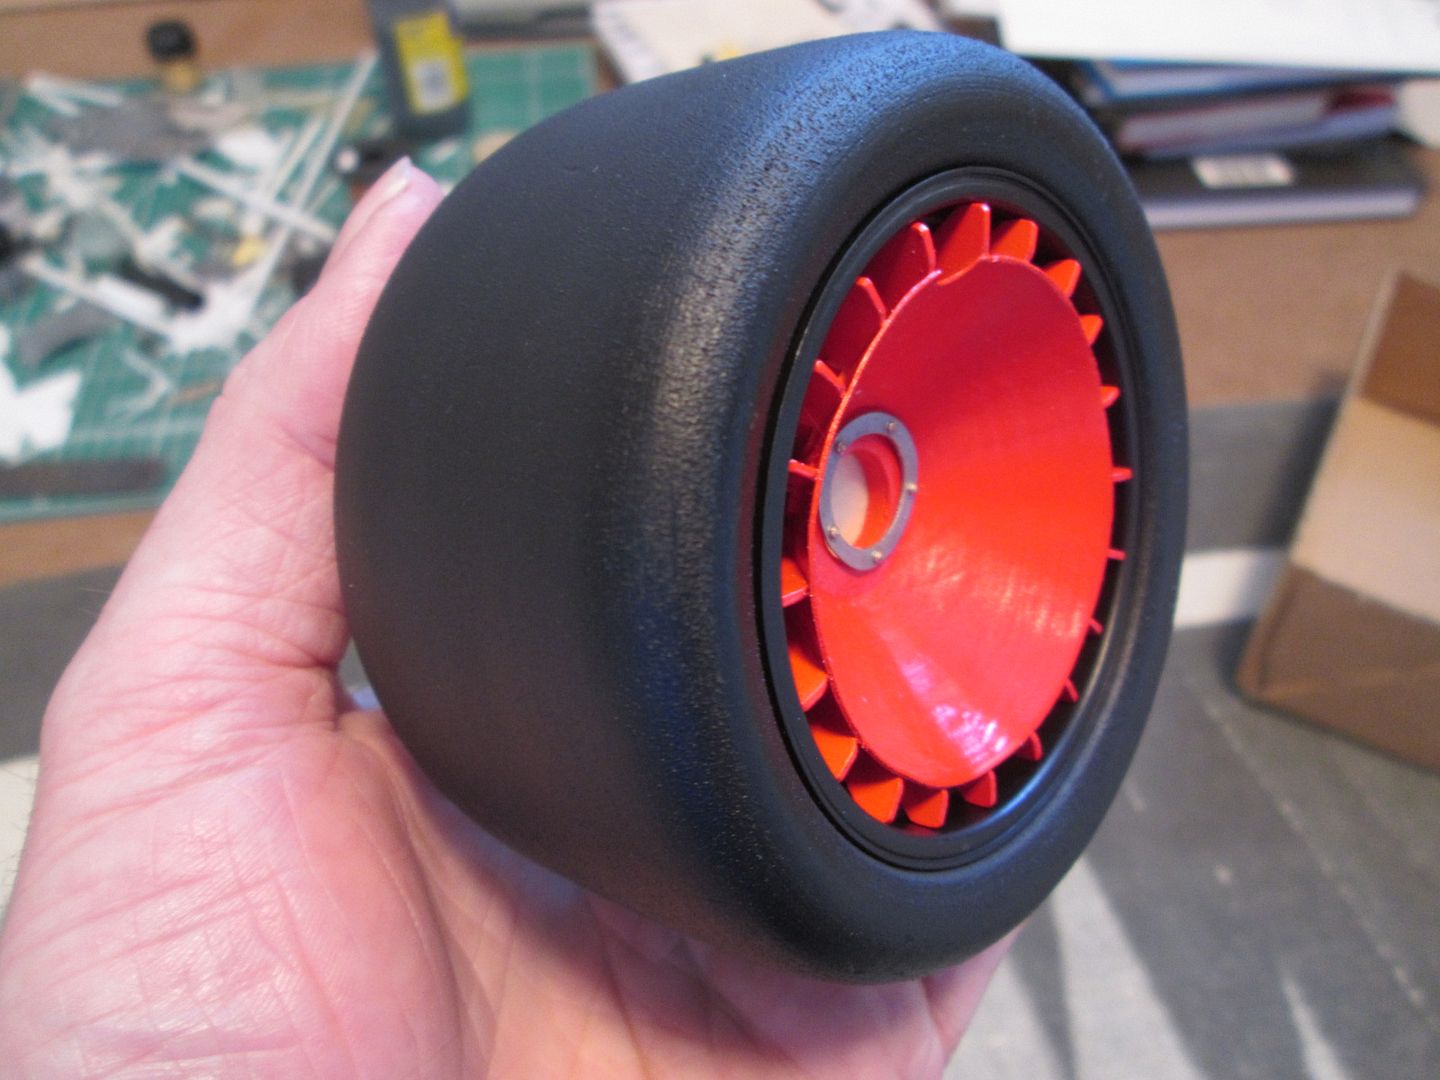 Anyone got a 1/8-scale 'Dunlop' template for the sidewall?! I'd love to add some lettering, but short of painting it freehand I don't think it's going to happen. I can't imagine that decals are going to stick on the foam, either... That's it for today. Hopefully they'll have some interesting machinery on display at Le Mans next weekend. I know there's a 'Gulf' exhibition at the circuit museum this year, so maybe some of those cars will be on the track display during the Friday pitlane walkabout. Either way, I'm looking forward to the trip. SB |
|
|
|

|
| ||||||||||||||||||||||||||||||||||||||
 |
POST REPLY TO THIS THREAD |
 |
| Thread Tools | |
|
|