|
|
|

|
|
| Search | Car Forums | Gallery | Articles | Helper | AF 350Z | IgorSushko.com | Corporate |
|
| Latest | 0 Rplys |
|
|||||||
| WIP - Street Post topics for any "Works In Progress" street vehicles projects in this sub-forum. |
 |
 Show Printable Version | Show Printable Version |  Email this Page | Email this Page |  Subscribe to this Thread
|
|
|
Thread Tools |
 07-15-2011, 08:15 PM
|
#1 | |
|
AF Newbie
Join Date: Jul 2011
Location: Manchester
Posts: 3
Thanks: 0
Thanked 0 Times in 0 Posts
|
VW Golf Mk1 Fujimi 1/24
Hello everyone, I'm new here, I'm 20 an engineering student at the University of Central Lancashire. I've just begun this build, my first attempt at creating a model. I bought it over a year ago as part of a promise to myself after passing my driving test. The Mk1 Golf is probably my favourite road car and was my short lived first car that I sold on as I quickly needed a well running reliable car to make a daily commute to university. I regret the decision but ultimately it needed to be done.
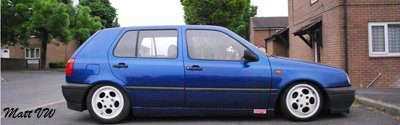
This is my second attempt at posting this thread, I think something went wrong with my first attempt as it isn't appearing, if two threads appear I apologise!  So there's the why for the build covered lets get into the actualy build, remember this is my first attempt so go easy. When I bought the model I knew very little about modelling, after reading around here I've gained more knowledge so its time to put it into practise. I bought the kit and a set of after market wheels which I belive where Aoshima I can't remember for certain. Please ignore the terrible photography a friend has my Telephoto macro lens. Here are the original wheels along side the much wider (too wide) Aoshima wheels. I liked the faces on the original wheels but the tires are terrible and far too narrow. 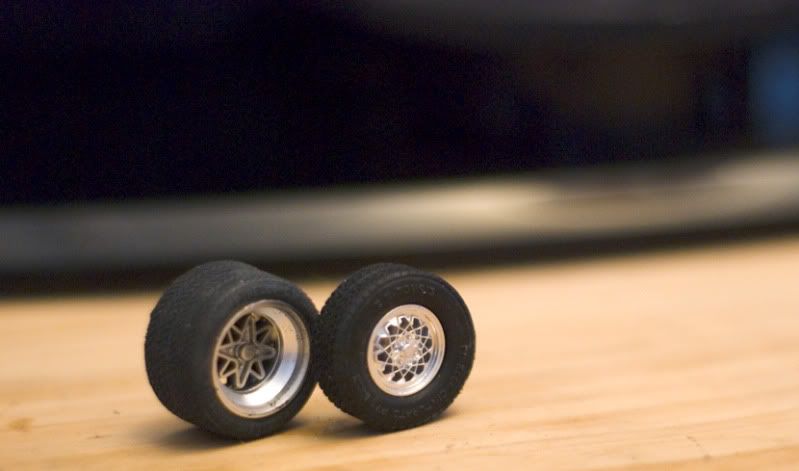 So I removed the faces of the Aoshima's and sanded down the original wheels to fit inside to be glued and puttied later. This also solved the issue of mounting the wheels to the chassis. 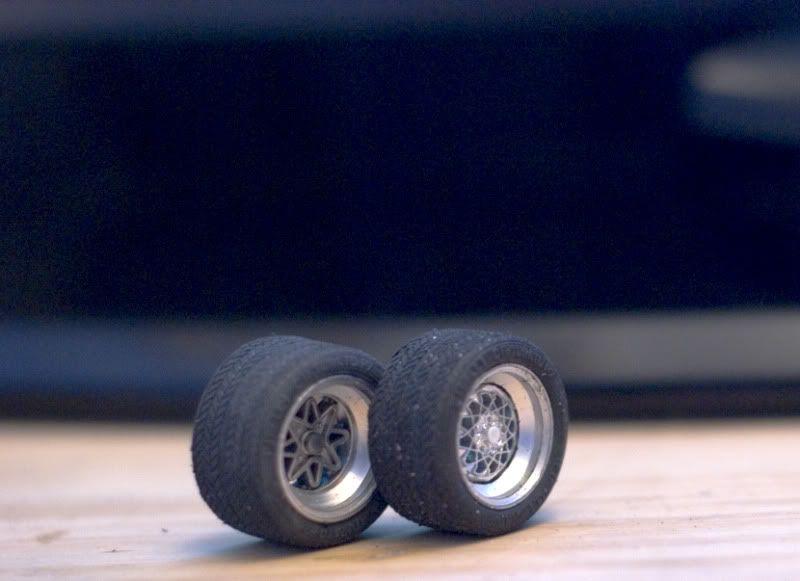 3 of 4 facces have been sanded and inserted. 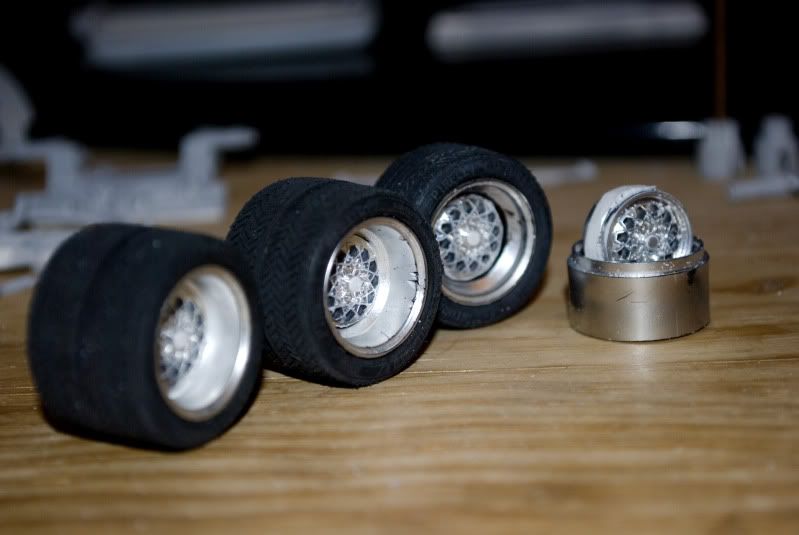 Sorting out the width a bit 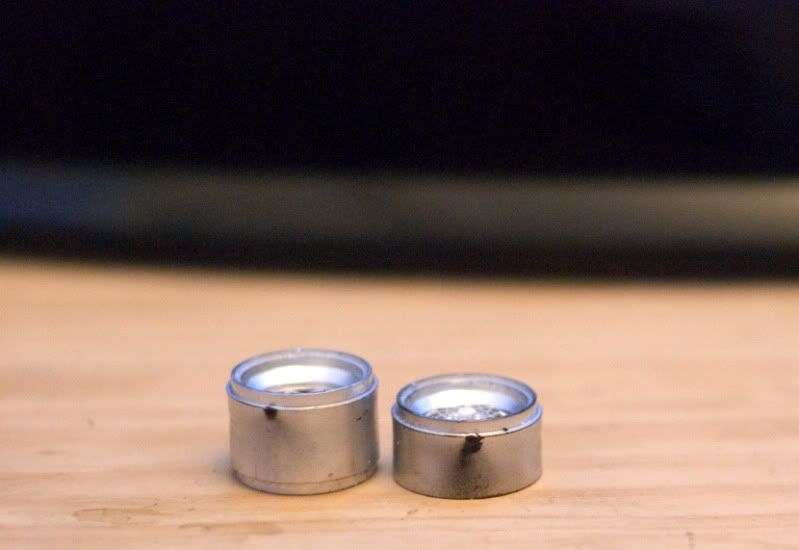 Moving away from the wheels I cut the petrol cap away from its circular backing to leave just the star cap. 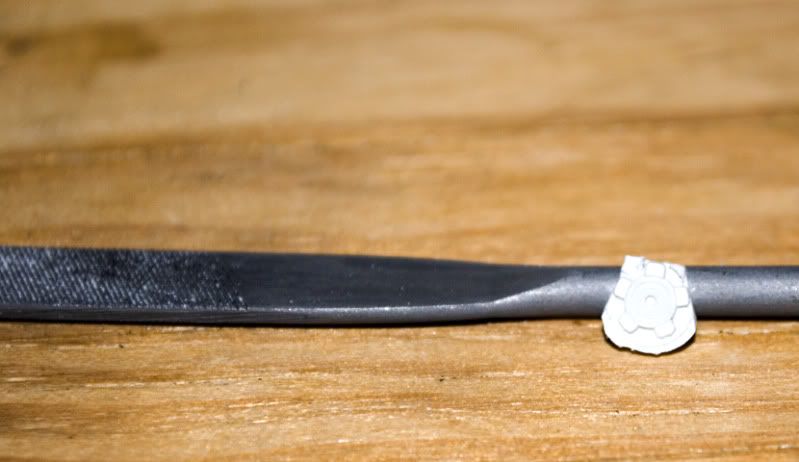 It has now been fully cut away. Here is the car itself. The roof has been milliputied as well as the grill surround edges as there were pretty large gaps. I've also puttied the two front suspension struts that I had drastically shortened, as well as puttying (sp?) the wheel face edges.  The roof and grill have now been sanded as have the suspension struts. I've also started work lowering the rear suspension and painting some parts. The body along with sprues were originally primered when I knew very little about modelling so now I'm going back and sorting the body properly which will obviously be reprimered and painted. Photos to come soon when I can take some in daylight. I still need to find fixes for the front wishbones and exhaust which I will explain with photos later. Here's some photos I took from Edition 38 the UKs biggest VW show these serve as my inspiration. 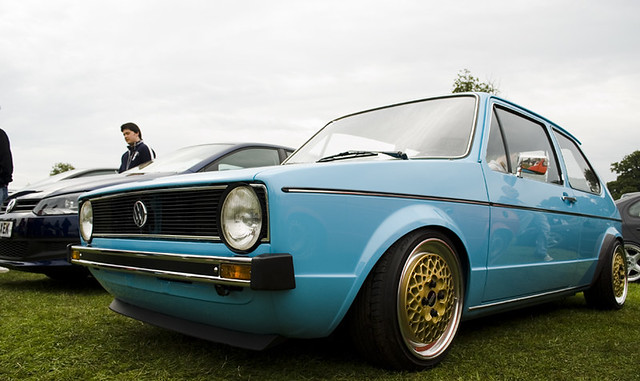 That is a low mileage LHD Belgian Series 1 Mk1 Golf owned by the person who bought my Mk1, he sold my Golf on to help fund the Magnesium BBS that it sits on. Another photo of mine from Edition 38, it runs a new (I believe MK4) Tdi engine. 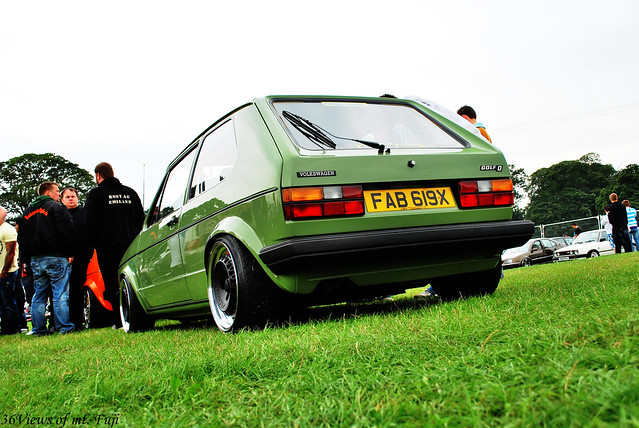 For those interested click the Flickr link in my signature for much more VW and general photograpy stuff. Hope you like and thanks for reading . |
|

|

|
|
07-15-2011, 11:24 PM
|
#2 | |
|
AF Newbie

Join Date: Aug 2008
Location: Miami, Florida
Posts: 93
Thanks: 0
Thanked 5 Times in 5 Posts
|
Re: VW Golf Mk1 Fujimi 1/24
Hi and welcome MattVW,
I know you're new here and new to model building but... let me ask you, will you make this just a curbside model (work on just what you can see from the outside, basic stuff) or will you tackle the suspension (as I can see from some attempts you made) and other minor details? If you really never made a model you might want to make a curbside as those are 'easier' to say. You can focus on learning how to paint the body and polish it, tuck those wheels in nicely like in the pics of the real cars, minor interior things, things like that.. Then when you feel more comfortable you can nicely build suspensions, chassis details, flocking, opening doors and such... Good luck on build and we're here to help! |
|
|
|
|
|
07-17-2011, 04:08 AM
|
#3 | |
|
AF Regular
Join Date: Aug 2009
Location: Saint Petersburg
Posts: 357
Thanks: 67
Thanked 48 Times in 43 Posts
|
Re: VW Golf Mk1 Fujimi 1/24
Matt, a good start on a great model!
|
|
|
|
|
|
07-17-2011, 09:39 AM
|
#4 | |
|
AF Fanatic

Join Date: Feb 2004
Location: Hartford, Connecticut
Posts: 5,601
Thanks: 7
Thanked 108 Times in 103 Posts
|
Re: VW Golf Mk1 Fujimi 1/24
good luck.
__________________
In Progress    
|
|
|
|
|
|
07-21-2011, 03:12 AM
|
#5 | |
|
AF Enthusiast

Join Date: Oct 2002
Location: Republic of Wallonia (ex-Belgium)
Posts: 2,059
Thanks: 6
Thanked 14 Times in 14 Posts

|
Re: VW Golf Mk1 Fujimi 1/24
I'll follow this, don't hesitate to ask if you need help
__________________

|
|
|
|
|
|
07-24-2011, 03:16 PM
|
#6 | |
|
AF Newbie
Thread starter
Join Date: Jul 2011
Location: Manchester
Posts: 3
Thanks: 0
Thanked 0 Times in 0 Posts
|
Re: VW Golf Mk1 Fujimi 1/24
Hi again everyone, thanks for the kind words. Taken me a while to make some progress worthy of posting. To answer Doc this will be a curbside model, painting is the thing I fear most so this is what I plan to learn and inevitably make mistakes on before I move on to other things.
I'm working towards a Tamiya 1/20 Mclaren Mp4/4 build with Top studio drive shaft, antenna, and cockpit detail kit so I have a lot to learn to build that to a worthy standard having seen Jaykay's and Kimi's Mp4/4's and their Jordan 191 and MP4/6 respectively I have an idea of what to build to. I'm currently up in arms about learning more with the my MP4/4 and then buying a 1/12 MP4/6 or buying something cheap with photo etch sets, buildiing that, and then going for the MP4/4 with the super detail kit. I just can't stand the lack of detail on the brakes for the MP4/4 I can only see the super detail kit as a realistic way of sorting it out. Doing either of those depends on how this build goes. Anyway, back on topic here's what I've been upto so far. Starting off with I guess I should call it the chassis. 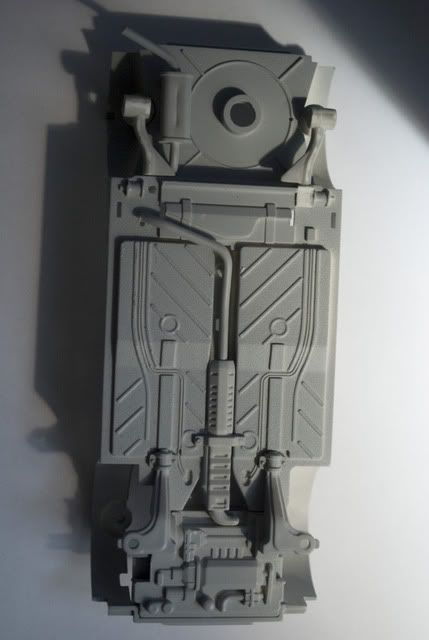 You can see the disappearing exhaust which will need sorting out, the two rear wish bones which should be a solid axle and at the front, the front wish bones and engine gearbox are all one piece as you'll see below. 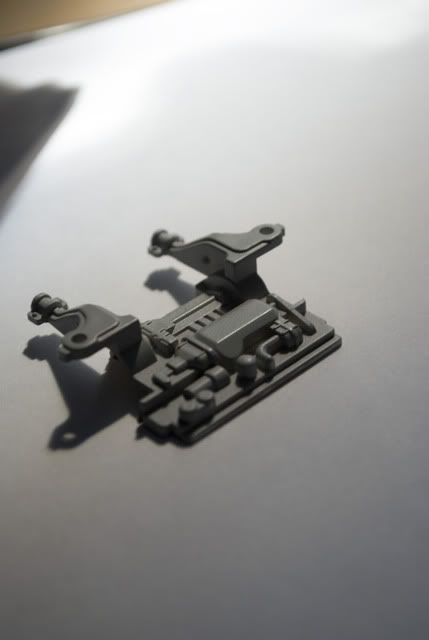 This piece creates some clearence issues as the wishbones are drastically lower than they should be, they're flat on the actual car and pivot about a point no lower than the brake rotors so never come into consideration when lowering, in the kit they're a big problem. 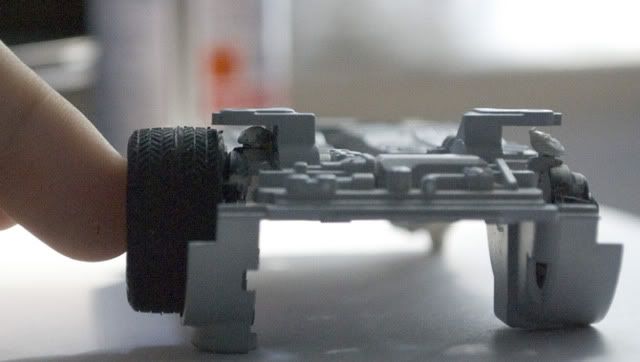 With the lowered suspension strut you can see the issue. 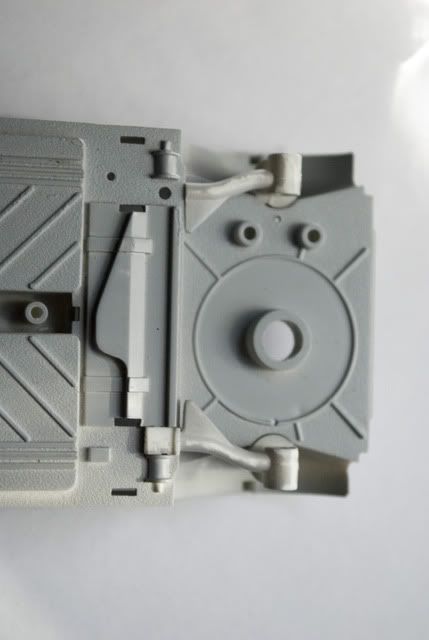 At the rear again you can see the endentation in the fuel tank even though the actual tank is similar in shape to a pillow. Don't think have the skill to remedy this so I'll leave it at that and use the endentation for a new exhaust as I can see clearence issues there too. More importantly in that picture is the modified rear suspension to the top of the picture I have removed the mounting point to allow the wishbone to go lower. 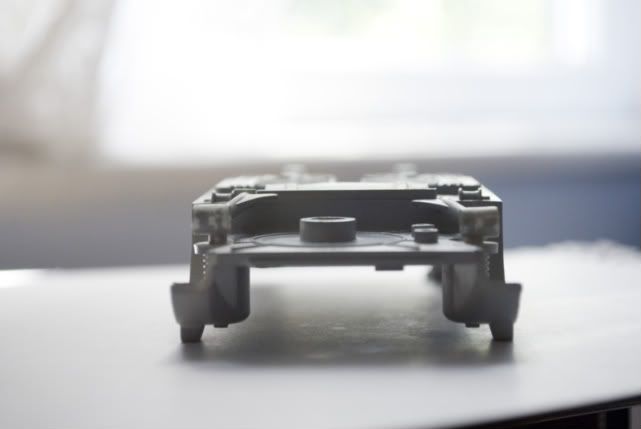 This picture shows the slightly lower rear suspension achieved by sanding down the turrent mounting point and by chopping filing and cementing a small cylinder piece in between the axle and coil. 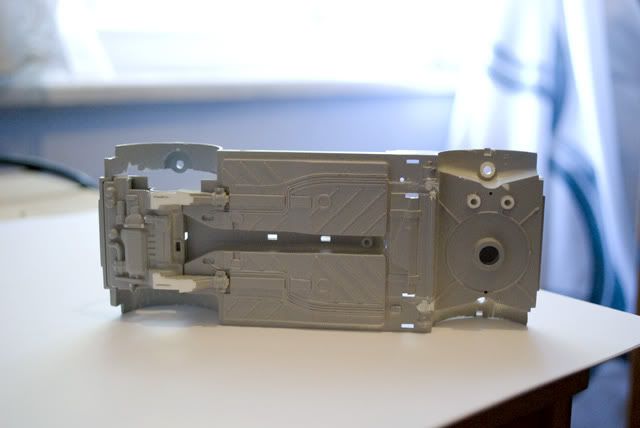 So I began filing the front wishbones down after chopping the suspension mount off the sides ready to be reattached lower down. And at the back I filled the rear suspension mounting points that will no longer be used. 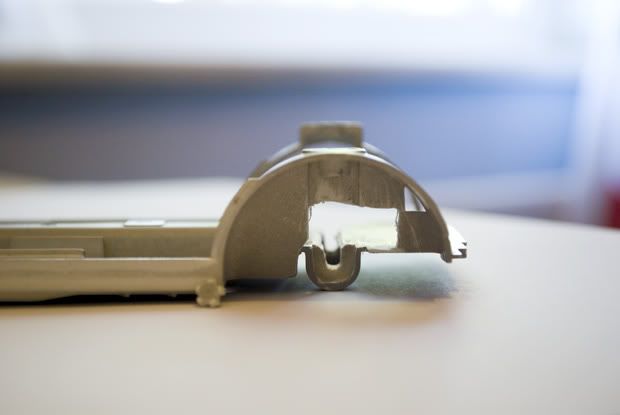 The new lower front suspension made made the requirement for a chassis notch, so it was filed roughly for now.  For the body the boot lid has been filled to smooth the rear wiper hole. Also the two piece seats have been puttied and sanded to remove gaps. 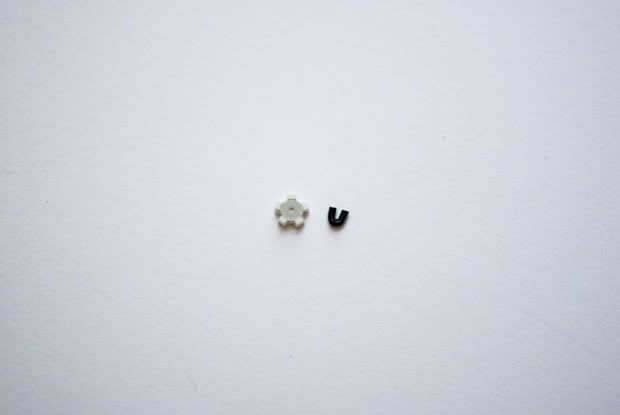 As mentioned in my first post the petrol cap has been modified down to a star cap from its circle backing plate. Astride is a tow hook made from solder wire, there will be another one to follow, no idea why I haven't made another one yet since I'm happy with the result of the first. Now for the first bit of paint I'm not ashamed of, the body. 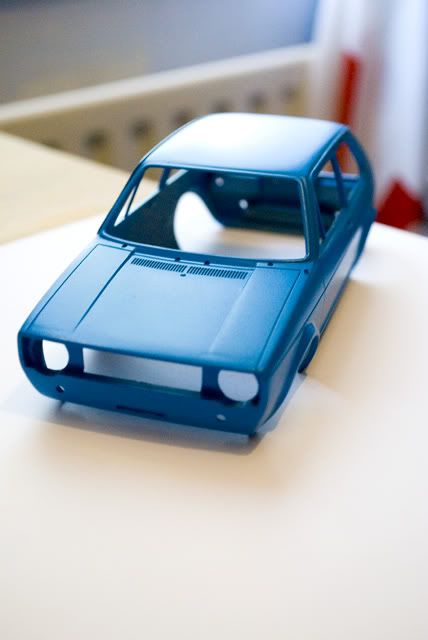 Sprayed with Tamiya TS-23 light blue. Its come out okay, there are three pin prick pitting holes on the roof and some slightly bumpy areas on the corners where I've removed reflectors and tried to carefully sand near swage lines. So overall, prep needs improvement, spraying is okay no runs, its a lovely orange peel which looks promising so have a fair idea of using light coats which I'm happy with. I've yet to polish and see the final results so I'll reserve full judgement for now. It still has the possibility to turn out terribly  . Its worth mentioning the body has had the sunroof, side reflectors and the left (passenger) side wing mirror mounting smoothed, as well as the gaps between the grill and the body filled. . Its worth mentioning the body has had the sunroof, side reflectors and the left (passenger) side wing mirror mounting smoothed, as well as the gaps between the grill and the body filled.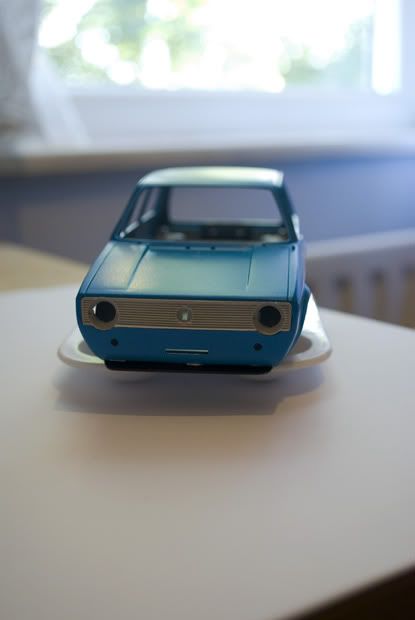 So far so good I feel for a first try, reading up seems to have payed off now just to gain experience. I've hand brushed some parts for the interior and question the finish of the dashboard which was my first piece, might sand and attack again but I'm unsure wether this will just make it worse. The parcel shelf has a good finish not a spray finish but good enough for me the same with the duckbill splitter above. For now I'm just messing about with thinner trying to find a good thickness, and learning how quickly I need to work with the paint as it soon clumps up when resuming a stroke. Much to learn. I'll post some more painted items in my next update, I've ordered some new wheels after milliputting one and finding it impossible to sand the ones I was putting together, and being sick of the stance with non-stretched tires, there are some new wheels with stretch in the post, I need these to continue work on the chassis. Hope you like it so far. Sorry for all the text . |
|
|
|
|
| |||||||||||||||||||||||||||||||||
|
POST REPLY TO THIS THREAD |
| Tags |
| 1/24 , fujimi , golf , mk1 |
 |
|
|