|
|
| Search | Car Forums | Gallery | Articles | Helper | Air Dried Beef Dog Food | IgorSushko.com | Corporate |
|
|||||||
| WIP - Motorsports Post topics for any "Work In Process" motorsports vehicles in this sub-forum. |
 |
 Show Printable Version | Show Printable Version |  Subscribe to this Thread
|
|
|
Thread Tools |
|
#16
 09-19-2010, 11:45 PM
|
||||
|
||||
|
Re: Benetton-Ford B188 Build starting
Hi Gang, building has been a bit slow but I have now finished up the Benetton B188. In the coming days, I'll be posting all the progress pictures.
Turns out that this kit is quite old. I've had it for years and never built it. I came to realize that the rear removable cowling was warped and did not fit well at all. Heck, after building the kit, and making it as a curbside kit, the rear cowling didn't fit great even after gluing. you'll see in the coming posts. First thing I built were the front and rear wing. unfortunately, I didn't take any shot. So, I decided to remove the molded seat belts fron the drivers seat. 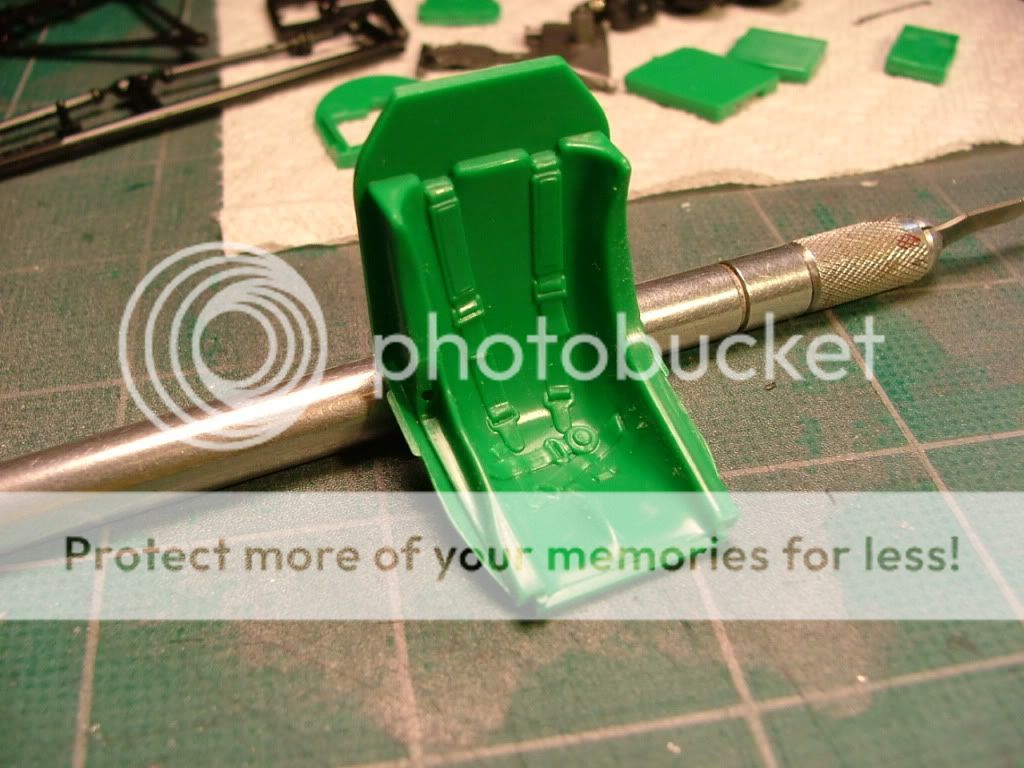 I used my dremel tool with a ball end bit and a straight milling bit with a radius end. 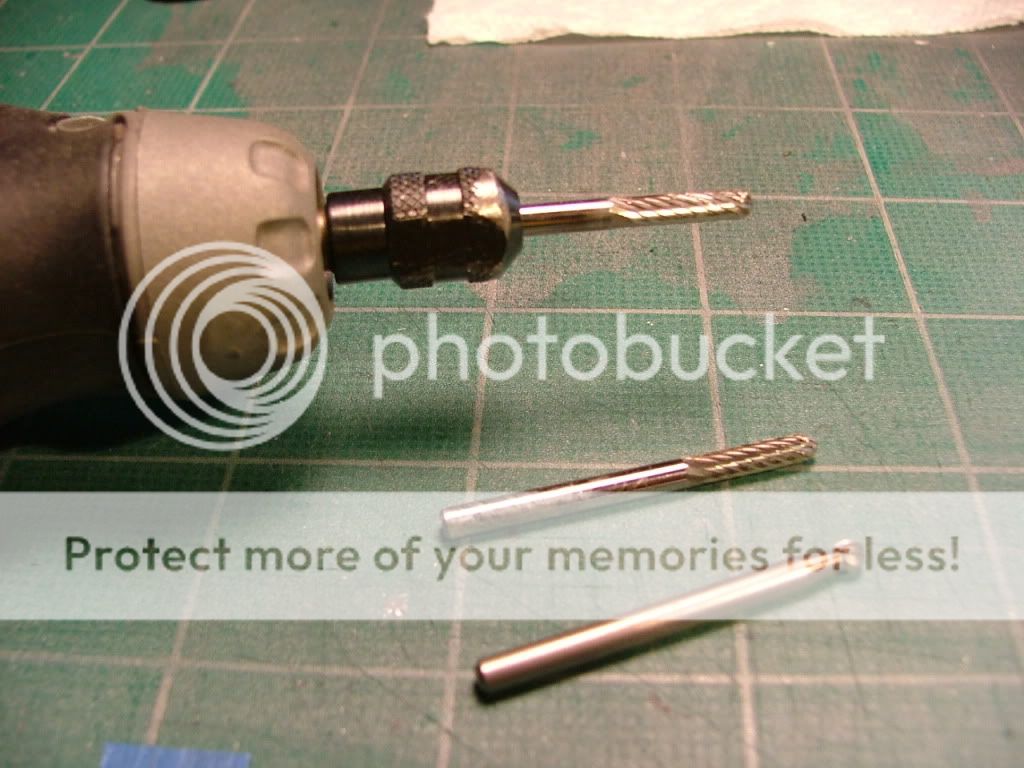 Here is another shot 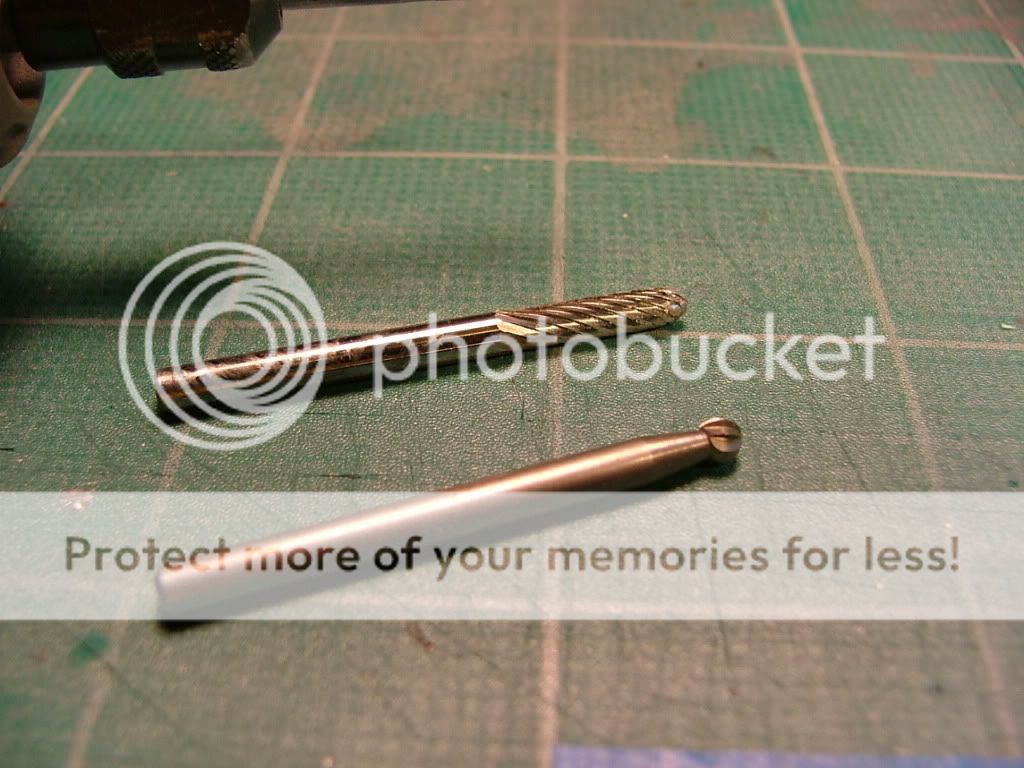 It was a bit challenging but the results were good. here's a pic of the raw seat without filler. 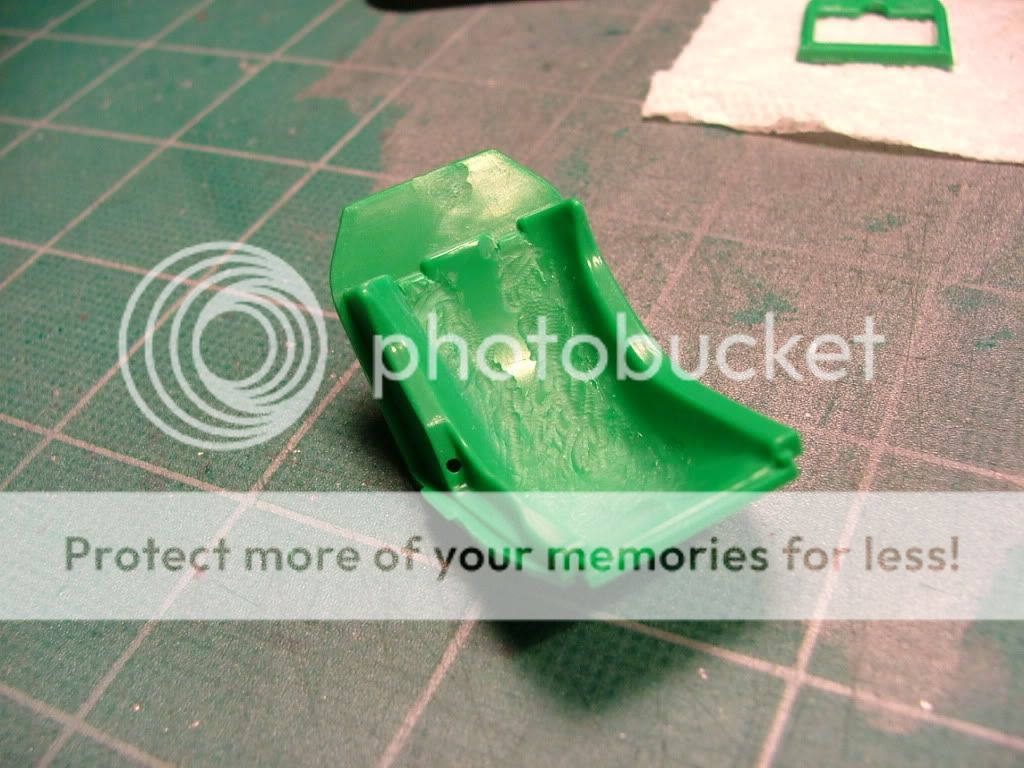 Now I filled the grind marks with white Squadron Shop putty 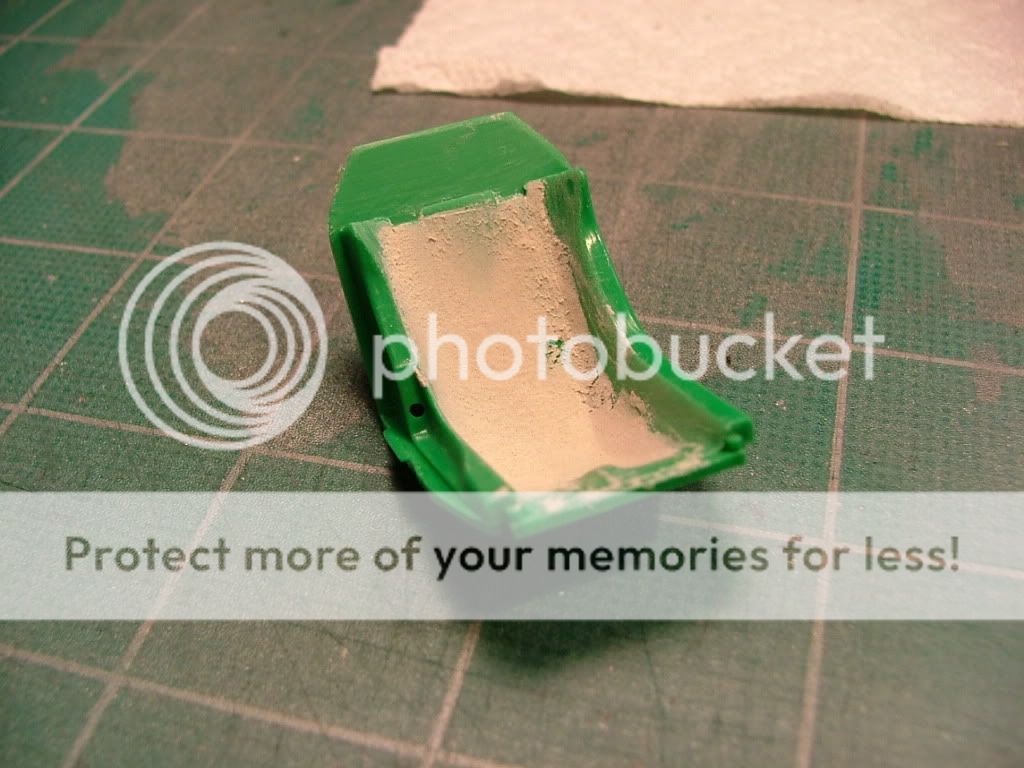 Here is a picture of the sanded seat. I didn't get a shot of it primed either. my mistake. Just plain forgot.  Next came the dash panel and steering wheel assembly. 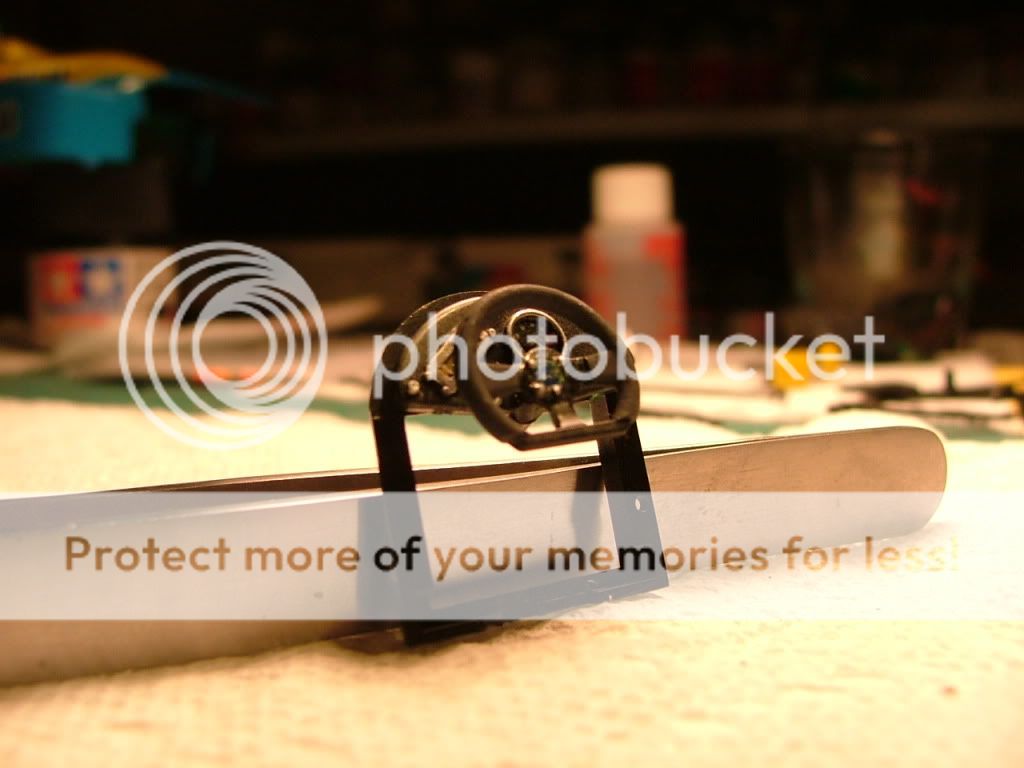 I used a red seat belt kit from Model Factory Hiro. This is the first time I have used the Hior detail kit. They make a very nice seat delt detail kit. 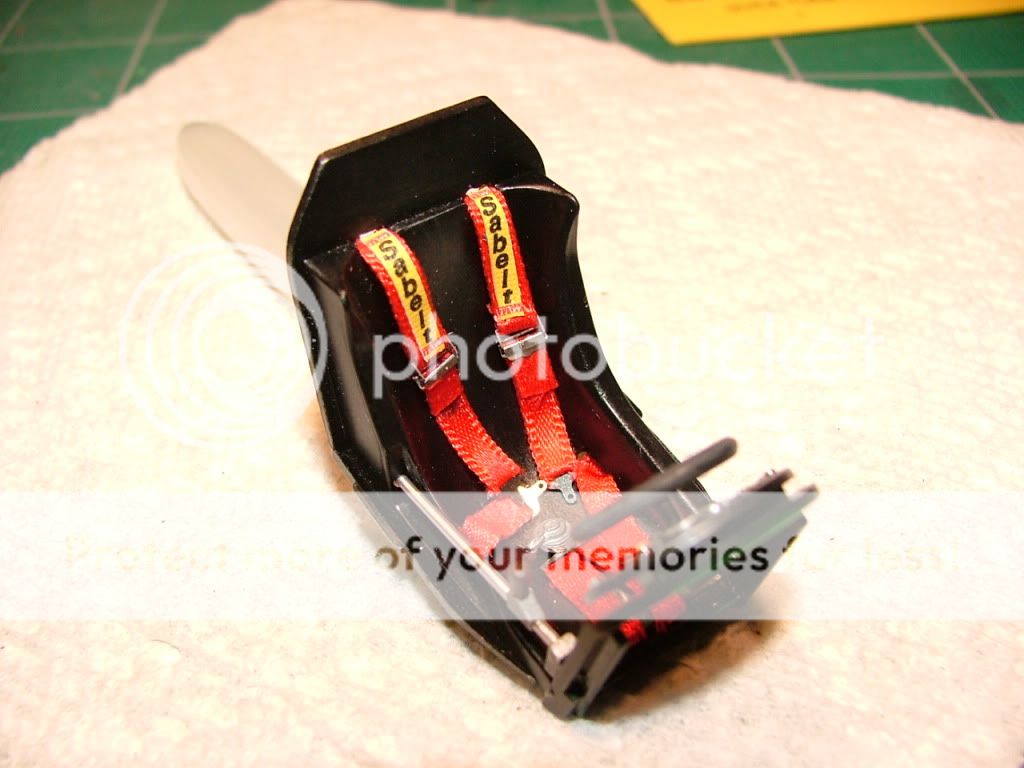 Another shot. this kit has nice add ons like the manufacturer labels and they look really great when applied. 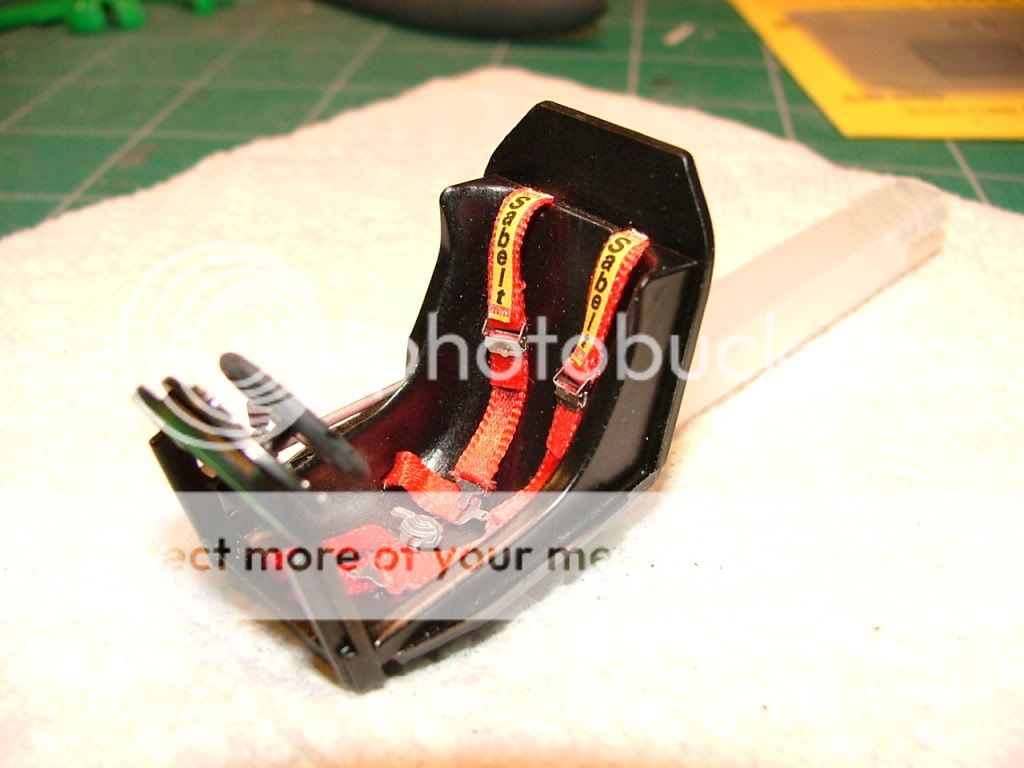 Next post I'll show some of the body work and masking the painting ... which was a pain in the back side but looks great when complete. To be continued, and thanks for reading and following my build.
__________________
Greg Davis Phoenix, Az. USA ---------- 

|
|
#17
09-20-2010, 03:57 AM
|
||||
|
||||
|
Re: Benetton-Ford B188 Build starting
Excellent progress. Can't believe you are fairly new to this!
That tyre sanding tool is a very ingeniously simple idea. I will have to go and get some washes and nuts and bolts! In addition to your 'tyre sanding tool', in my builds I have used nail clippers to cut away the excess seam line prior to sanding. Due to the curved profile of nail clippers, this helps with the profile of the tyre and leaves a neat cut. The beauty is that you can use it on tyres with tread! All you have to do is to simply squeeze the tyre to make the seam line more pronounced, then clip off the excess. Continue this until you have worked your way around the circumference of the tyre. Look forward to more progress on this kit.
|
|
#18
09-22-2010, 02:35 PM
|
||||
|
||||
|
Re: Benetton-Ford B188 Build starting
Nice work on that seat..!!!
__________________
Steve Noble
|
|
#19
09-22-2010, 10:05 PM
|
||||
|
||||
|
Re: Benetton-Ford B188 Build starting
Hi there guys. Thank you both, Steve and Smoke, for the input and nice comments about the Benetton build.
It's been fun posting this stuff so far and I'll be adding some more real soon. Since this is my first full post, I missed a few progress photos as I progressed through the build. It's all good though, I have plenty of stuff to share so keep checking in and let me know what you think. Hey Smoke, I think I'll use the clippers idea before I do my sanding with the tire tool. At times, when sanding my tires, the center molding flash lines can be tough to remove. Clipping them off first, would help a ton. Thanks for the idea. Enjoy gang and happy building!
__________________
Greg Davis Phoenix, Az. USA ----------
|
|
#20
09-22-2010, 10:51 PM
|
||||
|
||||
|
Re: Benetton-Ford B188 Build starting
Hello again everyone. In this post I'll show you some minor mods I made to this kits front suspension. What I did in this small series of pictures was to add brake lines and little metal tabs, as brackets, to hold the brake lines.
I use black, 30 AWG, solid core "wire wrap" wire. I have a variety of colors and gauges. For brake lines, I use 30 AWG wire, for spark plug lines and engine electrical, I use 28 AWG wire. If you're not familiar with wire types, I always buy solid core wire and not "stranded" wire because I personally fell that the solid core wire is easier to work with. Here are a few shots of the lower suspension arms. 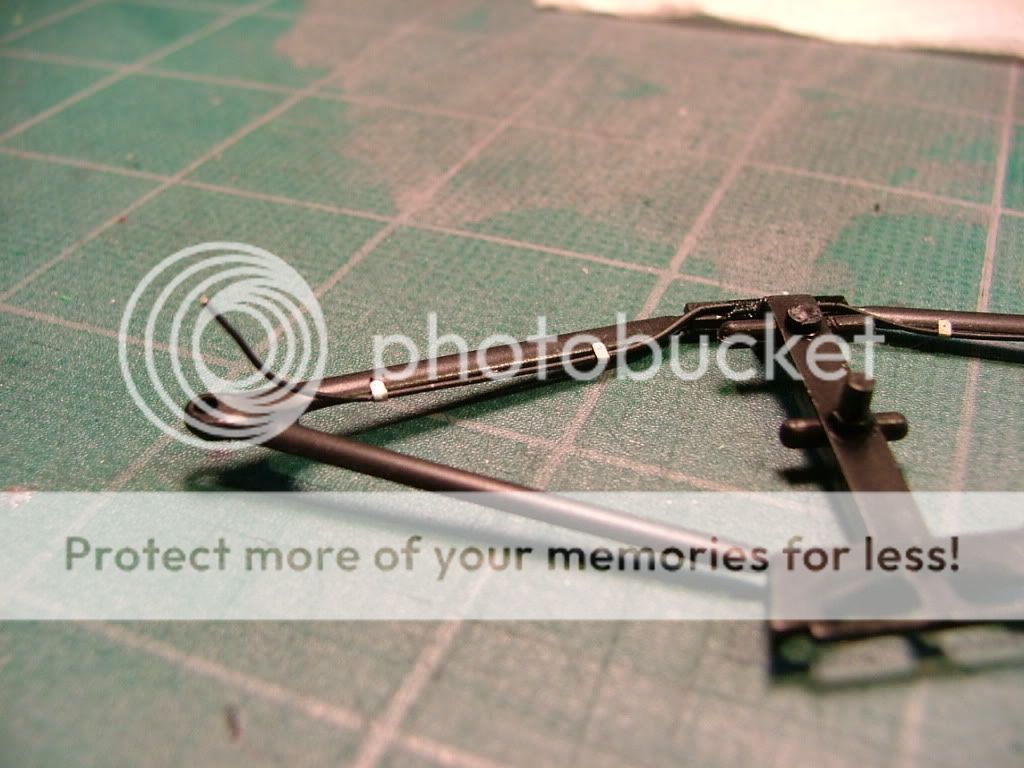 I have not cut this suspension part yet for installing into the chassis. 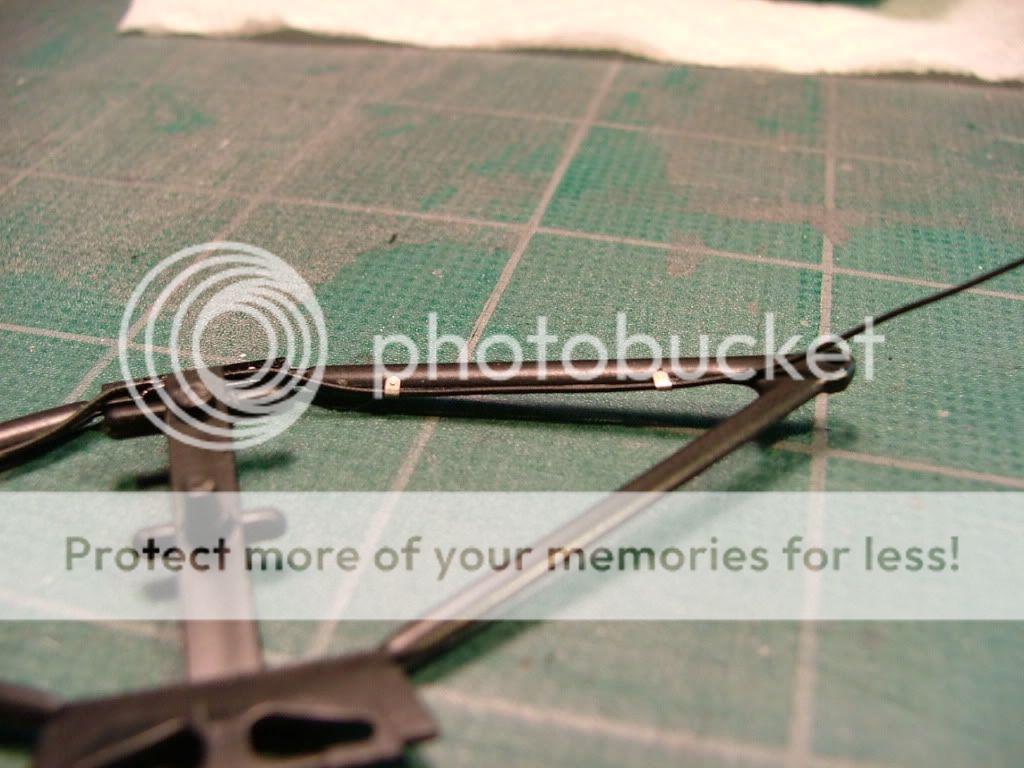 Next, I cut the rear shocks off the rear suspensions parts and built coils out of blue 28AWG wire. Solid core of course. Also I used styrene rod, cut and glued in place. I tried to match the size of the shock diameter and spring size. I wrapped the blue wire around a .125 diameter rod.  Here is a shot of the rear suspension with the shocks installed. 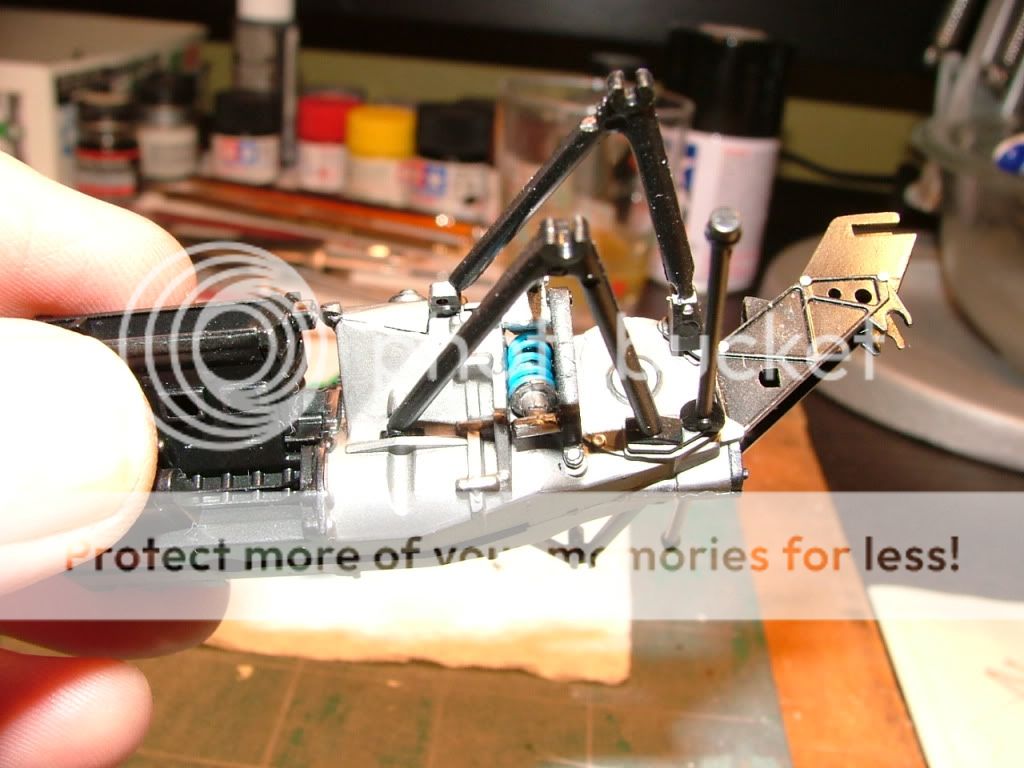 This is actually the first time I have tried to make these shocks. I saw a write up somewhere on how to do this. I was not that tough. I failed to take acurate measurements before I started cutting. The fit was okay after I made them, but if I had measured better, the fit would be much better. 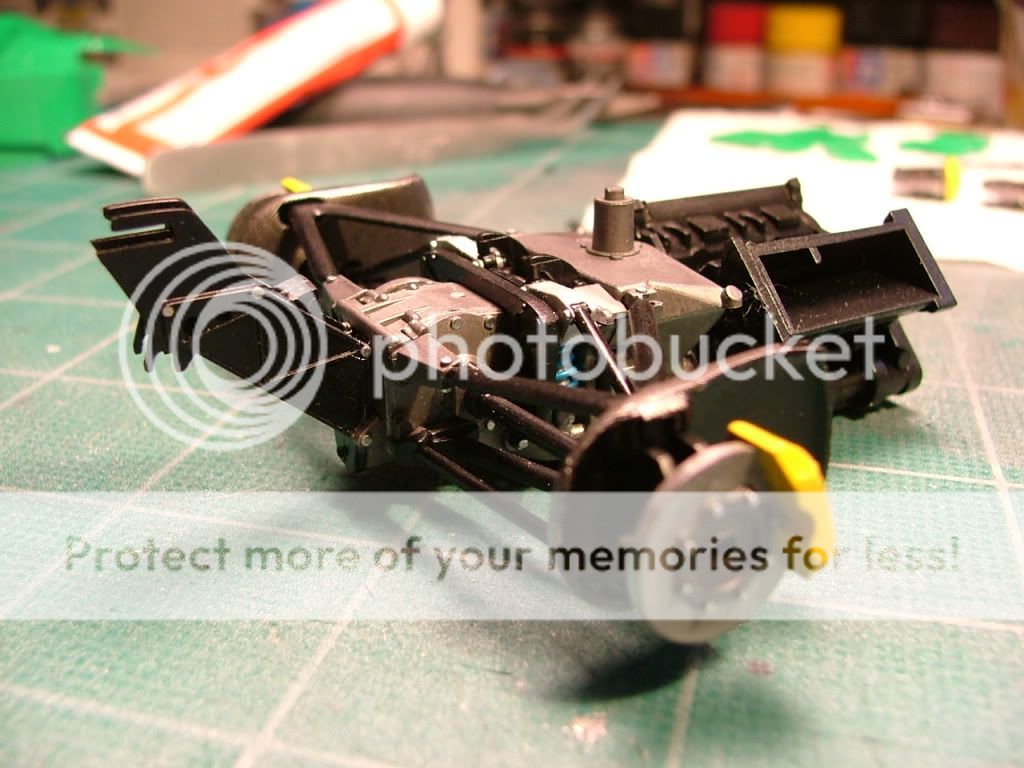 Well this is it for now. Next I'll show you how I cut up the front suspension parts and bonded them into the monocoque. Enjoy the reading gang and give me your feed back. Happy building !!
__________________
Greg Davis Phoenix, Az. USA ----------
|
|
#22
09-24-2010, 06:30 PM
|
||||
|
||||
|
Re: Benetton-Ford B188 Build starting
Hi there Porsnatic, the "solid core" wire I like to use is designed for circuit cards. What I did, was called around town (Phoenix, Az.) looking for wire or cable distributors who would sell to the public. It only took a few phone calls.
Now heres the real beauty of the whole thing. 1.) You can get multiple colors. red, black, yellow, green, blue etc. tons of colors. 2.) You can get the wire in various wire gauges. The larger the wire gauge number (30awg) the smaller the diameter of the wire. Ex: 30awg = .020 diameter 28awg = .025 diameter 12awg = .100 diameter 3.) You can buy 100 foot roll for about 3 or 4 dollars. SUPER SAVINGS! What I did was to take some calipers / micrometers and measure some of the model car wiring I have purchased in the past. That way, I knew what the wire diameters were and then cross referenced that to a wire gauge chart. You'll spend 4 or 5 dollars buying model car spark plug or engine wire for your models and just get 18 to 24 inches of wire. RIP OFF !! The 100 foot roll is 1200 inches. you do the math. There is usually a minimum buy length from wire suppliers. that's why I have 100 foot rolls. Hope this info is helpfull to everyone. Great question Porsnatic. Happy model building !!
__________________
Greg Davis Phoenix, Az. USA ----------
|
|
#23
09-24-2010, 10:33 PM
|
||||
|
||||
|
Re: Benetton-Ford B188 Build starting
Hello again everyone. Time to continue with more of this build.
This kit is going to be a "Curbside" kit. I'm not going to worry about the engine and trying to remove the rear cowl. The fit on the rear cowl to the monocoque is really bad. the rear cowl is pretty warped. Take a look. The right side pod and cowl aligns pretty well. 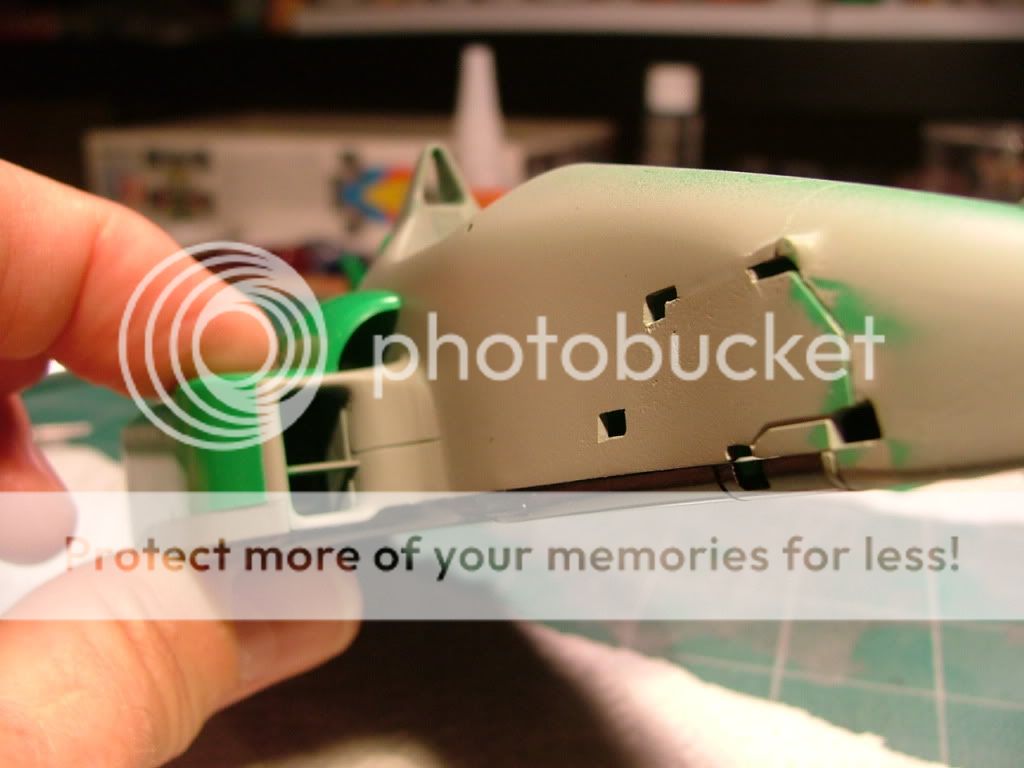 The left side does not fit good at all. 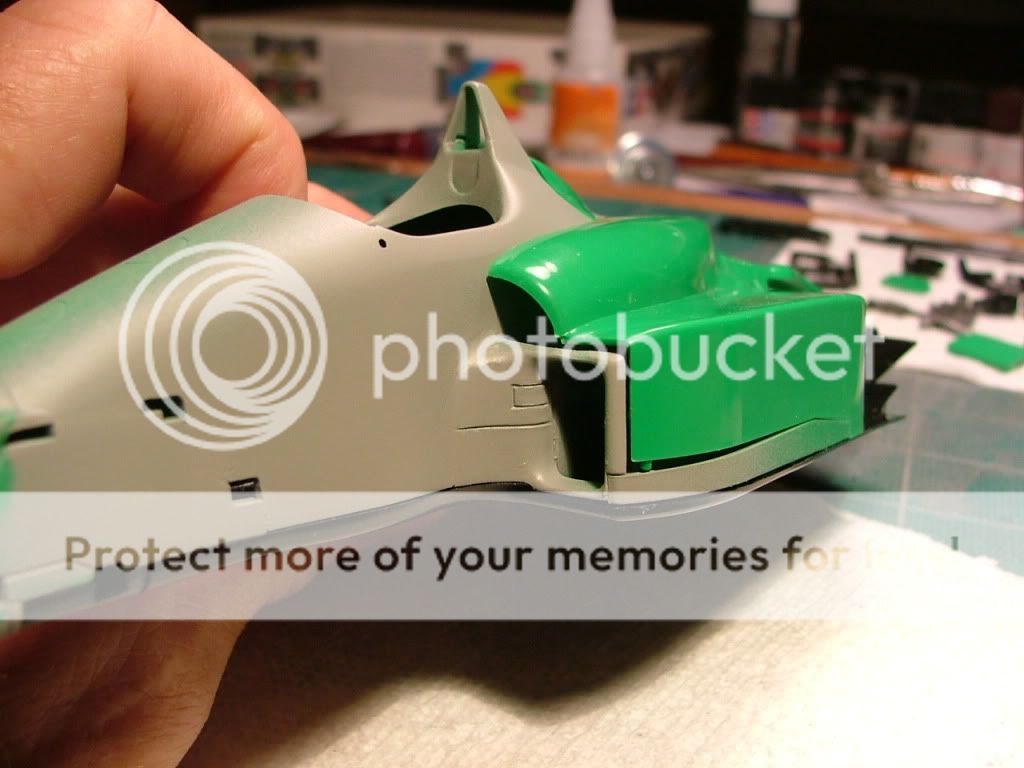 Another shot with the parts at rest, sitting natural. YUCK !!  You can see a significant gap on the back side of the roll bar section of the chassis. 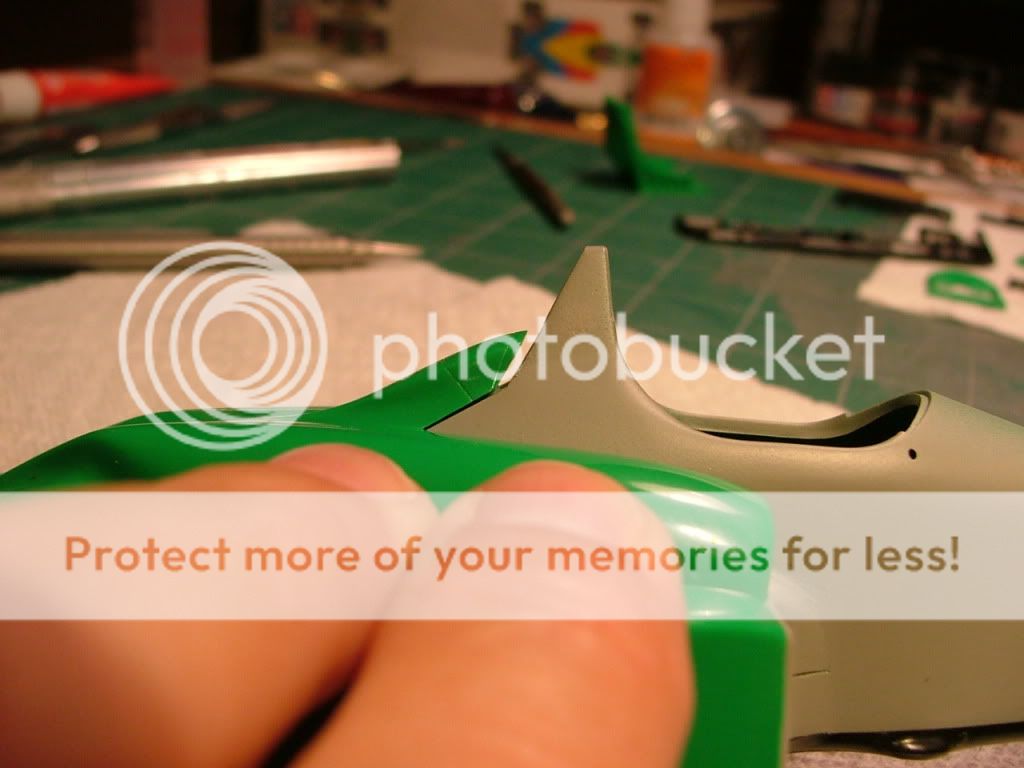 I realized, after I filled and sanded the nose, I needed a nose piece "parting line" so I used my scribing tool and etched and line back into the monocoque. Funny thing is, I should have only filled and sanded the "rear" kit molding lines and not the front ones as well. I guess I got carried away. This should work well when painted. 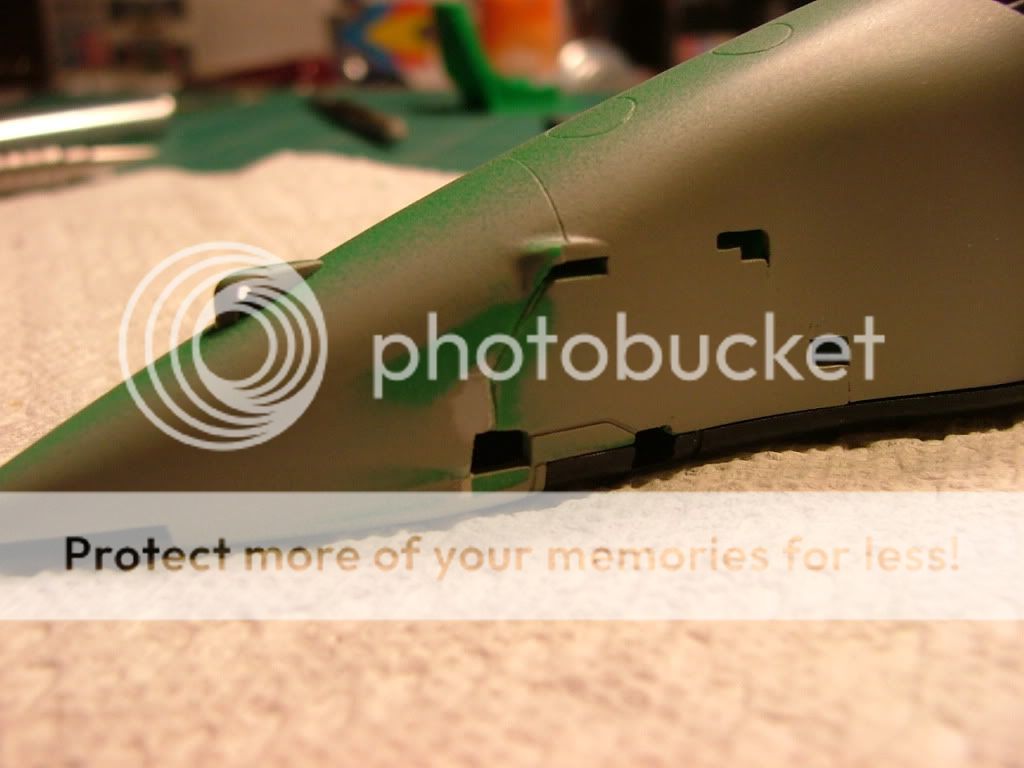 Next I did the carbon fiber on the rear diffuser area and painted the tin areas. 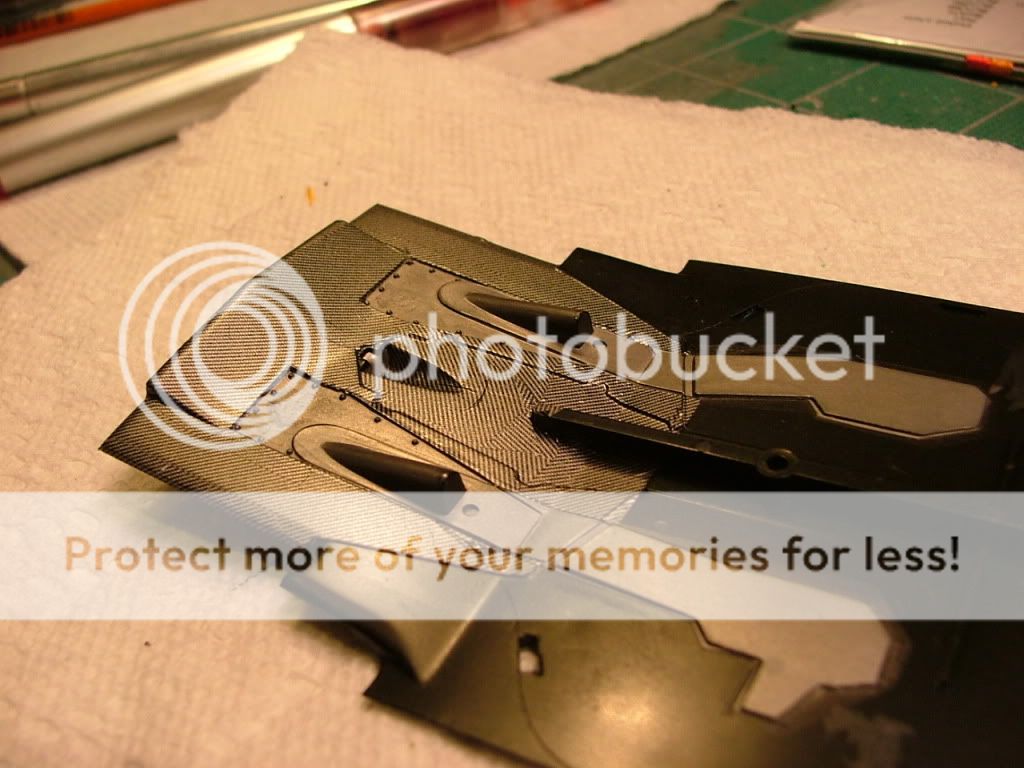 Again, not to concerned about all the area in the rear because in the end, the engine and rear cowl will cover pretty much all of it up. 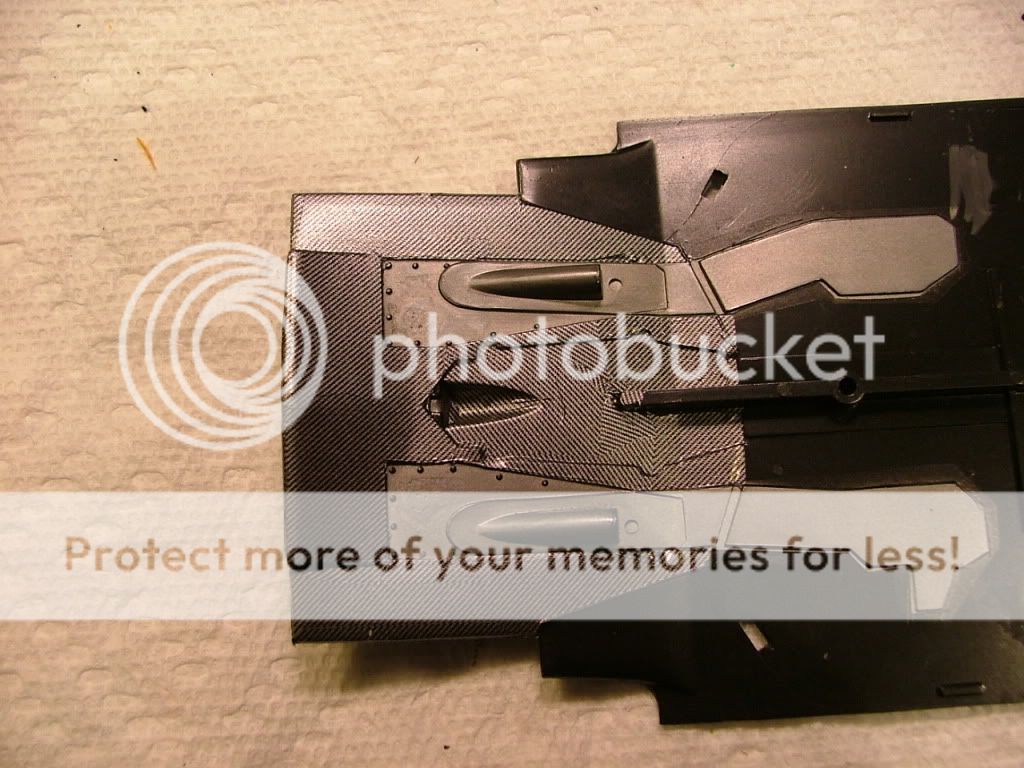 Next I added the engine assembly. 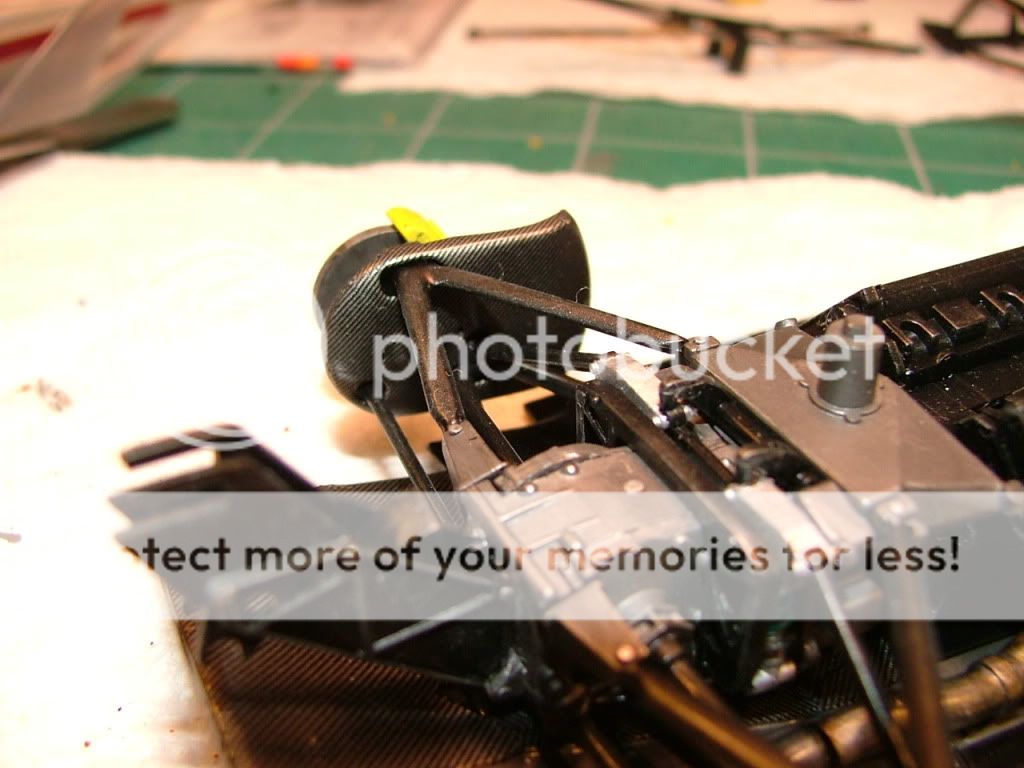 Heck, I didn't even need to add on the overhead cam covers on the cylinder head. 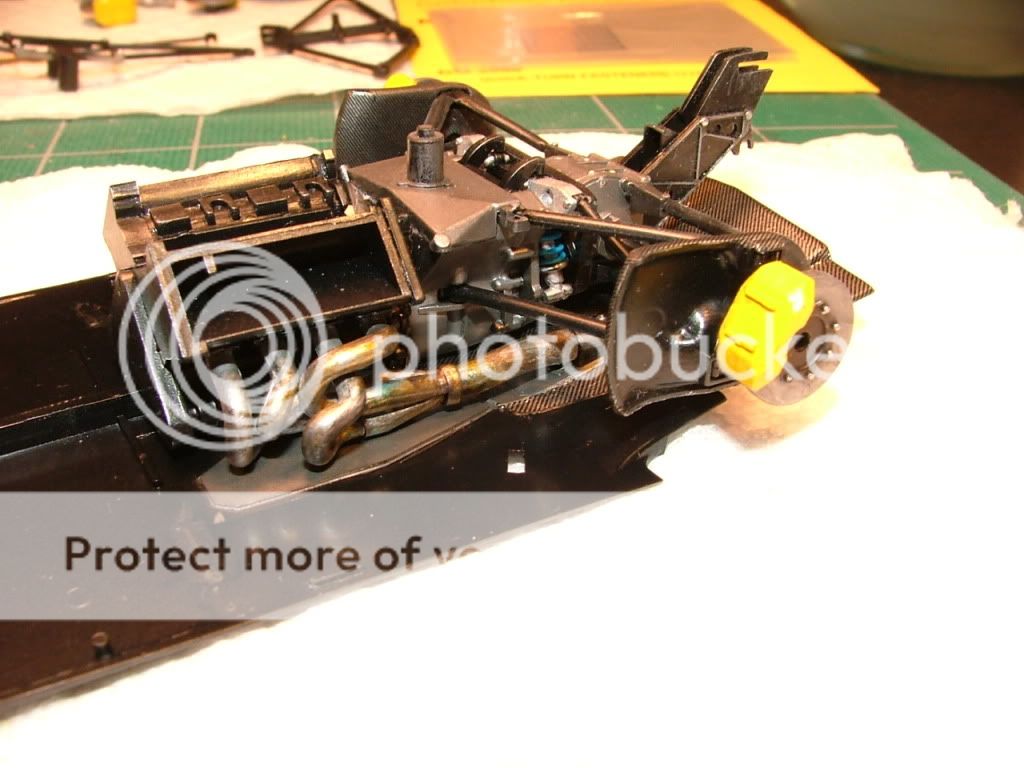 Okay, I think that's enough for now. Next I'll post the pictures of cutting the front suspnsion apart, and bonding it into the monocoque. I hape everyone has a great build going, and your all having fun doing it. Enjoy!!
__________________
Greg Davis Phoenix, Az. USA ----------
|
|
#24
09-24-2010, 10:43 PM
|
||||
|
||||
|
Re: Benetton-Ford B188 Build starting
Just a quick little shot or 2 of the finished product. Something to just take a peek at.
 and another peek.  More to come soon. Enjoy.
__________________
Greg Davis Phoenix, Az. USA ----------
|
|
#26
10-01-2010, 08:46 AM
|
||||
|
||||
|
Re: Benetton-Ford B188 Build starting
Nice build with some great tips and tricks for free.
Great stuff. I really like the way the exhausts look. Very realistic. Could you please tell me how you've done this?
|
|
#27
10-09-2010, 01:46 AM
|
||||
|
||||
|
Re: Benetton-Ford B188 Build starting
Hi there Axel, I'll try to answer the header painting question in my next post. This post will cover the masking of the body for painting.
For anyone who might be following this post, I'm sorry thit I have not written for a few weeks. I've started a build of the Tamiya, 1/12 scale, Ferrari 312T4. I got a bit distracted. Anyhow. the painting and masking. I like save a few bucks when I can so I don't but the tamiya paint masking tape that is like pin stripe tape. I make my own using the blue 3M painters tape. I lay a strip on my hobby pad that I build my kits on. I use a steel edge rule and a sharpe blade and cut my own pin stripe take. Take a look. 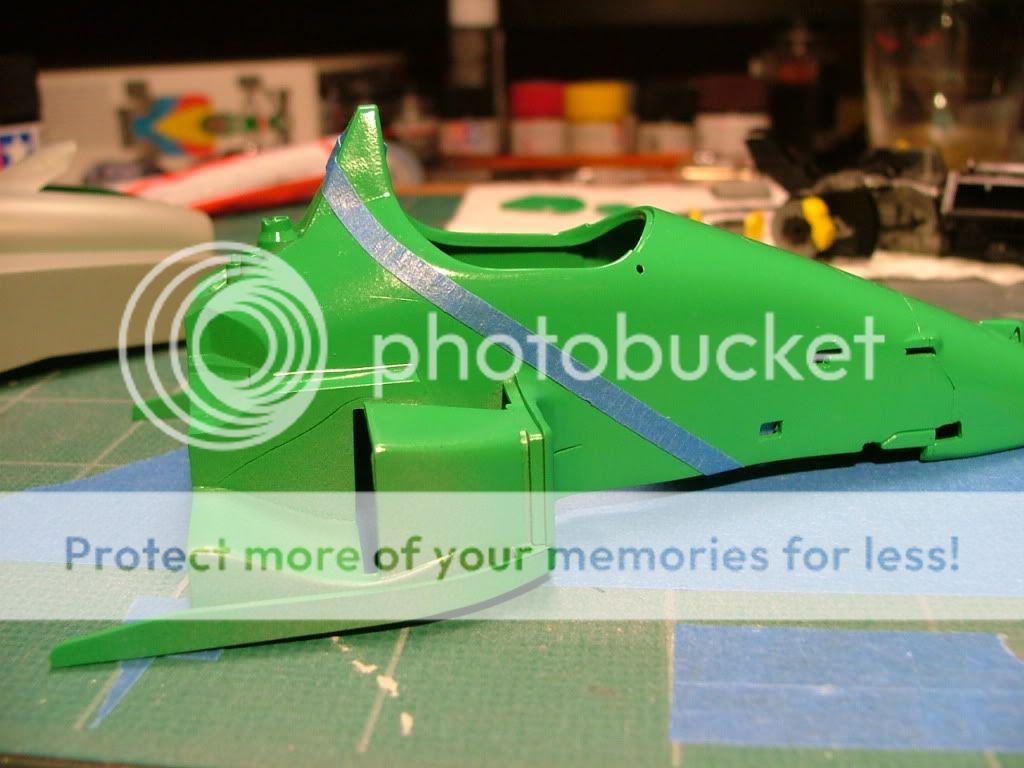 Here is the other side. 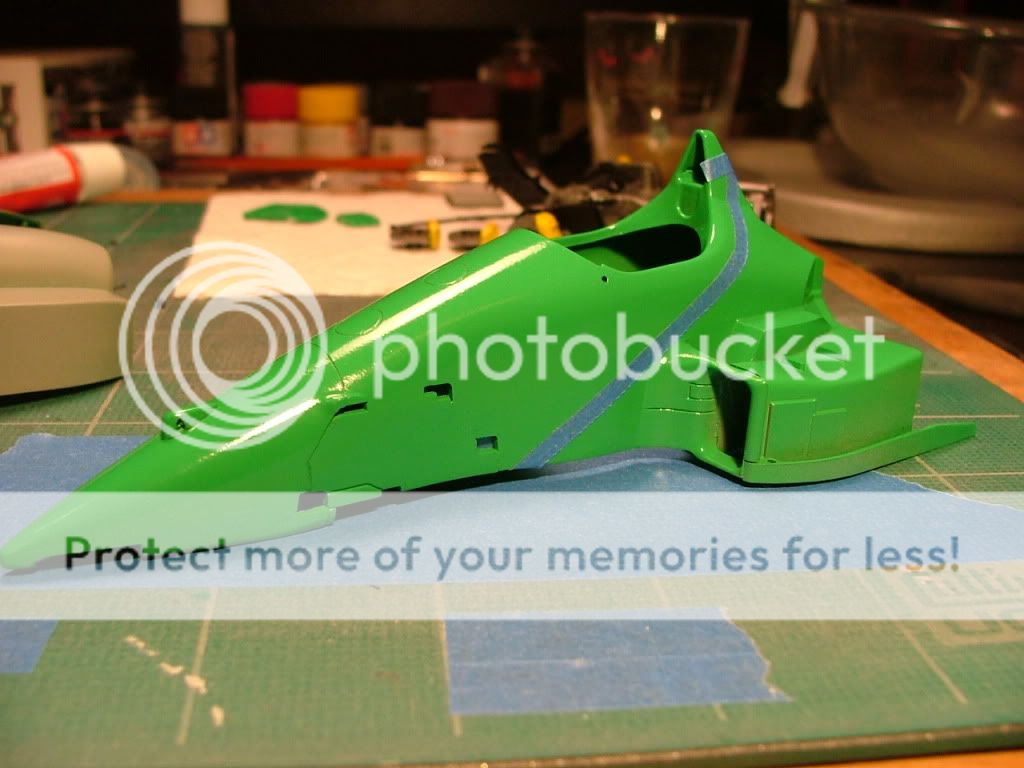 The blue tape bends okay. it can, at time, leave a slight residue but that is easily cleaned off with alcohol after the paint is dry. 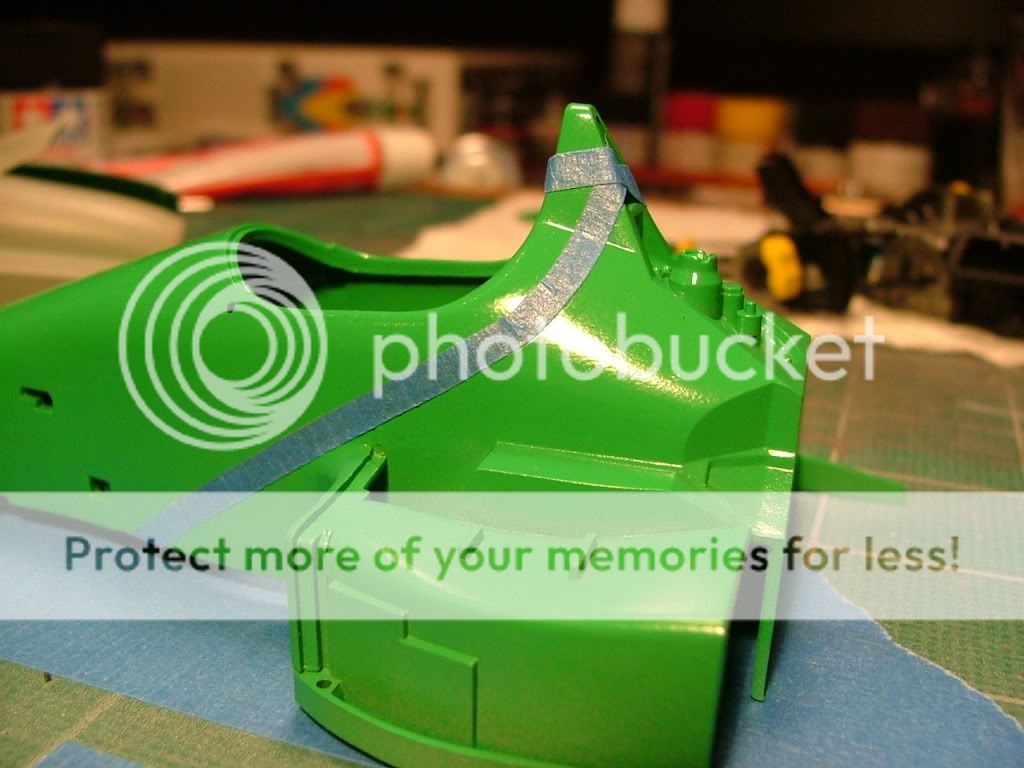 I trim some newspaper and make my mask. 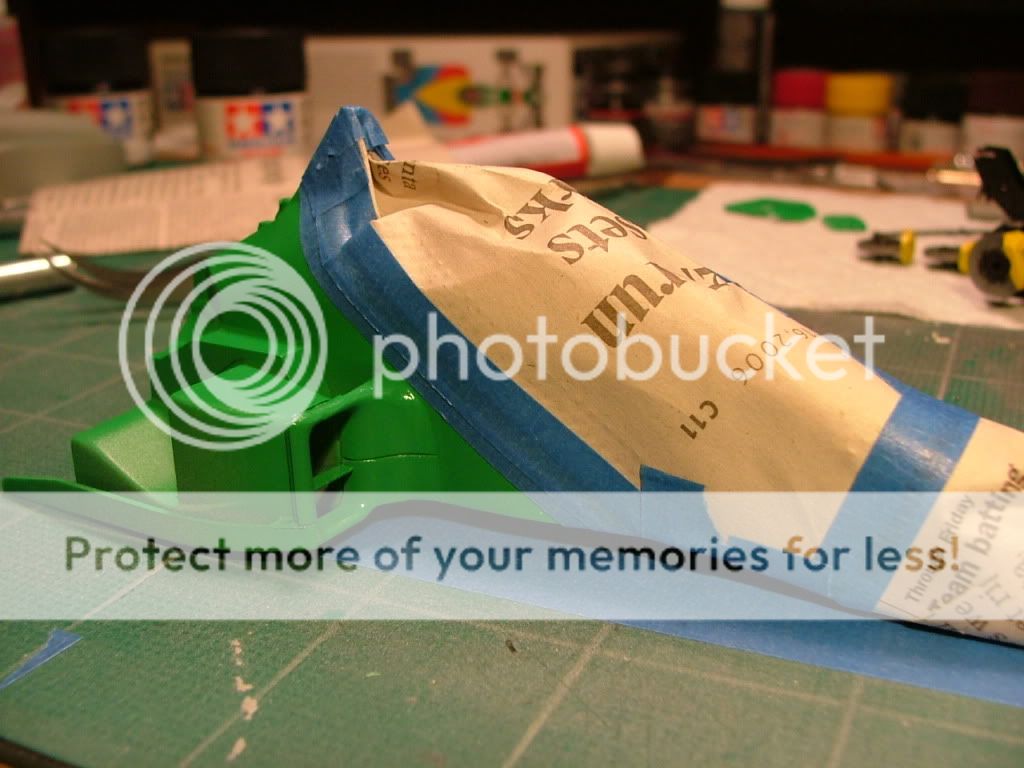 And the other side 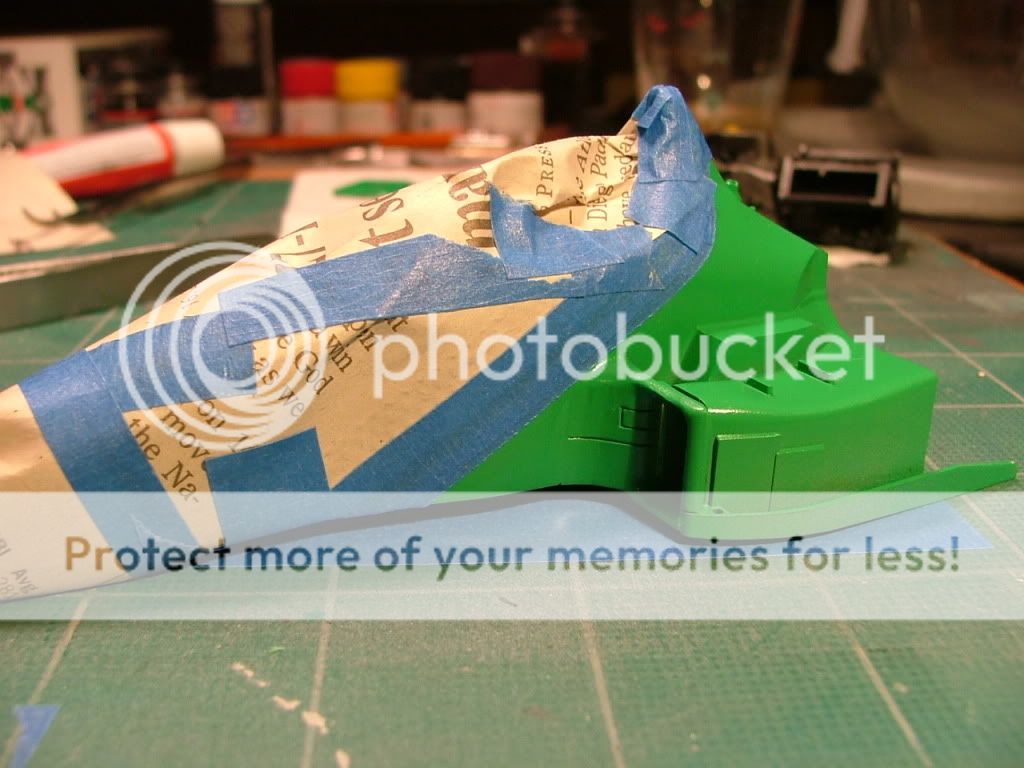 So as you can tell the first color is green. The next color I painted was red. This shot shows that I now added tape to the rear of the chassis once I masked the nose portion. 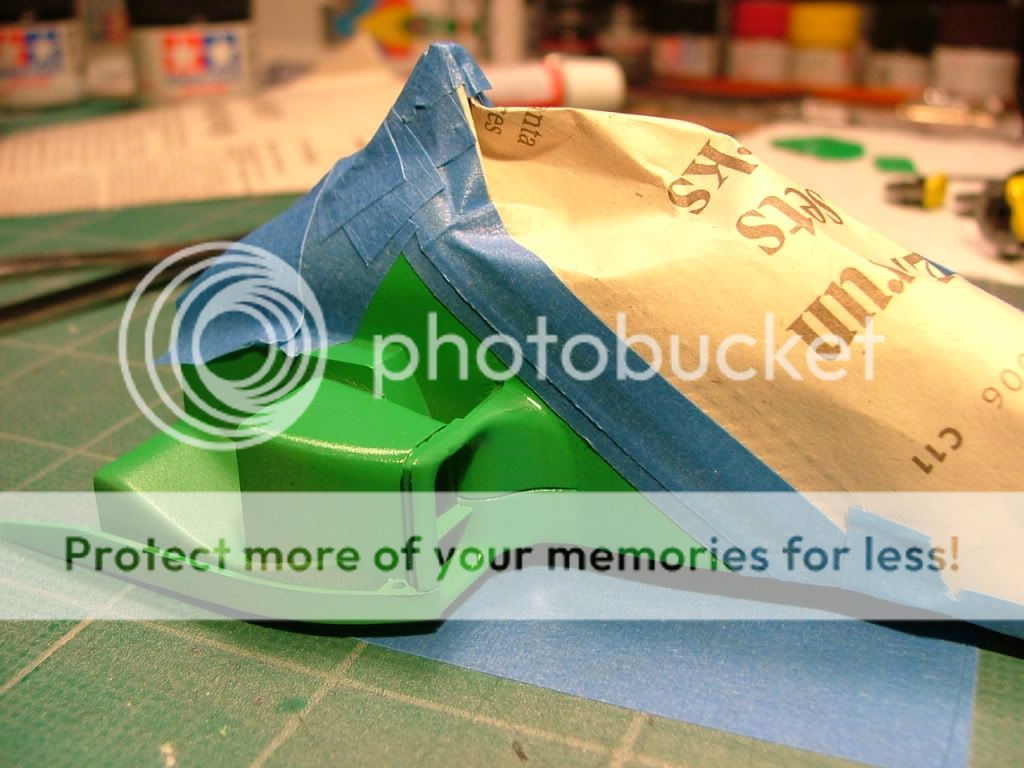 And the other side again. Now the rear is taped / masked and ready for red paint. 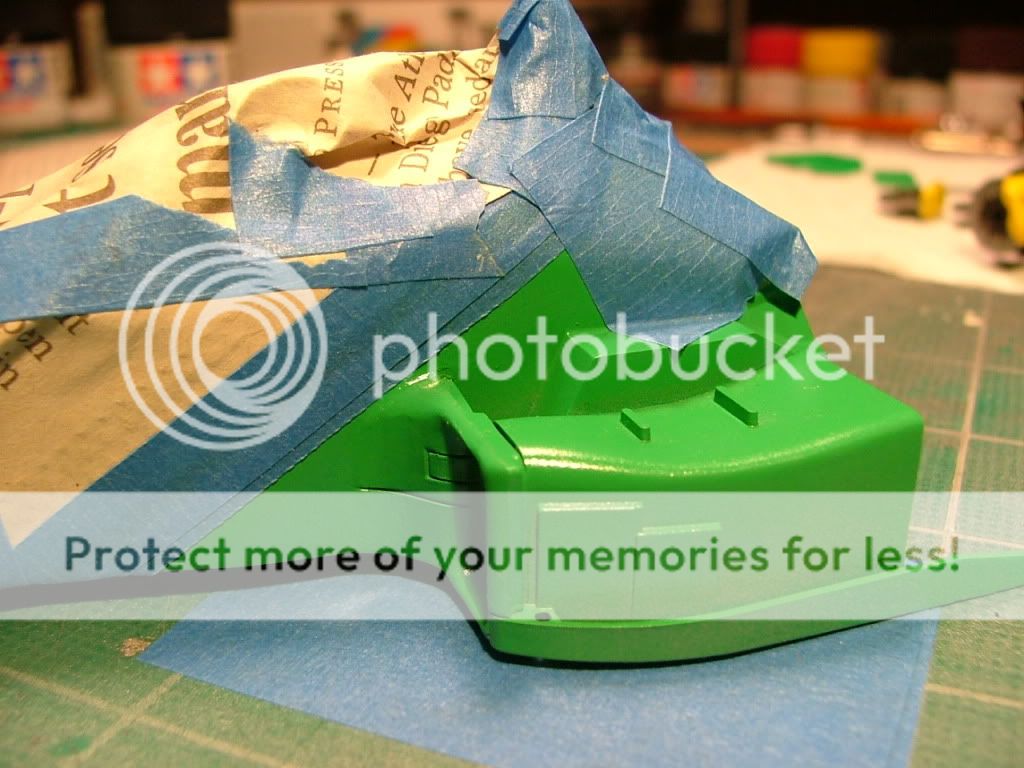 First coat of red 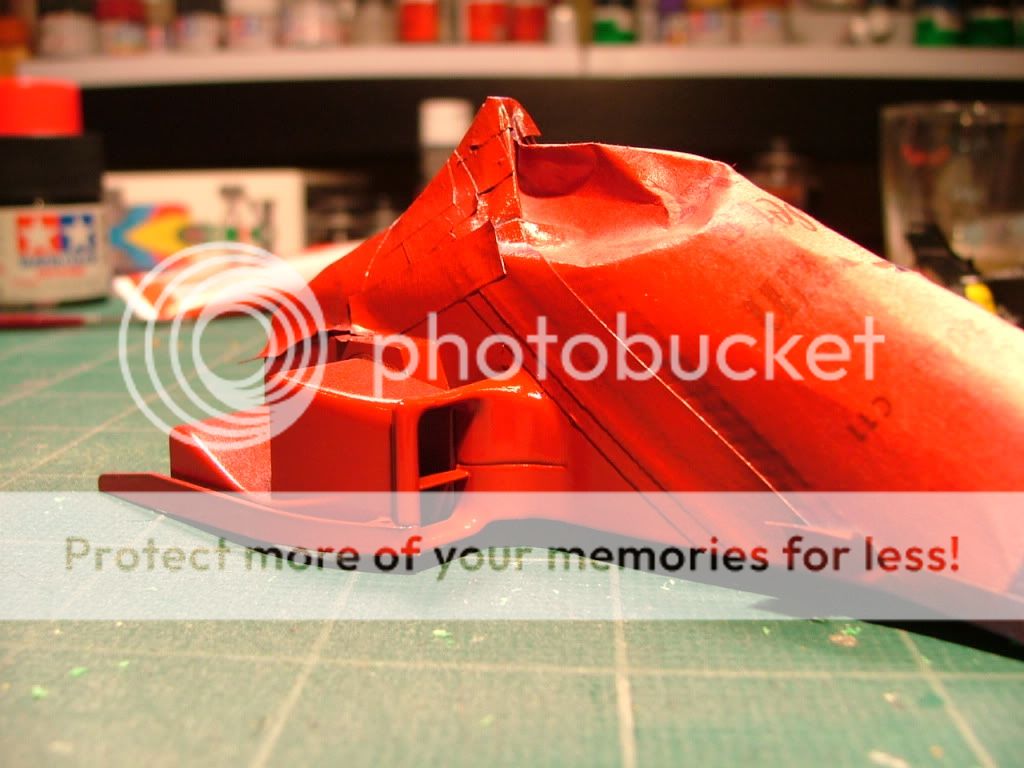 And the other side . . . yes again. 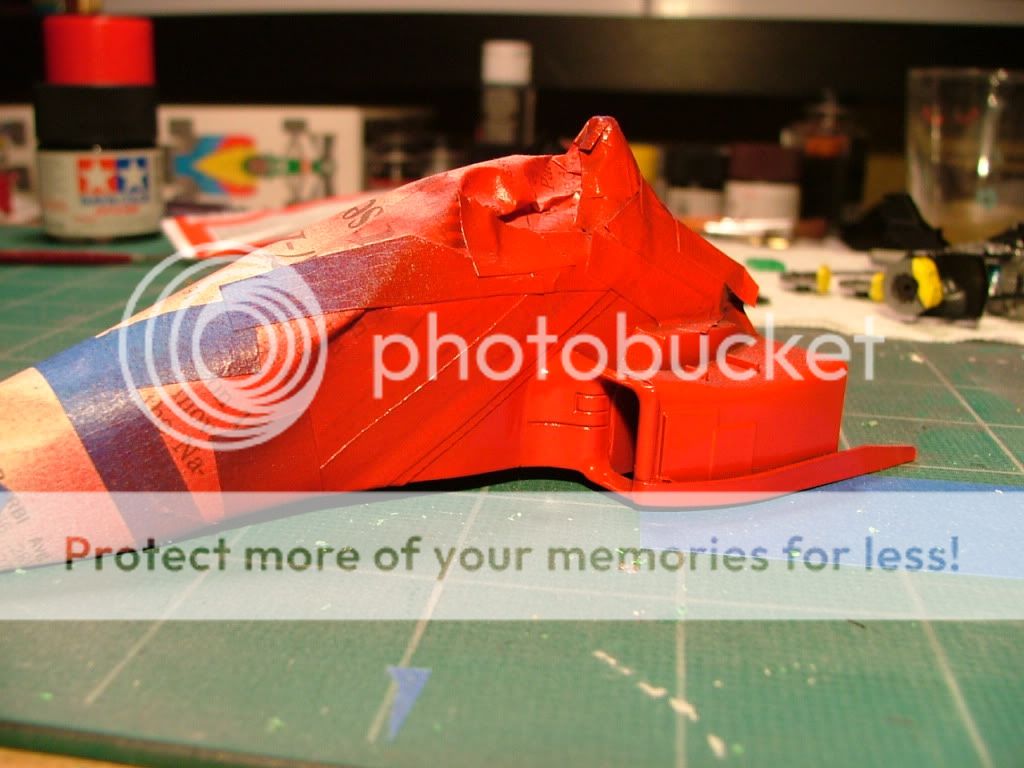 After applying a few coats of red, I removed the rear masking tape. 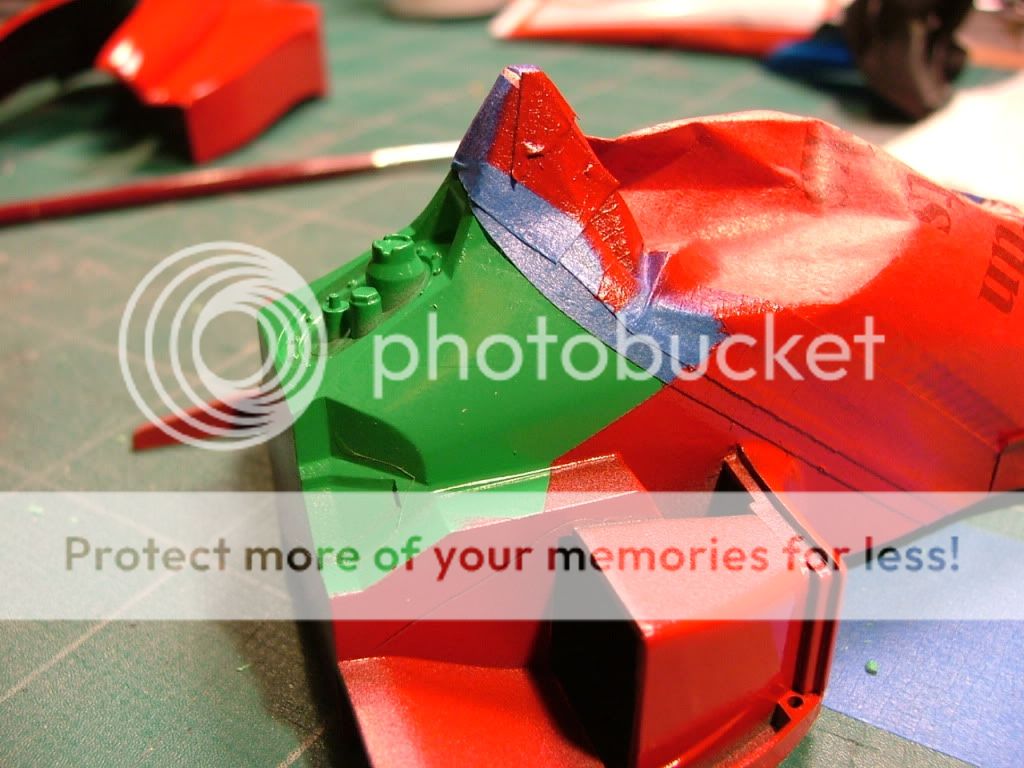 other side 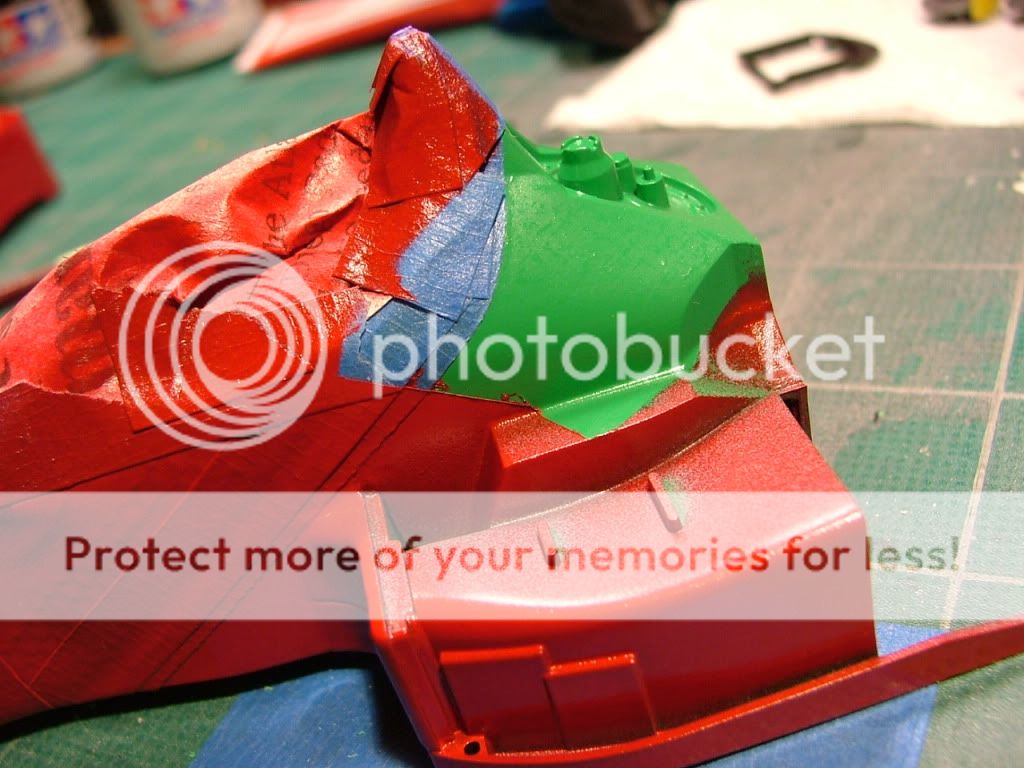 This area will be painted yellow. but first I need to mask off the red. Note that I have not removed the original masking job on the nose. 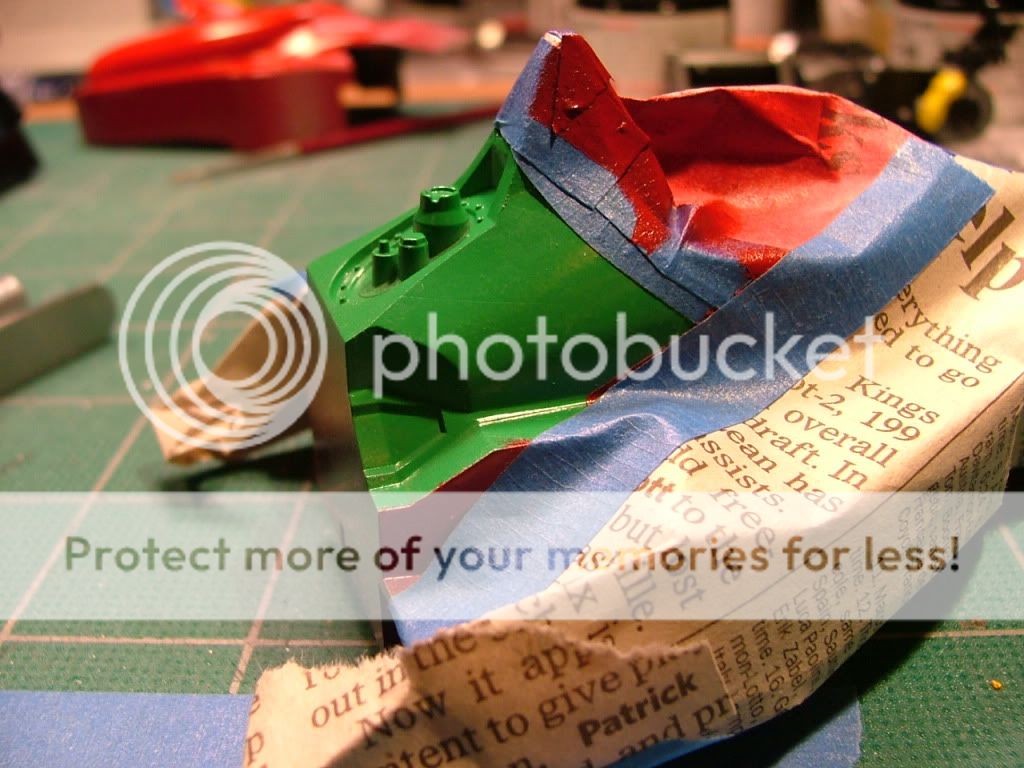 the other side too. 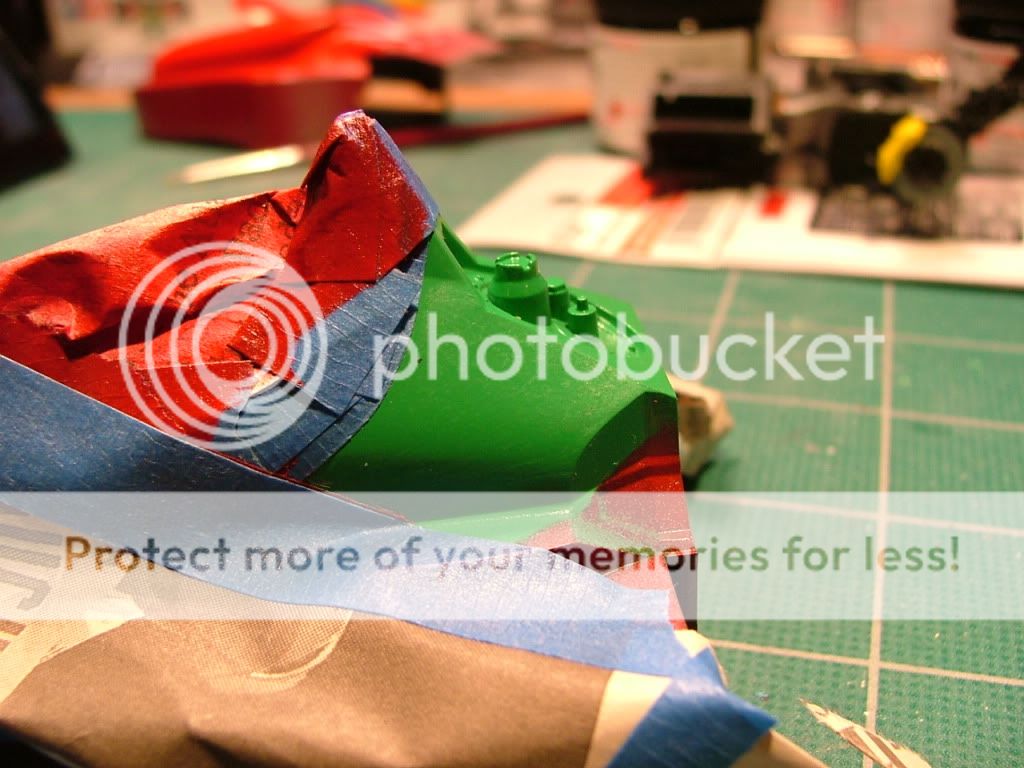 Now the yellow paint. 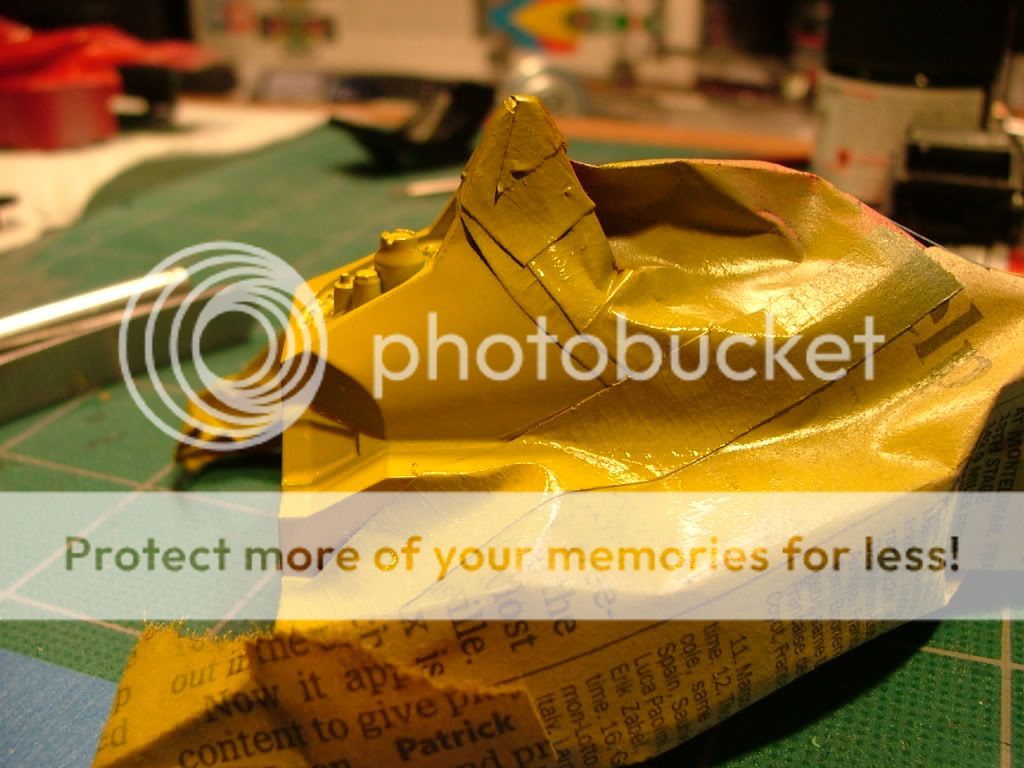 After the yellow dries, peel it all off and look what you get.  Turned out pretty good. As a curbside kit, I was not worried about the radiator ducts and painting anything black. The rear cowl won't be coming off when the kit is all done. 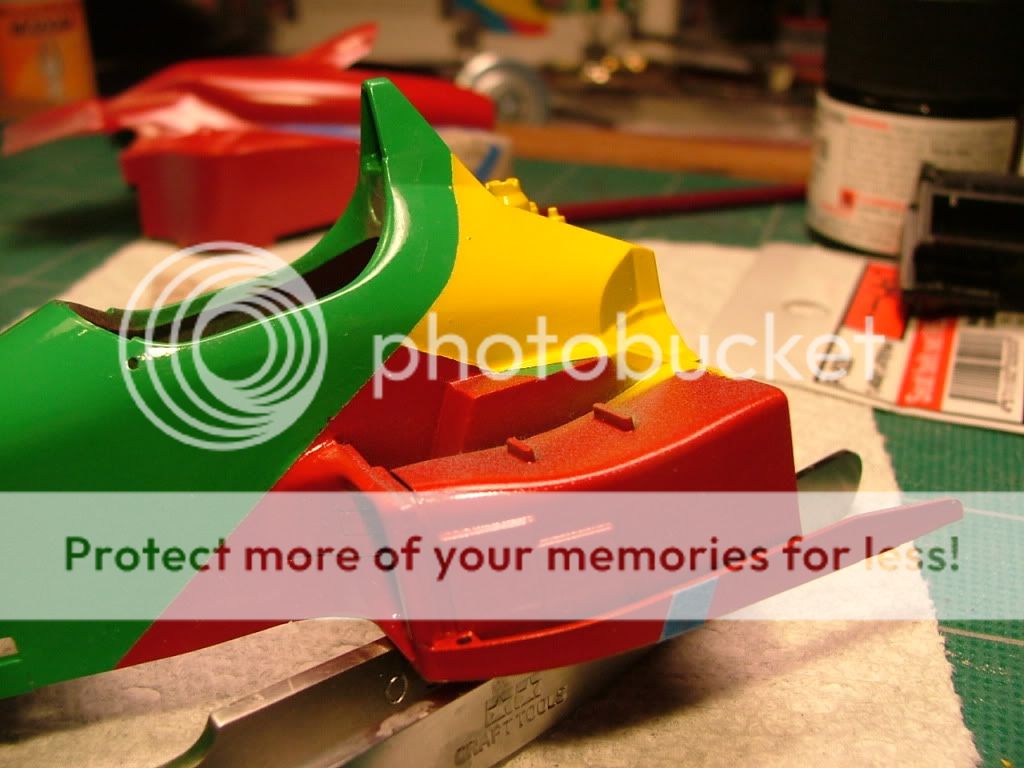 You may notice a small piece of blue tape on the edge of the chassis. Unfortunately, I failed to take a key picture. I put the rear cowl on the chassis and ran the masking tape line that would become the blue section on the rear. You'll have to use your imagination here for a bit. Now I re-masked the entire forward portion and hit it with blue.  First coat on rear cowl is, yes, you guessed it, red. 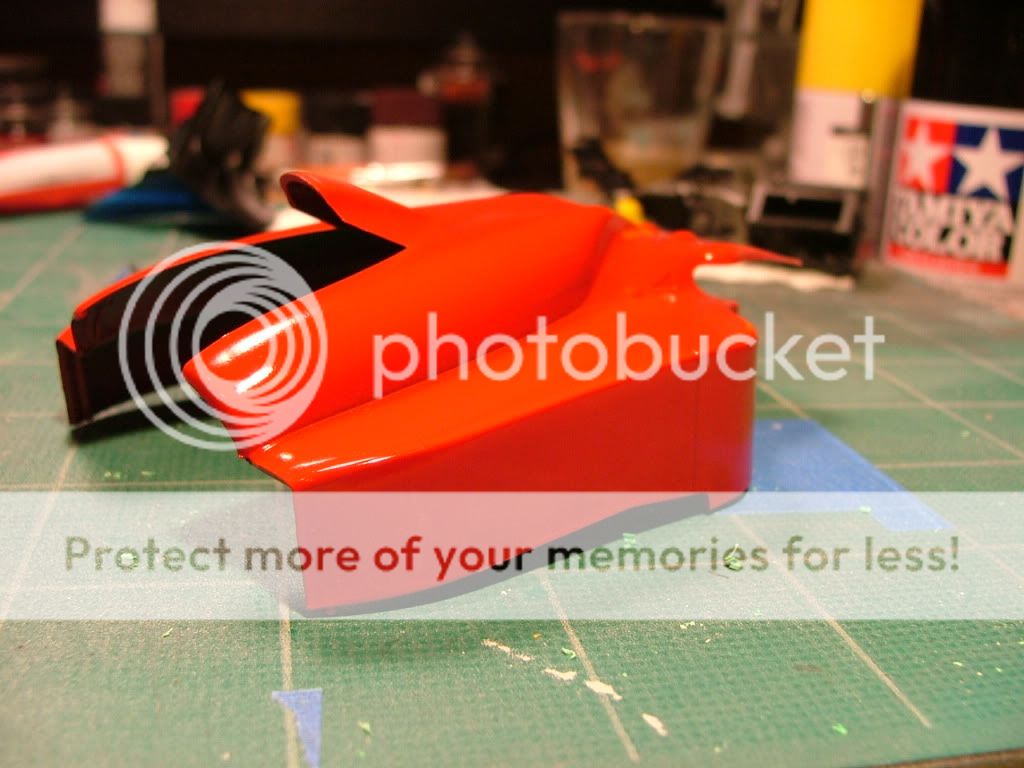 Now you can see the rear masking. 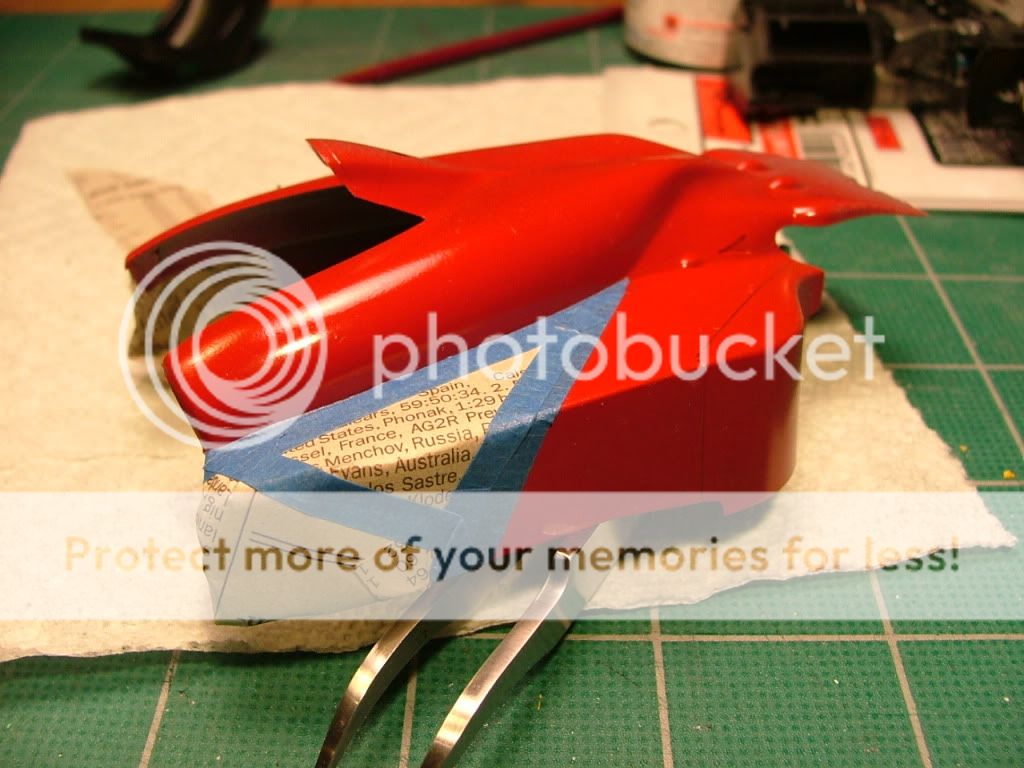 the other side. 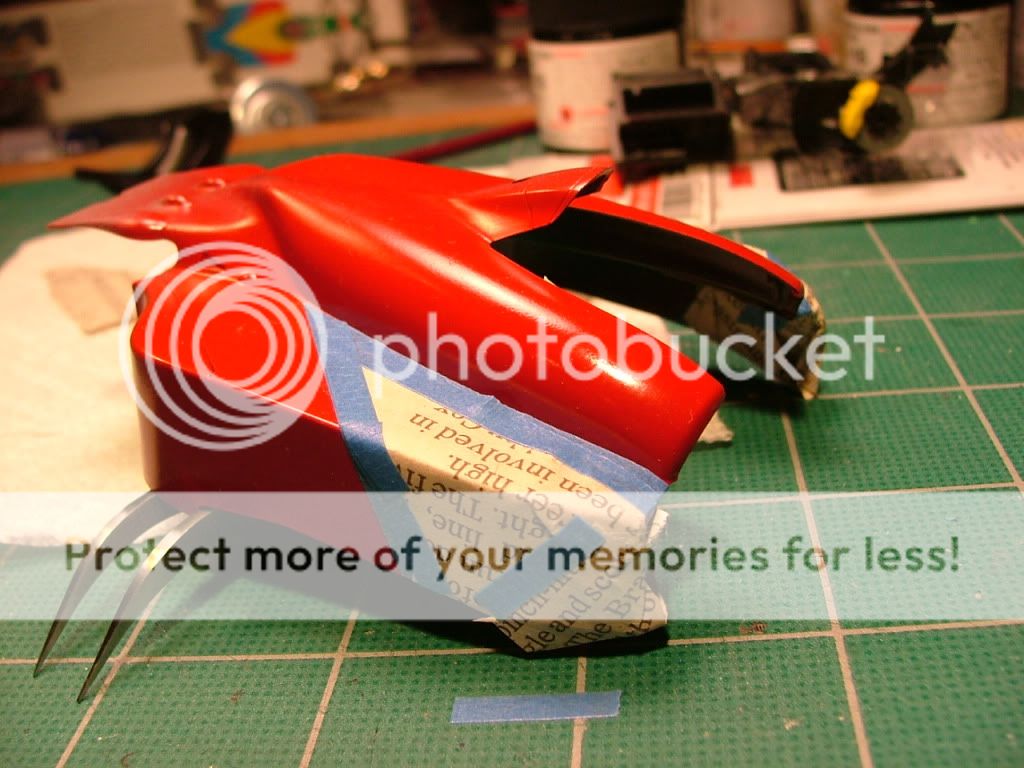 Now a squirt of yellow. I focused on mainly painting the top portion and not the rear to much. 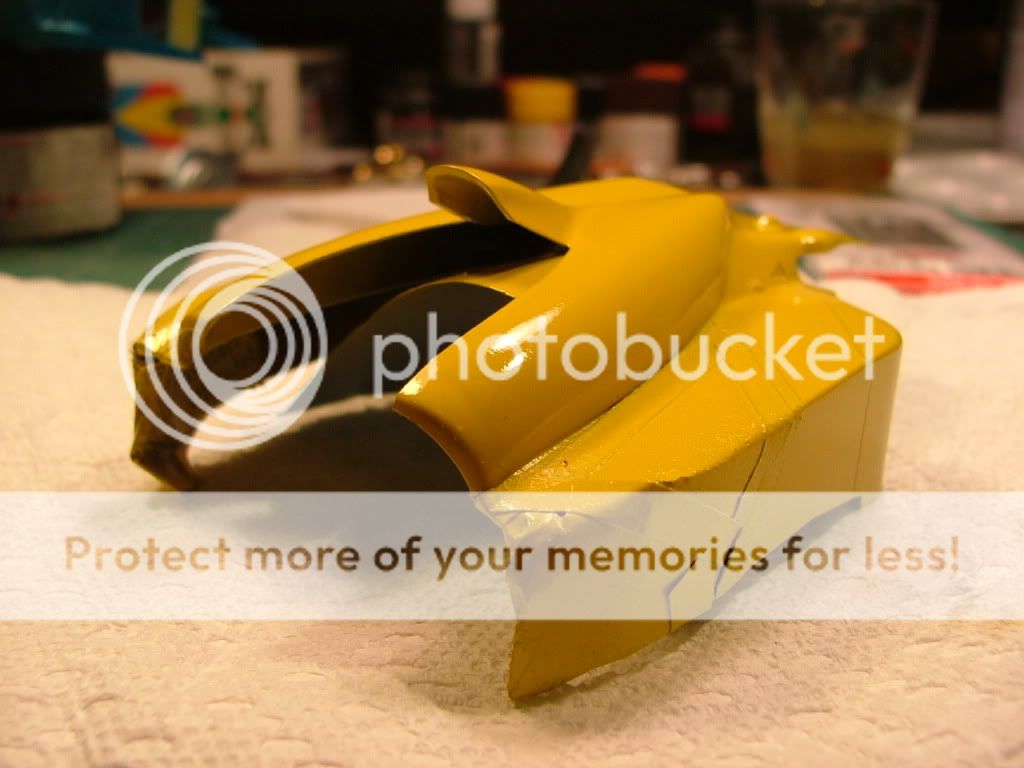 Again I forgot some pictures here. I had to mask over the yellow and paint the blue. I forgot to take those pictures. 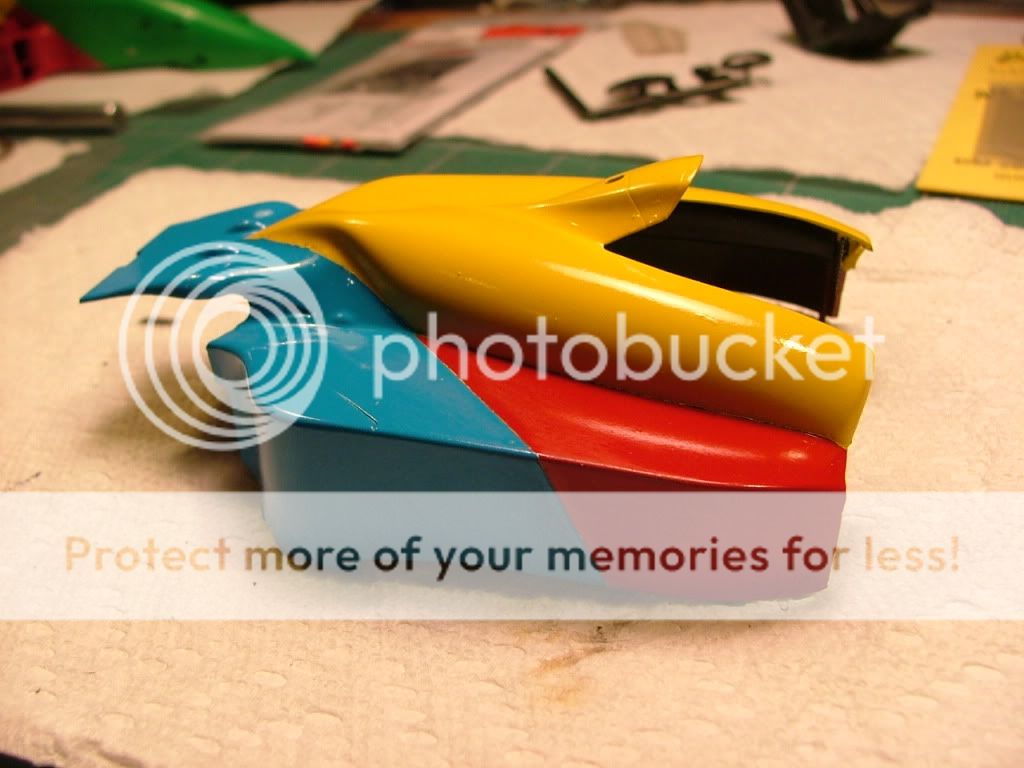 Here is the back end of the chassis and rear cowl 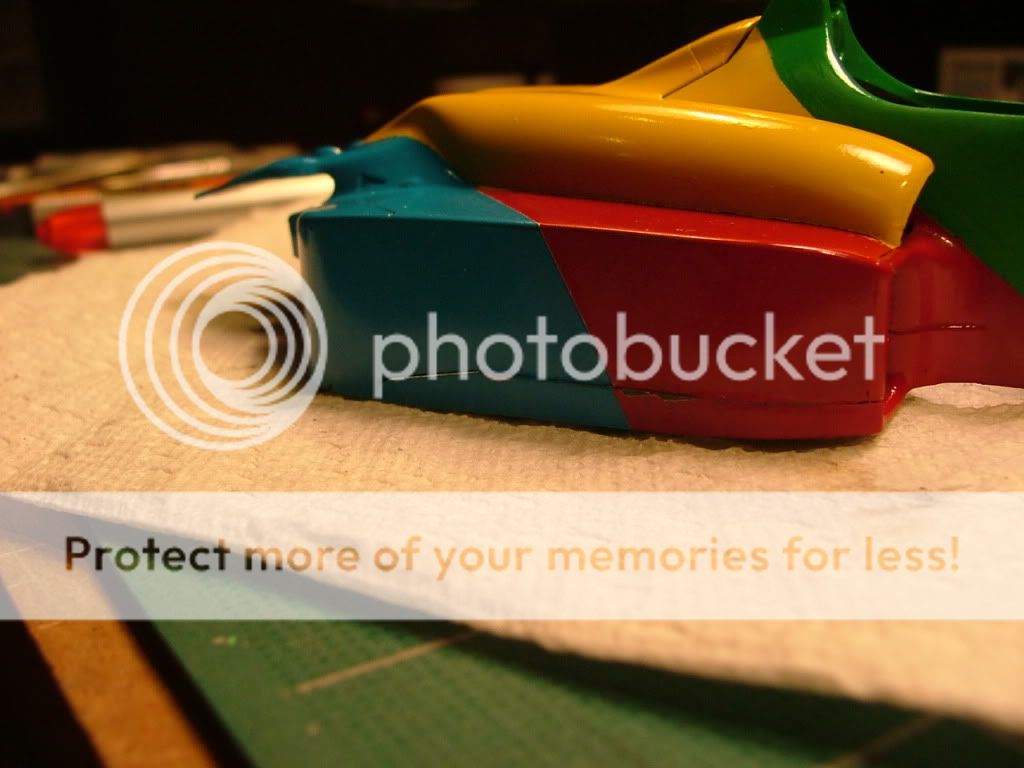 And here is the final product. 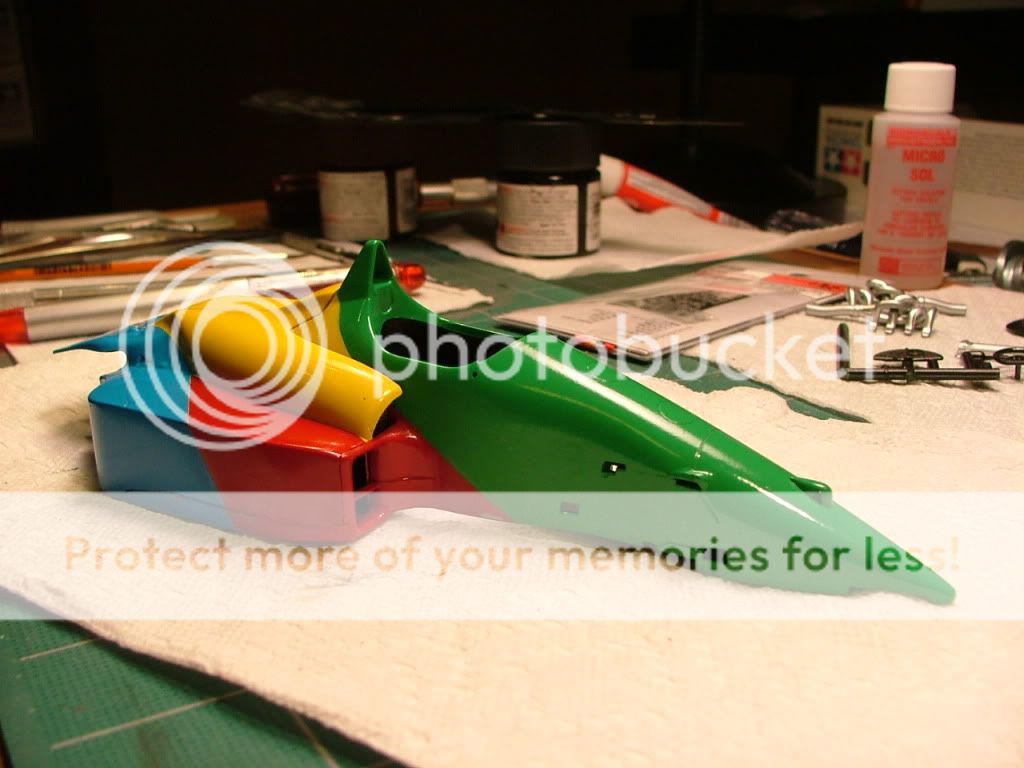 Now alI have to do is a little light sanding to eliminate a few ridges where the masking was. It's hard to mask and not have some kind of ride remain on the part. Next I'll apply the decals and and clear coat. Stay tuned. next post is final chassis picture before assembly. Happy building gang !!
__________________
Greg Davis Phoenix, Az. USA ----------
|
|
|
POST REPLY TO THIS THREAD |
 |
|
|


