Hello everyone,
For my next project, I'm moving forward to 1978 and the 935/78 'Moby Dick'. Again, this will be 1/8 scale and scratch-built from styrene, fibreglass, and - no doubt - all sorts of other bits and pieces. Why this car? Well, for a start it looks great:

...and although it's based on a conventional 911 chassis (heavily modified, of course), it's more tube-frame than monocoque. Porsche really went to town with the rule-book on this one, using every regulation they could to their advantage - the end result was some 750bhp from a new version of the 911's turbo engine, and over 220mph at Le Mans. Moby Dick's official works competition history amounts to only four races, but it certainly left a mark.
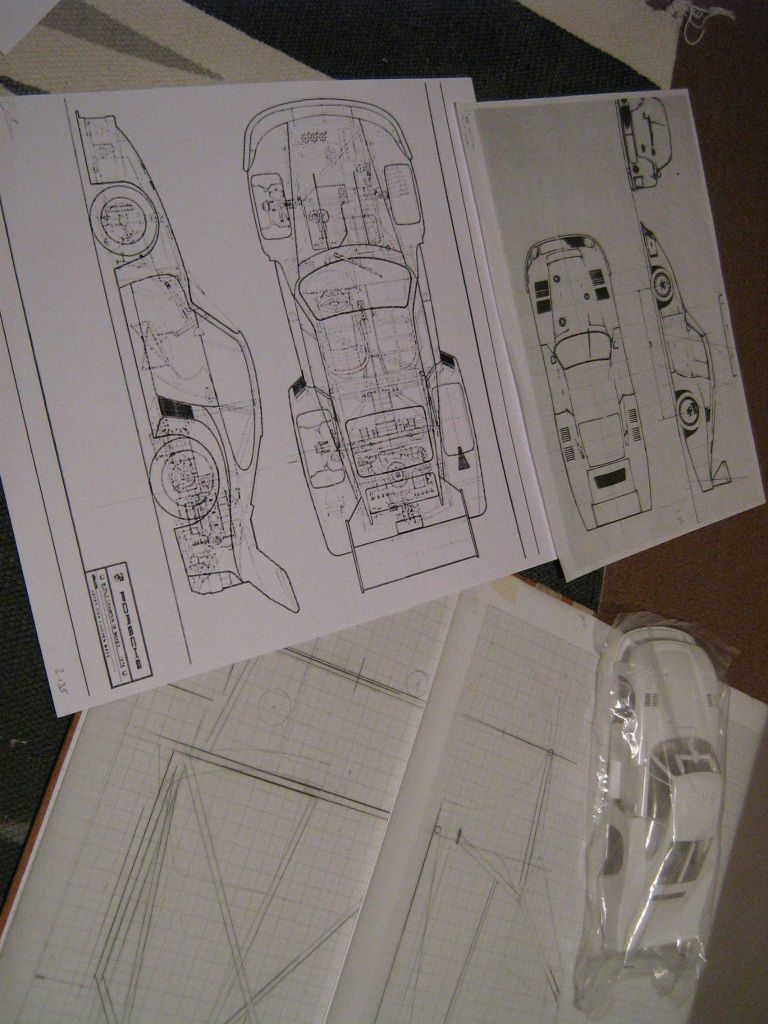
My primary reference for this project is the fantastic range of photos on the Freisinger Motorsport website, covering the rebuild of the second 935/78 chassis. There's a line drawing showing the external views, and the Tamiya 1/24 kit, of course, but other than this it's a question of pulling together various articles in books and magazines.
As there are quite a few unknowns about this car, my plan was to start by drawing-up a set of 1/8 scale outlines for the bodywork as a master reference. Onto this I would add chassis details by overlaying sheets of draughting film - I know it would be easier to do this using CAD, but I'm a pencil and paper kind of guy!
To get a better understanding of the chassis layout, and how it would interact with what was left of the original 911's body structure, the next step would be to make a mk1 version of the tube frame. I could use this to design the moulds for the fibreglass panels, and also to work out how to improve the structure's strength. The mk2 chassis would incorporate all these developments and be used for the final build.
Sounds simple enough, but I still expect this to be another long one...
So, I started working on the drawings back in November, and continued through Christmas and into January:

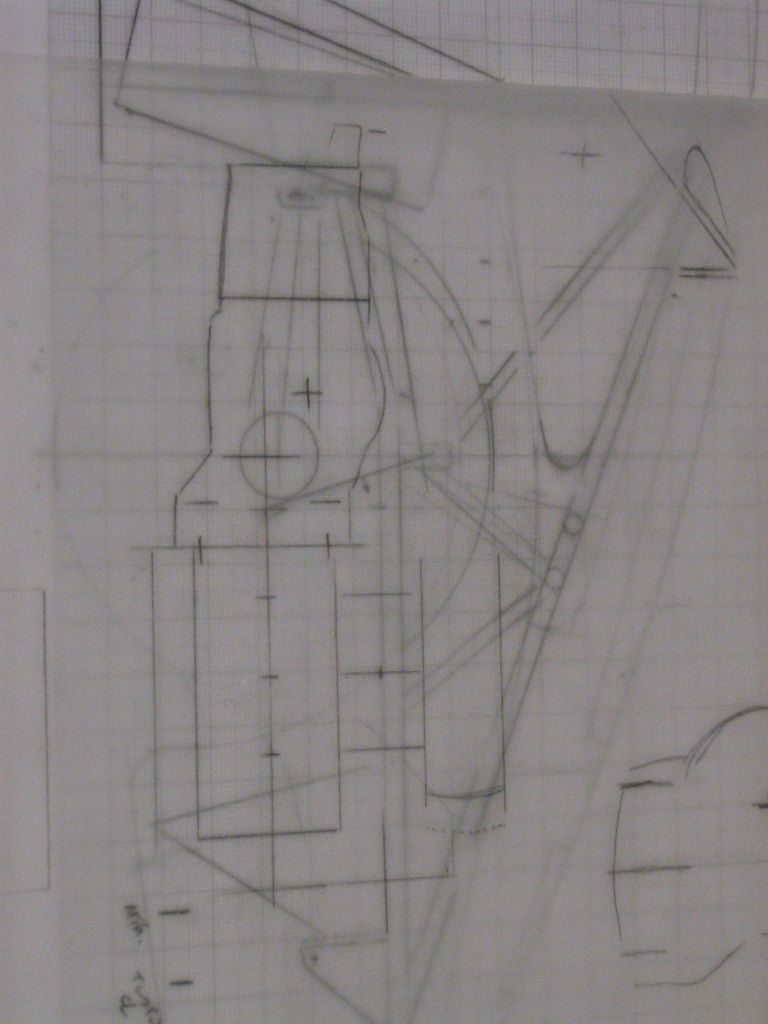
I know - that's a regular 935, not the 78 car! It's the only drawing of it's type I could find, but once it's magnified to a useful size most of the detail is lost. Still, it has given me an idea of the relative positions of the engine, gearbox, etc, and will act as a starting point for some of the other components.
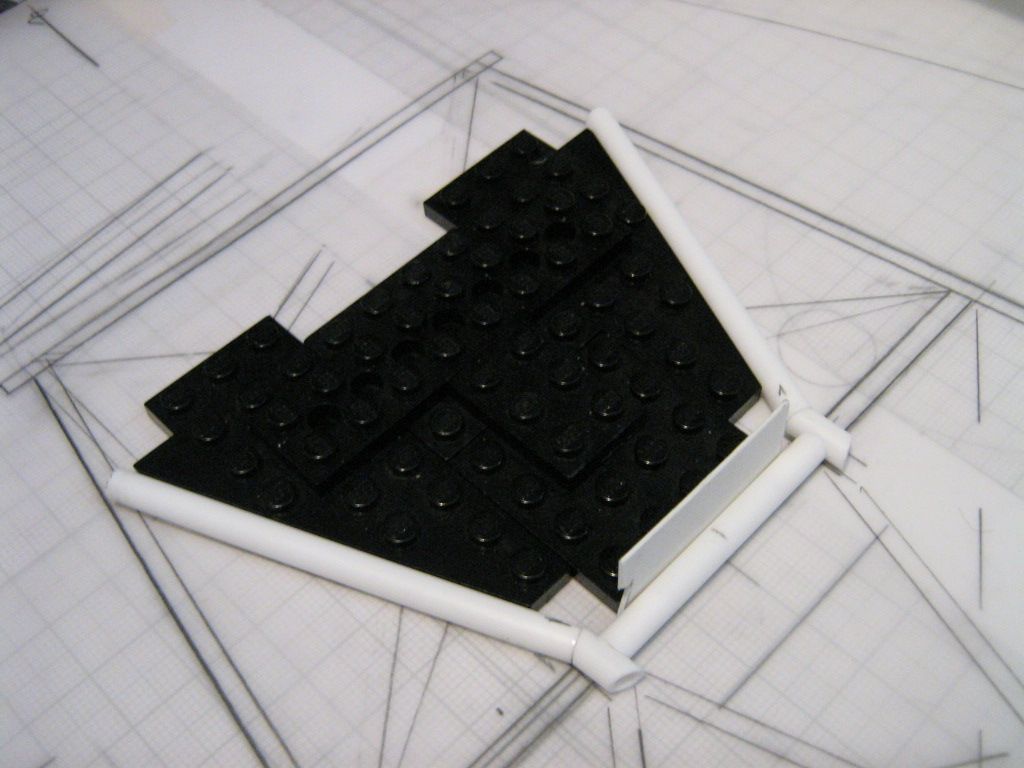
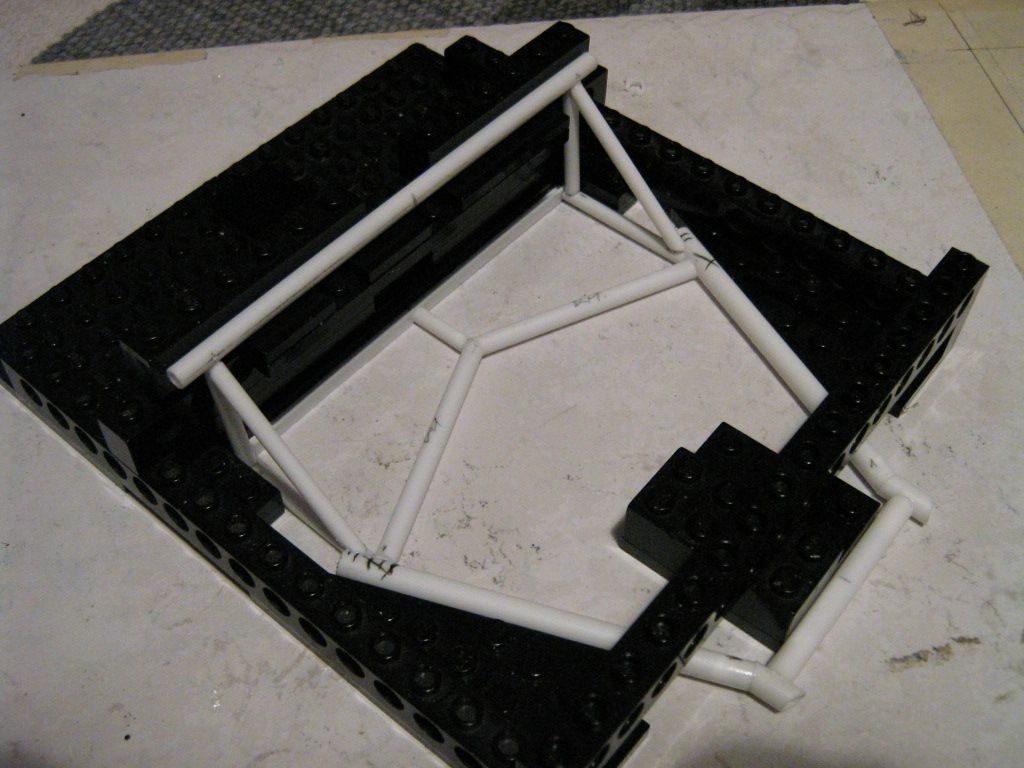
Earlier this month I was ready to start cutting tube; normally I would start by laying out the centre cockpit section, but this was one of the big unknowns - so this time I began with the rear bulkhead:
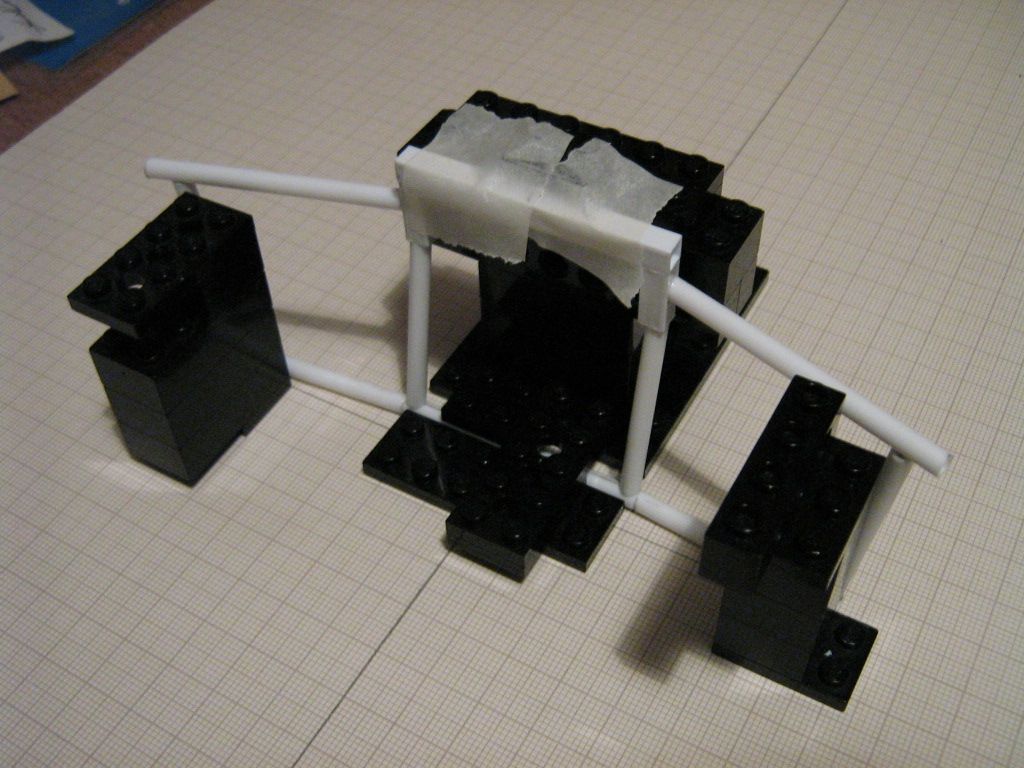

I'm using an old cupboard door as a baseplate, and the Lego is getting another outing to make the jigs. It's useful stuff for doing this sort of thing, and although it's taking time now to set things up for the mk1 frame, it should make life easier when it comes to the mk2.
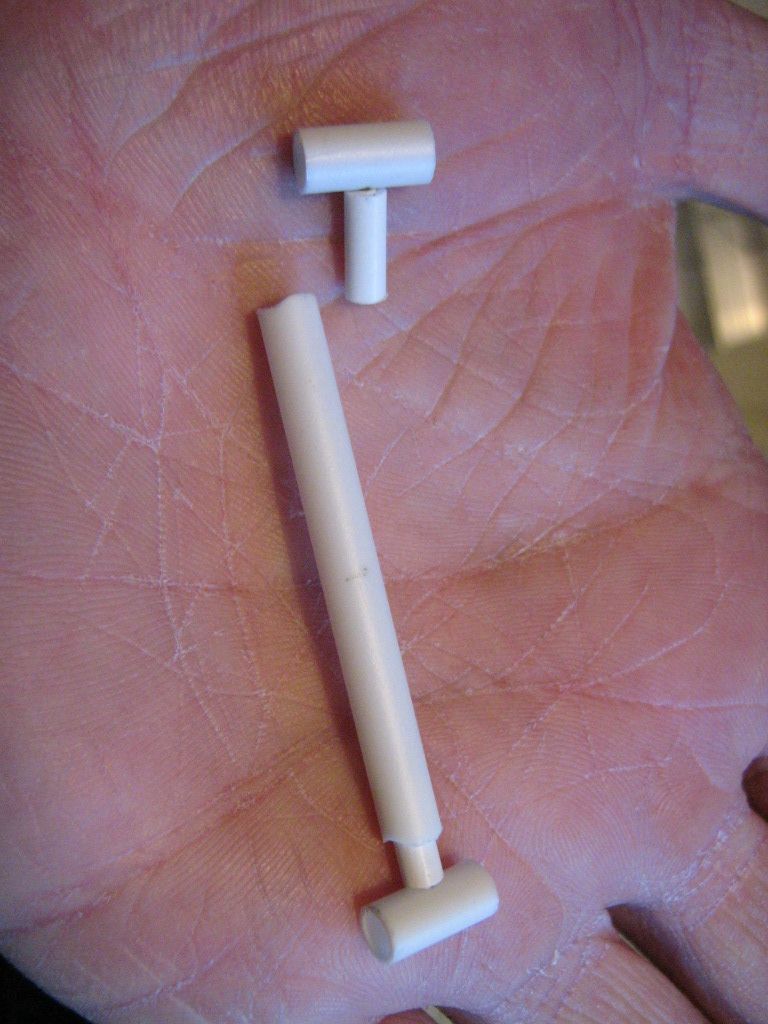
Most of the tubes here are 4mm, but there's a few sections of 4.8mm around and the black roll-hoop is 6mm fire-extinguisher piping. When I've got the bodyshell sorted out, this might be re-made in ali or brass for the mk2, but for now the flxible piping is perfect. I've pinned as many of the joints as I can for strength, but the mk2 frame will benefit from a re-design of some of the tube intersections.
I haven't included every single tube - for the mk1 frame it's unnecessary. Suspension pick-ups, etc, won't be required until the mk2, and some of the joints are not as tidy as they could be! On the mk2 I'll be adding greenstuff weld details again, as on the 908.
With the rear well underway, I made a start on the front end:
Lack of a proper frame drawing makes some of this an exercise in educated guesswork, but the important thing is to create a chassis which
works. With this project I'm not too concerned right now about how I'm making the engine, gearbox, suspension, etc - these will all be similar-but-different to what I've done on other cars. If I can make a frame and fit the core body structure around it, we'll be in business! There's still plenty of questions to be answered - for example, the front wishbone pick-ups are a bit vague, and it looks like they ran the water and oil through the tubes, so that complicates matters too.
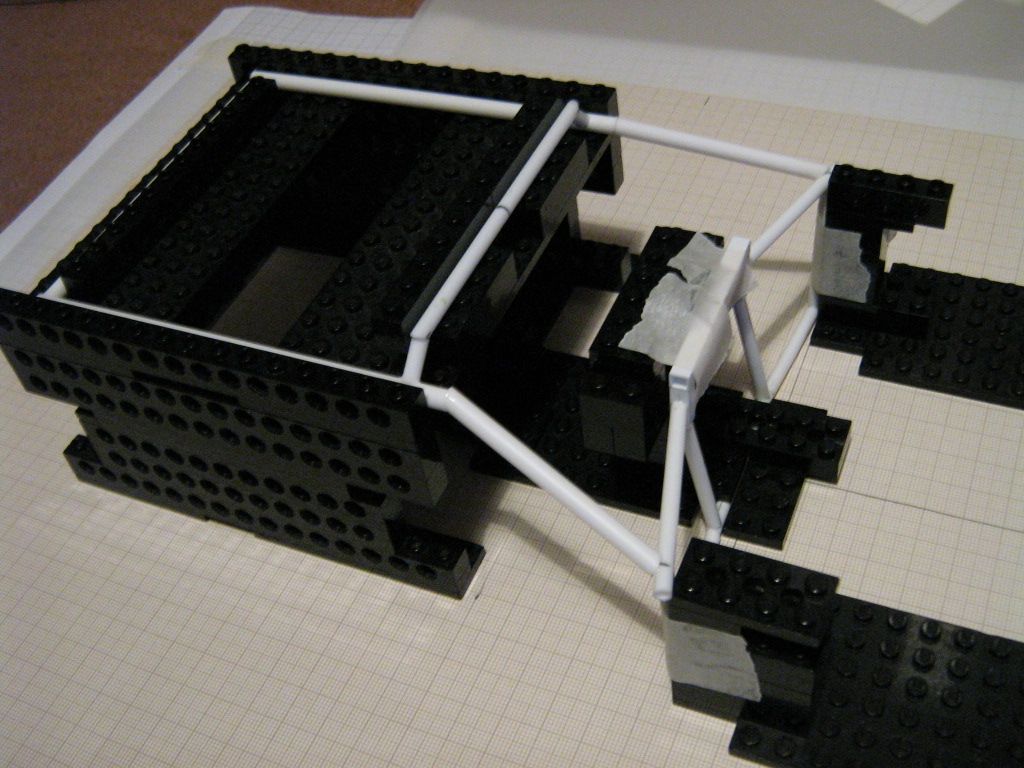
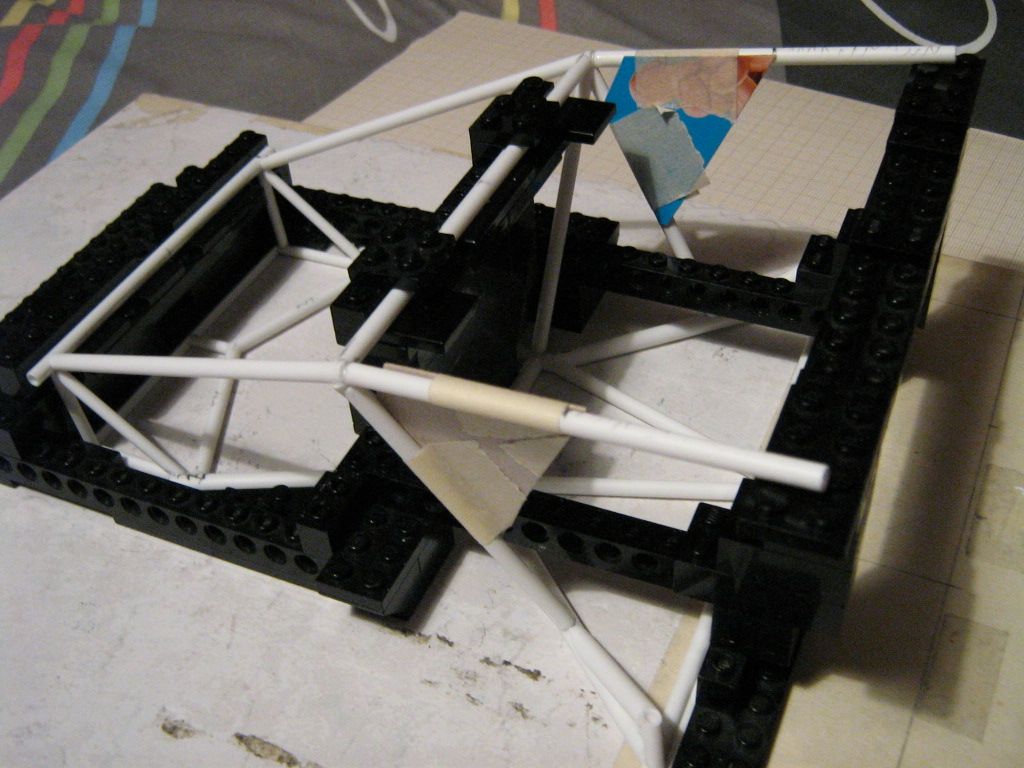
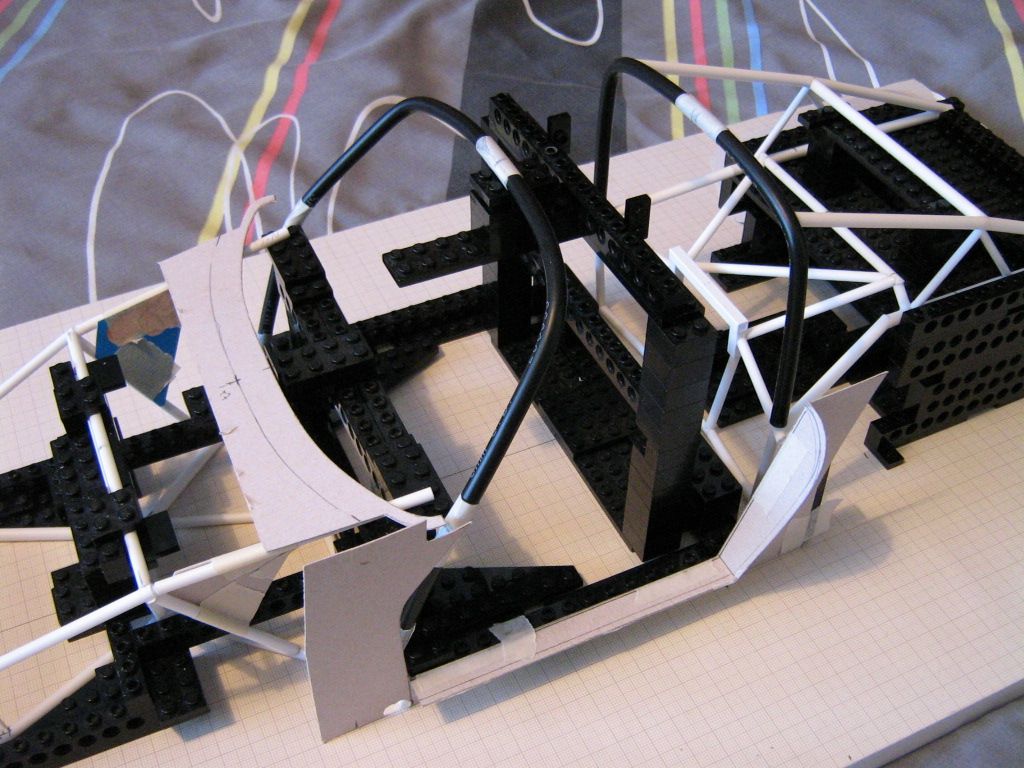
Here's the front and rear ends together:

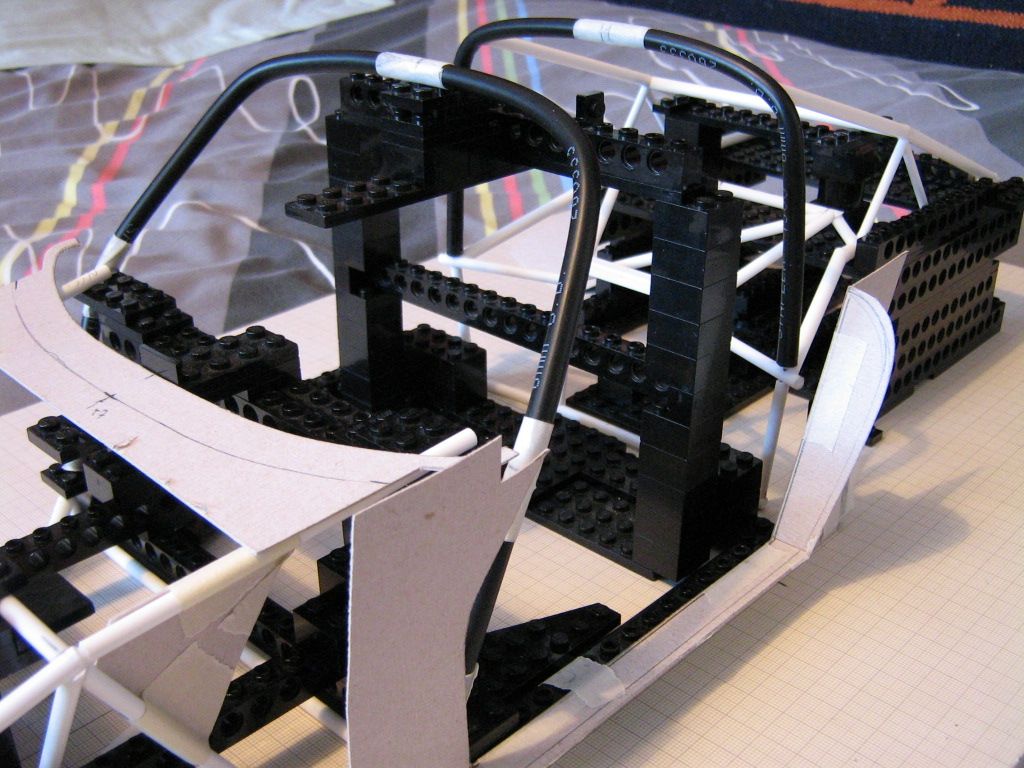
...and with the windscreen support frame in place:

The windscreen frame is probably a little too wide right now, so I'll have to take maybe 1/4" or so out. The lower mounting points are a little 'fluid' right now, so the exact size might not be clear until I've made some of the bodywork...
I wanted to get a feel for how the body would fit around the frame, so I set-to with the cereal packets and tape to create a few sample panels:
Starting to look like a 911 already! It's going to be a challenge working out how to actually mould all these parts, but I think the results will be worthwhile. The hardest part will probably be the roof and pillars...good job I've still got plenty of my blue insulating foam available! I suspect I won't be able to include all the detail I want into a fibreglass part, but I can always add styrene detailing where necessary. We'll see...
Finally, with the front and rear sections taking shape, it was now a good time to add the sides to connect the two ends. These are buried within the steel road-car sills and so are not visible in any of my photos. I've made mine as a two-layer structure - what's left of the original 911 body can't add much strength to the car, so everything has to depend on the tube-frame. I can't believe Porsche designed it as a single layer of tubes, and there's enough clues in the Freisinger photos to make me think they did something along these lines. I'll probably re-work this area for the mk2 to increase the strength - although my models are mainly plastic, they still weigh quite a bit when complete!

Adding all the cockpit diagonals will eat-up my stocks of styrene tube, but I'm going to have to put a few of them in to give it some strength. I made sure to have plenty available when I started! Again, I'll probably add some brass or ali tubes into the mk2, especially in the sills or for the roof-rails.
So, that's about where I am with this right now. I'll continue adding a few more tubes to the cockpit during the week, and by next weeked it should hopefully look like a complete chassis. Then the hard work will
really begin.
As usual, thanks for having a look, and I hope you stick around to the end!
Have a good week,
SB