I thought I would post my steps possibly for a tutorial on how to go about making custom Coilovers. I will be doing this for my Peugeot 206.
The needed supplies are:
Dremel (recommended)
Sandpaper (I use 200 grit)
30 gauge wire.
The wiring can be found at Radio Shack. 30 gauge is ideal but the size can be increased depending on the car.

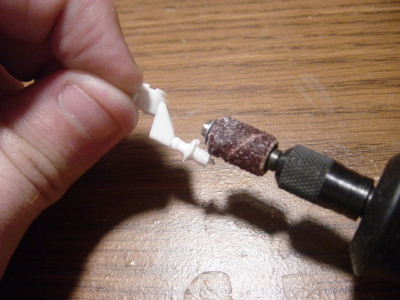
First I shall take the coil-over and examine how it is set up. As in how long, wide and how close together the coils are. After examining I am ready to start sanding the plastic coils off with the dremel.
I may remind that you should only try this if you have a "nack" for sanding.
You should slowly work your way around the coils at to make sure the shock is completely bare. Be sure not to sand off the base of the coils or the scratch build coil will have no place to rest.

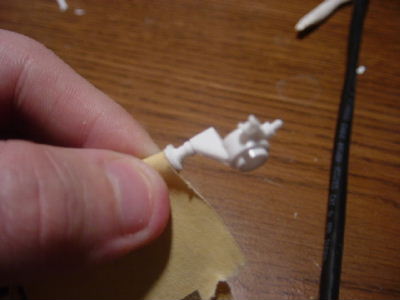
Next after sanding the coils off completely, I will examine the shock once again for any rough spots. And to correct these, I use the sand paper to work my way around the shock to create a more smooth surface to simulate a real shock.
Be sure to look anywhere else on the part that you may have sanded too hard with the dremel to fix.
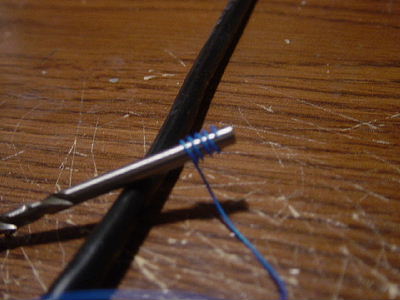
Next come the part of actualy making the coils. The 30 gauge wire can be easy and hard to work with. To actualy create the coil, you need to find a round surface like a tree sprue or a drill bit. I use my drill bits to make my coils of any kind.
Here I will be using the largest drill bit I have.


Stretch out an apropriate length of wire and wrap it around the bit. From this point, you can stretch and crimp the coil to the desired length. Be sure to wrap the wire tightly around the bit or you will get a lopsided coil.
Remove the coil by cutting the wire at the desired point and "screwing" the coil off the bit.
Place the coil on the modified shock to get an idea of what the finished product will look like. You can make any adjustments from here.

Here we compare the scratch built coil over with the kit plastic one. It looks much more realistic than the original and can also be modified to actualy work.
After I am finished, the final part is placed on the car to show what the result looks like. And the final result is to my liking.
During the process of all of this, you can paint the shock and coils to the desired color. As you can see, I neglected to do so for the time being.
I hope that this has been a helpful thread in your scratch building aspect of modeling.
Brian

