been a bit busy so just a small update.
photos were taken indoors under flourescent light so I'll take better ones tomorrow when I should get some parts painting done.
I also got hold of a complete set of service manuals for the bikes so I've been looking at the kit parts and resisting the urge to fill in the missing parts.
First of all, chassis frame halves cememted together, painted and (some of) front fork painted.

The chassis frame was first primed roughly with automotive primer before I sprayed on a good coat of Hycote Double Acrylic Ford Graphite Grey.
Once that had cured enough to mask, I did so and sprayed the rear section with Hycote Double Acrylic Aluminium.
Didn't put clear on it as the real chassis isn't fully gloss finished.
The front fork was hand painted in mixed Citadel paints Shining Gold and Mithril Silver.
It's not perfect and really, I would've like to have fabbed some up out of brass and aluminium.
Put the engine block together, filled in the seams and gave it base coat of Hycote Aluminium before a generous wash of Citadel Mitril Silver mixed with a little Tamiya XF-1 Flat Black and extra X-20a thinner because brush paints doesn't like to sit on the Hycote if it's diluted with water too much.

There's some little bits of fabbing to do here.
In the photo, you can see where on the real engine, the termostat would go.
The odd thing is, the space/hole is there in the kit for it but the part doesn't exist.
It's probably in the full detail version though.
Now for the rear suspension.
I said before that I was going to articulate it but after a very brief moment's thought, I decided against it. I went ahead with seperating most of the components though.
He's most of it along with the spring and damper parts I knocked up out of 0.6mm Jewellery wire, styrene rod and a bit of aluminium.
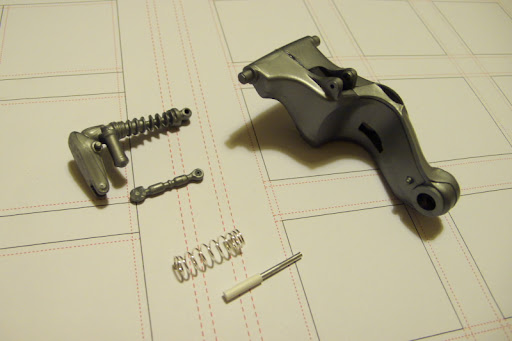
Because the spring is a bit loose, I had to add a couple of small discs of styrene to hold its position.
Small circles courtesy of my bargain buys from hong kong $10 store.

What it looks like put together.

At this point, the molded on reservoir bugged me so I removed that and made the correct pipe for it.
Not very good photo of it so I'll update this photo tomorrow.
