Hello again,
It's a double-size post tonight to make up for last week! Last night I was busy listening to the closing stages of the Rolex 24 at Daytona and had got into a groove with the modelling, so decided to do the update today.
So, here's the next stage in the construction of the front uprights. I've applied greenstuff to all the lug detailing and given it an initial shaping with the file. To mount the stub-axles to the main body of the upright I've built up a central spigot which is pinned through the double-skin. The stub-carrier section is sized to take a 5/16 capscrew (with the head turned down) which will form the basis of the axle - but with more detailing than last time!

Next, I wanted to work on the lower wishbones. I'm using RC car balljoints again, and these are pinned onto 1/8" stryrene tube. To bulk-up the rear arm of the wishbone, I'm adding two lengths of shallow channel section, which will eventually be greenstuffed and shaped to suit - the strength remains in the central tube, though. In time I'll add a small bracket to each arm to connect the front link - the Moby's wishbones are not one-piece.

In amongst all this I've CA'd the ali sleeving into the strut tubes so that I can do a basic assembly of the suspension:

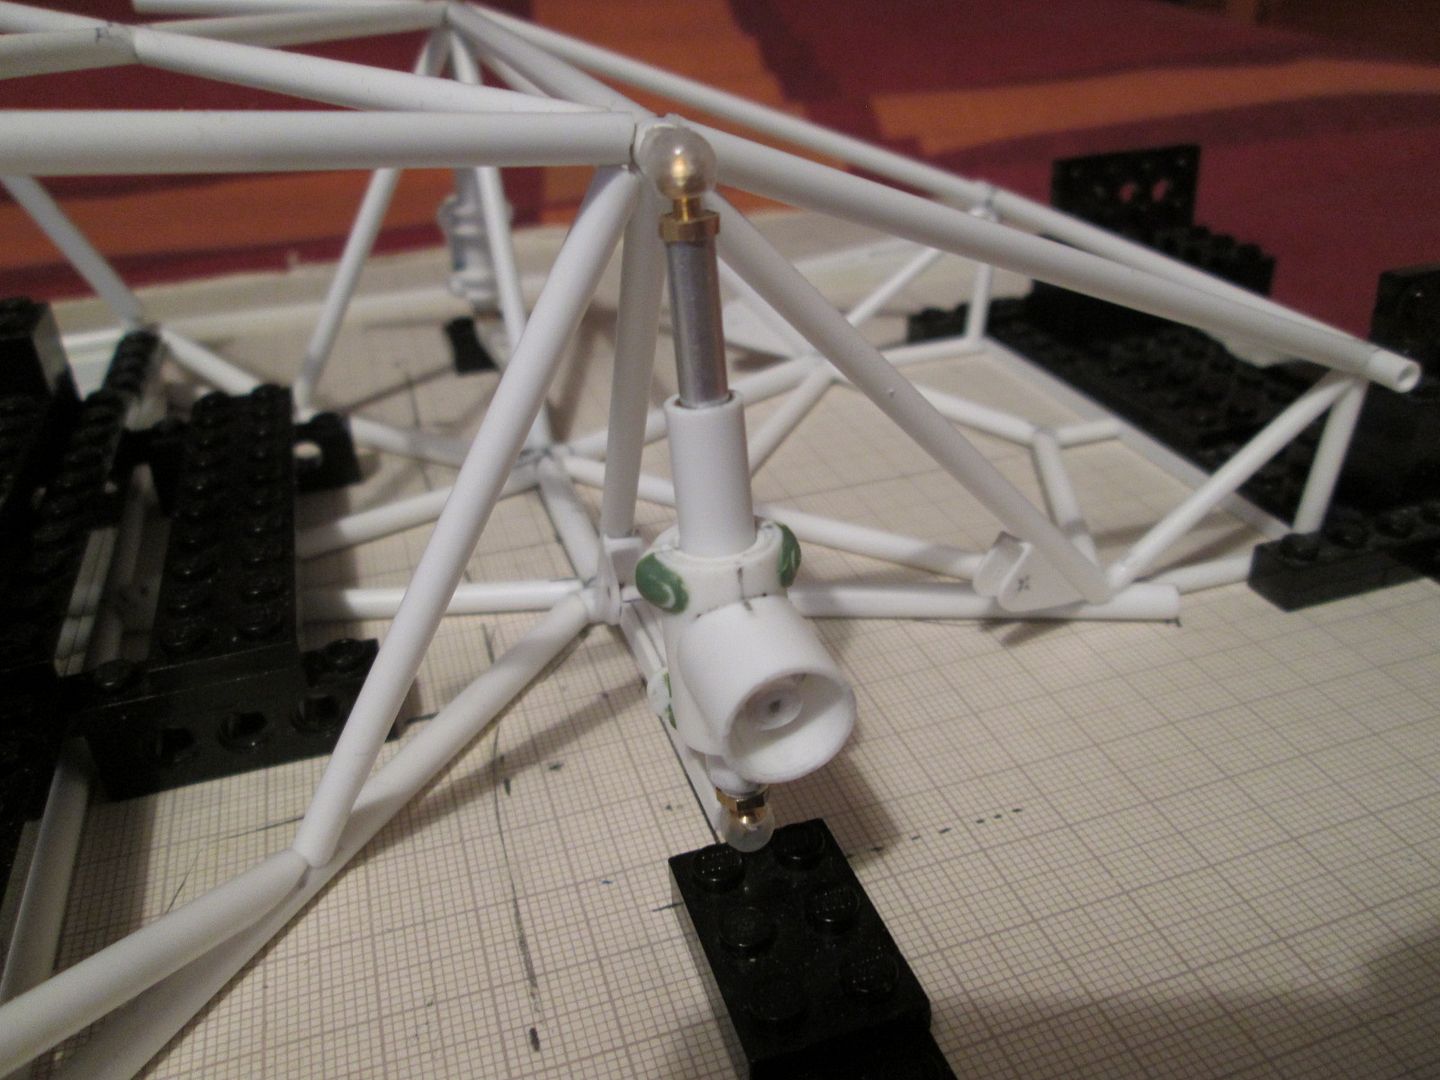
The uprights are still free to move on the strut so I can adjust the positioning, and there's scope to tweak the wishbones too. You might just be able to pick out some of the hex-nut detailing I've added to the uprights, too.
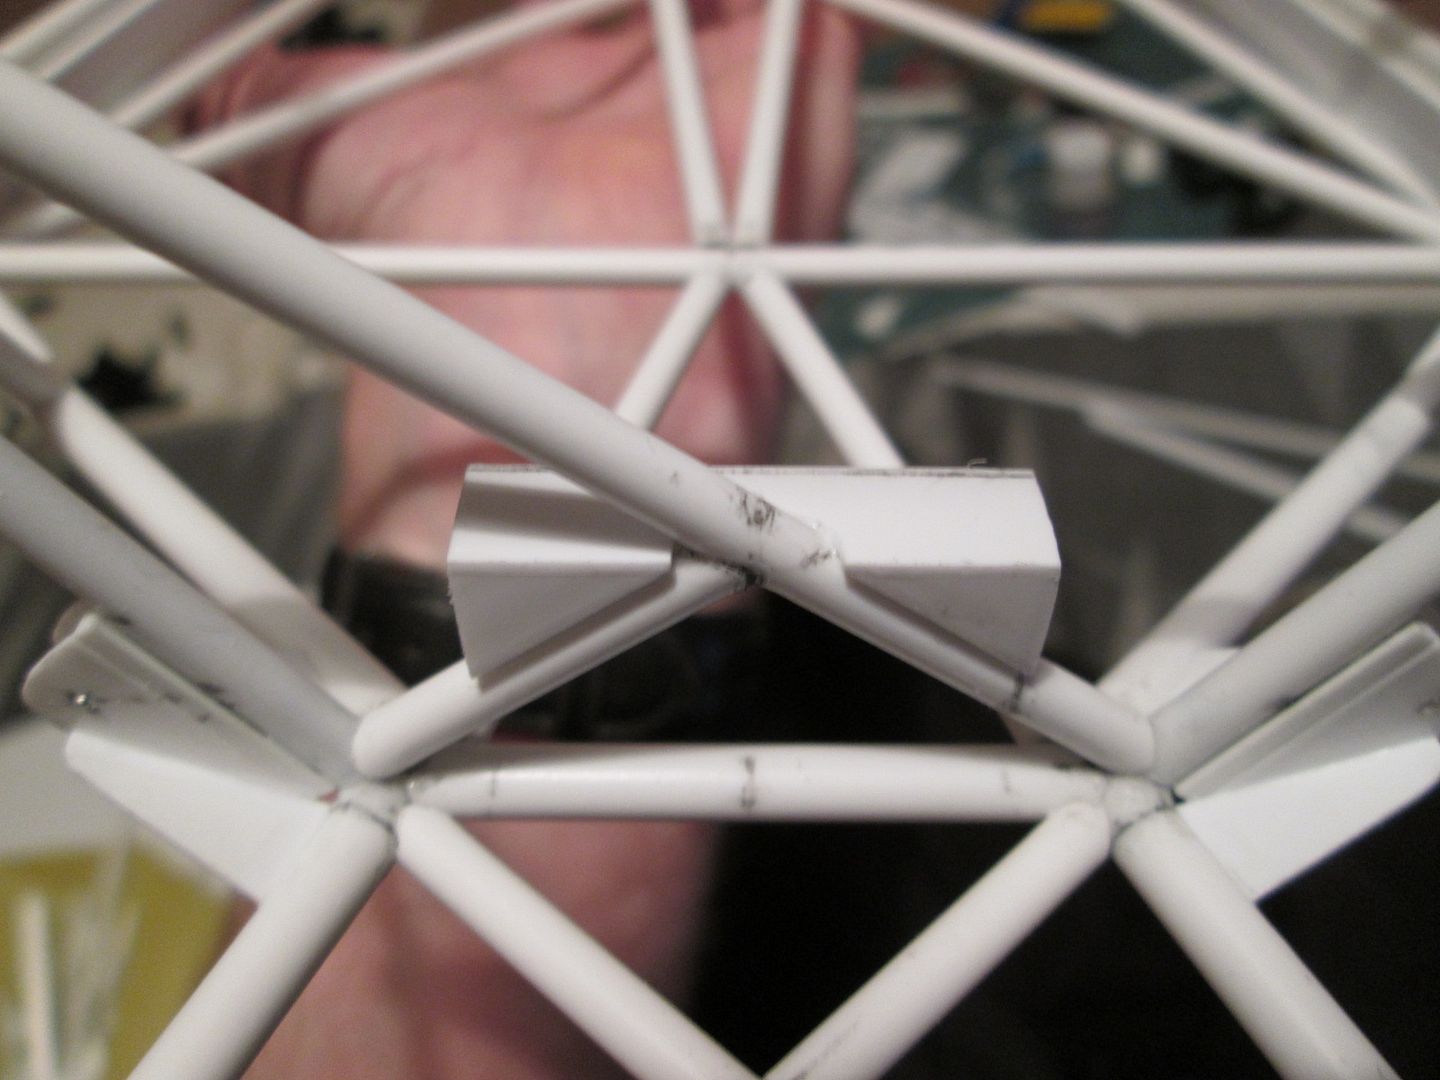
Before continuing with the suspension components, I wanted to reinforce the mountings. So, I added a few gusset plates:


Most of the work in the last few days has been focussed on the steering rack mounting. This structure will connect the two rear pick-ups of the wishbone, and once it's done I can start thinking about the rack itself. First step was to fit the two diagonal chassis tubes - the longer one had been cut and trimmed some time ago - but I added some ali reinforcement inside too. Next was a pair of triangular blocks connectd by a length of 0.75mm stryrene sheet - this is the core of the structure:
Now I could start filling in the gaps. To give a little more depth to the plate detailing I glued thin slices of styrene tube to the inside faces to create the impression of swaged holes:


...and the view from the back:
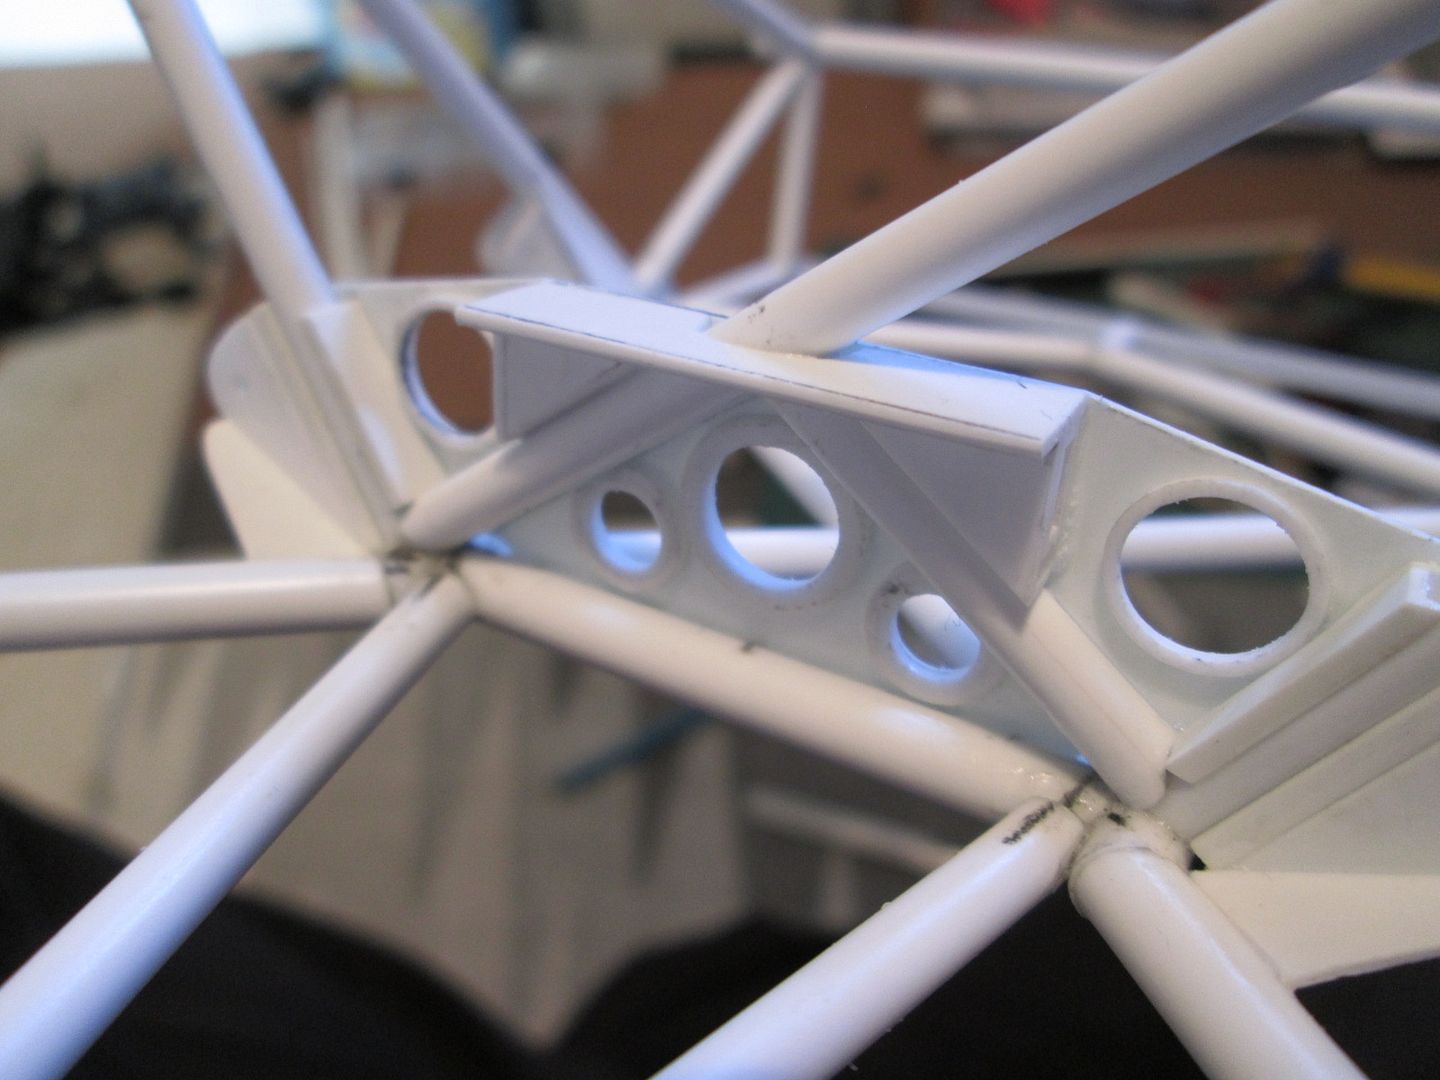
Two small plates fill-in the top of the structure; I added some small styrene pieces inside to give these plates something to sit on:
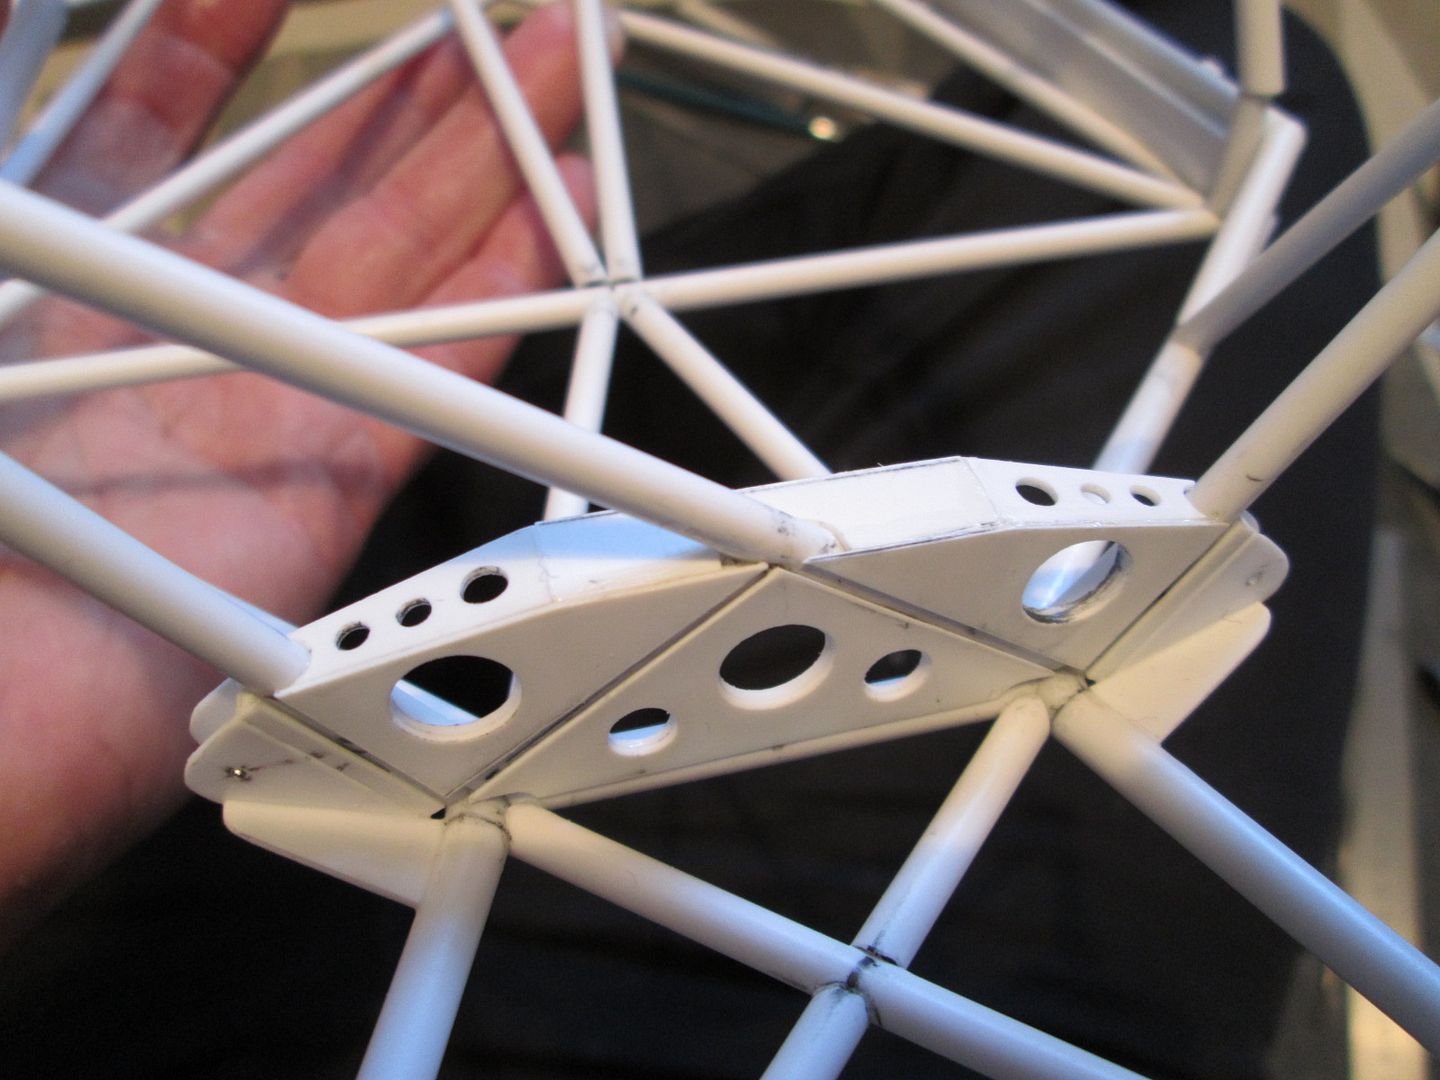
Finally, I've started adding plates to the back of the structure - this is not quite as simple as the front face, as I'm having to work with all the different angles:

So, this should be finished off during the next few days, and then I can add some greenstuff all over to fill in the gaps and give it some extra detailing. I've painted the inside of the structure during assembly, as it will be a pain to get in there afterwards - although once the model is finished, you won't see
any of this as it will be buried beneath the fuel tank...
That's it for tonight - all up to date. It's actually been quite refreshing to get back into some proper detail work, and the front of the chassis is suddenly looking a little more realistic. I'm going to have to start tackling the wheels soon, though...
Neil - thanks for the Sugru reference. It's not something I've tried myself, but it could have it's uses. As you say, might be worth getting some and giving it a go!
More next week,
SB