Next was the interior - and this is where I wanted to make some changes to the old kit.
Interior tub was cleaned and ejector holes filled:
 IMG_0911
 by
Italian Horses, on Flickr
A quick coat of primer to check:
 IMG_0913
 by
Italian Horses, on Flickr
Back to sanding!*
Kit sets had no backs, so they were filled with some putty and sanded smooth.
 IMG_0909
 by
Italian Horses, on Flickr
The rest of the seats was cleaned up:
 IMG_0910
 by
Italian Horses, on Flickr
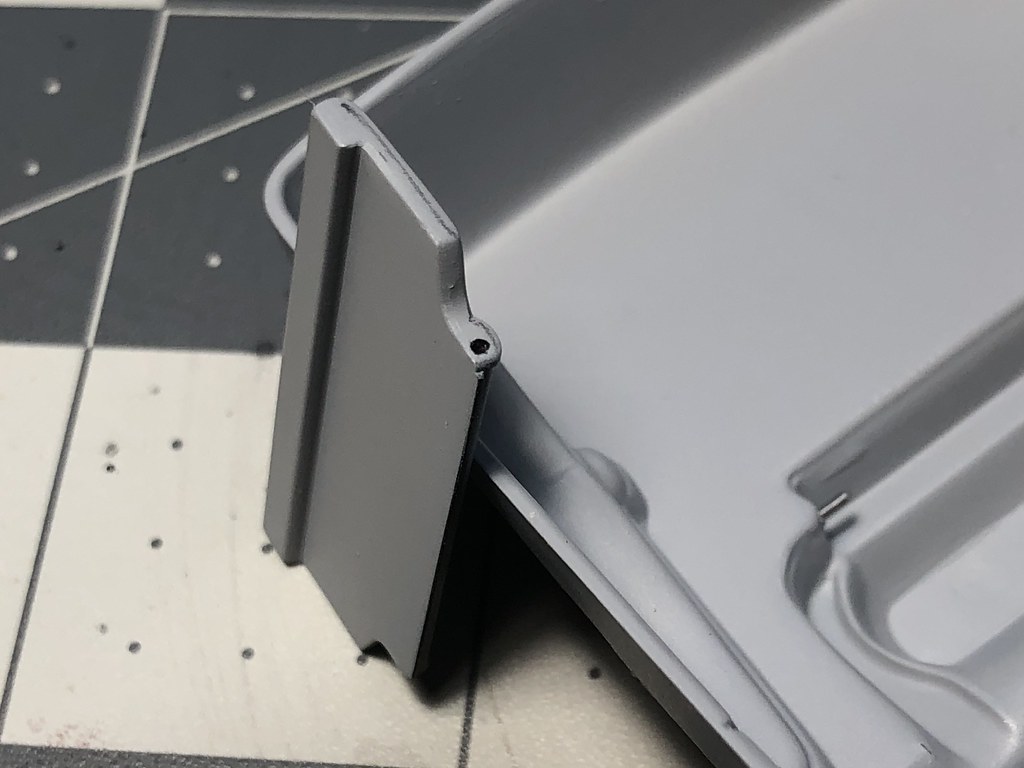
The rear jump seat folds down in the real car to make the flat cargo area, so I wanted to replicate the on the model. I drilled holes in the bottom of the interior tub, and inserted small pins to serve as pivots:
 IMG_0922
 by
Italian Horses, on Flickr
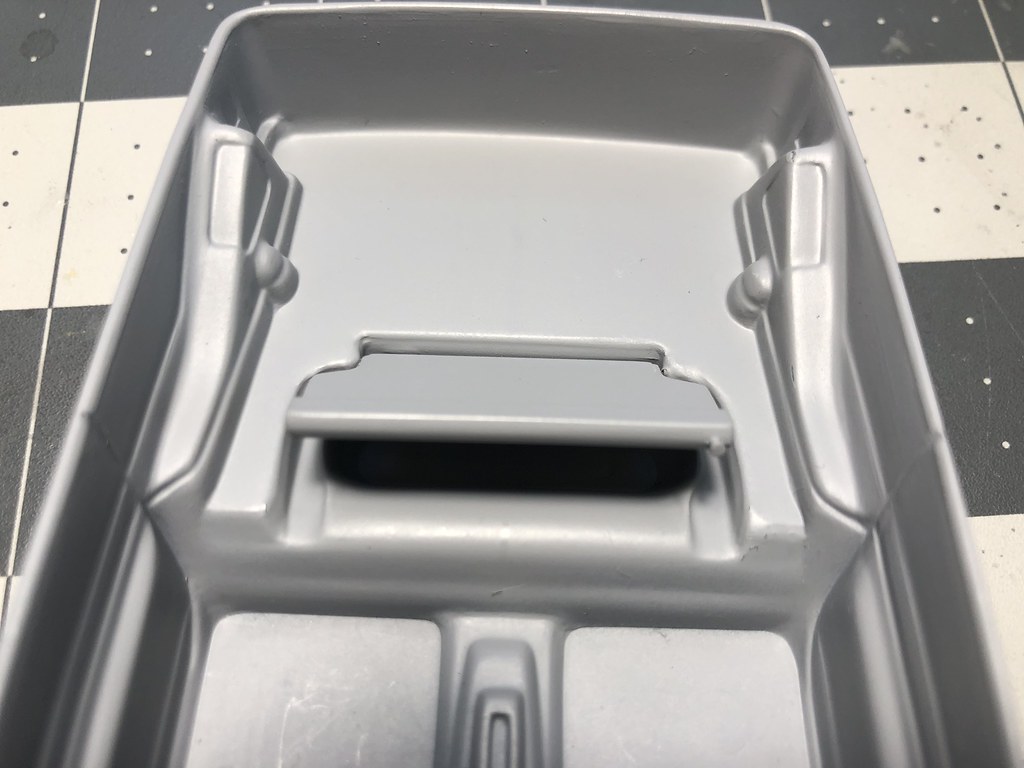
I also drilled holes in the seat:
 IMG_0921
 by
Italian Horses, on Flickr
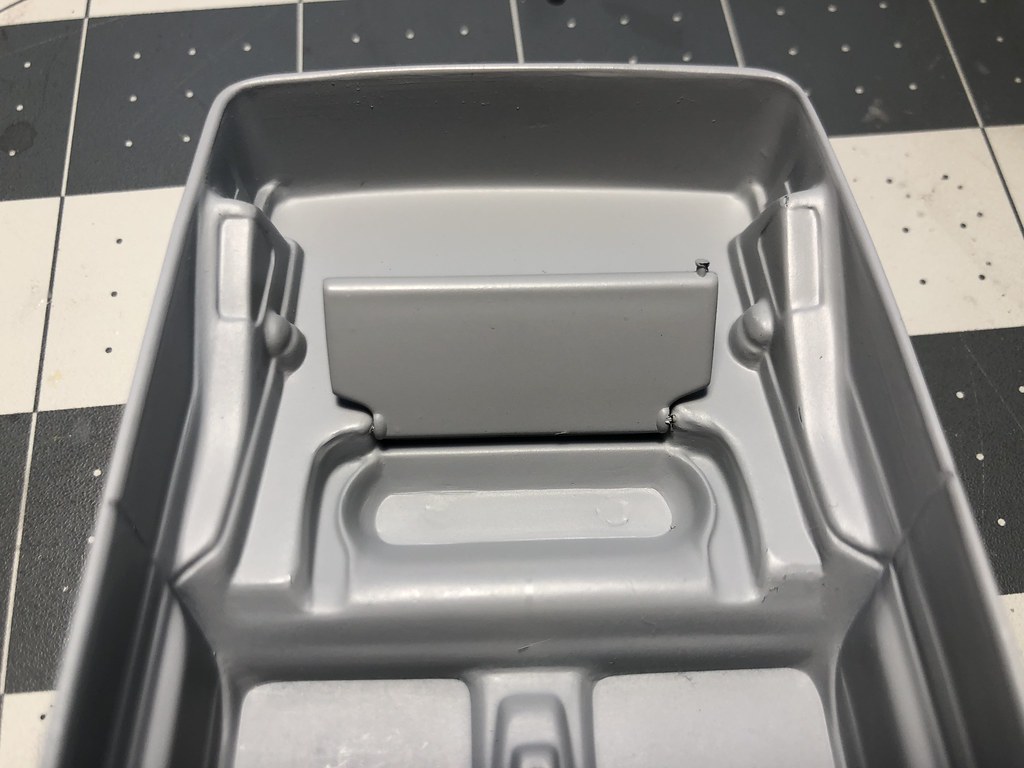
After painting, I would just mount the seat, slide in the pins, and secure them with the glue.
 IMG_0920
 by
Italian Horses, on Flickr
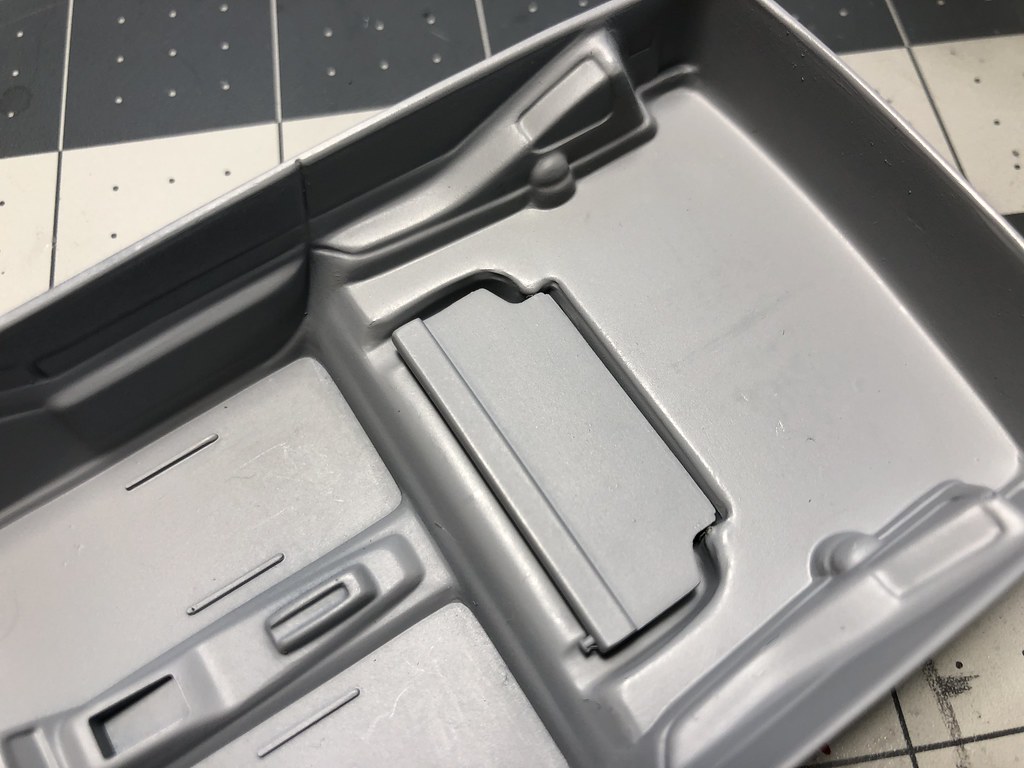
But the seat worked fine and stayed in the position:
 IMG_0917
 by
Italian Horses, on Flickr
 IMG_0916
 by
Italian Horses, on Flickr
 IMG_0919
 by
Italian Horses, on Flickr
Rear cargo area is really open and can be easily seen through the rear window, so I wanted some nice carpet there. But first I needed to make a template:
 IMG_0915
 by
Italian Horses, on Flickr
I had this nice blue MFH self-adhesive carpet that I decided to use for the job:
 IMG_0923
 by
Italian Horses, on Flickr
Using my template, I cut the carpet:
 IMG_0924
 by
Italian Horses, on Flickr
Then everything was painted in a custom mix of blues of XF18:XF8 in 3:1 proportion.
 Untitled
 by
Italian Horses, on Flickr
 IMG_0926
 by
Italian Horses, on Flickr
Made templates for the seats, and cut the decals out. The tiny sheet I used was meant to do nails, so it was barely enough!
 IMG_0929
 by
Italian Horses, on Flickr
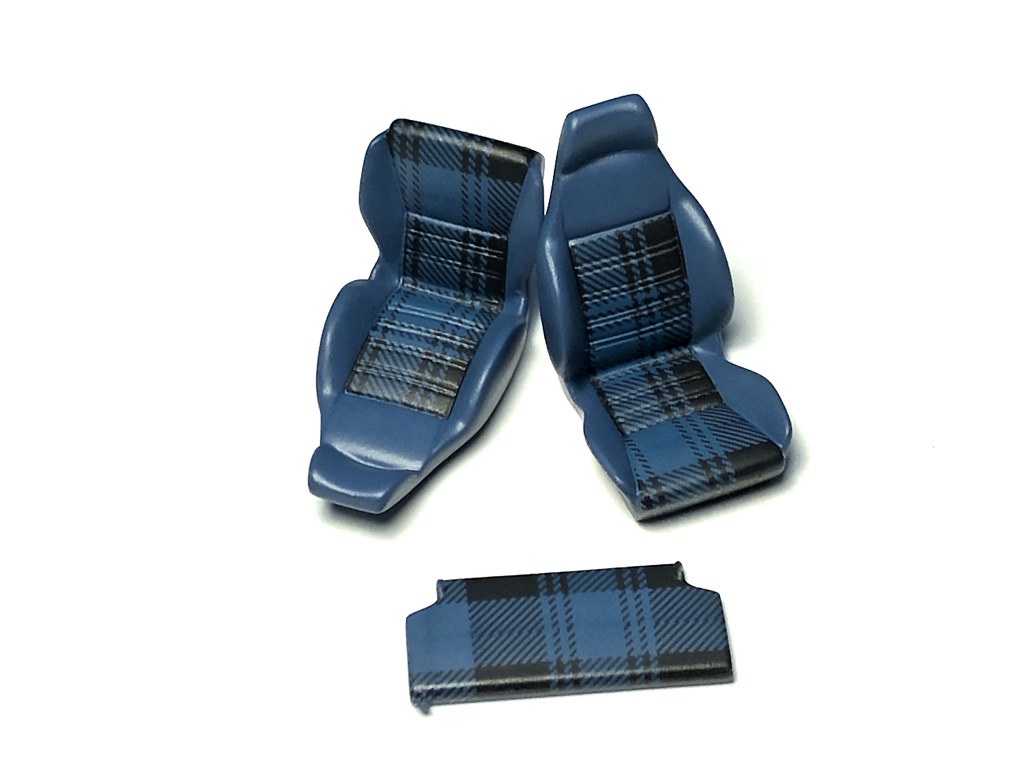
Decals applied to the seats:
 IMG_0936
 by
Italian Horses, on Flickr
With lots of Microsol they conformed fine, but were too shiny. Gave it a good coat of flat clear to dull it up a bit:
 IMG_0955
 by
Italian Horses, on Flickr
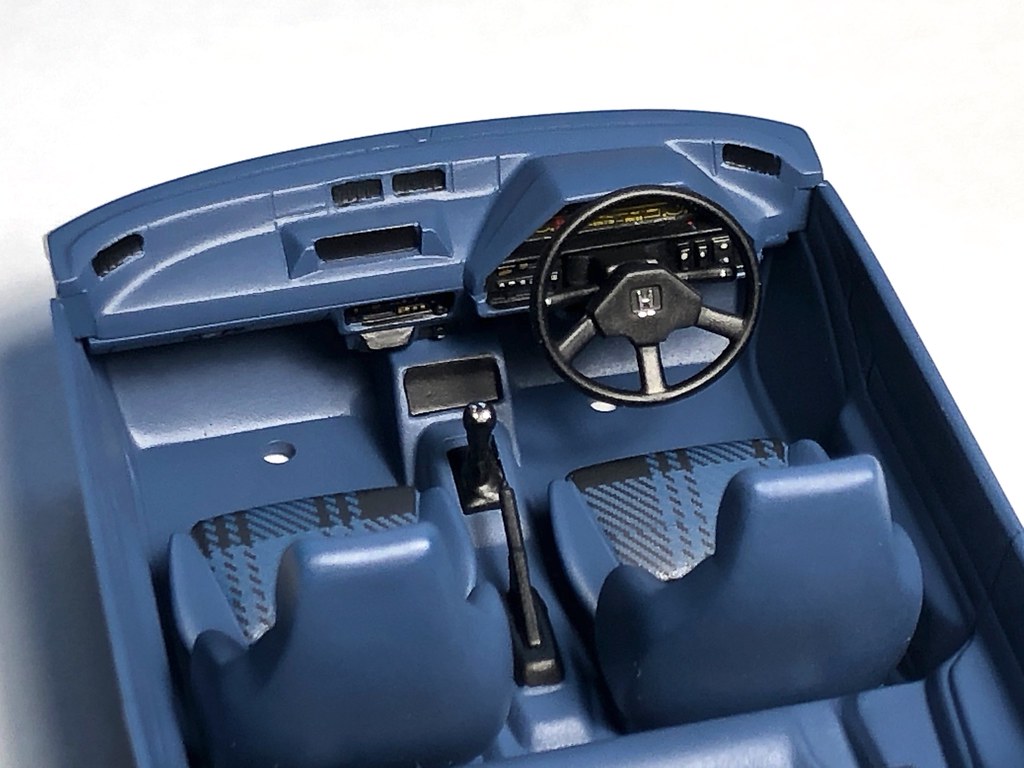
Then I detail painted the dashboard and all other small interior pieces:
 IMG_0959
 by
Italian Horses, on Flickr
 IMG_0958
 by
Italian Horses, on Flickr
 IMG_0960
 by
Italian Horses, on Flickr
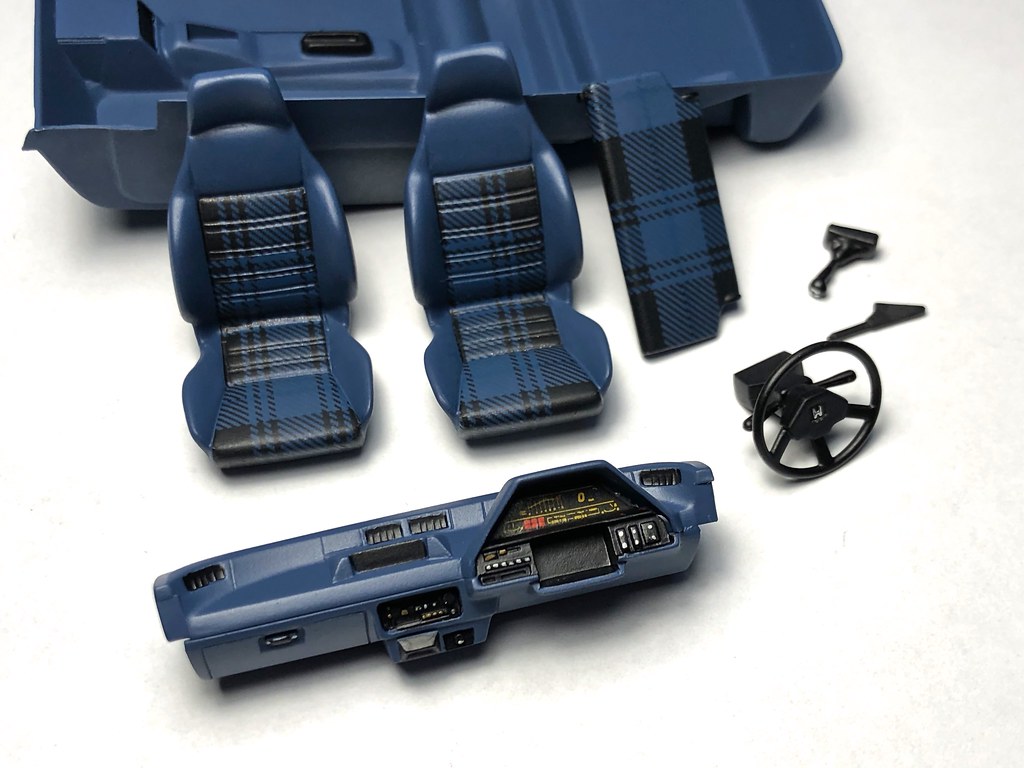
And mocked-up the interior:
 IMG_0966
 by
Italian Horses, on Flickr
 IMG_0967
 by
Italian Horses, on Flickr
 IMG_0964
 by
Italian Horses, on Flickr
 IMG_0961
 by
Italian Horses, on Flickr
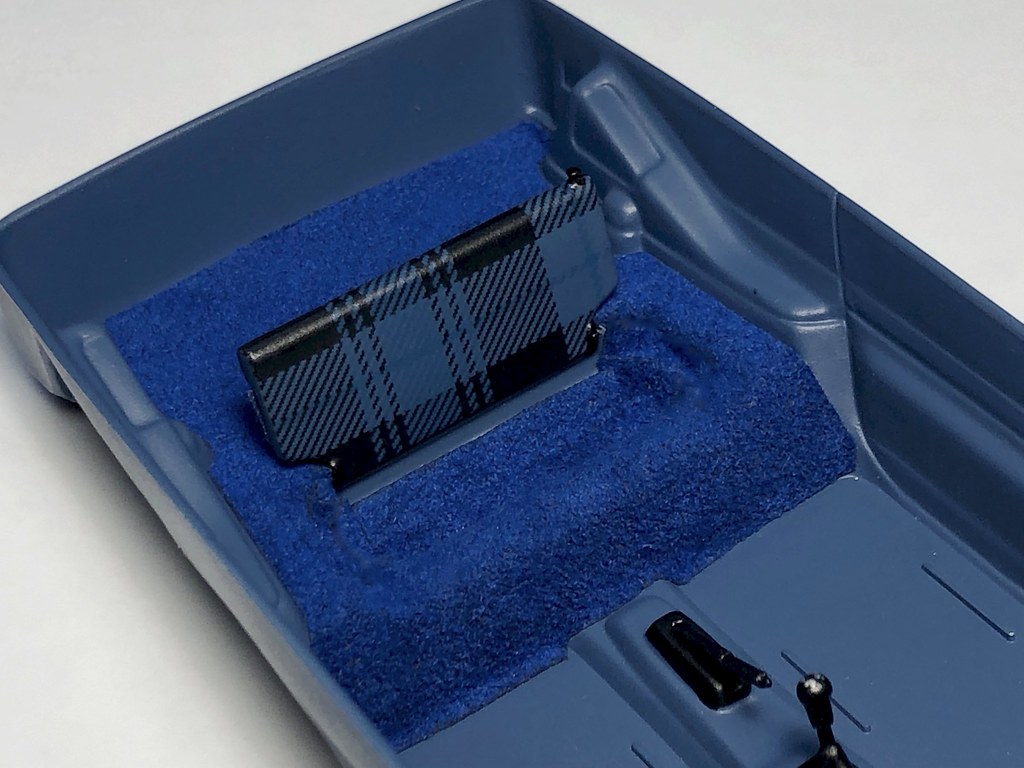
Now it was time to apply the carpet:
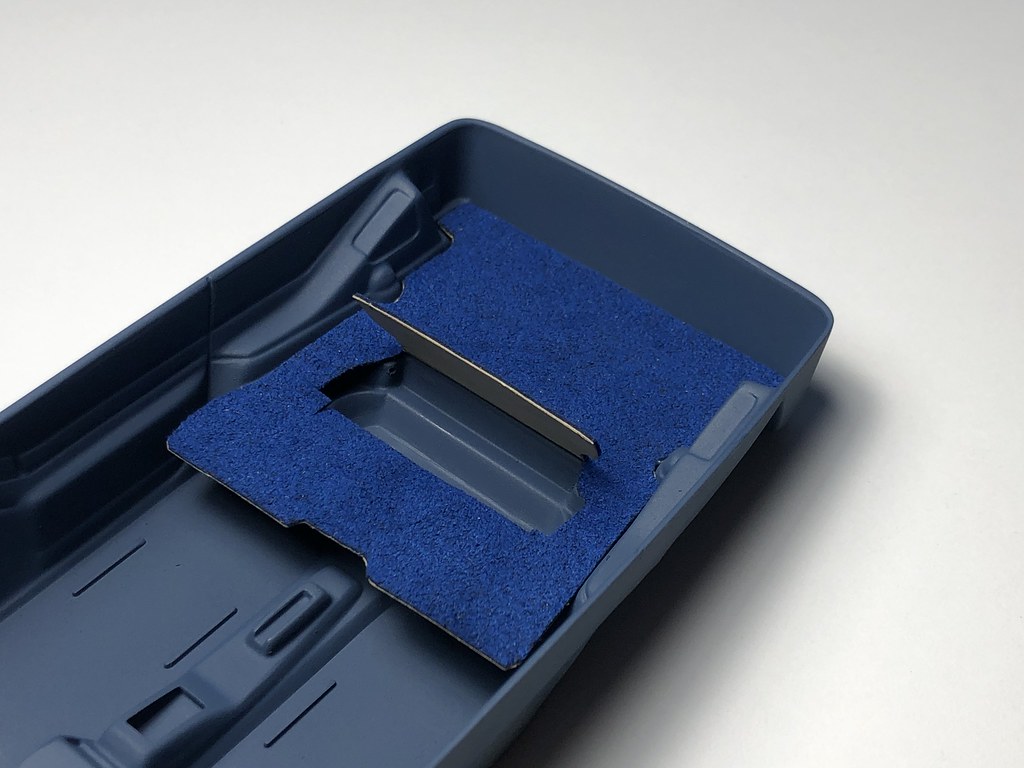 IMG_0925
 by
Italian Horses, on Flickr
 IMG_0969
 by
Italian Horses, on Flickr
 IMG_0973
 by
Italian Horses, on Flickr
Unfortunately, my template was not precise, and it wouldn't let the seat fully fold when the back piece of the carpet was glued to the seat back. I have re-done it later, but didn't take the pix!
 IMG_0975
 by
Italian Horses, on Flickr
The rest of the interior was assembled together, also made some carpets for the front to cover the holes in the interior tub:
 IMG_0986
 by
Italian Horses, on Flickr
 IMG_0981
 by
Italian Horses, on Flickr
 IMG_0980
 by
Italian Horses, on Flickr