Inicio este nuevo proyecto en parte para desestresarme un poco del Lancia Delta, ya que al menos yo, necesito terminar piezas, pintarlas y terminar maquetas. El Lancia me está llevando mucho tiempo para pensar en las soluciones de las bisagras y aunque me gusta, hay que terminar algo!
Im starting this new project partly to de-stress a bit from the Lancia Delta, as I, at least, need to finish parts, paint them and finish models. The Lancia is taking me a lot of time to think about the solutions for the hinges and although I like it, something has to be finished!
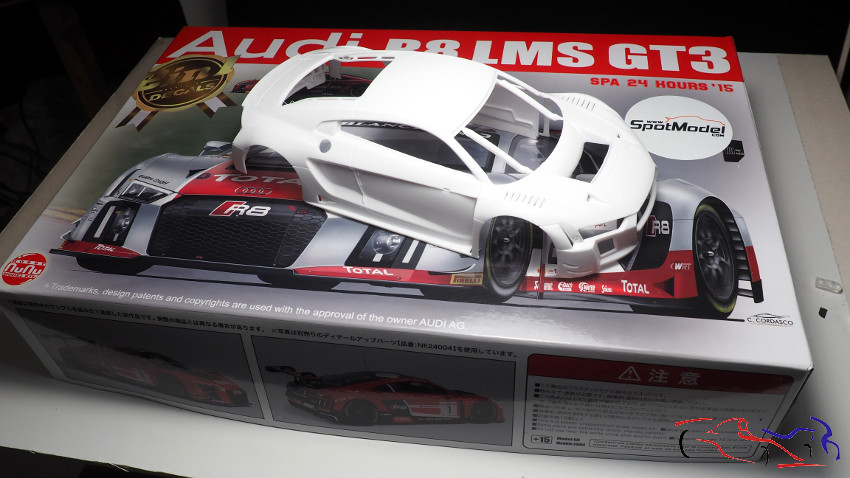
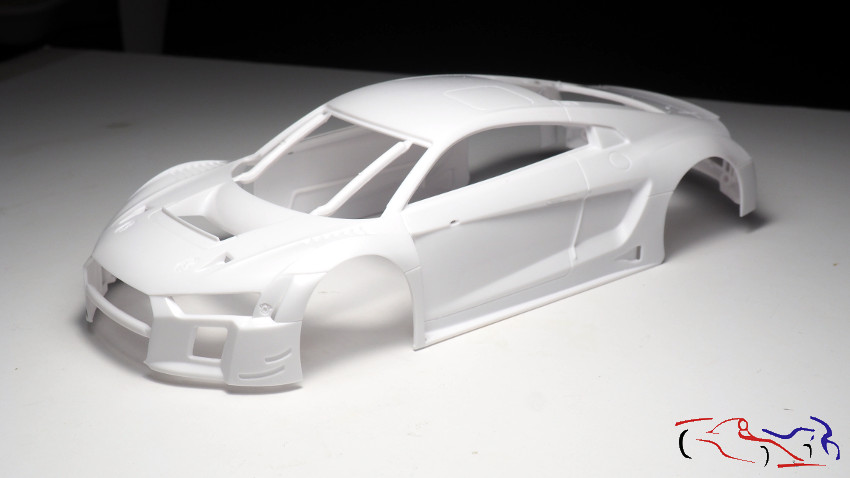
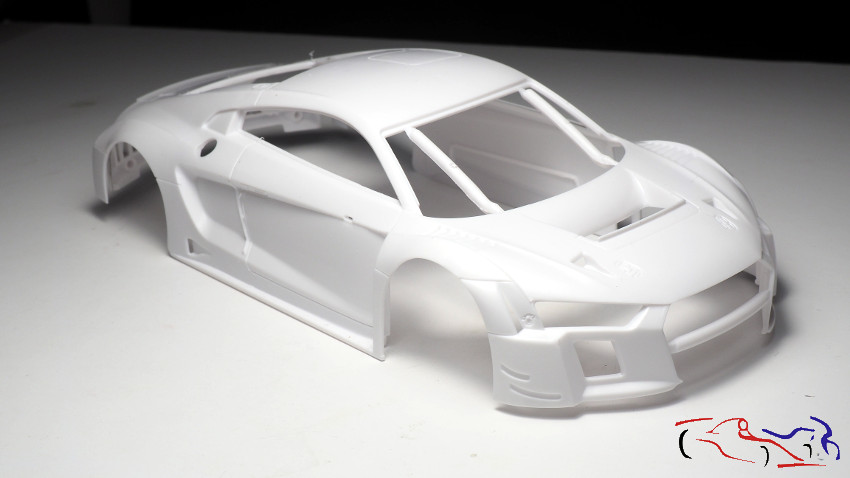
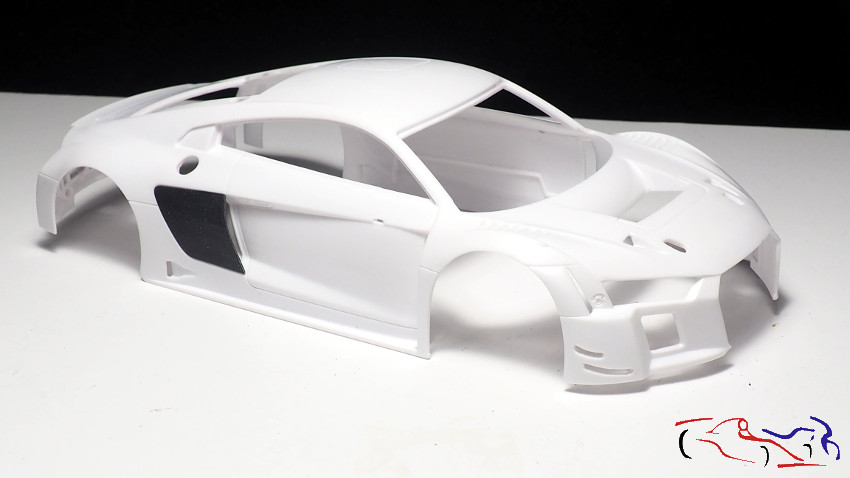
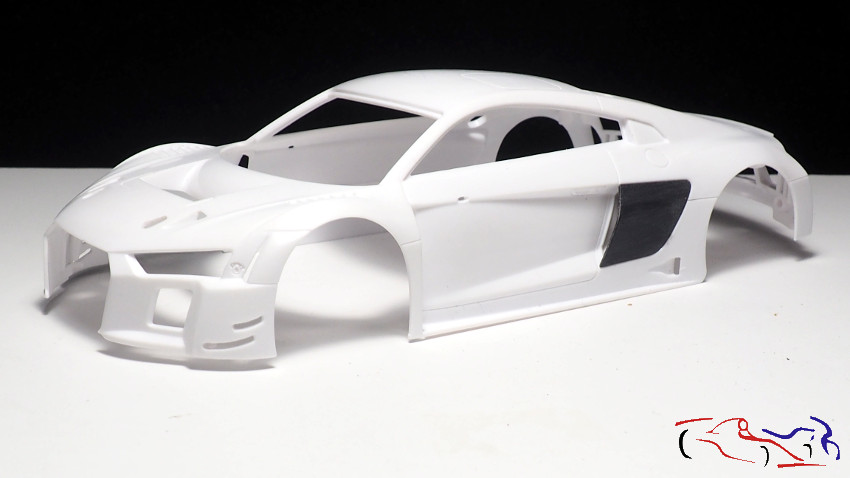
El kit es el Audi R8 LMS GT3 que ha realizado Nunu a escala 1/24, y del cual muestro la carrocería sobre la caja:
The kit is the Audi R8 LMS GT3 that Nunu has made in 1/24 scale, and of which I show the bodywork on the box:
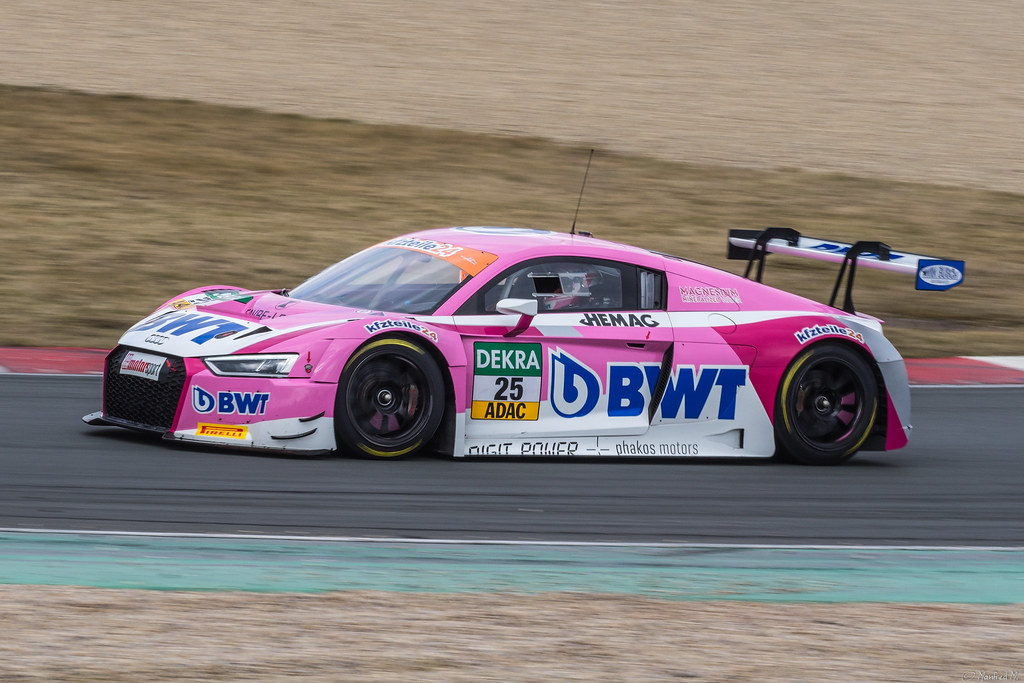
Y la decoración elegida es la de BWT, muy vistosa y atractiva!!
And the chosen livery is the BWT, very attractive and eye-catching!
A su vez, me gustaría que esta maqueta no me lleve mucho tiempo por lo que no voy a abrir ninguna puerta ni nada. Pero no lo voy a dejar solo el coche, por tanto ¿qué le voy a incluir? Las calcas de BWT de LB Productions, los fotograbados de Scalelab 24, y las ruedas de KMP:
At the same time, I dont want this model to take a lot of time, so Im not going to open any doors or anything. But Im not going to leave the car alone, so what am I going to enhance it? The BWT decals from LB Productions, the photoetched parts from Scalelab 24, and the wheels from KMP:

Decir que Scalelab 24 me mandó sin coste (un buen punto a su favor) una actualización de los fotograbados con algunas piezas mejoradas:
Just to say that Scalelab 24 sent me free of charge (a good point in their favour) an update of the photoetched parts with some improved ones:
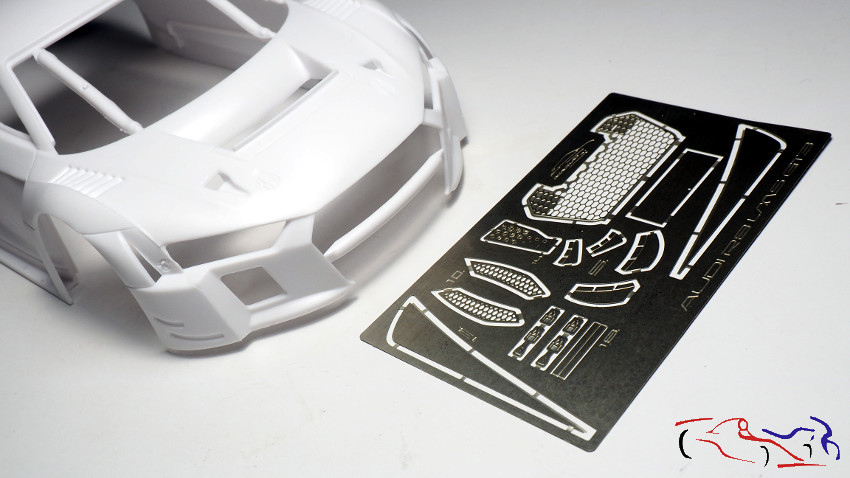
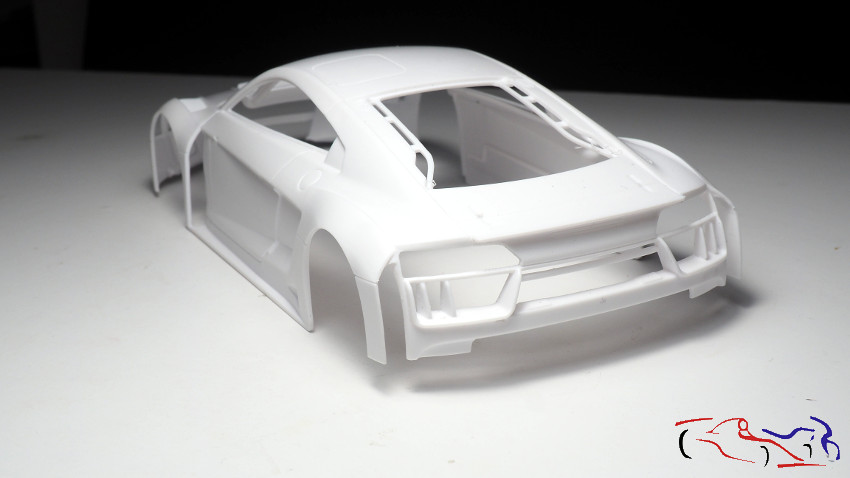
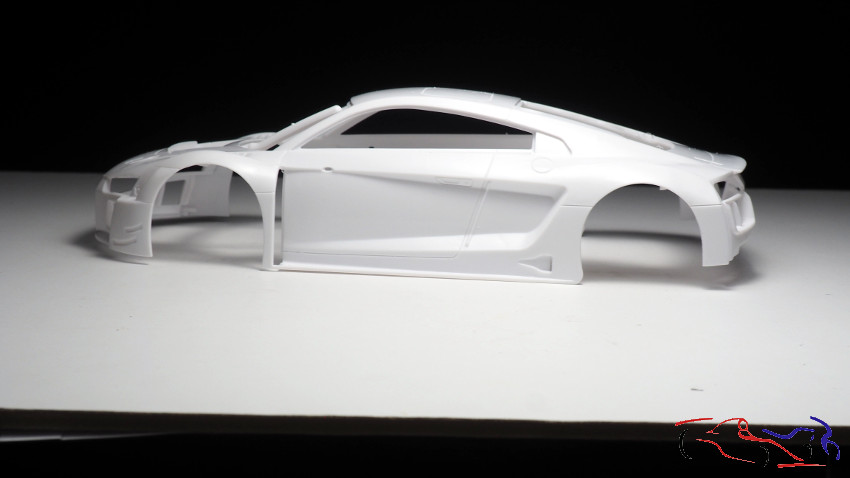
Y empezamos con el kit. La carrocería parece tener buenas formas y aquí os la muestro. Tiene pocas rebabas o lineas de molde, y el plástico no es malo. Otra cosa son las piezas de plástico negro, que no me gustan nada:
And we start with the kit. The body seems to be in good shape and here I show it to you. It has few burrs or mould lines, and the plastic is not bad. Another thing is the black plastic parts, which I dont like at all:
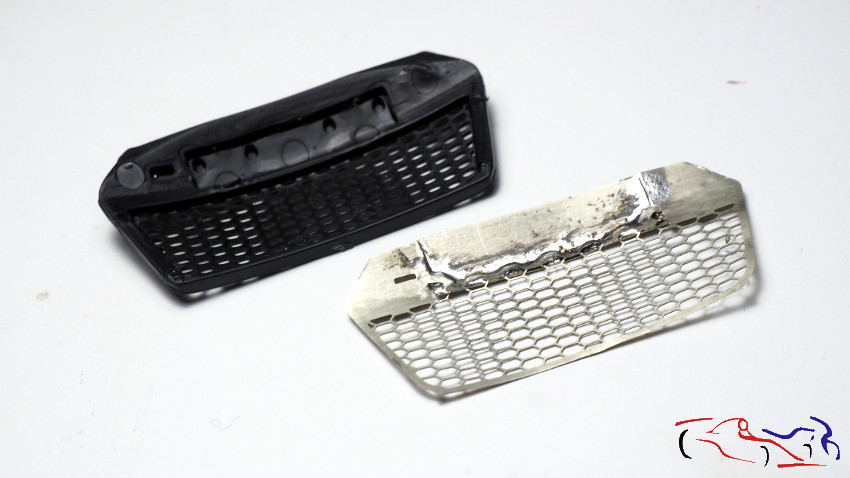
Lo primero que hago es adaptar los dos fotograbados de la rejilla delantera, a la pieza de plástico original. Pongo el fotograbado encima y con los dedos lo voy dando la misma forma que la original. Después le pongo la chapa superior del centro y los fijo por la parte exterior con cinta de enmascarar. Este proceso lo vi en un video de Youtube de Scaleauto shop, que hizo el mismo Audi con el mismo TK de Scalelab24:
The first thing I do is to adapt the two photoetched parts of the front grille to the original plastic piece. I put the photoetched parts on top and I give it the same shape as the original one pressing with my fingers. Then I put the top plate in the middle and fix them on the outside with masking tape. I saw this process in a Youtube video from Scaleauto shop, which made the same Audi with the same TK from Scalelab24:
A continuación, le doy la vuelta y lo sueldo con estaño, en la primera foto, siendo el resultado la segunda foto:
Then, I turn it upside down and I solder it with tin, ( in the first photo), being the result in the second photo:
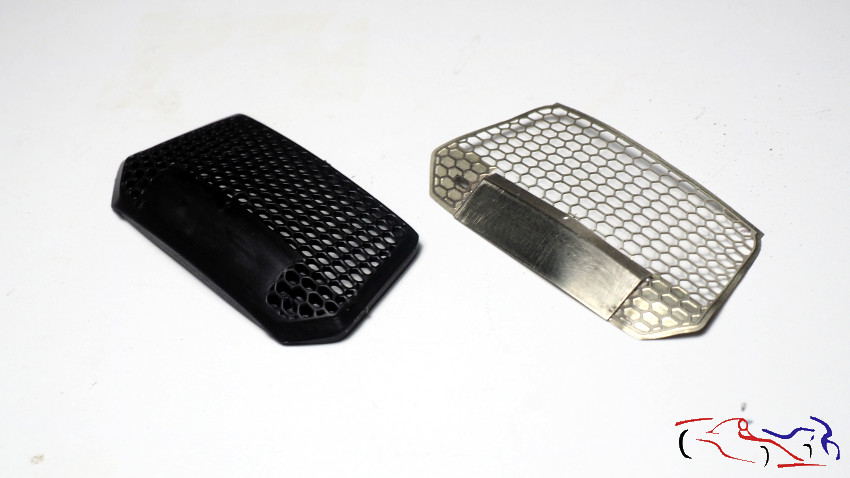
Siendo éste el resultado!!
This is the result!:
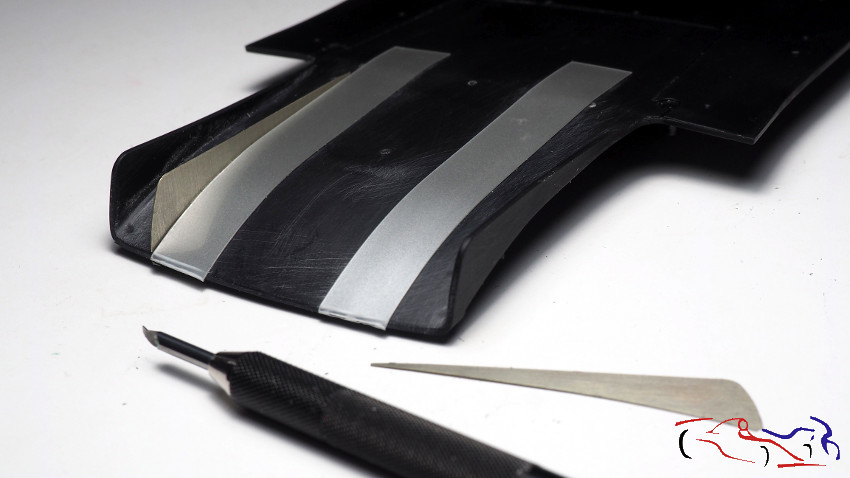
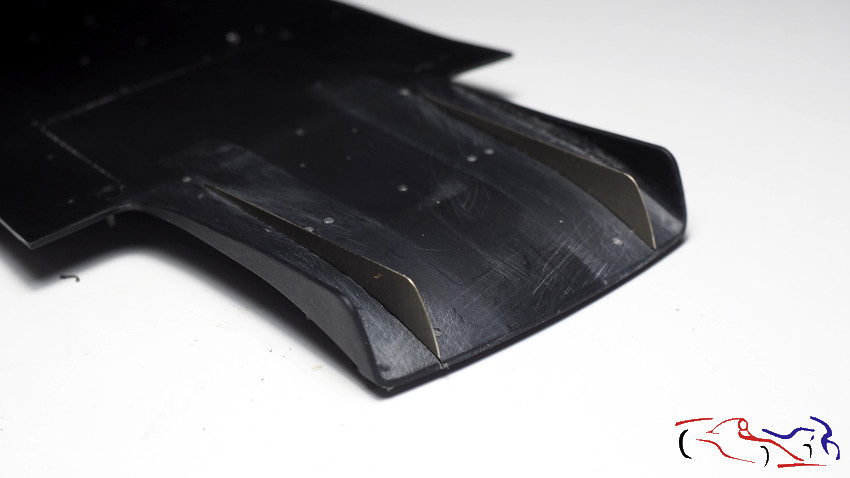
Pasamos a la parte trasera del chasis, donde tenemos el difusor con dos 4 planos verticales: dos laterales y dos centrales, que voy a remplazar por dos fotograbados. Para ello, los elimino, y haré una linea en el plástico donde insertaré los fotograbados. Para hacer esa linea, coloco a modo de de guias, unas Dymo de las antiguas (segunda foto), y por las que paso un perfilador, haciendo la linea honda para colocar el fotograbado. Una vez hechas las dos, inserto los fotograbados y los pego con ciano:
Lets move on to the rear part of the chassis, where we have the diffuser with two 4 vertical planes: two lateral and two central ones, which Im going to replace with two photoetched parts. To do this, I remove them, and make a line in the plastic where I will insert the photoetched parts. To make this line, I place some old Dymo as a guides (second photo), through which I pass a profiler, making the deep line to place the photoengraving. Once the two lines are made, I insert the photoengravings and glue them with cyano:

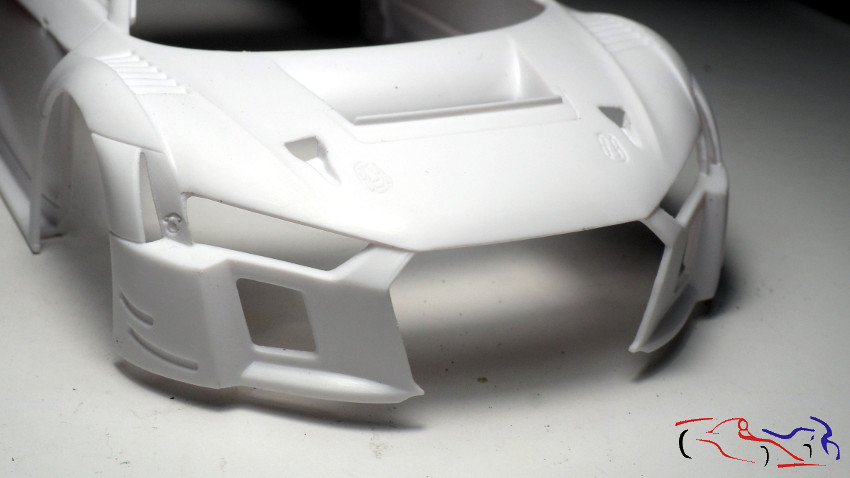
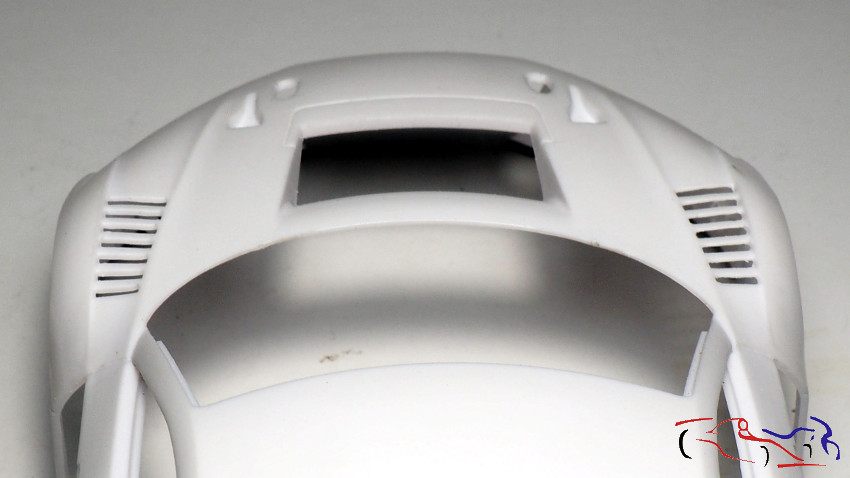
Volvemos a la carrocería. En este paso, afilo las tomas de aire NACA tanto del frontal como de los laterales, para que el perfile de la carrocería no sea tan ancho. Aquí las vemos una vez afiladas.
Back to the bodywork. In this step, I sharpen the NACA air intakes on the front and sides, so that the bodywork profile is not so wide. Here you can see them once they have been sharpened.
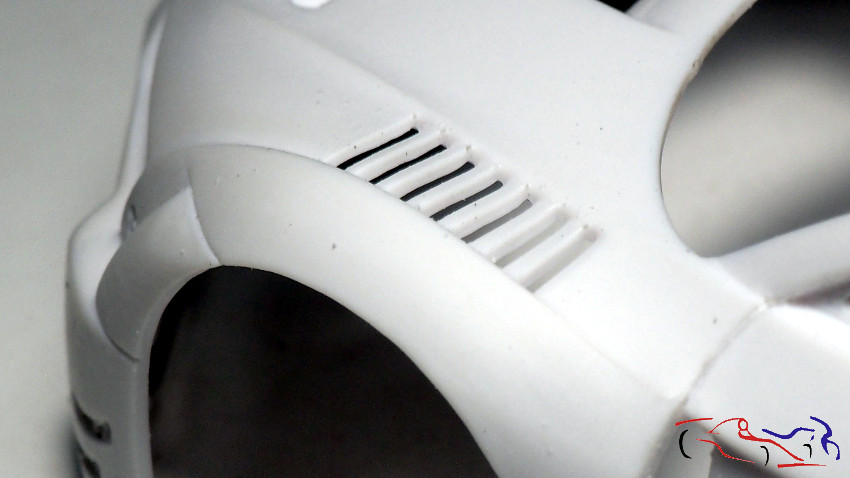
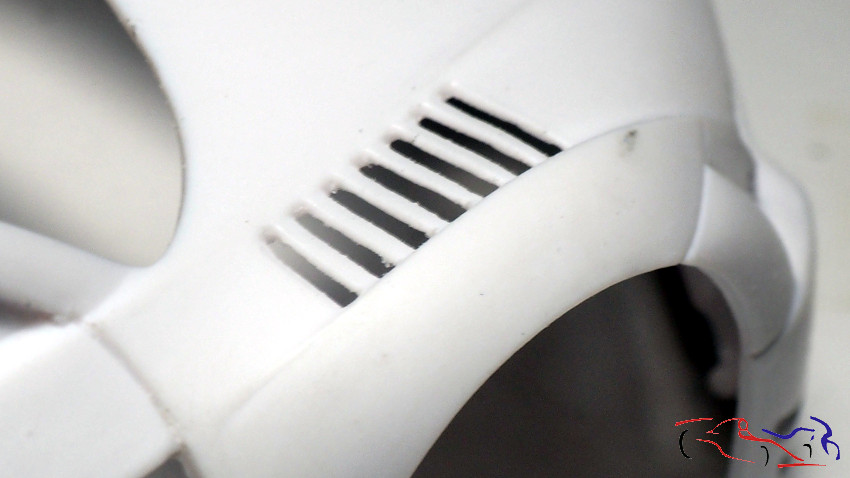
Seguimos con la carrocería, afinando ahora las salidas de aire que hay sobre las ruedas delanteras. En la primera foto, vemos la diferencia entre las originales del aldo izquierdo, y las modificadas del lado derecho. La segunda foto nos muestra las rejilas originales y la tercera foto, las rejillas modificadas, a falta de afinarlas:
We continue with the bodywork, tuning now the air outlets on the front wheels. In the first photo, we can see the difference between the original ones on the left side, and the modified ones on the right side. The second photo shows the original grilles and the third photo shows the modified grilles, still to be tuned:
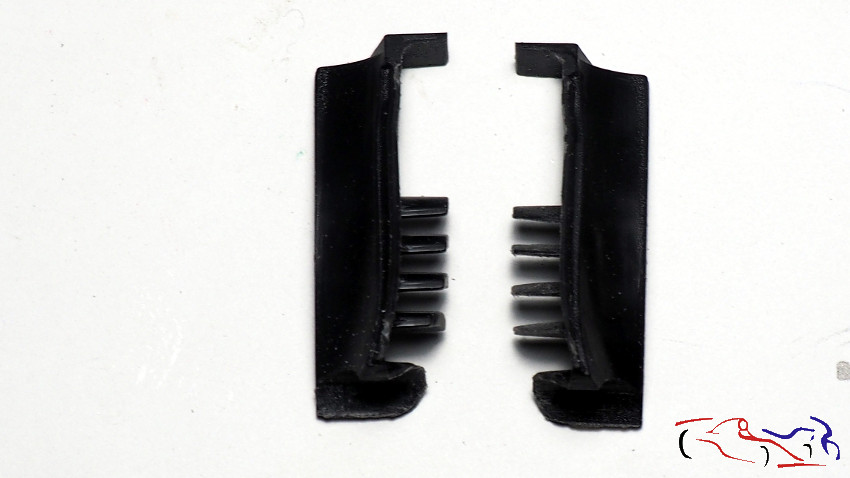
Más modificaciones. Ahora le toca el turno a la pieza negra posterior, que contiene los deflectores de las salidas de aire traseras. Como veis, la izquierda ya está lijada y los deflectores son más finos, comparando con los de la derecha, que aun no los he modificado.
More modifications. Now its the turn of the rear black piece, which contains the rear air outlet deflectors. As you can see, the left one is already sanded and the deflectors are thinner, compared to the ones on the right, which I havent modified yet.
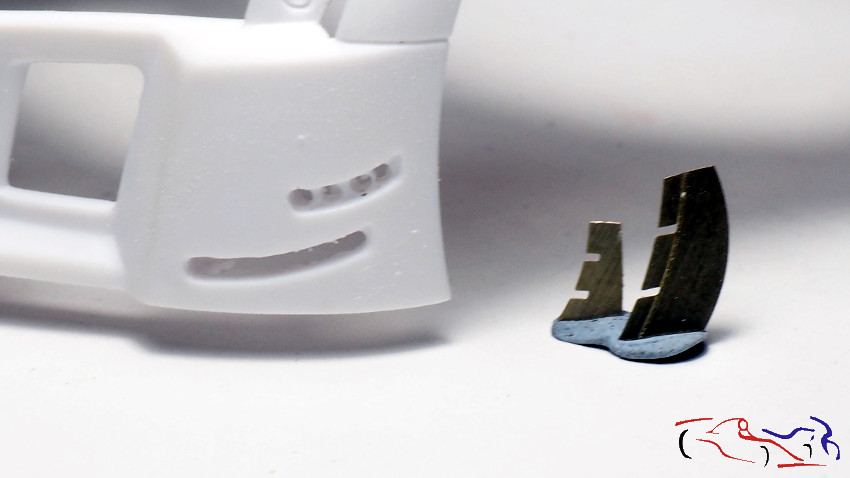
Igual ocurre con las piezas que hay detrás de las ruedas delanteras. En este caso, de las dos piezas d ela fotografia siguiente, la pieza derecha ya está modificada. En ambos casos, he usado limas y lijas porque he pensado que sustituir los deflectores horizontales por los fotograbados era muy complicado y laborioso, y puesto que no quiero complicarme mucho. Respecto al plástico negro de Nunu, no me gusta porque no es fino y es dificil de trabajar, dejando muchos restos al lijar, y que hay que afinar las piezas mucho. Además, las piezas tienen muchas rebabas!!,
The same applies to the parts behind the front wheels. In this case, the two pieces of the following picture, the right piece is already modified. In both cases, I have used files and sandpaper because I thought that replacing the horizontal deflectors with the photoetched ones was very complicated and laborious, and because I dont want to complicate things too much. Regarding the black plastic from Nunu, I dont like it because its not thin and its difficult to work with, leaving a lot of remains when sanding, and the pieces have to be very fine. Besides, the pieces have a lot of burrs!
A continuación, vamos a continuar con la carrocería. Como hay muchos fotograbados que voy a utilizar, es necesario preparar donde se van a colocar para que se adapten mejor. Empezamos por las fijaciones del capó y del motor. Como esas fijaciones van al nivel de la carrocería, hago sus correspondientes agujeros, para rellenarlos posteriormente con masilla epoxy. Este proceso es el mismo que mencioné anteriomente, de Scaleauto shop.
Next, we are going to continue with the bodywork. As there are a lot of photo-etched parts to be used, it is necessary to prepare where they will be placed so that they fit better. We start with the bonnet and engine mountings. As these fixings go at the level of the bodywork, I make their corresponding holes, to fill them later with epoxy putty. This process is the same named above from Scaleauto shop.

De la misma manera, taladro los huecos de las derivas laterales del faldón delantero. Más adelante, pondré masilla epoxy donde insertaré los fotograbados, que después retiraré para dejar el hueco. En este hueco será donde los coloque una vez terminada la carrocería y las derivas. Este mismo proceso lo usaré en las fijaciones de los retrovisores y del alerón trasero.
In the same way, I drill the holes in the side drifts of the front apron. Later, I will put epoxy putty where I will insert the photoetched parts, which I will later remove to leave the hole. This hole will be where I will place them once the bodywork and the drifts are finished. I will use the same process for the rear view mirrors and the rear wing.
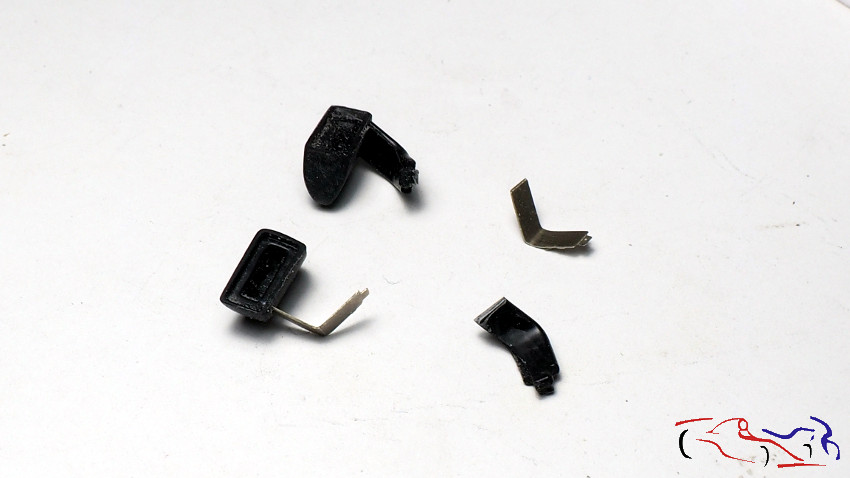
Respecto a los retorvisores, el TK de Scalelab24 trae las fijaciones para sustituir las del kit. Para ello, cortamos la base del retrovisor, le hacemos una guia con el panelador donde insertaremos el fotograbado. En la imagen, vemos un retrovisor origunal en la parte de arriba, y uno modificado en la parte izquierda. A la derecha tenemos el fotograbado y la base eliminada del retrovisor original.
Regarding the rear-view mirrors, the Scalelab24 TK comes with the fixings to replace those of the kit. To do this, we cut the base of the mirror, we make a guide with the panel where we will insert the photoetched parts. In the image, we see an original mirror on the top, and a modified one on the left. On the right we have the photoetched parts and the base removed from the original mirror.
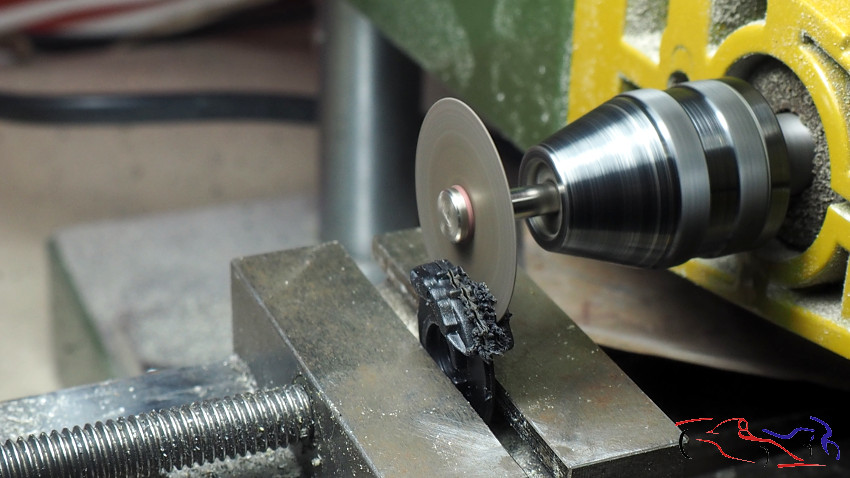
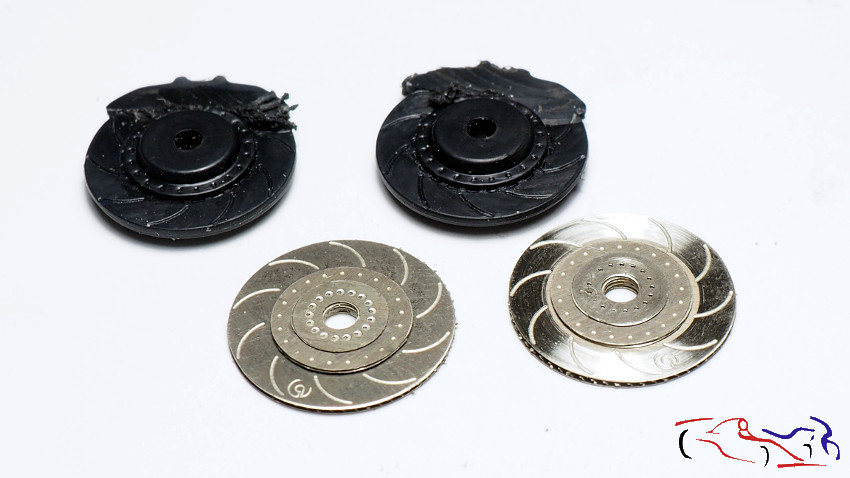
Pasamos a los frenos. El TK de Scalelab24 trae los discos, pero no las pinzas. Por tanto, tengo que usar las del kit. Para ello, necesito cortarlas de las piezas originales, separando las dos mitades de cada disco. Uso el minitaladro con un disco de corte. En la foto de la derecha, vemos los lados laterales de las pinzas, ya separados de los discos.
We move on to the brakes. The Scalelab24 TK comes with the discs, but not the calipers. Therefore, I have to use the ones from the kit. To do this, I need to cut them from the original parts, separating the two halves of each disc. I use the mini drill with a cut-off wheel. In the picture on the right, we can see the lateral sides of the calipers, already separated from the discs.
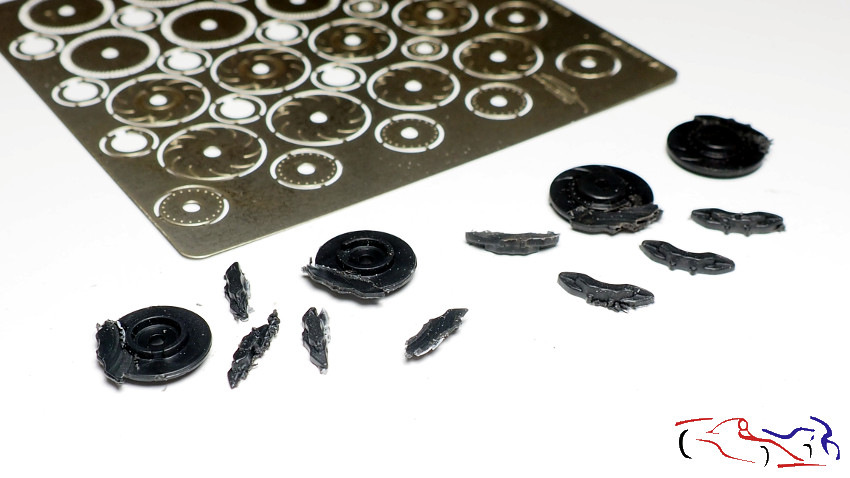
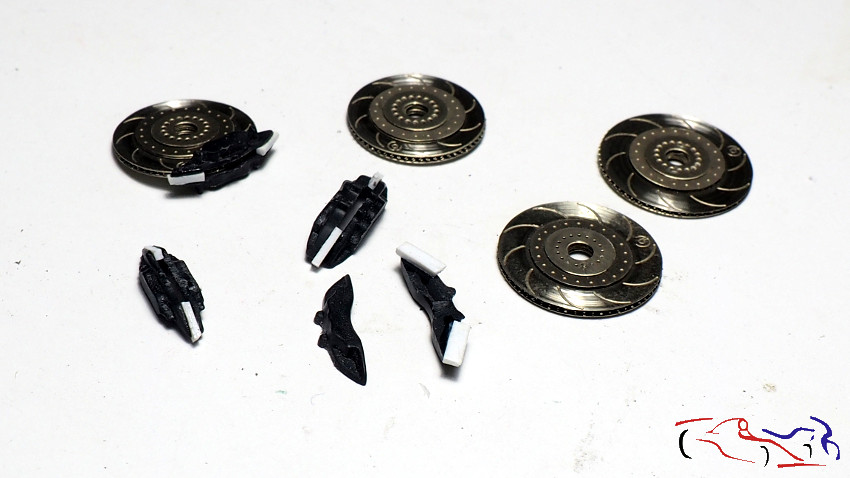
Una vez separados los laterales de los discos, hay que poner una pieza en los extremos que los separe para poder introducir los discos de fotograbado. Una vez pegadas las dos artes de los discos, limamos y lijamos para adaptarlos a las formas de las pinzas.
We move on to the brakes. The Scalelab24 TK comes with the discs, but not the calipers. Therefore, I have to use the ones from the kit. To do this, I need to cut them from the original parts, separating the two halves of each disc. I use the mini drill with a cut-off wheel. In the picture on the right, we can see the lateral sides of the calipers, already separated from the discs.
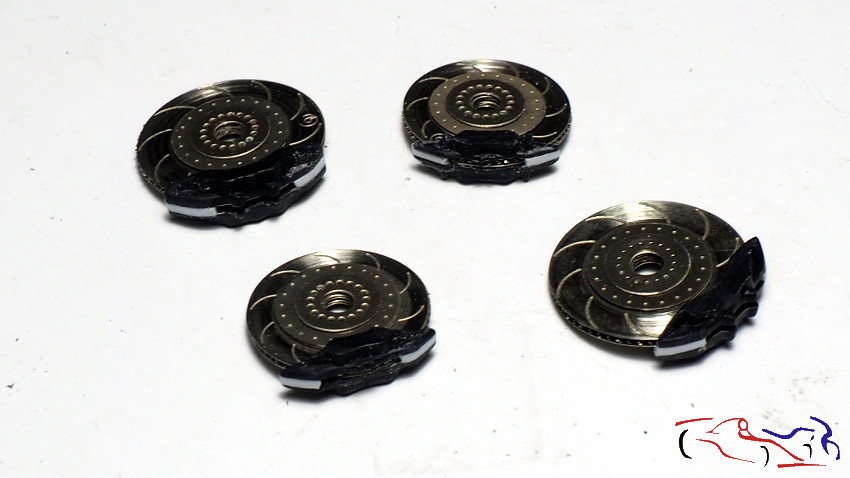
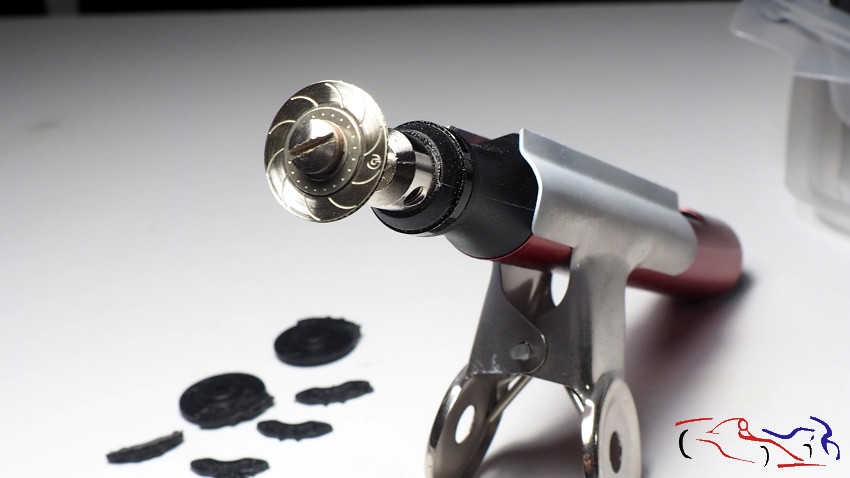
Y habéis visto los discos como brillan? Incluso tienen las marcas concéntricas de las zapatas del freno!! Pues eso lo he hecho poniendo el disco en el soporte de sierras en mi minitaladro nuevo de la marca Dspiae, y le he pasado una lija de grano 100. El resultado se ve en la segunda foto, comparándolo con un disco sin tratar.
And have you seen how shiny the discs are? They even have the concentric marks of the brake shoes on them! I did this by putting the disc on the saw stand on my new Dspiae mini-drill, and sanded it with 100 grit sandpaper. The result is shown in the second photo, compared to an untreated disc.
Más cosas: he montado también la jaula para ir imprimándola.
More things: I have also assembled the cage for priming..

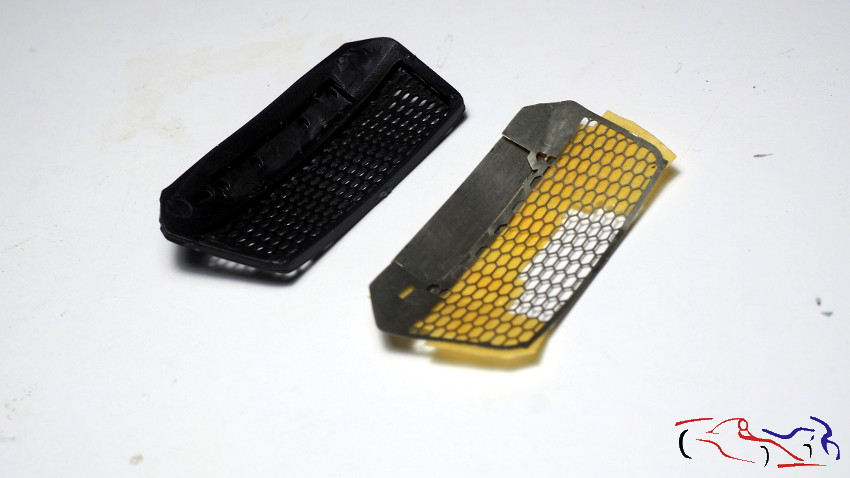
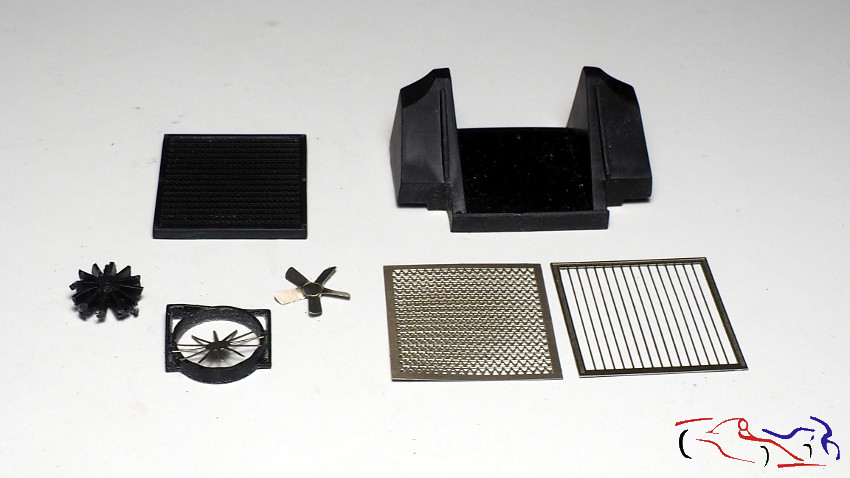
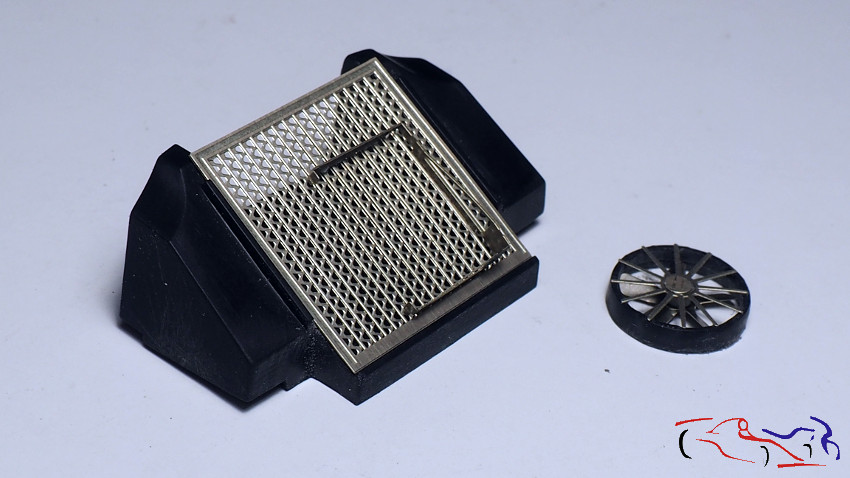
Pasamos al radiador delantero. Las piezas negras son las originales (base, radiador y ventilador) aunque ya he cortado el ventlador de su aro, para incluir el de fotograbado. Las dos rejillas sustituiran a la pieza negra de la izquierda. Y en la segunda foto, se ven las rejillas ya pegadas, y el ventilador aparte, ya que va pintado de negro, mientras la base va de aluminio.
Lets move on to the front radiator. The black pieces are the original ones (base, radiator and fan) although I have already cut off the radiator rim to include the photoetched one. The two grilles will replace the black piece on the left. And in the second photo, you can see the grilles already glued, and the fan apart, as it is painted black, while the base is made of aluminium.age for priming..
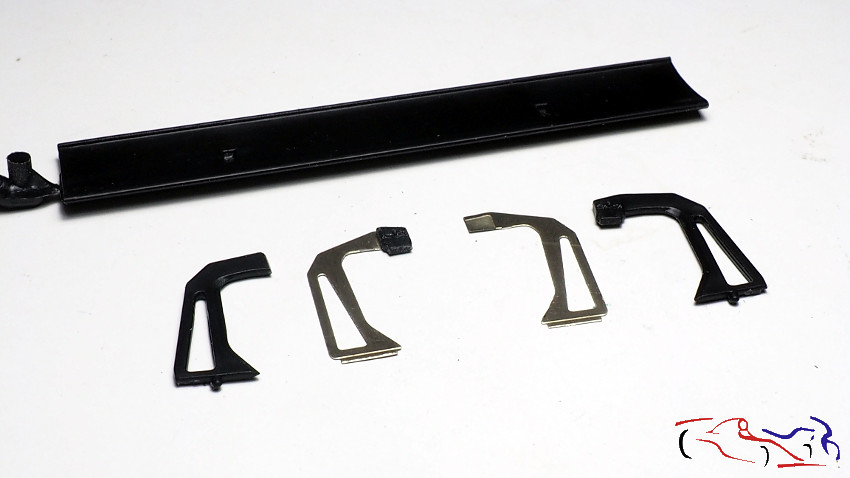
Otras piezas que sustituimos por fotograbado son los soportes del alerón, pero no lo sustituyen completamente, ya que la pieza que sujeta el aleron, hay que cortarla del original y pegarla en el fotograbado, tal y como muestro en la foto. De izquierda a derecha: soporte original sin la pieza recortada, fotograbado con la pieza pegada, fotograbado original y pieza original del kit.
Other parts that we replaced with photoetched parts are the aileron supports, but they do not replace it completely, as the piece that holds the aileron has to be cut from the original and glued on the photoetched part, as I show in the photo. From left to right: original support without the cut piece, photoetched parts with the glued piece, original photoetched parts and original part from the kit.
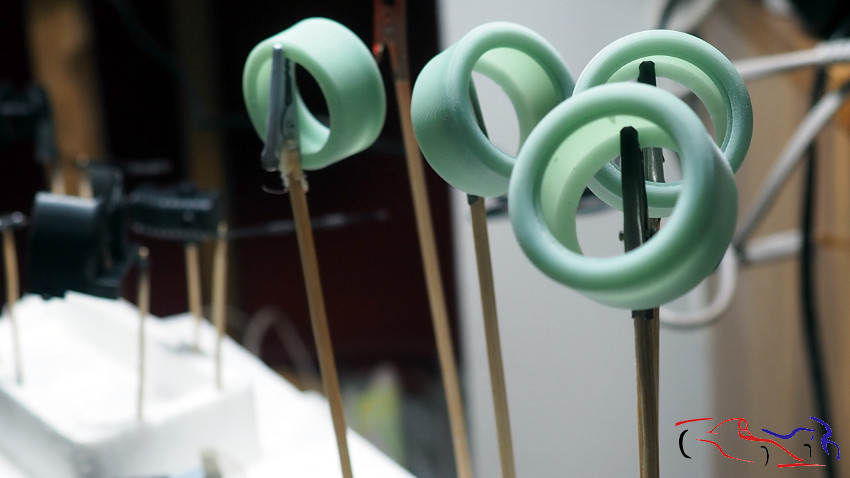
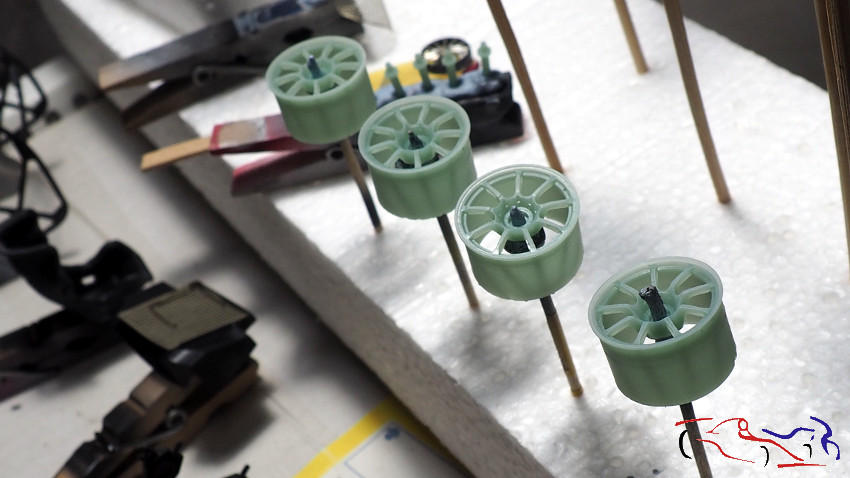
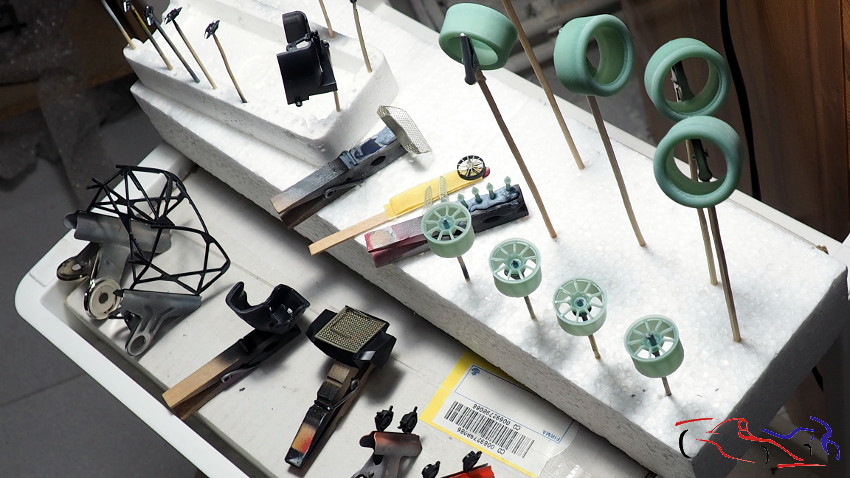
Y vamos colocabdo piezas para imprimar y pintar. Destacar las ruedas de KMP:
And we are placing parts for priming and painting. The KMP wheels stand out:
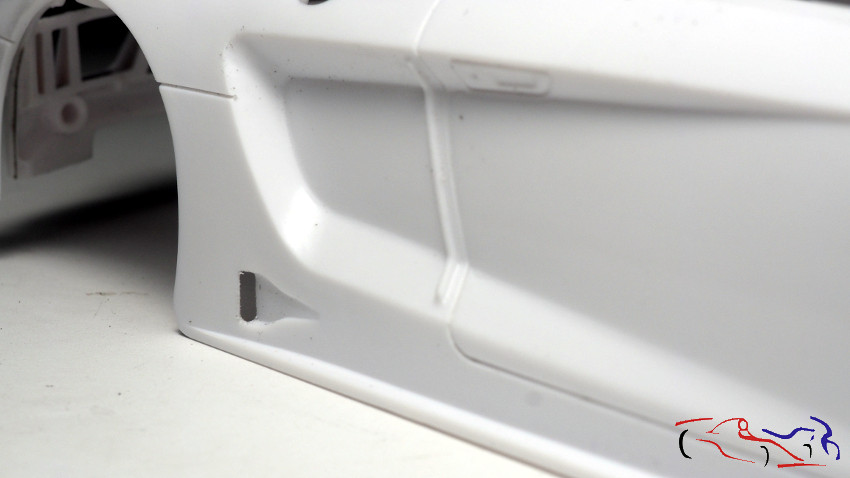
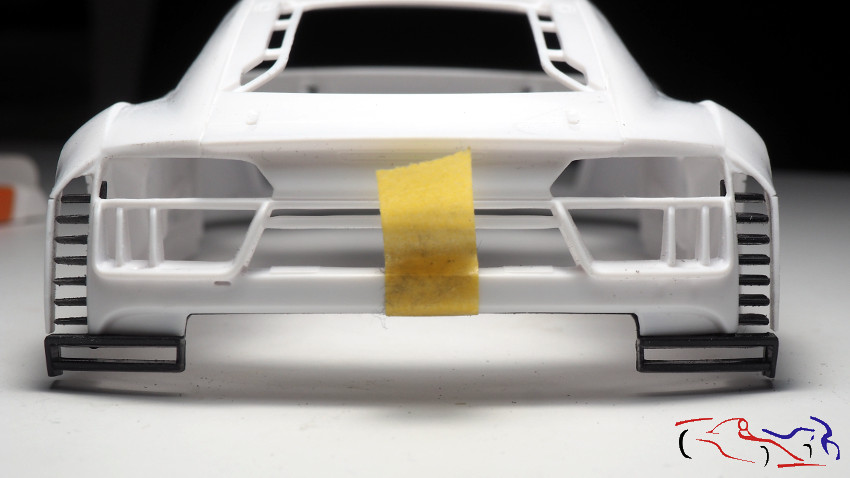
Y para finalizar, la carrocería con los laterales puestos y a falta de añadir la masilla epoxy en los lugares donde van los fotograbados
And finally, the bodywork with the sides in place and still needing to add the epoxy putty in the places where the photoetched parts are placed.
Lo siguiente será poner la masilla epoxy, lijarlas, afinar la coarrocería, y
poner la imprimación!! Gracias por ver y comentar!!
Next will be to put the epoxy putty, sand them, tune the bodywork, and
put the primer on! Thanks for watching and commenting!