Hi all,
It's been a long time coming, but I've finally made up a tutorial about my method for making realistic-looking "convoluted tubing" style wiring harnesses. Several of you became interested after I introduced this wiring in my
Corvette build...sorry to keep you waiting.
Well, are you ready for the ride of your life? If not, that's OK, because this won't be it...but you will learn how to make a harness.
First off, this method of harness making is best suited to
modern American and Japanese cars which use the convoluted tubing. European cars, both old and new, seem to have a different type of smooth rubbery tubing, while old American cars have a taped-up harness which requires a different approach. In the future I'll try to make some how-to's for those types of harnesses.
So:

Definitely...
Sure...
...Probably not.
Don't spend too long trying to figure out where to get those CTS and RS4 kits...let's just hope your scratchbuilding skills are way better than mine.
Alrighty, on to
supplies. As shown, you will need the following items:
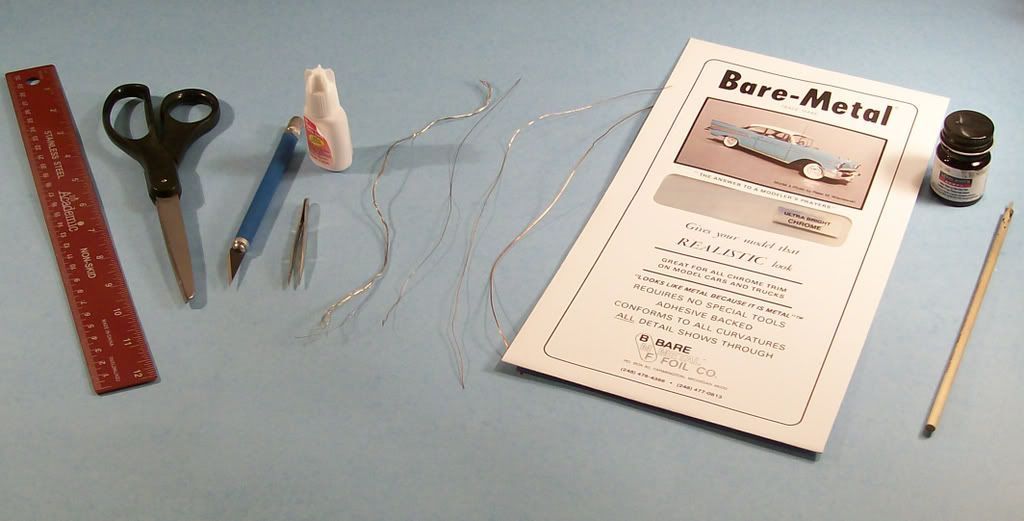
1. A ruler (metric, preferably)
2. scissors
3. hobby knife
4. superglue (CA)
5. tweezers
6. a sizeable amount of small wire between ,1 and ,15 mm diameter (I get mine from the inside of a TV Coax cable...the small wire forms a mesh beneath the outer rubber layer)
7. a piece of wire between ,25 and ,3 mm diameter
8. a piece of wire between ,4 and ,45 mm diameter
9. a piece of wire between ,6 and ,7 mm diameter
10. Bare-Metal foil (any type)
11. your favorite type of semi-gloss black (or gray, depending on the color of the harness you are replicating) paint (I use Testors).
12. Not shown: pencil and paper.
Now, it's time for a little vocab lesson (oh no!!) This might not make much sense now, but wait until I get into things and it will become clear.
Core wire: This is the wire that is actually inside your wiring harness. It is made from your very smallest wire.
Wrap wire: This is the wire that forms the outer "tubing" of the harness. It is also made from the smallest wire.
Guide wire: This is used for construction only, to make "tubing" out of the wrap wire. It is what the larger sizes of wire are used for.
Loop: A core wire that is connected to something at both ends
Stub: A short core wire that is connected at only one end
Frustration: Something to avoid during this project
Let's use some of that vocab and bust out the pencil and paper...and hopefully some reference photos. Feel free to grab a low-calorie snack at this point, as you won't be doing any serious modeling for a bit.
You are about to draw three (3) pictures. Don't worry if your drawing skills stop at stick figures: that's about what you'll be drawing.
Here's the three pictures (don't freak out...I'll explain them)
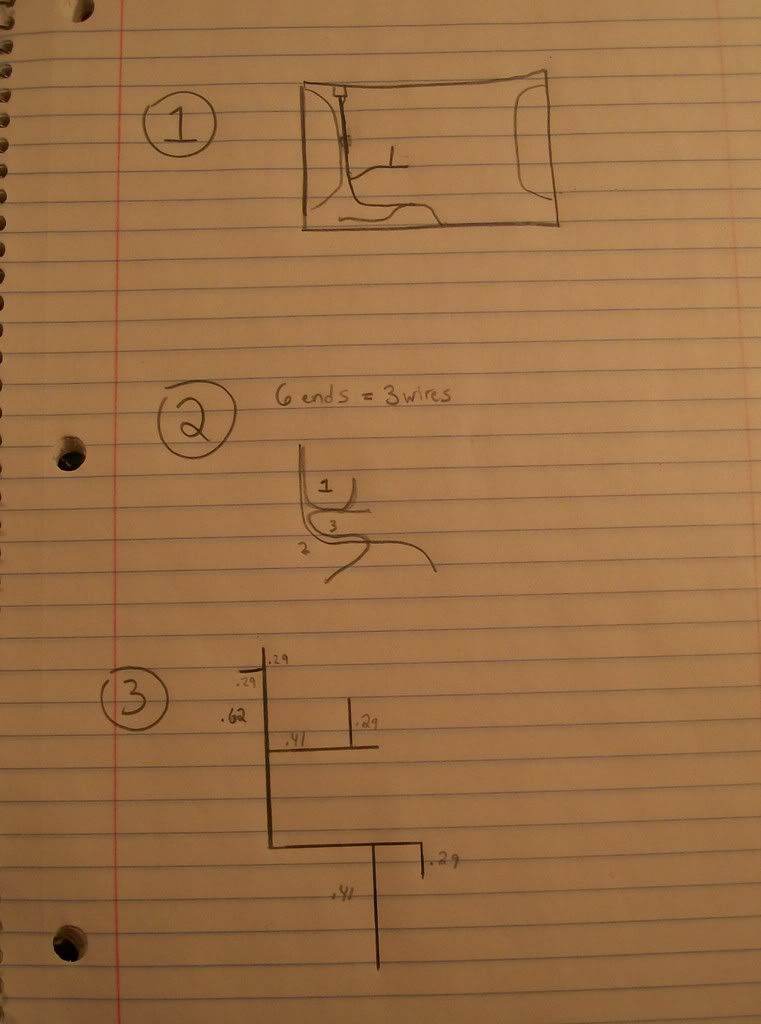
Picture
ONE: This is what I call my "layout diagram." Basically, you draw a simple view of the engine bay, with the various components you are planning to connect to the wiring harness, and the harness itself. I am doing a generic, simple harness for the purpose of this tutorial, so I didn't label anything (silly me), but when you do your model you'll want to write in which parts are which to avoid confusion. (example: fan motor, fuel injectors #1, #2, #3, #4, alternator, etc.)
Picture
TWO: This is what I call my "looping diagram." Here's where things get a little tricky. Pay close attention.
1.
COUNT how many wire ends you will have. My picture has 6. Each bit of wire that you want sticking out of the harness somewhere counts as an end. If you have two wires attached to your alternator, that's TWO ends. Anywhere that the harness terminates, contains at least one wire end. Count them ALL.
2.
PLAN which ends will connect to form
loops. If you have an even number of ends (6, 8, 10), EVERY end will be part of a loop. If you have an odd number (7, 9, 11), you will have one
stub. Use the stub where it works best. It won't connect to any other part of the harness, so it's good in tight quarters. I usually make at least one loop go from one end of the harness to the other, to tie things together. Each branch of the harness must contain a loop that attaches to either the main body of the harness or another branch; a branch with self-contained loops can't attach to anything. It's not so hard once you start doing it. Caution

: Don't try to put too many loops through the same part of the harness! They won't fit inside!
3.
DRAW your loops.
4.
NUMBER your loops, as I did (1, 2, and 3). This makes things easier if you have a whole bunch of loops.
Picture
THREE: This is what I call my "bending diagram". Here's where you'll need both your model body/engine bay tub and that ruler. Figure out how long each part of the harness needs to be, then draw it as a straight line to the correct length. Caution
: Give yourself a little extra to connect to each part! You can always trim extra, but can't do much about a wire that's too short. Finally, indicate how big the outside of the harness is to be at these points (these are the sizes of your guide wires). I'm using ,29mm; ,41mm; and ,62mm because that's what I have.
OK. That part (especially picture
TWO) may have thrown you for a loop (no pun intended...

), but you'll understand through building your own harness. It doesn't take that long to figure out...just looks complex at first.
Time to put the snack away; let's get on to building!!! (Don't throw away these diagrams...you're about to use them for good).
Here's where you make all your core wires. Grab that small, abundant wire and the tweezers. Lay it directly on top of your "bending diagram" (Picture
THREE)...that's why we measured...and make each wire. Caution
: If you have a bunch (which is likely for any real car), you might want to take a piece of paper, draw some numbered circles, and place each core wire in its numbered circle (that's why we numbered the wires in picture
TWO) to keep them organized!
When you get each piece bent to shape, cut it to length (duh)
Here are my three little core wires. Hard to see, but oh well.
All right, now for the fun part! By fun, I mean long, boring, and repetitive...
Winding wire!!
This is where you use your wrap wire and guide wire.
I'm starting with the ,62mm (my biggest...you could go all the way up to 1mm for huge harnesses like many modern cars have)
Wind...
...and compress it.
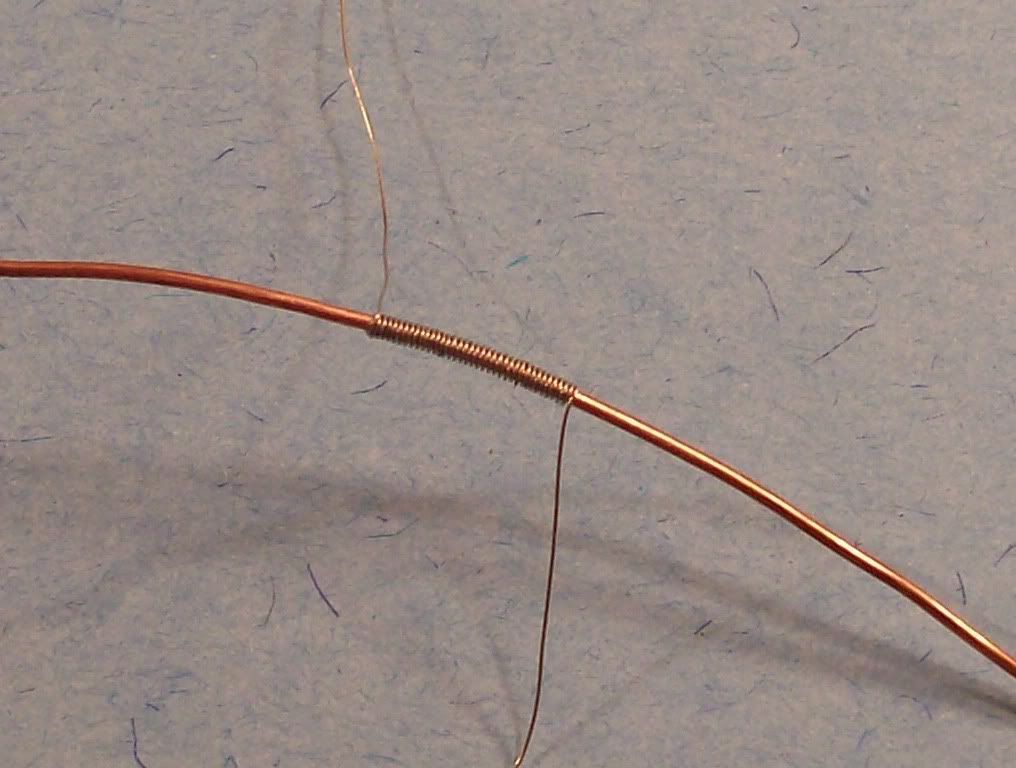
Then, wind and compress a whole bunch more.
Caution
: If you wind your wire too far apart, it may get loose and bunchy when you "compress" it! You can remedy this, often, by holding one end of the coil firmly and twisting (from the other end) the whole coil in the direction of winding, which tightens it up.
I know this is not fun, but bear with me.
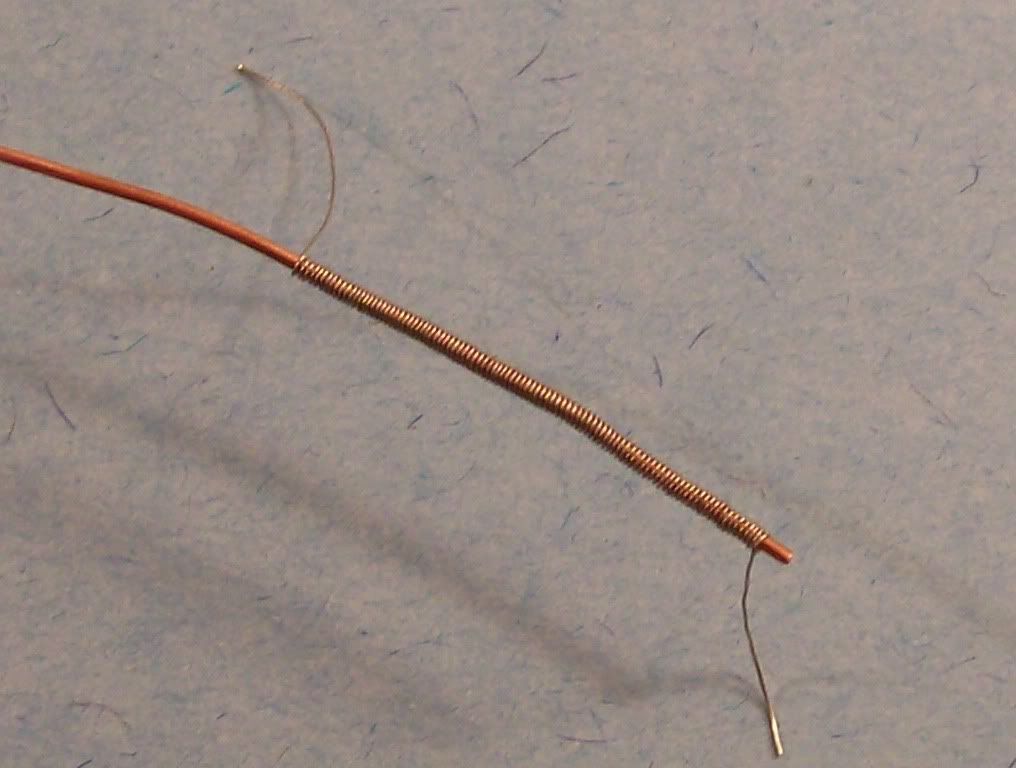
Oh look, I don't even have close to enough yet...

Not cool.
Anyways, more and more winding...gives us...
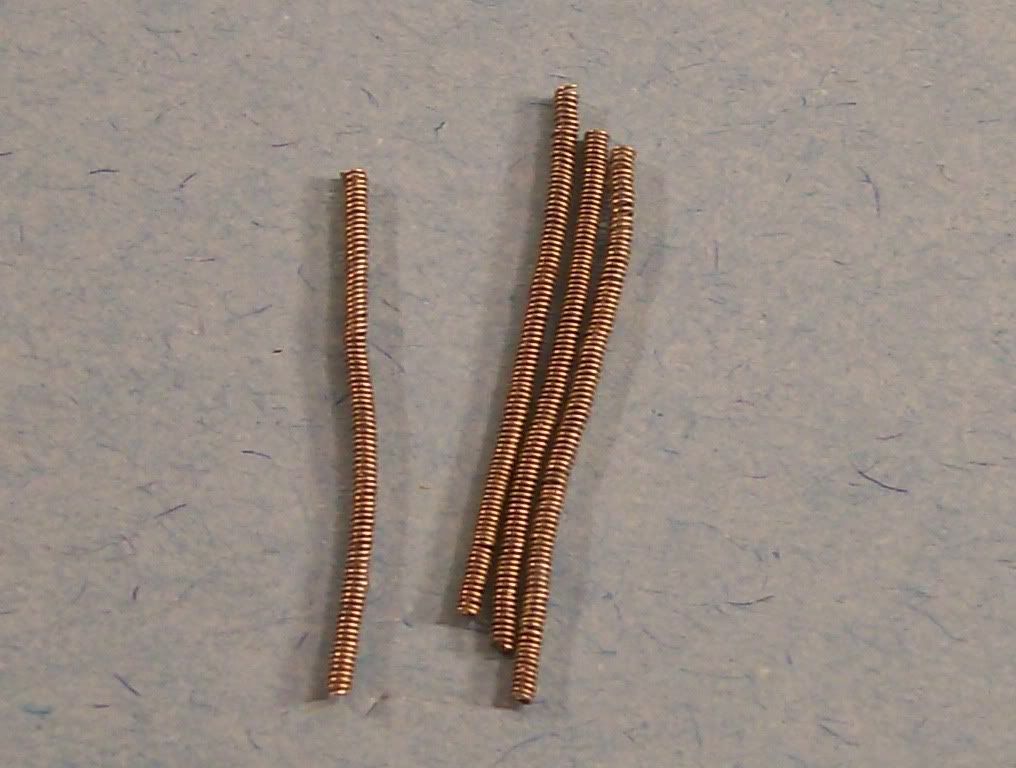
Yay.
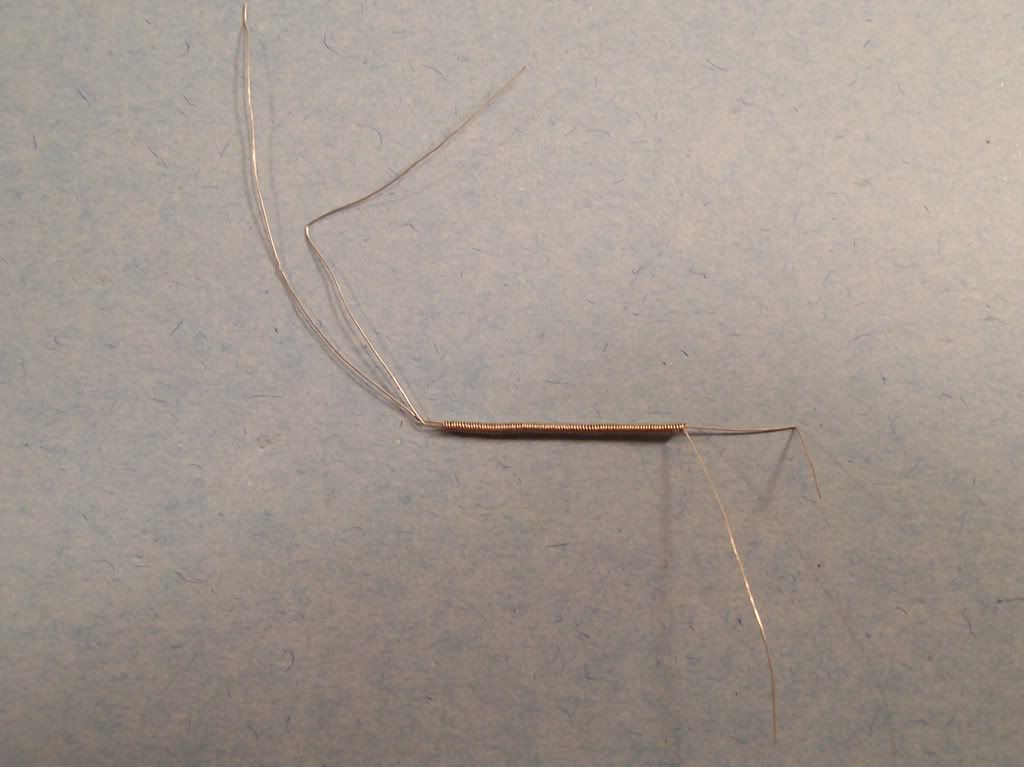
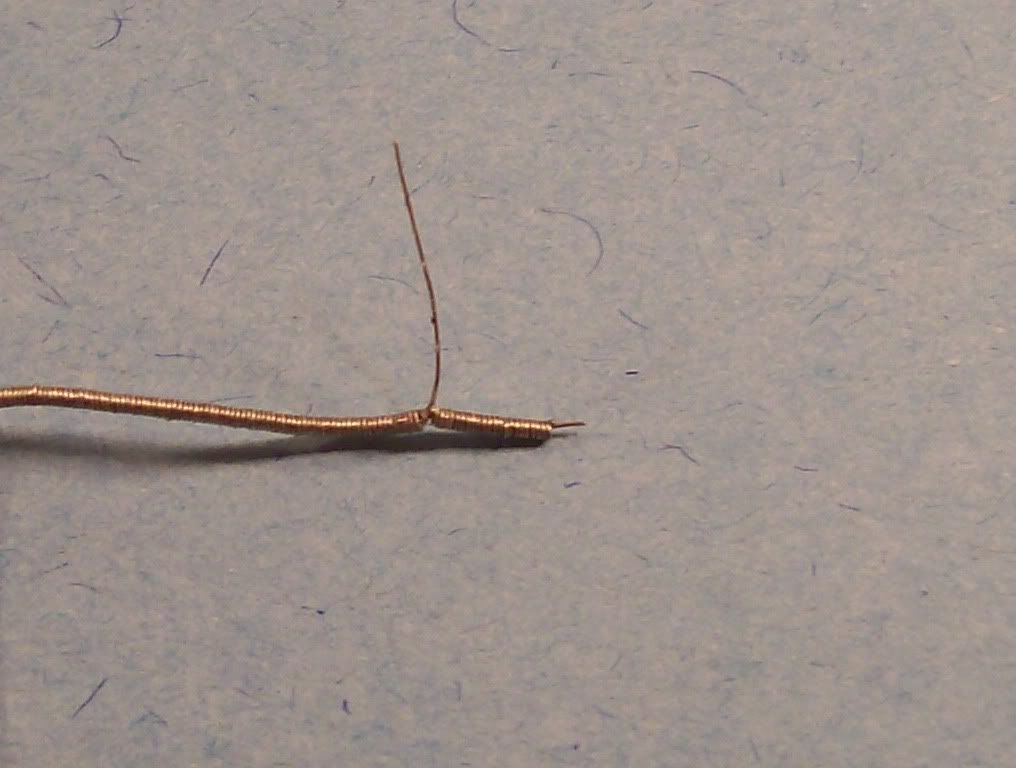
Time to install that tubing!
I've slipped it onto the first loop, in the correct place.
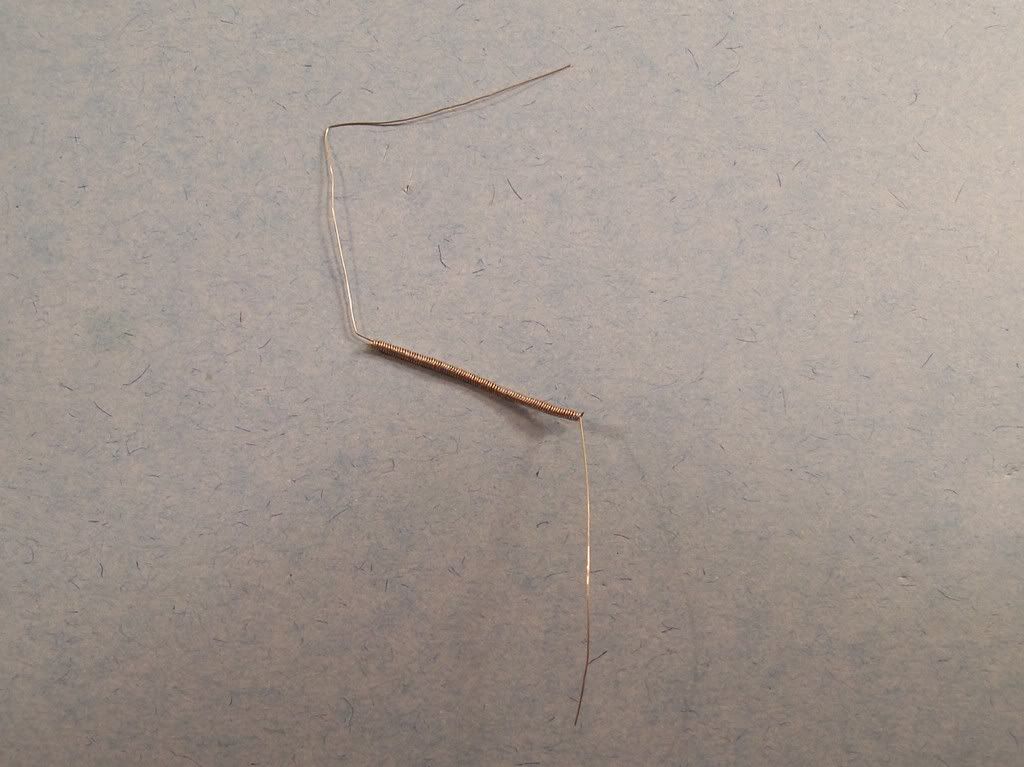
This was not hard to do. Things get a little trickier when we slip in another loop:
Then we add another section of tubing. To hold the tubing in place, try superglue. I did.
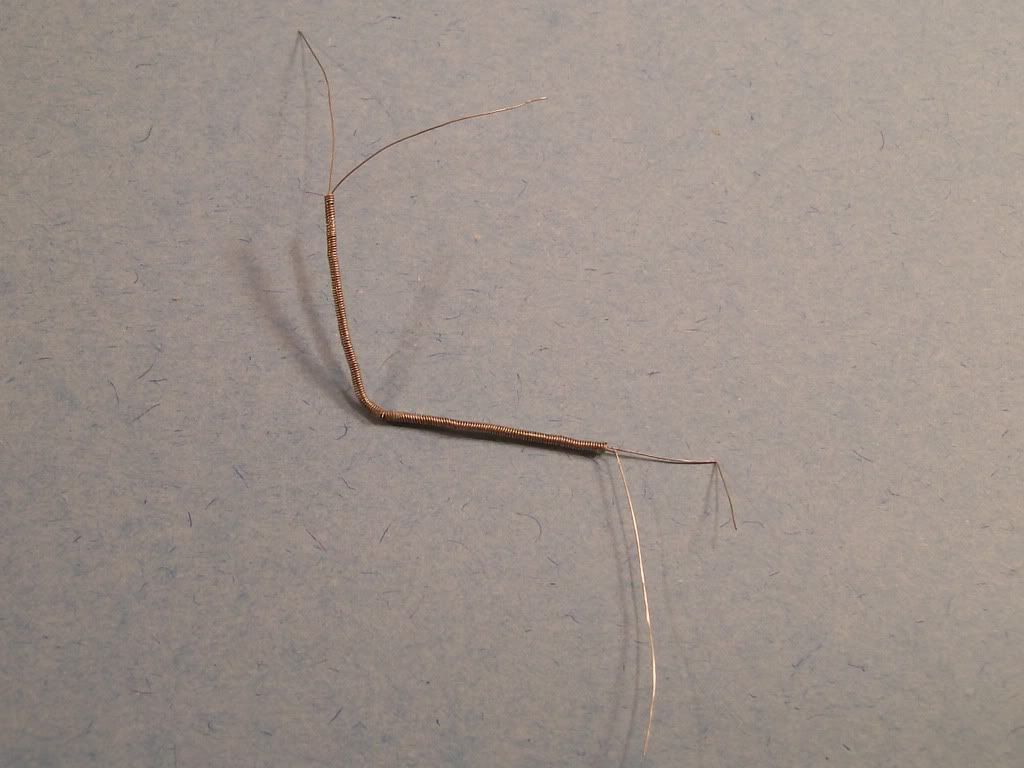
I then finished up by adding the rest of the ,62mm tubing and the third loop.
Next up...more winding. I did the medium size (,41mm for me) next. Caution
: Don't try to wind too much wrap wire onto a medium or small guide wire, because the guide wire kinks as you wind! You won't be able to get your wrap wire off (after all your work!) and you'll feel like this:

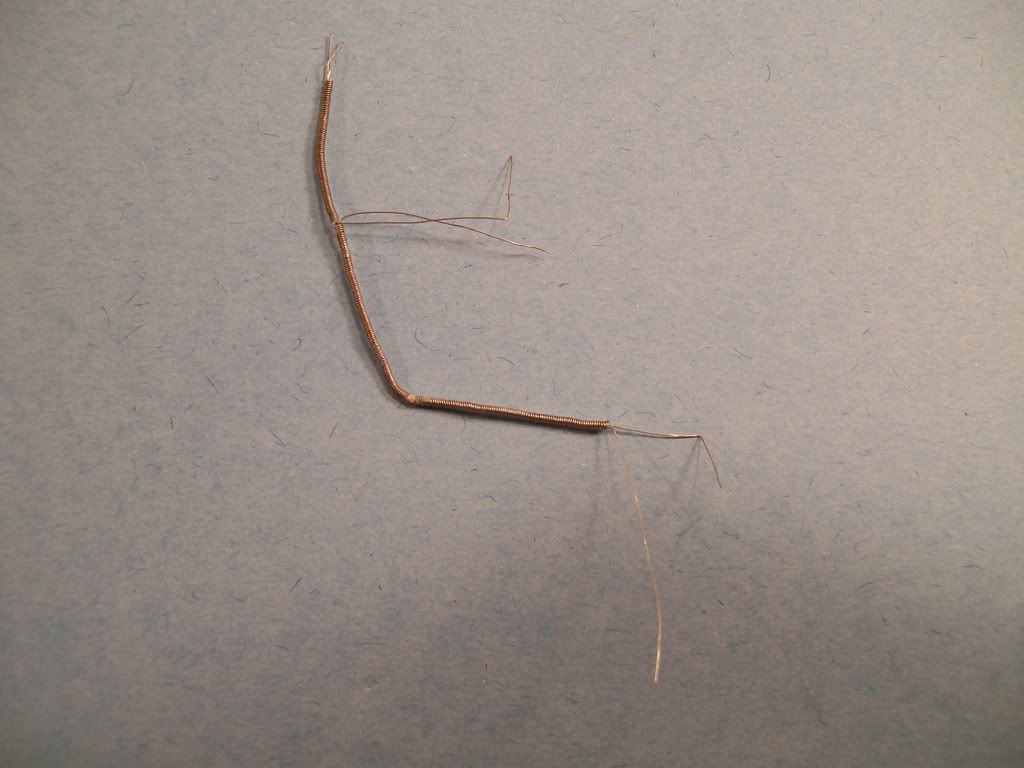
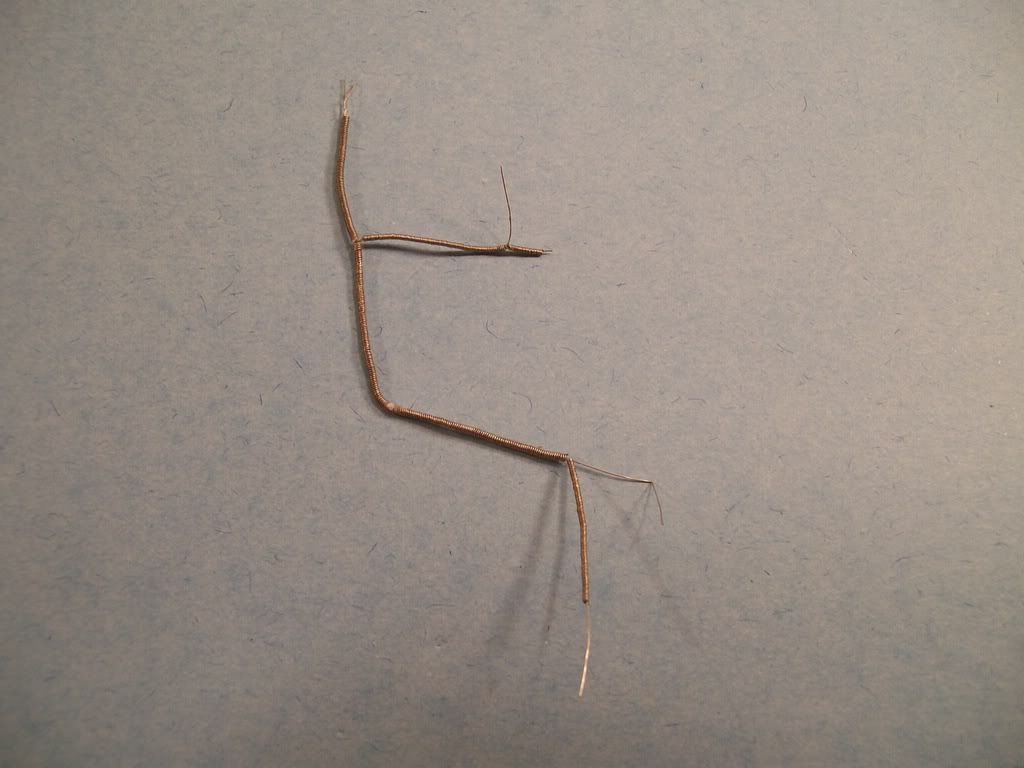
Here I've slipped on some ,41mm tubing in the correct place.
Then, I slipped on a final piece,
leaving a tail of wire sticking out to connect to the electrical component.
All the medium tubing installed, as per my measurements in picture
TWO.
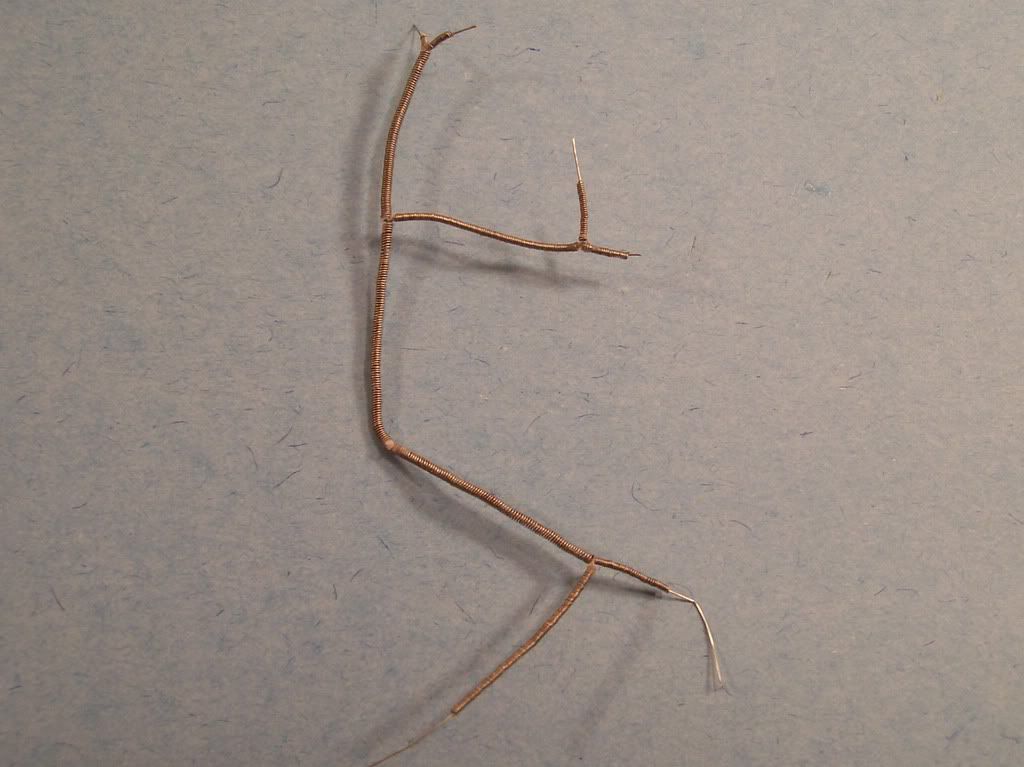
And then comes winding the wrap wire around the smallest guide wire (,29mm for me). This is the most difficult and tedious one (remember not to wind too much at a time!).
Caution
: Don't lose hope at this point. You're almost there, and it will look AWESOME!!
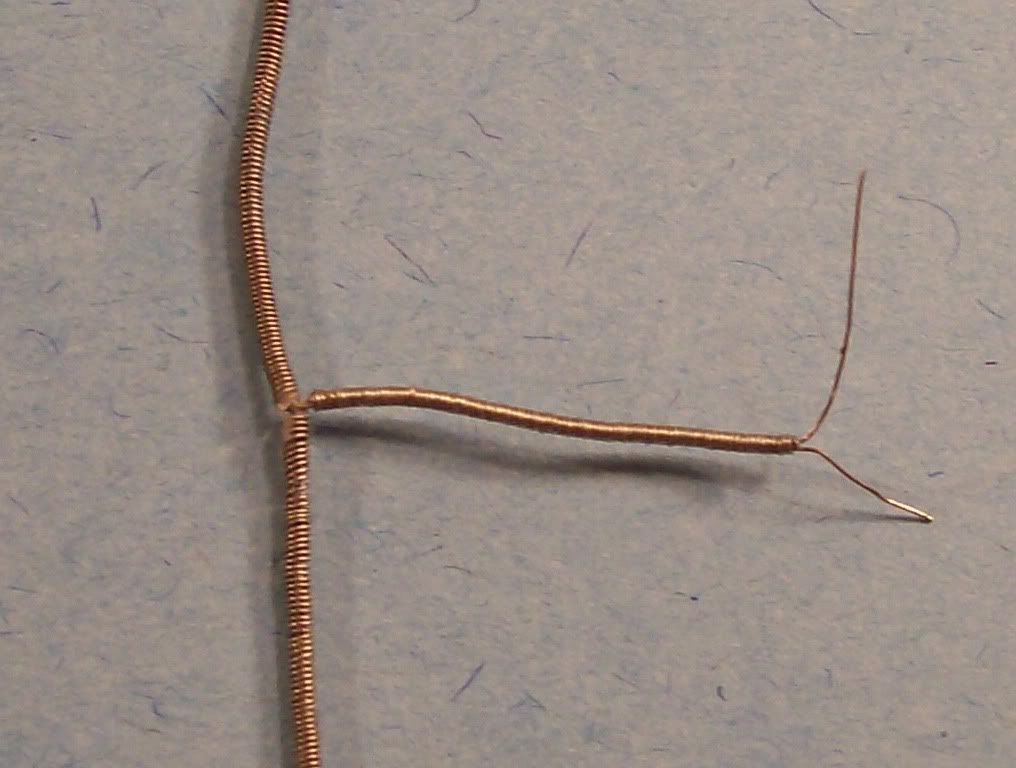
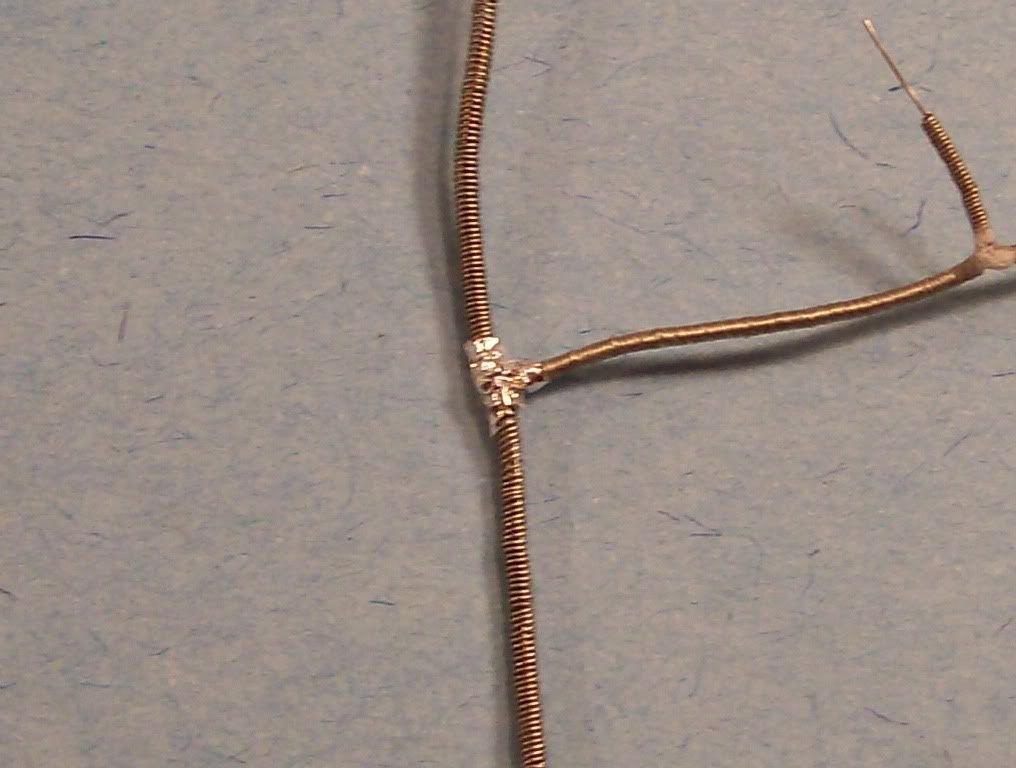
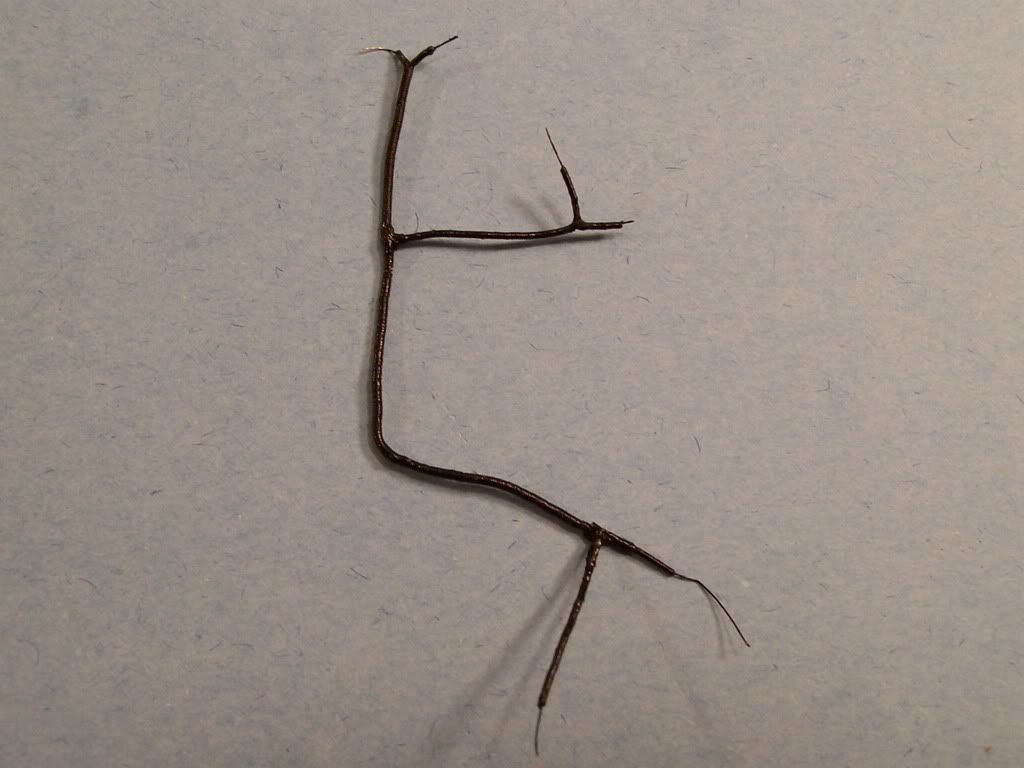
Here I've installed all the small tubing. My harness tubing is done!!!

You may notice that the joints between branches of the harness look tacky, with exposed core wire. No problem...on real cars they fix this same issue with electrical tape. We'll use BMF (or an equivalent foil substance) to cover those joints.
Caution
: This stuff is a PAIN. It refuses to stick to the wire and once again I had to call upon my friend Cyano Acrylate to keep the "tape" (BMF) in place.
Finally, it's time for paint. Many Japanese cars have gray harnesses, while American cars almost always have black harnesses (semi-gloss for both). Select the appropriate paint (acrylic is best) and brush it on (yes you airbrushers...it is safe to brush this). It will take a couple of coats because the paint has to "clog" the "tubing" on the first coat. Caution
: Oh...wait...

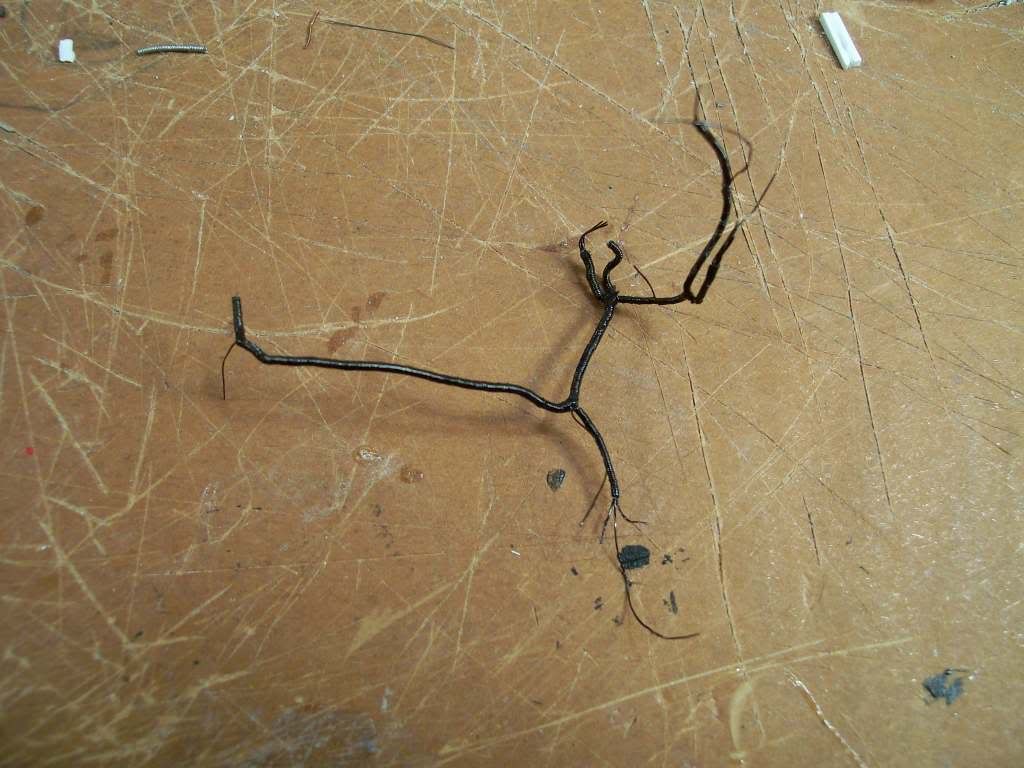
So, anyways, here it is with paint! A wiring harness, sure enough!
Well there you have it...making a wiring harness is actually pretty easy, if you can get past the pencil and paper part (it's confusing, I understand) and don't despair about the wire wrapping! Wiring is an integral part of any car, and making one of these harnesses will take your next 1:24 or 1:25 build up to a new level of detail!
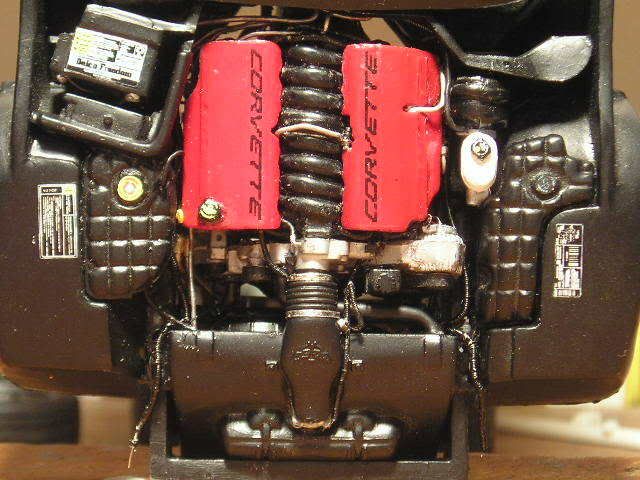
Oh, and by the way, this was, as I mentioned, just a generic and SIMPLE harness. Check this one out (HALF of the engine bay wiring for a 1999 Mustang)
This isn't the greatest pic, but it's the best I have AT THE MOMENT. I'll try to put up an improved one once I finish that 'Stang! You can see the wiring in place:
I will try to make some tutorials in the near future addressing wiring for older American cars and for European cars (since I know this forum thrives more on those for sure!!)
Until then, use this where applicable! Thanks for reading, good luck, and happy modeling!!
Alex Bush