O.k. guys here comes another update already! Thanks for your comments!
First up
.Sean
.im not Saint:-) Thats the other german dude with an eternal McLaren project
Cinqster
.did you ever get the PM I sent you about your Porsche project? Not that I need a reply
.just wondering:-)
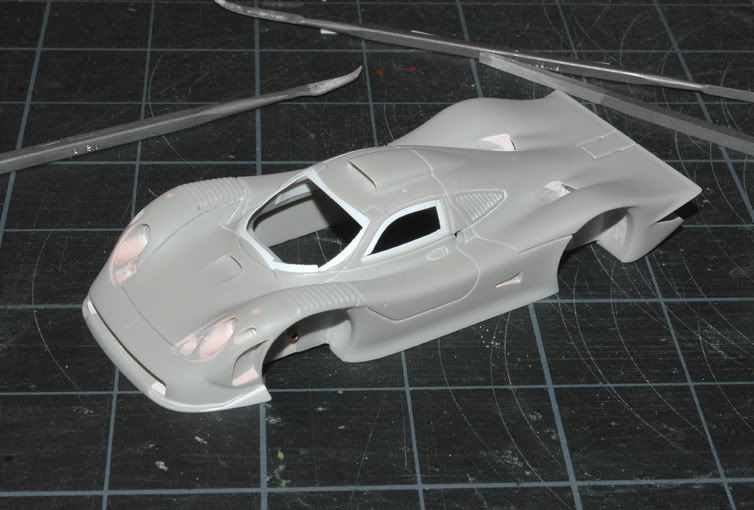
On to the GT1! I carried on with body modifications/corrections.
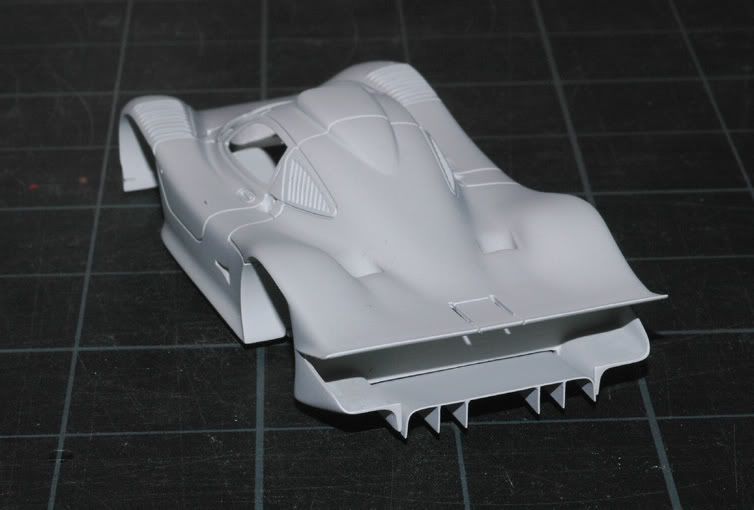
In the next picture you can see the reworked air outlet from the front cooler, front splitter/bumper and the brass tube for the axle that I installed with body filler.
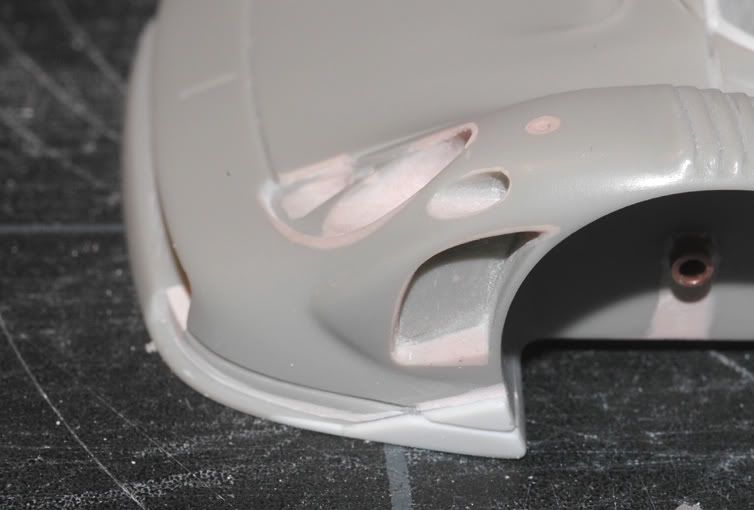
Then I realized though that I had made a mistake with this white wedge you can see in front of the wheel arch. That thing was on the kit but not really nice. So I replaced it with styrene and made the shutline
.only to find out a little later that these were only used for added downforce on short FIA races but not at Le Mans
.so they had to go again!
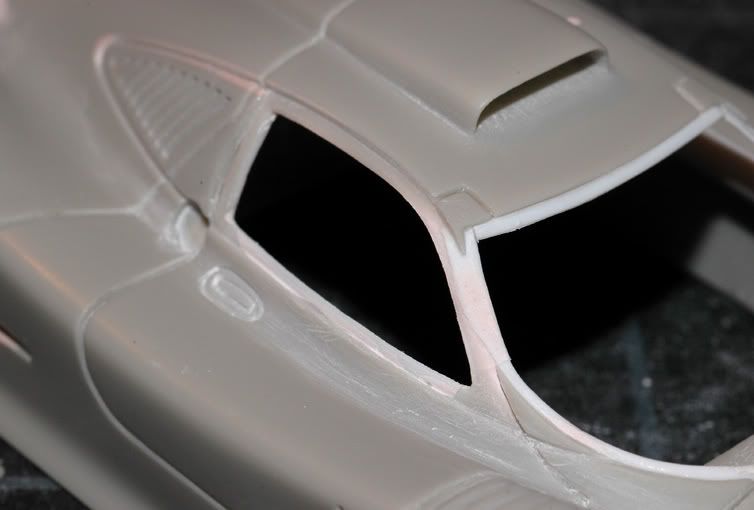
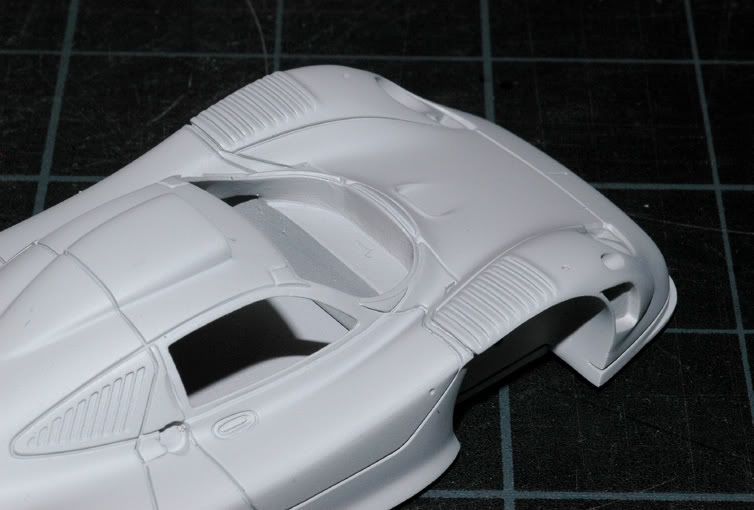
I also started cleaning and deepening the shut lines and the air ducts in front of the cockpit and on the roof. Then I went on to the windows.
These kits usually come with a glass piece that youre supposed to glue in from the inside
But thats not right because the glass ( or Perspex ) windows are usually put on from the outside. So I wanted to change that!
I started by thinning out the material thickness around all the windows which led to the A-posts becoming a lot thinner. In the process I also reworked the window graphics because they were a bit flat especially at the top. Then I glued in from the inside strips of 0,2mm sheet styrene. These were then filed to follow the window graphics to create a constant flange to put the glass pieces on.
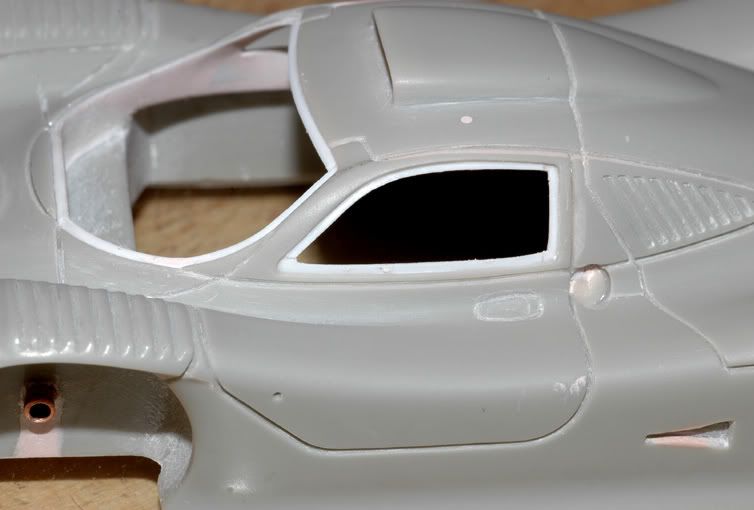
So far so good
.but not good enough! ( Homer voice on ) Dohh! ( Homer voice off )
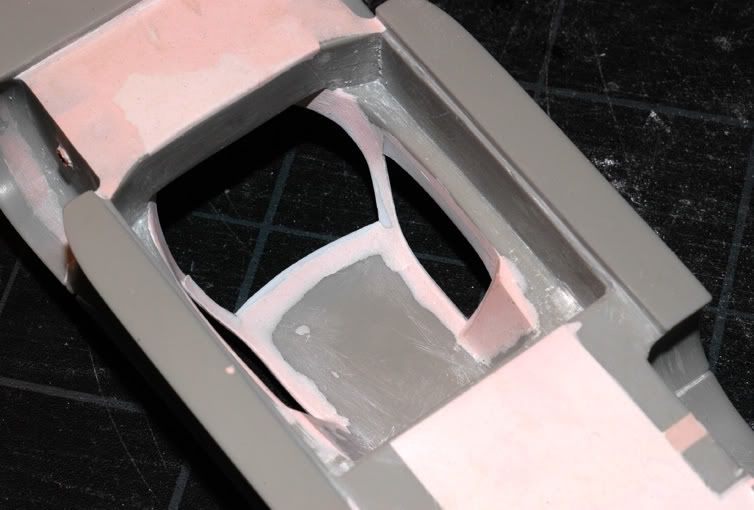
Only when I was done with that I checked my reference a bit closer and realized the side windows were in fact wrong.
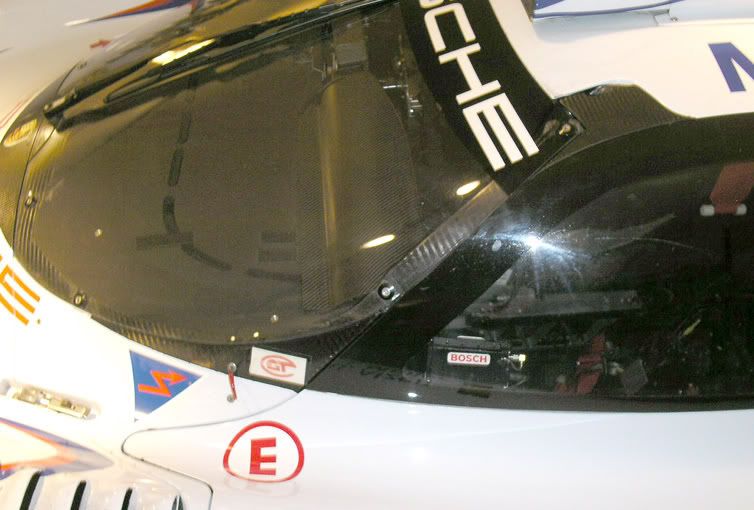
On the model I still had window frames but the real car didnt! No roll down windows, so they were just fixed on the frame from the outside like at the front. See the real one:
So I went on and took the frames away. I could have saved all the work adding the styrene strips from the inside if only I had looked a bit closer at the pictures to begin with!
Next up you have a picture of the resin bodys underside. I cleaned it up, straightening edges and lines and filling up dents and holes with body filler.
Thats an area that will mostly be invisible once the model is finished but I would always think about that mess when looking at it later :-)
Next I made a new floor for the model. This kit ( as most of that type do ) came with a white metal plate. I dont like these. They are usually at least a bit warped and you have to make them straight and fit the body. Also I dont like the makers emblems and stuff that are usually cast into these
.thats so die-cast :-)
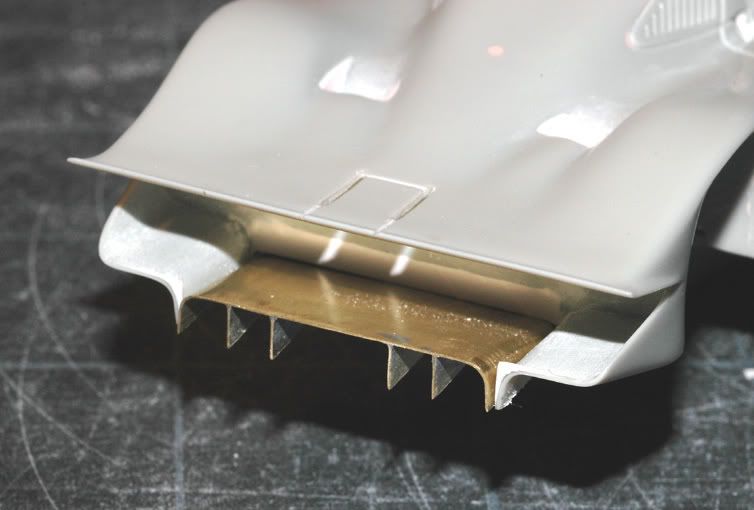
Heres a picture of mine made from renshape ( styrene would do the job as well ) together with a replacement diffusor.
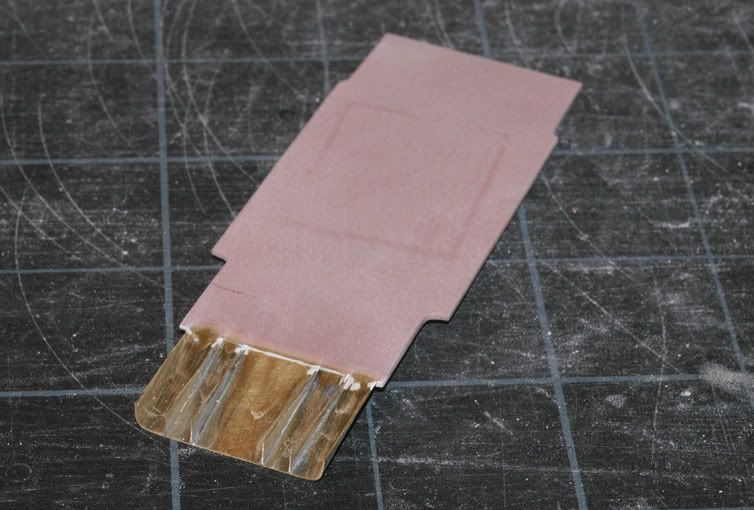
I decided to make that from 0,2mm brass instead of styrene because of the round shape at the edges. Styrene would be quite difficult to convince to stay in that shape :-)
The vertical fins in the middle were soldered on. In the end the whole assembly is much stronger than plastic! Here you see it in place:
That was it for the major body modifications and it was time to prime the pieces and see what I had done in lovely uniform grey :-)
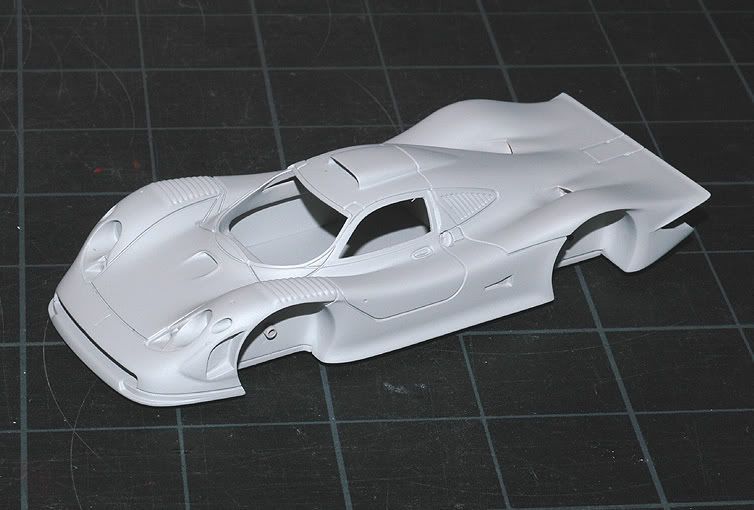
I used 2K-automotive primer for that again.
Sometimes I think a kit should come ready to be primed like that from the manufacturer
well theyre not all Hiros
and I have worse :-)
Thats it for now. More to come!